New High res fix #6509
Replies: 14 comments 22 replies
-
|
I'd like to know how I can replicate the functionality of the old high res fix. It was really fast, now whatever I try takes at least 4 times as long and the results aren't nearly as good. Pretty sure I'm doing something wrong, but no idea what exactly it is. |
Beta Was this translation helpful? Give feedback.
-
|
leave the hi res WxH settings at 0 and i think youl lwant to change the hires steps. hires steps at 0 does something strong but if u set it to a very low amount it has little/no effect and creates a lot of artifacts. 1 for example. you might need to change the hi res steps value. the step value works similarly to the step value for the model, only for the upscaler instead of the model |
Beta Was this translation helpful? Give feedback.
-
|
Before: highres fix always did half the steps from the firstpass. Example with 40 steps: 40 steps first for firstpass then 20 steps for the secondpass It can be twice as slow as before depending on the sampler, but now you can lower the secondpass (hires) steps even further and make it even faster. Set your Hires steps to half of your regular steps to reproduce the older speeds. More explanation in a comment below. |
Beta Was this translation helpful? Give feedback.
-
|
This still valid, right? |
Beta Was this translation helpful? Give feedback.
-
|
I like the new version way better, because I test seeds on the small images, I had to change the setting back and forth for many images. Now its way more in the workflow for seeing the small image first to be upscaled with the fix enabled. |
Beta Was this translation helpful? Give feedback.
-
|
is there any way to use the old highres settings? |
Beta Was this translation helpful? Give feedback.
-
|
To understand the new highres fix we have to explain a couple terms: Firstpass = simply an image generated without highres fix enabled. A regular generation. Highres fix process: firstpass gets generated -> gets upscaled with the selected upscaler to preserve or enhance detail > gets sent through an img2img process and upscaled = final result. Q: Why is highres fix even needed? This is why you can get double bodies and other anomalies, since it learned to fill 512x512, but now there's 1024x1024 of noise to fill, double the noise. One seemingly logical way to fix this is to try and generate everything at 512x512, or as close to that, and upscale from that. However, newer models and samplers handle higher resolutions better, and now there are also models trained at 768x768 or even above. Eventually models will be trained at higher and higher resolutions, including non square resolutions. Sticking to hardcoded 512x512 for highres fix is already bad and will be worse in the long run. Hence the need for the current new highres fix that offers much more control than before. Here's a quick comparison between the old highres fix and the new one. Before: tl;dr too confusing Now: tl;dr easier to understand How to manually reproduce the old highres fix if you liked it This isn't needed for older generations already saved. The functionality for them is already there, so they should translate when loading them. This is if you want to make new images using the old method because (insert your reasoning). First way: Second way: Third way: https://preyx.github.io/sd-scale-calc/ Q: Why is it slower than before? If you hover over the new Hires steps tooltip, it says "If 0, uses same as for original". This means if you set 40 steps for the firstpass, it'll also do 40 steps for the secondpass. Hence it can be technically twice as slow as before especially depending on the sampler used, but it can also add twice as more detail. Like explained above, you can manually set this depending on your preferred trade off between speed and detail. Q: So why am I getting different results than before? *Here comes the math and code, this is the part of the old highres fix code that defined the image resolutions. When setting any of the firstpass sliders to 0 in the old highres fix, this happened. Notice the OR, which means you could set something like firstpass 768 x 0 or 0 x 768 and it would still default to 512 * 512: When manually setting the firstpass sliders to a non 0 number, this happened: You can look at the old code here, ignore the green line, use the red line as reference and use the Expand down arrow to expand the code https://github.com/AUTOMATIC1111/stable-diffusion-webui/pull/5382/files If you don't understand the math, you could ask ChatGPT like I did, it gave me this for the firstpass = 0 operation when upscaling to 1024x1024: I'll be honest with you chief, I'm also bad at even simple math and can't even tell if that's right, but just at a glance you can see two different calculations were done. Hopefully this won't confuse you further and will help you understand why you're getting different results and why the new highres fix offers much more control than before. |
Beta Was this translation helpful? Give feedback.
-
|
Thanks for the detailed explanation! If I had "upscale latent image when doing high rez fix", what is the equivalent of that in the new way of doing it? Someone told me "Latent(nearest-exact)", is it that?
|
Beta Was this translation helpful? Give feedback.
-
|
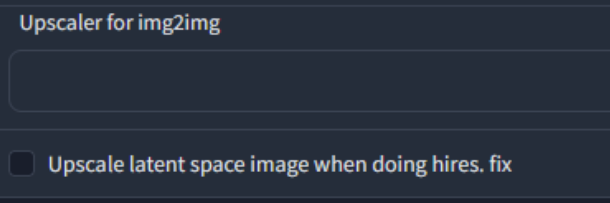
I think the regular default Latent upscaler in the dropdown should be 1:1 the old one in Settings, I get similar results but I could be wrong and it could be closer to one of the other Latent variations. It still needs denoise above 0.5, below that it'll look blurry but that's also how it worked before. Too high denoise can also sometimes cause double bodies. For Upscaler for img2img, yeah if you had a different upscaler selected there, you can just set it now in the new highres fix dropdown, and that overrides the one selected in Settings. The one that's still in the Settings page still applies to the actual img2img tab. I think it would be cool if img2img also had the new upscaler dropdown, for now you could add it to Quicksettings list with upscaler_for_img2img. This page has a bunch of different upscalers, I like the Ultramix collection but been trying some of the other collections recently too. |
Beta Was this translation helpful? Give feedback.
-
|
Alright, thanks for answering! |
Beta Was this translation helpful? Give feedback.
-
|
I fully agree that the new highres ui is like 20 times better than the old one. Changing what sliders mean was both confusing and cumbersome. |
Beta Was this translation helpful? Give feedback.
-
|
I have to say even after perfecting the settings I'm still getting a ton of super weird gens I never had before, double noses, two heads, really super weird stuff. Even when using appropriate sizes 512x then doubling the size |
Beta Was this translation helpful? Give feedback.
-
|
I Had to revert to an older version , there was just too much double heads etc , and the generations were not as good |
Beta Was this translation helpful? Give feedback.
-
|
Yup, me too. But I'm not gonna switch back. (Mostly because I don't know how... I think they're is a setting in the AutoUI settings...) I'm gonna experiment and see if I can get it working. I only recently had this issue. I heard it might be cache related or to do with the browser. Tomorrow is experiment day! |
Beta Was this translation helpful? Give feedback.
-
Hello, did you find a solution to get the old high res x? |
Beta Was this translation helpful? Give feedback.
-
|
IMO: Old Hires.Fix was very good and not so resource hungry at pointed here: #6593 so I can't use it in real production. If I manage to upscale I a little bit (withou out of memory) the results are disappointing in compare to the old version! I would be happy to see old one again as option. |
Beta Was this translation helpful? Give feedback.
-
|
Guys, it's literally been explained in this thread and others how to get it to act exactly like the old high-res fix. So..... |
Beta Was this translation helpful? Give feedback.
-
|
Yes, that was my understanding, so i don't get the fuss about it. Auto even added a way to use old inputs and recalculation to new ones, i just pointed the fact. |
Beta Was this translation helpful? Give feedback.
-
|
I looked at the explanation for the old high-res fix, and it doesn't seem to help me. The new high res fix introduces artifacts and anatomy issues. To me and others here, functionally, this new high-res fix seems to be a downgrade. For example, with the latest high res fix using the NAI model with high res off: https://i.imgur.com/Bq8DXJ5.png and high res fix on: https://i.imgur.com/taeObLM.png Using an older version with high res fix off: https://i.imgur.com/kt7RDFE.png and high res fix on: https://i.imgur.com/Xinx1ZK.png
You can see with the older version using the older high res fix, it does not have the hair or chair artifacts. Both the old and new high res fix do change the output image because of the denoising strength being greater than 0.0, but the extra artifacts end up producing worse images. Still, even with the up-scaling, it does end up having more artifacting than the previous high-res fix did: https://i.imgur.com/E3cZDXS.png and https://i.imgur.com/zCQCoMe.png are examples of this. With denoising strength set to 0.0, the output image is unusable for latent upscaling: https://i.imgur.com/mwBZk8k.png with SwinIR 4x it's better but still not quite perfect: https://i.imgur.com/Q1jEGnY.png At this point, unfortunately, the best solution for me might be to go back to an older version of stable-diffusion-webui. It might be worth trying out other upscalers though but I'm not sure. Still, hopefully this comment will end up being useful/interesting to someone reading it. Edit: Seems like ESRGAN_4X and SwinIR_4X upscalers provide the best results for me. Edit 2: It almost seems like weirdly even with 512x512, high res fix off upscaling off, the base images it generates seem to have more anatomy errors than the older stable-diffusion-webui from what I can see. |
Beta Was this translation helpful? Give feedback.
-
Was thinking about the same, See: #6593 (comment) |
Beta Was this translation helpful? Give feedback.
-
Hello, did you find a solution to get the old high res x? |
Beta Was this translation helpful? Give feedback.
-
Try lower denoising for Latent upscalers, in between 0.55 and 0.65 has seemed ok for me, above 0.7 is when double features can sometimes appear depending on the image and model. Try below 0.5 for non Latent upscalers. Really the amount of denoising depends on what type of detail you want out of the image and how much control you're willing to put into it. I recommend enabling displaying previews after 1 step in the Settings, to look at the before and after, also enabling save image before highres fix. This will let you see the firstpass and the secondpass separately and how much the secondpass changes. The upscaler is applied this way (I corrected part of it that was backwards in the previous post) The firstpass gets generated > that firstpass gets upscaled with the selected upscaler to preserve or enhance detail > that upscale gets noised and denoised through an im2img process > final image. |
Beta Was this translation helpful? Give feedback.
-
|
Or we can ask automatic1111 to add again the option as a plugin?
Le jeu. 12 janv. 2023 à 09:42, Jenar ***@***.***> a écrit :
… At this point, unfortunately, the best solution for me might be to go back
to an older version of stable-diffusion-webui. It might be worth trying out
other upscalers though but I'm not sure. Still, hopefully this comment will
end up being useful/interesting to someone reading it.
Was thinking about the same, See: #6593 (comment)
<#6593 (comment)>
—
Reply to this email directly, view it on GitHub
<#6509 (reply in thread)>,
or unsubscribe
<https://github.com/notifications/unsubscribe-auth/AODP7RGKD6F6FVYUVCTSACLWR67XPANCNFSM6AAAAAATUOVU4Q>
.
You are receiving this because you authored the thread.Message ID:
<AUTOMATIC1111/stable-diffusion-webui/repo-discussions/6509/comments/4665200
@github.com>
|
Beta Was this translation helpful? Give feedback.
-
|
Hot new upscaler (maybe also Hires.Fix alternative) https://github.com/Coyote-A/ultimate-upscale-for-automatic1111 |
Beta Was this translation helpful? Give feedback.
-
|
To bring old Hires.Fix and move "new buggy" as extension script pls vote/comment for: |
Beta Was this translation helpful? Give feedback.
-
|
I certainly prefer the UI aspect of the new one, not having to change firstpass and result sliders each time (and just using the multiplier) is much easier. Can't speak to results as I didn't do much testing, but ones I've gotten seemed fine. |
Beta Was this translation helpful? Give feedback.
-
|
I used to run the old highres fix with a denoising value of 0.1 - 0.25 because I didn't want the image to have large changes from the initial 512x512 pass... now that seems to be thrown out the window? If I set it below 0.5, the final image becomes blurry. If I set it above 0.5, the final image has significant changes compared to the initial pass one. |
Beta Was this translation helpful? Give feedback.
-
|
I recall the old one also resulting in blurriness when using low denoise. It would make sense, too. Perhaps choosing another upscaling method might help? Maybe a non-latent one, one of the sharper ones. |
Beta Was this translation helpful? Give feedback.
-
|
No the old one was perfect, even with very low denoise value, it upscaled well. It added nice details, corrected faces, but still preserved position and shape of objects, clothing and limbs. Now with the default "Latent" upscaler, when you want more details it also drift away too much from the first pass picture, even sometimes it's not even the same picture at all. There are no safe denoising values anymore. It either produces a bad picture or a different picture. What was the default upscaler previously when checking the hires fix checkbox? Was it ESRGAN_4X? Is it even possible now to have the exact same result as before? |
Beta Was this translation helpful? Give feedback.
-
So I'm looking at the code, and I'm lost. |
Beta Was this translation helpful? Give feedback.
-
|
3.5 months later, and I figured I'd finally give upgrading another go. Same problem persists - it seems completely and utterly impossible to recreate anything even resembling the images created using the original hi-res fix from before the change in January. Regardless of which upscaler I choose (or None), regardless of using the new upscaling method or the "compatibility" fix version, and regardless of denoising strength - image is completely different than in the older version. TBH, I'm disappointed at how much of a breaking change this is, and stumped that not more people are bothered by it. And the breaking changes page goes into detail about the width and height of images, but says nothing about which upscaler was used back when you couldn't choose one yourself, nor about the fact that behaviour of denoising strength has changed considerably. Low denoise values of 0.1-0.2 used to produce images that would looks quite similar in first pass & hi-res, while now low denoise values produce a garbled mess. |
Beta Was this translation helpful? Give feedback.
-
|
In the very early versions of ATUTOMATIC 1111, the tooltip used to say: "tiles the upscaled image and then run image to image on every single tile" and never explained how it worked nor how to configure the tiles size, their seams blending .... where did this method went? because img 2 img through N tiles looks kinda simillar to traditional SDUpscaling and "maybe better" ? |
Beta Was this translation helpful? Give feedback.
-
|
I think the tile-based upscaling is in img2img, the "SD upscale" script. It does what you say and has sliders for tiles, etc. There is some extra explanation on the Features page of the wiki. That doesn't have much to do with highres fix. |
Beta Was this translation helpful? Give feedback.
-
|
You are looking for this: https://github.com/Coyote-A/ultimate-upscale-for-automatic1111 I can recommend it. Set Denoise to 0.37 - 0.40 Most of the time you dont even need the seams fix to activate. Its pretty easy to use in img2img and it does wonders |
Beta Was this translation helpful? Give feedback.
-
|
Anyone know how to use the new workflow using the API? I'm always getting weird results: #13297 |
Beta Was this translation helpful? Give feedback.
Uh oh!
There was an error while loading. Please reload this page.
-
Hi, I would like to discuss the new high res fix.
It is completely different from previous versions and there are not even a mention of it in the wiki.
If I understand correctly now, we need to choose a main resolution that is low and then use high res fix to set the new resolution that we want?
Before we just set the final resolution in the main settings then click high res fix and it was automatically finding a lower res for starting generation and then doing its magic.
Beta Was this translation helpful? Give feedback.
All reactions