Bathymetry Integration
A bathymetry integration plugin that automatically spawns and removes bathymetry DEM grids converted preliminarily from high-resolution NOAA bathymetry data.
- Features
- Automatic spawn/remove with vehicle locations
- Overlaps for mission continuity
- Relocate the vehicle to the designated initial latitude and longitude at the start
- Use bathymetry tile dissected with depth-dependent texture
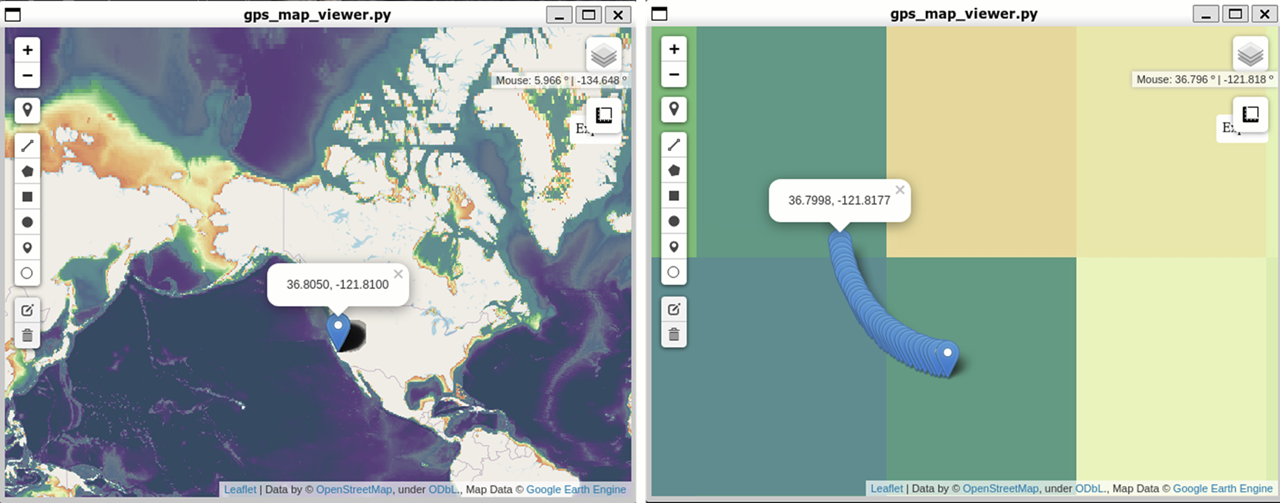
- GPS Viewer to see vehicle's whereabouts
The plugin is defined at .world file and would require input settings used for preliminarily converted bathymetry data (prefix, spacings, number of columns/rows, anchored latitude/longitude). The bathymetry tile data is located at dave/models/dave_bathymetry_models/.Also, each robot will provide its locations with intervals defined at urdf. The plugin is also usable for multiple robots.

- The bathymetry plugin uses latitude and longitude coordinates to recognize which tiles to spawn and remove. To do so, it uses the GDAL library to convert in between UTM(epsg:4326; X/Y coordinates) coordinate system used in the simulation and WGS86(eps:3857, Latitude/Longitude) coordinates system.
# For initial lat/lon spawning
sudo apt-get install python3-gdal
# For GPS Viewer
# Install required python3 modules
pip3 install google-api-python-client earthengine-api pyCrypto
pip3 install earthengine-api --upgrade
pip3 install folium

# Authenticate google earth engine
earthengine authenticate
# It will give you a link where you can log in. This happens only once- Download files for bathymetry demo and recompile to install
# downloading a file from google drive became compliated. Install and use gdown. Or, use [this link](https://drive.google.com/file/d/1lOqG5cdf5NEHnxsqKyEWNgQ0Ugk6u80A/view?usp=sharing)
# Install gdown
pip install gdown
# Download demo files archive
gdown --id 1lOqG5cdf5NEHnxsqKyEWNgQ0Ugk6u80A
# Move downloaded file to dave directory
mv Dave_Bathymetry_Demo.tar.gz ~/uuv_ws/src/dave
cd ~/uuv_ws/src/dave
# Extract the demo files
tar -xzvf Dave_Bathymetry_Demo.tar.gz
# recompile
cd ~/uuv_ws
catkin_make- Run gazebo with roslaunch command for bathy_dave launch file:
roslaunch dave_demo_launch dave_bathymetry_demo.launch- Unpause the gazebo by clicking the play button at the bottom-left of the window
- As the clock ticks in the ROS Server,
set_init_latlonwill reposition the vehicle to the initial position defined at the launch file - Zoom out (scroll down) to see the edge of the loaded bathymetry grid tile and the Rexrov
- Run this command on a new terminal window
# Assume that you are in the dave directory
python3 gazebo/dave_gazebo_bathymetry_misc/merry_go_round.py
The merry_go_round.py script will move the vehicle in a circle. You may change the script parameter inside to modify center lat/lon, radius, depth, angular speed.
The details of the plugin settings are described at the end of the dave_bathymetry_demo.world file
    <plugin name="bathy_dave_plugin" filename="libdave_bathymetry_world_plugin.so">
      <bathymetry interval_s="0.1">
        <grid prefix="MontereyBay" tiles_to_keep="1" priority="1" colmax="10" rowmax="10"
              anchor_lon="-70.699" anchor_lat="41.509" spacing_lon="0.012" spacing_lat="0.010" />
      </bathymetry>
Also, the update rate for the tiles is specified in each robot description. dave/urdf/robots/rexrov_description/urdf/rexrov_oberon7_bathymetry.xacro
  <gazebo>
      <plugin name="gazebo_ros_control" filename="libgazebo_ros_control.so">
        <robotNamespace>/$(arg namespace)</robotNamespace>
        <robotParam>/$(arg namespace)/robot_description</robotParam>

        <bathymetry>
          <interval_s>0.1</interval_s>
        </bathymetry>

      </plugin>
  </gazebo>
At dave/examples/dave_demo_launch/launch/dave_bathymetry_demo.launch
<arg name="bathymetry_prefix" value="MontereyBay"/>
<arg name="robot_name" value="rexrov"/>
<arg name="initial_latitude" value="36.805"/>
<arg name="initial_longitude" value="-121.810"/>
<arg name="initial_depth" value="-5"/>
...
...
<!-- Set initial position using latitude and longitude (EPSG:4326) -->
<include file="$(find set_init_latlon)/launch/set_init_latlon.launch">
    <arg name="namespace" value="$(arg robot_name)"/>
    <arg name="init_lat" value="$(arg initial_latitude)"/>
    <arg name="init_lon" value="$(arg initial_longitude)"/>
    <arg name="depth" value="$(arg initial_depth)"/>
</include>-
robot_name: name of the vehicle model -
initial_latitude: initial latitude [deg] -
initial_longitude: initial longitude [deg] -
initial_depth: initial depth [m]
<!-- GPS Viewer -->
<include file="$(find gps_map_viewer)/launch/gps_map_viewer.launch">
    <arg name="namespace" value="$(arg robot_name)"/>
    <arg name="refresh_rate" value="1.0"/>
    <arg name="save_html" value="True"/>
</include>
- `namespace` : name of the vehicle model
- `refresh_rate` : refresh rate for GPS position marker update in the map
- `save_html` : Save rendered data as HTML which will be saved at /tmp/GPSViewer_log.html
- `default_zoom` : set initial zoom (range from 0 to 15, larger mean more zoom)
- `meadianColorDepth` : The bathymetry tile is divided into two layers for coloring: shore and deepsea. This decies which depth to divide.

# Importing more bathymetry data
- The bathymetry data need to be converted to be imported using the plugin.
The converter to obtain bathymetry tiles from RAW bathymetry files can be found at [Bathymetry converter](https://github.com/Field-Robotics-Lab/Bathymetry_Converter).

*The plugin was developed by Micahel Jakuba at WHOI and modified and implemented to the dave project by Woensug Choi.