Updating Firmware
- If you are in beta, probably not, at least not yet. It's a somewhat clunky process if you've not worked with Arduino before. This is primarily for those that would like to update their settings or experiment with the dev firmware. It is recommended to wait until final beta 0.5 firmware is released, as it allows for configuration on remote.
- Launch it to ensure appropriate User folders are created.
- Download the OSRR Repository
- Navigate to the OSRR-Firmware Folder.
- Copy the 'libraries' & 'OSRR-rev1' folders inside OSRR-Firmware folder to your Documents/Arduino/ folder.

- Your libraries & Arduino Sketch folders should now contain these contents:


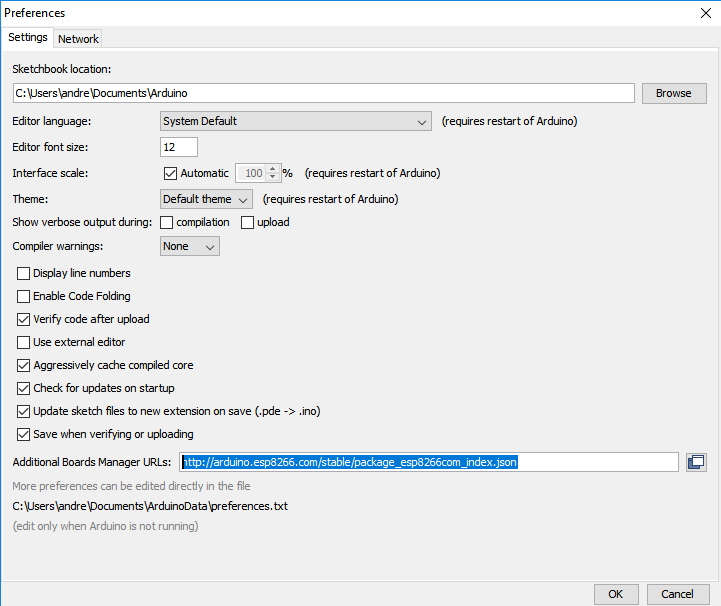
- Open the Arduino IDE, goto: File >> Preferences.
- Enter
http://arduino.esp8266.com/stable/package_esp8266com_index.jsoninto Additional Board Manager URLs field.
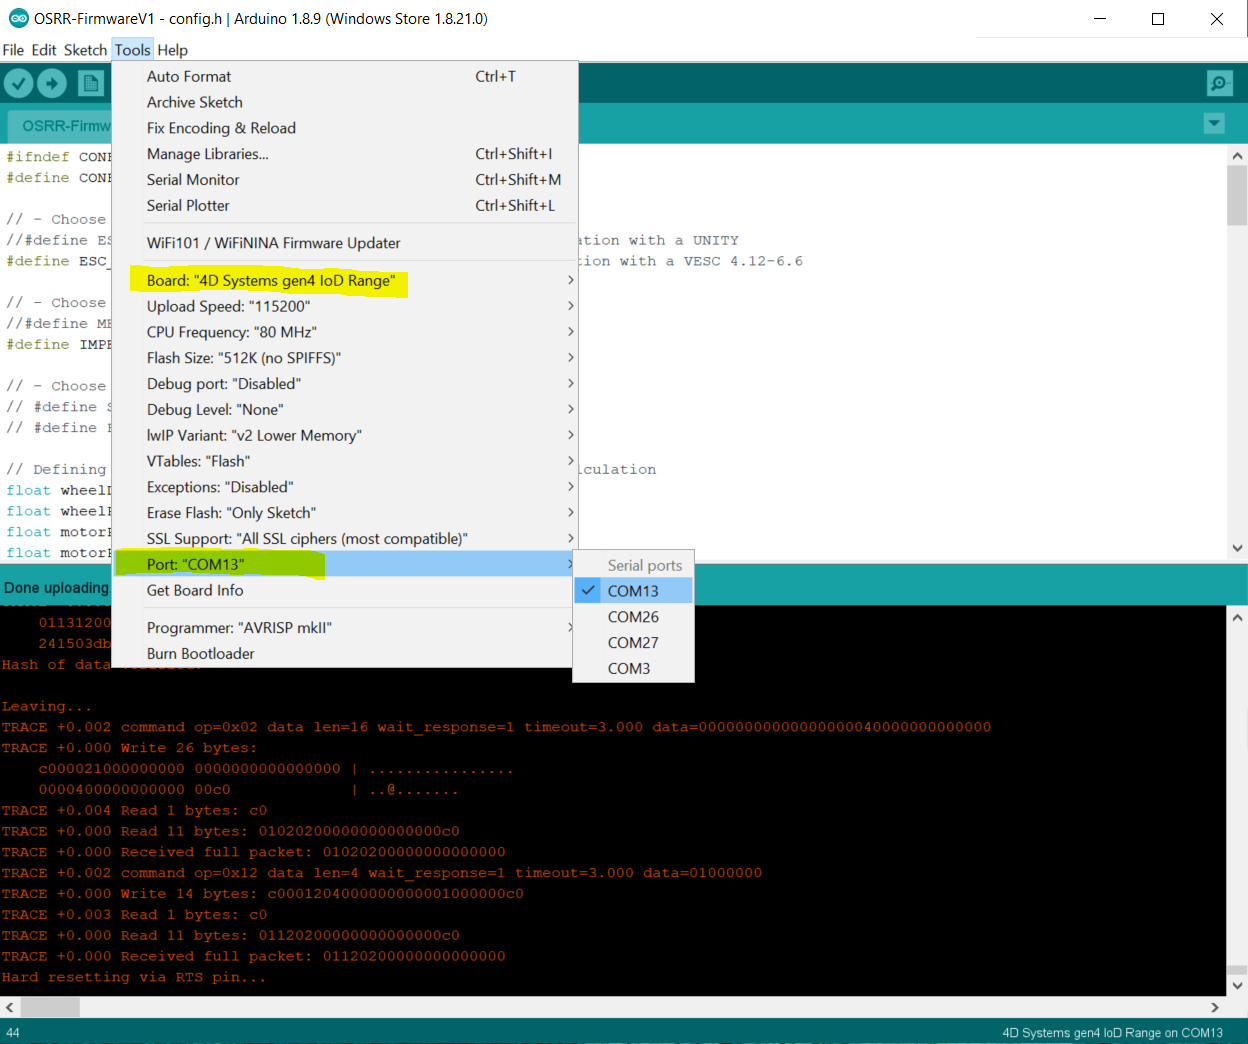
- Within the Arduino IDE Menu, goto: Tools >> Boards >> Boards Manager.
- You should now see a board package for 'esp8266' at the bottom of the boards list.
- Select Install/Update.

- You should now exit the Arduino IDE and relaunch it to ensure the updates you made are enabled.
1. Open the OSRR-rev1.ino from the Arduino IDE.
2. You will be programming the LCD module inside the OSRR directly, which requires that you open up the enclosure & remove the LCD module from its socket.