Rob the robot 🤖: Bip boop bip boop boop... Now we have a functional backend but there is no interface that allows us to use it, so we finished half of the work ! We need to implement it now or we will die... lost in the galaxy... forever... It’s up to you !
Today, there are many technologies available in order to create a website. The React library is one of the most used and popular, having a very important place in the world and being carried by Facebook.
Using TypeScript against JavaScript is the best thing that could happen to you.
TypeScript is :
- 💪 More reliable
- 🎯 More explicit thanks to its types
↔️ TypeScript and JavaScript are practically interchangeable
Let me show you a few links to websites which could be useful for this workshop and in a general way for your borders :
Before starting the workshop, make sure you've completed all the steps of the setup.
This part focuses on the frontend of your project. This is an early and broad area. But today we are going to focus on three main areas: the visuals, the user experience, and the code architecture.
That's why we will guide you throughout this part, by proposing you some visuals as an example, but be careful, this is only a recommendation. Feel free to use your personal artistic choices.
First, you should know that the whole architecture is provided to you with some small pieces of code.
⚠️ It is important to respect the following architecture for this workshop.
The router of your pages is a component that is very high in your DOM, that is to say that the rest of the components you will create will necessarily be one of its children more or less directly.
The router will allow you to call the desired component according to the page requested in the URL thanks to the path passed in parameter of each <Route />.
For example, we have already implemented a Hello World page (here) but also a page managing the 404 error (here).
👁️ Take a look at these two pages and the code (here) to better understand your router.
src/pages/Connection/index.tsx
Now that you understand how it works, you will have to create a new route.
Your route must call the Connection component with the path /login.
Congratulations, you just finished your first step !
Now, we are going to attack the heart of the project, the first step will be to implement a connection page and that can be either a login page or a register page depending on the URL.
Your two components must be called from your Connection component, for the latter we have chosen to provide you with a good part of the code, so you will only have to modify the children of the ConnectionForm tag.
Your role is to make it call either the :
Logincomponent ifpageType === 'login'orSignUpifpageType === 'register'.
This also means that you have to link this with your router.
Now go to the Login component.
This one is quite simple, you just need to implement a form containing an input for the Email address, a password input and a login button.
Be careful with each styled component that you will implement, it is important to keep in mind a responsiveness dimension. A good way to test this is to open your web console.
When a user presses the login button, you must call the function postLogin to connect with your backend.
You will have to implement a form without using the classic HTML tag, in our case we will use simple HTML <input> tags with the following props:
- value
- type
- placeholder
- onChange
For each input you will have to create a state to manage its value. docs
In this case, you must have these four variables :
emailValuesetEmailValuepasswordValuesetPasswordValue
The value of each input will correspond to the value of its state, which will be modified
via its setter function which will be called by the onChange property.
The
onChangeproperty takes a function as parameter. You have two choices:
- Create a constant variable containing a useCallBack which itself contains an arrow function. (This should be your default choice if the action does not fit in a single line of code.)
- Or you can create an arrow function directly in the
onChangeproperty. (This choice is acceptable if your function fits in a single line.)
For the other props mentioned above, it is trivial to find their value.
To summarize this task, you must : Add to the Login component a form allowing to connect by filling it with your email and password after pressing the login button. These components must be responsive and must call your backend functions.
Now go to the Register component.
This one is similar to the previous component, you are asked almost the same thing. But this time you will have to add some extra fields.
You must implement the four fields below:
- Password
- Password confirmation
- Wallet
You will still need to implement your form, using States.
The only difference is that when you click on the register button, you will have to
register the user, but also create a Smart Contract for them.
To do this you need to look at and call the functions putRegister and postSmartContract.
Let's do a quick recap of what we have at this point. For now, your users can log in from the
/loginURL with their email address and password. But also create an account if needed and directly connect it to their wallet via the URLsignup.
Take a look at the Dashboard component.
We land in your user's space. In fact, this is your first step. You need to get your users to this page once they've logged in.
We also remind you that at the bottom of each step documentation is available. Make sure you read it!
The idea is to create a space where each user will be able to visualize all his NFTs, and interact with them. From this page it should also be possible to Log out.
In order to do this, add a button allowing you to Log out in the TopBar.
Perfect ! It is now time to create your button to add a new NFT. This button must look like this. (see image below)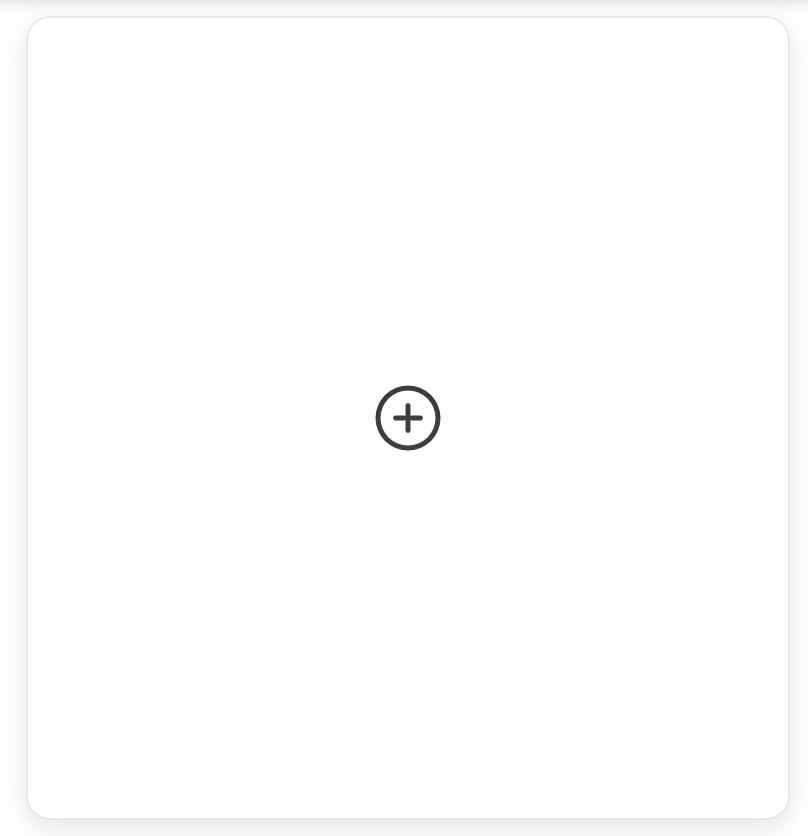
You must create this button in the component ViewNft in the NftManager.
When a user clicks on this button, you must set the page status to create.
When this is implemented, you should have a white page with your top bar. This means that you are on your creation page.
This page must allow you to upload a new NFT.
In order to do this, it must show a form to the user, containing the following information :
- name
- nftName
- description
- receiverAddress
- image (In this first iteration the image will be represented by a string)
By the way, after the user has filled all these fields, you need to call the function postUploadNft.
You will also notice that this function take the exact same parameters as the ones asked previously.
Once the user created his NFT, you must set the page status to view;
Now that you know how to create NFTs, it would be very useful to display them all.
To do this go back to the ViewNft component in the NftManager.
You will have to display all the user's NFTs next to the button used to create an NFT, which will remain at the first position in the grid.
You need to use the getNft function, it allows you to retrieve the user's NFTs.
Look at its return type, and display each element of the array in your component. The idea would be to make an grid of images.
Ideally it should be positioned like this 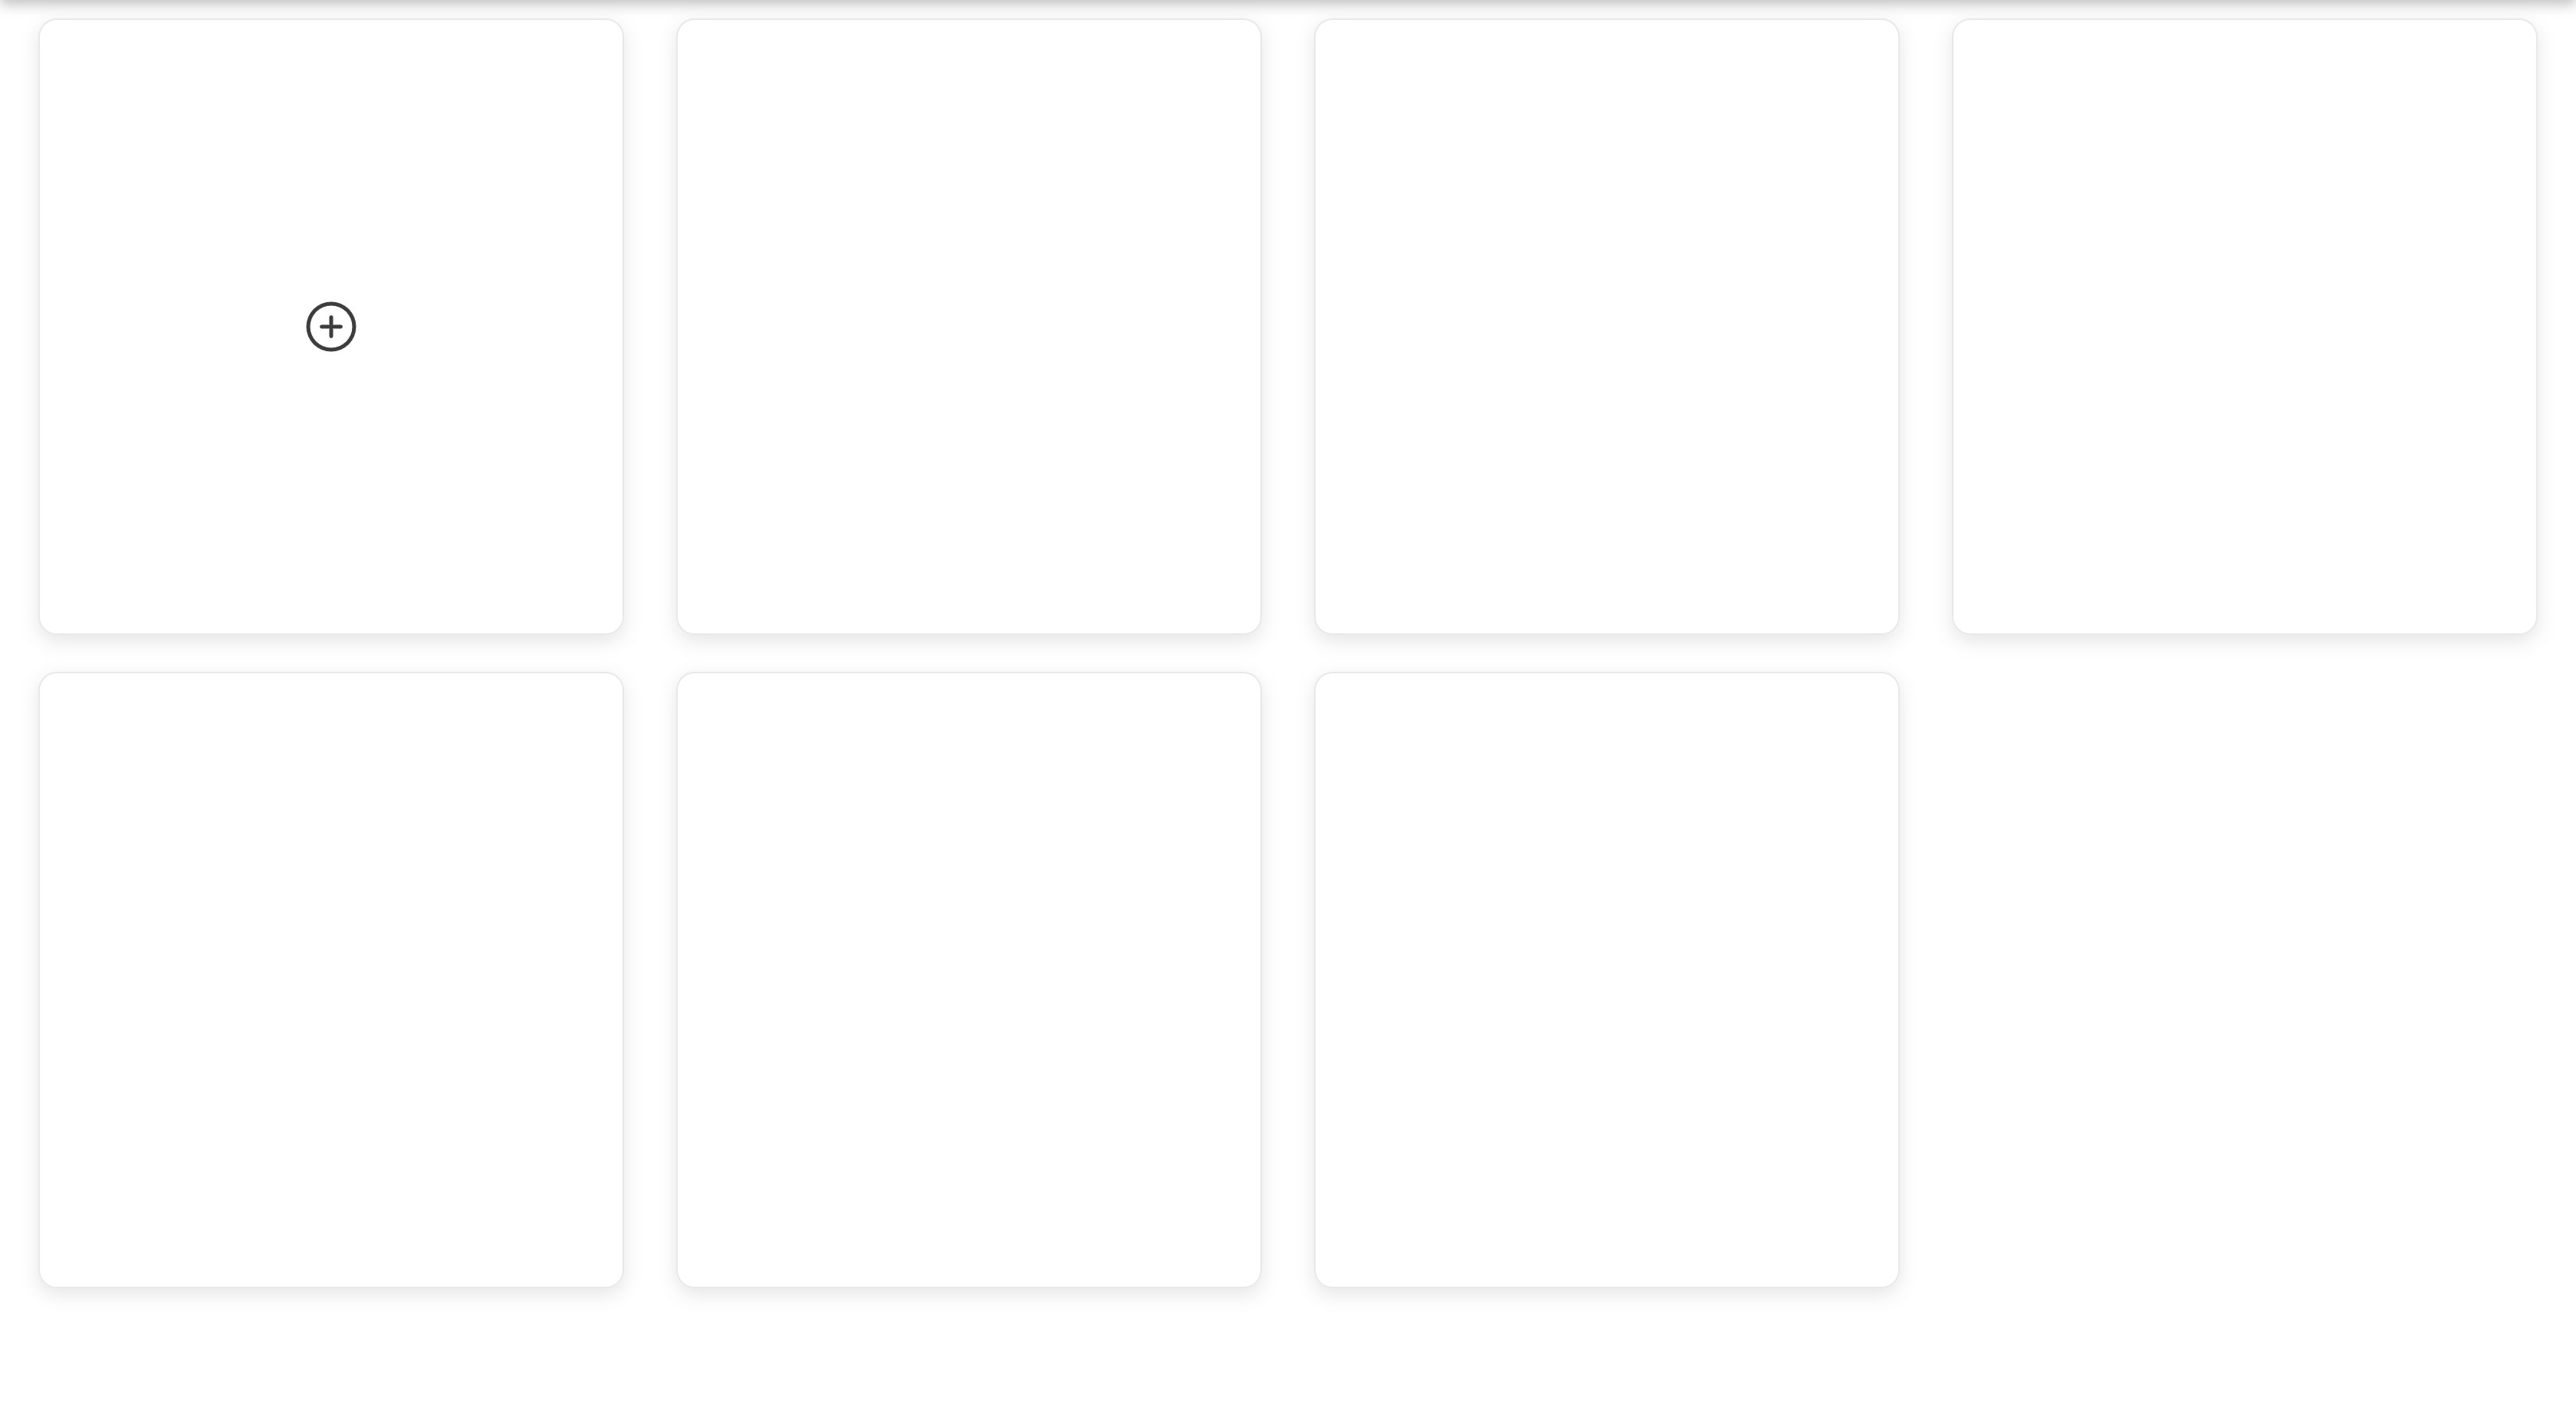
In order to do this you will have to use the map method which allows you to iterate over an array in typescript.

Nicolas HEUDE Baptiste BARBOTIN

:---: |
🚀 Don't hesitate to follow us on our different networks, and put a star 🌟 on
PoC'srepositories.