You signed in with another tab or window. Reload to refresh your session.You signed out in another tab or window. Reload to refresh your session.You switched accounts on another tab or window. Reload to refresh your session.Dismiss alert
I was able to install and join (successfully) a sensor node to our distributed setup via WireGuard VPN.
I will try to cover every detail in this guide, but please be aware this setup is NOT officially supported and the official docs suggest to use a VPN node (concentrator).
DISCLAIMER : This guide assumes the manager and the sensor node are based on CentOS 7 (the official ISO image).
Without further ado, here is the setup:
Configure a port-forwarding (DNAT) rule on the router/firewall in front of the Manager node;
Create a custom port and host groups on the manager node:
Edit the manager pillar file to include the new host/port groups in the INPUT chain by appending the following at the end of /opt/so/saltstack/local/pillar/minions/<manager.sls>:
MANAGER-PUBLIC-IP is the one you configured DNAT at step 1.
Start and enable the wireguard interface on the sensor with:
sudo systemctl enable --now wg-quick@wg0
At this point the manager and the sensor should be able to communicate via the wg0 interface.
Again double check the connectivity from the sensor via the wireguard VPN - ping/ telnet on ports:
If above tests fail... double check everything, because the sensor installation will most probably fail otherwise.
You can check the VPN status with wg command and the quick-start guide also worth reading.
FINALE: If step 12 is successful, then you are READY to proceed with the installation of the sensor, run:
reacted with thumbs up emoji reacted with thumbs down emoji reacted with laugh emoji reacted with hooray emoji reacted with confused emoji reacted with heart emoji reacted with rocket emoji reacted with eyes emoji
Uh oh!
There was an error while loading. Please reload this page.
Uh oh!
There was an error while loading. Please reload this page.
-
Hi,
I was able to install and join (successfully) a
sensornode to our distributed setup via WireGuard VPN.I will try to cover every detail in this guide, but please be aware this setup is NOT officially supported and the official docs suggest to use a
VPN node(concentrator).DISCLAIMER : This guide assumes the
managerand thesensornode are based on CentOS 7 (the official ISO image).Without further ado, here is the setup:
Configure a port-forwarding (DNAT) rule on the router/firewall in front of the
Manager node;Create a custom
portandhostgroups on the manager node:/opt/so/saltstack/local/pillar/minions/<manager.sls>:sensor nodeChoose
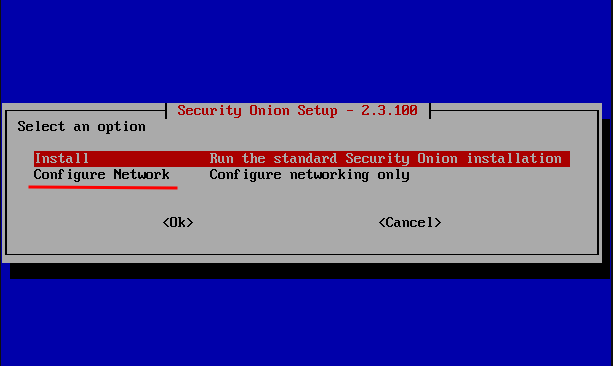
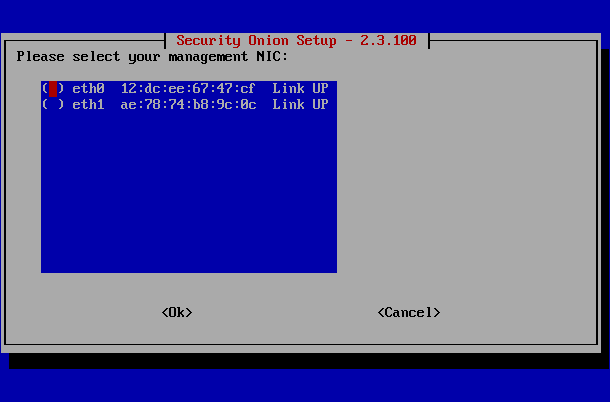
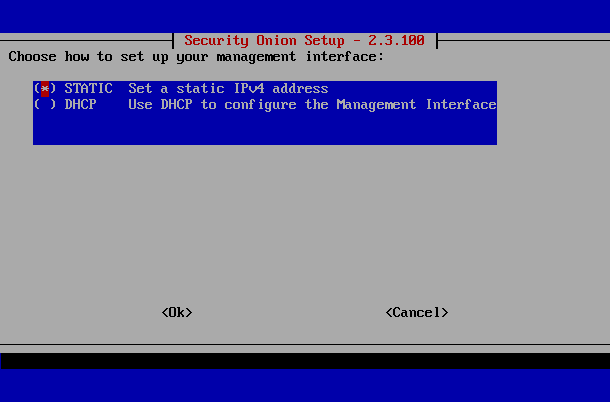
Configure Networkand setup your management interface:...
After you are done with the
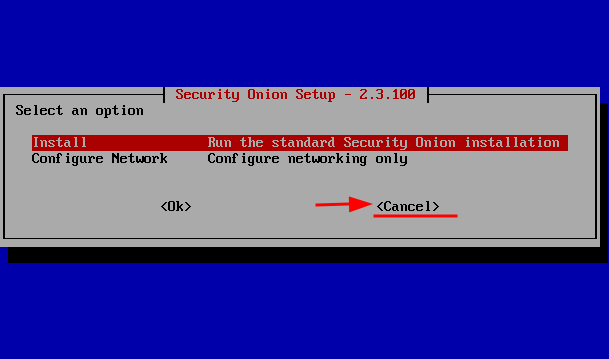
network configurationselectCancel:Double check for connectivity issues to the internet - ping / traceroute / etc... or at least to the manager
public IPfrom step 1;Find out the
sensorpublic IP ( the one that MASQ / SNAT the traffic to the internet).I'm using:
public-ipof the sensor fromstep 4to the manager firewall:sensorwireguard VPN IP address to the manager firewallsensorandminionhostgroups:OR
wireguardkernel module and its tools on bothmanagerandsensor:At this point you may reboot the node, though this is not mandatory.
manager/sensor):Save those keys until the setup is over, after that you may delete tem.
managernode -/etc/wireguard/wg0.conf:I'm not sure if the
sensormanagement IP address (192.168.0.55) is required, feel free to experiment without it.Start and enable the wireguard interface on the
managerwith:sensornode -/etc/wireguard/wg0.conf:MANAGER-PUBLIC-IPis the one you configuredDNATat step 1.Start and enable the wireguard interface on the
sensorwith:managerand thesensorshould be able to communicate via thewg0interface.Again double check the connectivity from the
sensorvia the wireguard VPN - ping/ telnet on ports:If above tests fail... double check everything, because the
sensorinstallation will most probably fail otherwise.You can check the VPN status with
wgcommand and the quick-start guide also worth reading.FINALE: If step 12 is successful, then you are READY to proceed with the installation of the sensor, run:
Cheers,
PY
Beta Was this translation helpful? Give feedback.
All reactions