Example: Adding authorization to an ASP.NET MVC web application
The HR Tool is an application where users can manage employee records, holidays, ... Some people can only access the application in read-only mode while others can create records and access sensitive employee data. The sample code for this application is available here
You first start by defining the permissions in the dashboard:
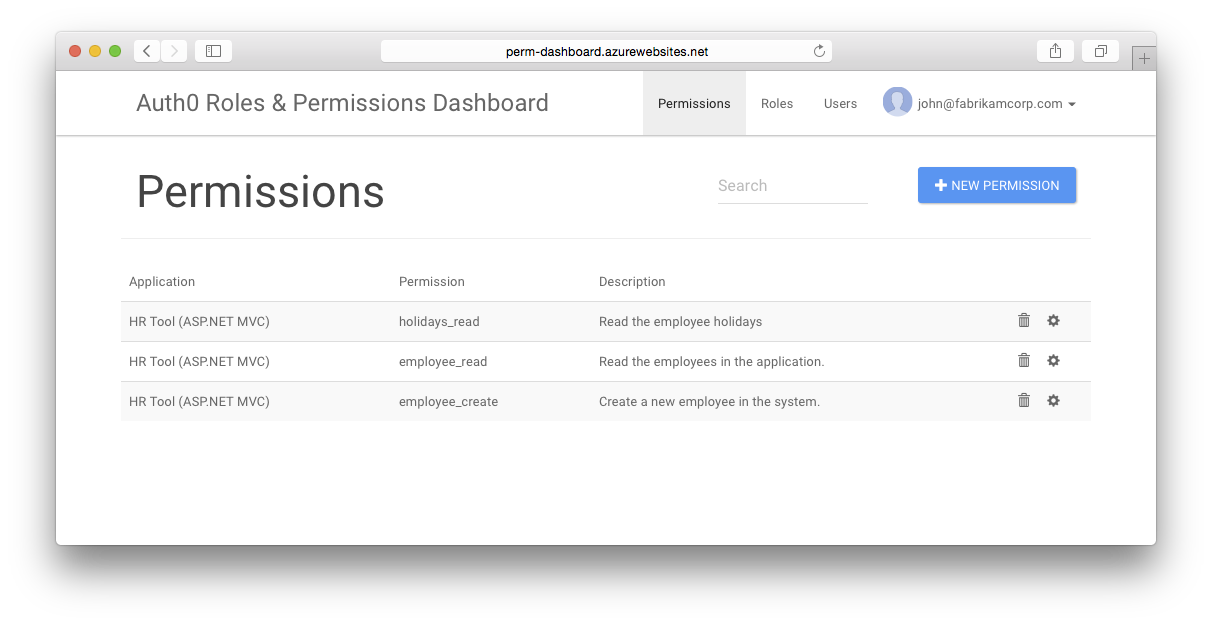
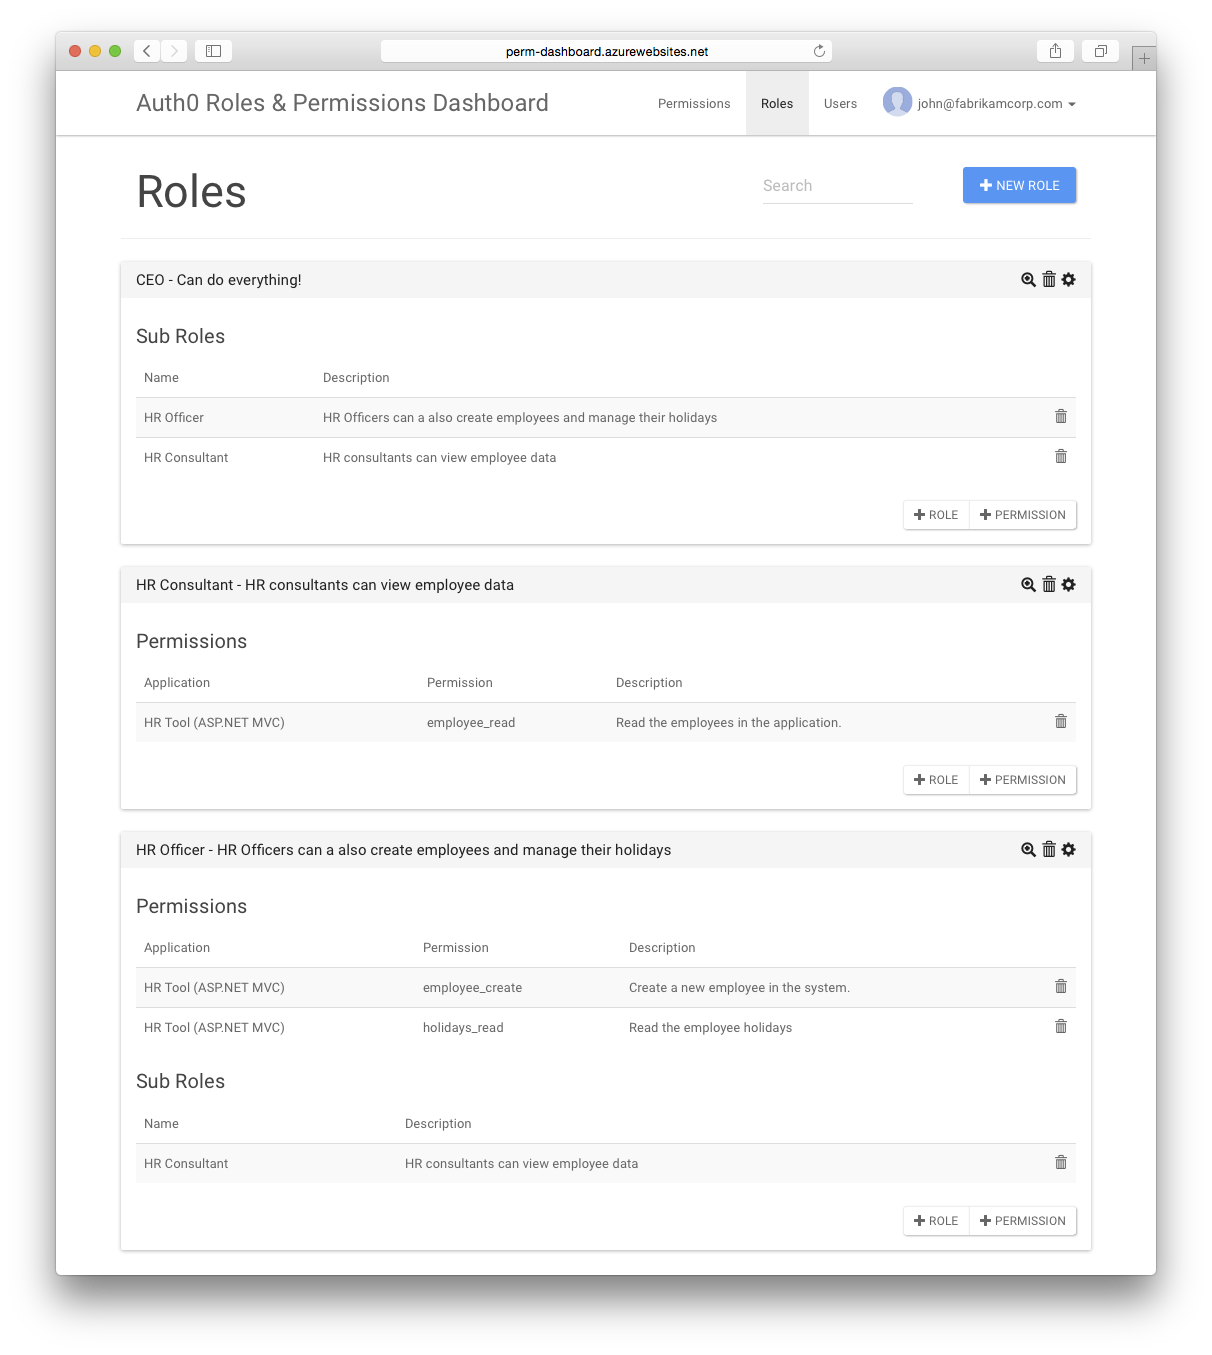
These permissions allow us to specify who can read employee data, create new employees and read holidays. The following roles exist in the organisation:
- HR Consultant: should only be allowed to read employee data
- HR Officer: is an HR Consultant who can also create employees and read holidays
- CEO: will be able to do everything, so contains all roles
The next step is to integrate this in the HR Tool, which is an ASP.NET MVC application. For this to work the Rule needs to be configured which adds the user's permission to the token in the authentication pipeline.
Start by adding Auth0 to the application using the Auth0-ASPNET-Owin NuGet package. In addition to the standard configuration this code will add the user's permissions as Role Claims in the user's identity.
    var provider = new Auth0.Owin.Auth0AuthenticationProvider
    {
        OnAuthenticated = (context) =>
        {
            var permissions = context.User["permissions"] as JArray;
            if (permissions != null)
            {
                foreach (var permission in permissions)
                {
                    context.Identity.AddClaim(new Claim(ClaimTypes.Role, permission.ToString()));
                }
            }

            return Task.FromResult(0);
        }
    };

    app.UseAuth0Authentication(
        clientId: ConfigurationManager.AppSettings["auth0:ClientId"],
        clientSecret: ConfigurationManager.AppSettings["auth0:ClientSecret"],
        domain: ConfigurationManager.AppSettings["auth0:Domain"],
        provider: provider);
The next step is to create a new AuthorizeAttribute which can show an "Unauthorized" page when the user is logged in but does not have access to use this specific feature:
    [AttributeUsage(AttributeTargets.Class | AttributeTargets.Method, Inherited = true, AllowMultiple = true)]
    public class AuthorizePermissionAttribute : AuthorizeAttribute
    {
        public AuthorizePermissionAttribute(string permission)
        {
            this.Roles = permission;
        }

        protected override void HandleUnauthorizedRequest(AuthorizationContext filterContext)
        {
            if (filterContext.HttpContext.Request.IsAuthenticated)
            {
                filterContext.HttpContext.Response.StatusCode = 403;
                filterContext.Result = new ViewResult { ViewName = "Unauthorized" };
            }
            else
            {
                base.HandleUnauthorizedRequest(filterContext);
            }
        }
    }
And finally actions can now be protected using one or more permissions. Here's how the EmployeeController is protected:
    [AuthorizePermission("employee_read")]
    public class EmployeeController : Controller
    {
        public ActionResult Index()
        {
            return View();
        }

        [AuthorizePermission("employee_create")]
        public ActionResult Create()
        {
            return View();
        }
    }
In addition to protecting the actual action the UI can also be shaped based on the user's permissions. If the user cannot create a new employee, why not hide the button in the view?
@using System.Security.Claims

@{
    ViewBag.Title = "Employees Overview";
}

<h2>Employees Overview</h2>

You can only see this page if you have the <strong>employee_read</strong> permissions.

<br/>
<br/>

@if (ClaimsPrincipal.Current.HasClaim(ClaimTypes.Role, "employee_create"))
{
    <a href="@Url.Action("Create", "Employee")" class="btn btn-info btn-lg">Create a new employee</a>
}
Now even if the user can find the URL to create the employee that's not an issue, since the action is also protected with the AuthorizePermission attribute.
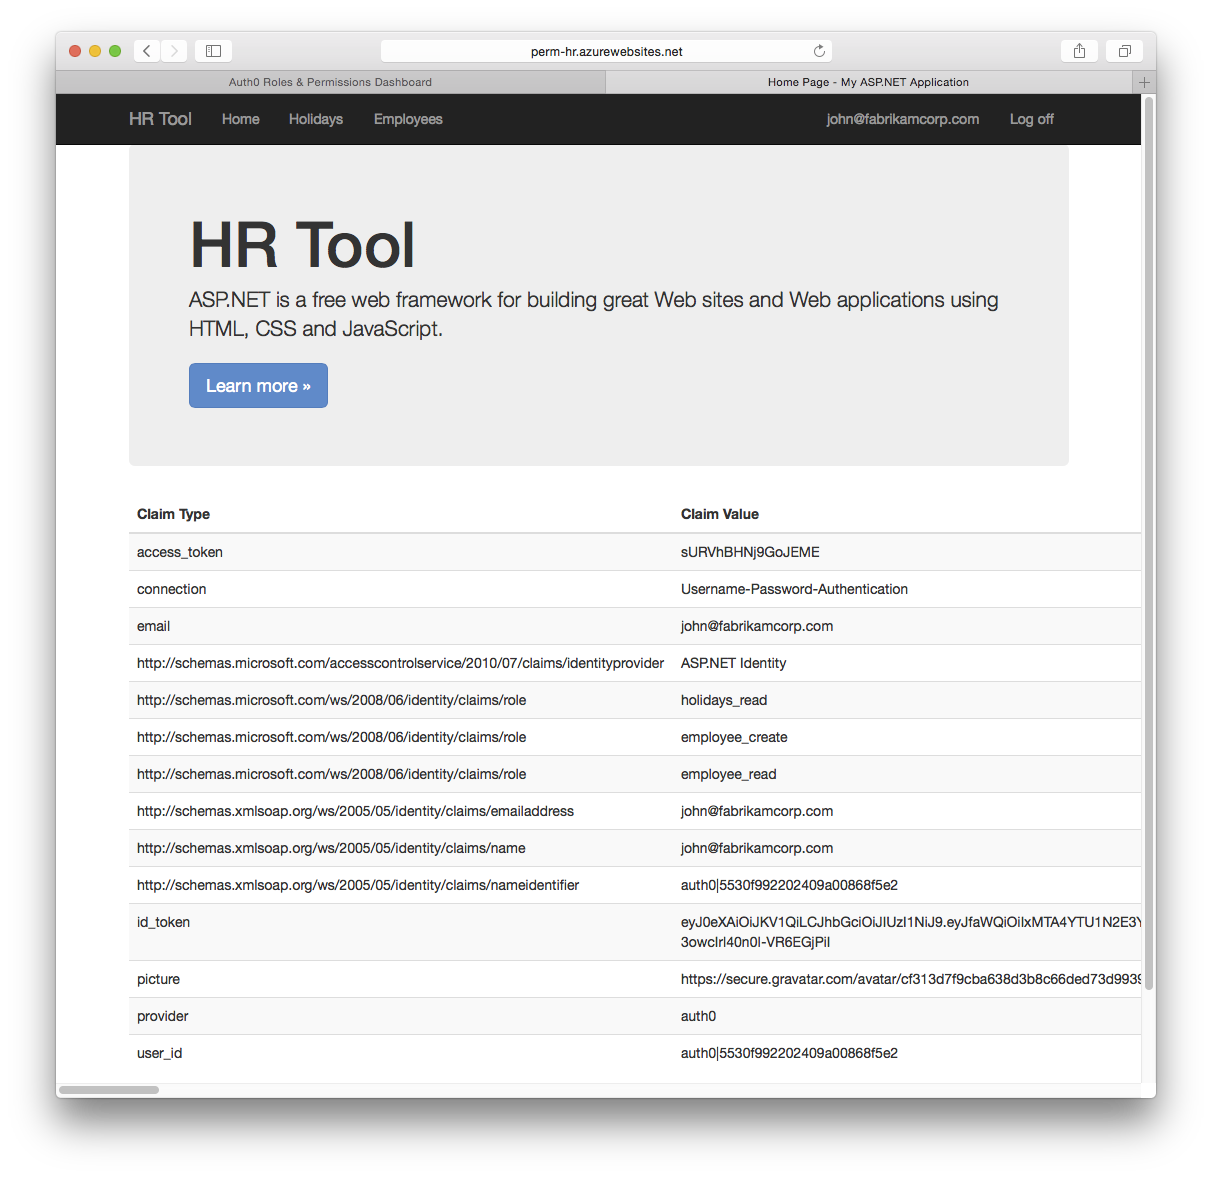
When users authenticate the homepage will show their claims, including the Role Claim which contains all of their permissions:
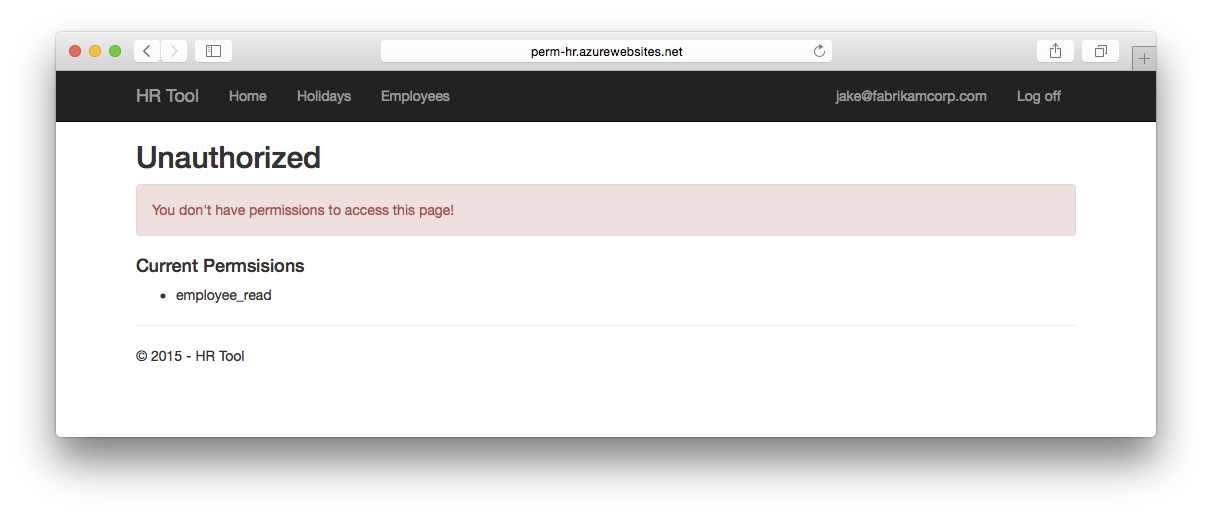
But when users try to access a page for which they don't have permissions, they'll see this: