Props (properties) are specialized React objects used to pass information from one component to another. Props create a unidirectional flow of data and behavior from a parent component down to a nested component via the component invocation. While state values are constantly updated through user interactions, props cannot be changed. They are a "read only" value.
- can define props
- can recall the syntax for passing data and behavior to a nested component
- can demonstrate how to access data and behavior in the nested component
- can describe the flow of information from a component to a nested component
- props (properties)
- key
cdinto thereact-challengesrepository- Create a new branch:
props-initials1-initials2(ex. props-aw-sp) - Create a new React application with no spaces:
yarn create react-app props-student1-student2(ex. yarn create react-app props-austin-sarah) cdinto the project- Open the project in a text editor
- Create a directory in src called components
- Code!
- $
yarn start - control + c (stops the server)
- command + t (opens a new terminal tab)
- Is your server running?
- Are your components exported?
- Inspect the page and look for errors in the console tab.
- Always look at the first error message in the list.
Since React is component based communication between components is very important. Components give us the ability to build modular interfaces and state values give us a means of tracking and updating data within components. Props, short for properties, give us the ability to communicate between components by passing data and behavior from one component down to a nested component.
Props can be either static data or methods. The data typically comes from a value in state. In a very practical sense, prop data is a snapshot of the state values that get passed down to components tasked with displaying and/or letting the user interact with that information. Props are passed from a component to a nested component through the component invocation. It is very similar to how a function get passed information through an argument.
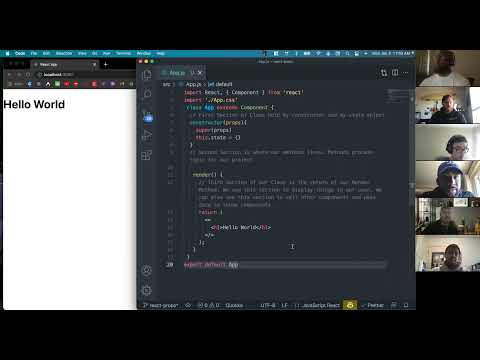
Here is an example that creates a greeter application in React. We start with App.js displaying a heading tag and a nested component with a smaller heading tag.
src/App.js
import React from "react"
import Greeter from "./components/Greeter"

const App = () => {
  return (
    <>
      <h1>Greeter Application</h1>
      <Greeter />
    </>
  )
}

export default App
src/components/Greeter.js
import React from "react"

const Greeter = () => {
  return (
    <>
      <h3>Hello World!</h3>
    </>
  )
}

export default GreeterNow we will pass data from App.js down to the greeter component. Within the Greeter component call we will pass a variable name that contains the string "Hamilton". The variable is now available to the greeter component as props. To reference the variable name in the greeter component we need to do two things. First we need to pass props as an argument to the component. Then we can reference the variable through props as props.name.
src/App.js
import React from "react"
import Greeter from "./components/Greeter"

const App = () => {
  return (
    <>
      <h1>Greeter Application</h1>
      <Greeter name="Hamilton" />
    </>
  )
}

export default App
src/components/Greeter.js
import React from "react"

const Greeter = (props) => {
  return (
    <>
      <h3>Hello {props.name}!</h3>
    </>
  )
}

export default GreeterRather than hard coding the string "Hamilton" directly in the component call we can use a state value to pass props to the nested component. This will make our application more dynamic as state values can be updated.
src/App.js
import React, { useState } from "react"
import Greeter from "./components/Greeter"

const App = () => {
  const [people, setPeople] = useState("Hamilton")

  return (
    <>
      <h1>Greeter Application</h1>
      <Greeter name={people} />
    </>
  )
}

export default App
The variable name is assigned information from the value in state. This makes name available to Greeter as props. Since Greeter is a display component there are no updates that need to happen in order to handle our refactor in App.js.
Our greeter application is working just great. But what if we have multiple people to greet? To expand the functionality of the application we can set an array in state. Then rather than a single Greeter component invocation we want to have one component per person. To manage this dynamically we can map over the array in state and return a component invocation. Now, no matter how many people we need to greet our code can manage the job effectively.
React is iterating over the array in state and producing a series of component calls as a result. Each component call acts independently from the others. To keep these similar code outputs organized, React likes to have a key for each iteration. A key is unique identifier that gets passed to the JSX tag returned from an iteration. A key can be any unique identifier. In this example we can use the index of the array since we have access to the index as the second parameter in the map method and we know each item in the array will always have a unique index.
As long as the name variable stays the same there are no changes that need to be made to Greeter.
src/App.js
import React, { useState } from "react"
import Greeter from "./components/Greeter"

const App = () => {
  const [people, setPeople] = useState(["Hamilton", "Washington", "Jefferson"])

  return (
    <>
      <h1>Greeter Application</h1>
      {people.map((person, index) => {
        return <Greeter name={person} key={index} />
      })}
    </>
  )
}

export default AppWe have explored passing information as props but we can pass behavior as well. The process is very similar. In this example, we can create a button that when clicked will trigger a prompt that we can use to add new people to our array. The button will be its own component named AddPerson. The logic will be held in App.js and the appropriate behavior can be distributed as needed.
We can add a method in App.js that will use the state setter method named setPeople to trigger a prompt() method. If we save the prompt to a variable we can capture the result of what our user types. Then it can be added to the array in state.
src/App.js
import React, { useState } from "react"
import Greeter from "./components/Greeter"
import AddPerson from "./components/AddPerson"

const App = () => {
  const [people, setPeople] = useState(["Hamilton", "Washington", "Jefferson"])

  const addPerson = () => {
    const newPerson = prompt()
    setPeople([...people, newPerson])
  }

  return (
    <>
      <h1>Greeter Application</h1>
      {people.map((person, index) => {
        return <Greeter name={person} key={index} />
      })}
      <AddPerson addPerson={addPerson} />
    </>
  )
}

export default App
The method we wrote will update the array in state. There are no updates that need to happen to Greeter as the code we wrote is dynamic. But the method is not yet being called. We need to create a button with an onClick event.
The button's onClick will call the method addPerson that is being passed as props down into the component.
src/components/AddPerson.js
const AddPerson = (props) => {
  return <button onClick={props.addPerson}>Add Person</button>
}

export default AddPerson
Now we have created a beautifully dynamic application that has great organization and proper separation of concerns.
As a developer, you are tasked with creating a dice application. The application will allow the user to role a standard six-sided dice and see the result of each roll. As the user rolls the dice, each roll gets logged creating a list of all the previous rolls.
When creating a project it is important to think about organization of your code. It is best practice to separate and compartmentalize all the actions in your code. The dice UI will be in its own component as will the roll log UI. App.js controls of all the data in state, renders the other components, and passes data to the dice and roll component.

- As a user, I can see a square box on the screen with a black border and a white background.
- As a user, I can click on the box to roll the dice and see the result of my roll in the box.
- As a user, I can see my roll logged and see the roll log continue to grow as I roll the dice.
- As a user, I can see the image of a dice face when I roll the dice.
- As a user, I can click a restart button that clears my roll log.