First Application Tutorial Icon img confusion #5796
Replies: 1 comment
-
|
Posted at 2023-04-03 by endikaserra As far as I can see the image converter does not have the possibility to rename and download the converted image, but it is only useful if you are going to import it into the code. The key is in the last part "but the tools are now built into the IDE". Inside the IDE you can do the same and import it directly with the name you want (image below), I guess that's what it means. After reading it I think it can be a bit confusing not to point out that you can't do that in the Image Converter, maybe before it was possible and now it is oudated? I've started this week with the Bangle.js too haha I hope it helps you. Attachments: Posted at 2023-04-03 by user155061 That does help! thank you so much!! Posted at 2023-04-04 by @gfwilliams So what were you trying to use? The IDE (as above?) or http://www.espruino.com/Image+Converter ? Yes, it looks like those docs need changing:
|
Beta Was this translation helpful? Give feedback.
Uh oh!
There was an error while loading. Please reload this page.
-
Posted at 2023-04-03 by user155061
Icon: timer.img⇠
In the menu, you'd have noticed that there was no icon shown.
To fix this, let's find a 48px icon. Unless you want to create one, we'd suggest using icons8.com as they're free for Open Source projects (we're also paid up just in case).
Go to icons8.com
Type Timer into the search box
On the left, click Color - this is the style we often use in Bangle.js
Choose Sand Timer or whatever you feel like
Click Download and download the 48px image
Now it's time to convert the image for use in Espruino and upload it. You can use http://www.espruino.com/Image+Converter for this, but the tools are now built into the IDE.
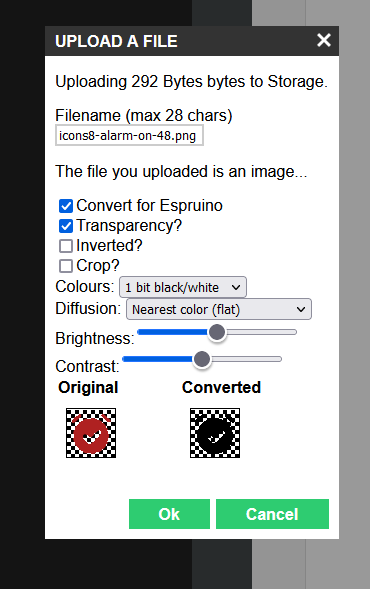
Click the Storage icon above Upload:
Choose Upload a File
Select the image file you downloaded
The IDE will detect it is an image and offer you some options for conversion
Name the icon timer.img
Ensure Convert for Espruino and Transparency are checked
Choose 4 bit Mac Palette and check the Preview. If the colours aren't good enough, try 8 bit Web Palette instead.
Now click Ok to upload
I am trying to follow this tutorial but I don't see a way to save or generate any icon after selecting the settings. If I right click on the image generated and click save, it saves both of the images side by side as a png. The tutorial says it should be an .img file. How do I resolve this?
Beta Was this translation helpful? Give feedback.
All reactions