Getting Started
In this tutorial, you will learn how to use Java-Deobfuscator. Before diving into steps, keep in mind that we won't actually deobfuscate any jar until next tutorial. This tutorial is just about how you would prepare deobfuscator to run.
- Download the latest release of Java-Deobfuscator
- Create a folder somewhere that you want to use as a workspace for deobfuscating processes
- Move deobfuscator.jar to the workspace folder
- (Optional) Create seperate folders for input and output jars
In the next steps, we will prepare the workspace to run the deobfuscator properly, there are several ways that you can run java-deobfuscator, but the easiest and the most efficient way is using deobfuscator-gui.
- Download the latest release of deobfuscator-gui
- Move deobfuscator-gui.jar to the workspace folder
- Create a config file named
config.yamlin the workspace with the following contents
input: input.jar
output: output.jar
detect: false
transformers:
- [fully-qualified-name-of-transformer]- Create a batch file named
run.batin the workspace with the following contents
java -jar deobfuscator.jar --config config.yaml
pauseAs mentioned earlier, we won't actually deobfuscate any jar now. But we will configure how to. You don't actually have to do these steps now as you don't know which obfuscator used. Just practice.
- Run deobfuscator-gui.jar directly
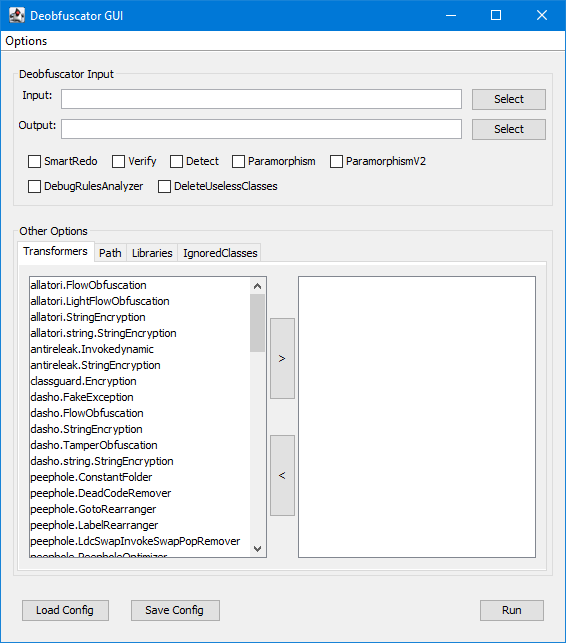
- Select your input and output jars
- Select the transformers that you've chosen
- (Optional) Most deobfuscation processes require
rt.jar, so you may have to add it inPathtab. Something likeC:/Program/Files/Java/jdk{version}/jre/lib/rt.jar - (Info) You can save and load configs by using the corresponding buttons
- Open
config.yaml - Replace
input.jarwith your jar's path - Replace
output.jarwith a path - (Optional) You can use input and output folders you've created earlier
- (Warn) You need to use backslashes(
\) instead of normal slashes(/) while writing paths - Look out the transformers at their package
- Replace
[fully-qualified-name-of-transformer]with the transformer that you've chosen
Here are two examples of config.yaml:
input: C:\jd-workspace\input\crackme.jar
output: C:\jd-workspace\output\crackme-deobf.jar
detect: false
transformers:
- special.RadonTransformerinput: .\input\crackme.jar
output: .\output\crackme-deobf.jar
detect: false
transformers:
- general.removers.SyntheticBridgeRemover
- general.removers.LineNumberRemover- (Optional) Most deobfuscation processes require
rt.jarin the path, so you may have to add this kind of code to yourconfig.yaml
path:
 - "C:/Program Files/Java/jdk{version}/jre/lib/rt.jar"
Now, you know how to use Java-Deobfuscator, even if we didn't actually deobfuscate something. In the next tutorial, you will try to deobfuscate an actual jar with the corresponding transformers given.