Sinkアプリケーションを追加して、メッセージの受信先を動的に増やしましょう。
以下のコマンドを実行すると、tweet-viewerフォルダに雛形プロジェクトが生成されます
curl https://start.spring.io/starter.tgz \
       -d artifactId=tweet-viewer \
       -d baseDir=tweet-viewer \
       -d packageName=com.example \
       -d dependencies=web,actuator,cloud-stream,amqp \
       -d type=maven-project \
       -d applicationName=TweetViewerApplication | tar -xzvf -
src/main/java/com/example/TweetViewerApplication.javaを次のように記述してください。
package com.example;

import java.util.List;
import java.util.concurrent.CopyOnWriteArrayList;
import java.util.function.Consumer;

import org.springframework.boot.SpringApplication;
import org.springframework.boot.autoconfigure.SpringBootApplication;
import org.springframework.context.annotation.Bean;
import org.springframework.web.bind.annotation.GetMapping;
import org.springframework.web.bind.annotation.RestController;

@SpringBootApplication
@RestController
public class TweetViewerApplication {
	private final List<Tweet> tweets = new CopyOnWriteArrayList<>();

	@GetMapping(path = "/")
	public List<Tweet> viewTweets() {
		return this.tweets;
	}

	@Bean
	public Consumer<Tweet> tweetCollector() {
		return tweet -> this.tweets.add(tweet);
	}

	public static void main(String[] args) {
		SpringApplication.run(TweetViewerApplication.class, args);
	}

	record Tweet(String text) {
	}
}このSinkアプリケーションでは受信したメッセージがListに追加され、HTTPのGETで確認できます。
channel名inputに対するdestination名とConsumerGroup名をapplication.propertiesに次にように設定してください。
spring.cloud.stream.function.bindings.tweetCollector-in-0=input
spring.cloud.stream.bindings.input.destination=hello
spring.cloud.stream.bindings.input.group=viewerはじめに作成したSourceからメッセージを受信できるようにdestination名は同じにする必要があります。しかし、先に作成したSinkとは別にメッセージを受信したいのでConsumerGroupは別にします。ここではviewerという名前にしました。
次のコマンドでこのSourceアプリケーションのjarファイルを作成してください。
./mvnw clean package -DskipTests=true
targetディレクトリにtweet-viewer-0.0.1-SNAPSHOT.jarができていることを確認してください。
$ ls -lh target/
total 56840
drwxr-xr-x  4 toshiaki  staff   128B Nov  2 02:43 classes
drwxr-xr-x  3 toshiaki  staff    96B Nov  2 02:43 generated-sources
drwxr-xr-x  3 toshiaki  staff    96B Nov  2 02:43 generated-test-sources
drwxr-xr-x  3 toshiaki  staff    96B Nov  2 02:43 maven-archiver
drwxr-xr-x  3 toshiaki  staff    96B Nov  2 02:43 maven-status
drwxr-xr-x  3 toshiaki  staff    96B Nov  2 02:43 test-classes
-rw-r--r--  1 toshiaki  staff    28M Nov  2 02:43 tweet-viewer-0.0.1-SNAPSHOT.jar
-rw-r--r--  1 toshiaki  staff   3.7K Nov  2 02:43 tweet-viewer-0.0.1-SNAPSHOT.jar.original
次のコマンドでアプリケーションを起動してください。
java -jar target/tweet-viewer-0.0.1-SNAPSHOT.jar --server.port=8085
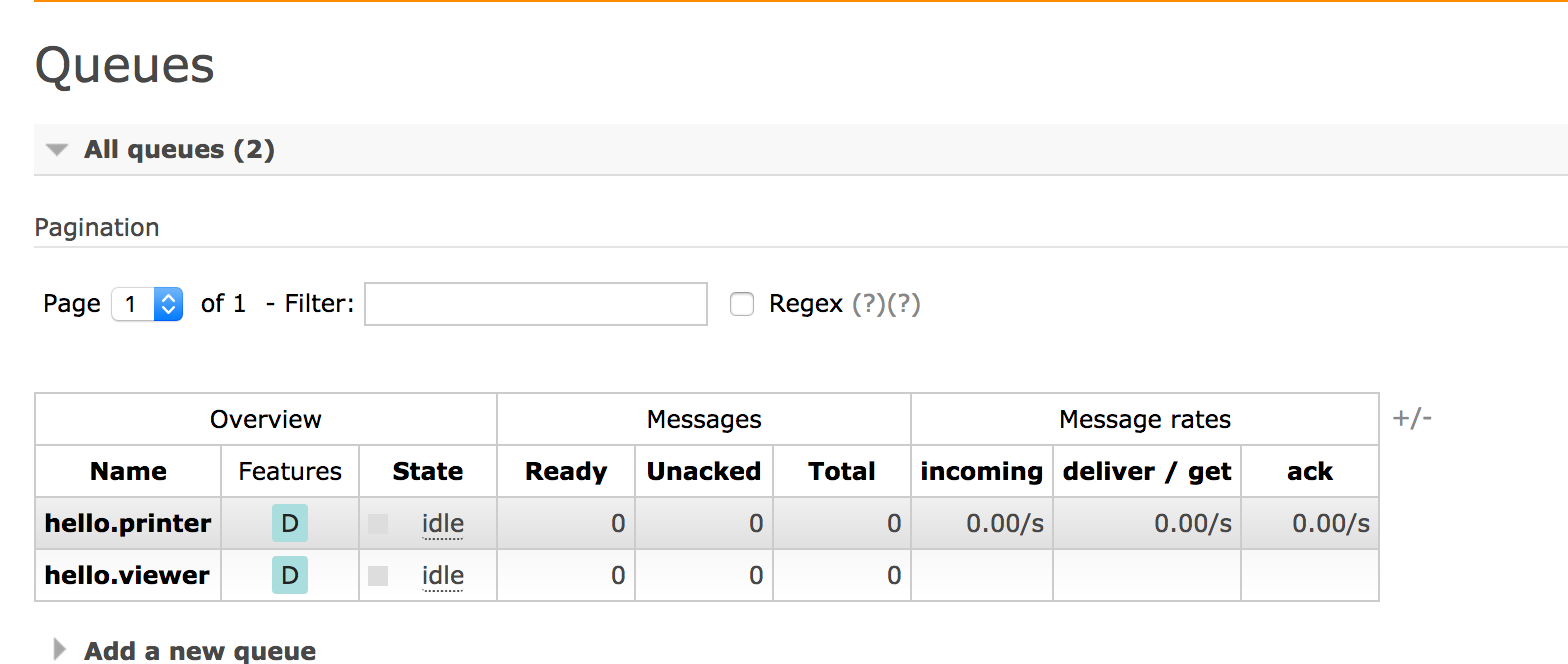
管理コンソール(http://localhost:15672)にアクセスして、Queuesタブを選択してください。hello.viewe Queueが追加されていることが確認できます。
Sourceにリクエストを送りましょう。
curl -v localhost:8080 -d '{"text":"Hello1"}' -H 'Content-Type: application/json'
curl -v localhost:8080 -d '{"text":"Hello2"}' -H 'Content-Type: application/json'
curl -v localhost:8080 -d '{"text":"Hello3"}' -H 'Content-Type: application/json'
curl -v localhost:8080 -d '{"text":"Hello4"}' -H 'Content-Type: application/json'
curl -v localhost:8080 -d '{"text":"Hello5"}' -H 'Content-Type: application/json'
一つ目のSinkにはいつも通りのログが取得されます(出力結果はSinkの数によって異なります)。
Received Hello1
Received Hello2
Received Hello3
Received Hello4
Received Hello5
その一方で、今回作成したSinkにもメッセージが届いていることを次のように確認してください。
$ curl http://localhost:8085/
[{"text":"Hello1"},{"text":"Hello2"},{"text":"Hello3"},{"text":"Hello4"},{"text":"Hello5"}]
Consumer Groupの仕組みを利用して、メッセージを受信するSinkを後から追加できることを確認しました。
連携するサービスが後から増えても、サービス呼び出し側(メッセージ送信側)のコードを変更することなくサービスを追加することができます。
このような手法をChoreography Styleと呼び、マイクロサービスアーキテクチャを実現する上で重要なパターンとなります。
Spring Cloud Streamを利用することでChoreography Styleを簡単に実現できます。