This guide walks you through using voice recordings to create and manage tasks in Lotti. You'll learn how to turn spoken thoughts into organized checklists automatically.
| What You'll Learn | Description |
|---|---|
| Voice Recording | Capture your thoughts by speaking |
| Automatic Transcription | AI converts your speech to text |
| Smart Checklists | AI extracts action items from your words |
| Task Tracking | Monitor progress and complete items |
Prerequisite: Before starting this guide, make sure you've completed the Getting Started Guide to set up your AI provider (Gemini or Ollama).
Before diving in, here's how voice-to-checklist works in Lotti:
┌─────────────────┐     ┌─────────────────┐     ┌─────────────────┐     ┌─────────────────┐
│  You speak      │ ──▶ │  AI transcribes │ ──▶ │  AI finds       │ ──▶ │  Checklist      │
│  your thoughts  │     │  to text        │     │  action items   │     │  is created     │
└─────────────────┘     └─────────────────┘     └─────────────────┘     └─────────────────┘
This entire process happens automatically after you stop recording. No extra steps needed.
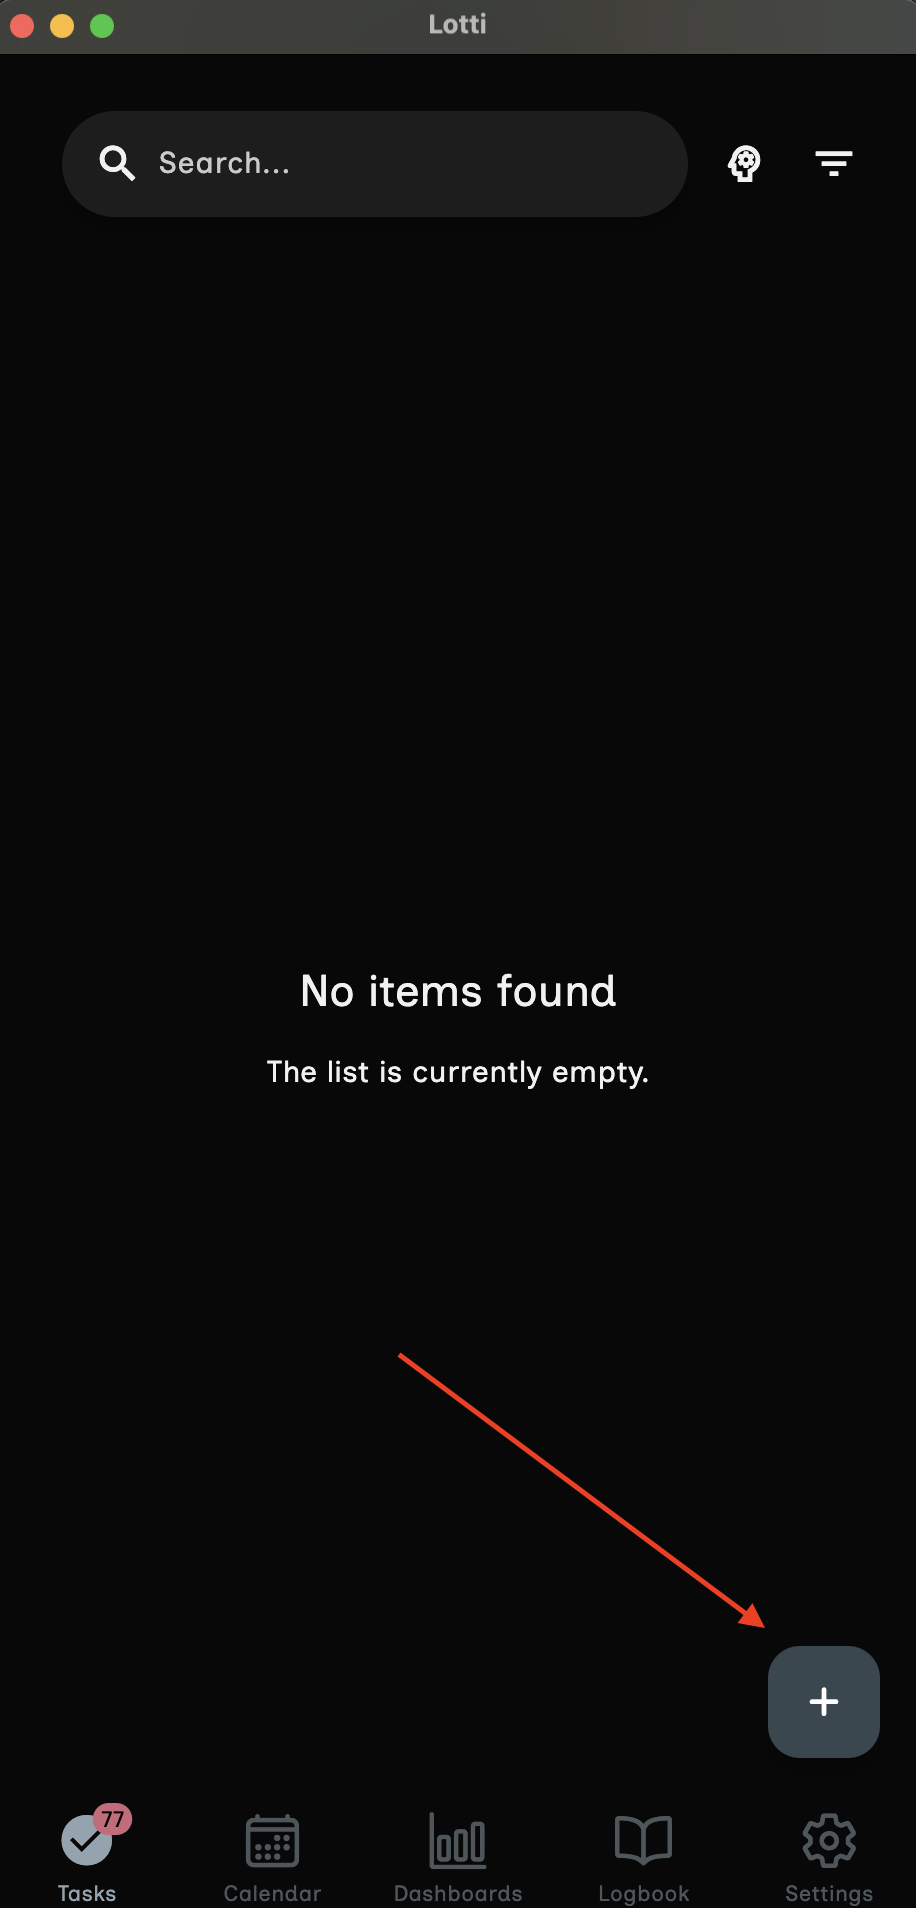
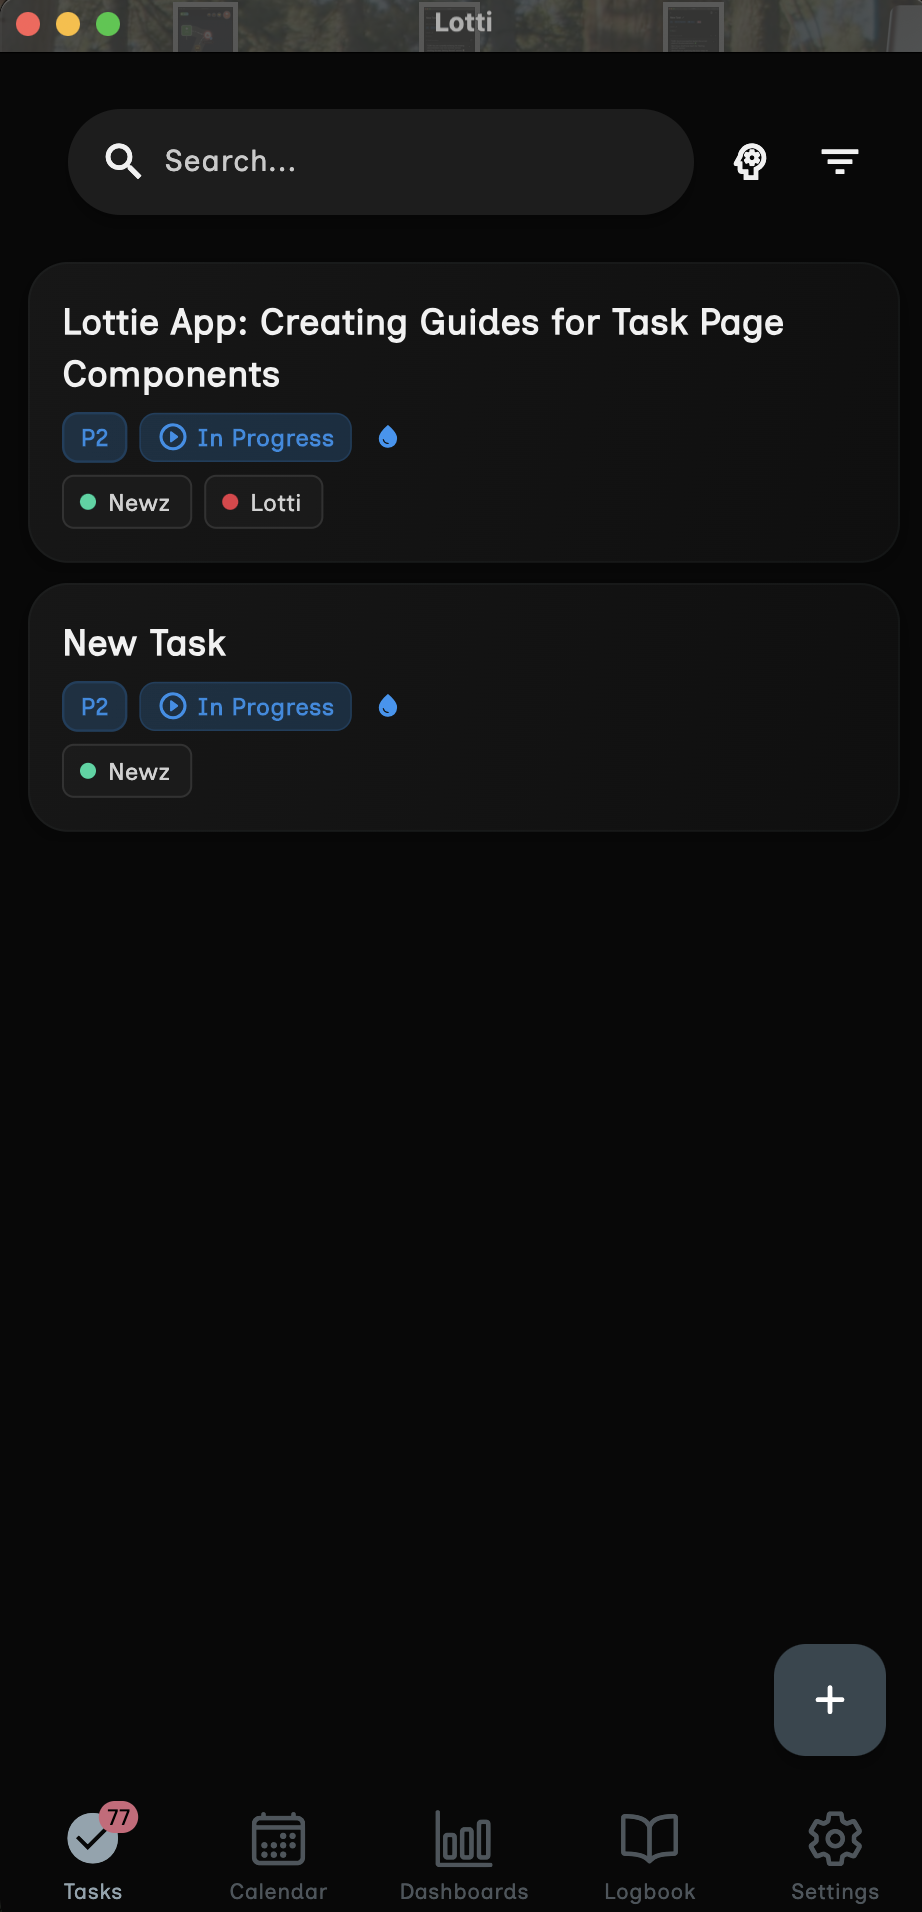
- Launch Lotti on your device
- Navigate to the Journal or Tasks section
- Look for the + button (floating action button) in the bottom right corner
- Tap the + button to open the create menu
After tapping the + button, a menu appears with several entry types:
| Entry Type | Icon | Description |
|---|---|---|
| Create Event | Calendar | Schedule a time-based event |
| Create Task | Checkbox | Create a task with checklists |
| Create Audio Recording | Microphone | Record a voice note |
| Create Text | Document | Write a text entry |
| Import/Paste Image | Image | Add a photo or screenshot |
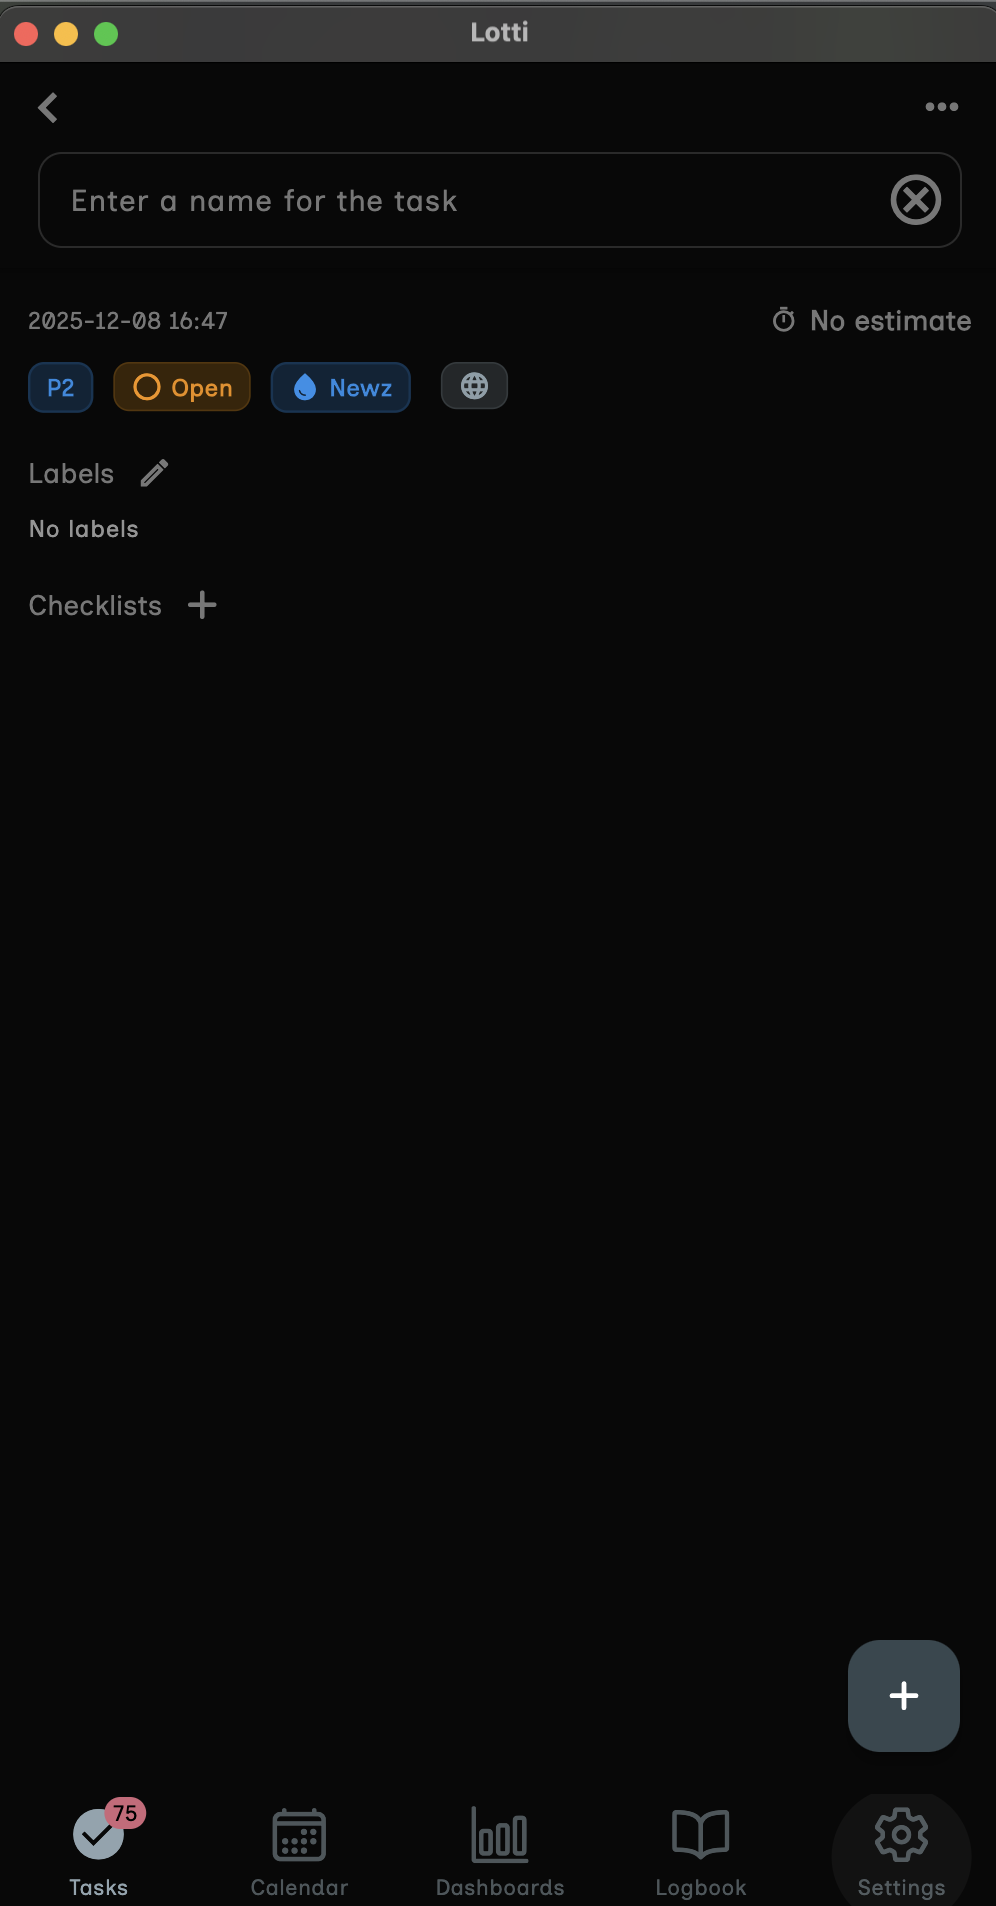
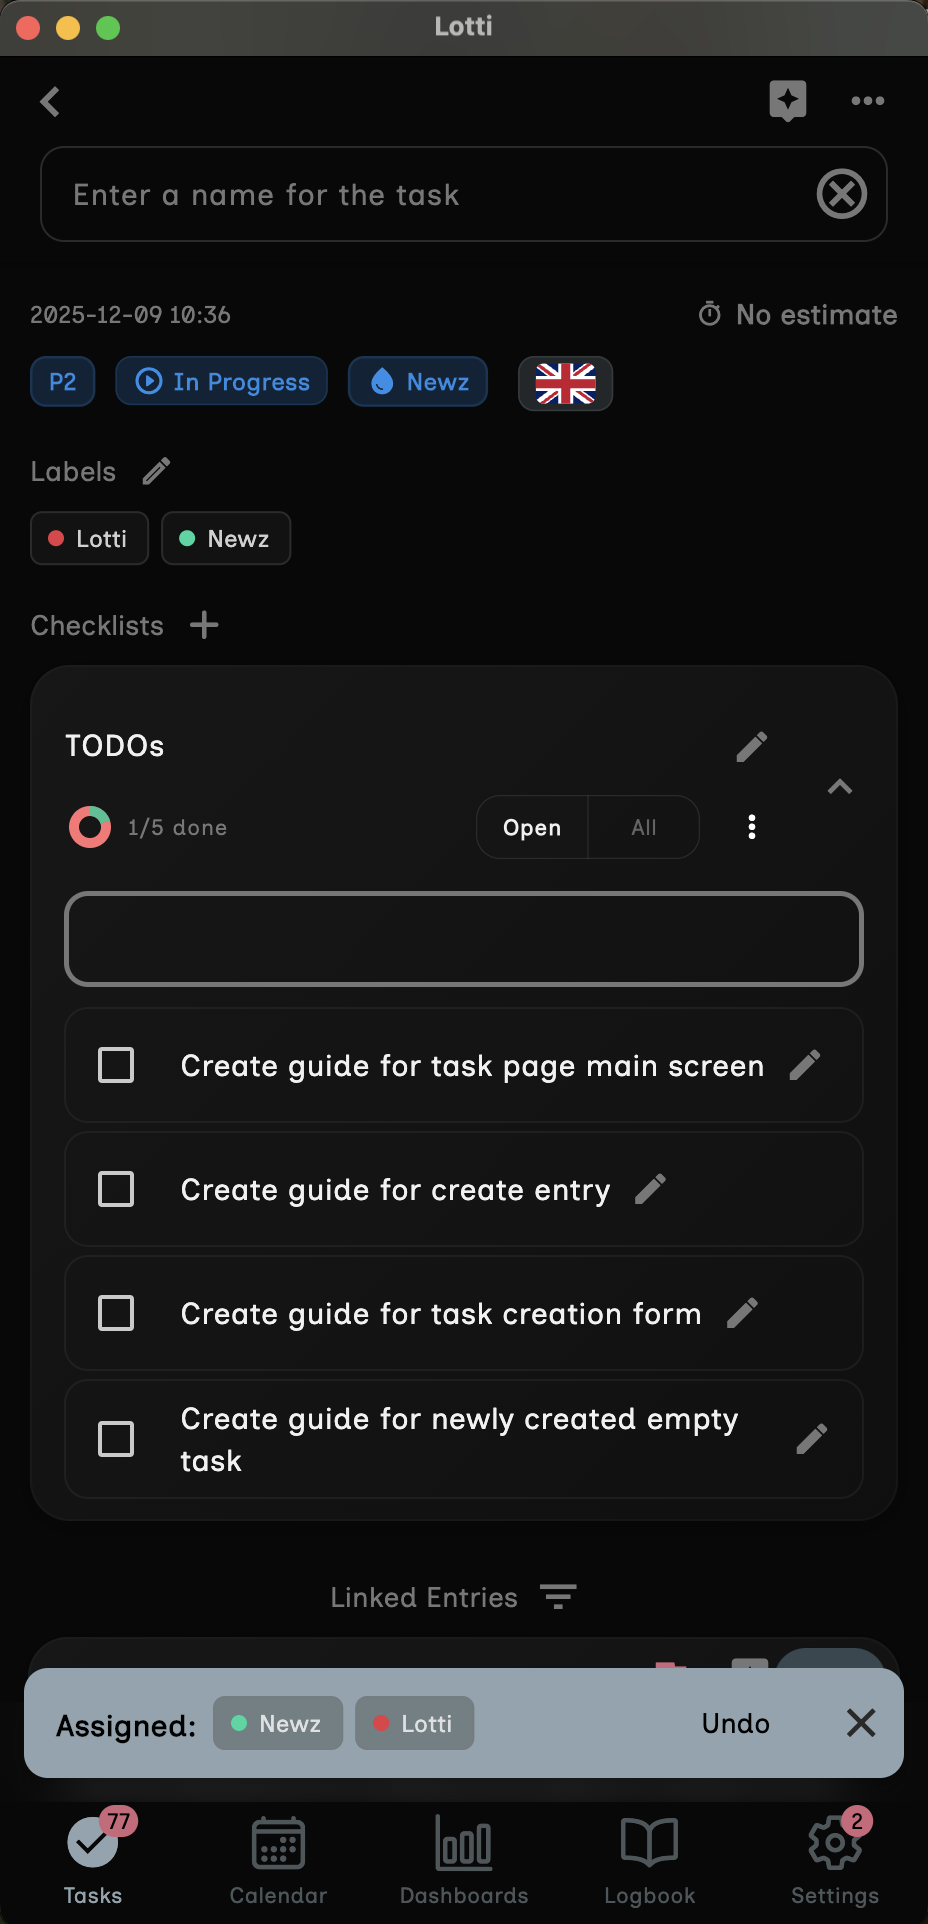
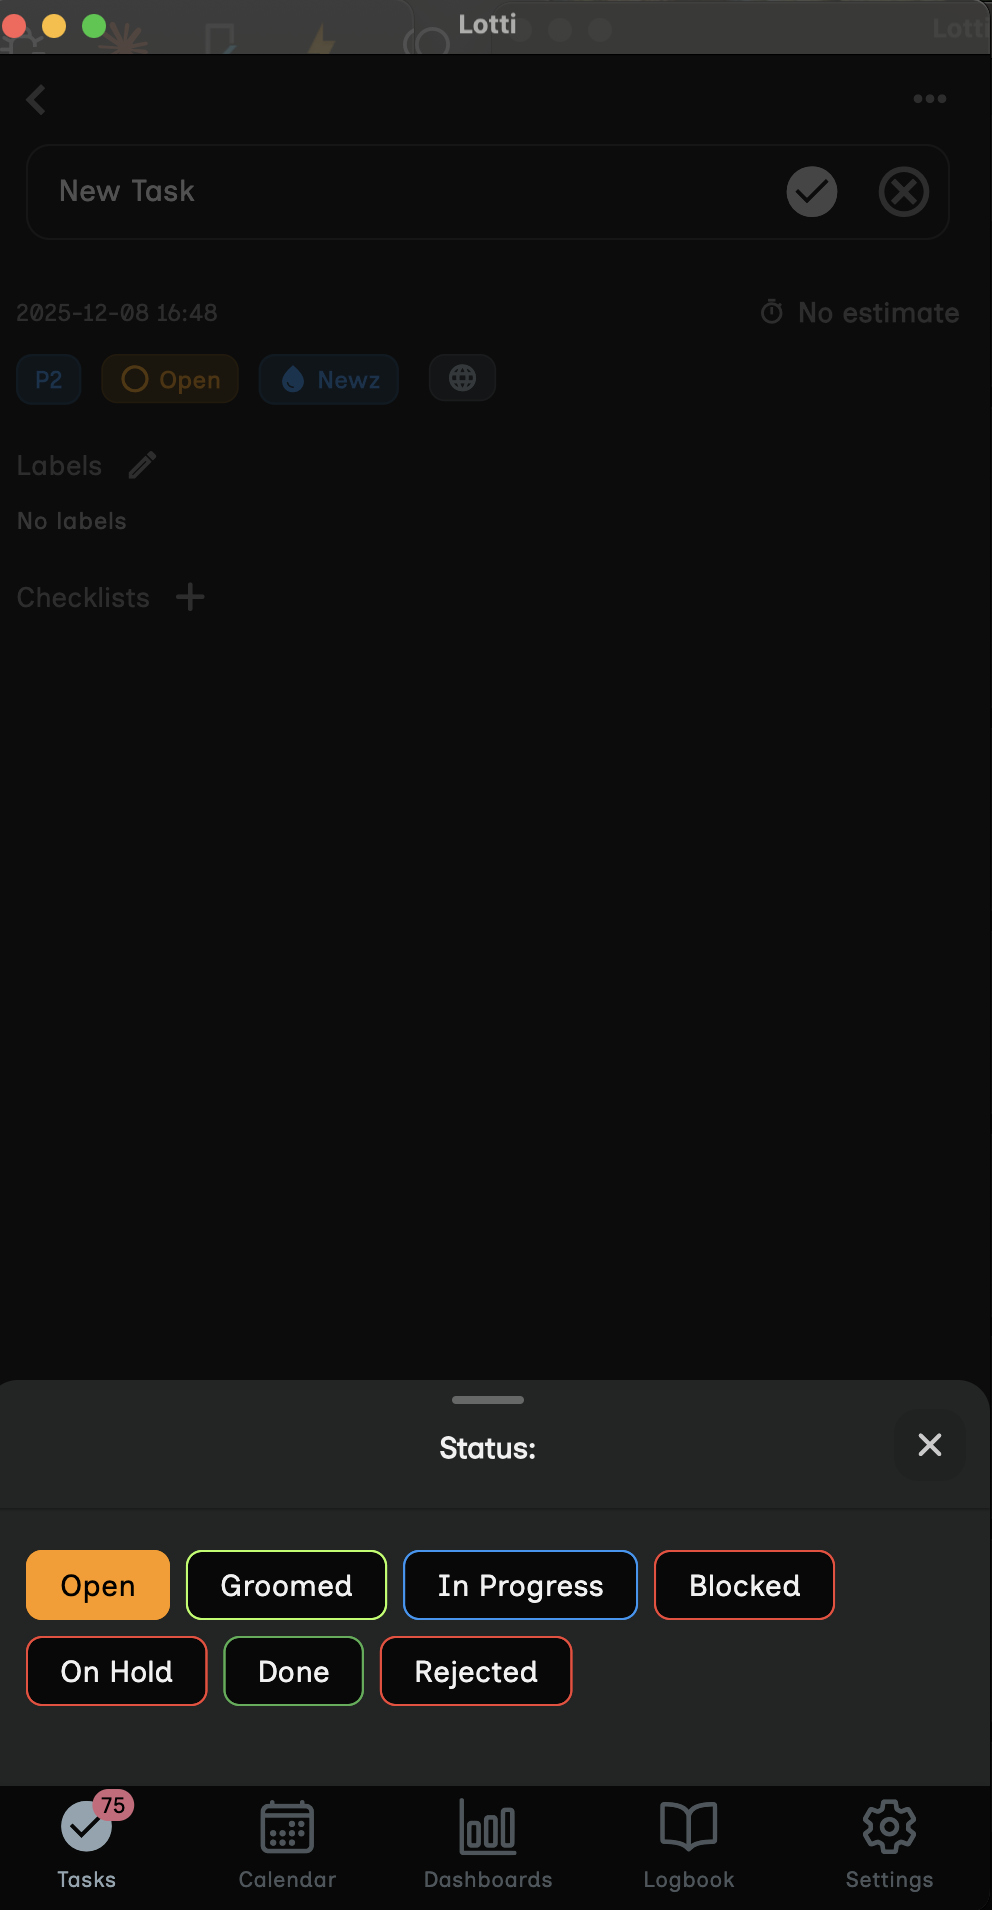
- Tap Create Task from the menu
- Enter a descriptive title for your task
- Good examples: "Plan weekend trip", "Quarterly report", "Home renovation project"
- Avoid vague titles like "Stuff to do" or "Things"
- Optionally, select a Category for better organization
- Tap Save to create the task
Tip: Choose a category that has AI prompts configured. This ensures automatic transcription and checklist generation will work.
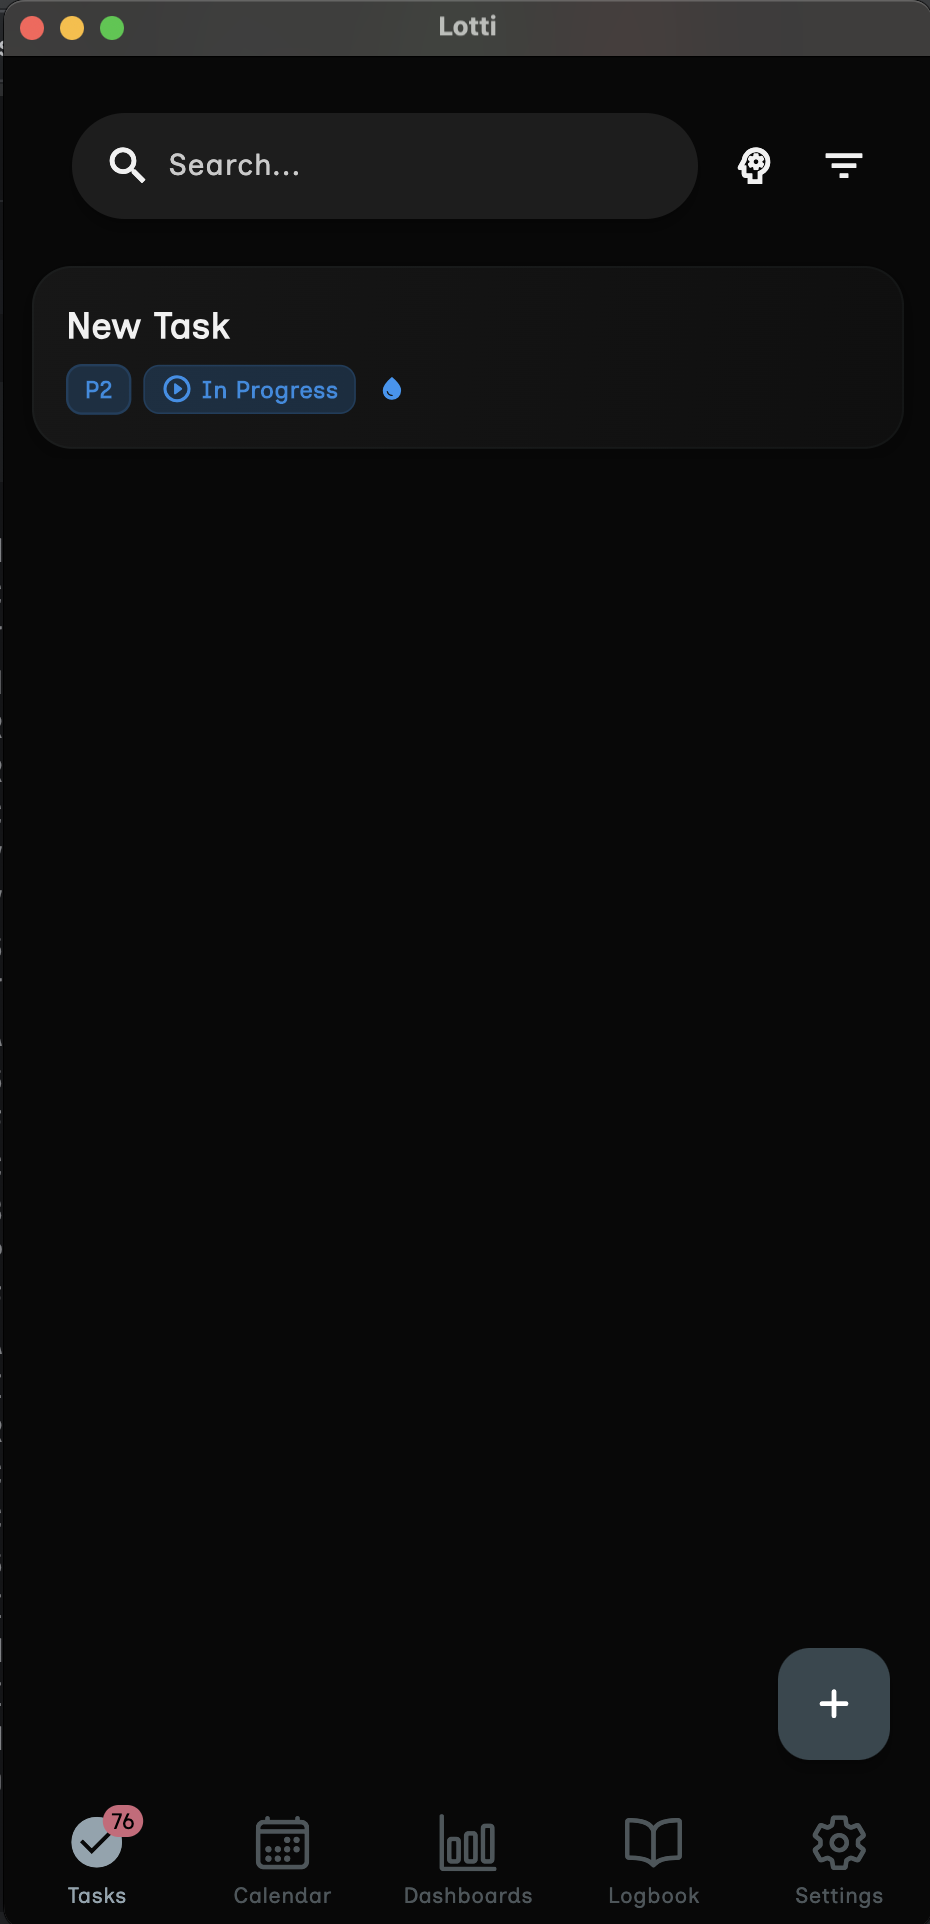
After saving, your task opens automatically. You'll see:
- Task header with the title you entered
- Empty content area ready for notes and recordings
- + button to add entries to this task
- While viewing your task, tap the + button
- Select Create Audio Recording from the menu
The audio recording modal appears with several elements:
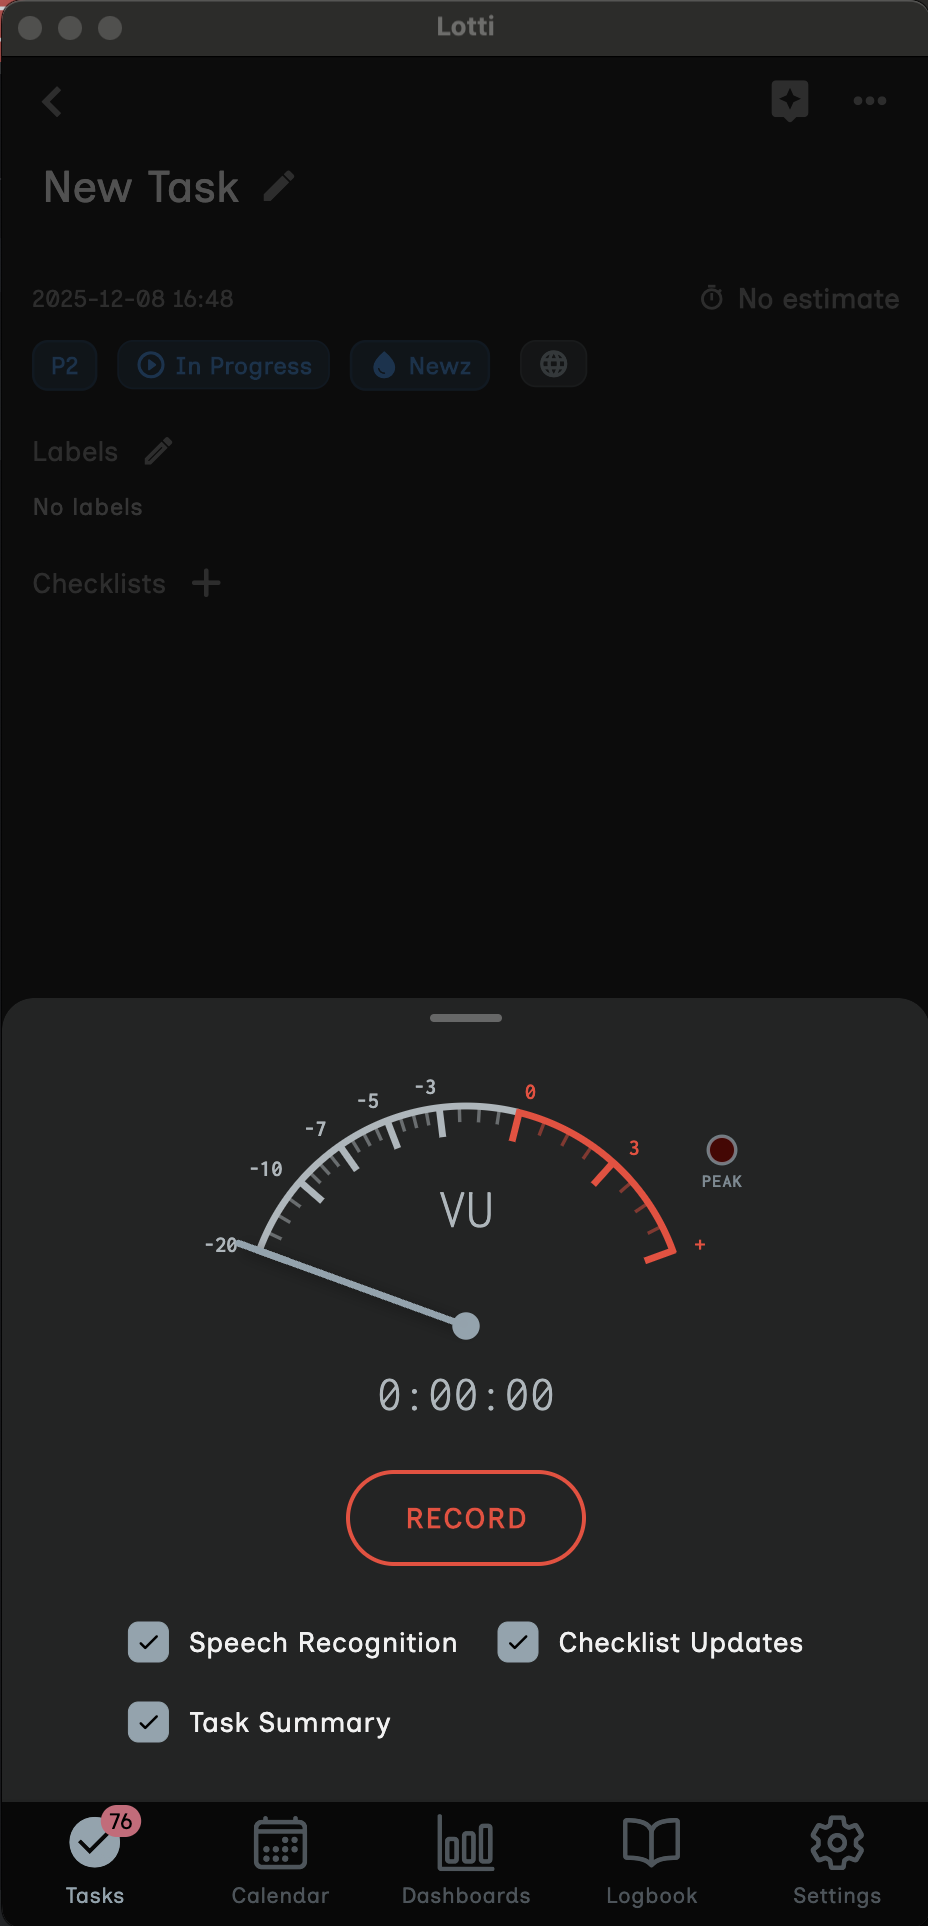
The recording screen has these components:
| Component | Location | Purpose |
|---|---|---|
| VU Meter | Center (large circle) | Shows real-time audio levels in dBFS |
| Duration Timer | Below VU meter | Displays recording length (MM:SS) |
| RECORD Button | Bottom left | Starts the recording |
| STOP Button | Bottom right | Ends and saves the recording |
| Processing Options | Below buttons | Checkboxes for AI features |
Before you start recording, check the processing options at the bottom:
| Option | What It Does | Recommended |
|---|---|---|
| Speech Recognition | Converts your voice to written text | ✅ Always enable |
| Checklist Updates | Creates checklist items from your speech | ✅ Enable for tasks |
| Task Summary | Generates an overview of your task | ✅ Enable for context |
Make sure all three checkboxes are selected for the complete voice-to-checklist experience.
Note: These options only appear when recording within a task. Standalone recordings won't show checklist options.
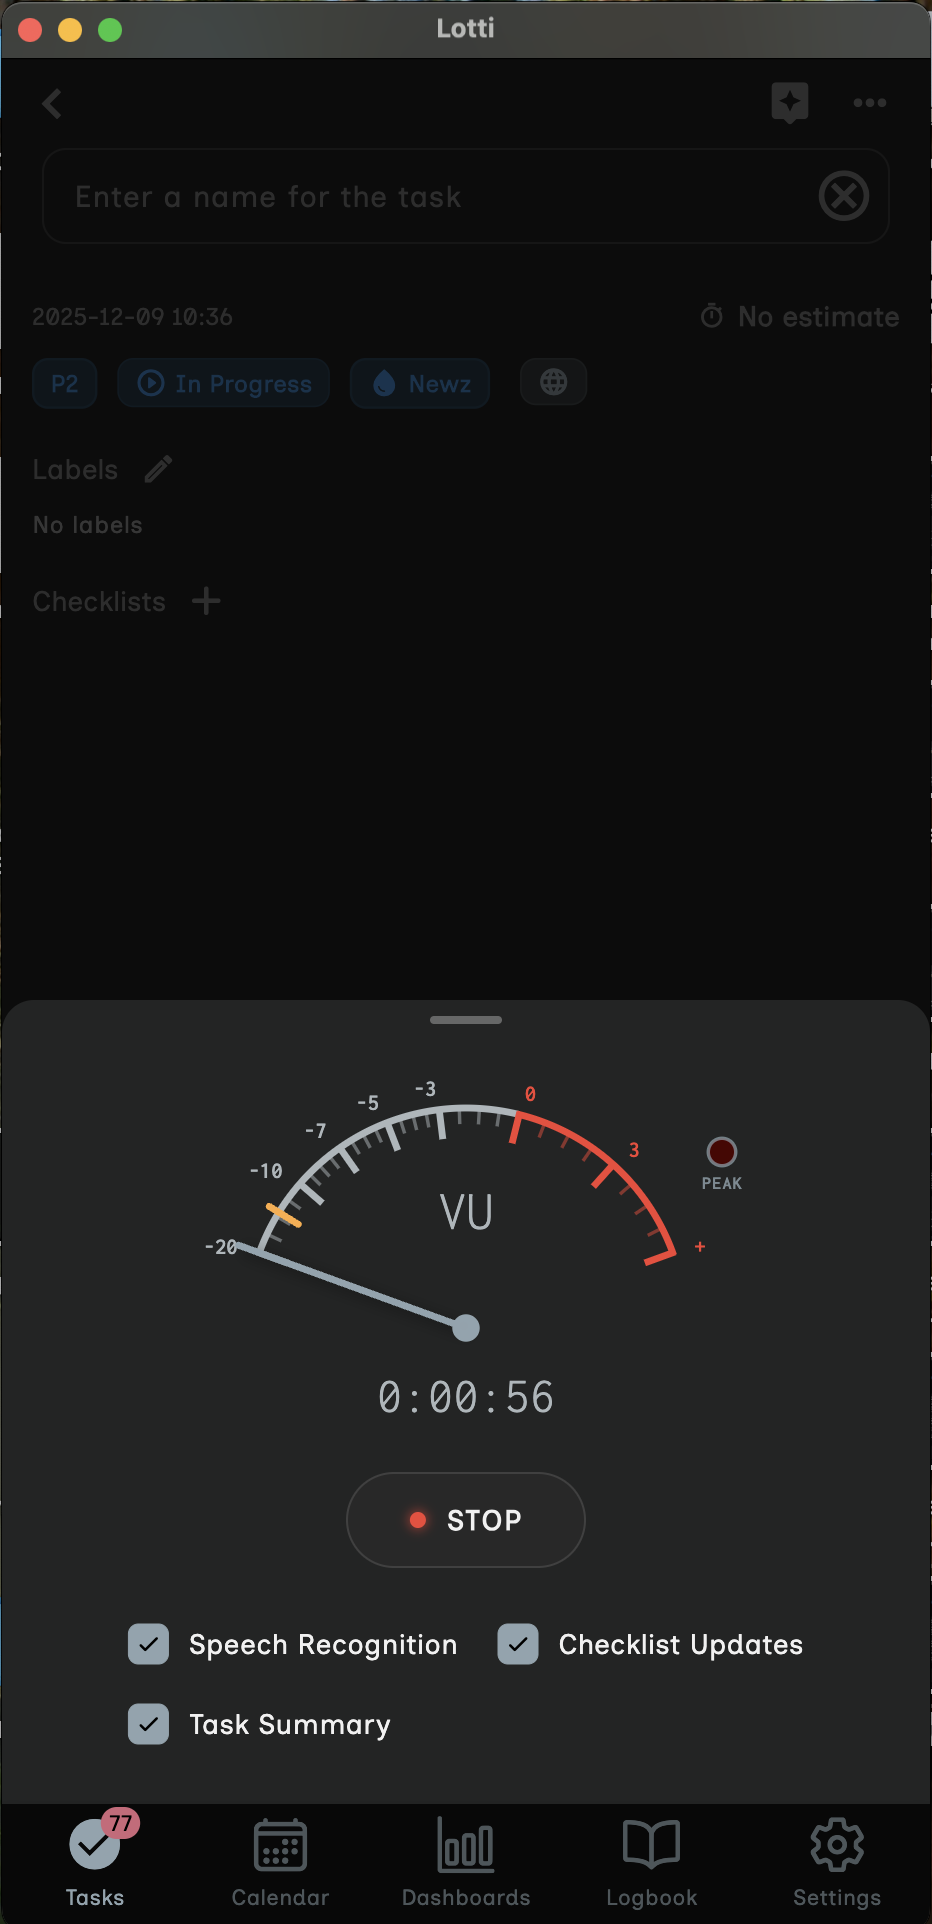
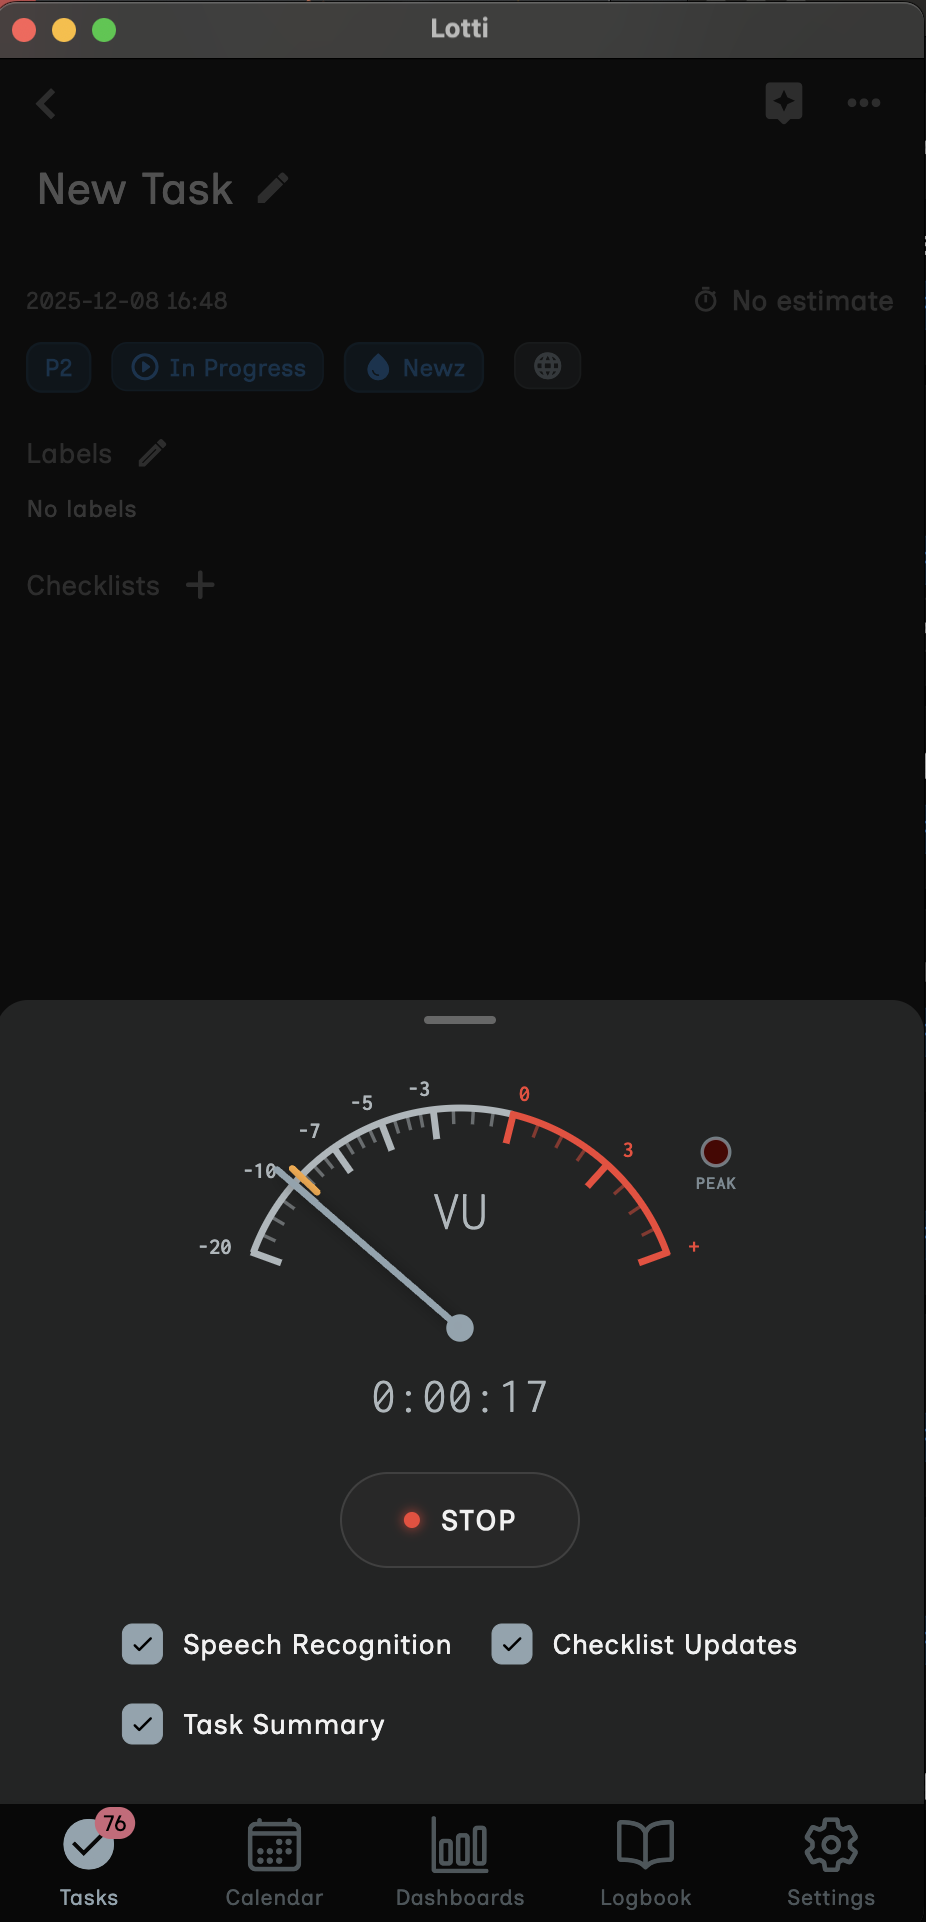
- Tap the RECORD button
- The button changes to show recording is active
- The VU meter starts responding to your voice
- The timer begins counting up
Now speak naturally about what you need to do. Here are examples of effective speech:
Good example:
"For the weekend trip, I need to book flights for Friday morning, reserve a hotel room for two nights, pack my suitcase with warm clothes, remember to bring my passport and chargers, and check if I need any vaccinations for the destination."
Why it works:
- Clear, specific actions
- Each item is distinct
- Includes relevant details
Less effective example:
"I have some stuff to do for the trip... you know, the usual things people do when traveling."
Why it's less effective:
- Vague language
- No specific actions
- AI can't extract concrete items

- When you've finished speaking, tap the STOP button
- The recording modal closes automatically
- Lotti begins processing your audio

Tip: Recordings have a maximum duration of 2 minutes for optimal processing. For longer thoughts, make multiple recordings.
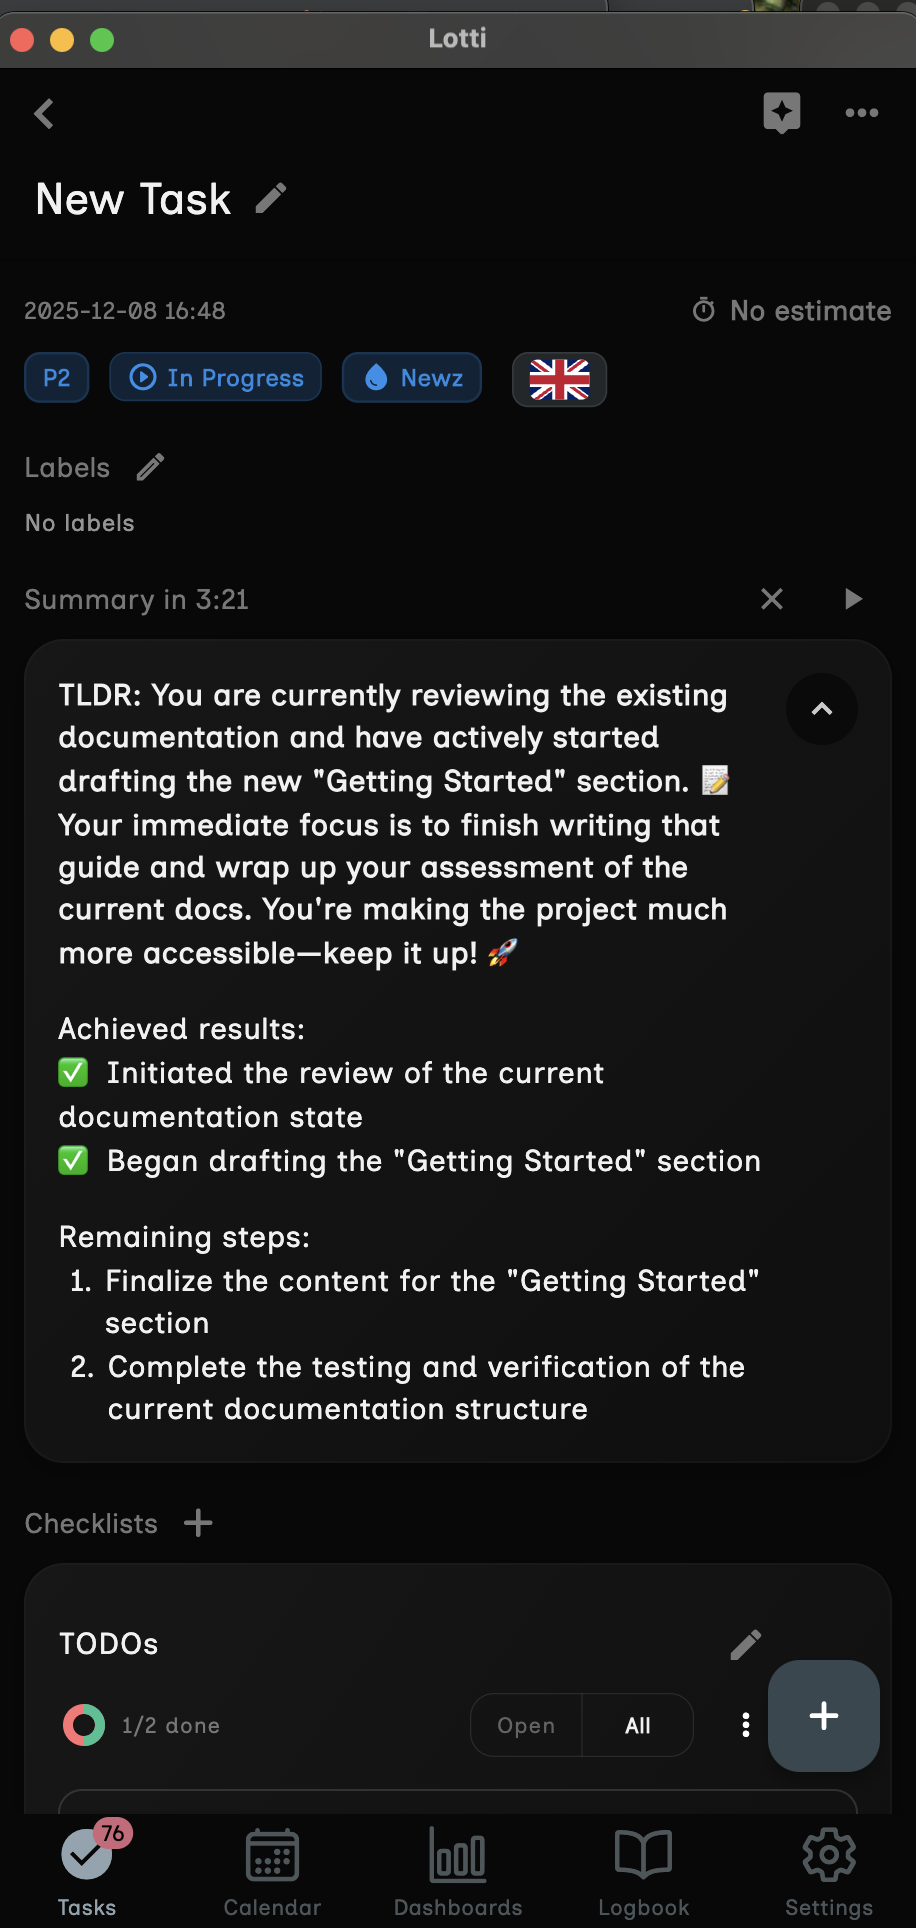
After you stop recording, Lotti processes your audio through three stages:
The AI listens to your recording and converts it to text.
- Processing time: A few seconds
- Result: Written transcript of your words
- Accuracy: Works best with clear speech and minimal background noise
Once transcription completes, the AI analyzes the text to find action items.
- What it looks for: Verbs, tasks, to-do items, action words
- How it organizes: Groups related items, removes duplicates
- Result: A checklist with individual items
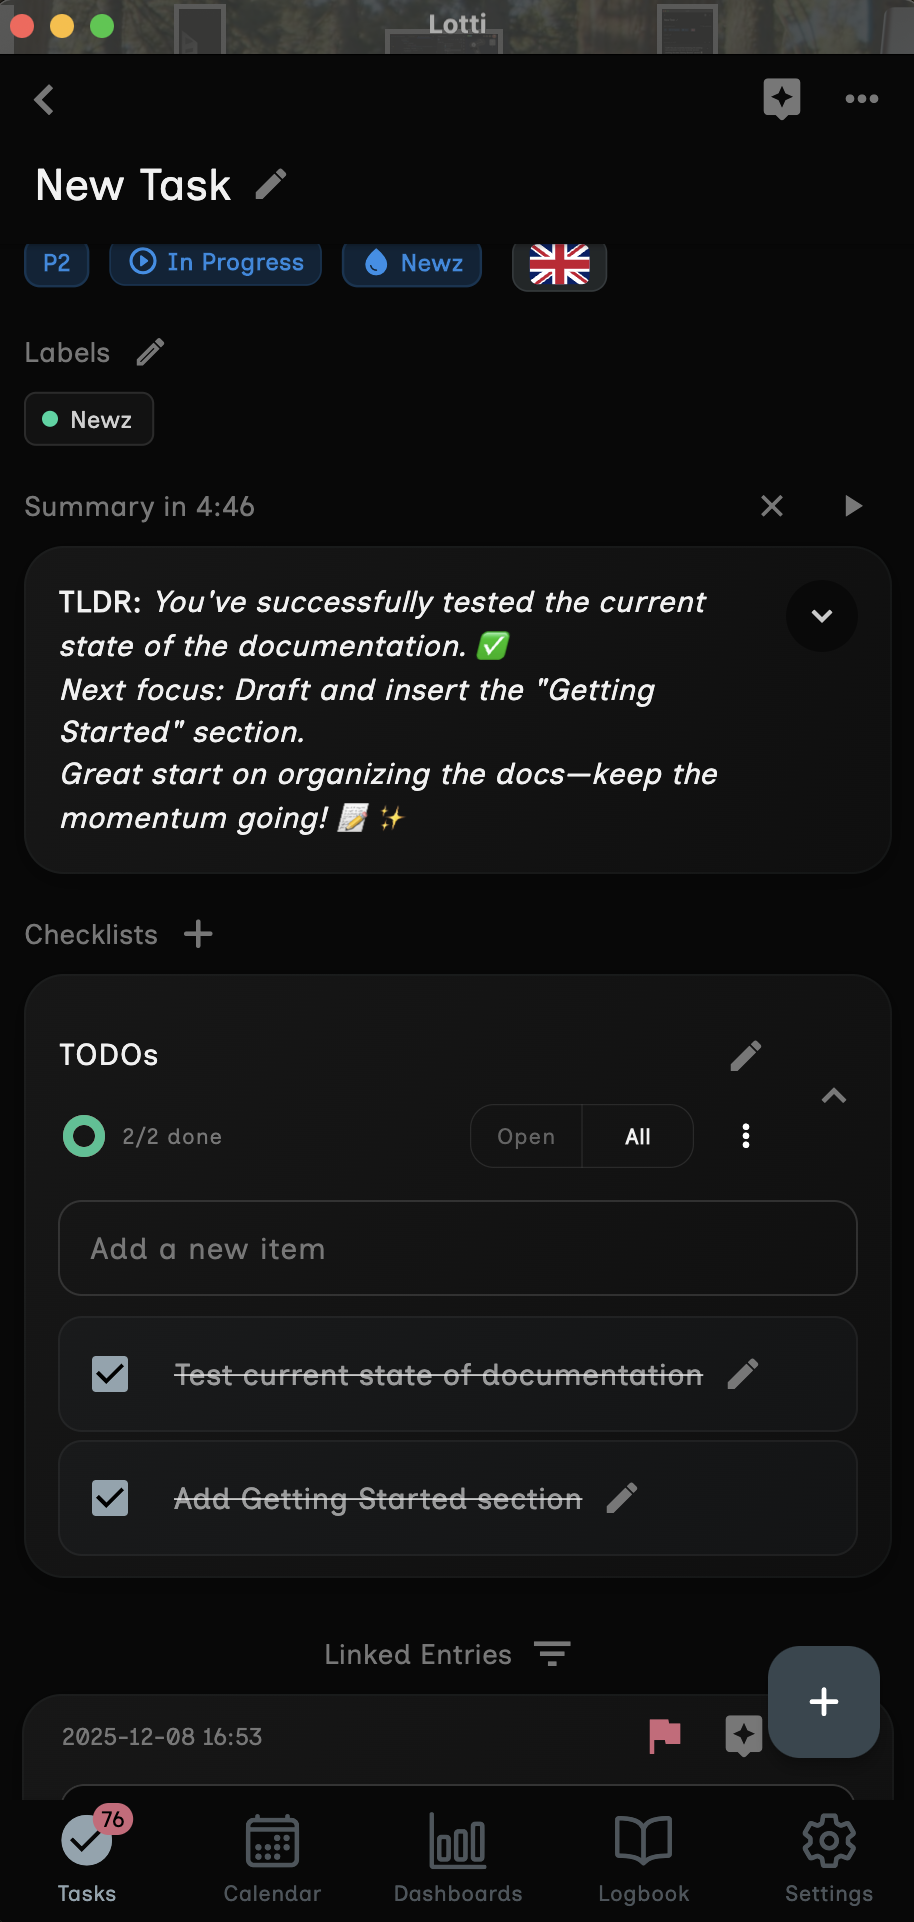
Finally, the AI creates a summary of your entire task.
- Includes: All recordings, notes, and context
- Purpose: Quick overview without reading everything
- Updates: Refreshes when you add new content
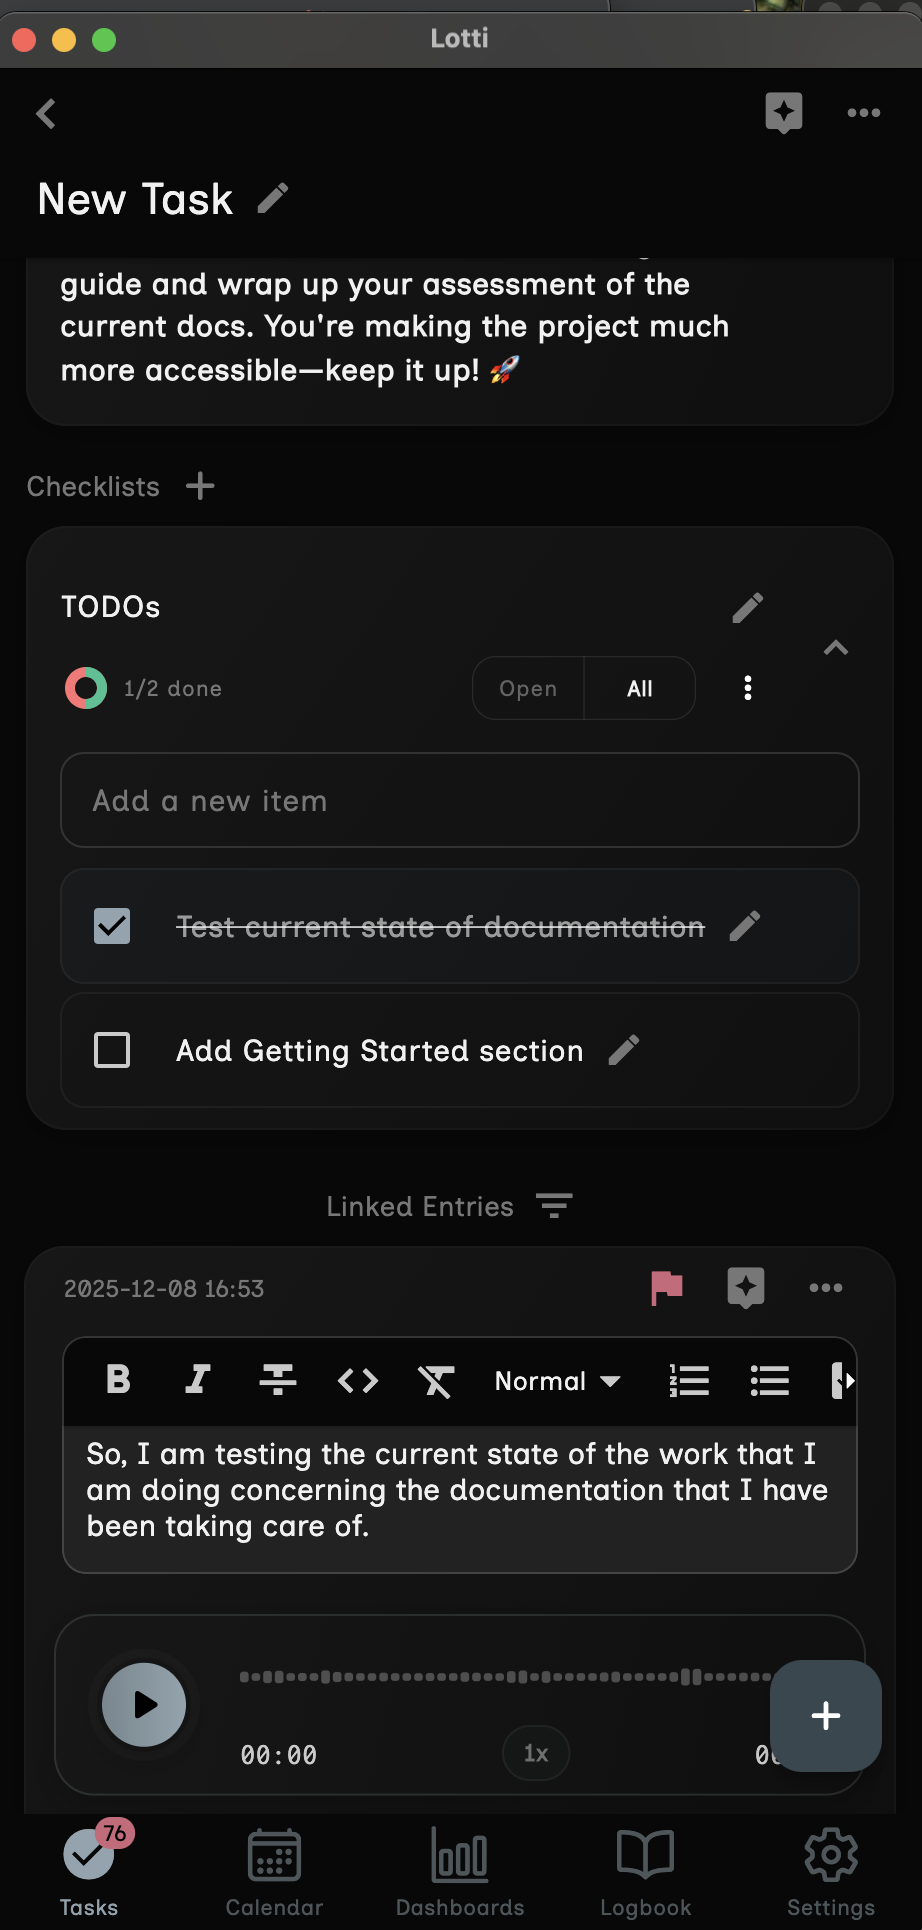
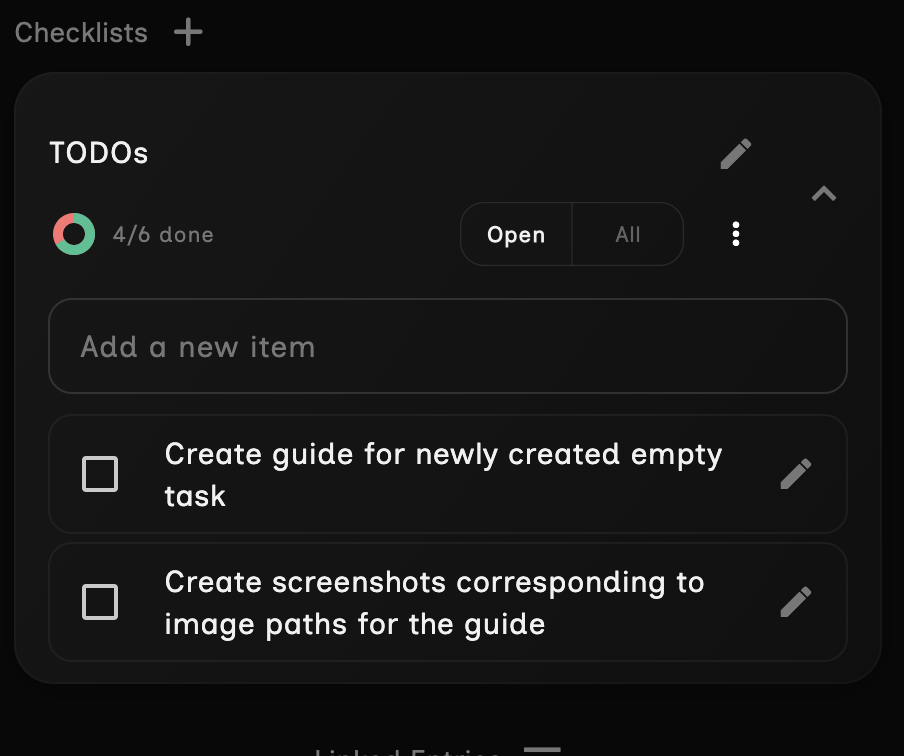
After processing completes, scroll down in your task to see the new checklist:

From our example, the AI might create these items:
| Status | Checklist Item |
|---|---|
| ☐ | Book flights for Friday morning |
| ☐ | Reserve hotel room for two nights |
| ☐ | Pack suitcase with warm clothes |
| ☐ | Bring passport |
| ☐ | Bring chargers |
| ☐ | Check vaccination requirements |
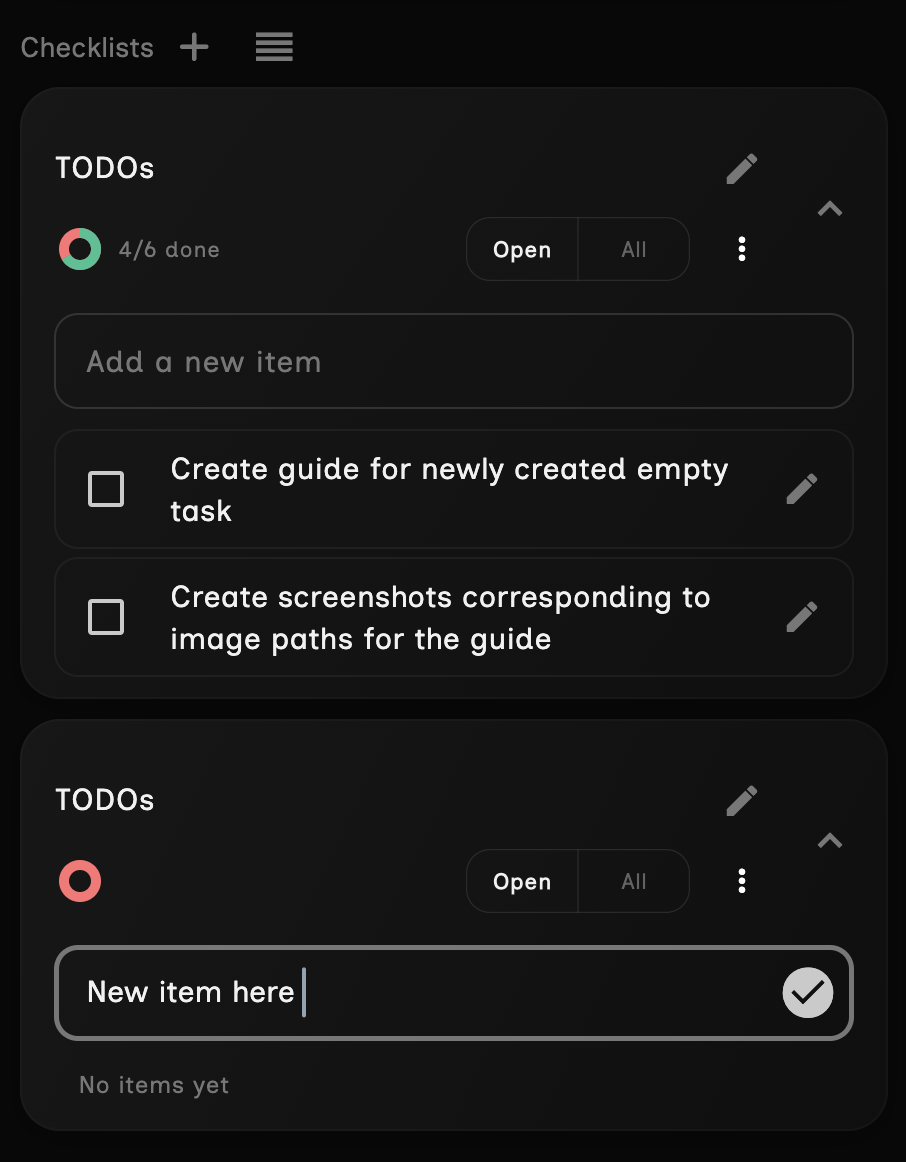
Each checklist in Lotti has these elements:
┌─────────────────────────────────────────────────────────┐
│  📋 Checklist Header                                    │
│  ┌─────────────────────────────────────────────────┐   │
│  │  [Progress Bar ████████░░░░] 4/6 completed      │   │
│  │  Checklist Title                    [Edit ✏️]    │   │
│  │  [All] [Open Only]                  [Menu ⋮]    │   │
│  └─────────────────────────────────────────────────┘   │
├─────────────────────────────────────────────────────────┤
│  ☑ Book flights for Friday morning                     │
│  ☑ Reserve hotel room for two nights                   │
│  ☑ Pack suitcase with warm clothes                     │
│  ☑ Bring passport                                      │
│  ☐ Bring chargers                                      │
│  ☐ Check vaccination requirements                      │
├─────────────────────────────────────────────────────────┤
│  [Add new item...]                                      │
└─────────────────────────────────────────────────────────┘

To mark an item as done:
- Find the item in your checklist
- Tap the checkbox (☐) on the left side
- The item shows as completed (☑)
- The progress bar updates automatically
To undo a completion:
- Find the completed item (☑)
- Tap the checkbox again
- The item returns to incomplete (☐)
The checklist header shows your progress in two ways:
| Indicator | Description | Example |
|---|---|---|
| Progress Bar | Visual representation of completion | ████████░░░░ |
| Counter | Numeric count of completed items | "4/6 completed" |

Use filter buttons to focus on what matters:
| Filter | What It Shows | When to Use |
|---|---|---|
| All | Every item (completed and incomplete) | Review everything |
| Open Only | Only incomplete items | Focus on remaining work |
To change filters:
- Look for the filter buttons below the checklist title
- Tap Open Only to hide completed items
- Tap All to show everything again
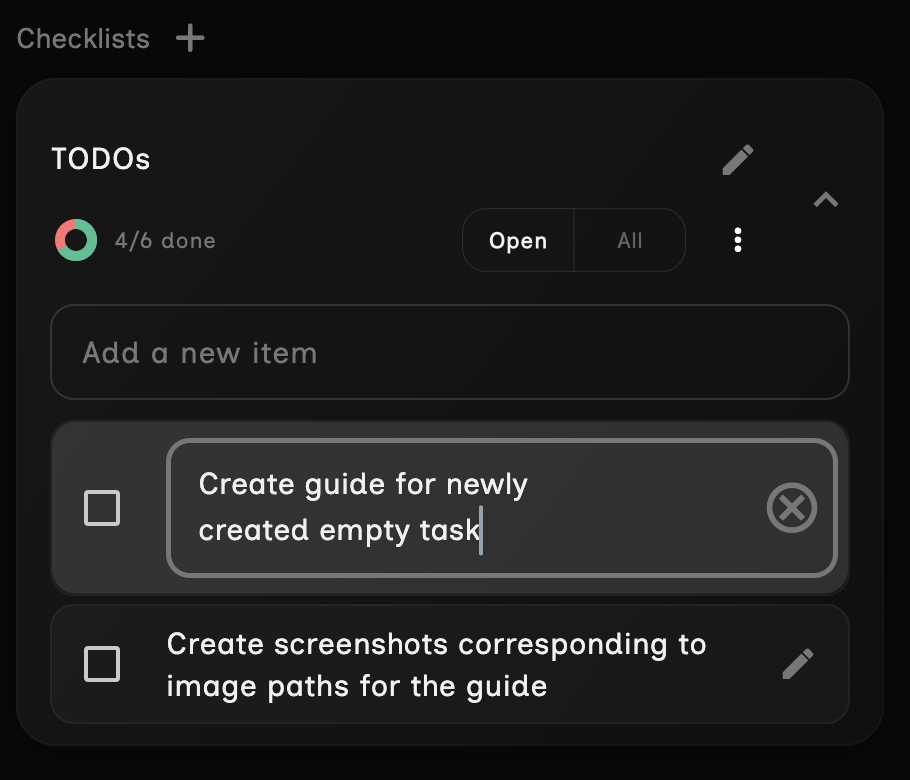
Sometimes you need to add items the AI didn't catch:
- Scroll to the bottom of the checklist
- Find the text field labeled "Add new item..."
- Type your new item
- Press Enter or tap the Add button
To rename your checklist:
- Tap the Edit button (✏️) next to the title
- Enter a new title
- Tap outside the field or press Enter to save
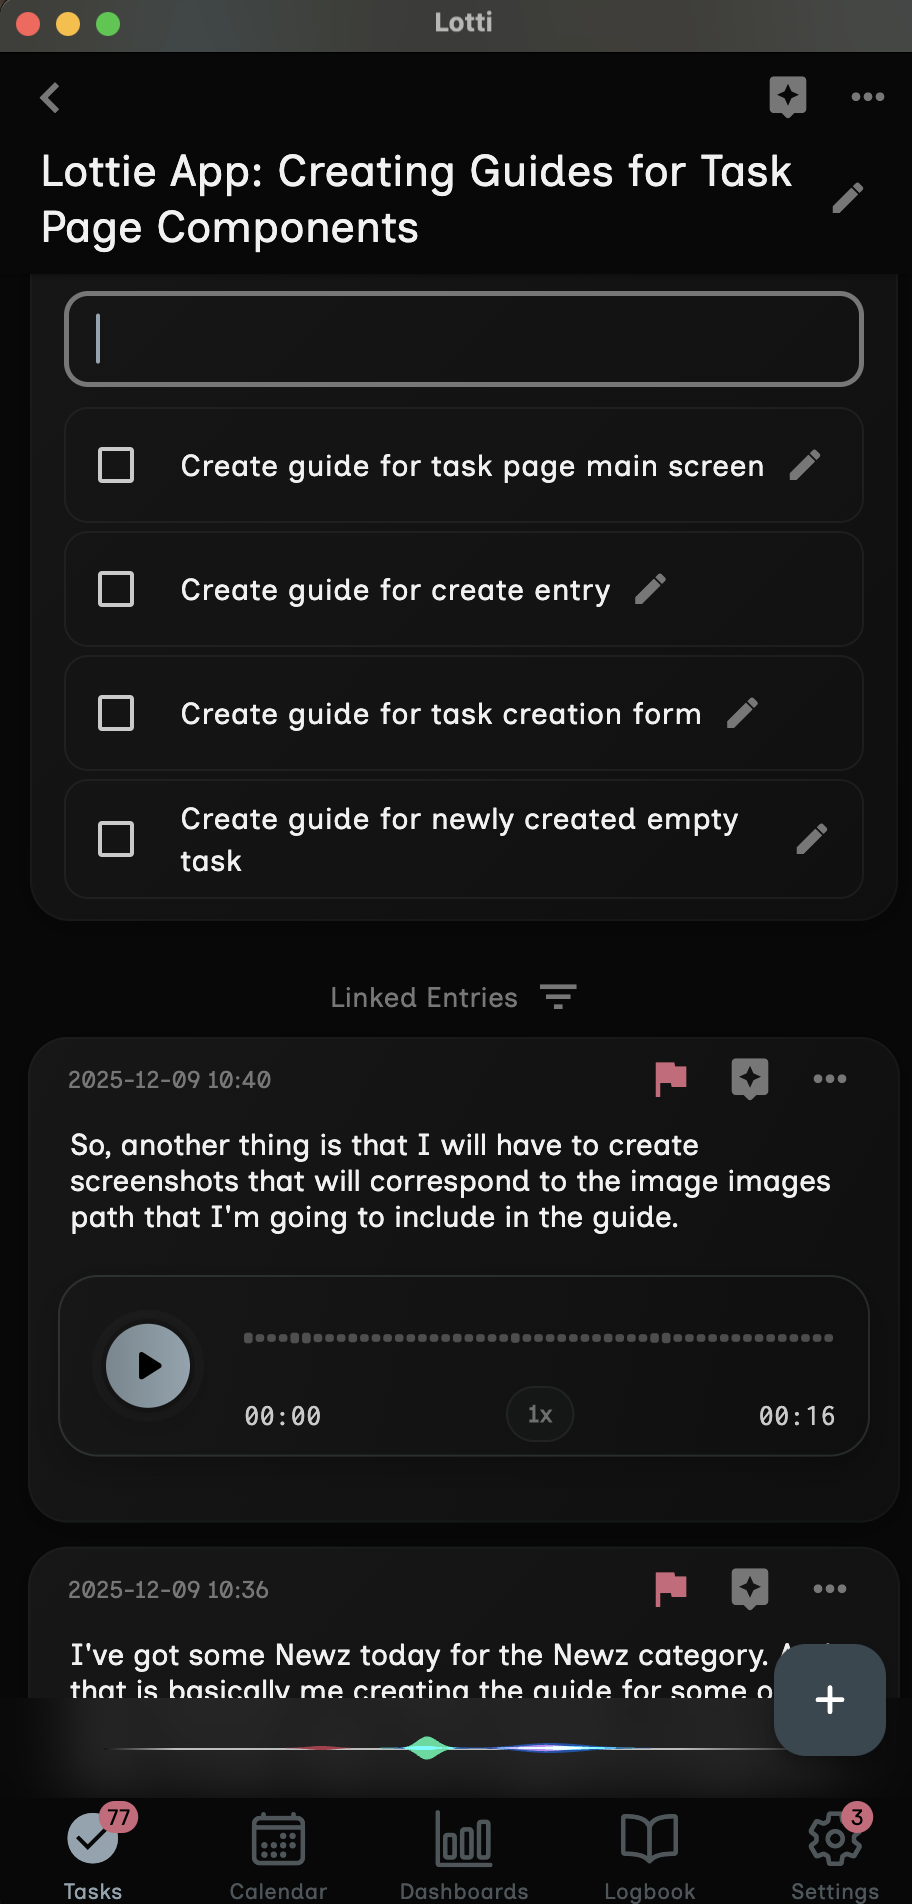
Tasks often evolve over time. You can add more voice notes to update your checklist.
- Open your existing task
- Tap the + button
- Select Create Audio Recording
- Ensure Checklist Updates is checked
- Record your additional thoughts
Example follow-up:
"I also need to arrange pet sitting while we're away, stop the mail delivery, and ask the neighbor to water the plants."
After processing, the new items appear in your checklist:
| Status | Item | Source |
|---|---|---|
| ☐ | Book flights for Friday morning | First recording |
| ☐ | Reserve hotel room for two nights | First recording |
| ☐ | Pack suitcase with warm clothes | First recording |
| ☐ | Bring passport | First recording |
| ☐ | Bring chargers | First recording |
| ☐ | Check vaccination requirements | First recording |
| ☐ | Arrange pet sitting | Follow-up |
| ☐ | Stop mail delivery | Follow-up |
| ☐ | Ask neighbor to water plants | Follow-up |

Note: The AI intelligently merges new items with existing ones, avoiding duplicates.
Lotti can suggest when checklist items might be complete based on your activity.
When the AI thinks an item is done, you'll see:
- A colored indicator bar on the left side of the item
- The bar may pulse gently to draw your attention
- Colors indicate confidence level:
| Color | Confidence | Meaning |
|---|---|---|
| Blue | High | AI is confident this is complete |
| Purple | Medium | Likely complete based on context |
| Gray | Low | Possibly complete, needs confirmation |

- Tap the colored indicator on the suggested item
- A dialog appears with:
- The AI's reasoning
- Confidence level
- Two action buttons
- Choose your response:
| Button | Action |
|---|---|
| Mark Complete | Accept the suggestion and check off the item |
| Cancel | Dismiss the suggestion and keep the item open |
- Find the three-dot menu (⋮) in the checklist header
- Tap to open the menu
- Choose an export option

| Option | Format | Best For |
|---|---|---|
| Export as Markdown | Plain text with formatting | Notes apps, documentation |
## Weekend Trip Checklist

- [x] Book flights for Friday morning
- [x] Reserve hotel room for two nights
- [ ] Pack suitcase with warm clothes
- [ ] Bring passport
- [ ] Bring chargers
- [ ] Check vaccination requirements
If you need to remove a checklist entirely:
- Tap the three-dot menu (⋮)
- Select Delete checklist
- Confirm the deletion
Warning: This action cannot be undone. The checklist and all its items will be permanently removed.
| Do This | Avoid This |
|---|---|
| "I need to call Mom tomorrow" | "Maybe contact family sometime" |
| "Buy groceries: milk, bread, eggs" | "Get some food stuff" |
| "Schedule dentist for Tuesday at 2pm" | "See the dentist eventually" |
| "Email John the quarterly report by Friday" | "Send something to someone" |
| "Research flights under $500 to Paris" | "Look into travel options" |
Key principles:
- Use action verbs (call, buy, schedule, email, research)
- Include specific details (names, dates, amounts)
- State one task at a time clearly
| Tip | Why It Helps |
|---|---|
| Create separate tasks for different projects | Keeps checklists focused |
| Use descriptive task titles | Easier to find later |
| Record updates as you think of them | Captures everything |
| Review and complete items daily | Maintains momentum |
| Factor | Recommendation |
|---|---|
| Background noise | Find a quiet space |
| Distance | Hold device 6-12 inches from mouth |
| Speed | Speak at a natural, steady pace |
| Pauses | Brief pauses between items help AI parse |
| Problem | Possible Cause | Solution |
|---|---|---|
| VU meter not moving | Microphone not detected | Check microphone permissions in device settings |
| Recording stops immediately | Permission denied | Grant Lotti microphone access |
| Audio quality poor | Too far from microphone | Hold device closer when speaking |
| Problem | Possible Cause | Solution |
|---|---|---|
| No transcription appears | AI not configured | Complete the Getting Started Guide |
| Transcription inaccurate | Background noise / fast speech | Re-record in quieter environment, speak slower |
| Wrong language detected | Auto-detection error | Set language manually before recording |
| Problem | Possible Cause | Solution |
|---|---|---|
| No checklist created | Checkbox not enabled | Ensure "Checklist Updates" is checked before stopping |
| Items missing | Vague speech | Re-record with specific, actionable language |
| Duplicate items | Multiple similar recordings | Delete duplicates manually |
| Action | Steps |
|---|---|
| New task | + → Create Task → Enter title → Save |
| Voice recording | + → Create Audio Recording → Record → Speak → Stop |
| Action | Steps |
|---|---|
| Complete item | Tap checkbox (☐ → ☑) |
| Undo completion | Tap checkbox again (☑ → ☐) |
| Filter view | Tap Open Only or All |
| Add item | Type in "Add new item..." field → Enter |
| Edit title | Tap ✏️ → Edit → Enter |
| Action | Steps |
|---|---|
| Export markdown | ⋮ → Export as Markdown |
| Delete checklist | ⋮ → Delete checklist → Confirm |
Now that you've mastered voice-to-checklist, explore these advanced features:
| Feature | Description | Where to Find |
|---|---|---|
| AI Chat | Have conversations with AI about your tasks | Chat icon in task view |
| Image Analysis | Add photos for AI-powered insights | + → Import Image |
| Weekly Reviews | Generate summaries of your accomplishments | Journal section |
| Categories | Organize tasks by project or area | Settings → Categories |
← Back to Main README | Getting Started with AI
This guide covers Lotti version 0.9.751 and later. UI may vary slightly between versions.