Allure notifications is the library that allows to send automatic notifications about the results of automated tests to your preferred messenger (Telegram, Slack, Skype, Email, Mattermost, Discord, Loop, Rocket.Chat, Zoho Cliq).
Notification languages: 🇬🇧 🇫🇷 🇷🇺 🇺🇦 🇧🇾 🇨🇳
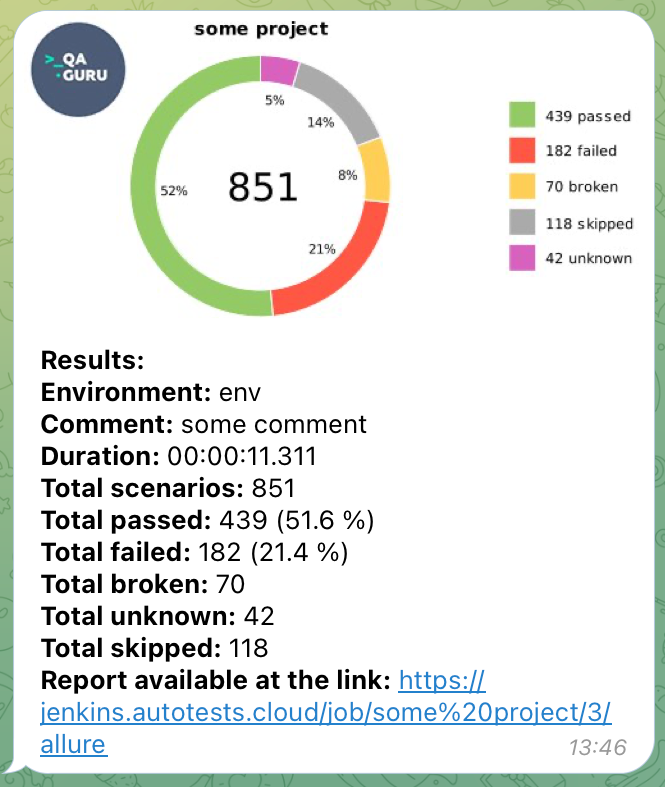
After an autotest has finished its work, the summary.json file is generated in the allure-report/widgets folder. This file contains general statistic about the test results and uses to form the notification sent by the bot (with the diagram and corresponding text).
Example of a summary.json file
{
  "reportName" : "Allure Report",
  "testRuns" : [ ],
  "statistic" : {
    "failed" : 182,
    "broken" : 70,
    "skipped" : 118,
    "passed" : 439,
    "unknown" : 42,
    "total" : 851
  },
  "time" : {
    "start" : 1590795193703,
    "stop" : 1590932641296,
    "duration" : 11311,
    "minDuration" : 7901,
    "maxDuration" : 109870,
    "sumDuration" : 150125
  }
}
In addition, if the Allure Summary plugin is connected, suites.json file will also be generated, and data from this file will be included in the statistic.
Example of a notification in Telegram
- Setup Java
- Create
notificationsfolder in the root of your project - Download the latest version of the
allure-notifications-<version>.jarfile and place it in thenotificationsfolder in your project - In the
notificationsfolder create theconfig.jsonfile with the following structure (keep the base section and the messenger to which notifications need to be sent):
{
  "base": {
    "logo": "",
    "project": "",
    "environment": "",
    "comment": "",
    "reportLink": "",
    "language": "ru",
    "allureFolder": "",
    "enableChart": false,
    "enableSuitesPublishing": false,
    "customData": {}
  },
  "telegram": {
    "token": "",
    "chat": "",
    "topic": "",
    "replyTo": "",
    "templatePath": "/templates/telegram.ftl"
  },
  "slack": {
    "token": "",
    "chat": "",
    "replyTo": "",
    "templatePath": "/templates/markdown.ftl"
  },
  "mattermost": {
    "url": "",
    "token": "",
    "chat": "",
    "templatePath": "/templates/markdown.ftl"
  },
  "rocketChat" : {
    "url": "",
    "auth_token": "",
    "user_id": "",
    "channel": "",
    "templatePath": "/templates/rocket.ftl"
  },
  "mail": {
    "host": "",
    "port": "",
    "username": "",
    "password": "",
    "securityProtocol": null,
    "from": "",
    "to": "",
    "cc": "",
    "bcc": "",
    "templatePath": "/templates/html.ftl"
  },
  "discord": {
    "botToken": "",
    "channelId": "",
    "templatePath": "/templates/markdown.ftl"
  },
  "loop": {
    "webhookUrl": "",
    "templatePath": "/templates/markdown.ftl"
  },
  "cliq": {
    "token": "",
    "chat": "",
    "bot": "",
    "dataCenter": "eu",
    "templatePath": "/templates/markdown.ftl"
  },
  "proxy": {
    "host": "",
    "port": 0,
    "username": "",
    "password": ""
  }
}
The proxy block is used if you need to specify additional proxy configuration.
The templatePath parameter is optional and allows to set the path to custom Freemarker template for notification message.
Example:
{
  "base": {
    ...
  },
  "mail": {
    "host": "smtp.gmail.com",
    "port": "465",
    "username": "username",
    "password": "password",
    "securityProtocol": "SSL",
    "from": "test@gmail.com",
    "to": "test1@gmail.com",
    "cc": "testCC1@gmail.com, testCC2@gmail.com",
    "bcc": "testBCC1@gmail.com, testBCC2@gmail.com",
    "templatePath": "/templates/html_custom.ftl"
  }
}
- Fill the
baseblock in theconfig.jsonfile
Example:
"base": {
    "project": "some project",
    "environment": "some env",
    "comment": "some comment",
    "reportLink": "",
    "language": "en",
    "allureFolder": "build/allure-report/",
    "enableChart": true,
    "enableSuitesPublishing": true,
    "logo": "logo.png",
    "durationFormat": "HH:mm:ss.SSS",
    "customData": {
      "variable1": "value1",
      "variable2": "value2"
    }
}
Fields:
project,environment,comment- the name of the project, the name of the environment, and a custom comment.reportLink- the link to the Allure report with results of tests.language- the language in which the notification text will be formed (options:en/fr/ru/ua/by/cn).allureFolder- the path to the folder with Allure results.enableChart- whether the chart should be displayed (options:true/false).enableSuitesPublishing- whether the statistic per suite should be published (options:true/false, defaultfalse). Before enabling the option, make sure that the<allureFolder>/widgetsfolder contains JSON filesuites.jsonlogo- path to the logo file (if filled, the corresponding logo will be displayed in the top left corner of the chart).durationFormat(optional, default value isHH:mm:ss.SSS) - specifies the desired output format for the test duration.customData- additional data that can be reused in custom Freemarker templates (optional field).
- Fill in the
config.jsonfile block with the information about the chosen messenger. - Execute the following command in terminal:
java "-DconfigFile=notifications/config.json" -jar notifications/allure-notifications-4.6.1.jar
Note:
-
The
summary.jsonfile should already be generated by the time of execution. -
You need to specify the version of the
jarfile that you downloaded in the previous steps in the command-line text. -
Configuration can be overridden via system properties (The system property will take precedence if the same configuration item is specified in the configuration file).
java "-DconfigFile=notifications/config.json" "-Dnotifications.base.environment=${STAND}" "-Dnotifications.base.reportLink=${ALLURE_SERVICE_URL}" "-Dnotifications.base.project=${PROJECT_ID}" "-Dnotifications.telegram.token=${TG_BOT_TOKEN}" "-Dnotifications.telegram.chat=${TG_CHAT_ID}" "-Dnotifications.telegram.topic=${TG_CHAT_TOPIC_ID}" -jar allure-notifications.jar
ℹ️ The property prefixes for custom data parameters are removed: system property
-Dbase.customData.variable1=someValuewill result in data with keyvariable1with valuesomeValue.⚠️ customDataparameter without name is allowed:base.customData.
-
Telegram config
The `telegram` block parameters:topic- optional parameter defining unique identifier for the target message thread (topic) of the chat to send the message to; check [Stackoverflow answers](https://stackoverflow.com/questions/74773675/how-to-get-topic-id-for-telegram-group-chat) to find out how to get the parameter value.
-
Zoho Cliq config
To enable Zoho Cliq notifications, you need to provide the following configuration parameters:token- Your Zoho Cliq API token (zapikey). To get this token:- Go to your Zoho Cliq account settings
- Navigate to "Bots & Tools" → "Bot"
- Create a new bot or use an existing one
- Copy the "Webhook URL" token parameter (zapikey)
chat- The name of the channel where you want to send notificationsbot- (Optional) The unique name of your bot if you want to send messages as a specific botdataCenter- The Zoho data center region. Supported values:com- United States (cliq.zoho.com)eu- Europe (cliq.zoho.eu) - Defaultin- India (cliq.zoho.in)au- Australia (cliq.zoho.com.au)jp- Japan (cliq.zoho.jp)ca- Canada (cliq.zohocloud.ca)