Welcome! The Raspberry Pi (RPi) is a great tool to empower your creativity. Discover the multiple possibilities this single board computer brings to you.
Interactive link https://doc.clickup.com/36177258/d/h/12g1ba-160/beb602325a60716
You could use the following table to quickly compare two versions of the RPi.
| Raspberry Pi 3 Model B | Raspberry Pi 4 Model B |
|---|---|
| Broadcom BCM2837 | Broadcom BCM2711 |
| Quad-Core 64bit @ 1.2GHz | Quad-core 64bit @ 1.5GHz |
| Cortex A53 (ARM v8) | Cortex A72 (ARM v8) |
| 1GB LPDDR2 SDRAM | 2GB, 4GB or 8GB LPDDR4 |
| 100 Base Ethernet | Gigabit Ethernet |
| Official page | Official page |
- RPi: Raspberry Pi is a series of small single-board computers (SBCs) developed in the United Kingdom by the Raspberry Pi Foundation in association with Broadcom.
- SBC: Single board computer is a complete computer built on a single circuit board, with microprocessor(s), memory, input/output (I/O), and other features required of a functional computer. [source]
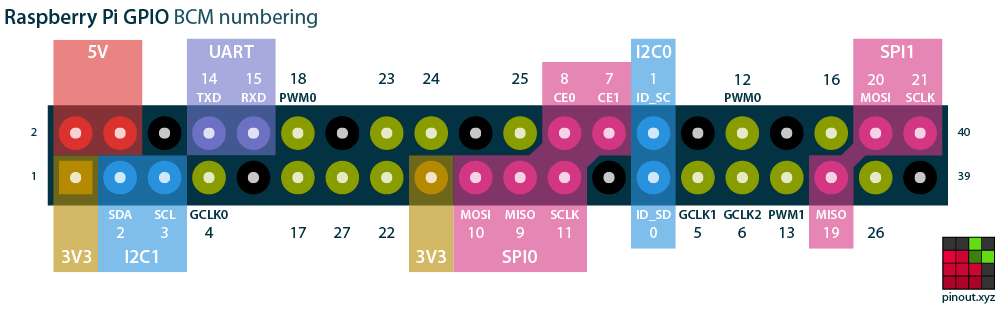
A great advantage about RPi is that you can interact with the hardware. Also, consider using a hat for this purpose.
The image is of the RPi 3, but it applies to the RPi 4. More details https://medium.com/youngwonks/raspberry-pi-3-pinout-50b904ed41f0

More details https://pinout.xyz/
# https://gpiozero.readthedocs.io/en/stable/installing.html
sudo apt update
sudo apt install python3-gpiozero
pinout
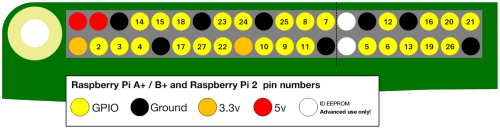
Take note of the white pins. More details https://projects.raspberrypi.org/en/projects/physical-computing/1
For older versions
Basic elements
- Raspberry Pi 3 Model B
- SD card 32GB
- Power cable 2.5A MicroUSB
There are two options; please make sure to have one of the following options.
- External monitor option
- HDMI monitor
- HDMI cable
- USB keyboard
- Ethernet cable option
- Ethernet Cable
- A computer with an RJ45 port
- Download Raspberry Pi Imager

- Install the application. Use default options
- Open Raspberry Pi Imager
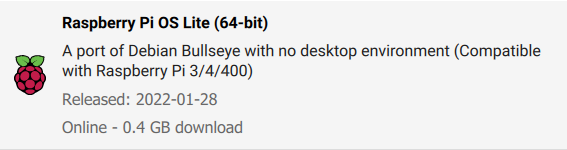
- Choose Raspberry Pi OS (other) > Raspberry Pi OS Lite(64-bit)
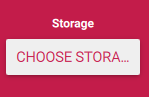
- Select your SD as storage
- Click on Gear Icon ⚙️
- Use the following values.
- Disable overscan
- Set hostname
- Enable SSH
- Use password authentication
- Allow public-key authentication only
- Set username and password
- Username: pi
- Password: raspberry
- Configure wifi
- Set locale settings
- Play sound when finished
- Eject media when finished
- Enable telemetry
- Click on WRITE > YES
Get the ip of the raspberry from the powershell
ping raspberrypi.local -4
- Connect the external devices
- Option A: Connect a keyboard, power, and monitor
- Option B: Connect ethernet to your computer and power
- Open a PowerShell
- Install 64-but x86 PuTTY with default options
- Open PuTTY
- Set Host Name
raspberrypi.local - Connection type ssh
- Click on Save and then Open
- Click on Accept in the Security Alert
- Set credentials
- raspberrypi login (login as): pi
- Password: raspberry
- Optional, turn off the RPi
shutdown now
You can also connect via
ssh pi@raspberrypi.local
- Set country code ISO 3166-1
sudo raspi-config nonint do_wifi_country MX
- Open the wpa_supplicant.conf, the purpose is to use this file to configure your Wi-Fi connections. This process is similar when you put the connections on your smartphone
sudo nano /etc/wpa_supplicant/wpa_supplicant.conf
-
f
-
Add network configuration
Wireless network wpa_passphrase "network_name"
network={
  ssid="network_name"
  scan_ssid=1
  psk=e647e6a0df46537ad98c7687fa75fa33f0e0489f80fec9ed0180058647724073
}
PEAP network echo -n "plaintext_password" | iconv -t utf16le | openssl md4
network={
  ssid="<<network_name>>"
  priority=1
  proto=RSN
  key_mgmt=WPA-EAP
  pairwise=CCMP
  auth_alg=OPEN
  eap=PEAP
  identity="<<user_name>>"
  password=hash:<<the_hash>>
  phase1="peaplabel=0"
  phase2="auth=MSCHAPV2"
}
- Apply changes
sudo reboot
- Open a python shell
python
- Declare LED
from gpiozero import LED
led = LED(14)
- Turn on LED
led.on()
- Turn off LED
led.off()
- Exit
exit()
- Download VS Code
- Install Remote SSH Extension
- Add ssh project
- Open workspace folder
- Run python scripts as
python blink_simple.py
bash <(curl -sL https://raw.githubusercontent.com/node-red/linux-installers/master/deb/update-nodejs-and-nodered)
Then you can start the service with
node-red-start
More details at https://nodered.org/docs/getting-started/raspberrypi
https://github.com/raspberrypilearning/physical-computing-guide/blob/master/pull_up_down.md
https://gpiozero.readthedocs.io/en/stable/
htop