| title | metadesc | order | page_id | warning | contextual_links | ||||||||||||||||||||||||||
|---|---|---|---|---|---|---|---|---|---|---|---|---|---|---|---|---|---|---|---|---|---|---|---|---|---|---|---|---|---|---|---|
How to Update an Excel File in Testsigma Uploads? |
When Excel files are modified during test execution, updates are stored locally. Learn how to upload the updated file back to Testsigma correctly. |
24.41 |
how-to-update-an-excel-file-in-testsigma-uploads-? |
false |
|
When you modify an Excel file during a test run, the changes are stored locally on the test machine. To make sure these updates are reflected inside Testsigma, you must upload the modified file back using the appropriate addons. This article discusses the steps required to update and re-upload the Excel file correctly.
Before you begin, ensure that you have an excel file that has been uploaded to Testsigma.
-
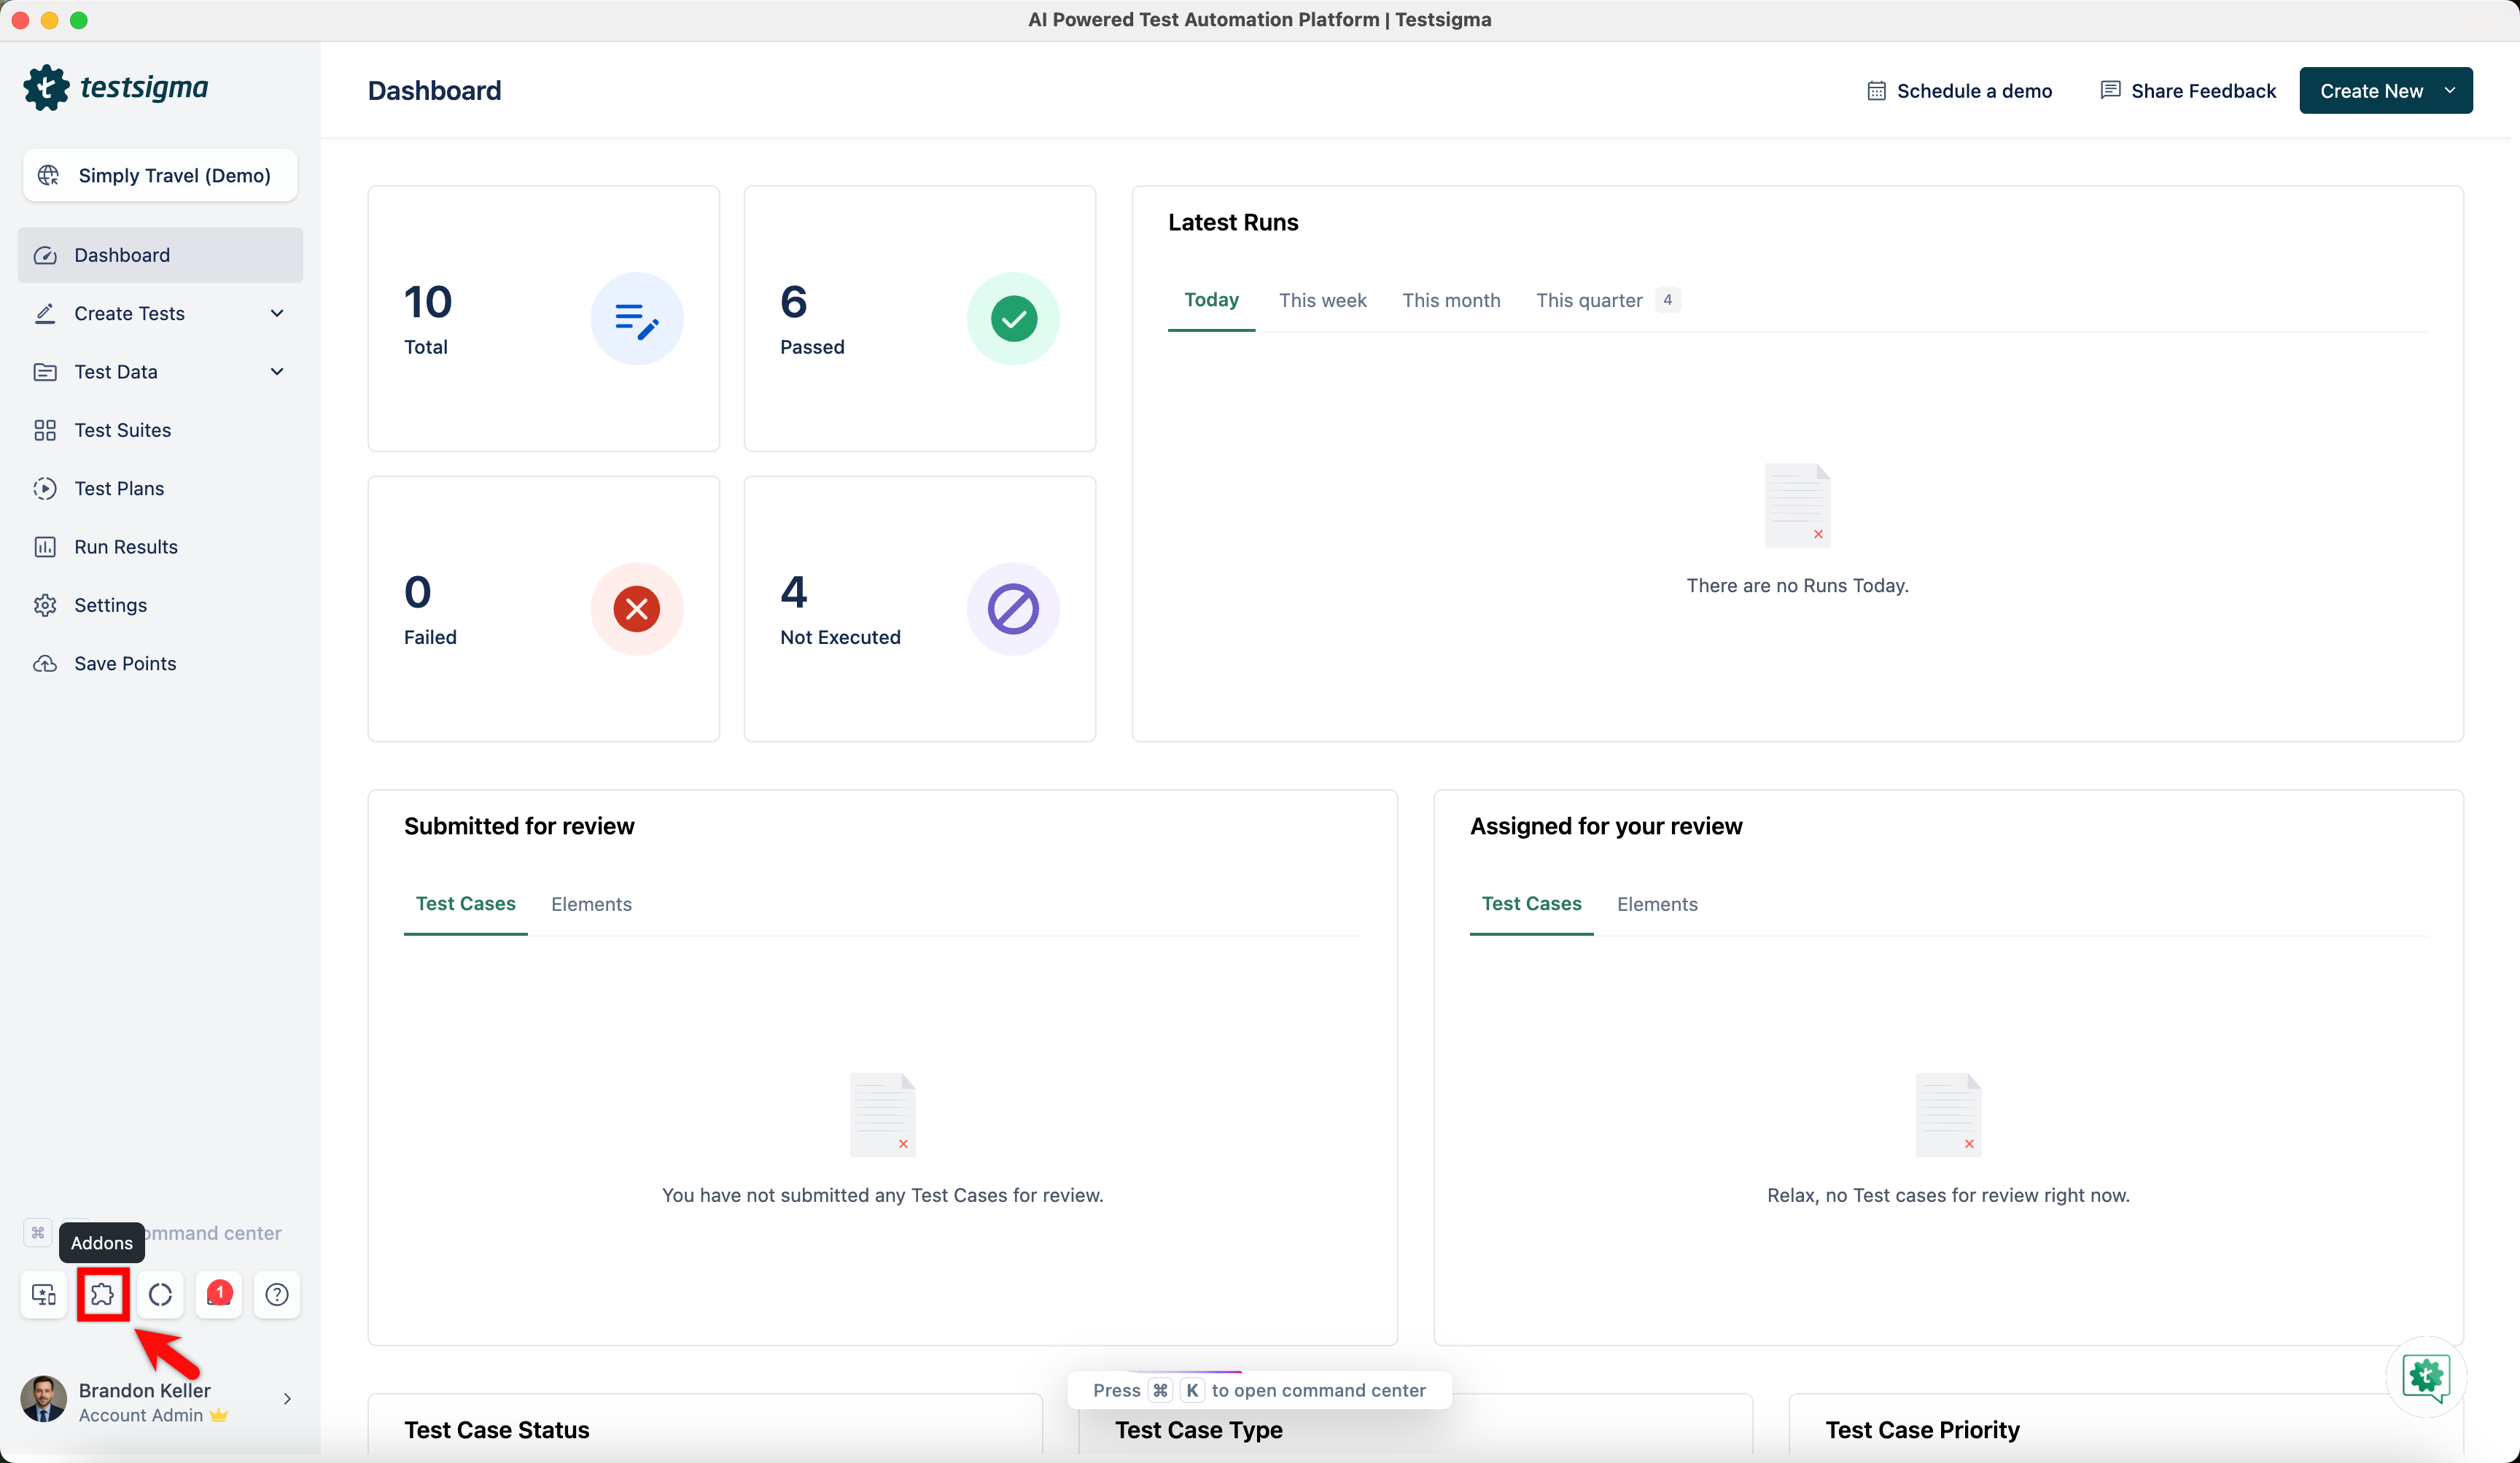
From the left navigation bar, click Addons.
-
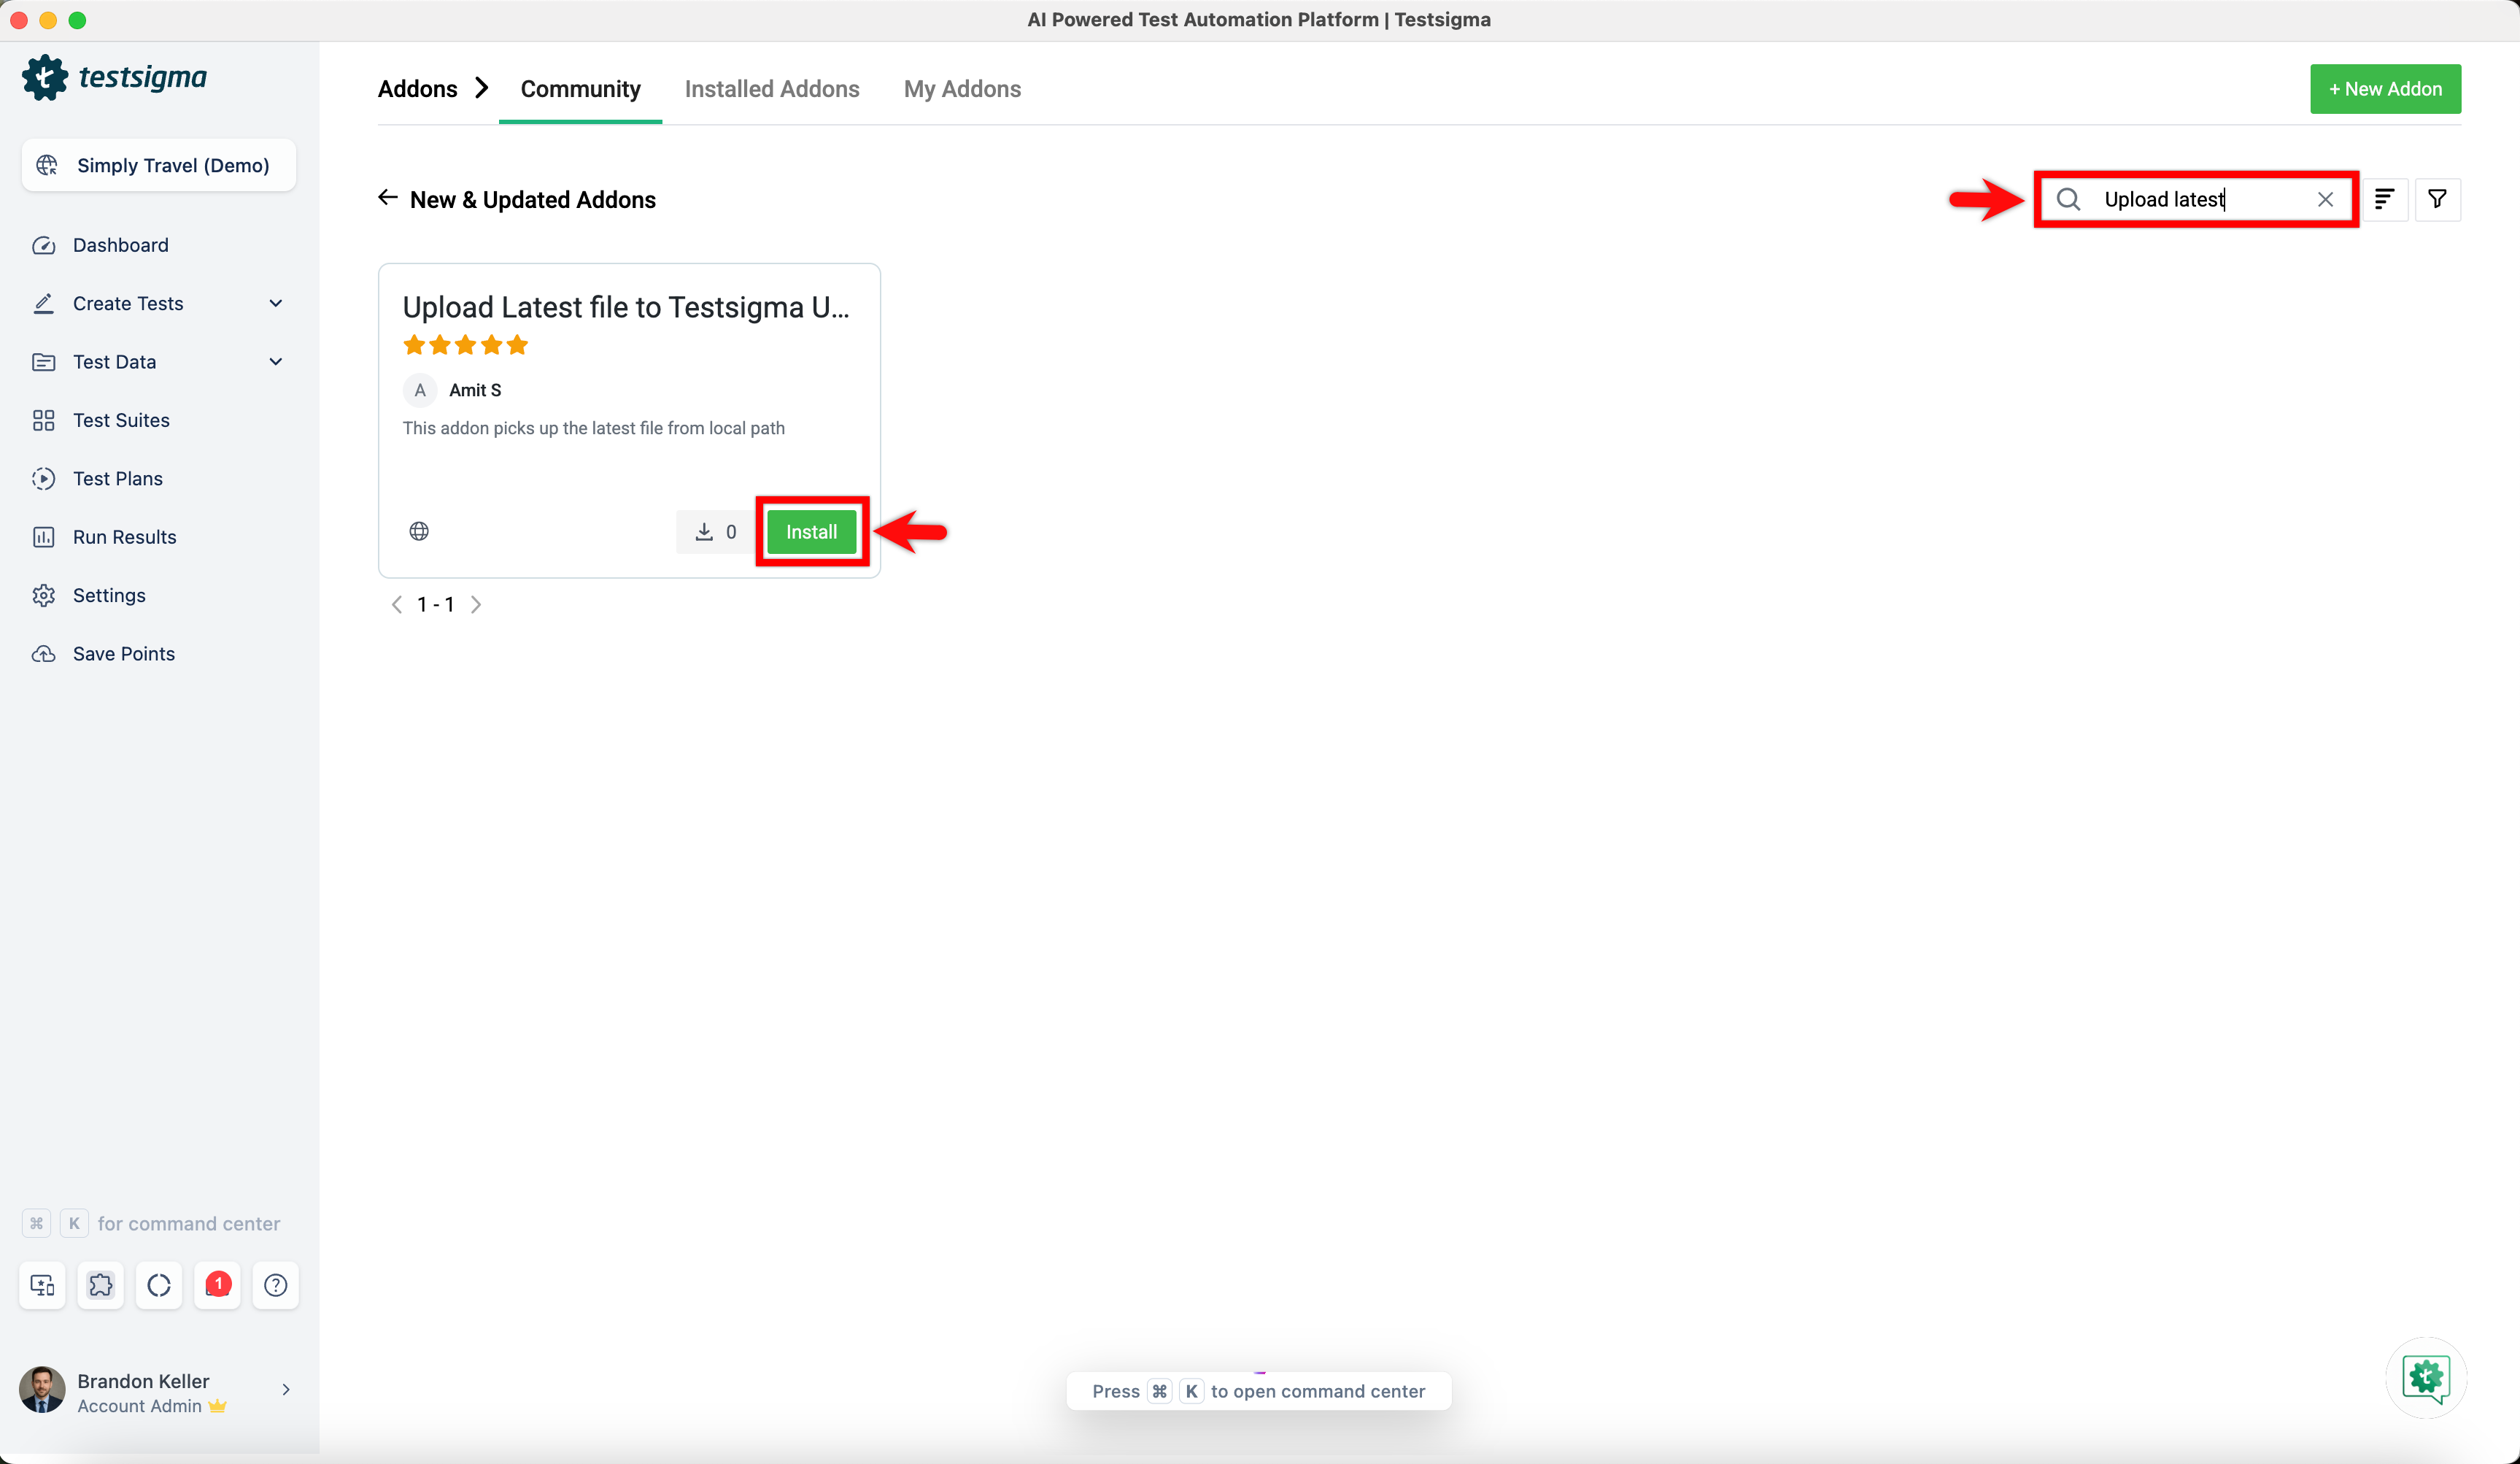
Under the New & Updated Addons section, search for the Upload Latest file to Testsigma Uploads addon and click Install.
-
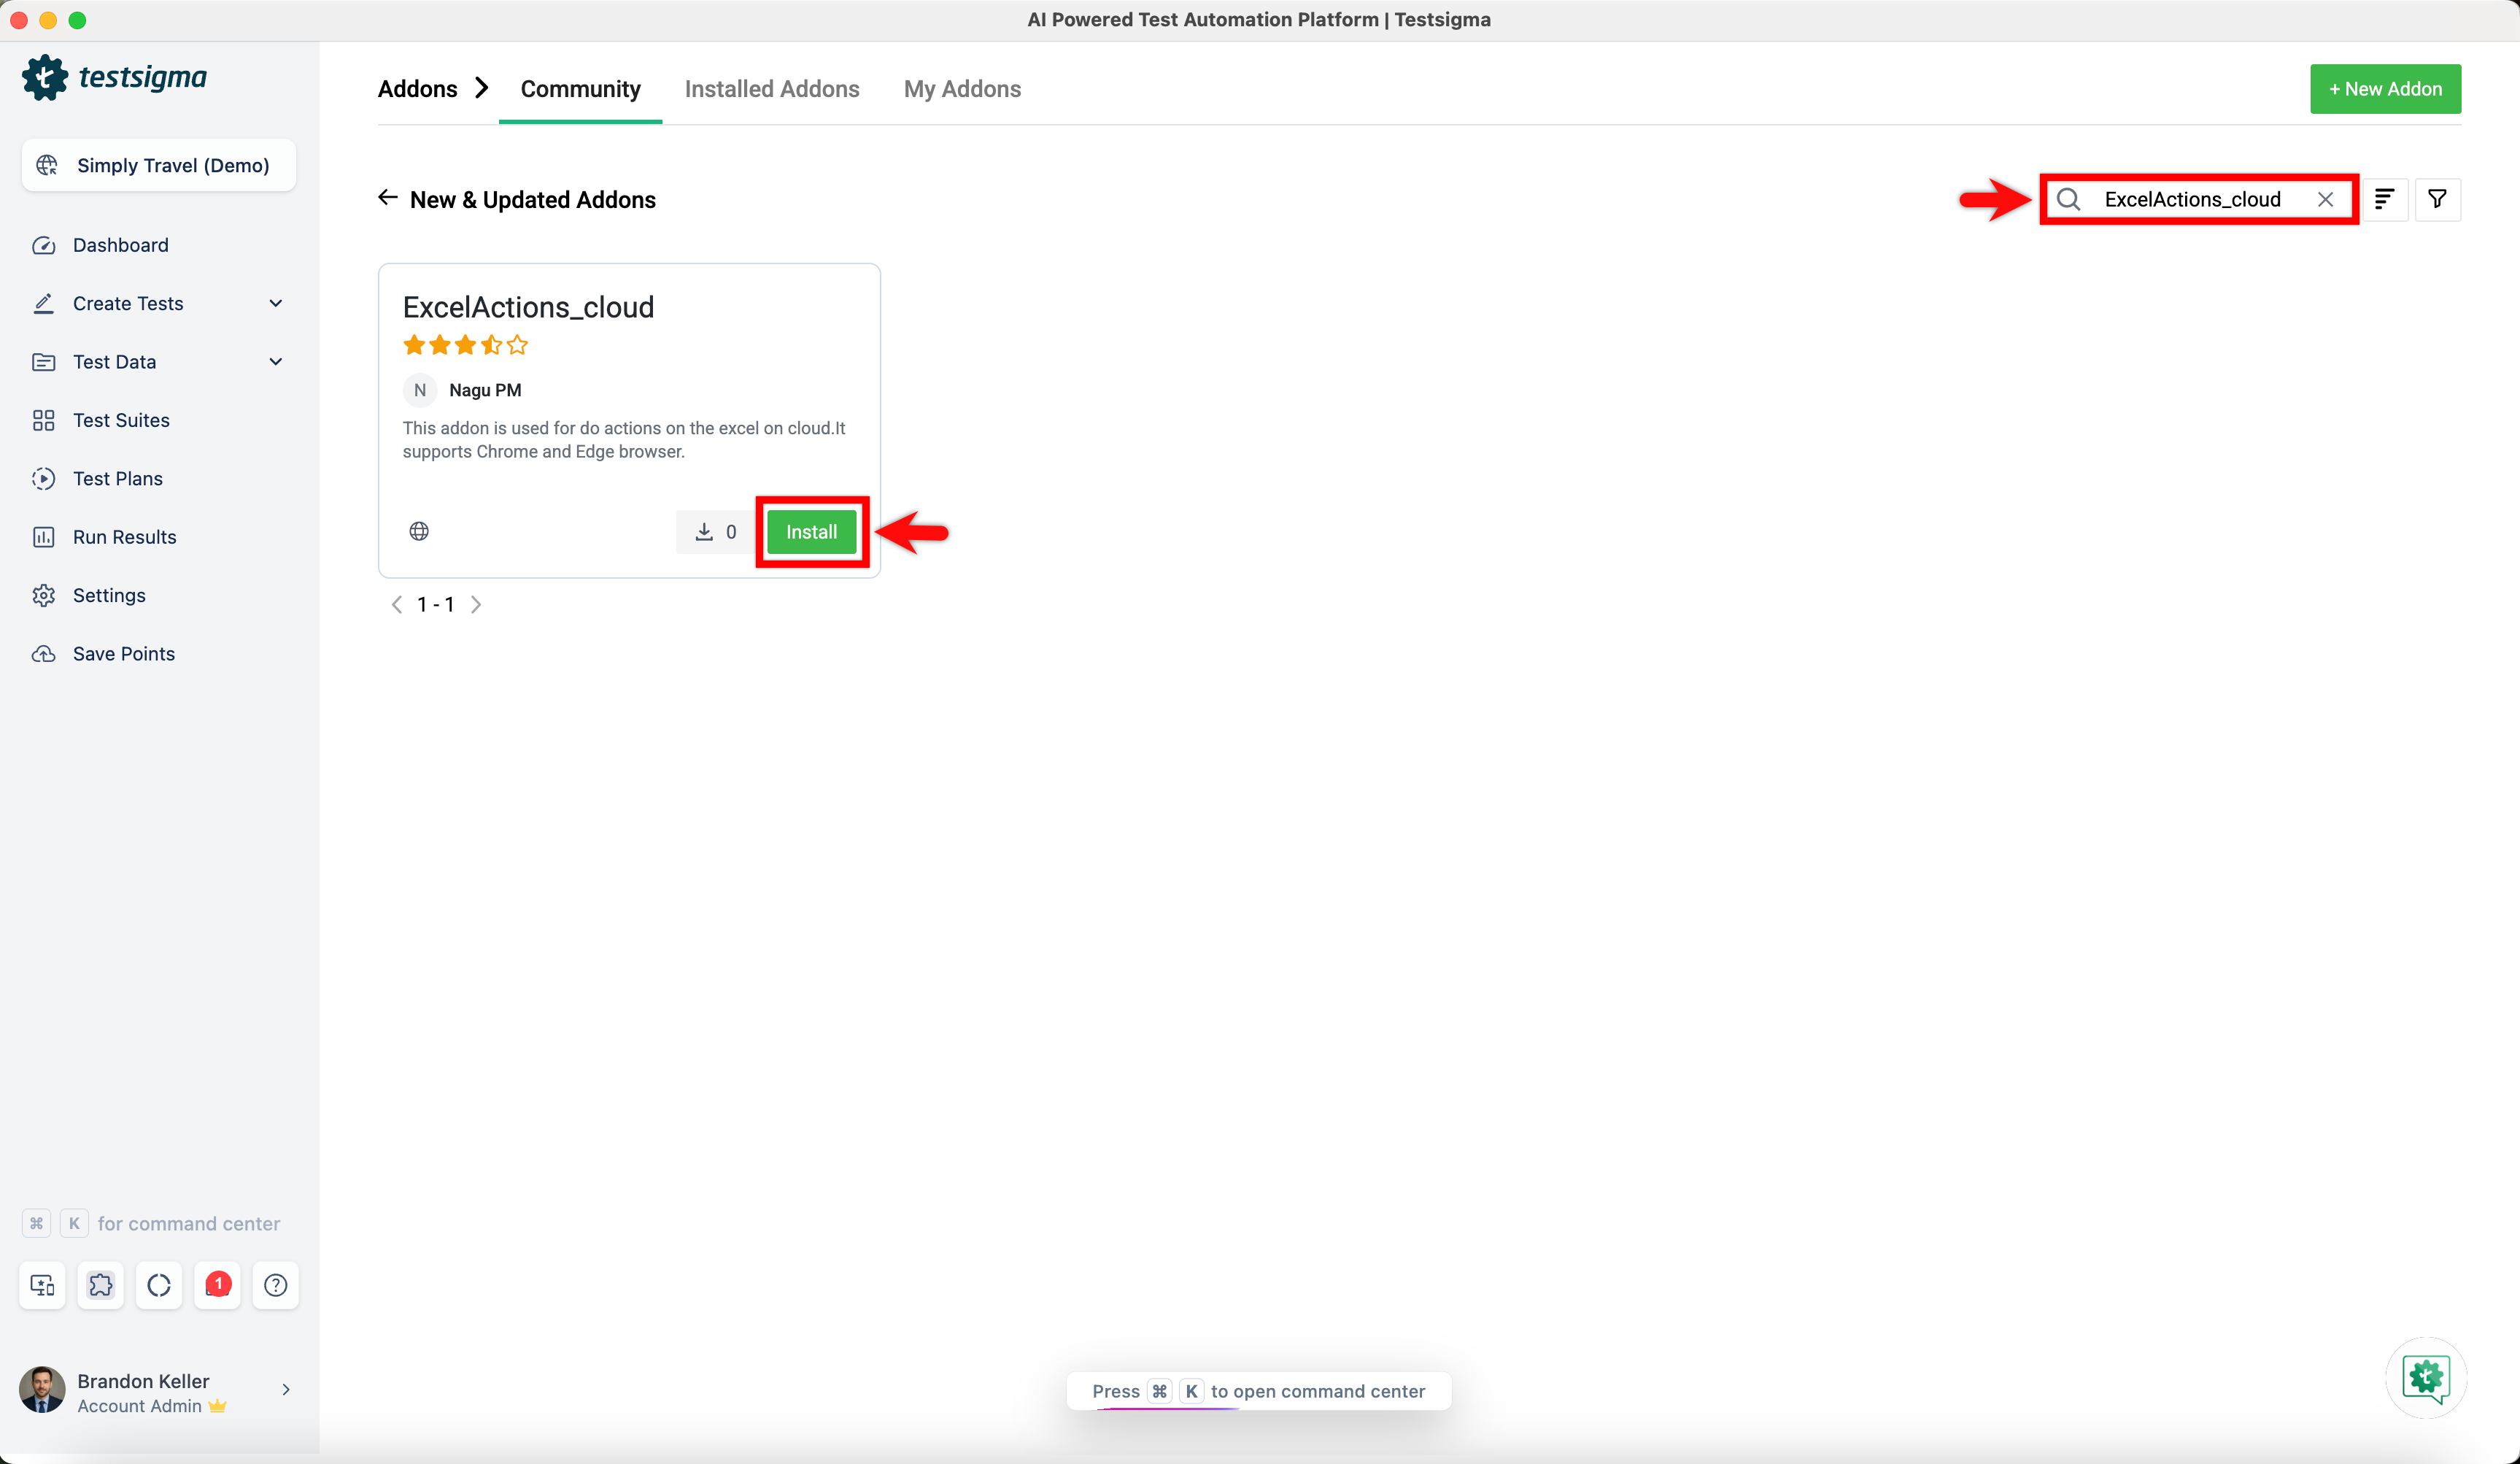
Under the New & Updated Addons section, search for the ExcelActions_cloud addon and click Install.
-
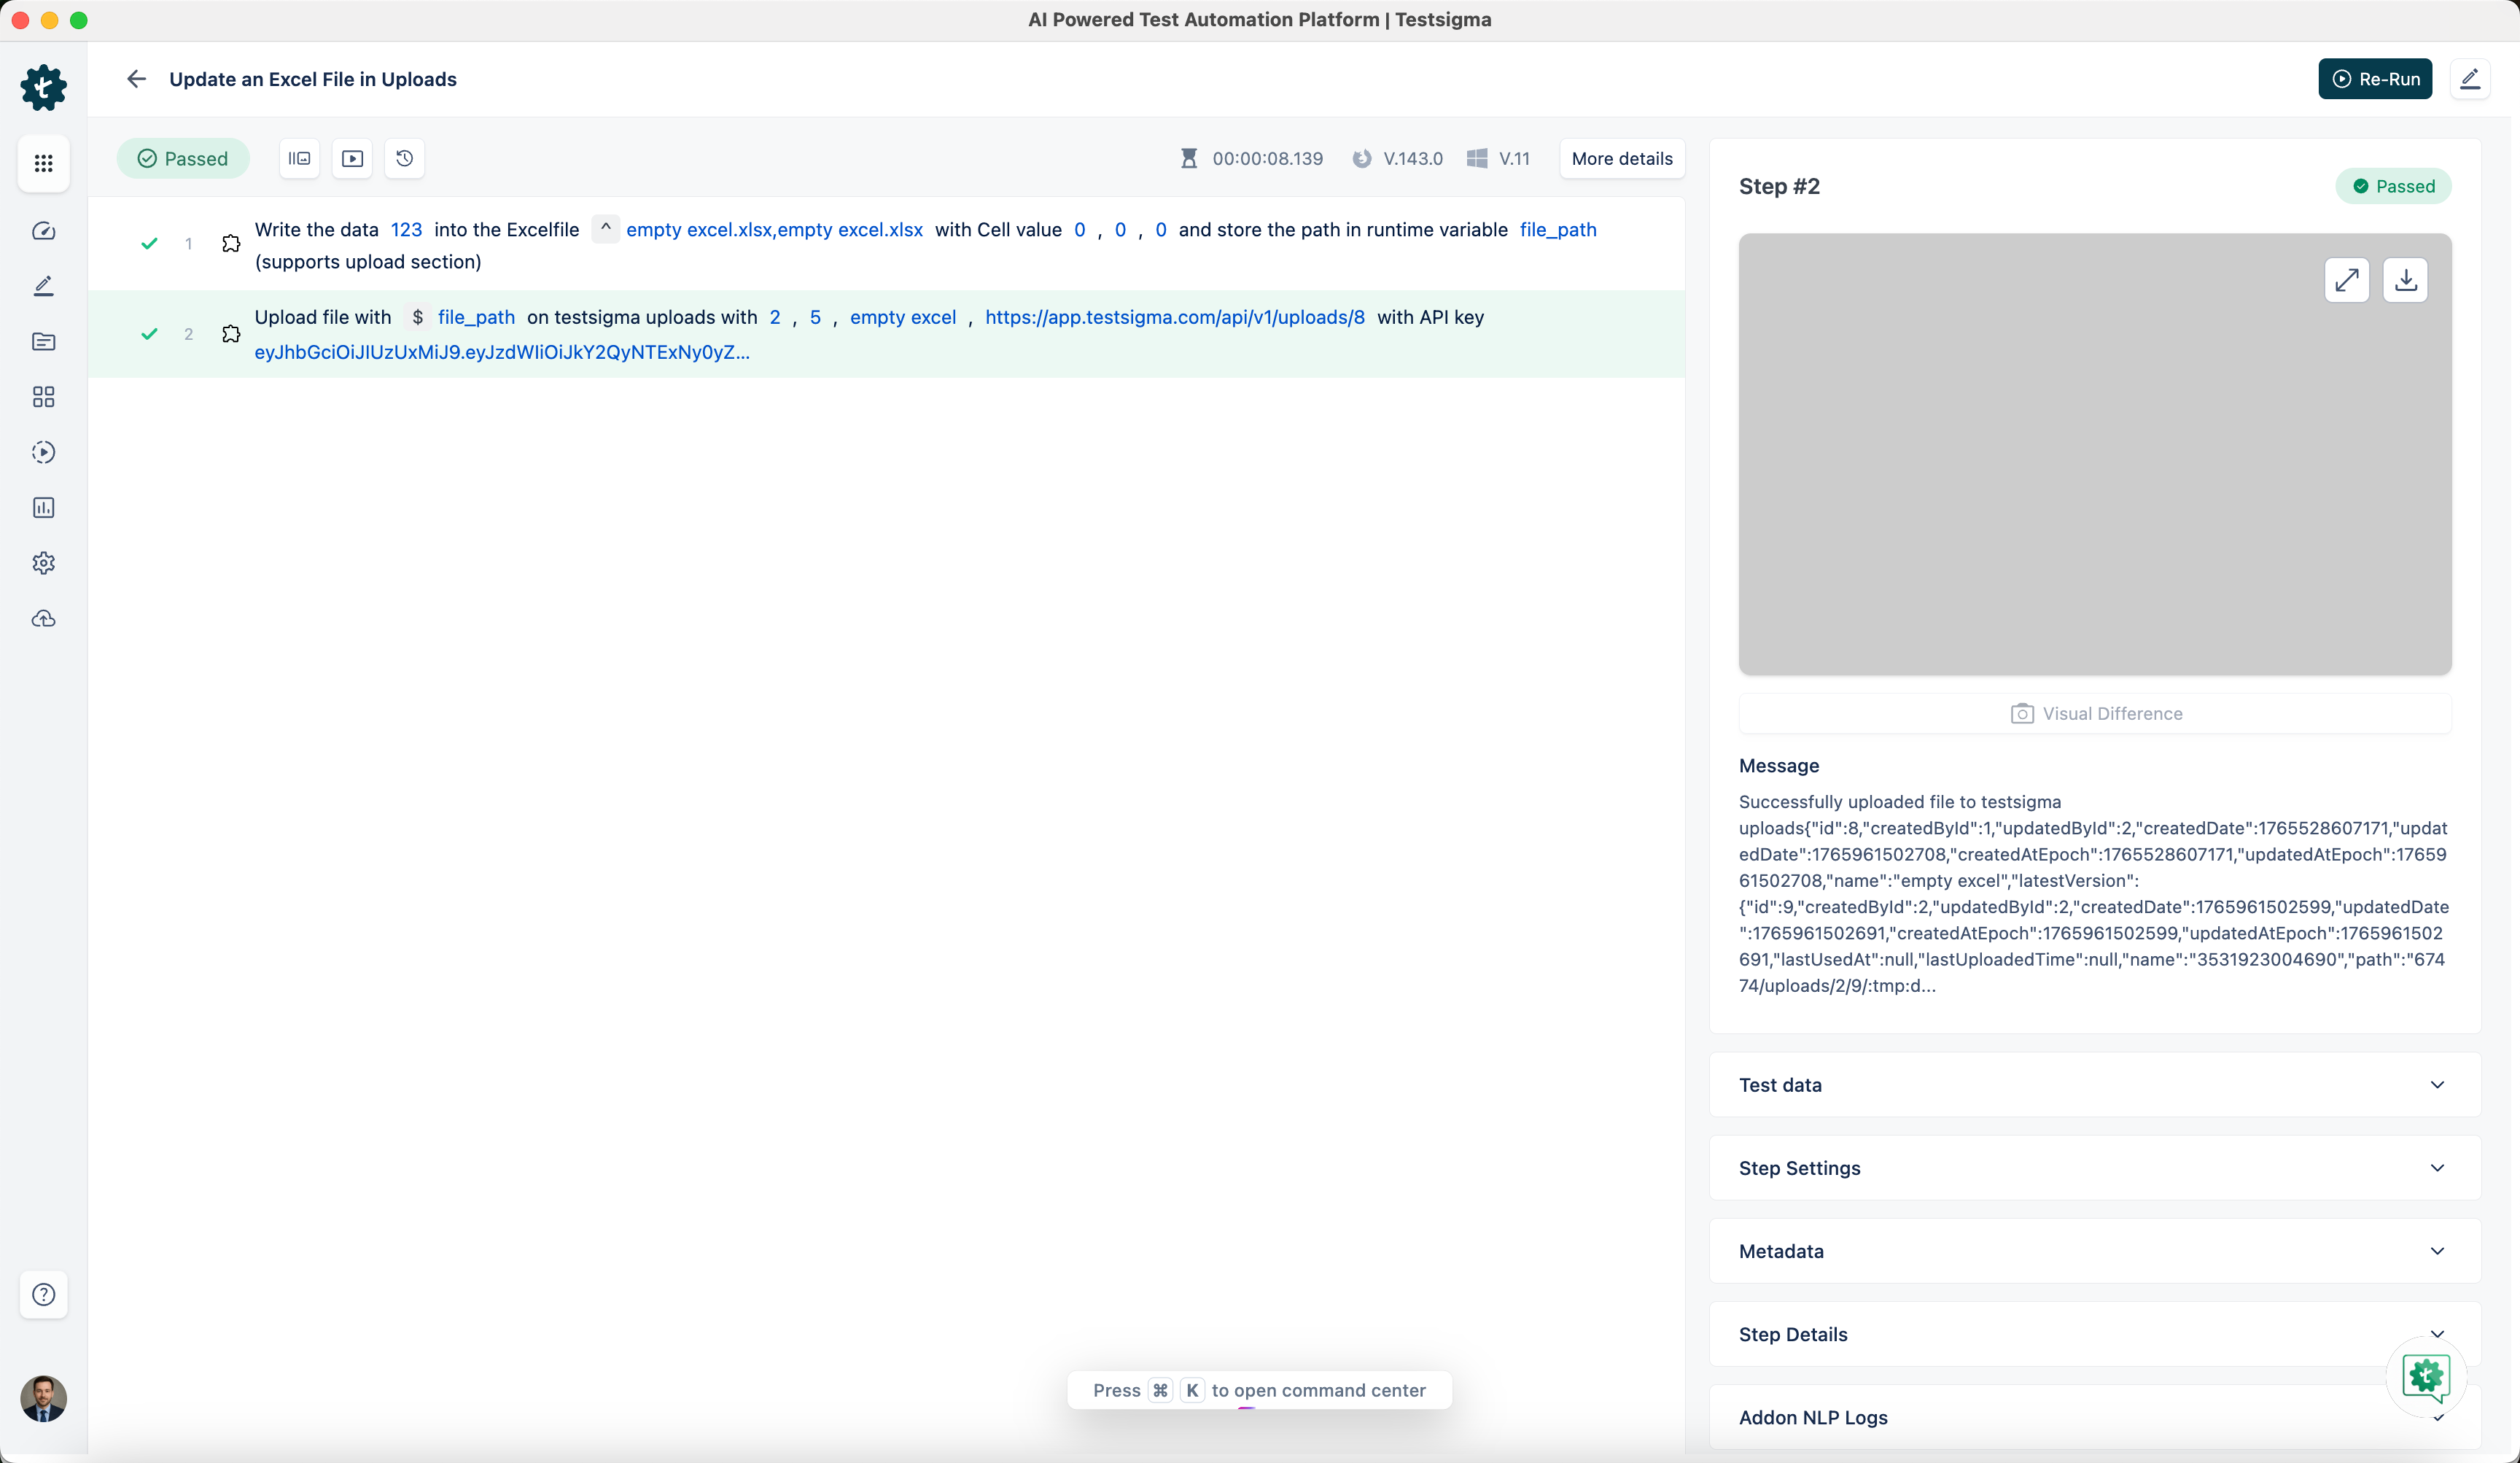
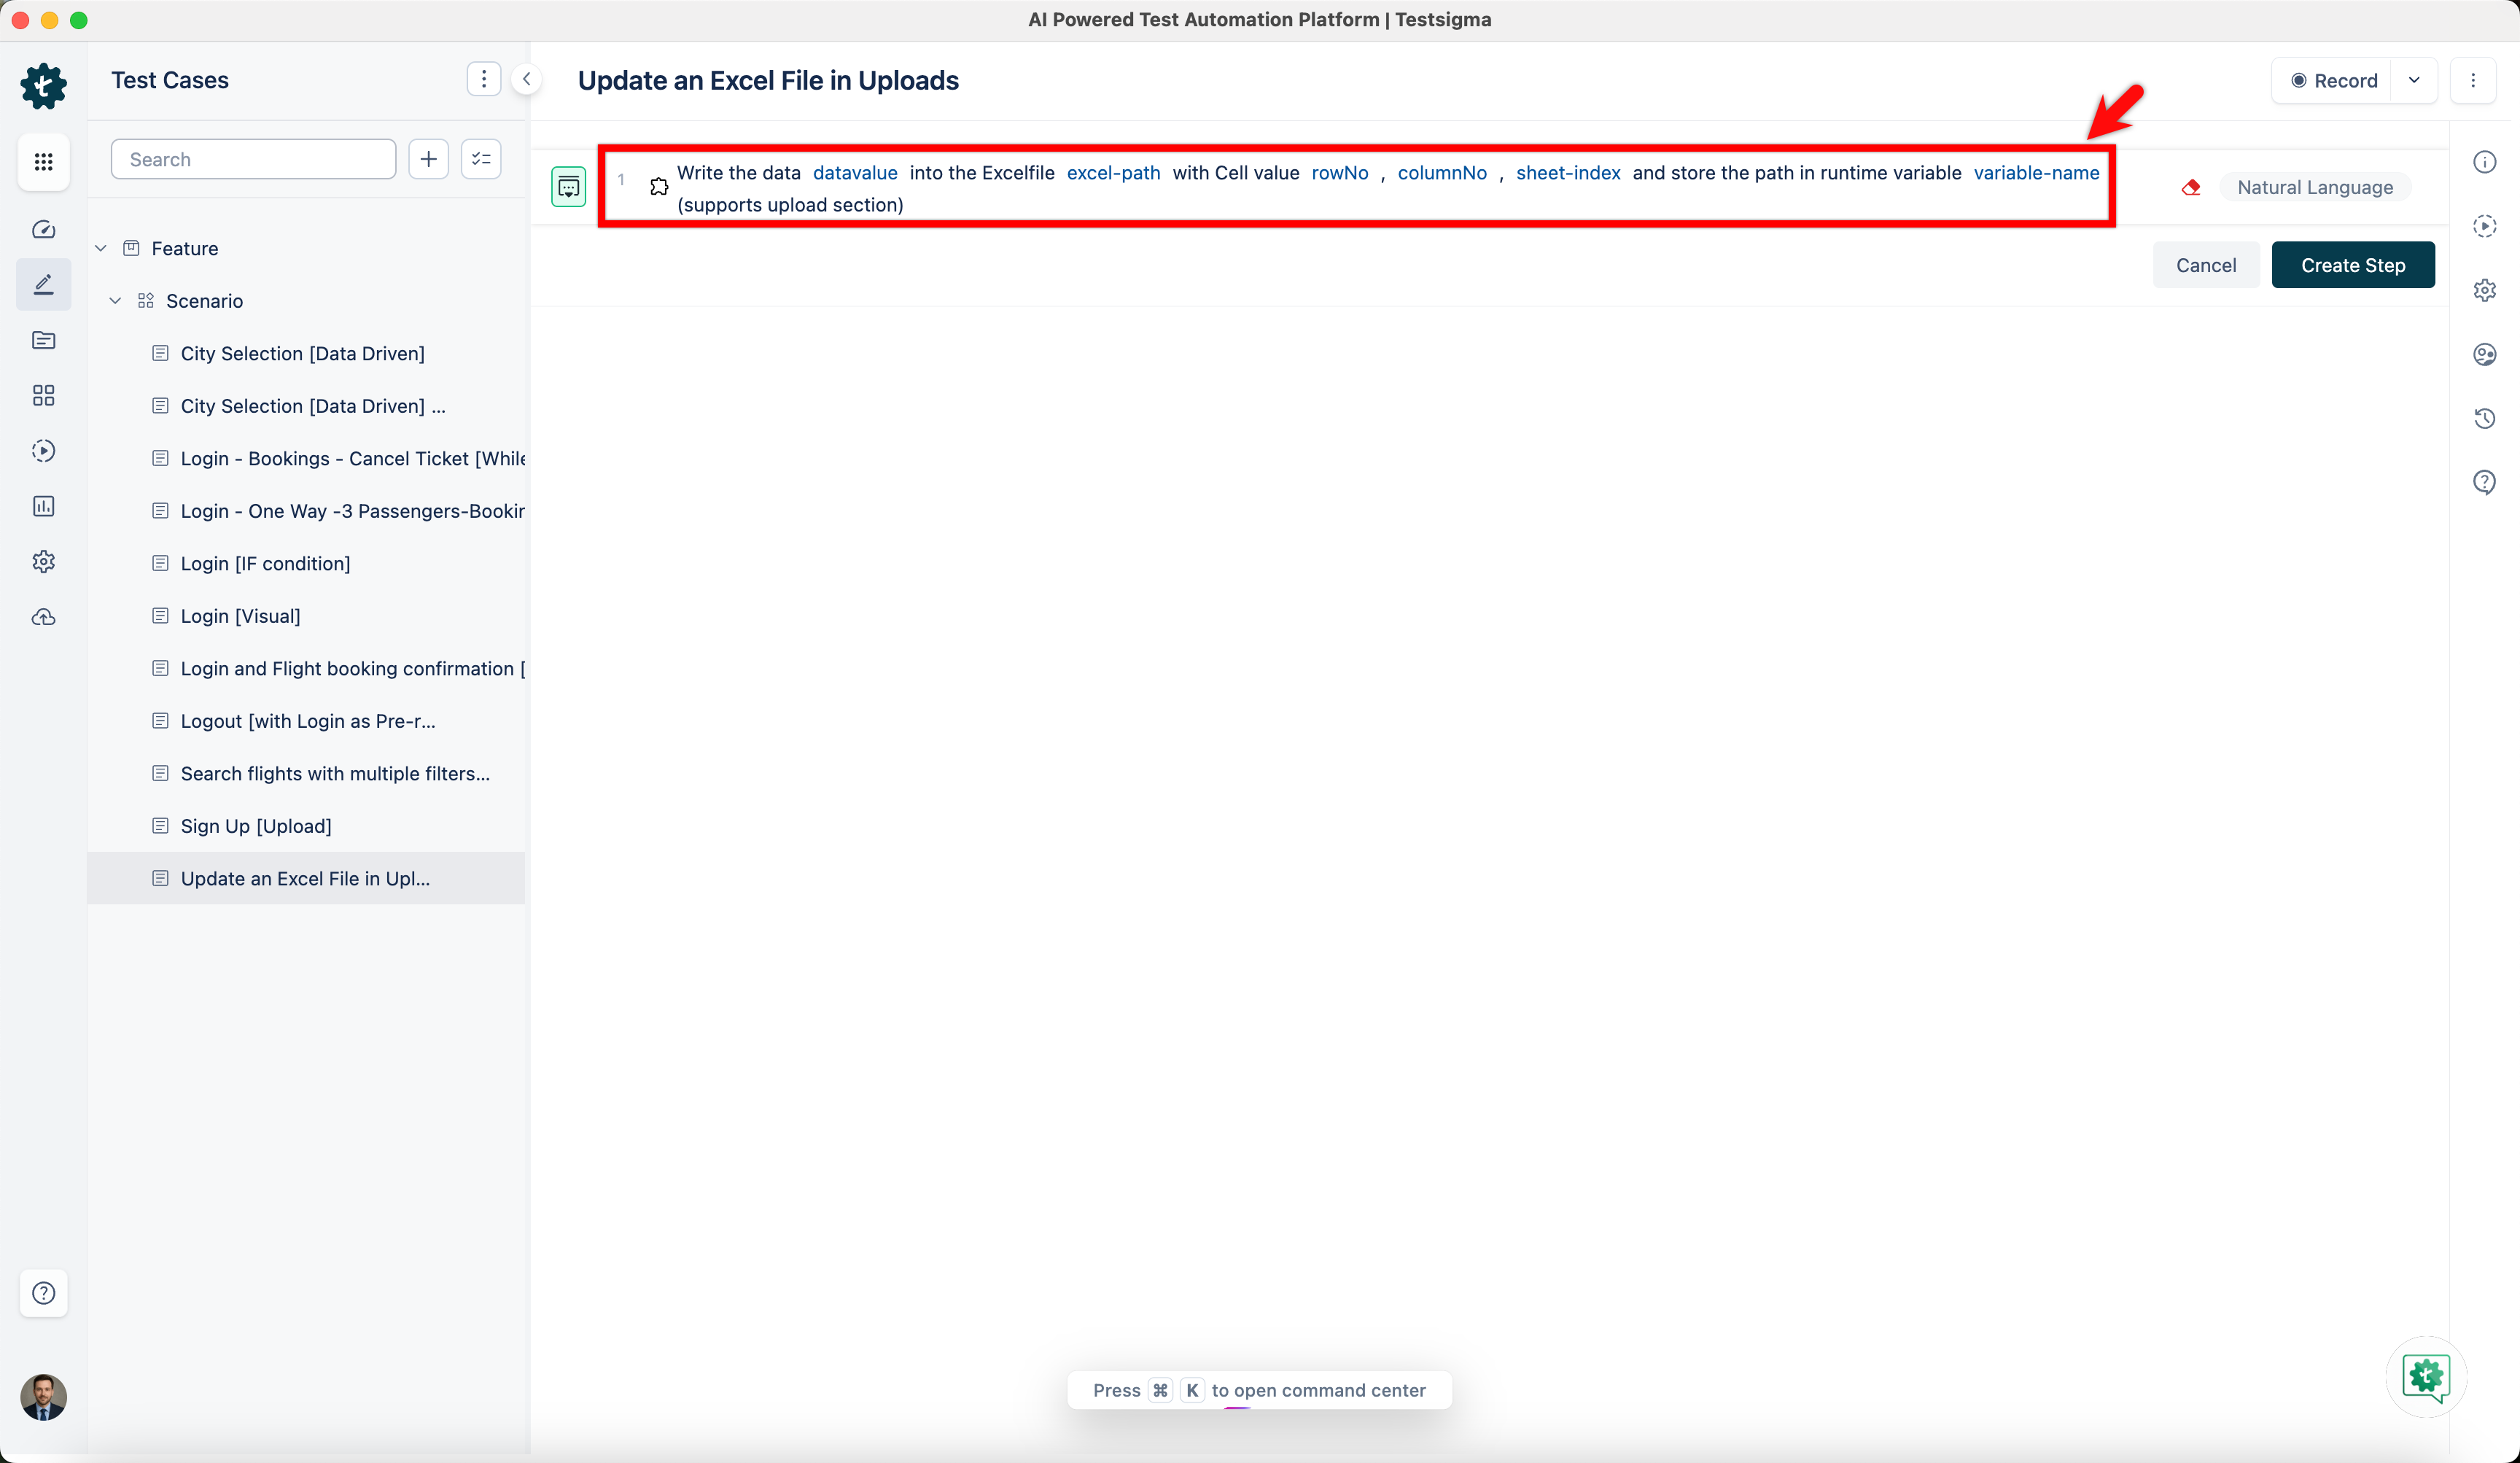
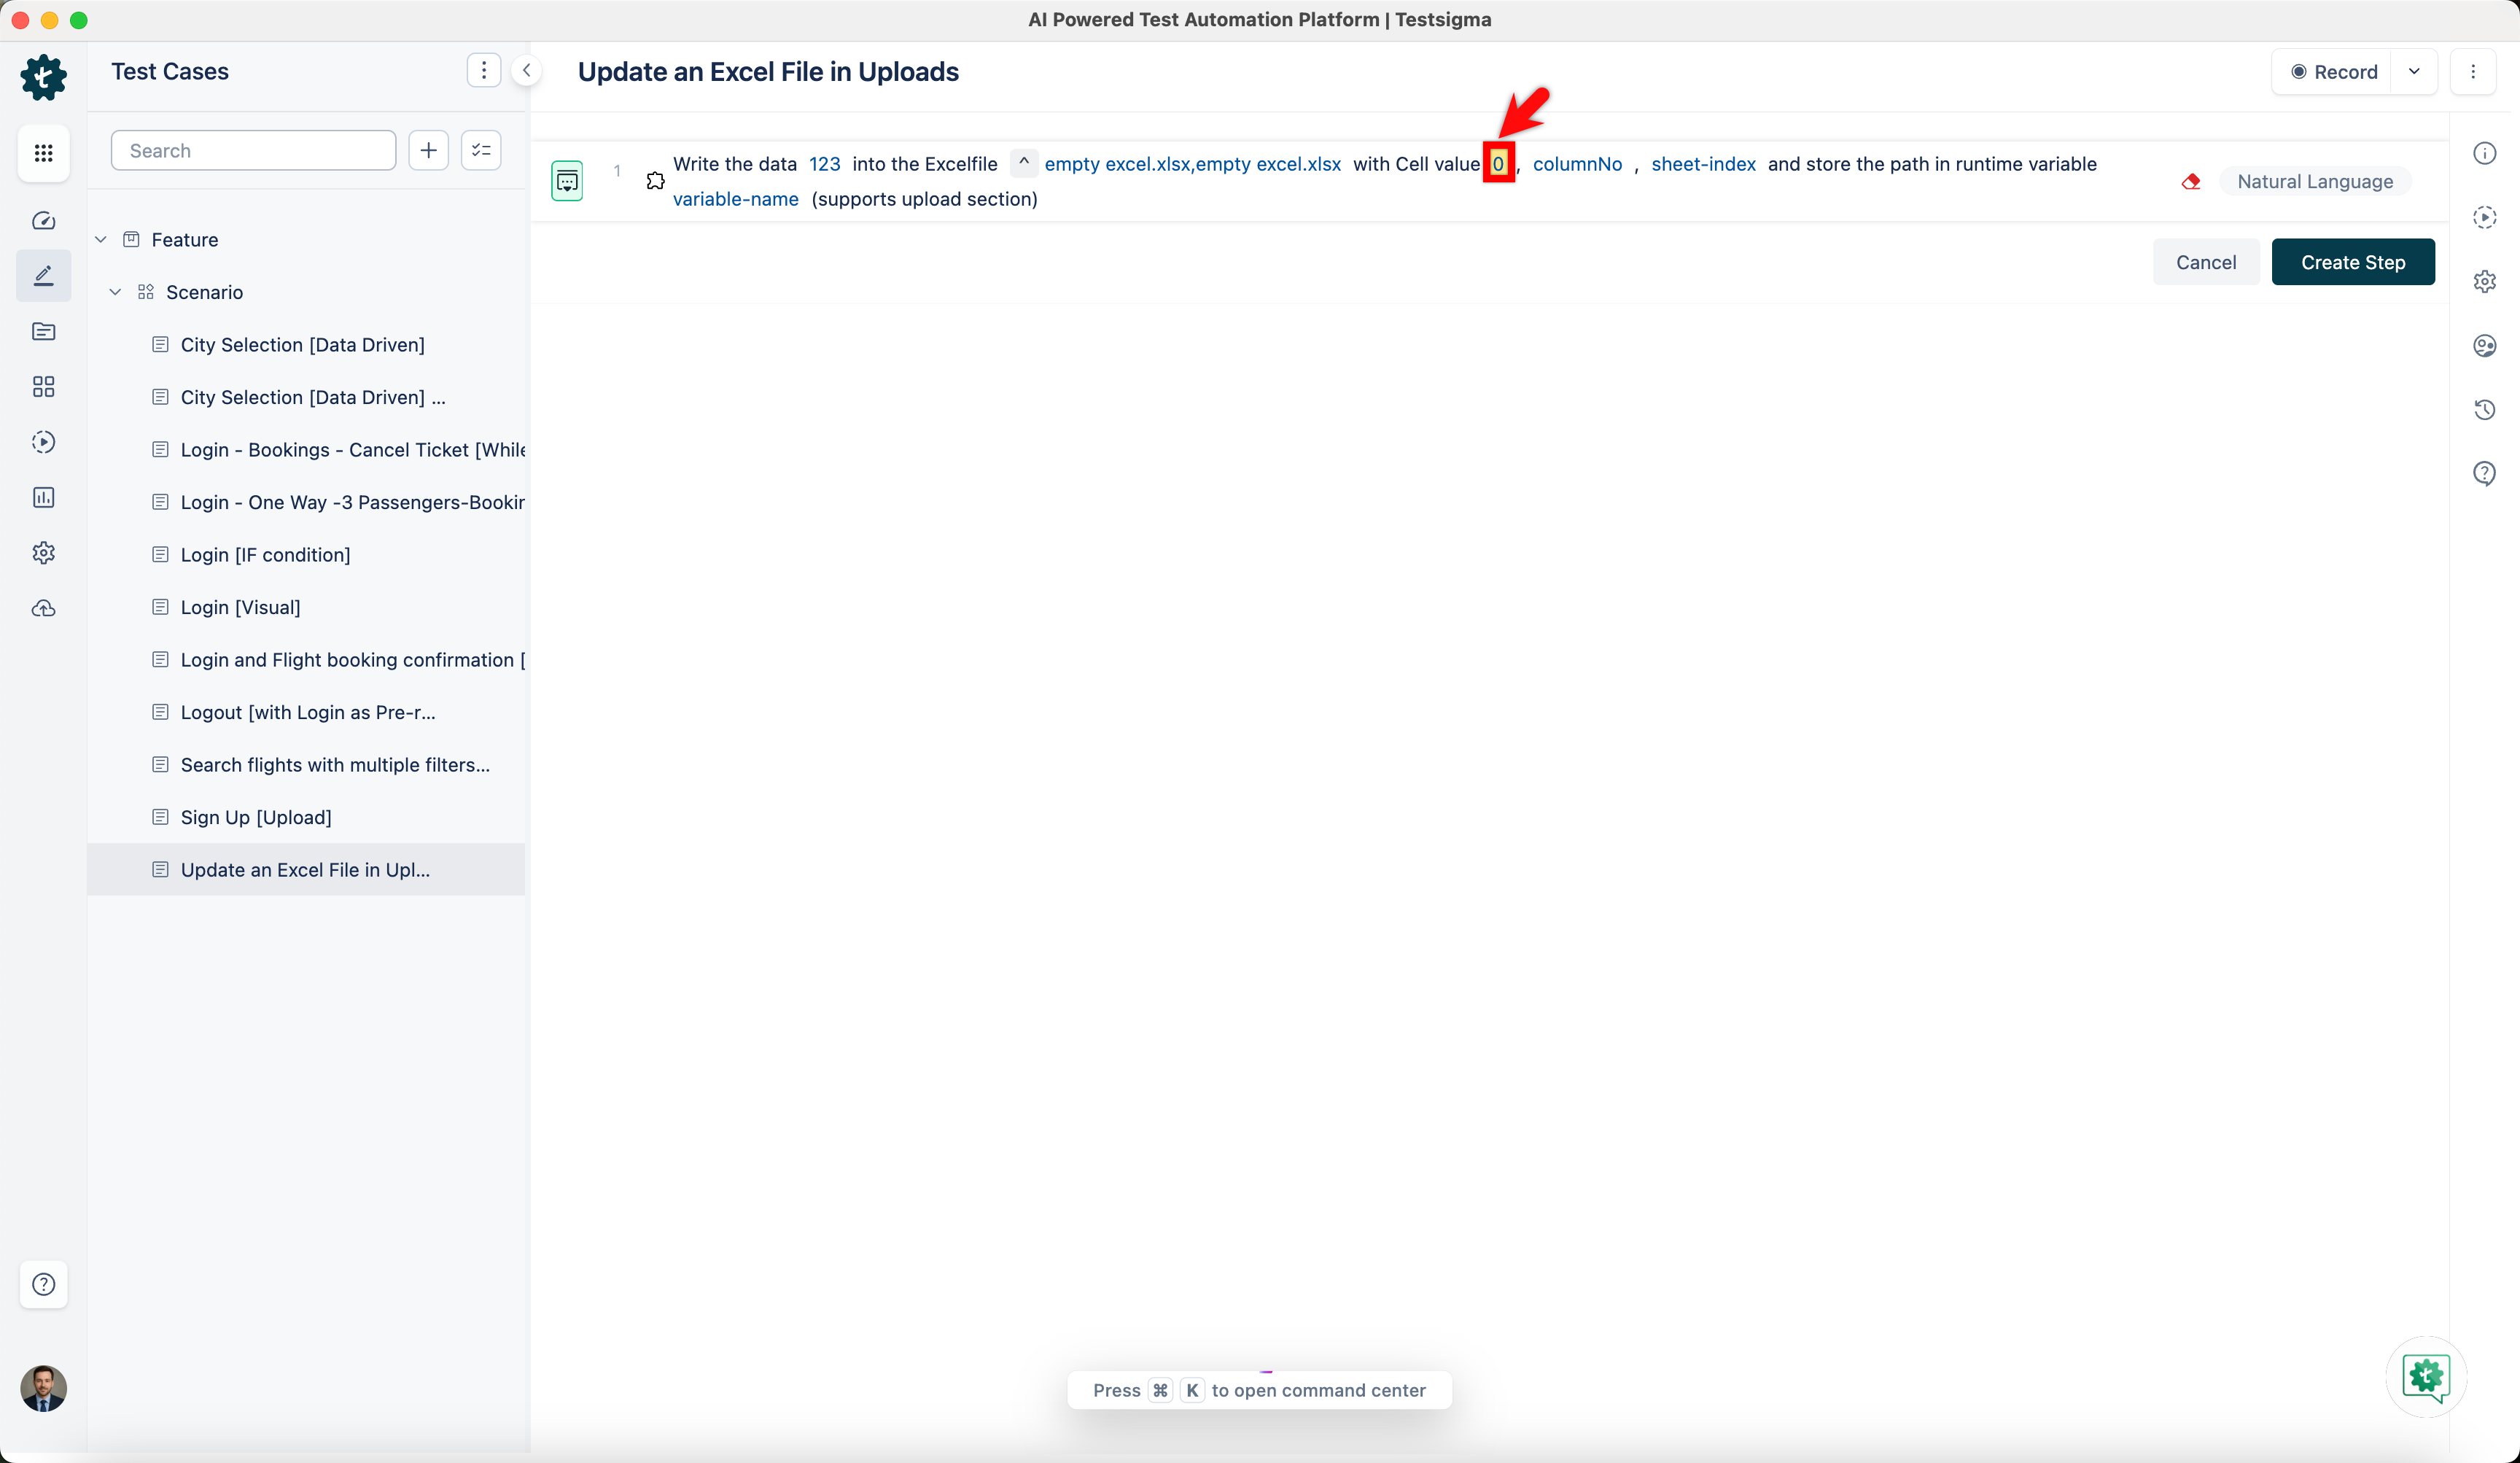
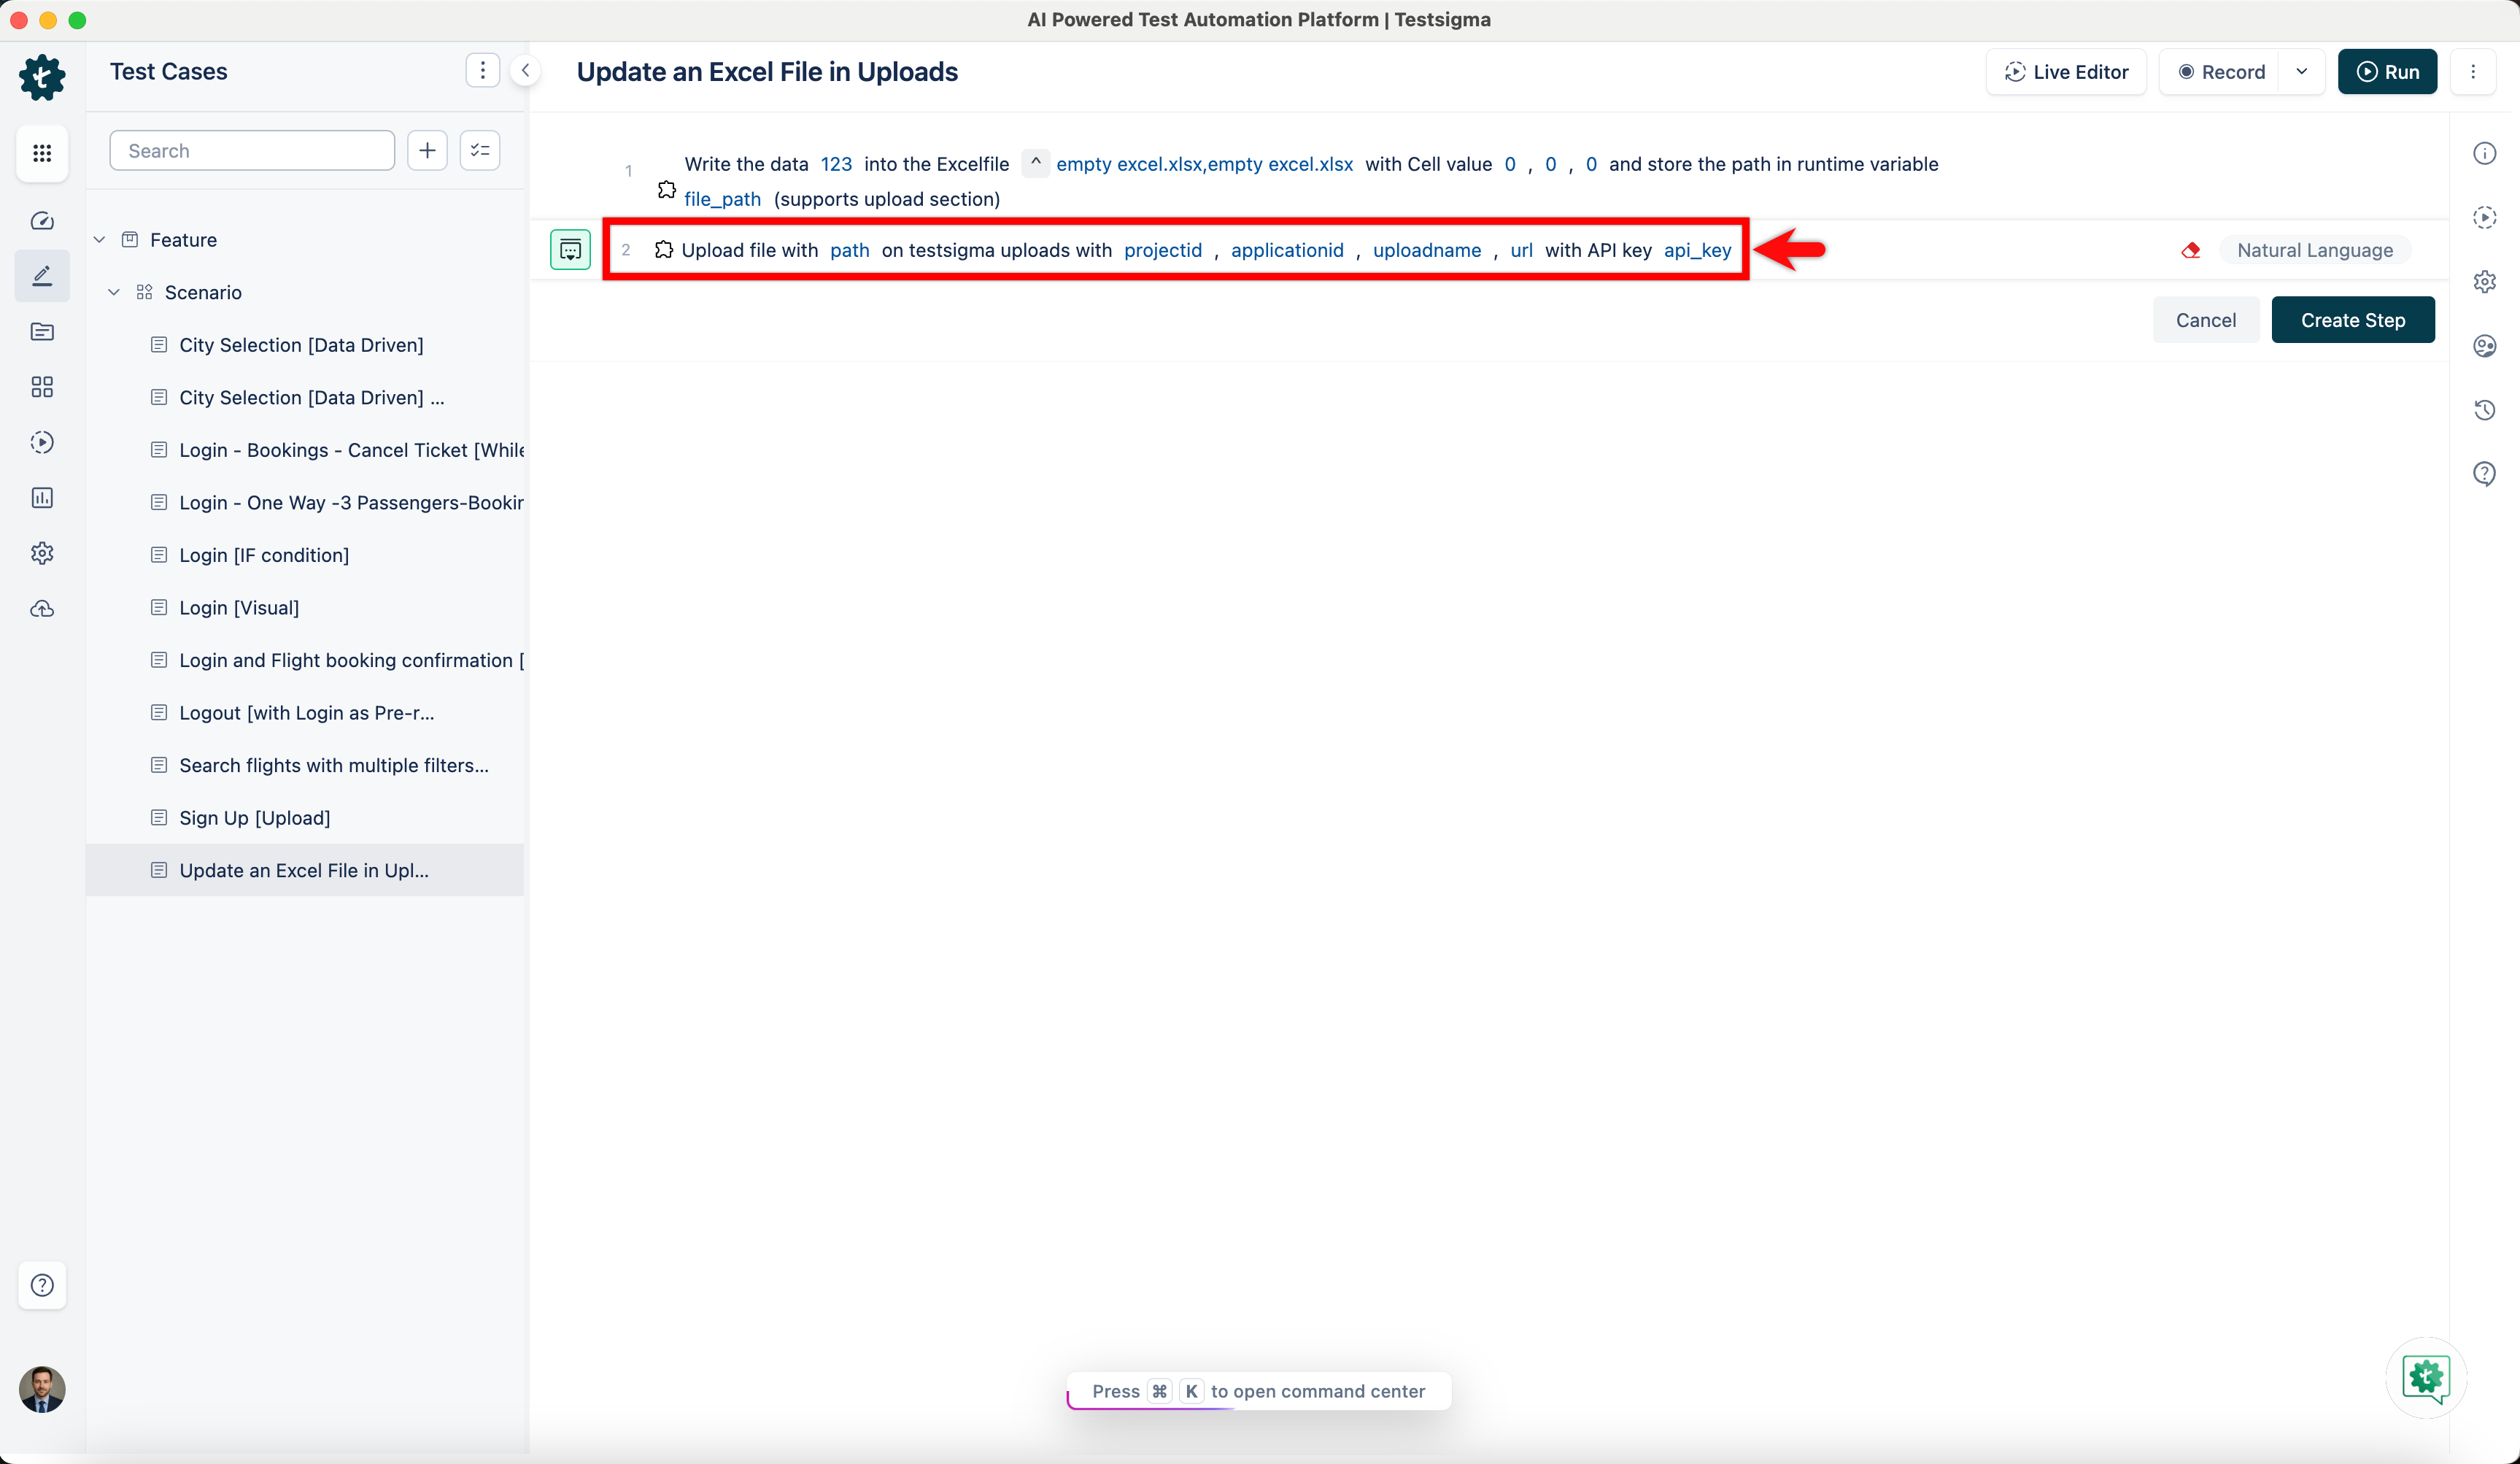
In your test case, first use the Wait the data datavalue into the Excelfile excel-path with Cell value rowNo, columnNo, sheet-index and store the path in runtime variable variable-name (supports upload section) NLP to enter the value that you want to add to the excel file.
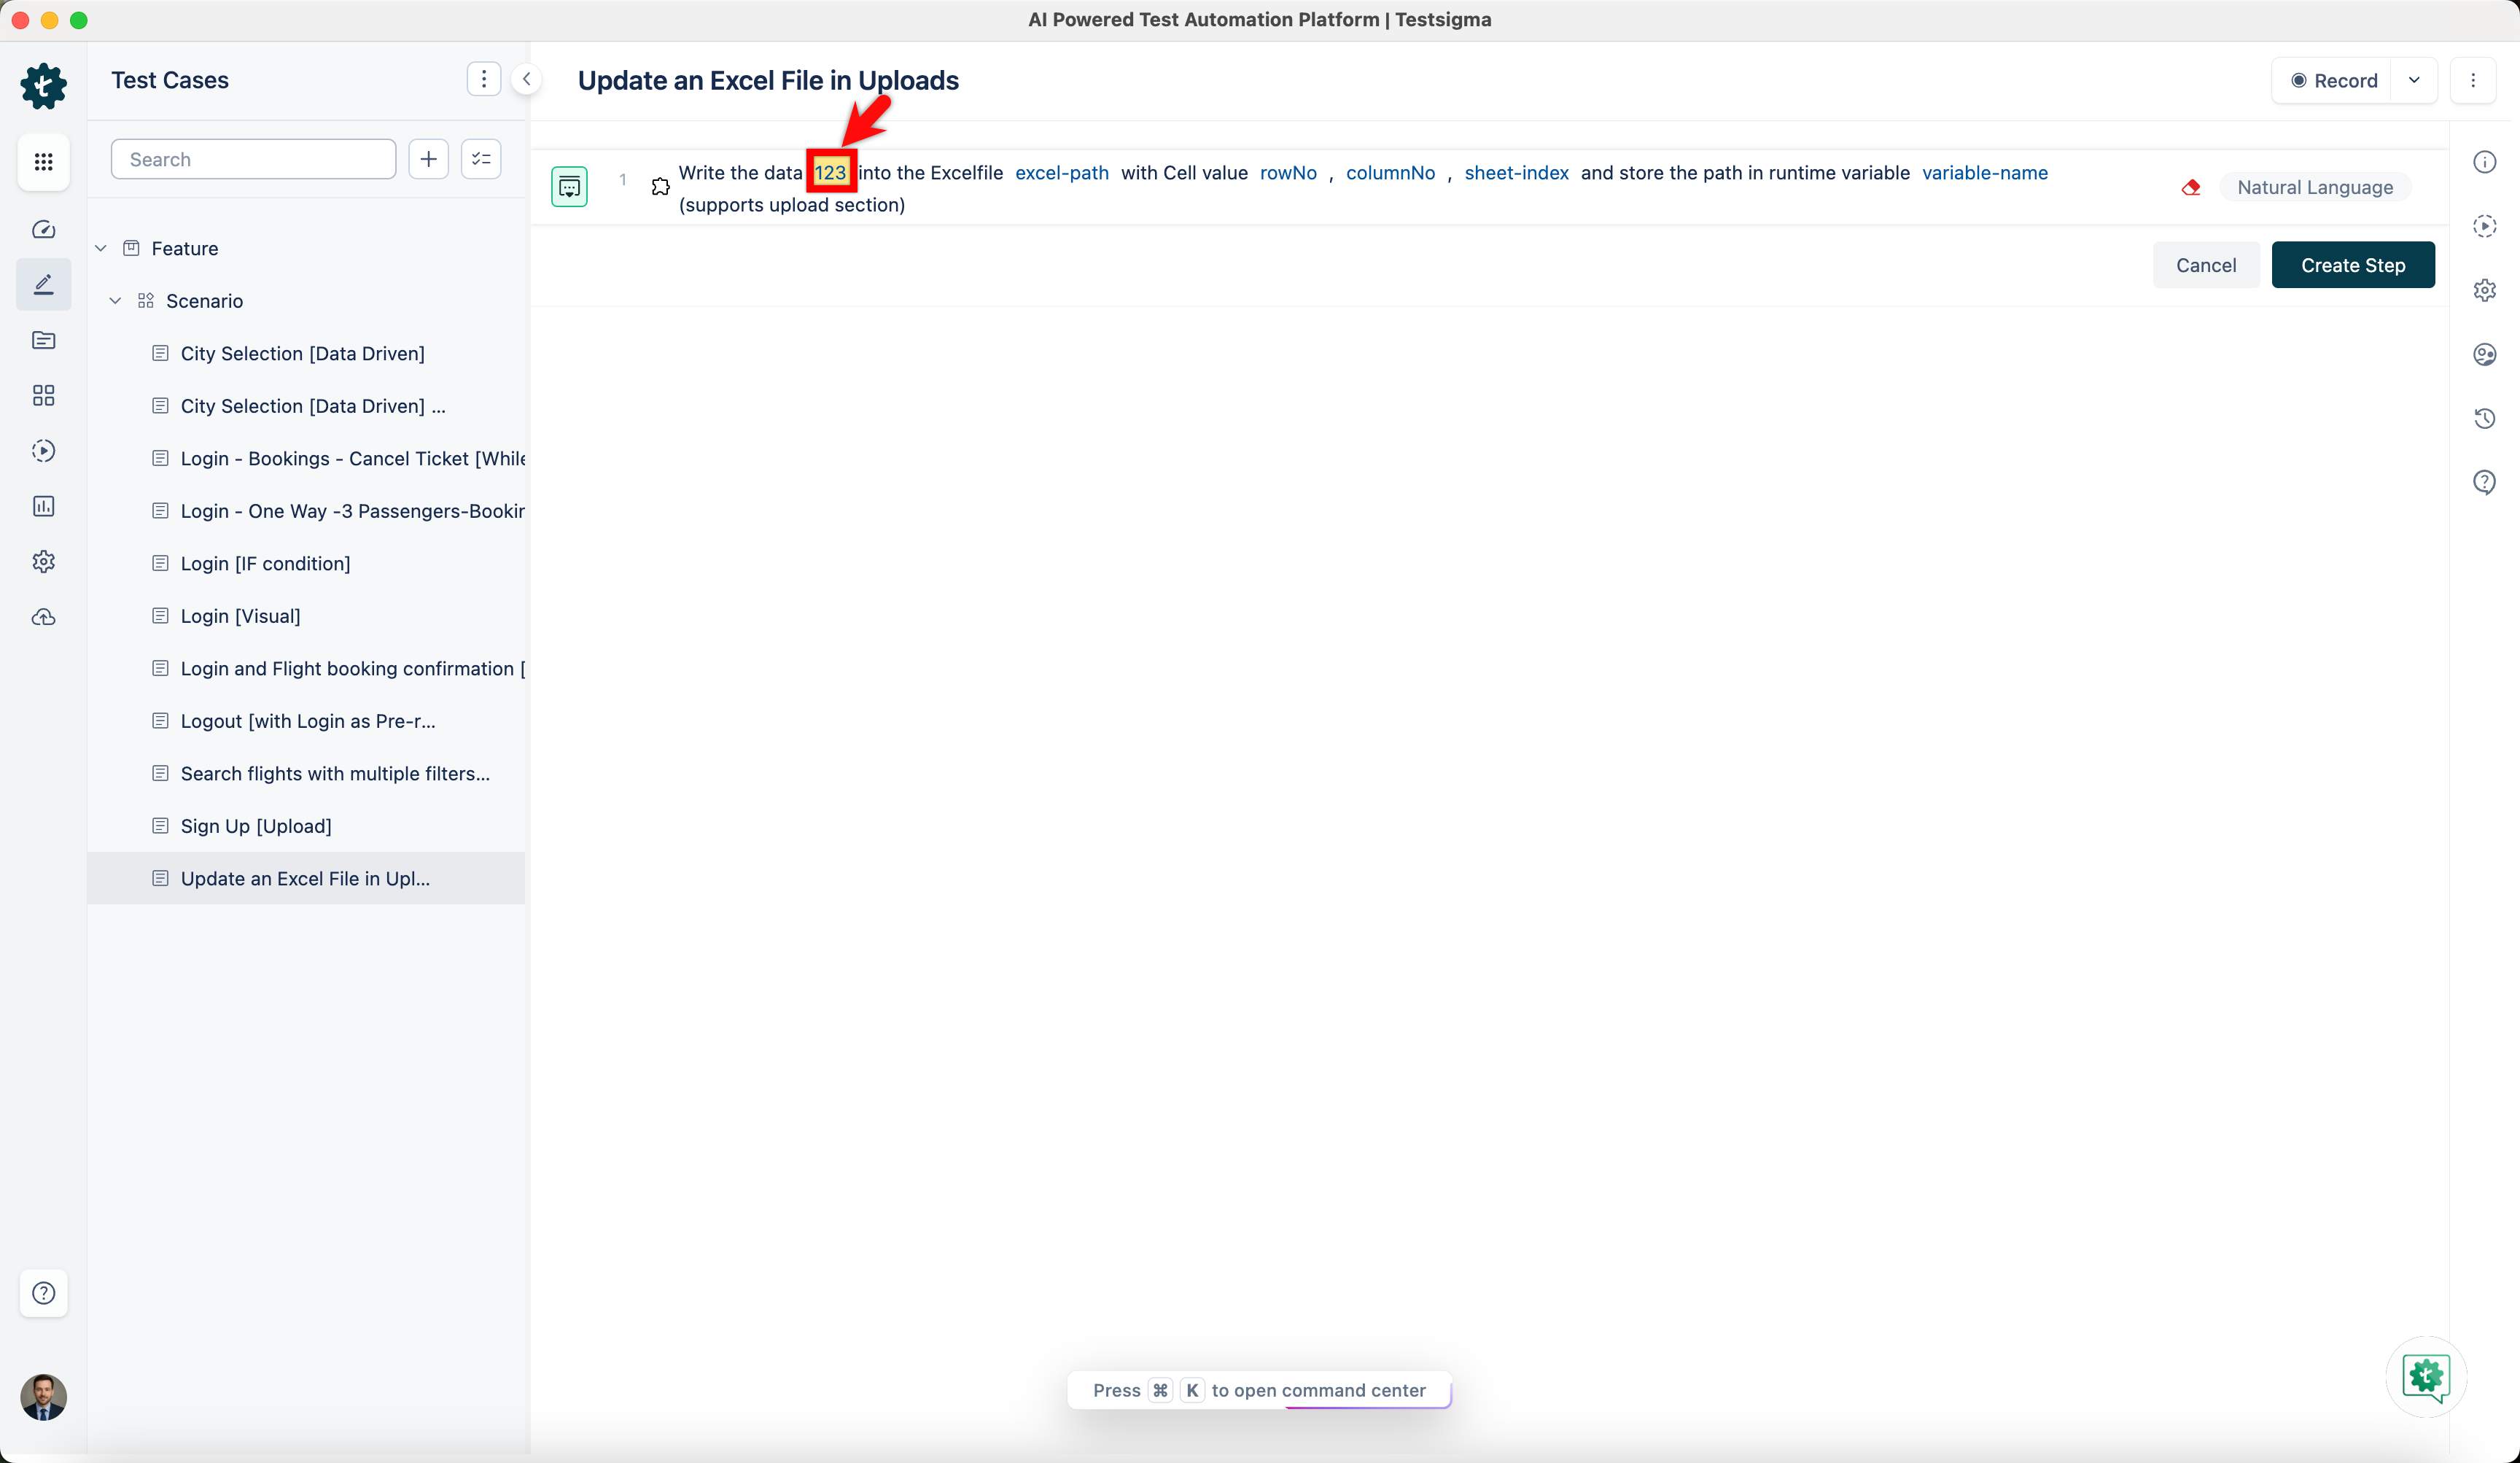
- Enter the value you want to write into the datavalue placeholder.
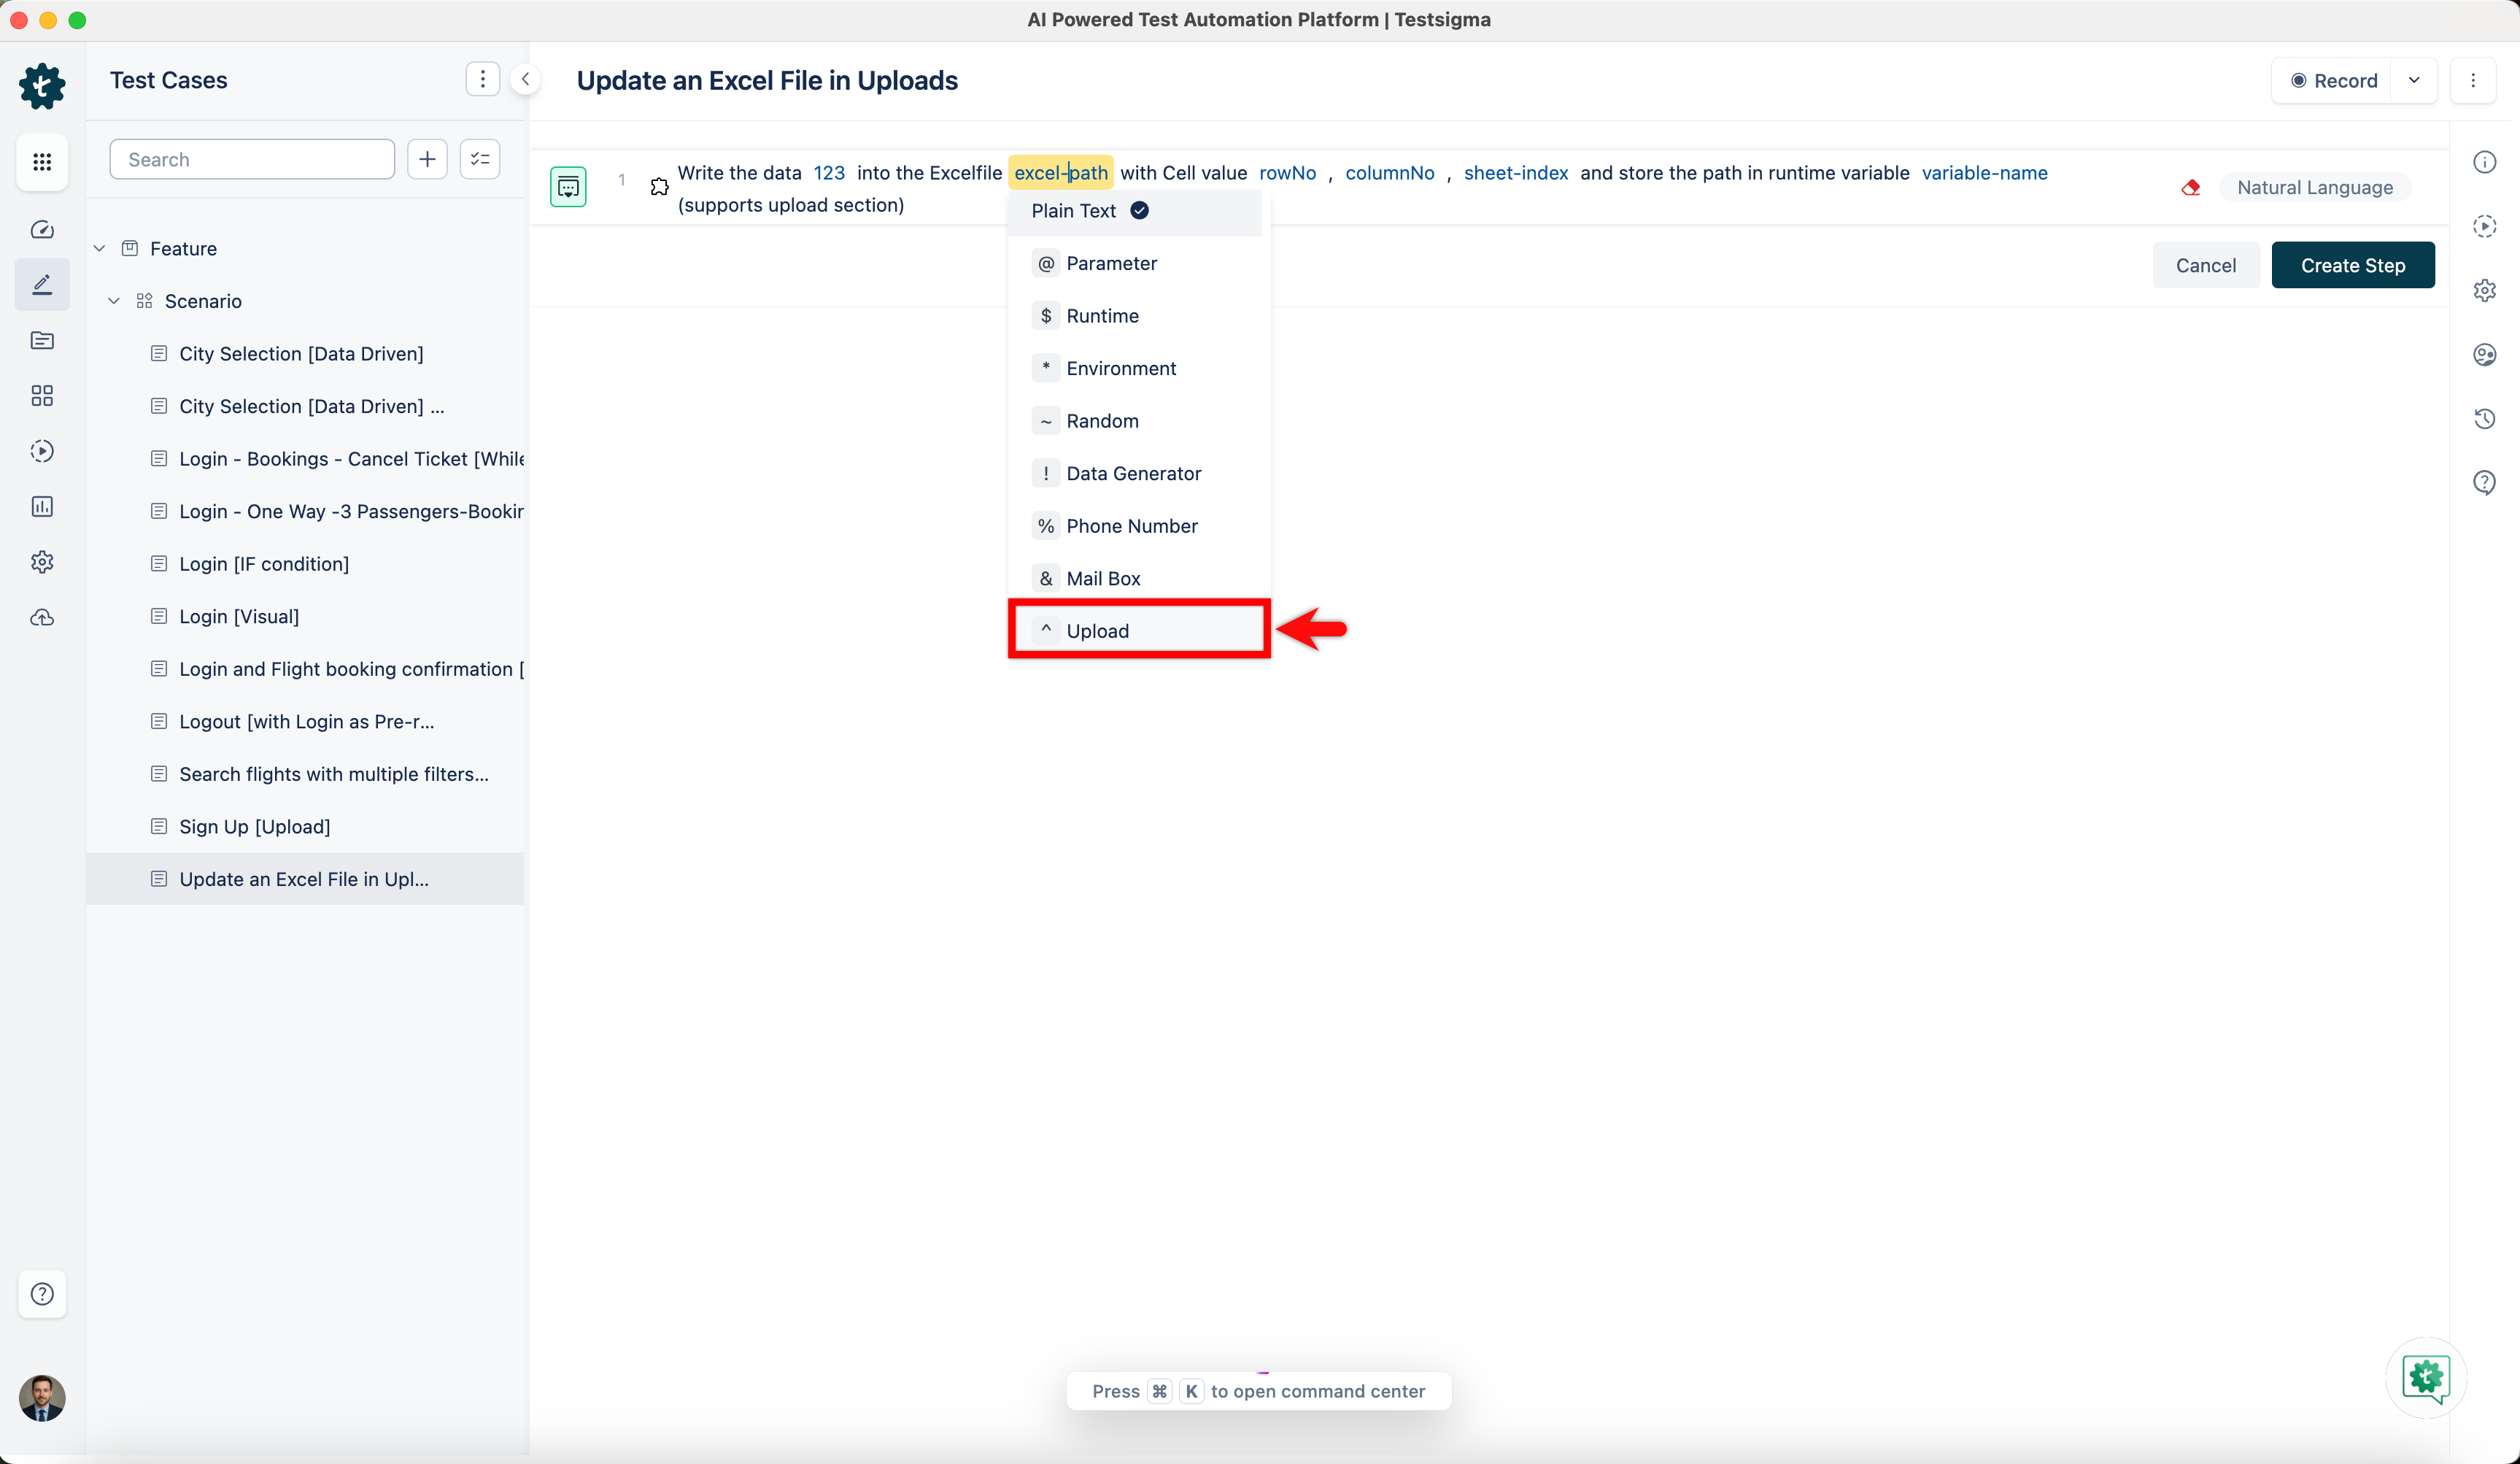
- Click the excel-path placeholder and replace it by selecting Upload from the Test Data Types dropdown.
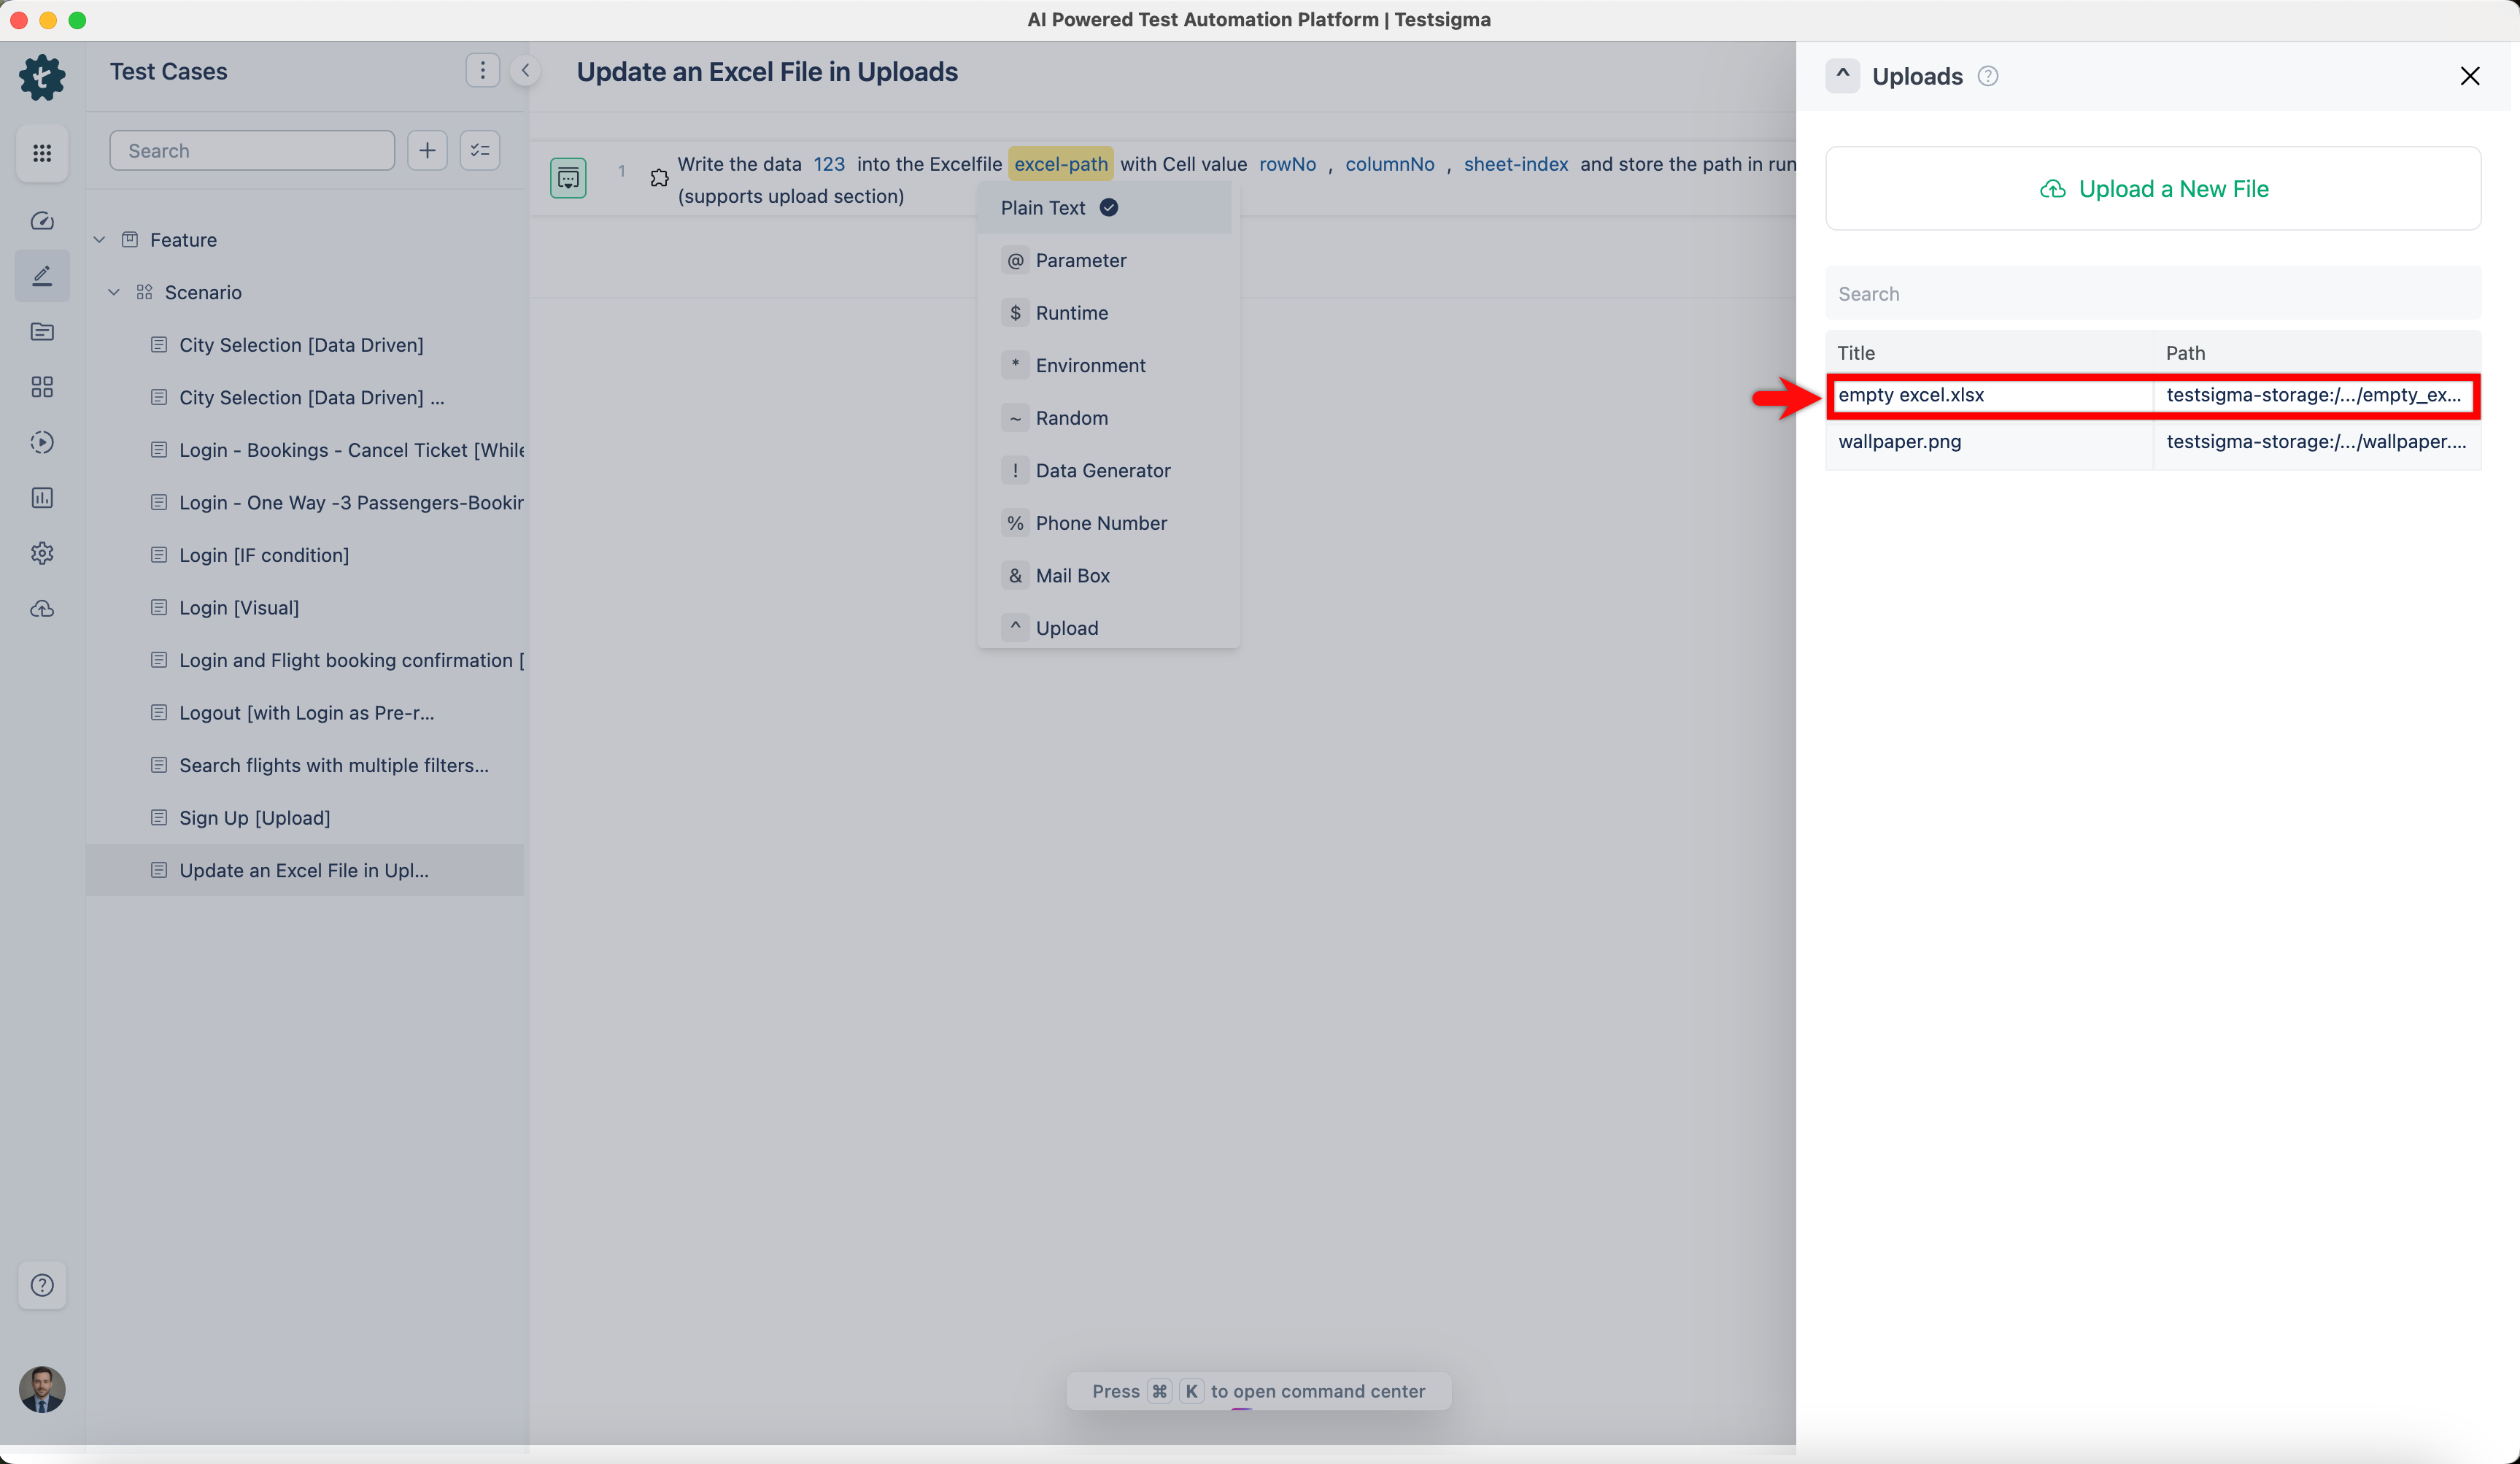
- In the Uploads overlay, choose the Excel file you want to update.
- Specify the row number in the rowNo placeholder.
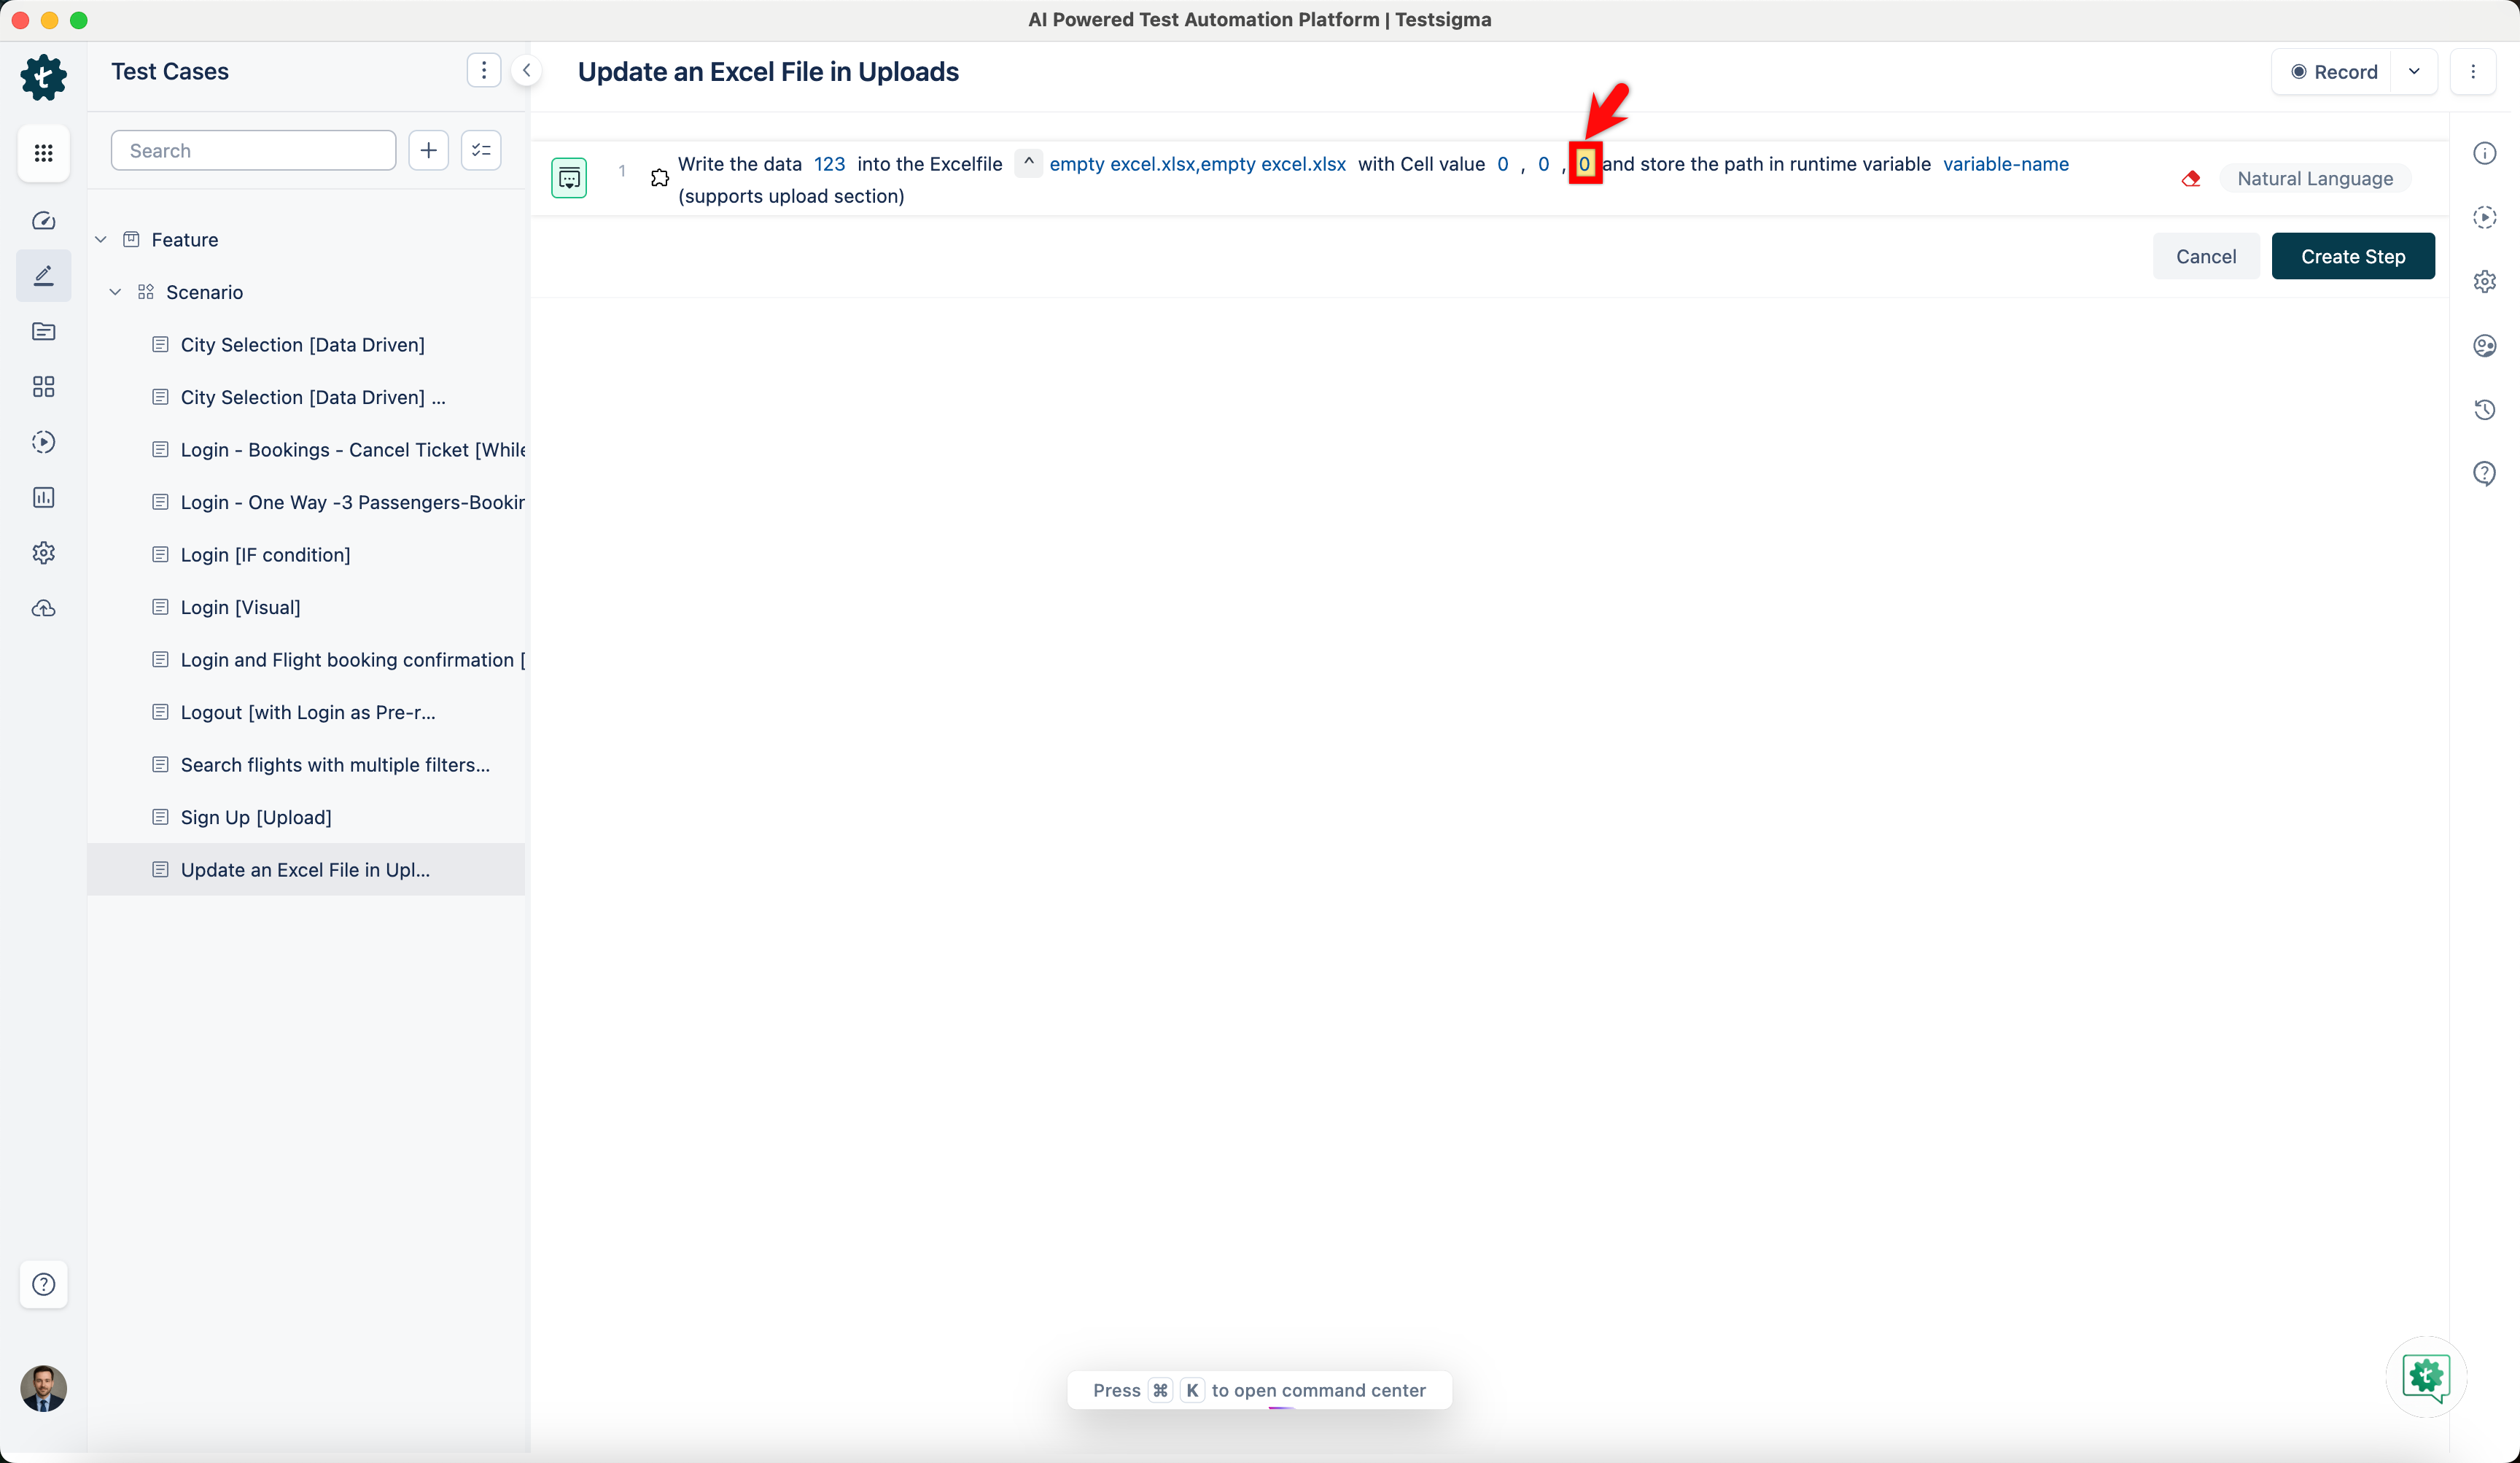
- Specify the column number in the columnNo placeholder.
- Specify the sheet number in the sheet-index placeholder.
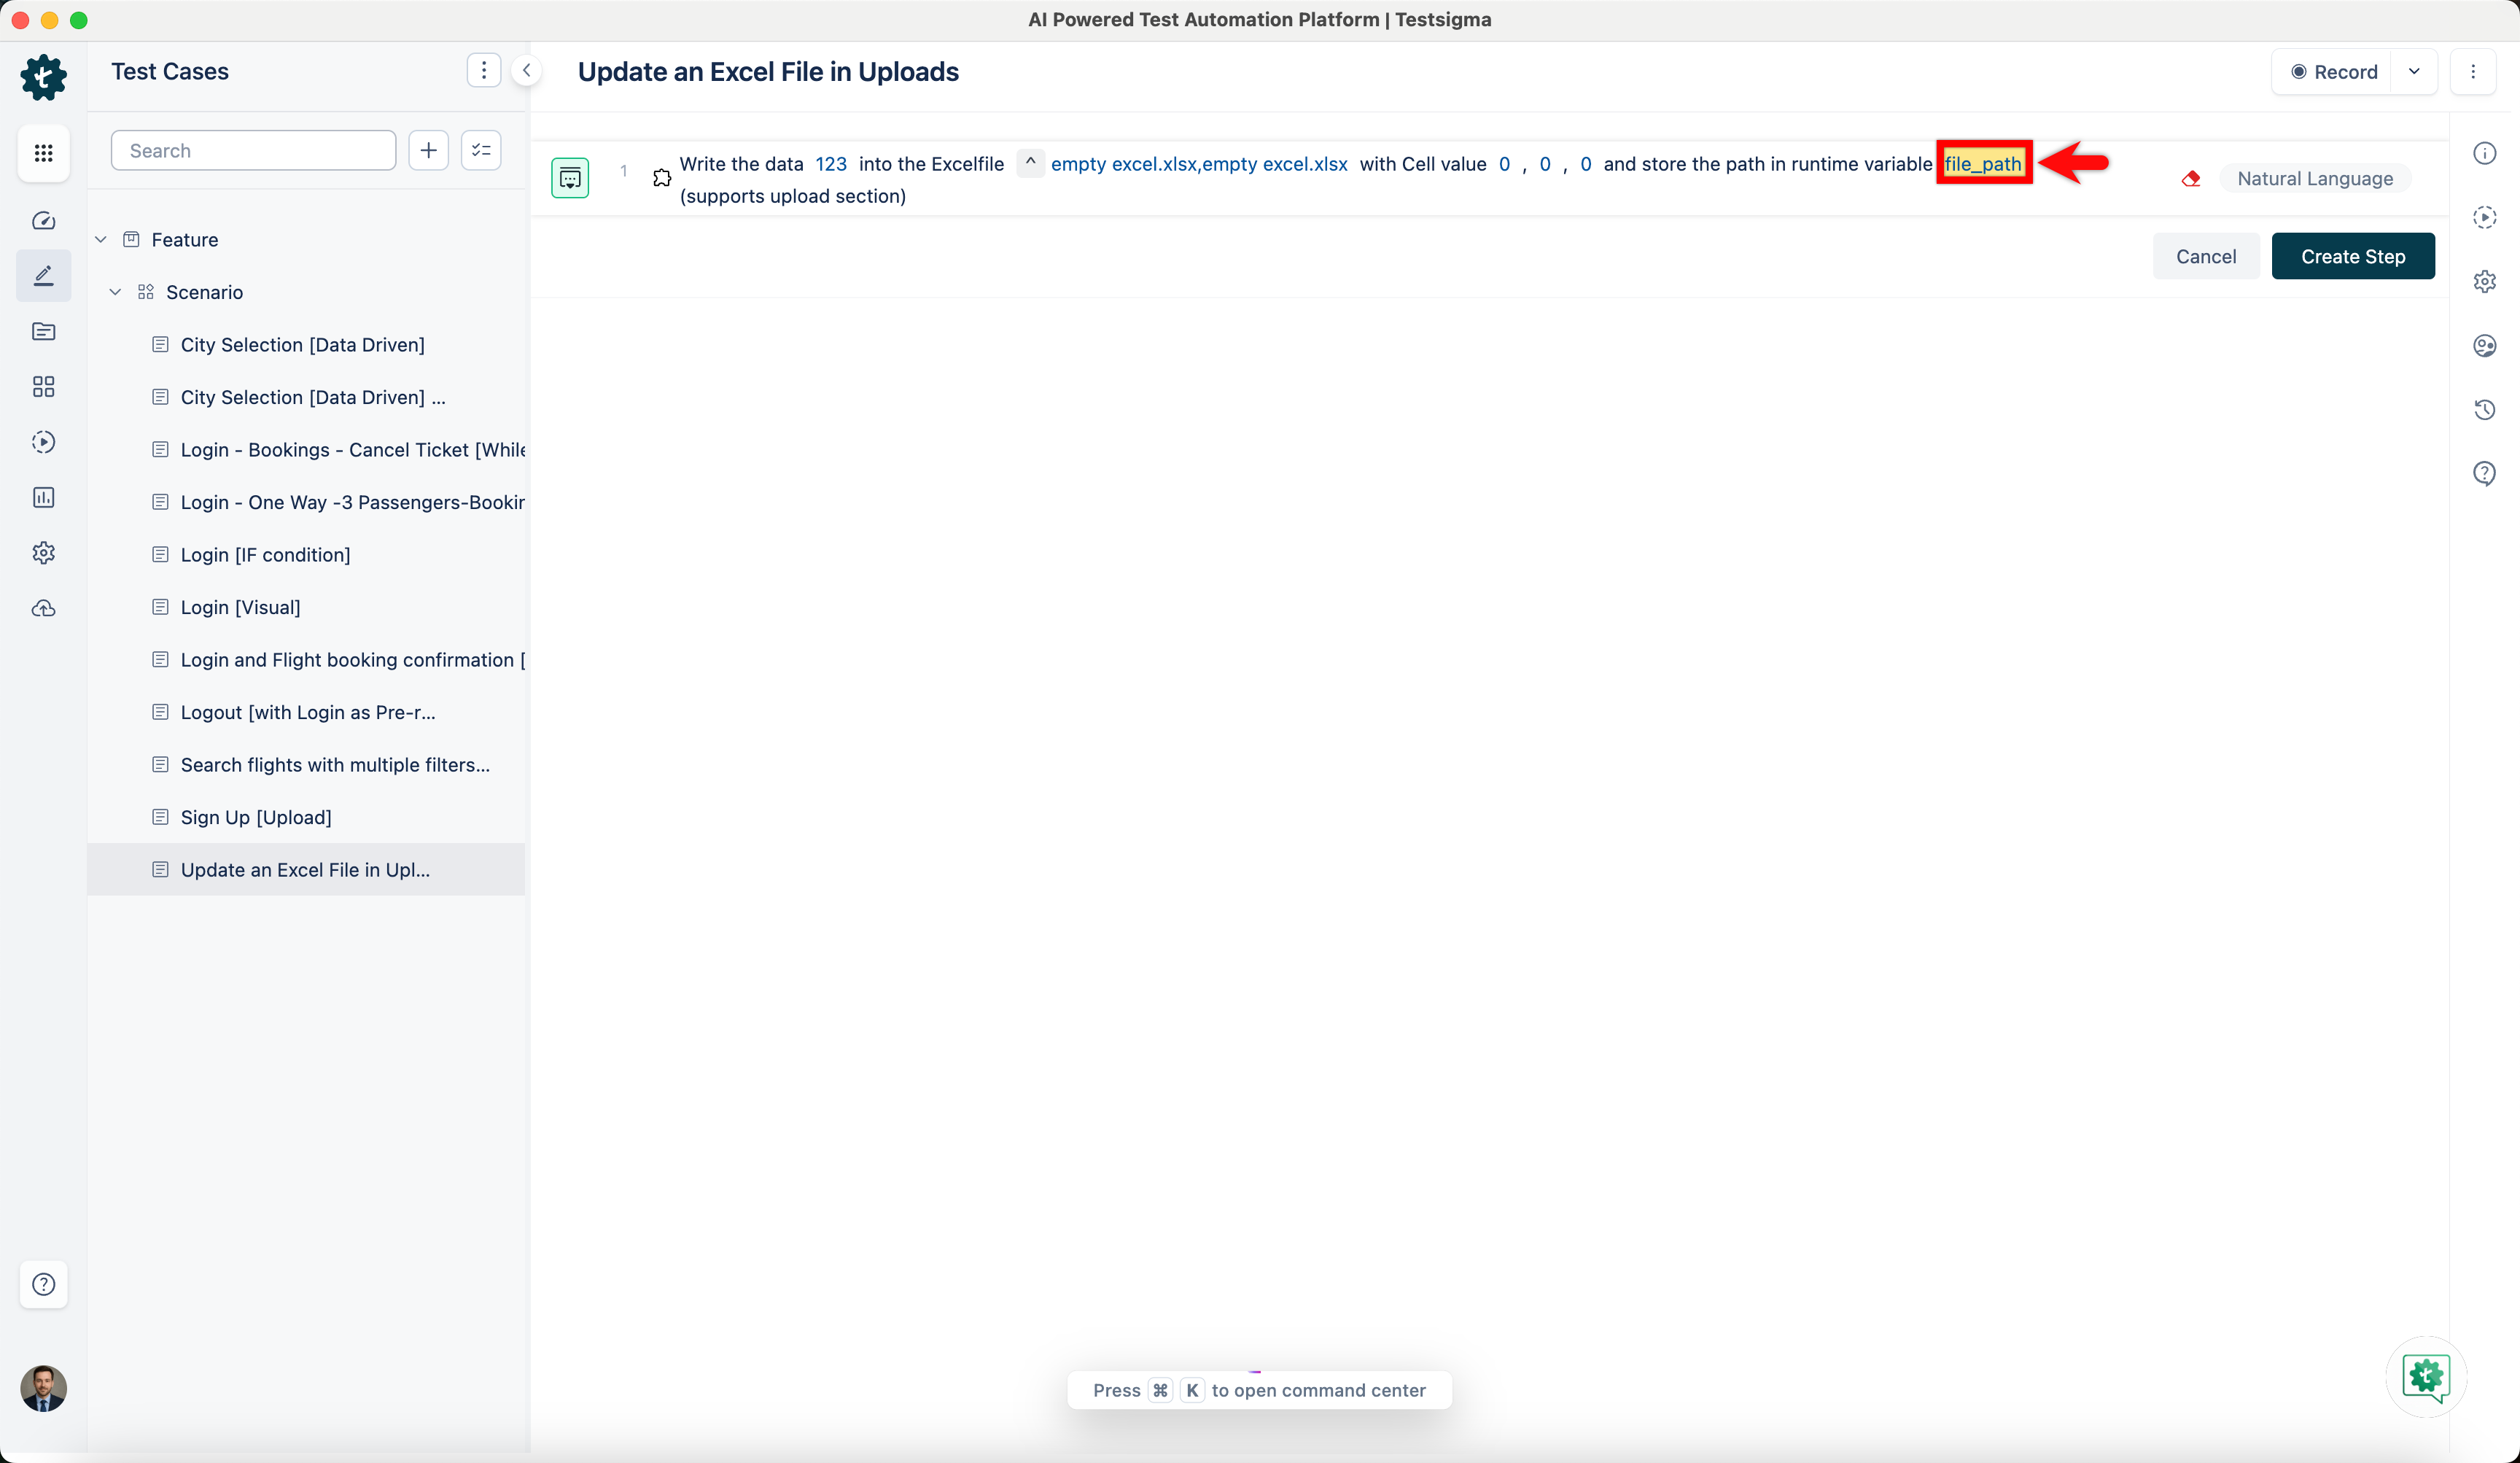
- Enter a variable name in the variable-name placeholder.
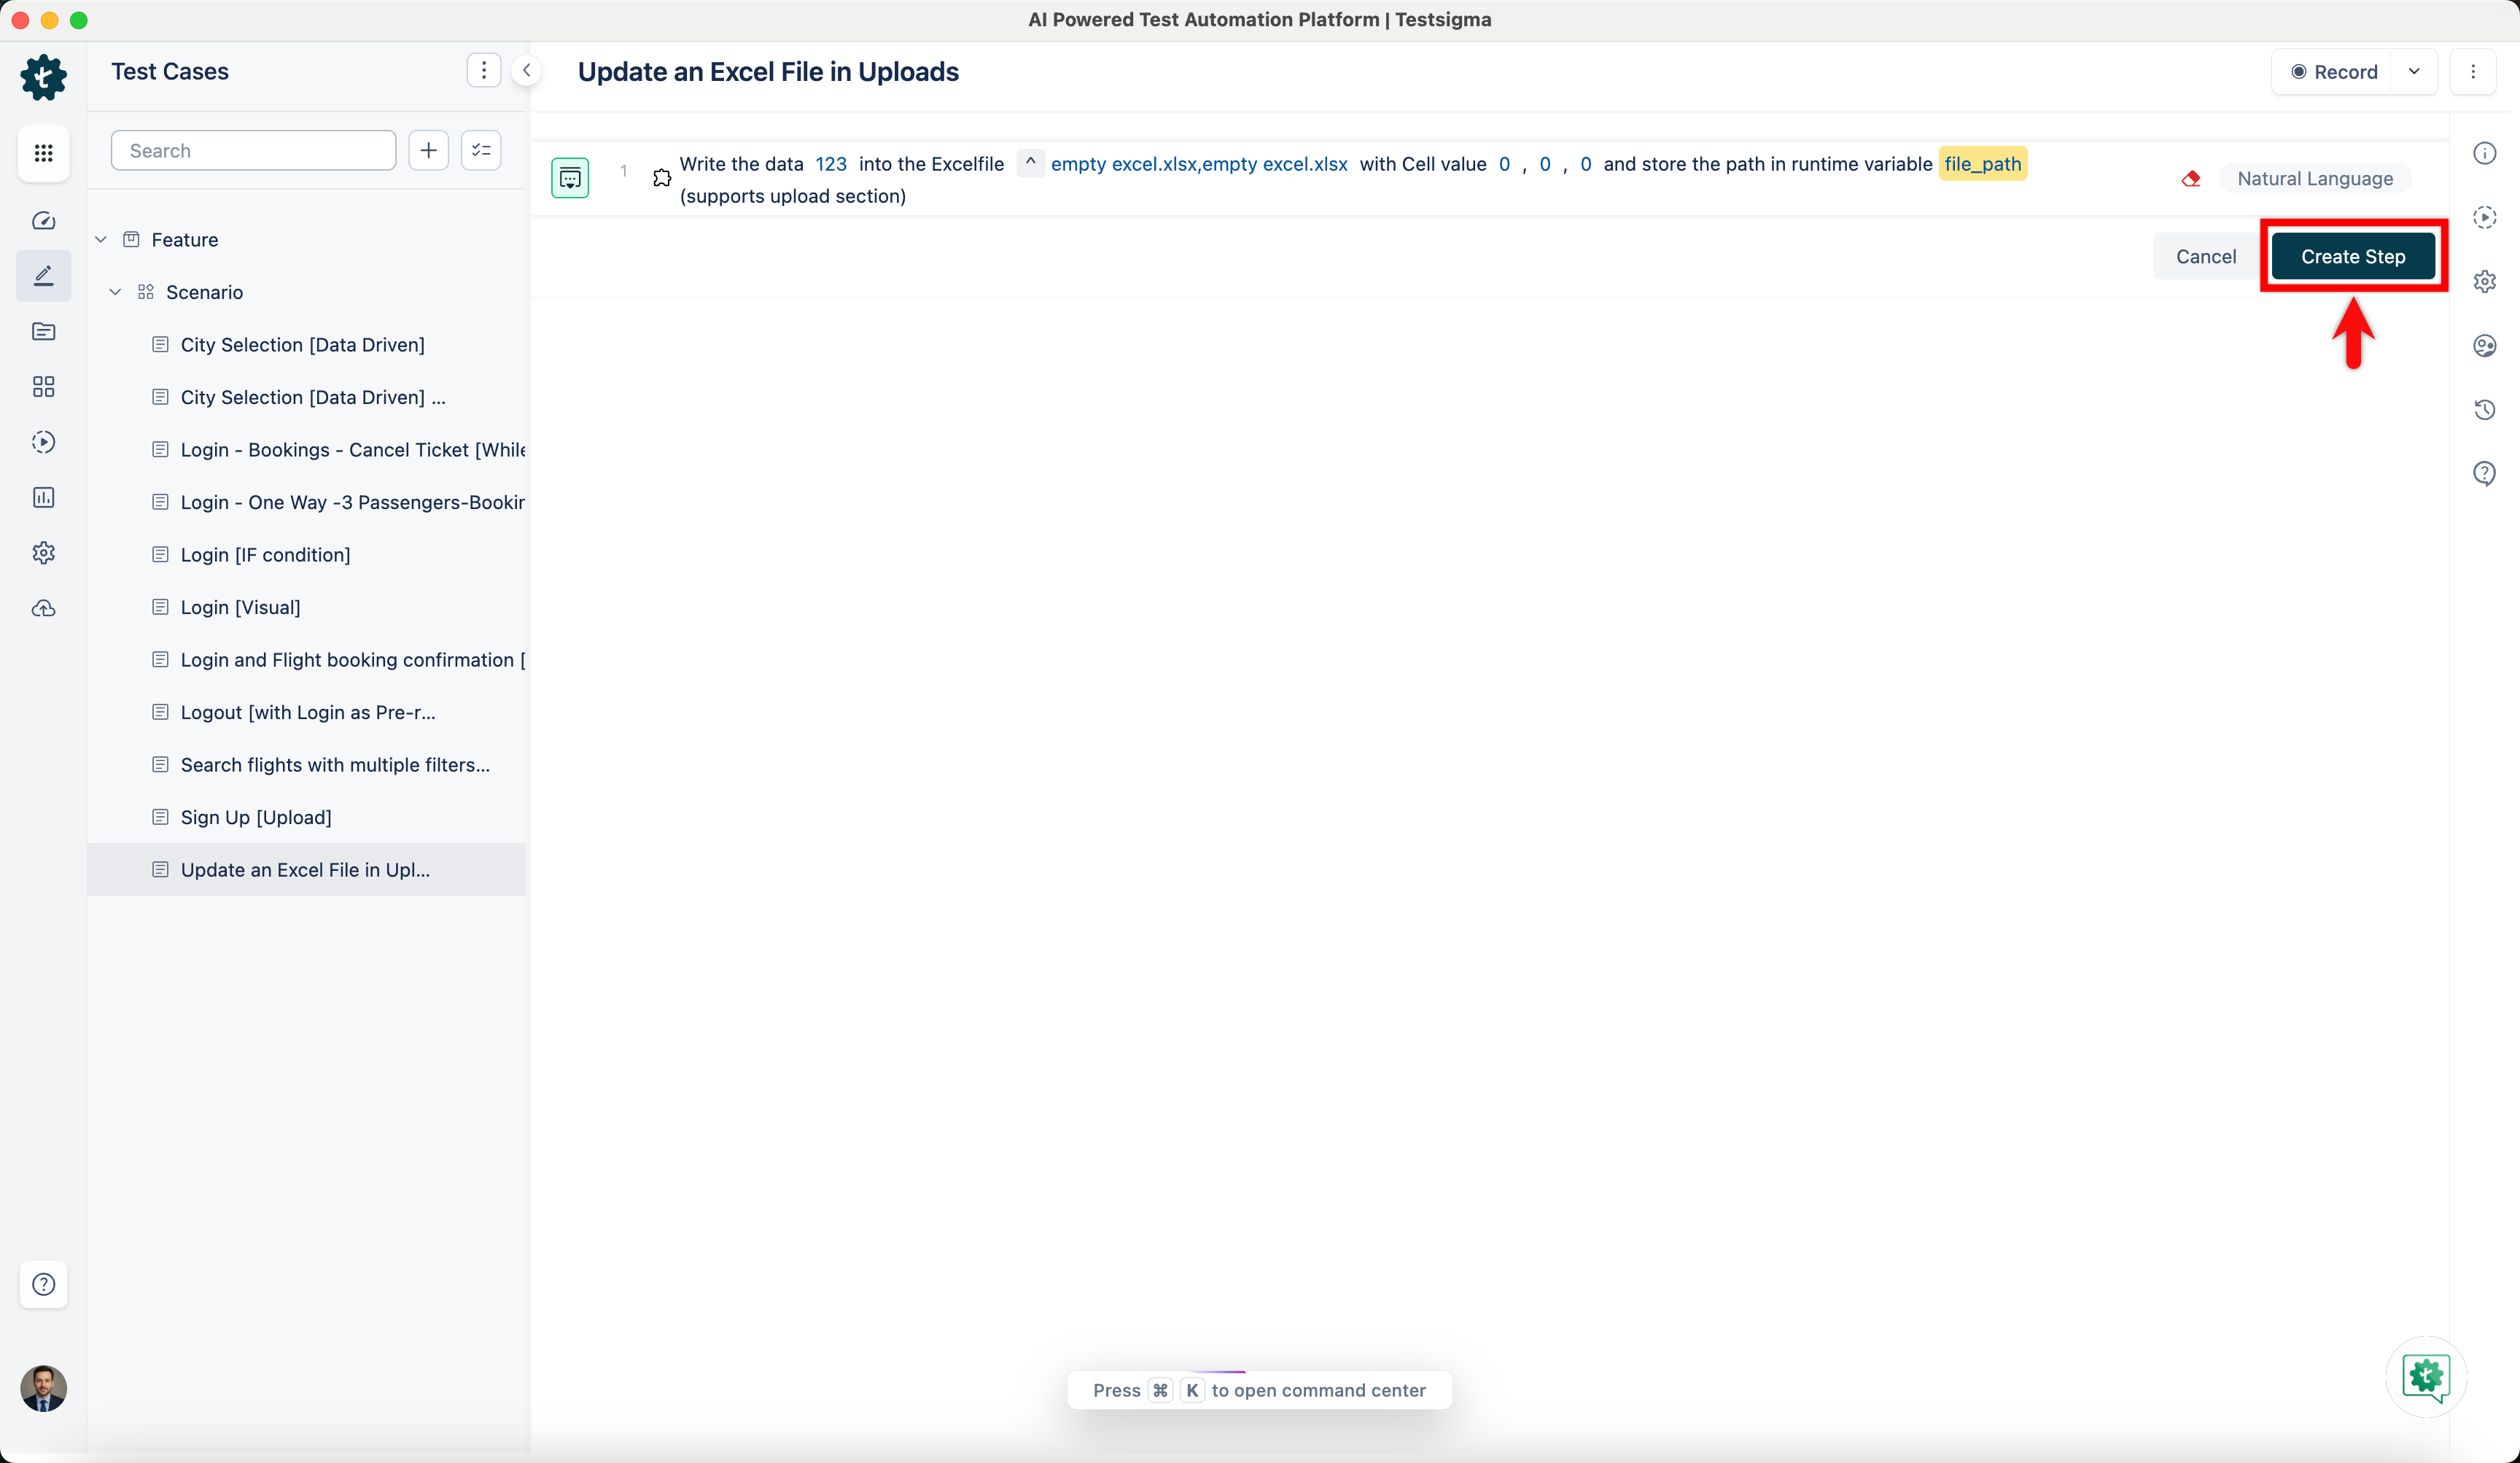
- Click Create Step.
- Enter the value you want to write into the datavalue placeholder.
-
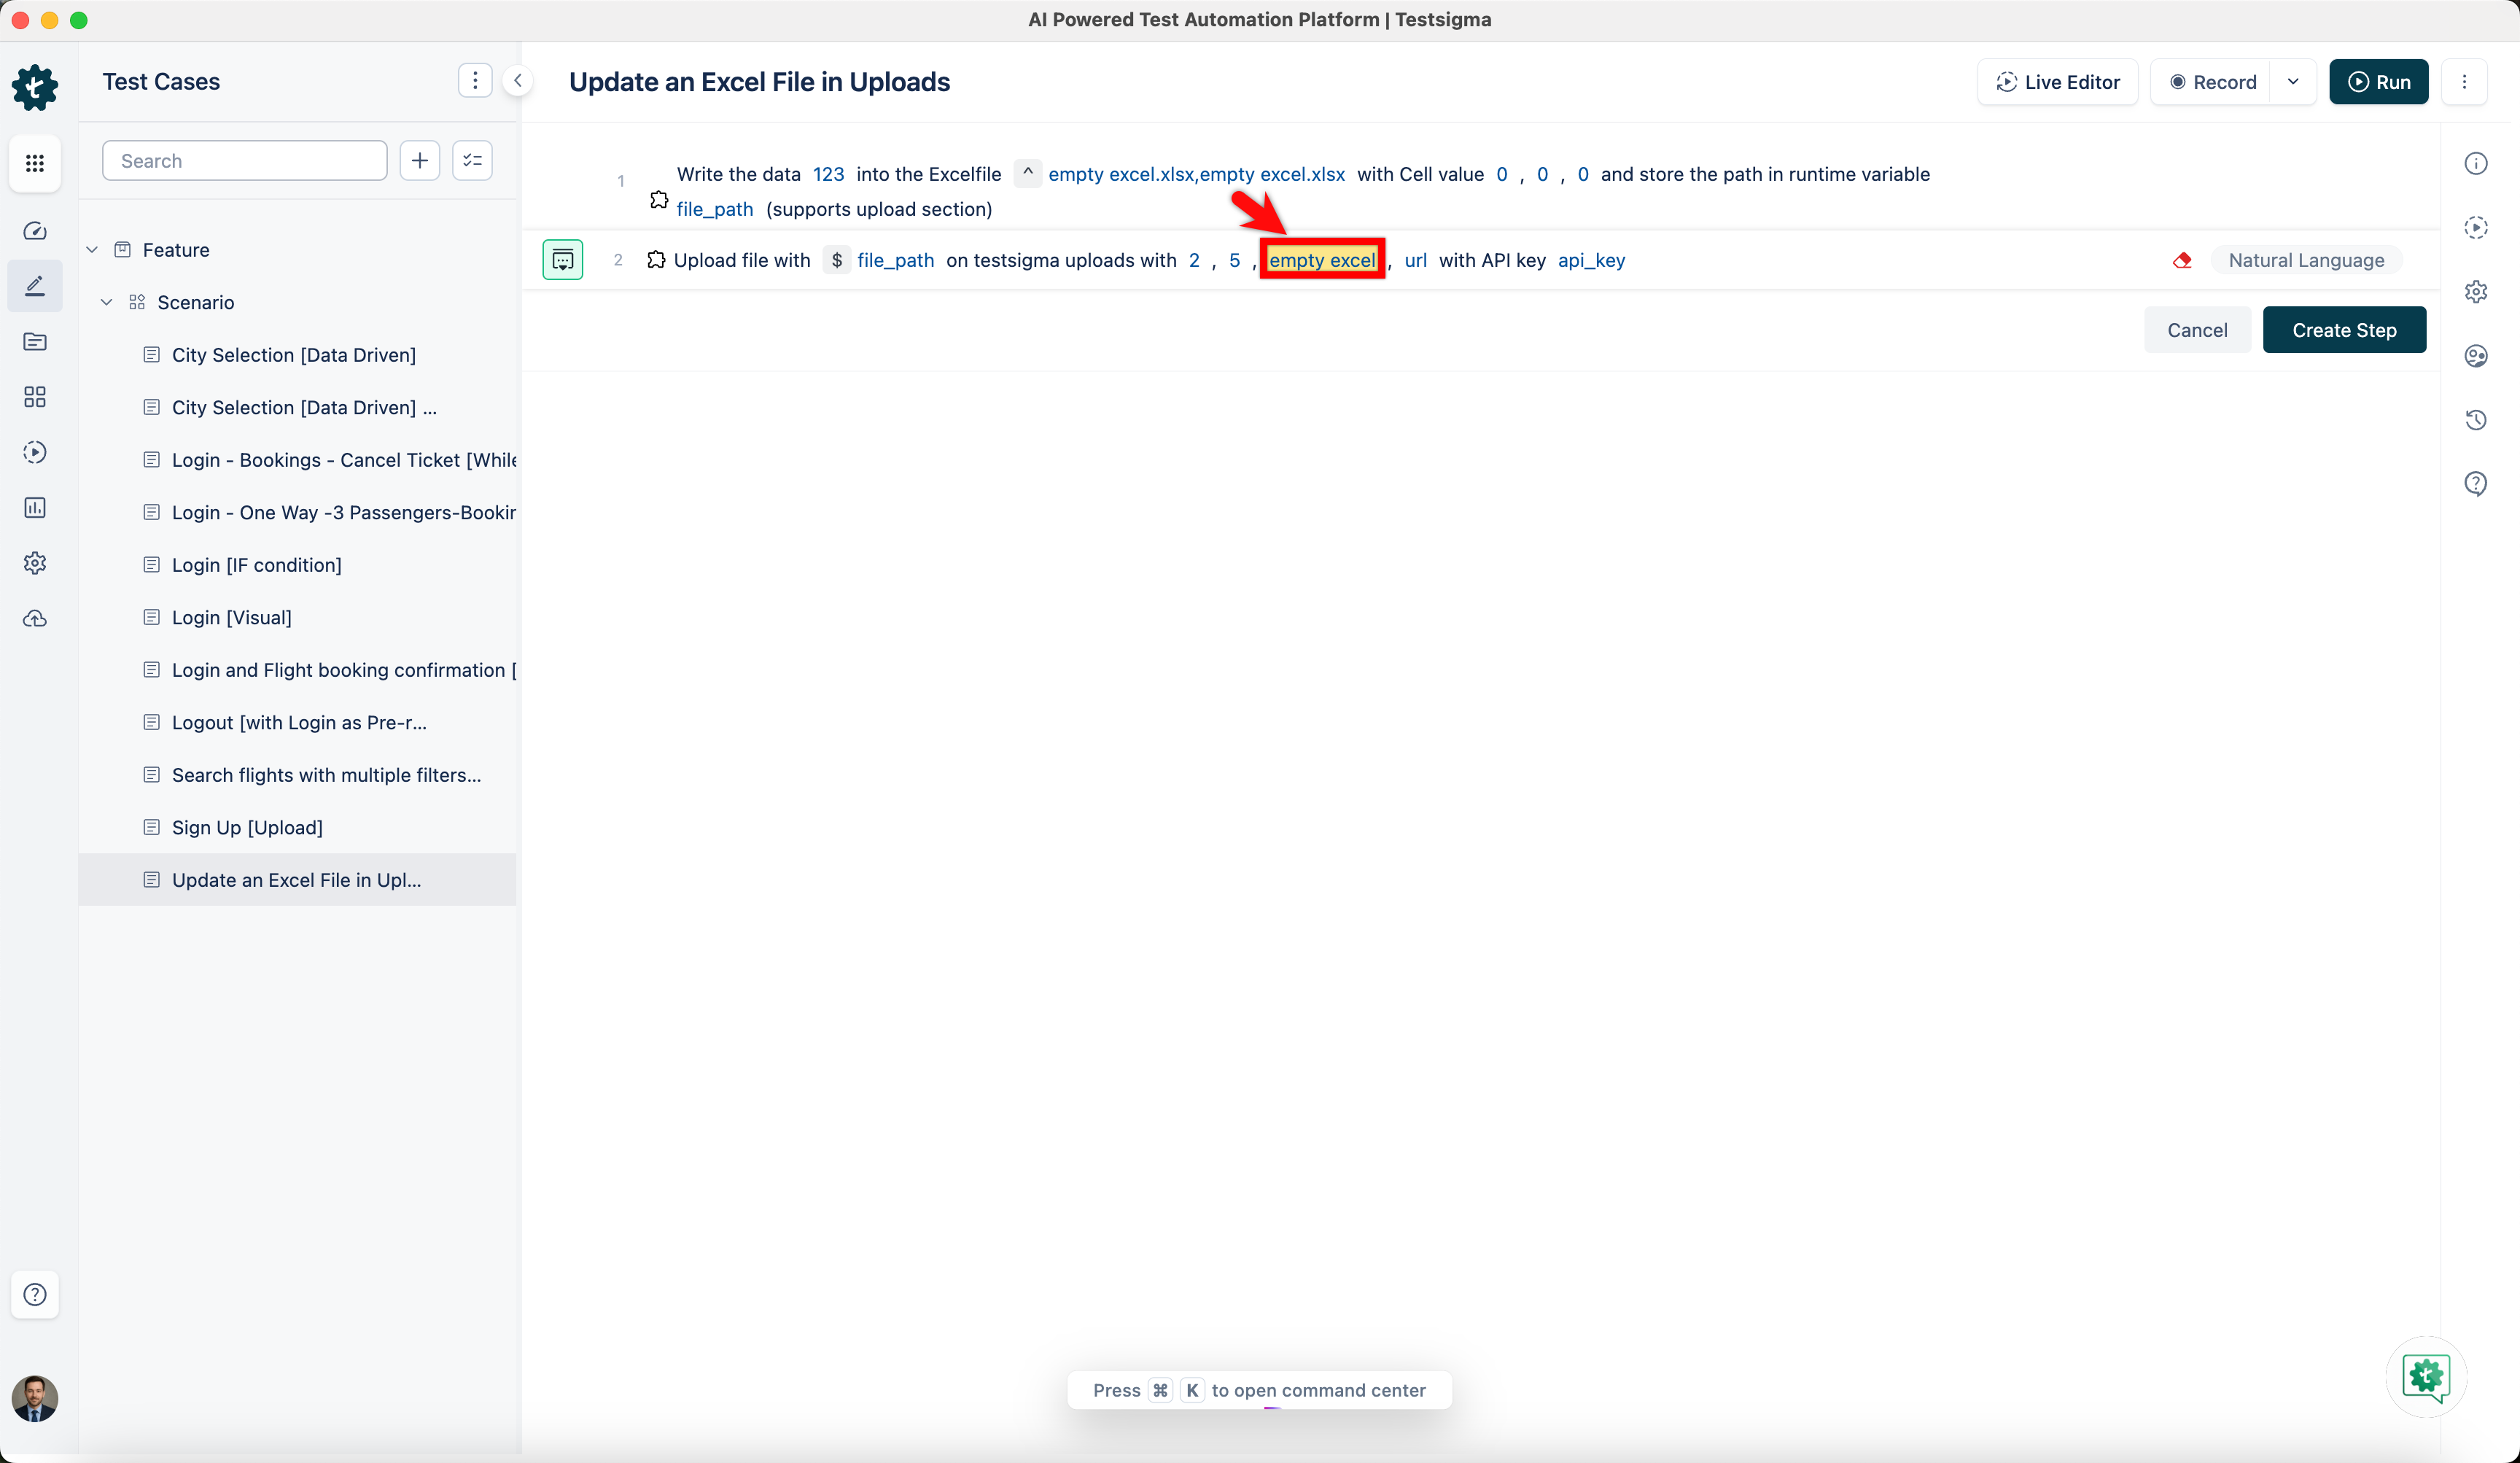
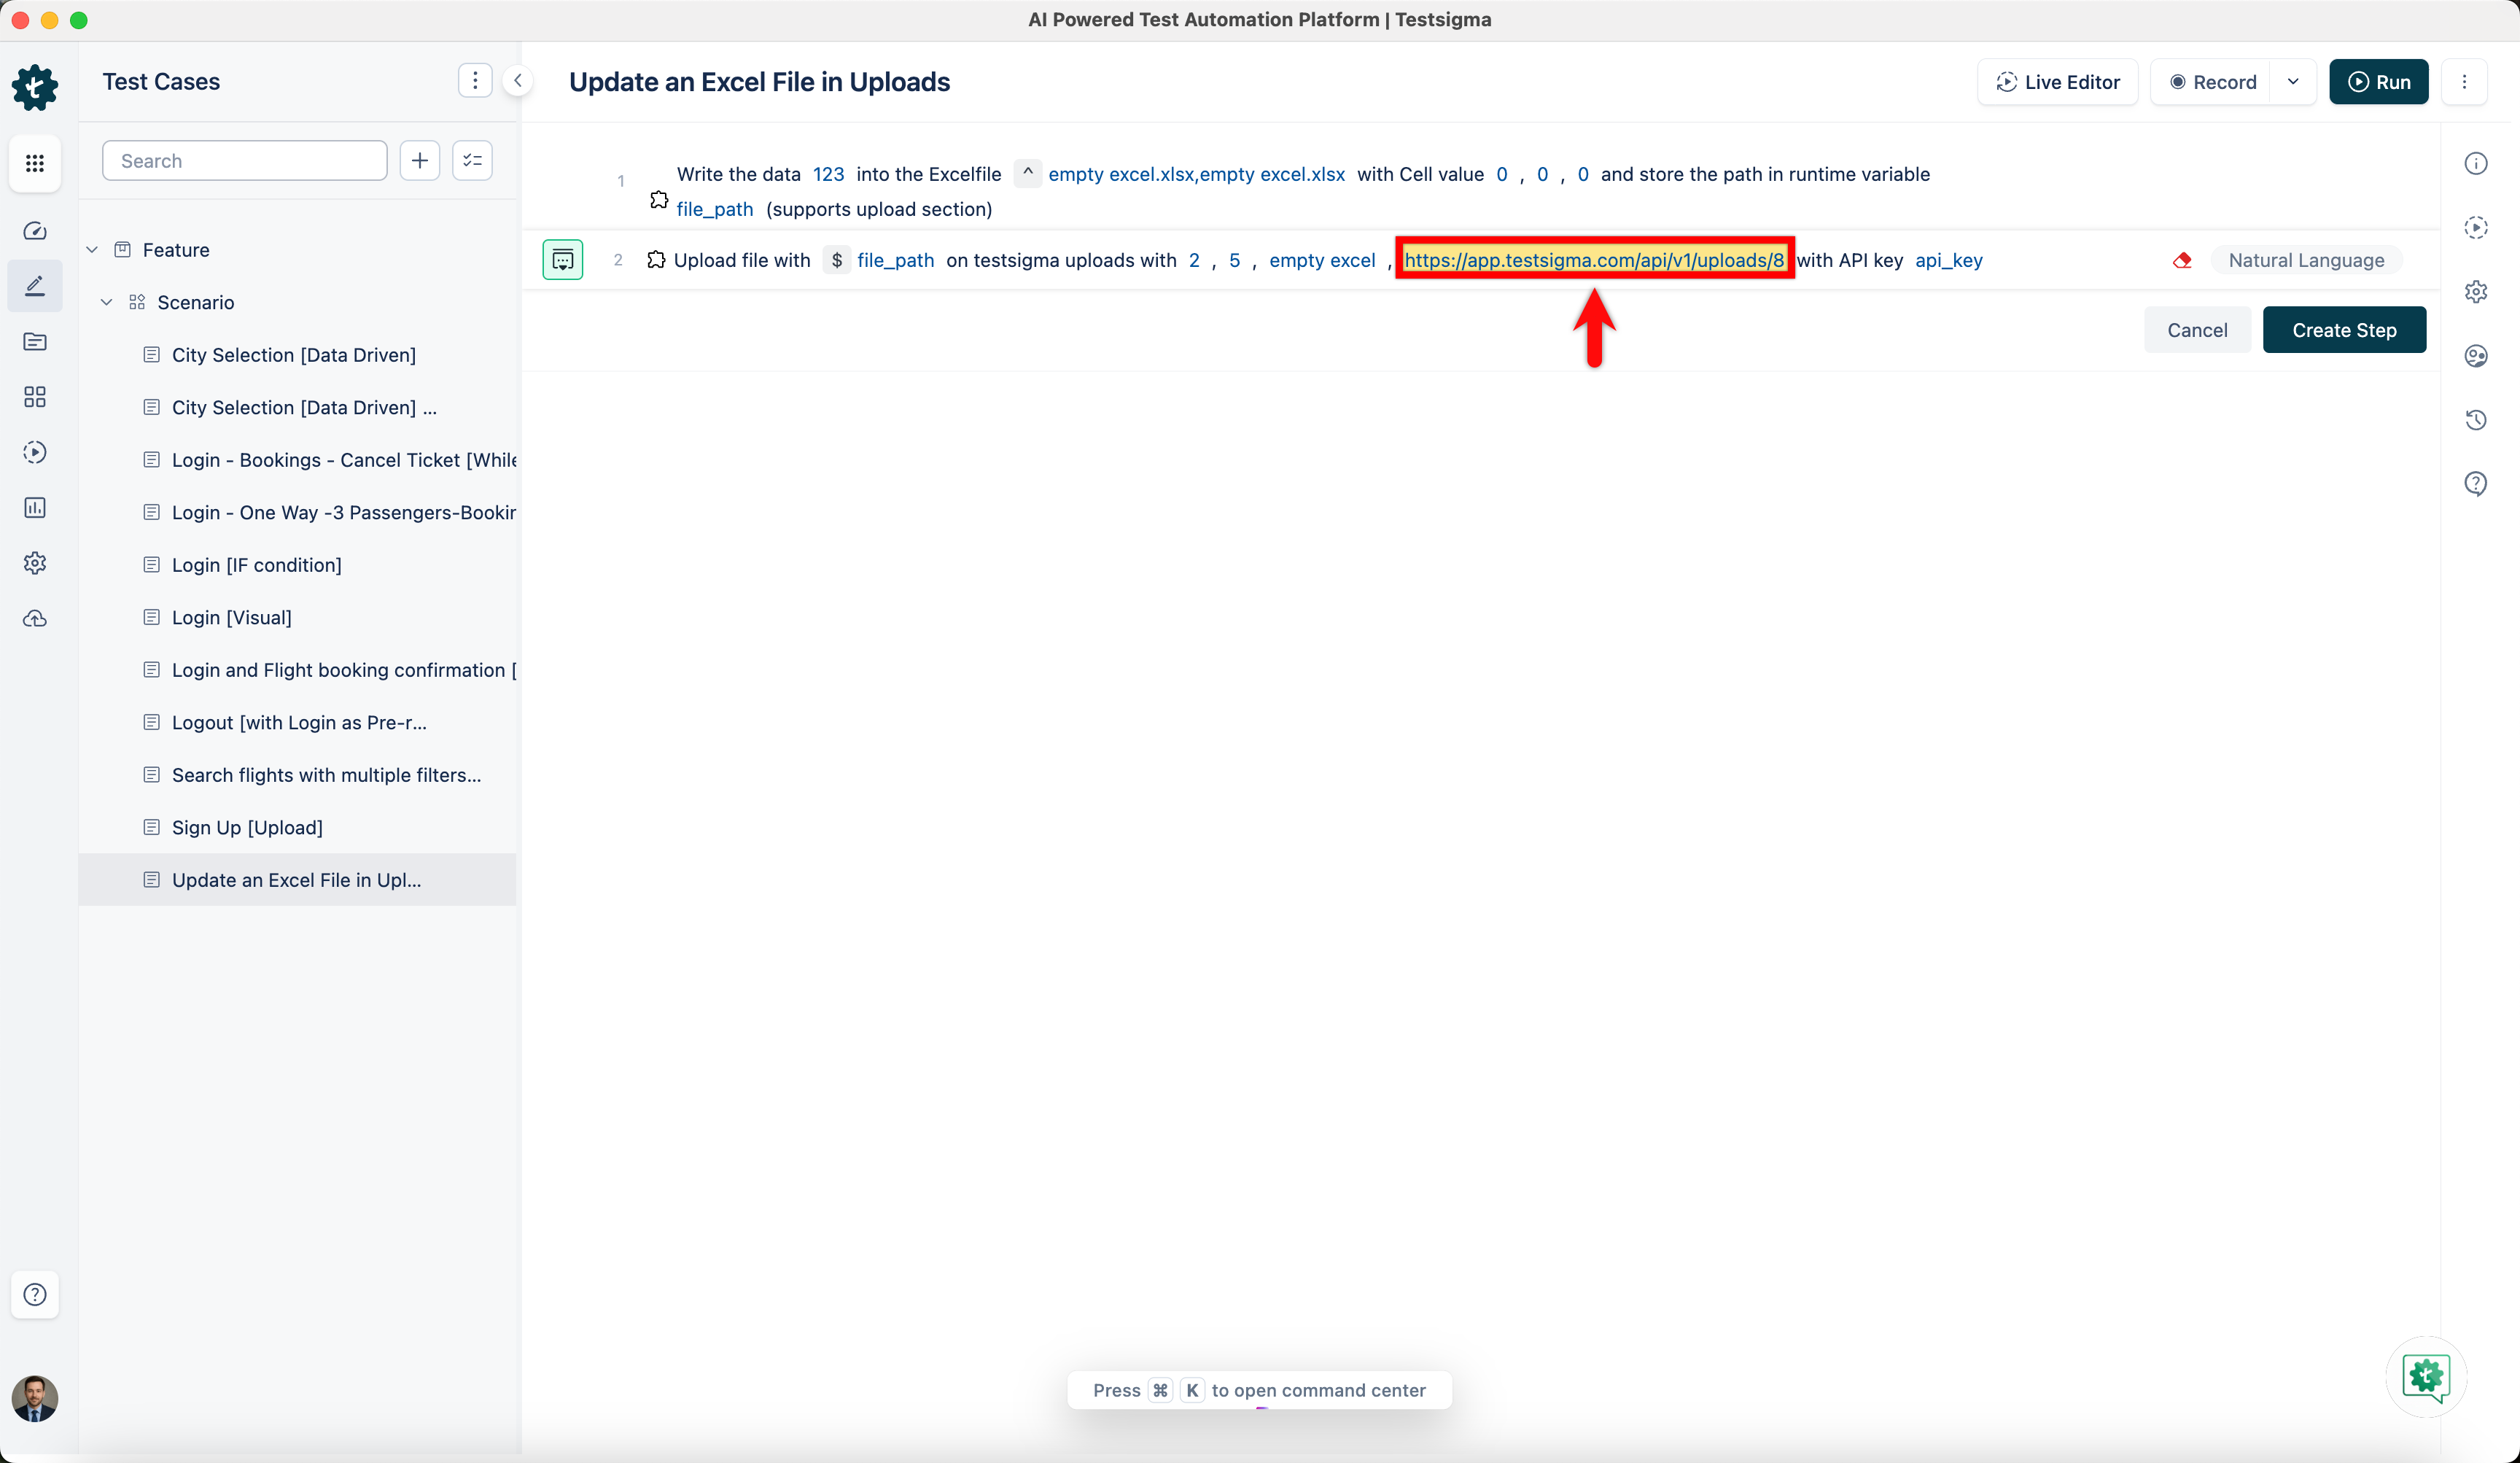
Secondly, use the Upload file with path on testigma uploads with projectid, applicationid, uploadname, url with API key api_key NLP to push the updated file back to your project.
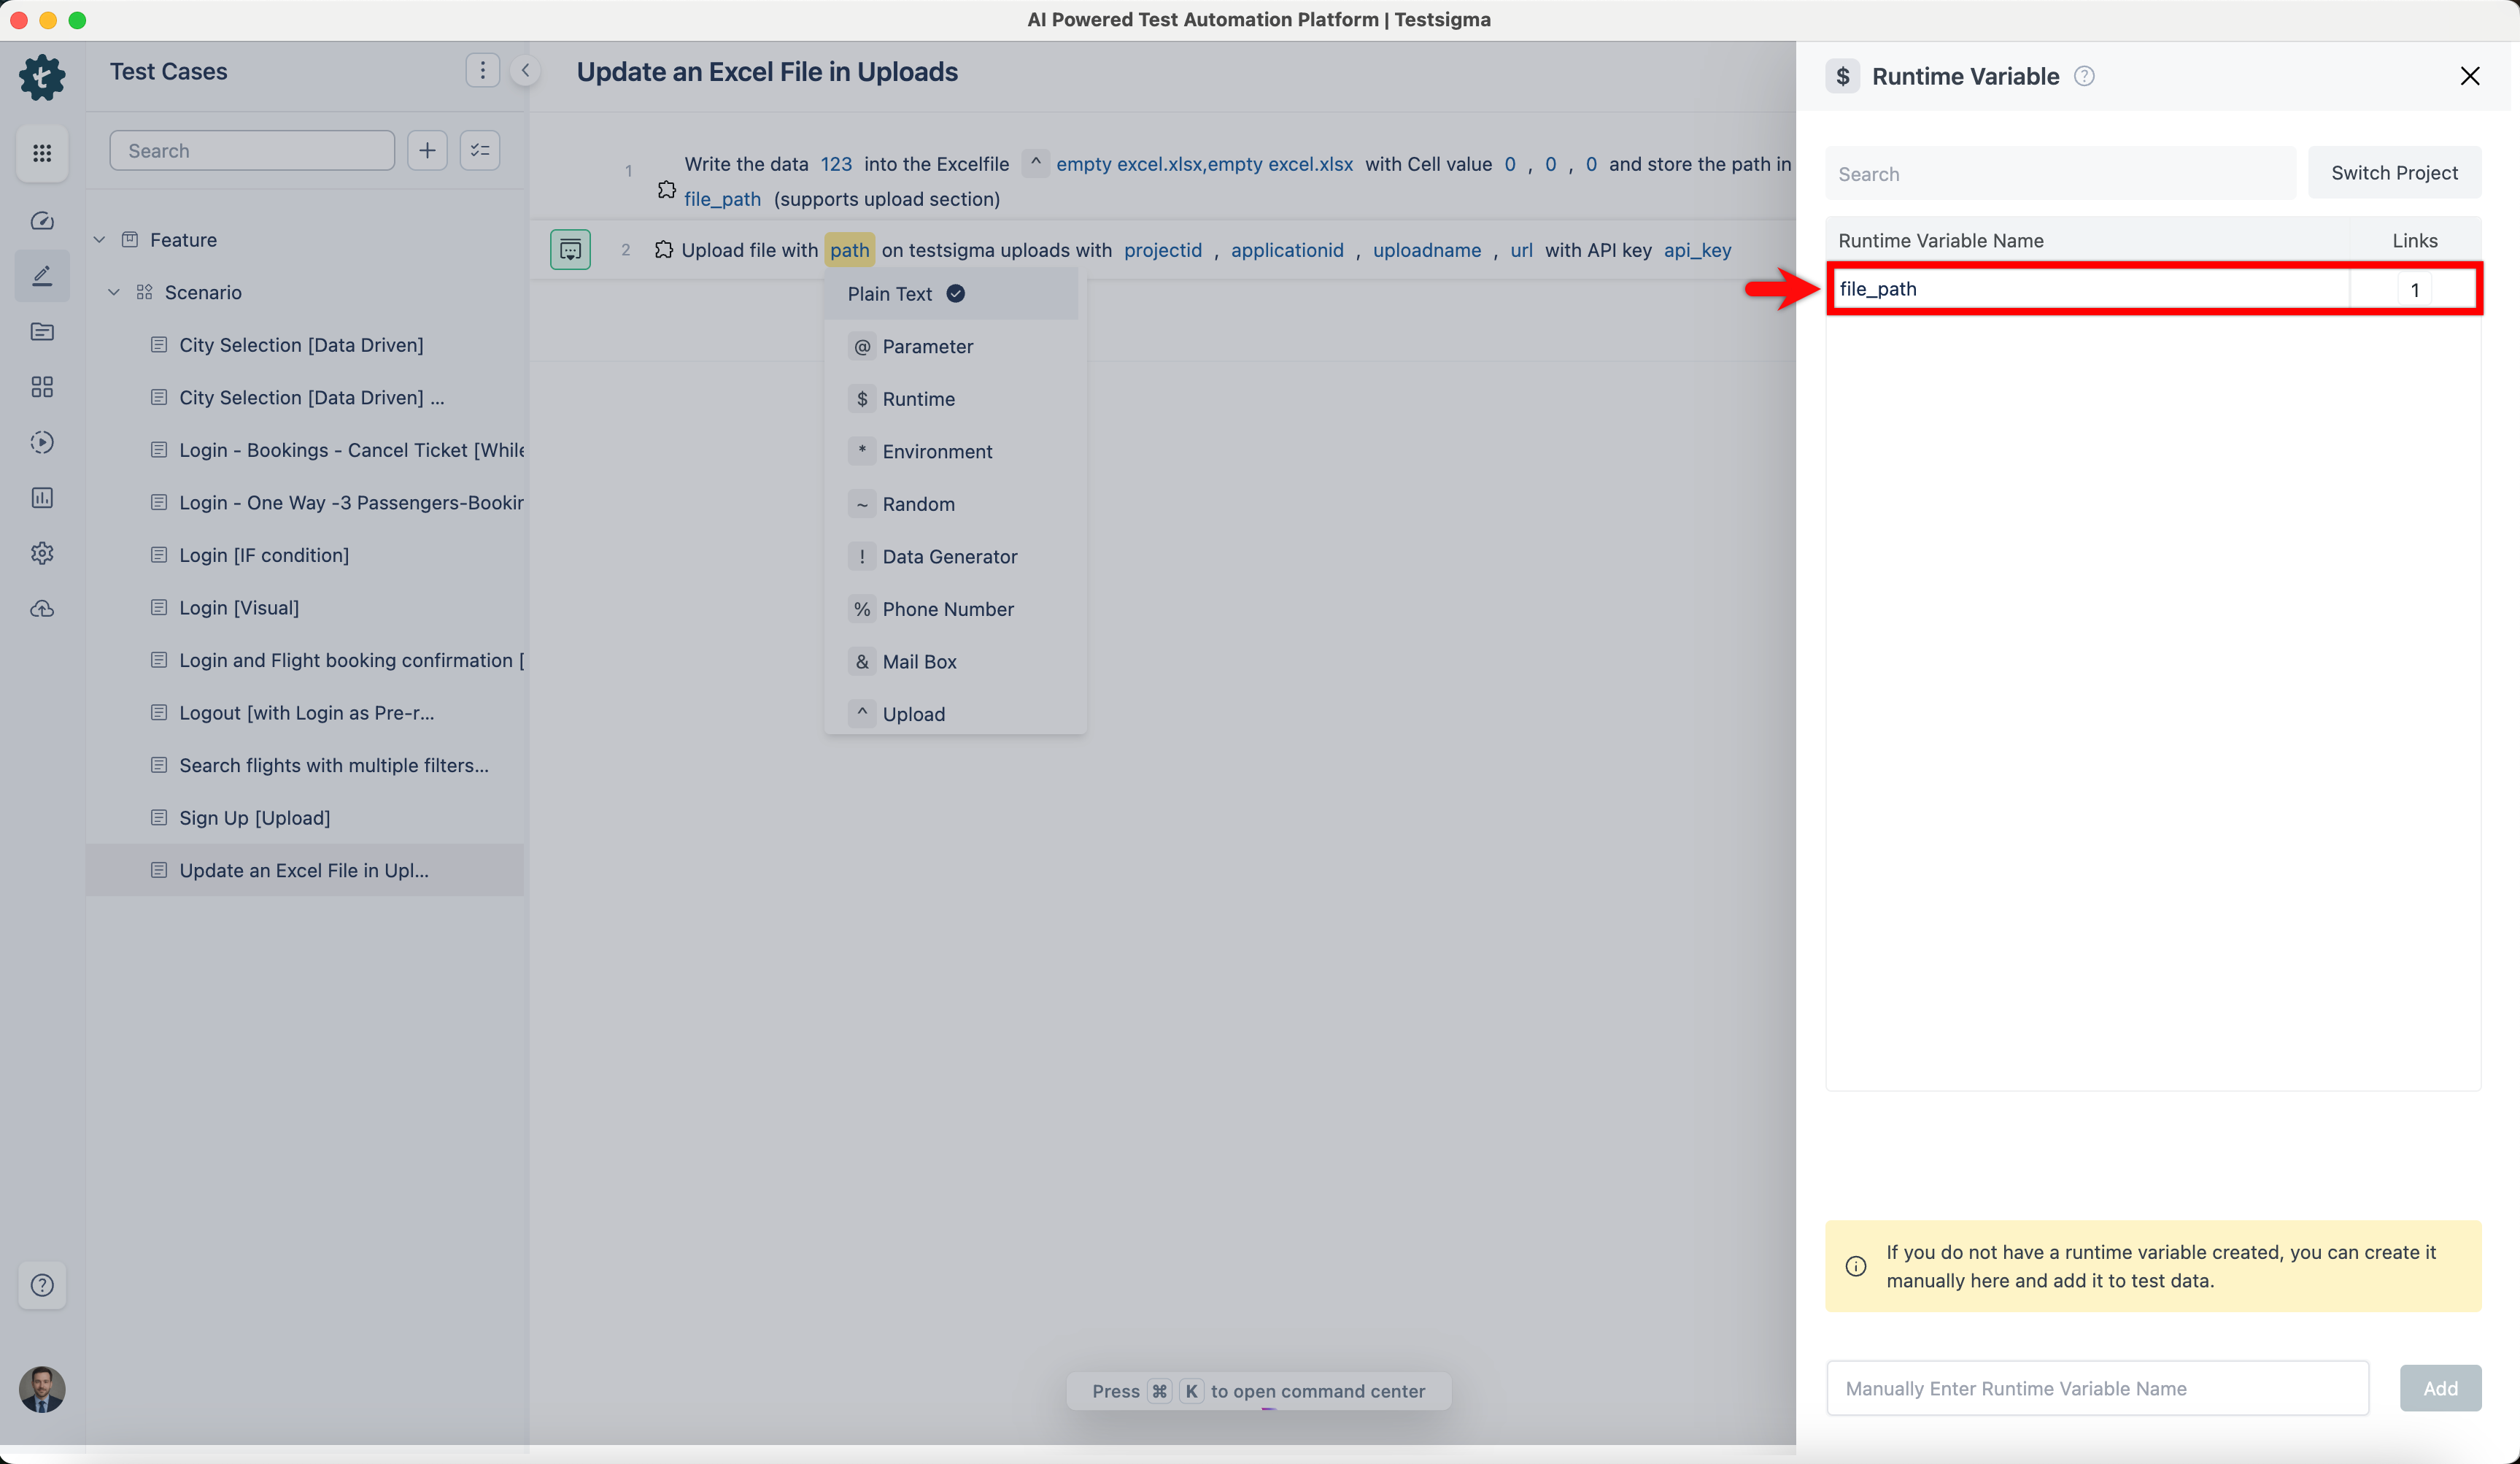
- Click the absolutepath placeholder and replace it by selecting Runtime from the Test Data Types dropdown.
- In the Runtime Variable overlay, select the runtime variable you created in the previous step.
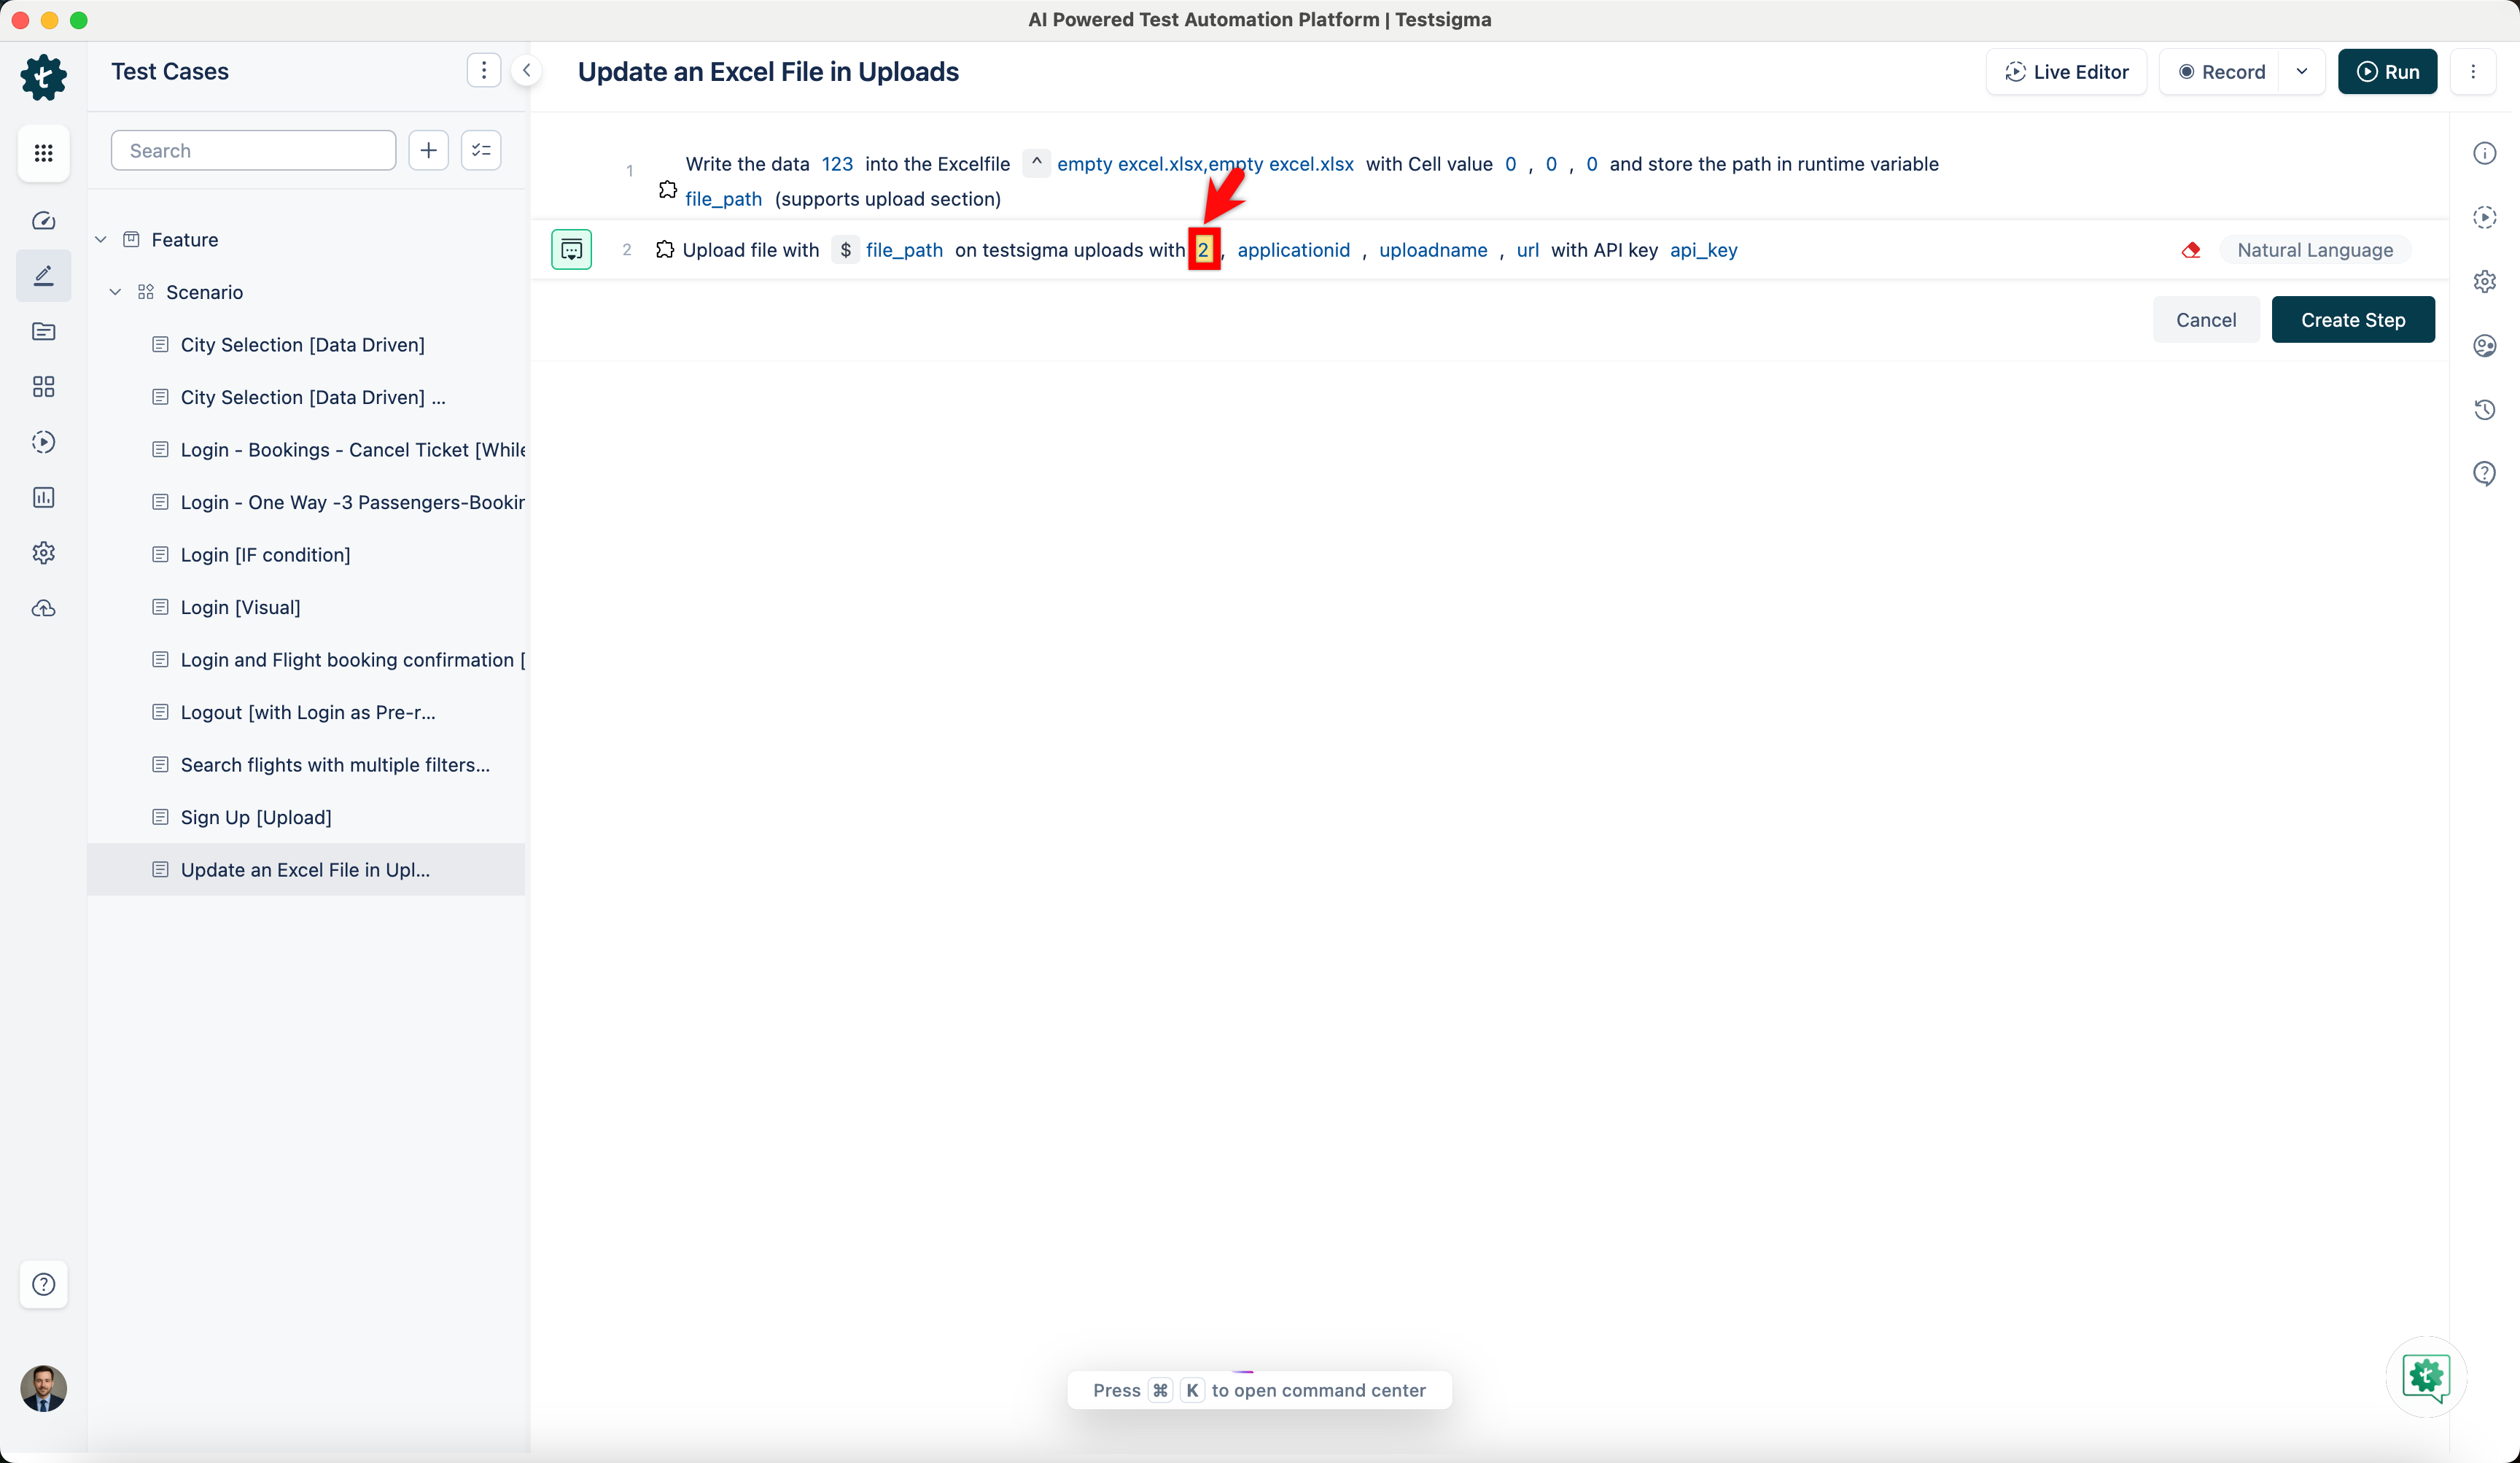
- Click the projectid placeholder and enter your project id.
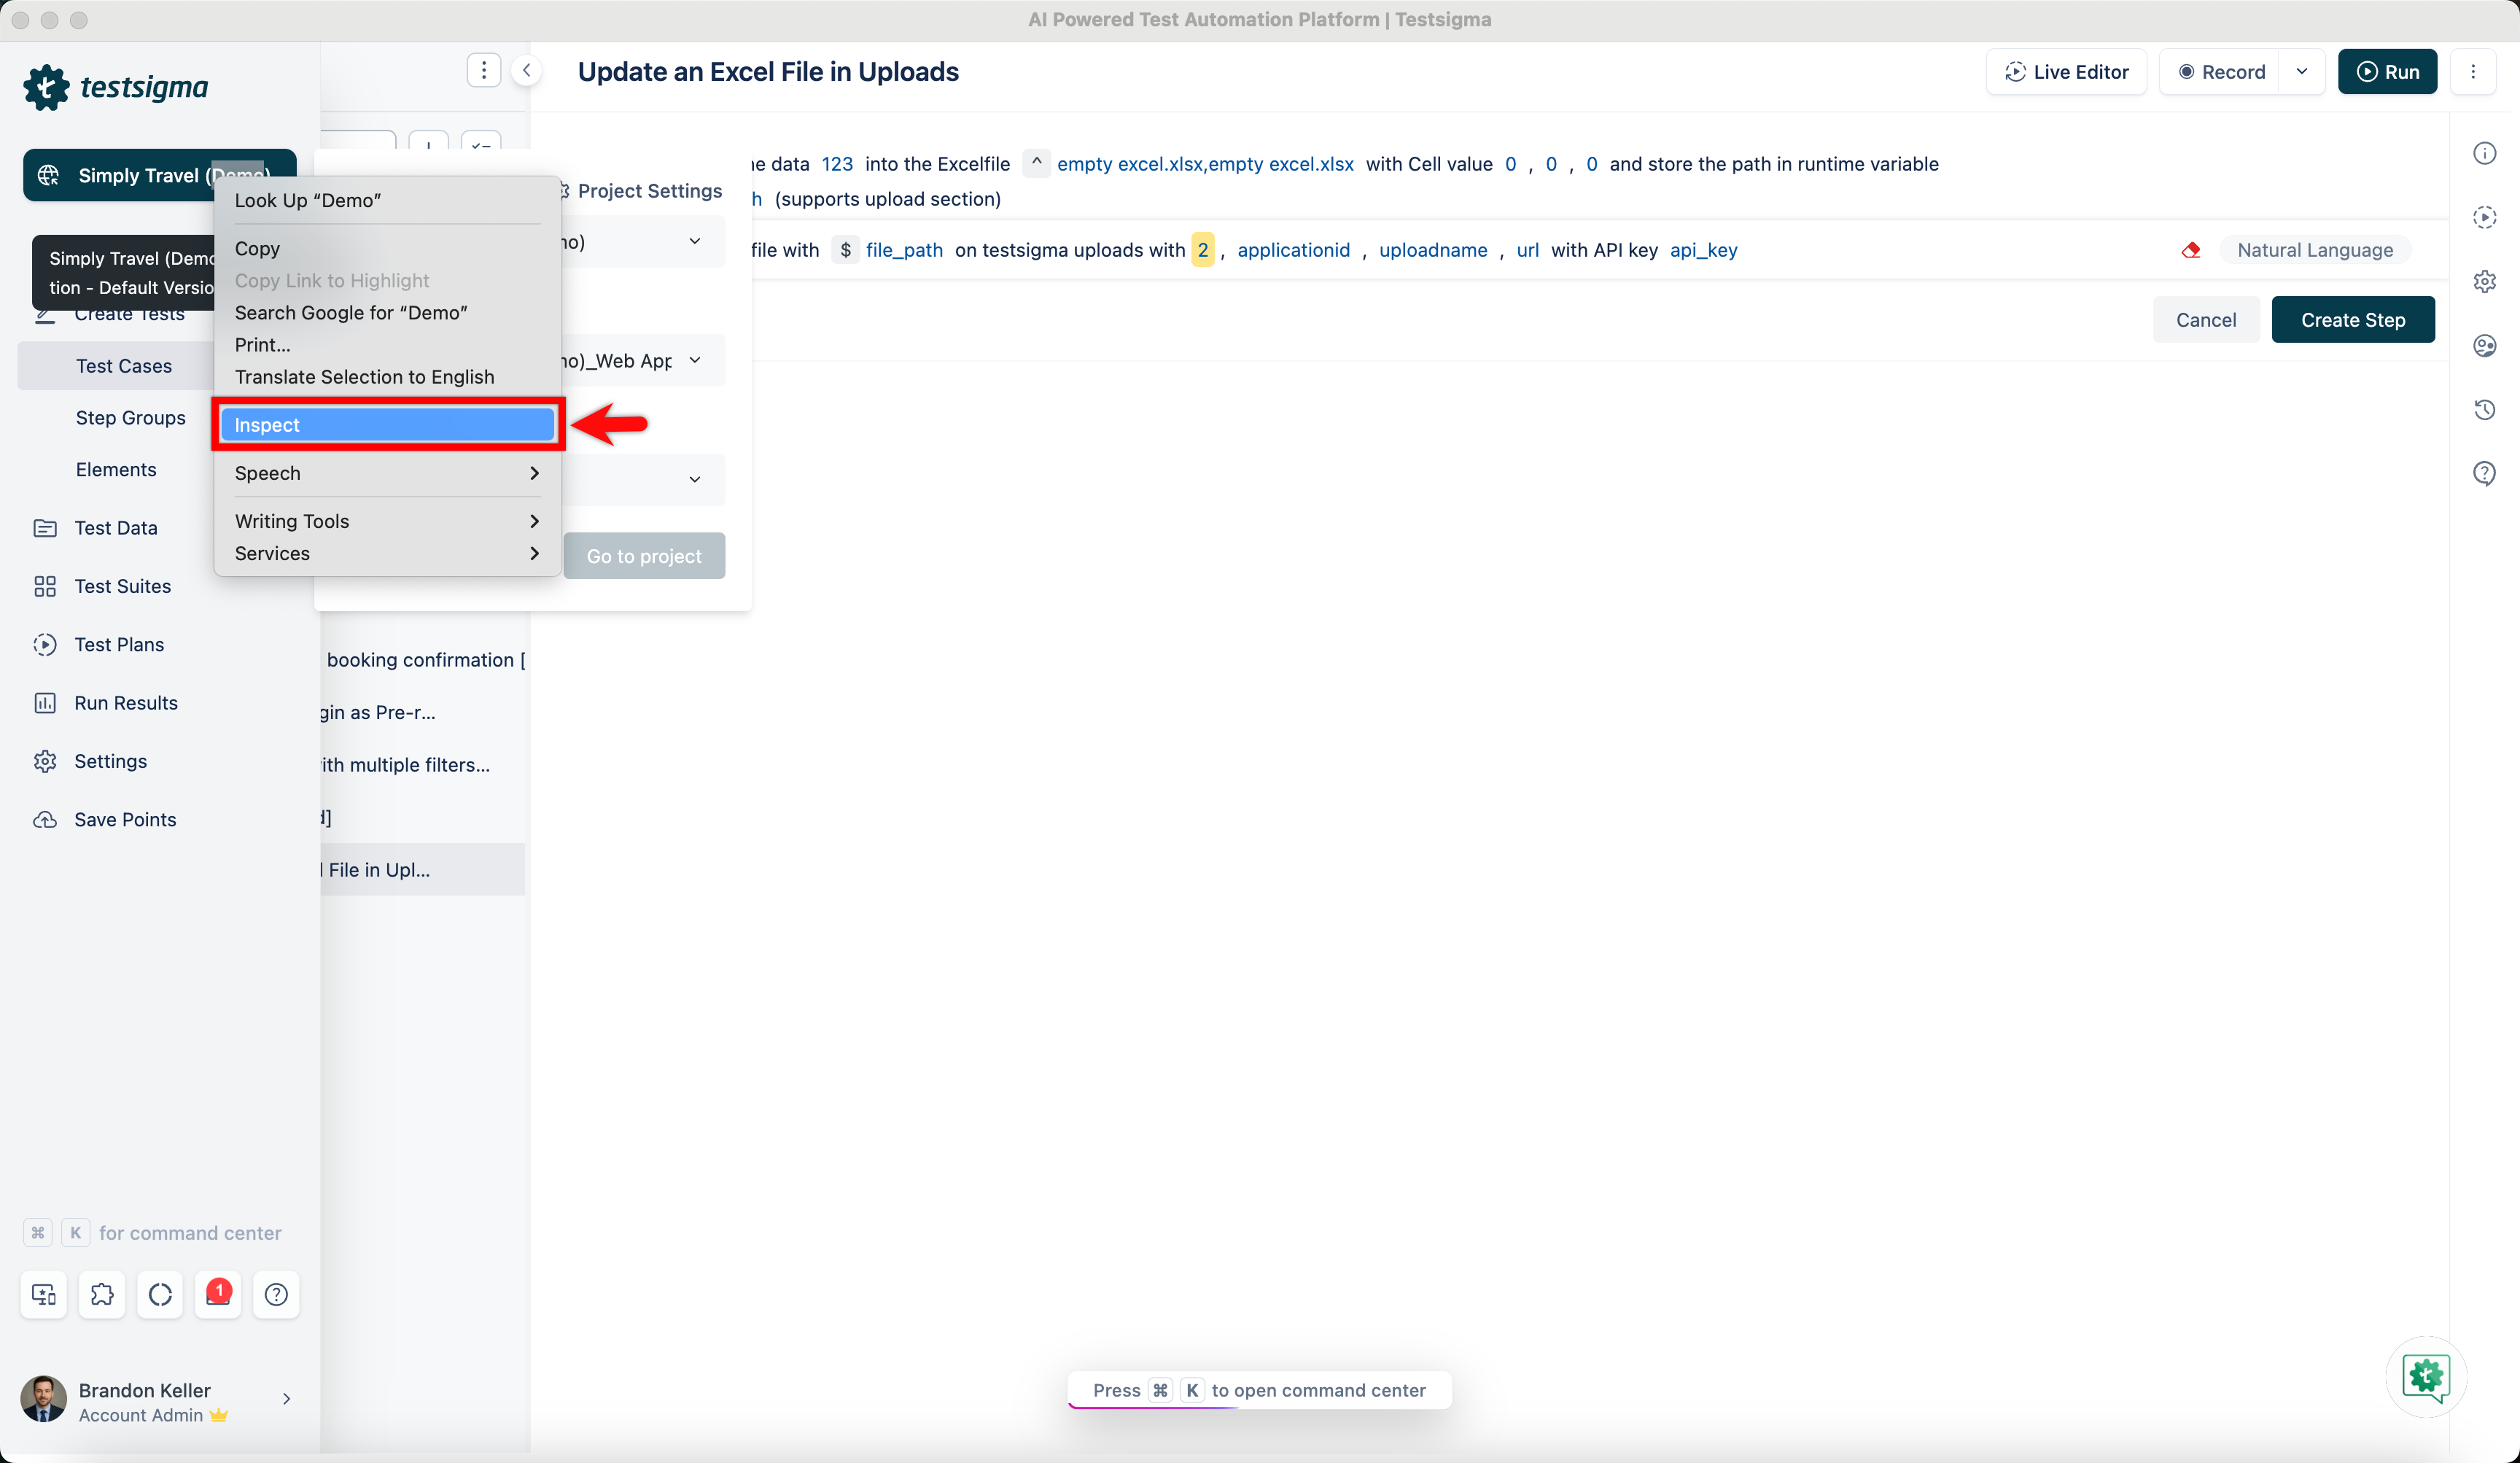
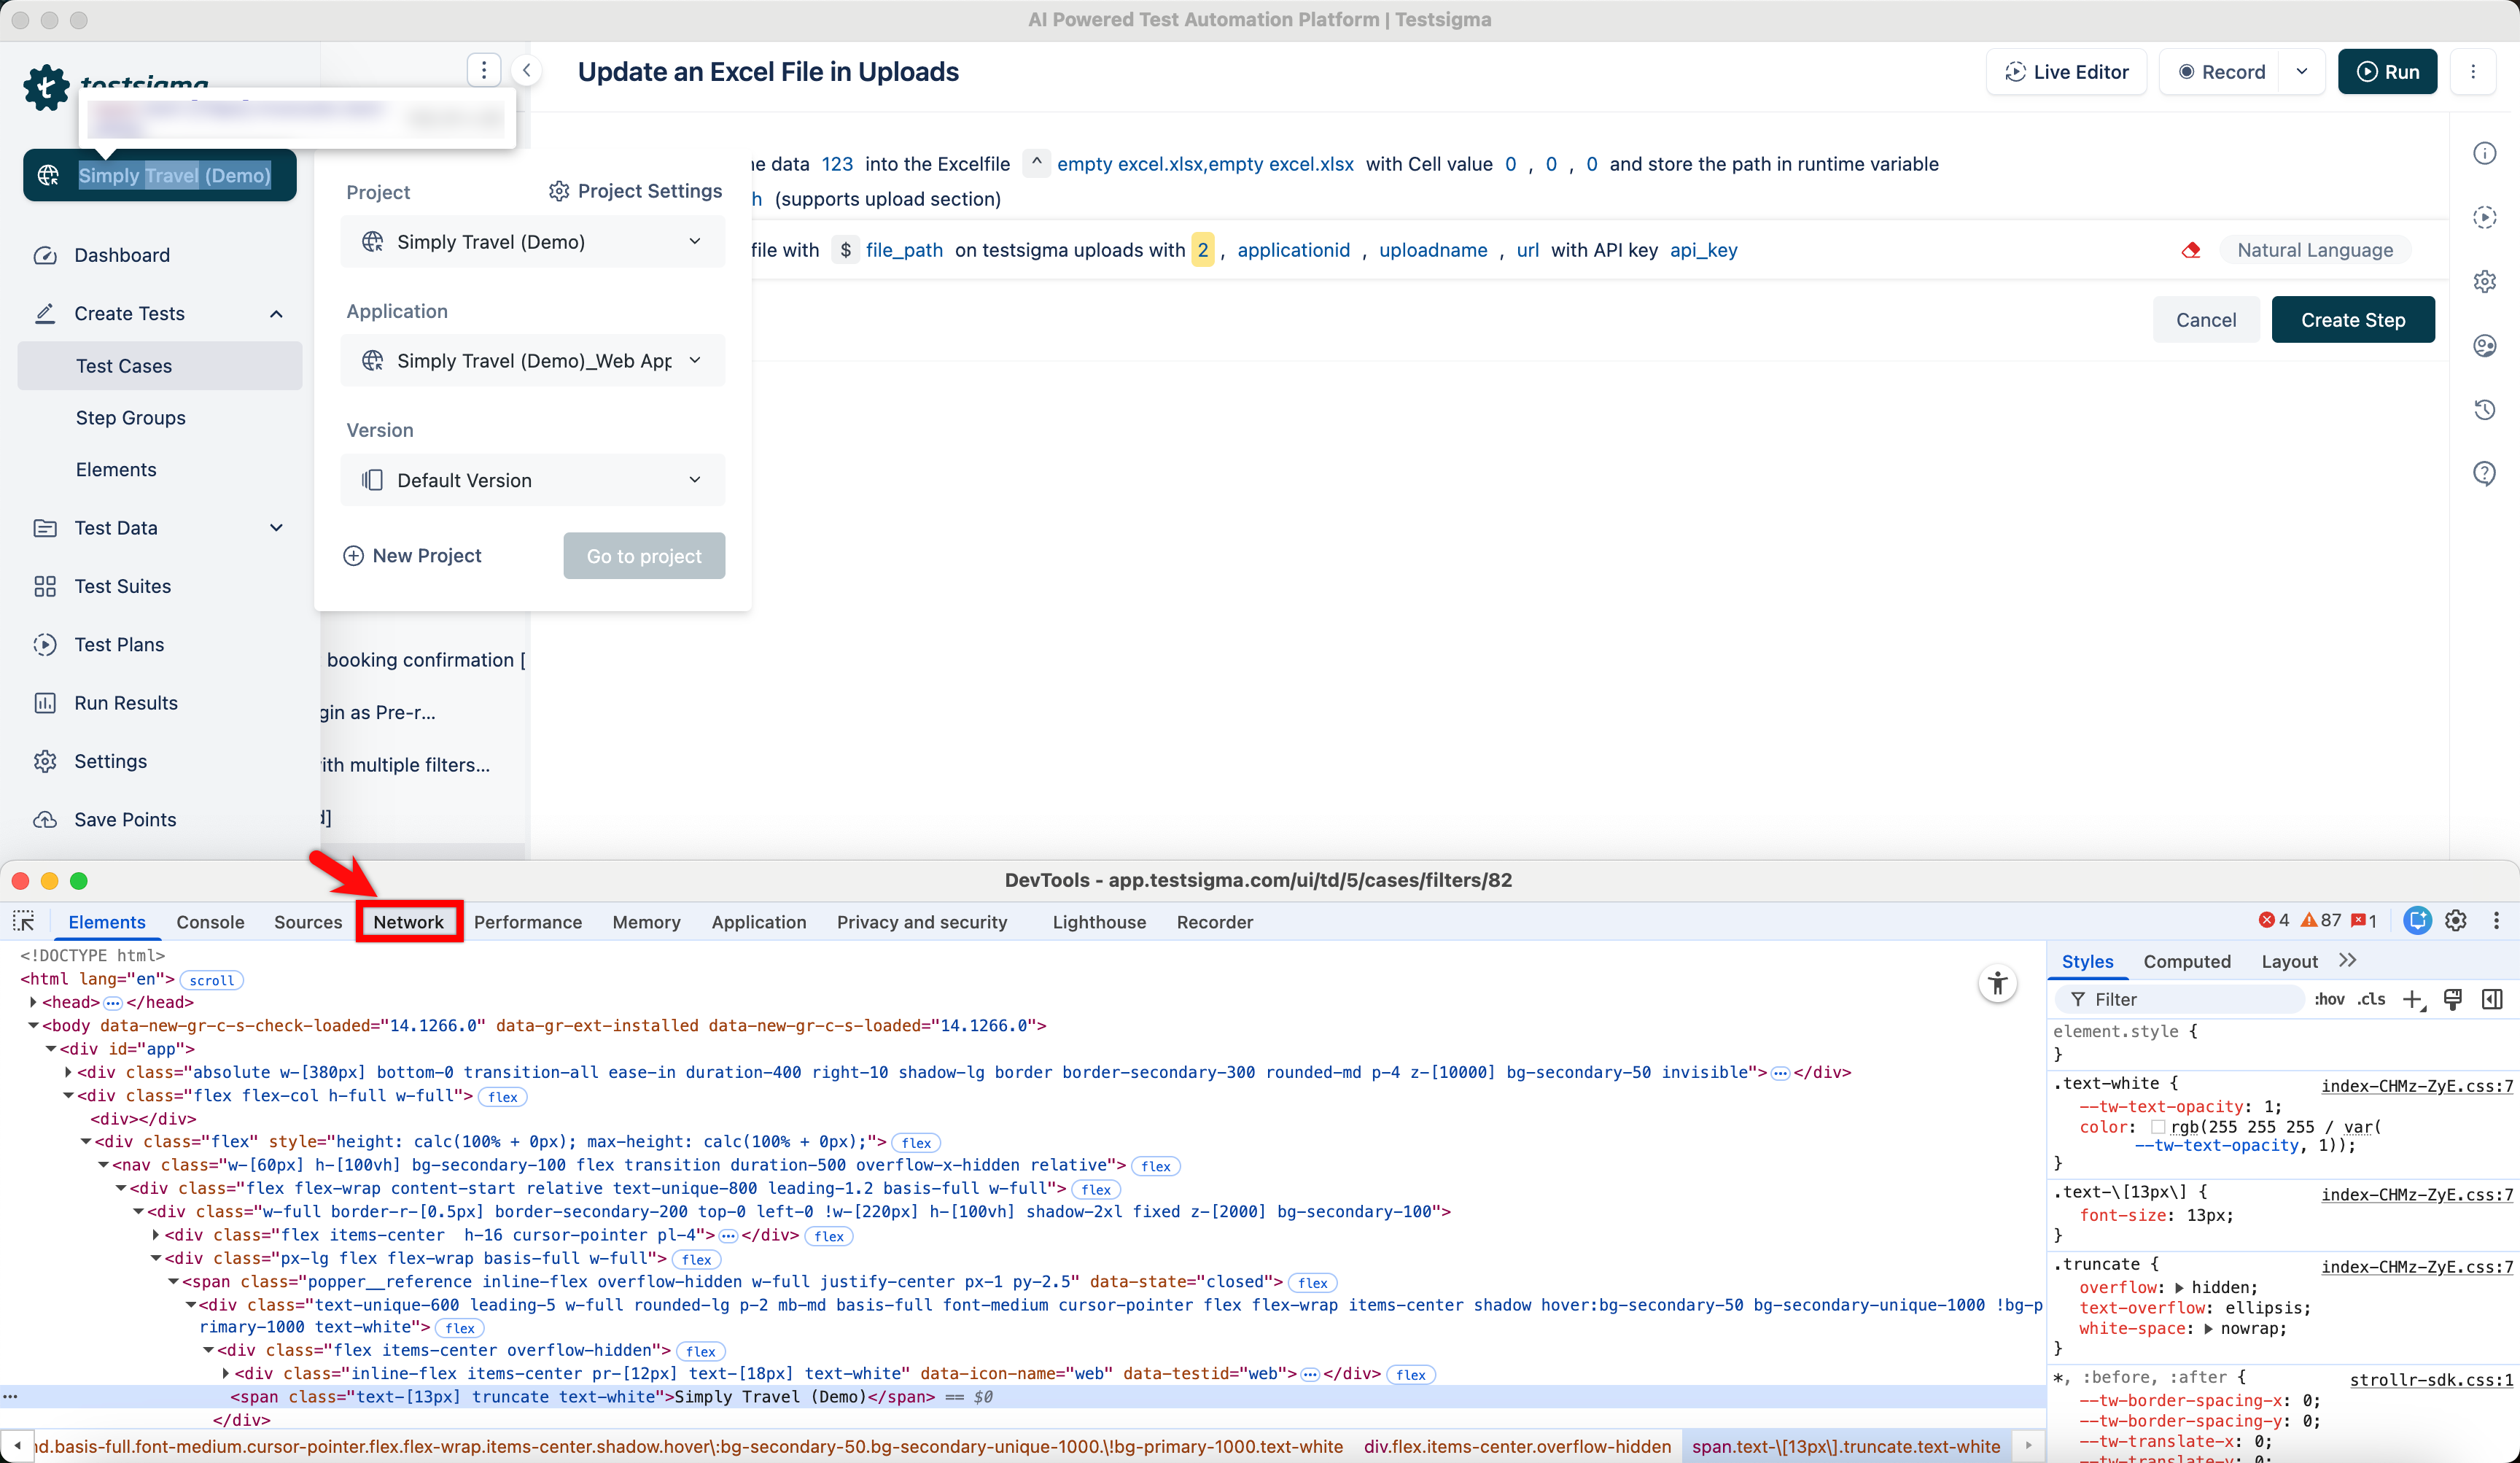
[[info | NOTE:]] | To get project id and application id use the following steps: | 1. Before you begin, open the inspect panel and refresh the page. Now, right-click on the application name and select Inspect.
| 2. Go to the Network tab and refresh the page.
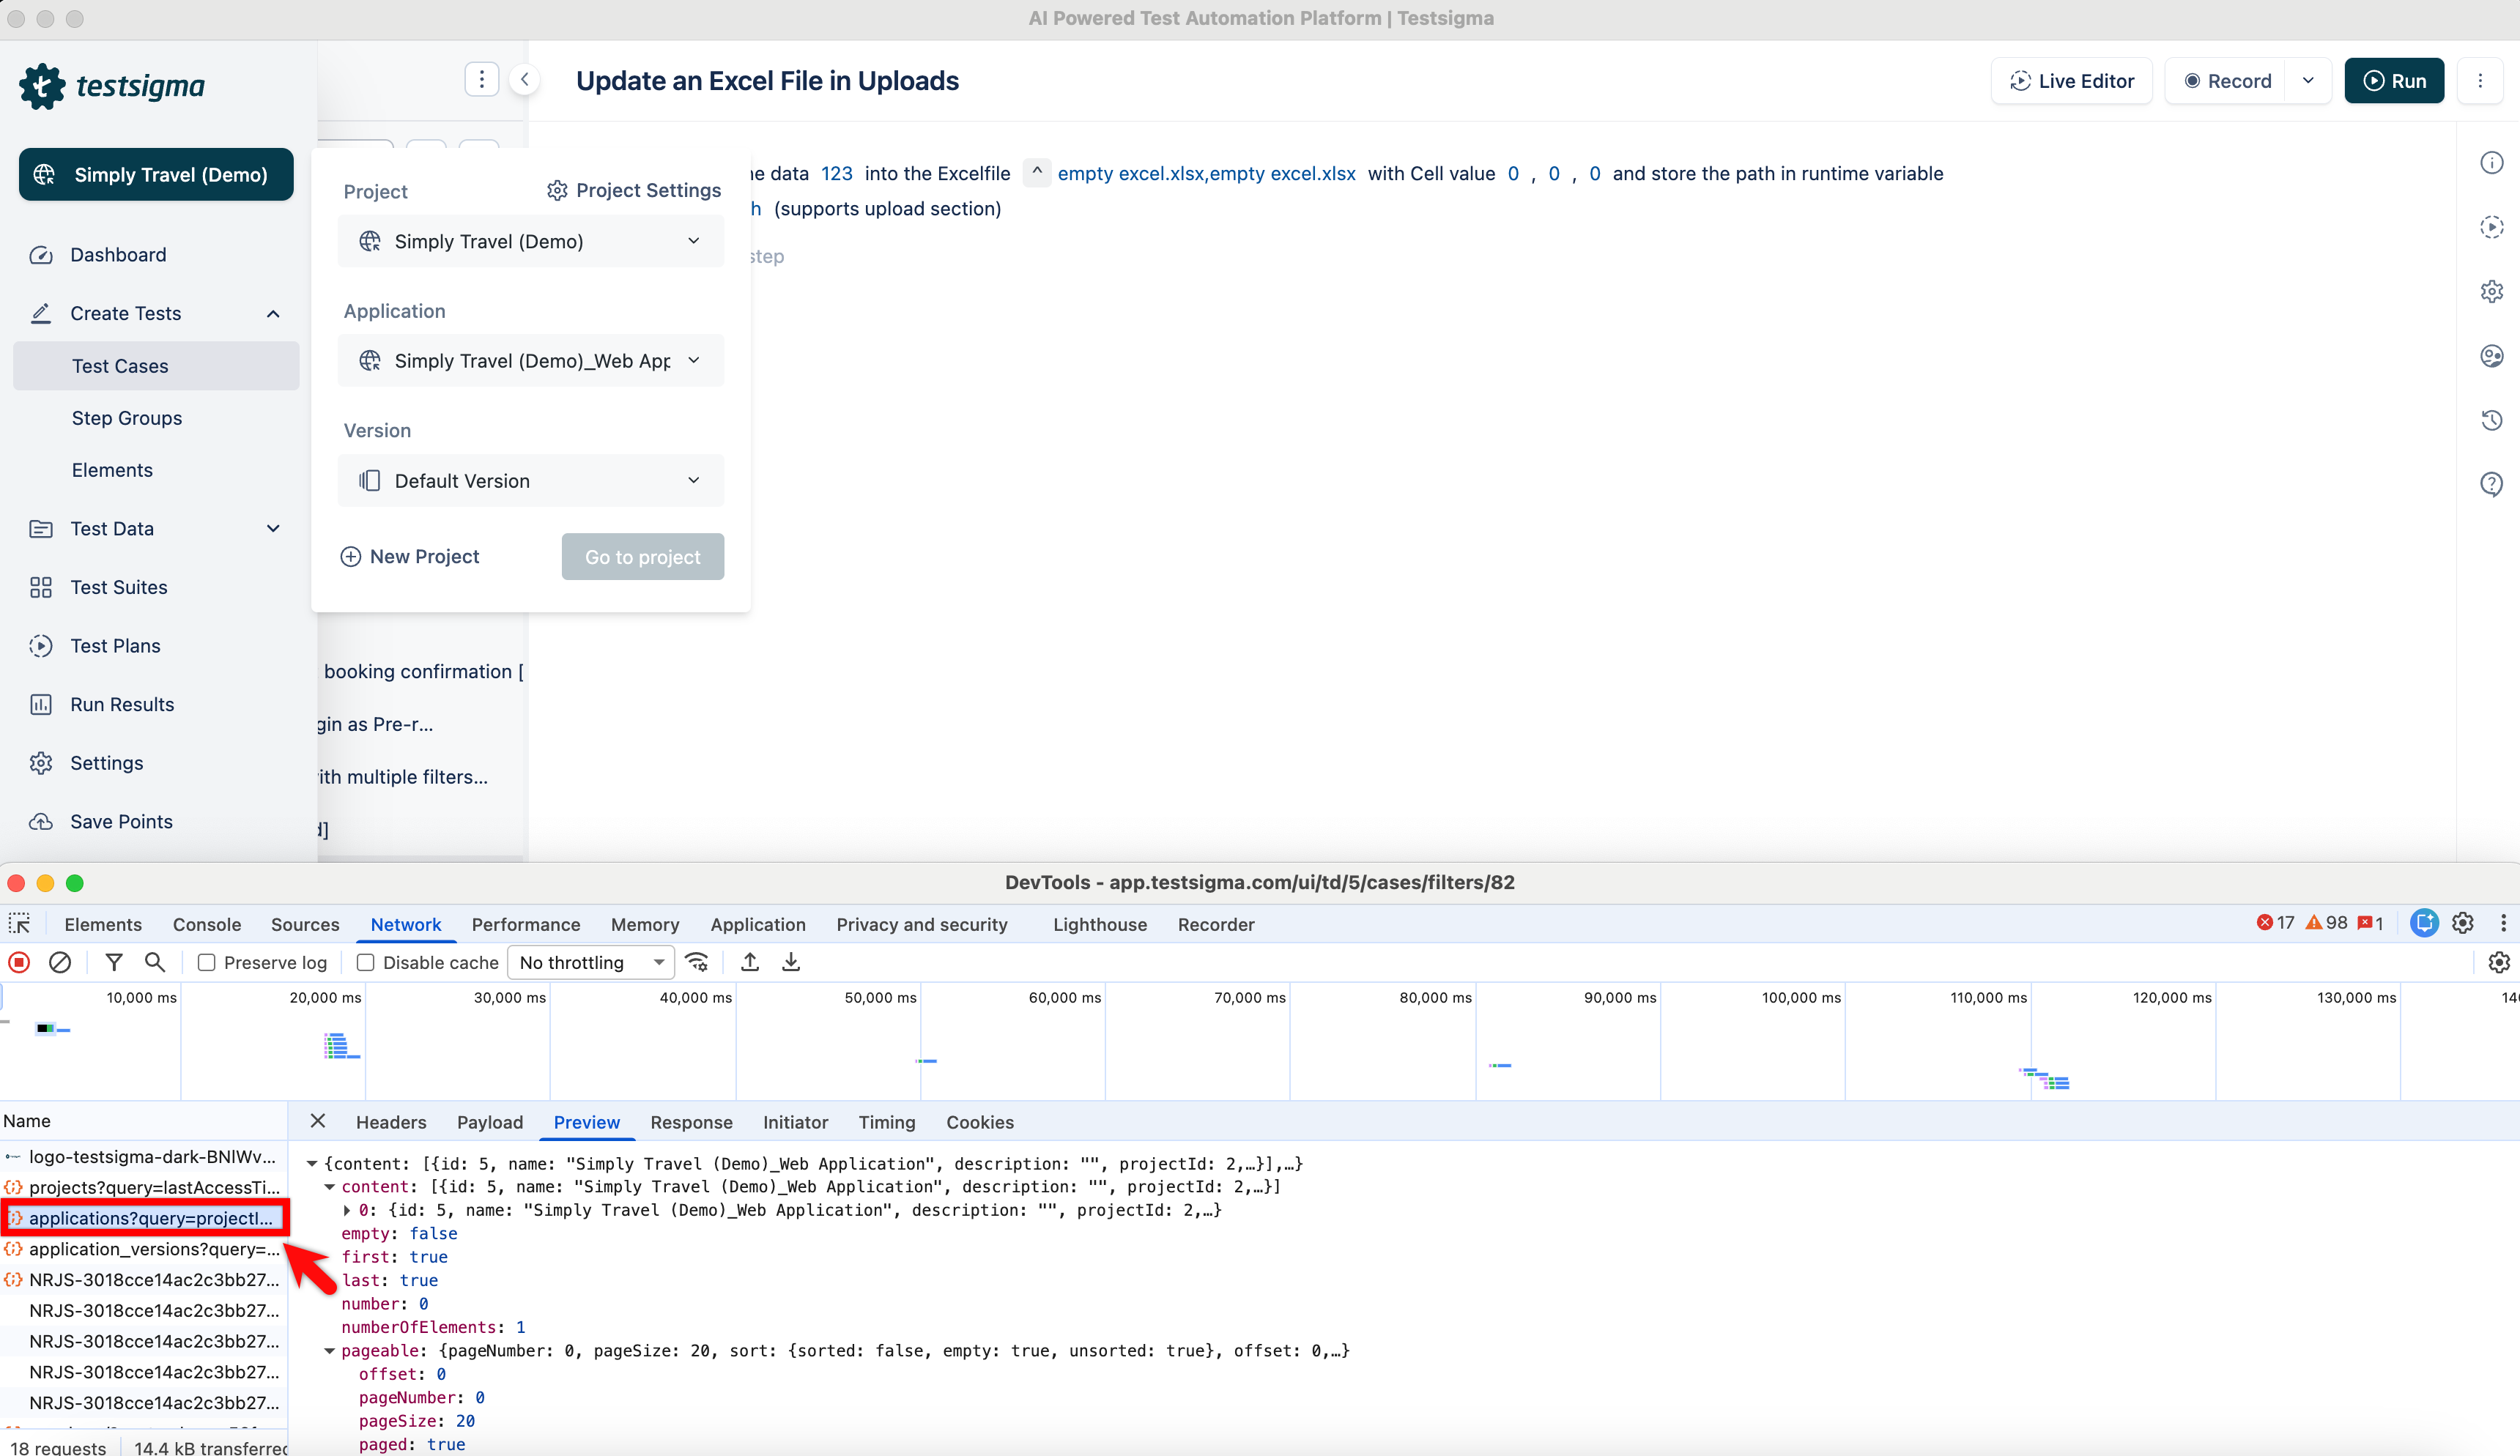
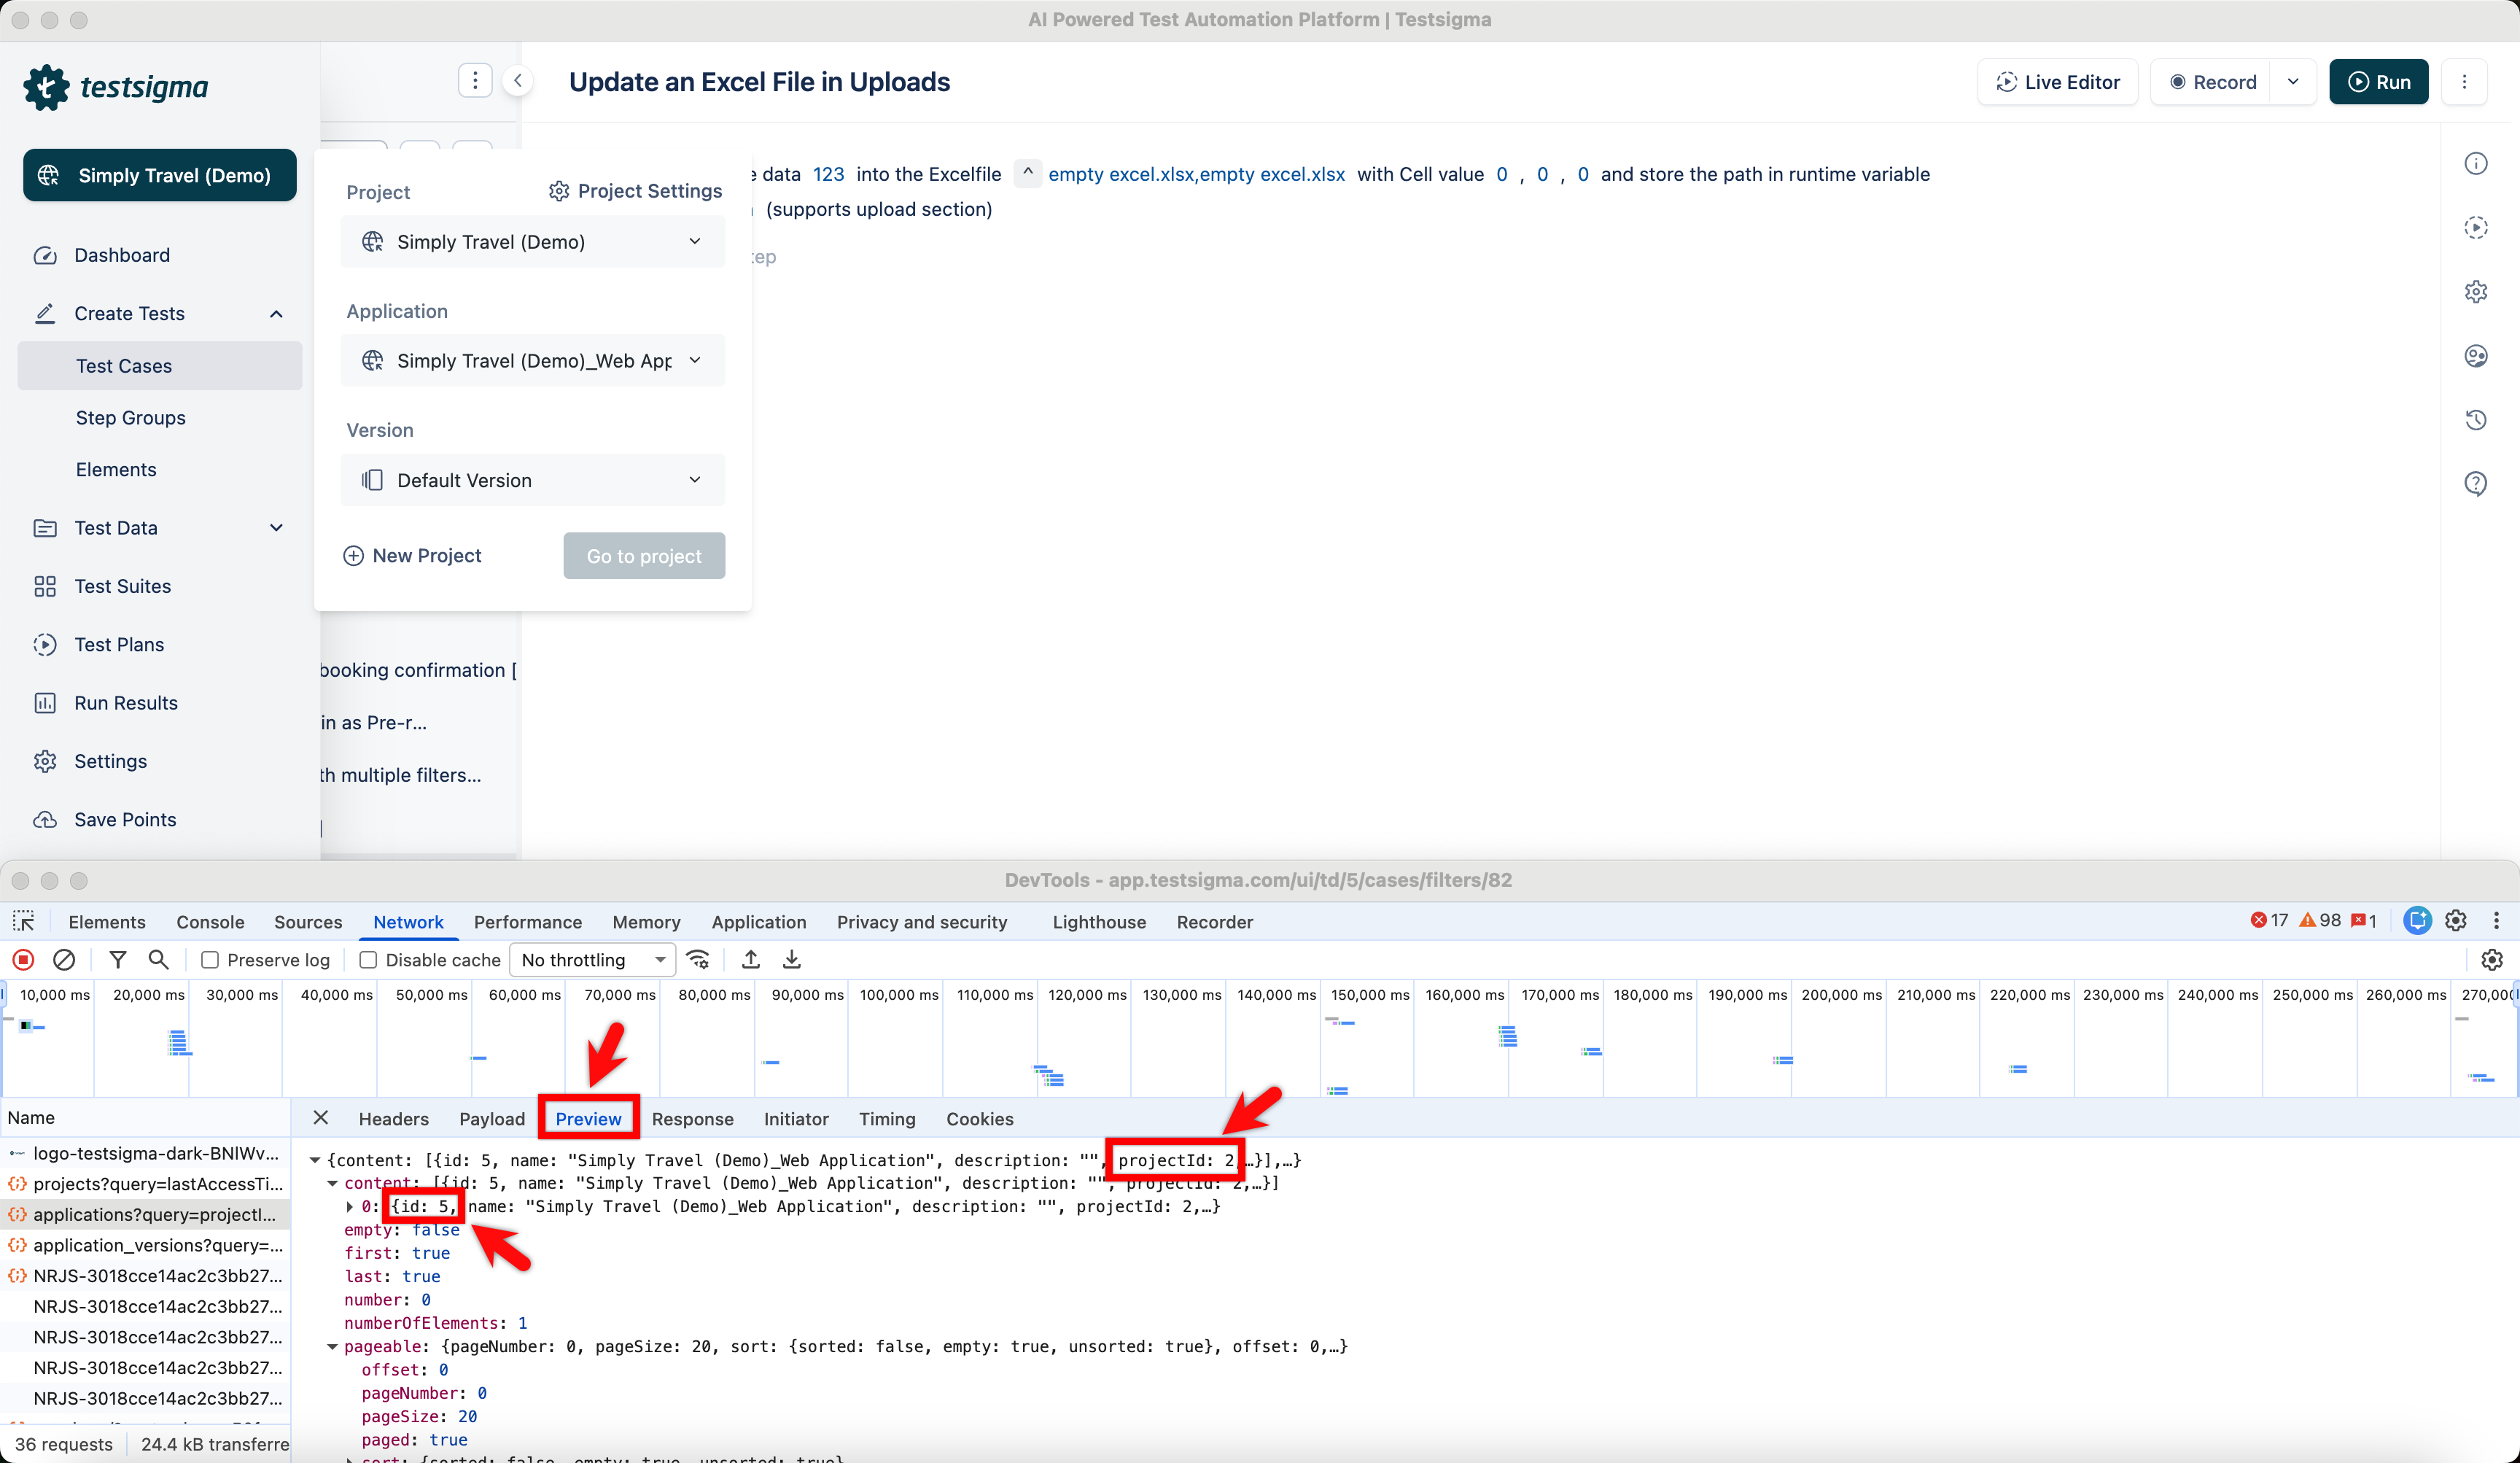
| 3. Click applications query.
| 4. Here you can find your projectId and applicationId under the Preview tab.
- Click the applicationid placeholder and enter your application id.
- Click the uploadname placeholder and enter your excel file’s name.
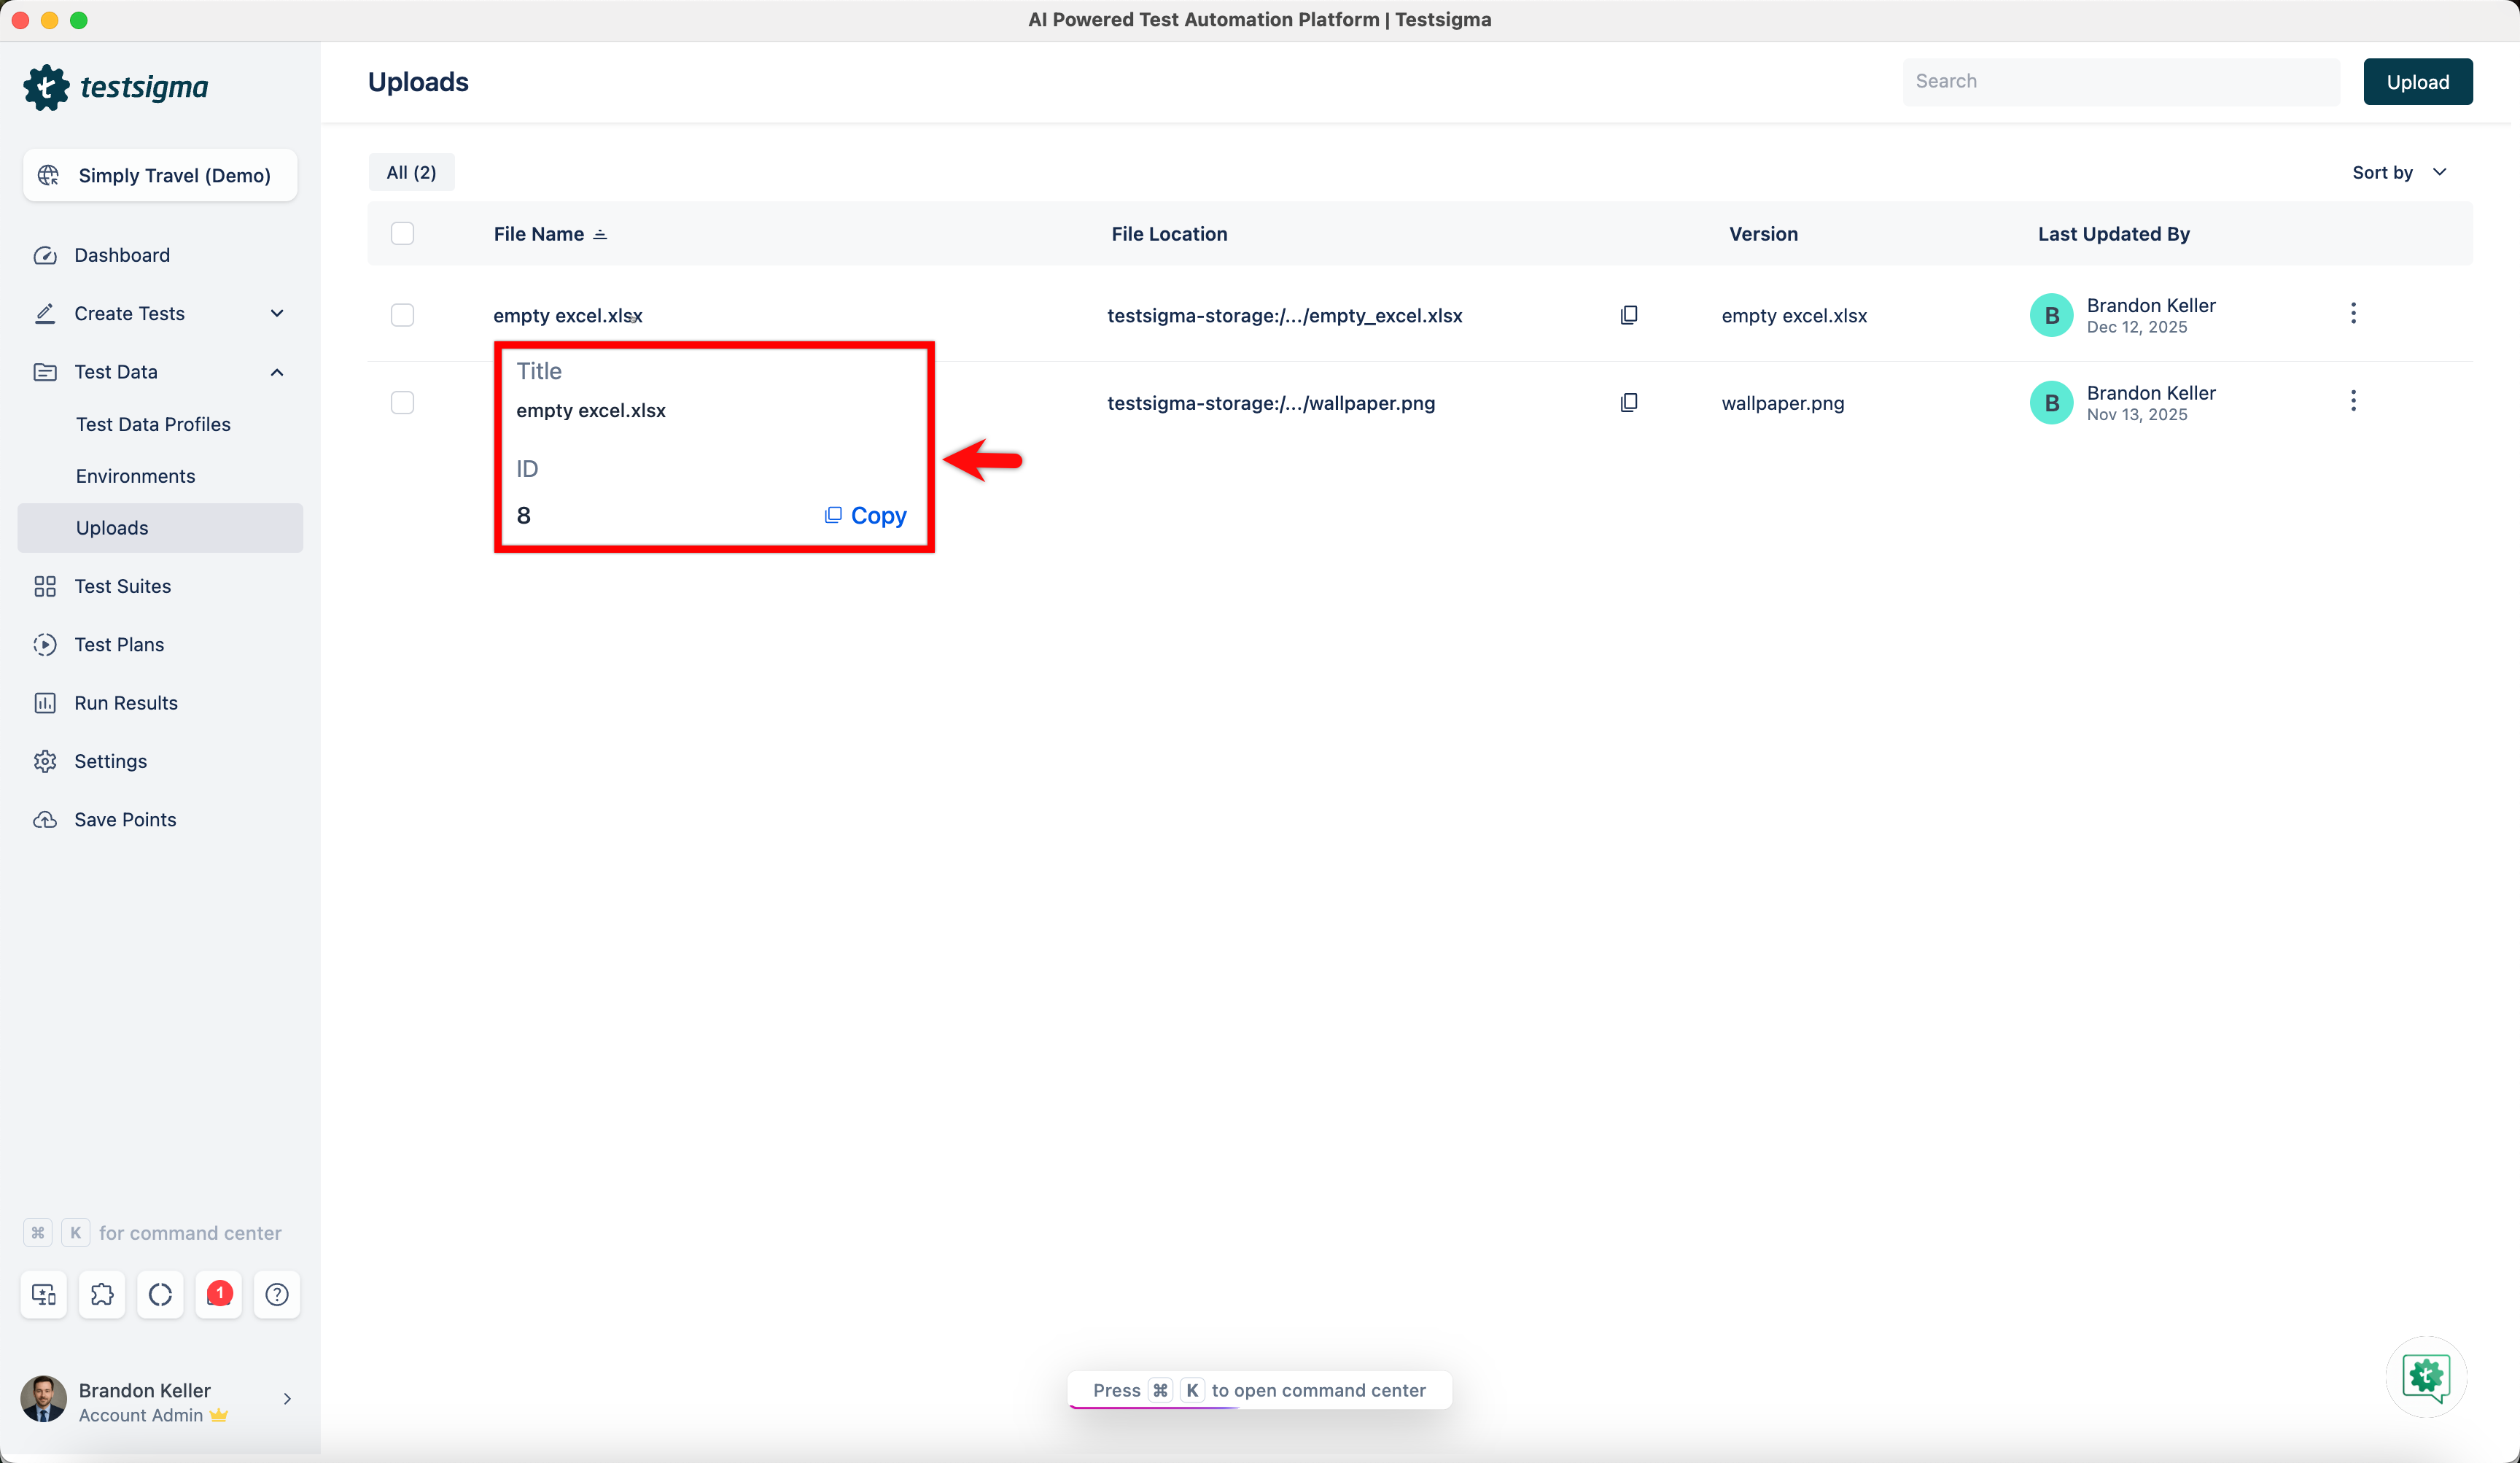
[[info | NOTE:]] | To get uploadname and upload id, go to Uploads and hover over the excel file you want to update.
- Enter the following URL https://app.testsigma.com/api/v1/uploads/{ID} and replace with the upload ID copied from the Uploads page. For example, https://app.testsigma.com/api/v1/uploads/8
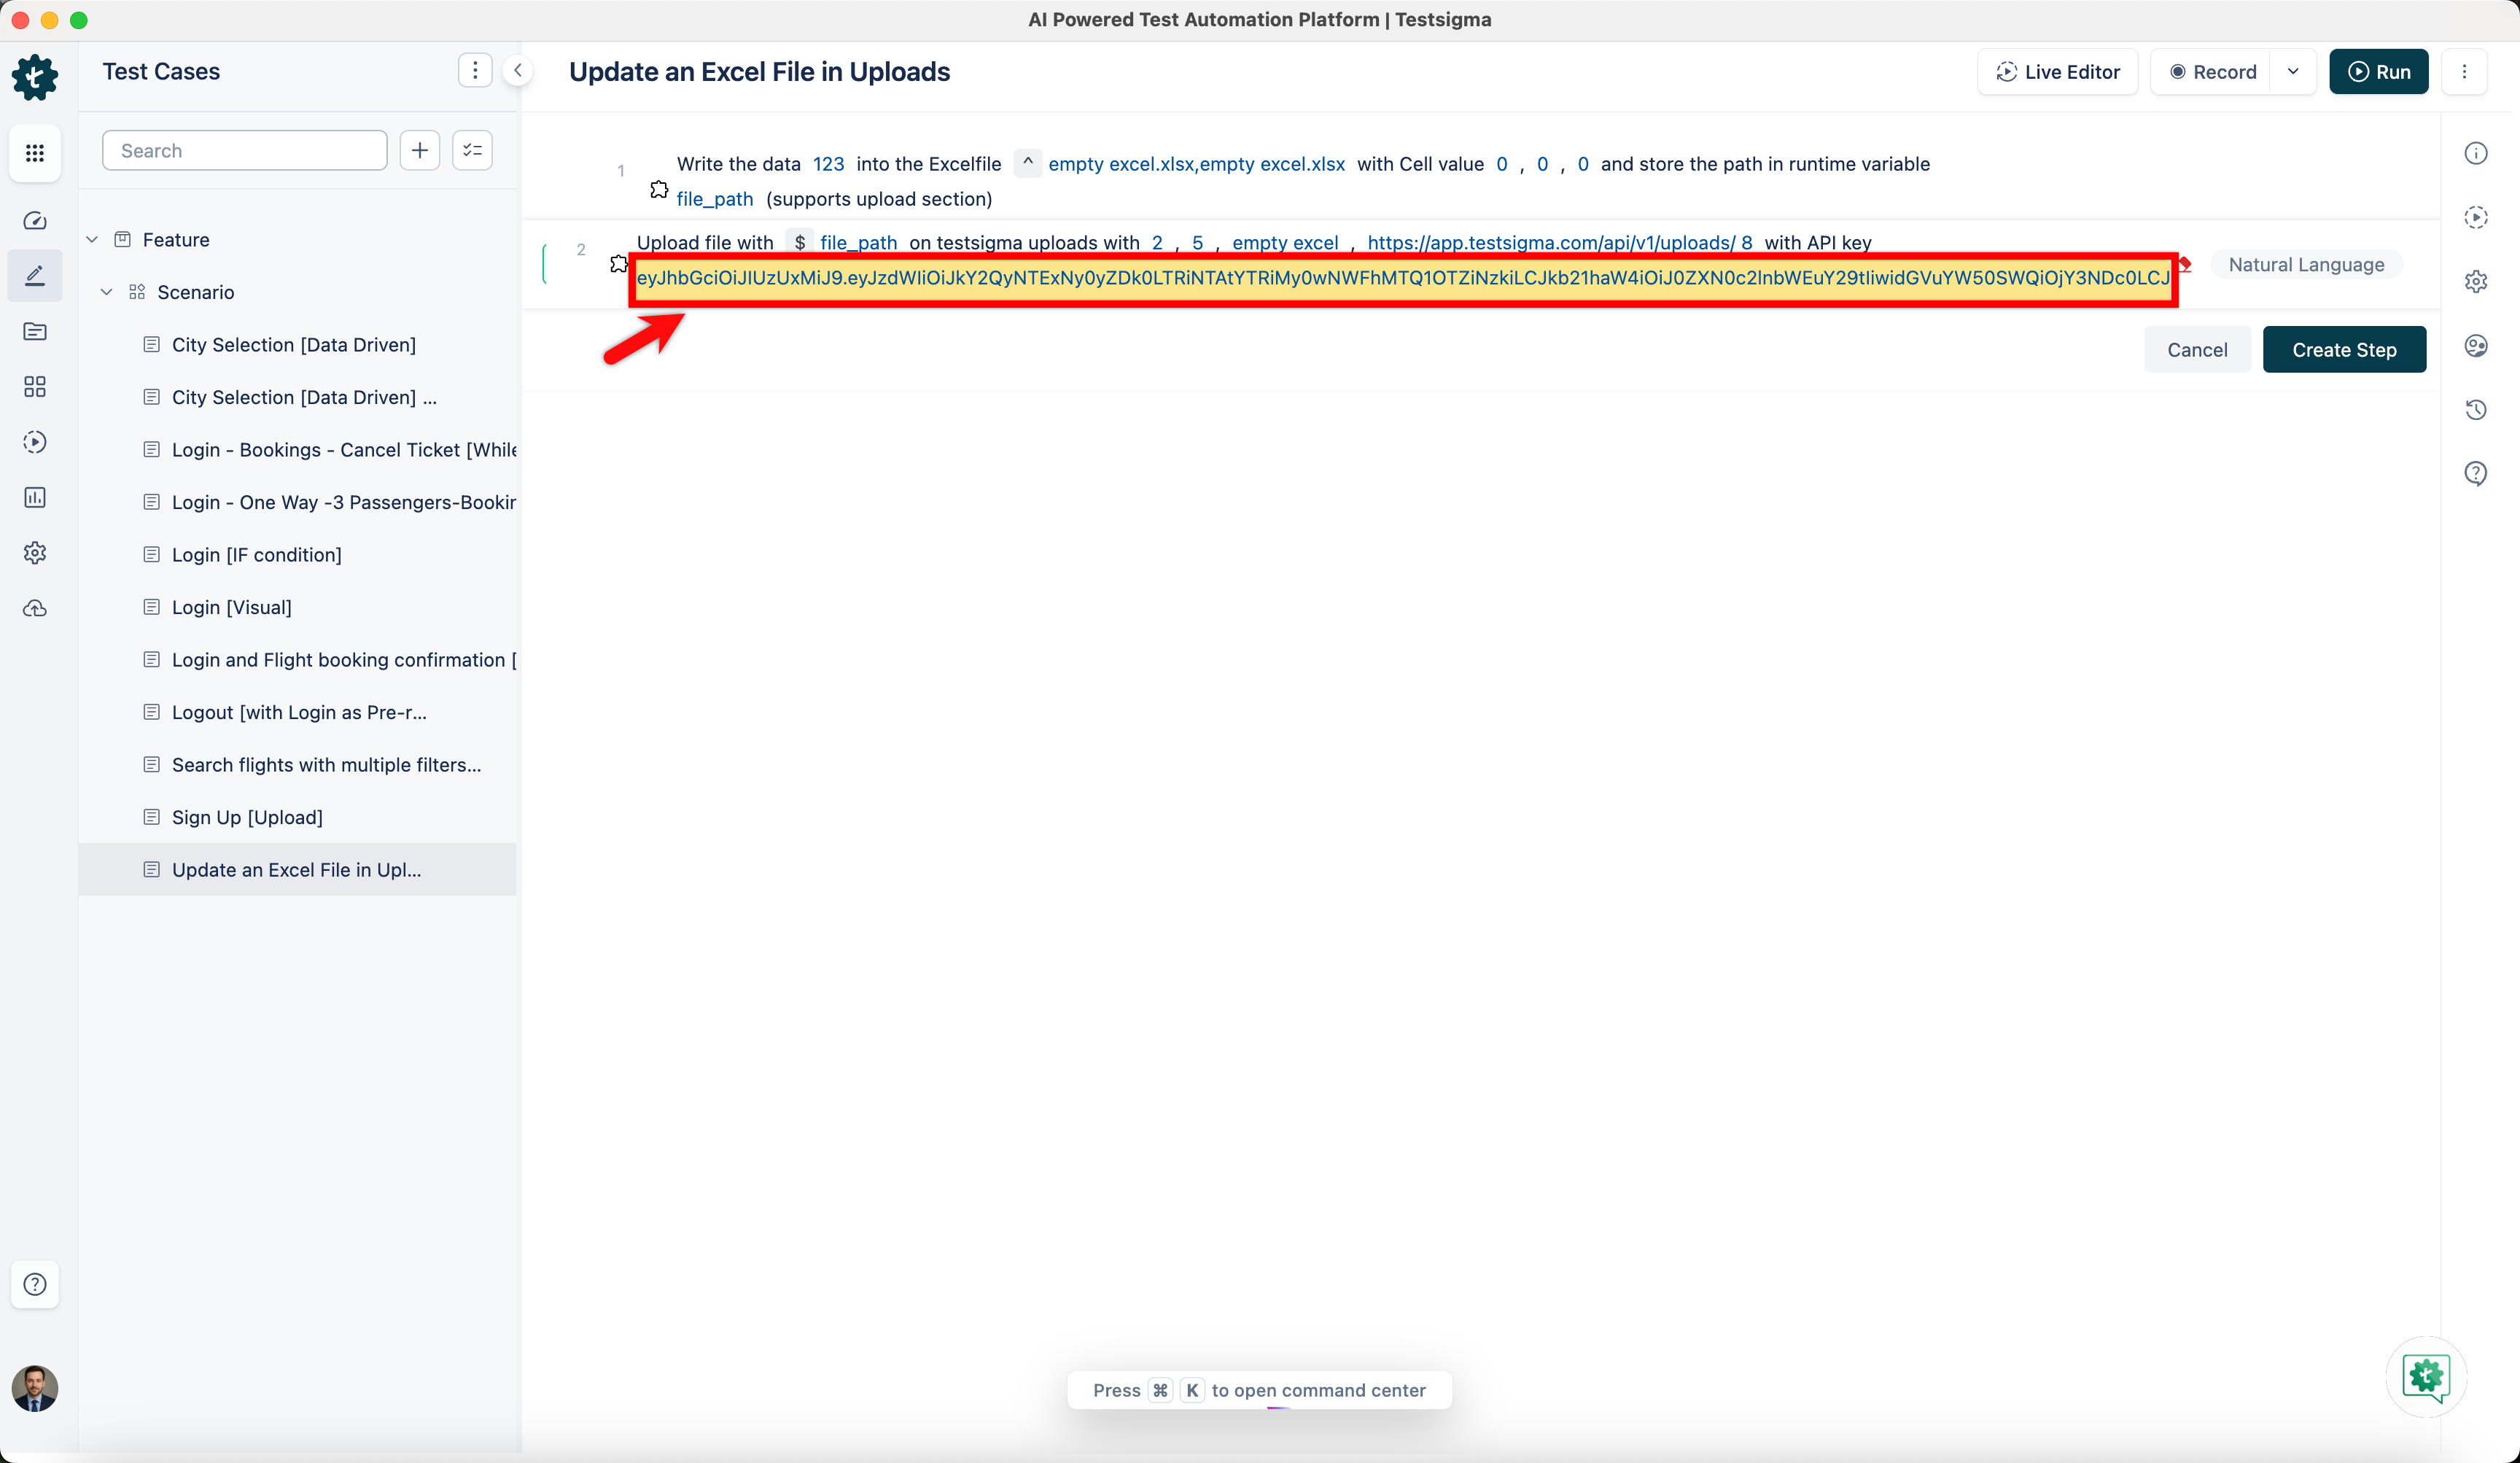
- Enter the api key in the testdata placeholder.
[[info | NOTE:]] | Please refer to the documentation on generating api keys.
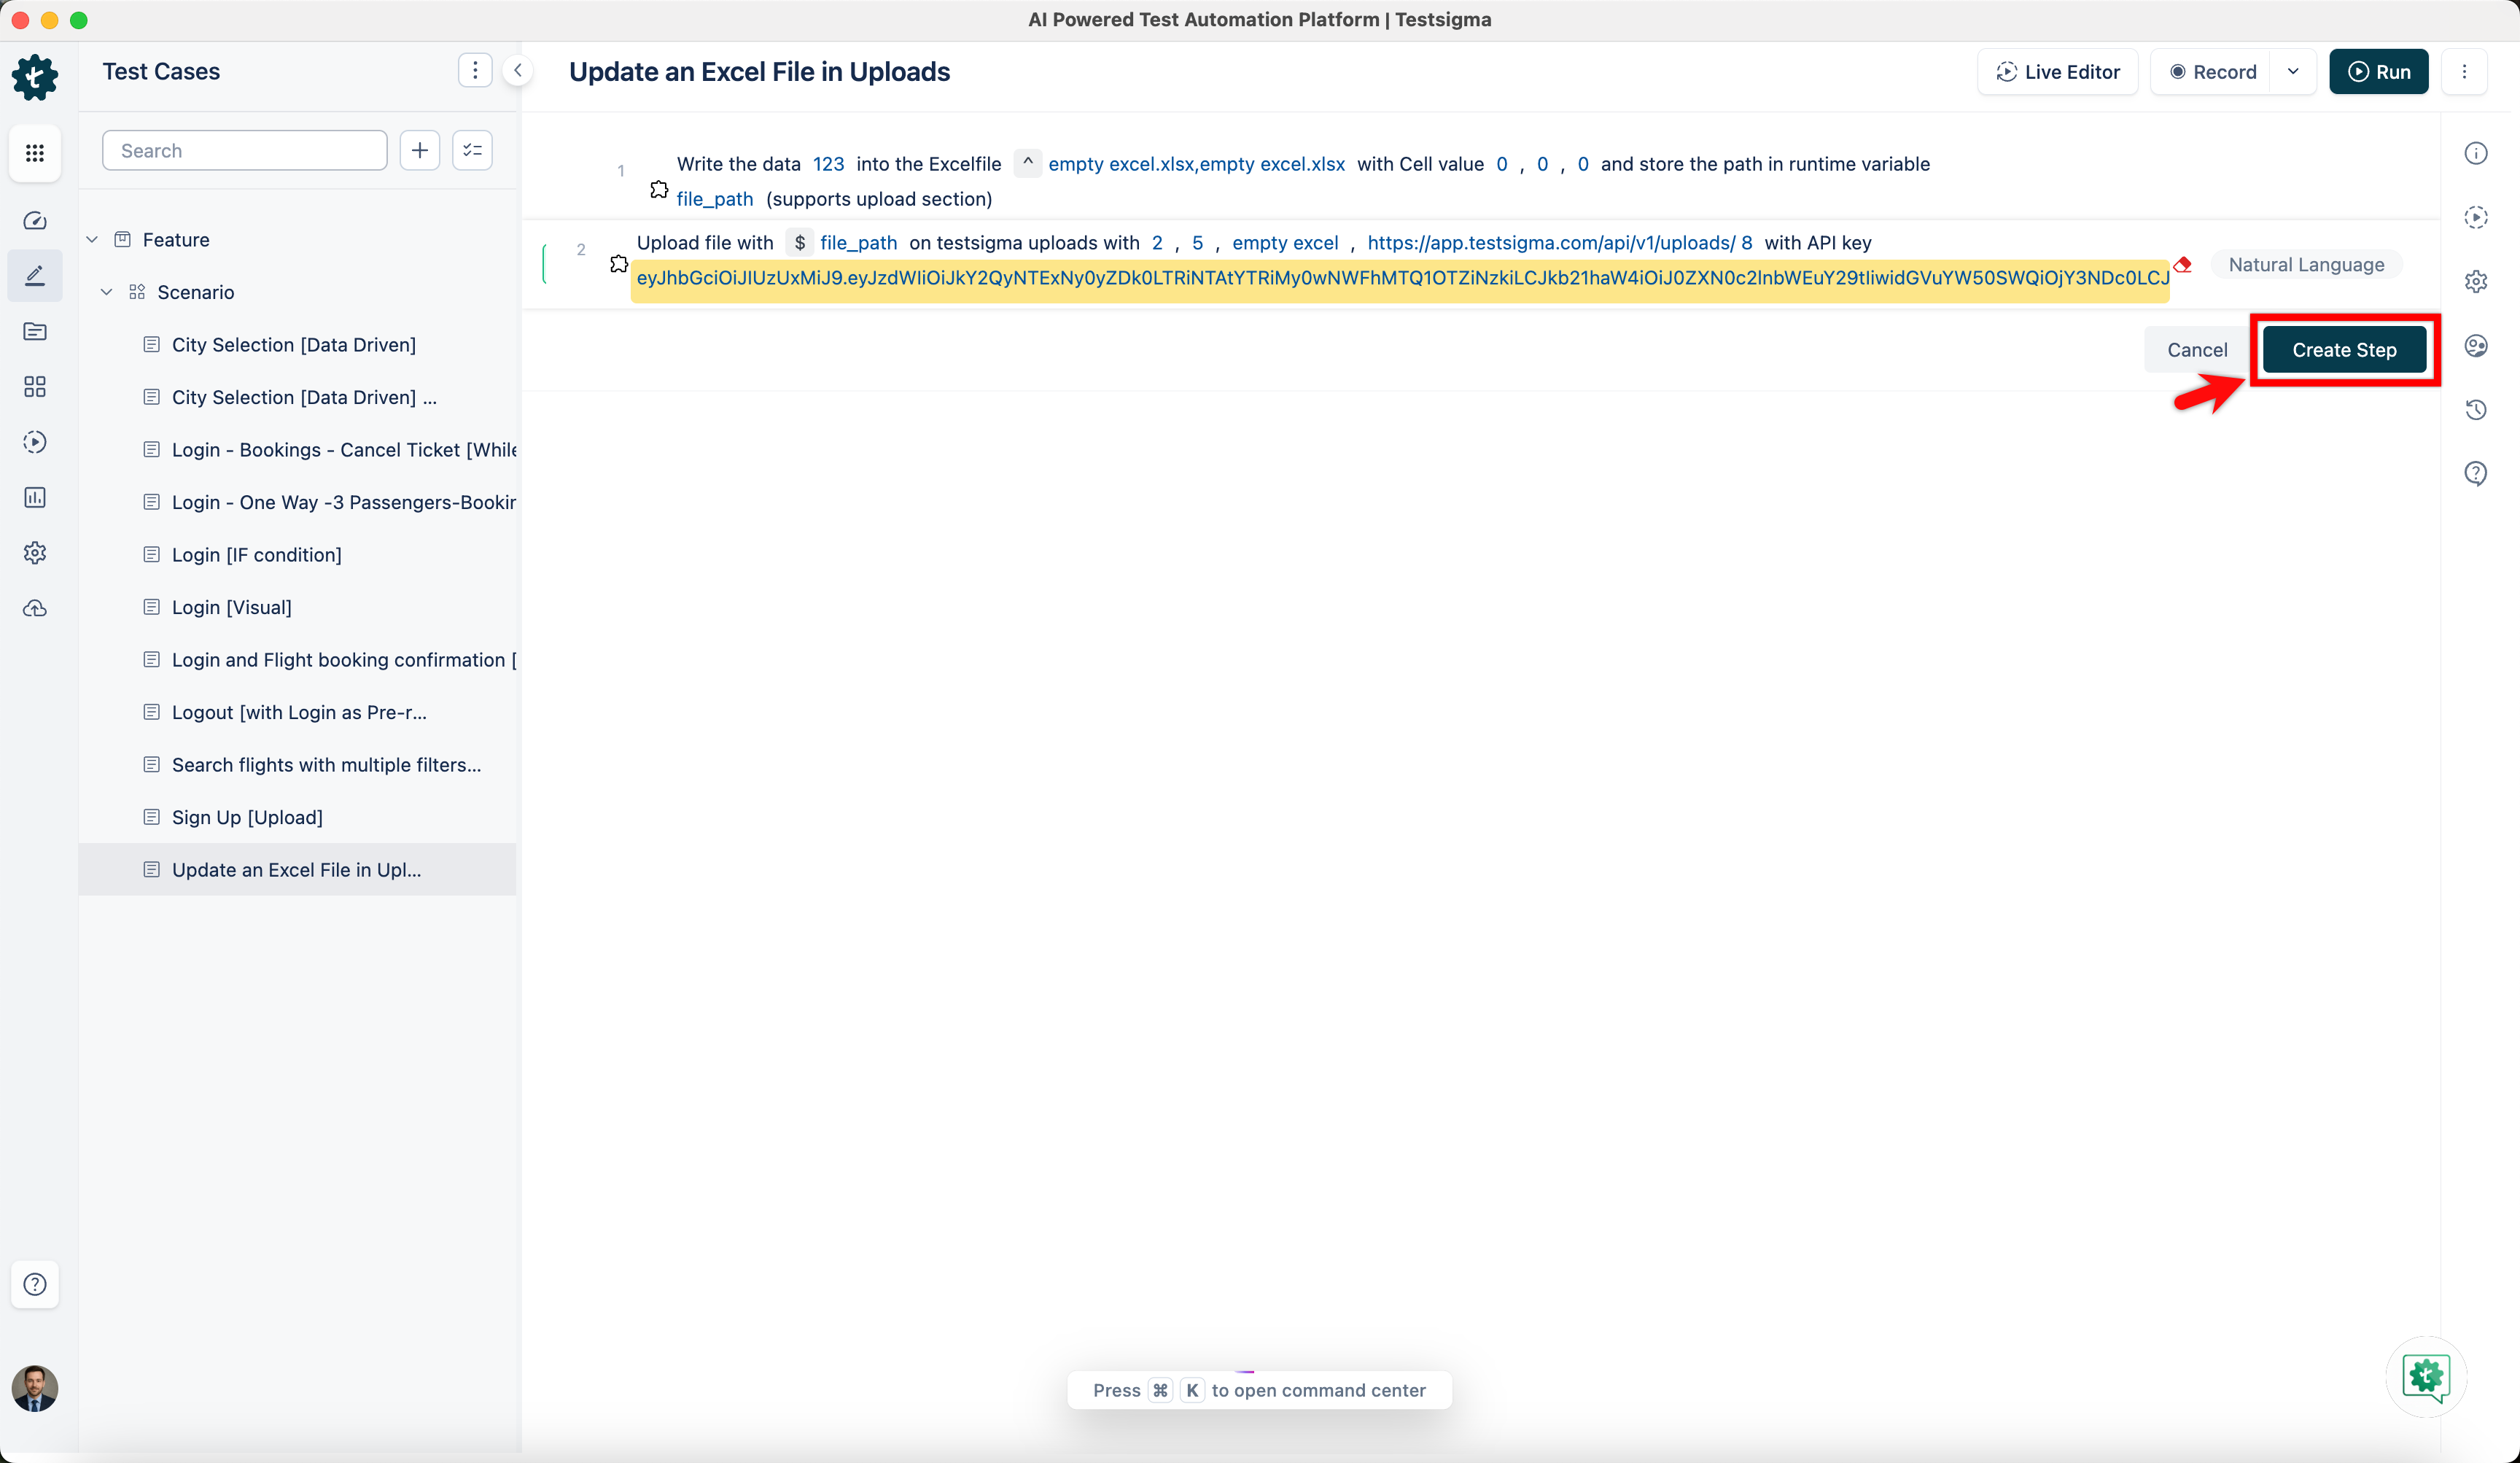
- Click Create Step.
- Click the absolutepath placeholder and replace it by selecting Runtime from the Test Data Types dropdown.


After you execute it, here's how it looks: