Software installation
You need to complete the following steps to build your development environment that enables you to flash the Mc Lighting software to the ESP8622.
Download and install the arduino software (IDE) at https://www.arduino.cc/en/Main/Software
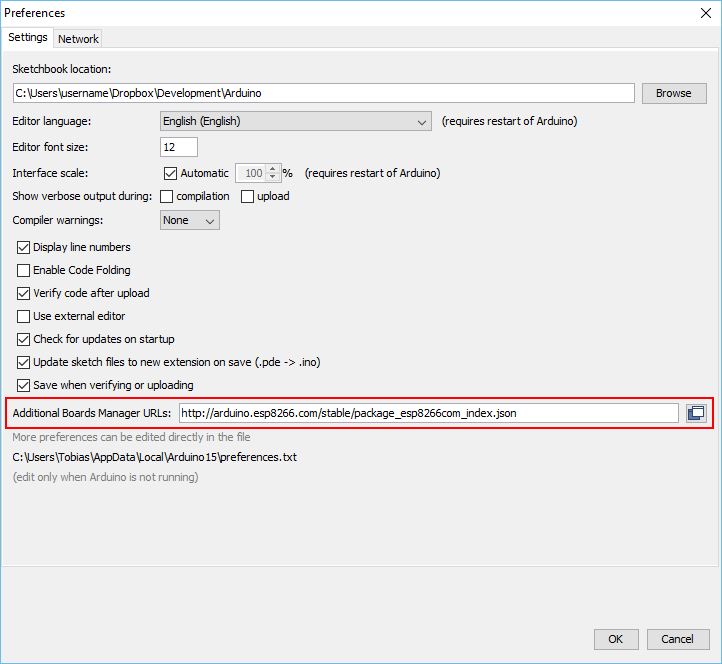
In the Arduino IDE open the preferences dialog and enter the following URL as "Additional Boards Manger URL":
http://arduino.esp8266.com/stable/package_esp8266com_index.json
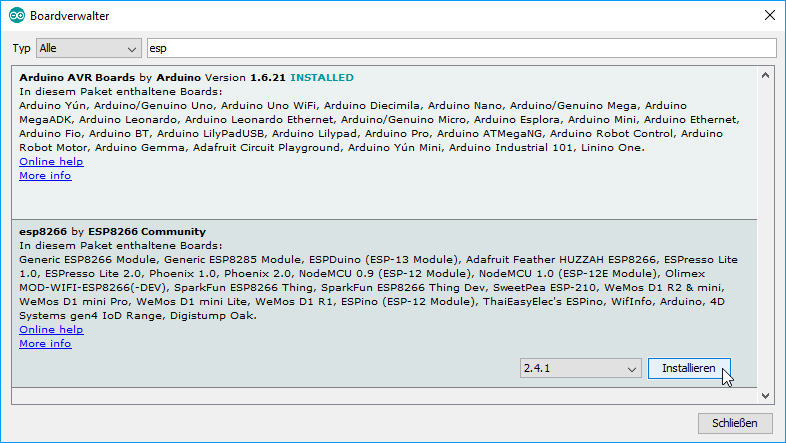
Go to "Tools" > "Board: " > "Boards Manager ...", search for "esp" and install the "esp8266 by ESP8266 Community" in version 2.3.0 (https://github.com/esp8266/Arduino):
Now go to "Tools" > "Board: " and choose "NodeMCU 1.0 (ESP-12E Module)", set CPU frequency to 80 MHz, and Flash size to "4M (1M SPIFFS)"leave upload spped at 115200. Select the right COM port.
Go to "Sketch" > "Include Library" > "Manage Libraries ..." and install the following libraries by searching for them and installing:
- WiFiManager by @tzapu (tested with version 0.12.0) https://github.com/tzapu/WiFiManager
- WebSockets by @Links2004 (tested with version 2.0.5) https://github.com/Links2004/arduinoWebSockets
- Adafruit NeoPixel by @adafruit (tested with 1.0.6) https://github.com/adafruit/Adafruit_NeoPixel
Go to: https://github.com/kitesurfer1404/WS2812FX and download the library repository as ZIP. Load that library into to Arduino software by: "Sketch > Include Library > Add .ZIP Library".
Now open the MC Lighting Arduino sketch in the IDE via "File" > "Open ...". Have a look at the "definitions.h" and change the values here to fit your setup:
// Neopixel
#define PIN 5         // PIN where neopixel / WS2811 strip is attached
#define NUMLEDS 24    // Number of leds in the strip

const char HOSTNAME[] = "ESP8266_01";   // Friedly hostname

#define ENABLE_OTA    // If defined, enable Arduino OTA code.

#define ENABLE_MQTT   // If defined, enable MQTT client code.
If you don't want to use Arduino OTA functionality, comment or delete the "ENABLE_OTA" line, e.g. //#define ENABLE_OTA.
If you don't want to use MQTT-API functionality, comment or delete the "ENABLE_MQTT" line, e.g. //#define ENABLE_MQTT.
Now you have done everything to get all the dependencies. You should now be able to build the software by choosing "Sketch" > "Verify / Compile" (or clicking the tick mark in the tool bar).
Please verify that you have connected the ESP board correctly to your computer via USB and that the correct COM port is chosen.
Now you should be able to upload the compiled sketch to the board via "Sketch" > "Upload" (or by clicking the right arrow in the tool bar).
The next step is to connect the ESP8266 to your wifi. The project uses the great WiFiManger library to provide a captive portal.
The steps are shown in detail here: https://github.com/tzapu/WiFiManager#how-it-works
I also created a little video that shows the steps:

If you have eabled MQTT-API you should enter your credentials here.
In short words:
- Start up your ESP8266, the little LED on the module should blink now and the LEDs should all green.
- The ESP8266 opens up a new WiFi Network with the name you provided in the definitions.h.
- Connect your PC or Smartphone to the Wifi and follow the steps to provide your WiFi credentials.
- The ESP8266 restarts and should be reachable via it's name or IP (have a look at the debug output in the Arduino software).
Next step is to upload the webpages to the ESP8266. This is done that way:
- Go to http://YOUR_ESP8266_HOSTNAME_OR_IP/upload.
- A simple upload form should appear.
- Upload the index.htm from the "McLighting\clients\web\build" directory.
- Optional: Upload the edit.htm.gz to get a editor for your filesystem via http://YOUR_ESP8266_HOSTNAME_OR_IP/upload.
- Optional: Upload the offline.appcache from the "McLighting\clients\web\build" directory if you want to use offline capabilities (won't work in all browsers and situations).