Udacity Project 2
Here is the video explaning the project
![]()
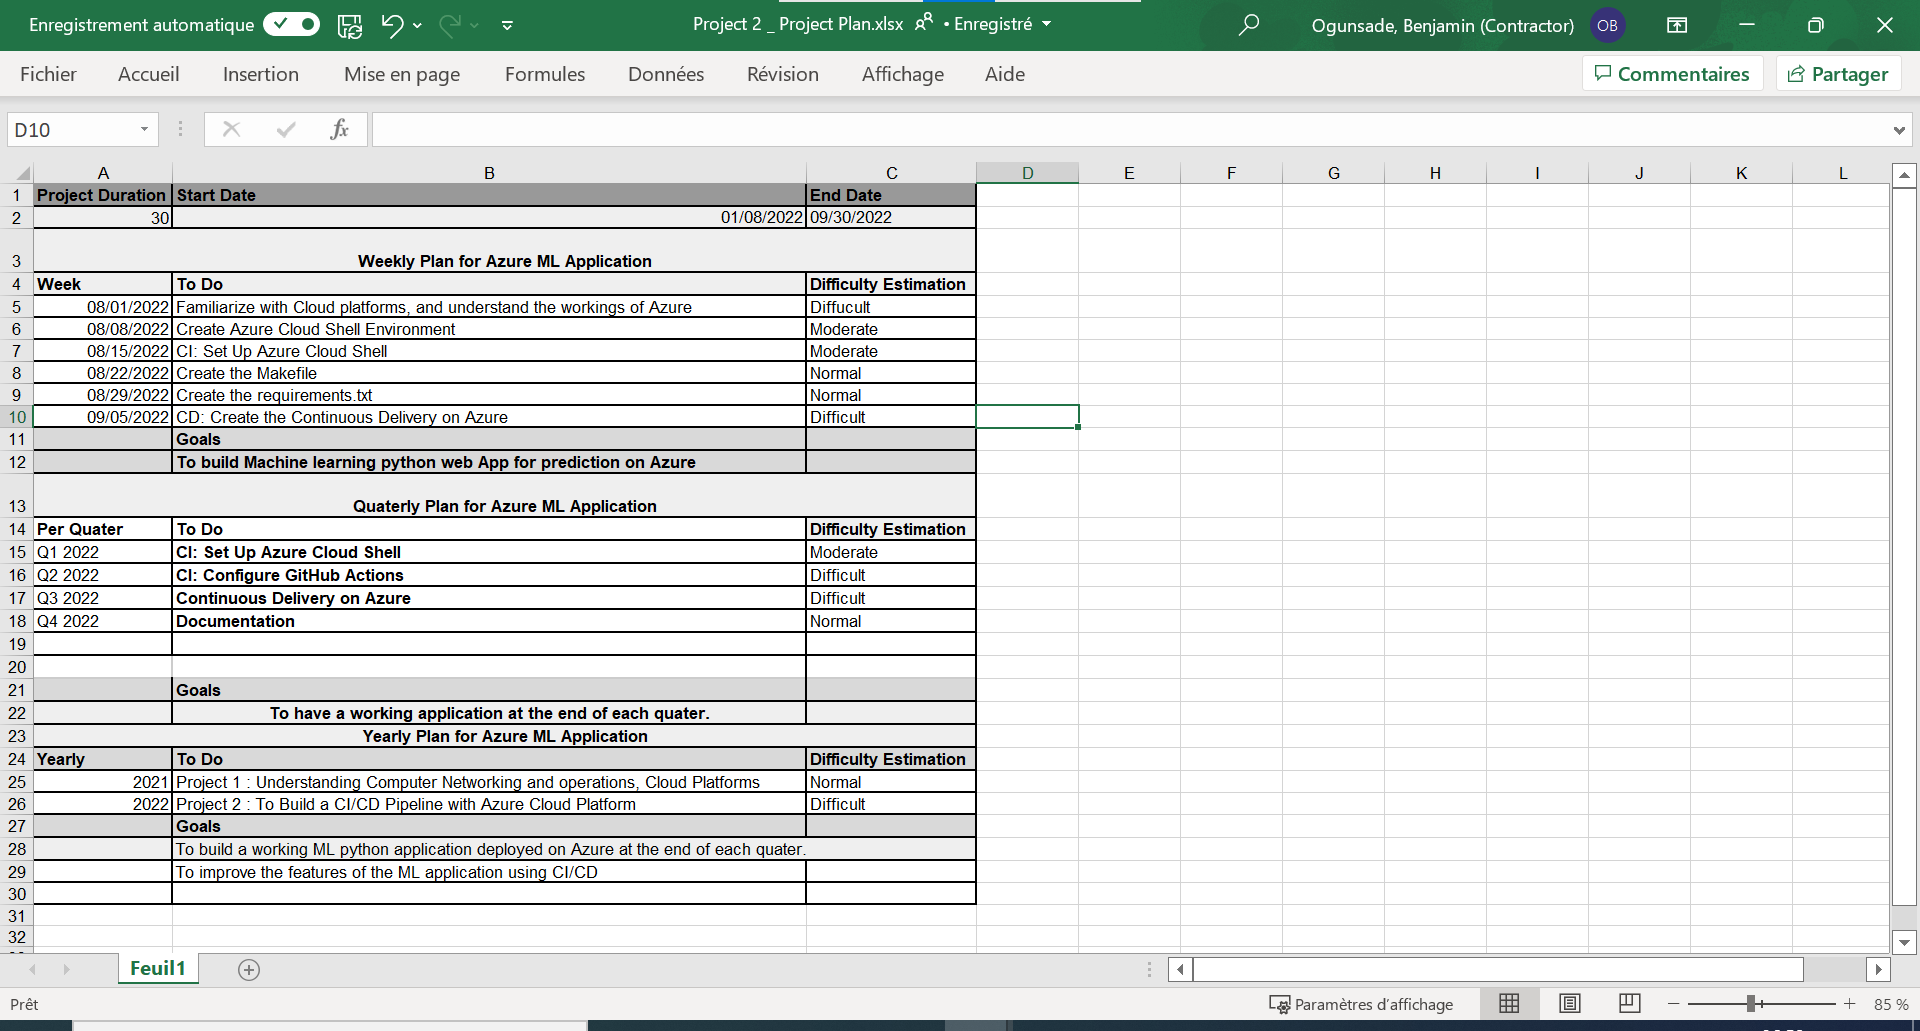
Here is the link to my Project Plan using Spreadsheet: https://testfutaedu-my.sharepoint.com/:x:/g/personal/baogunsade_futa_edu_ng/Eexutlf_95xLrofbrLEFyTgB3uSsO1NEl-QEsq2Hgl06Cg?e=Taa0TJ
Here is an preview of it:
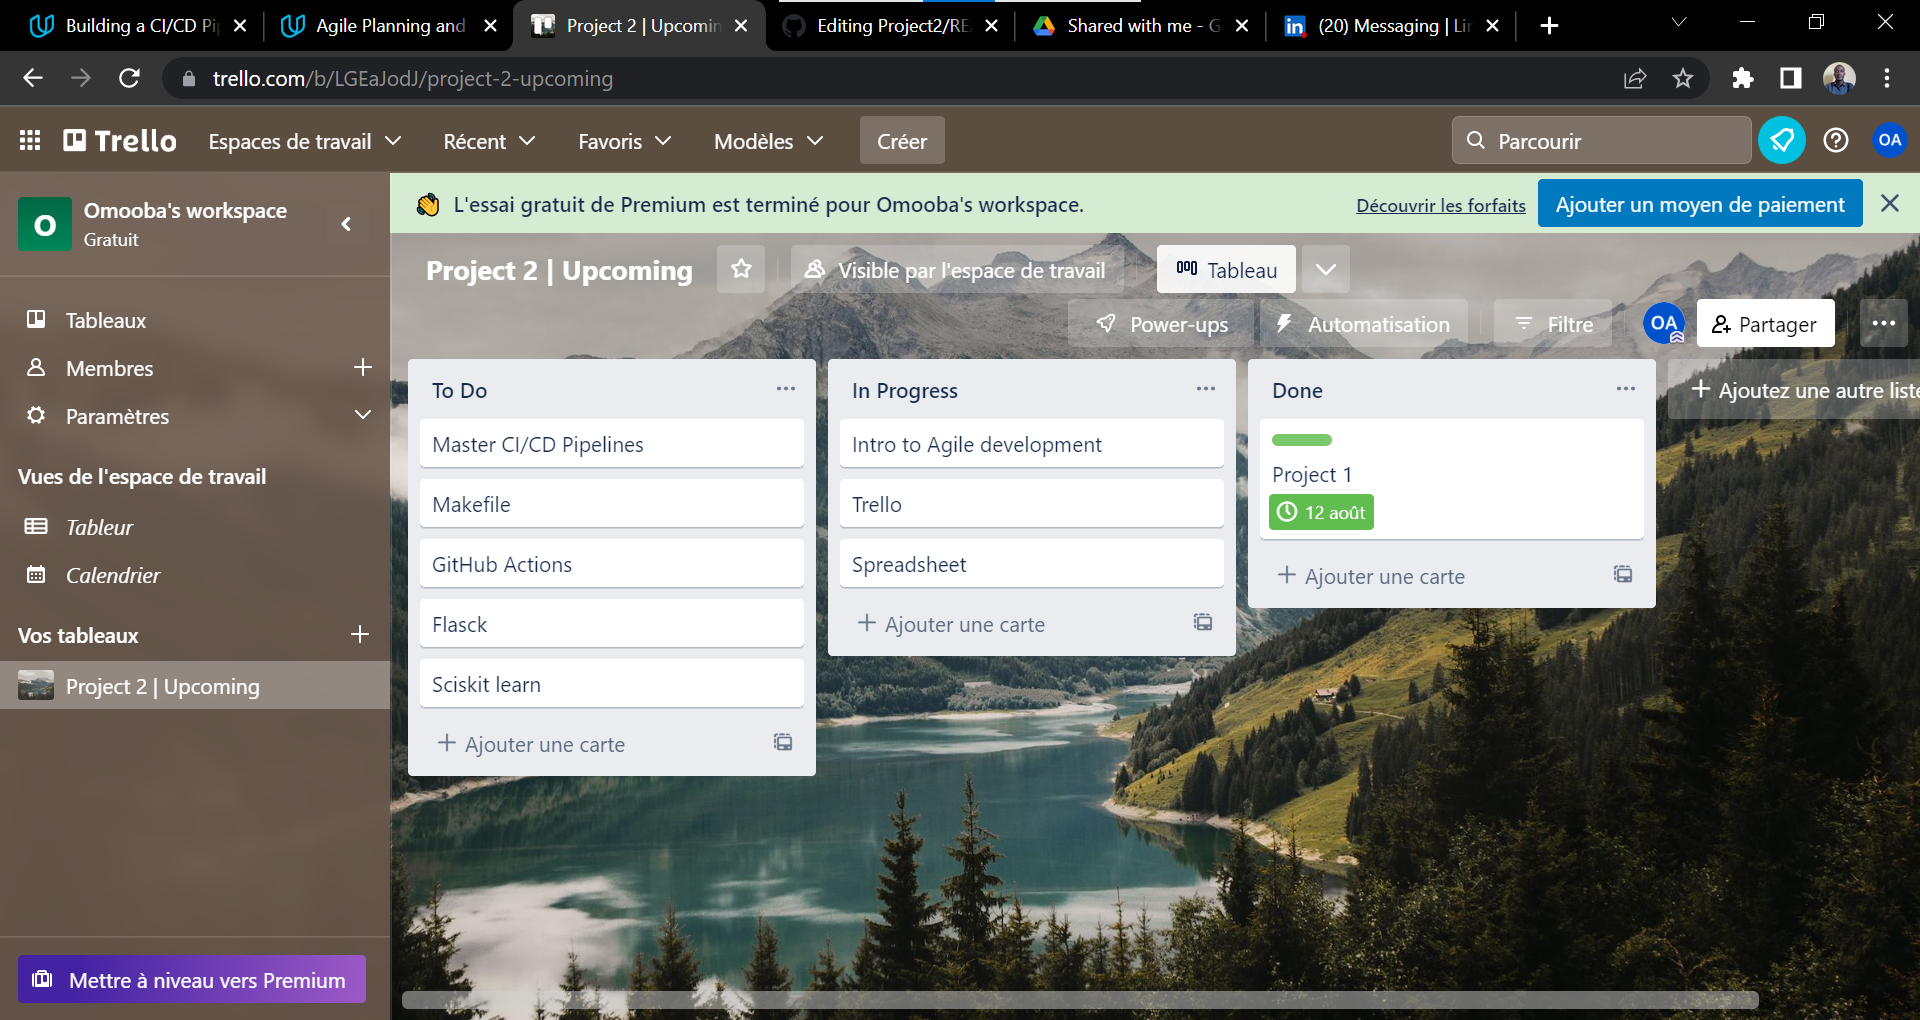
Here is the link to my Trello Project : https://trello.com/b/LGEaJodJ
Below is a screenshot
- Create an Azure Account
- Install the Azure command line interface
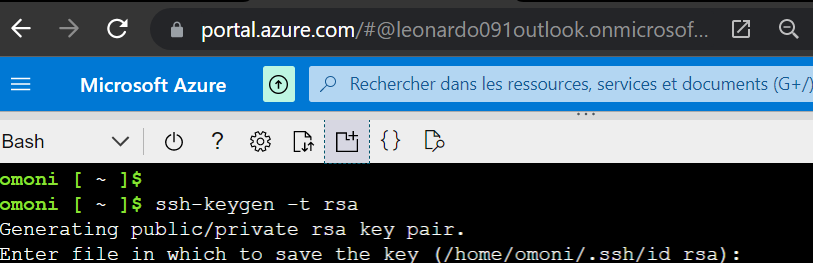
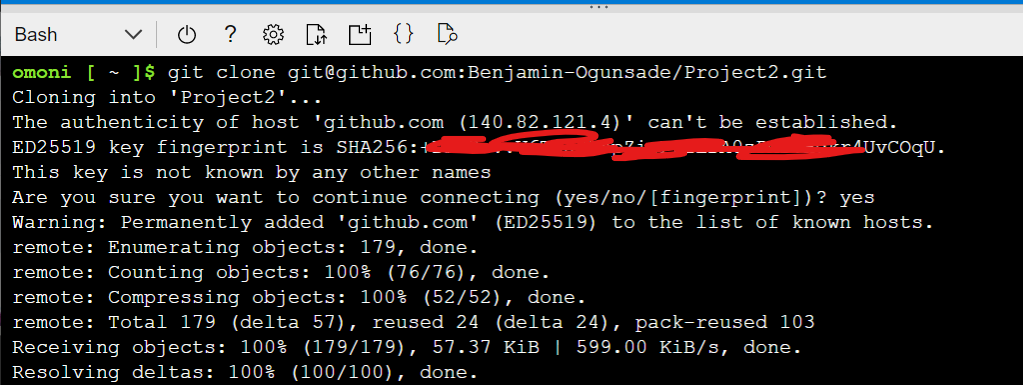
To clone the starter repository, a public ssh key needs to be generated for remote authentication to GitHub, via the CLI comnand
ssh-keygen -t rsa
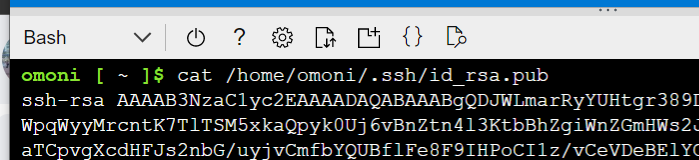
The above command generates the public key which is recovered via:
cat /home/odl_user/.ssh/id_rsa.pub
This is copied and pasted here, select "New SSH key", give it a suitable title e.g "Project2_SSH-keys". Validate it.

Hence, the git clone command will run, unhindered.
git clone git@github.com:Benjamin-Ogunsade/Project2.git
- Below is a screenshot of the successful cloning
- Create the Makefile
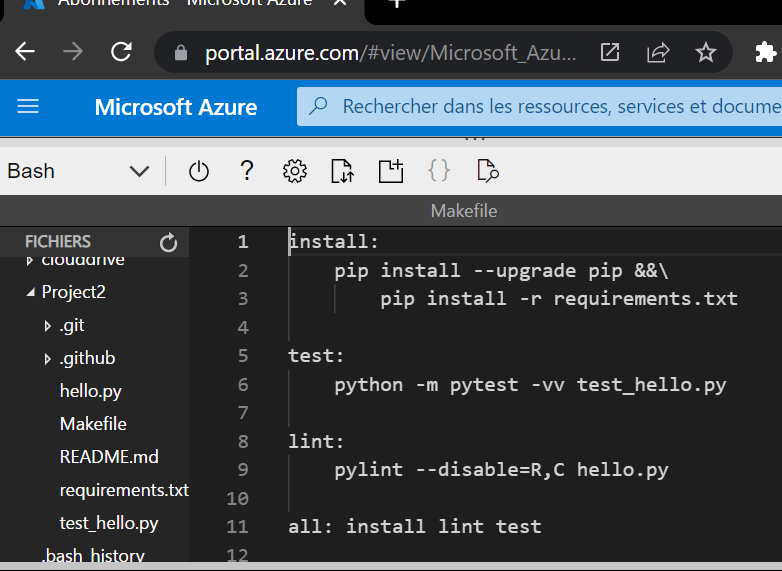
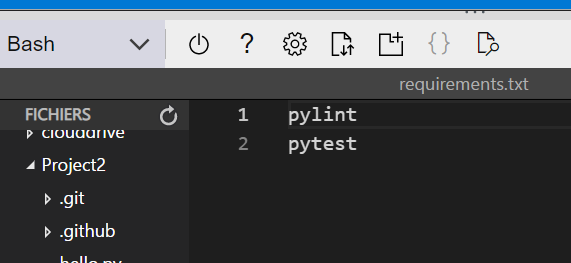
- Create the requirements.txt file
- Create the Python virtual environment
python3 -m venv ~/.myrepo
source ~/.myrepo/bin/activate
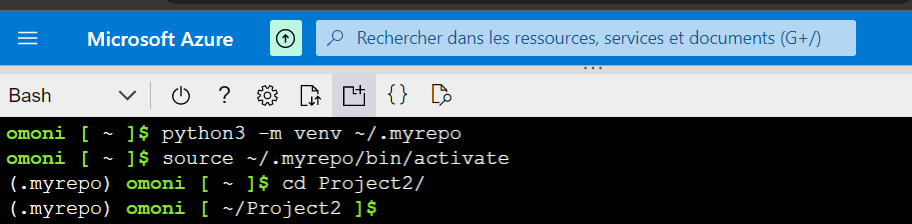
Having created the vitual environment and sourced into it
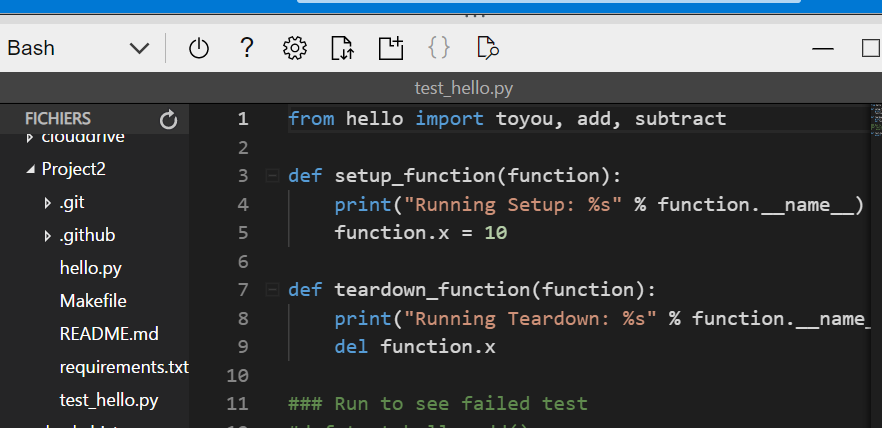
- Create the project script and file test
The project script
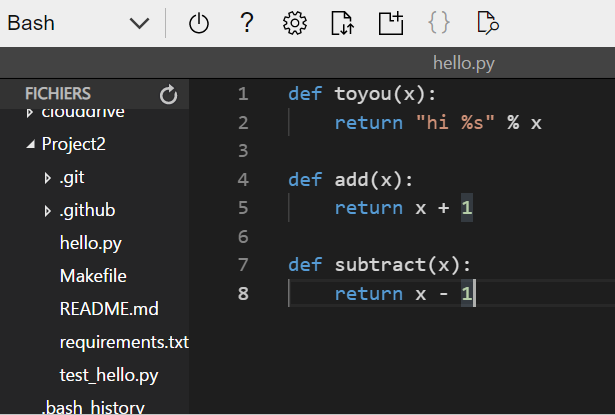
The file test
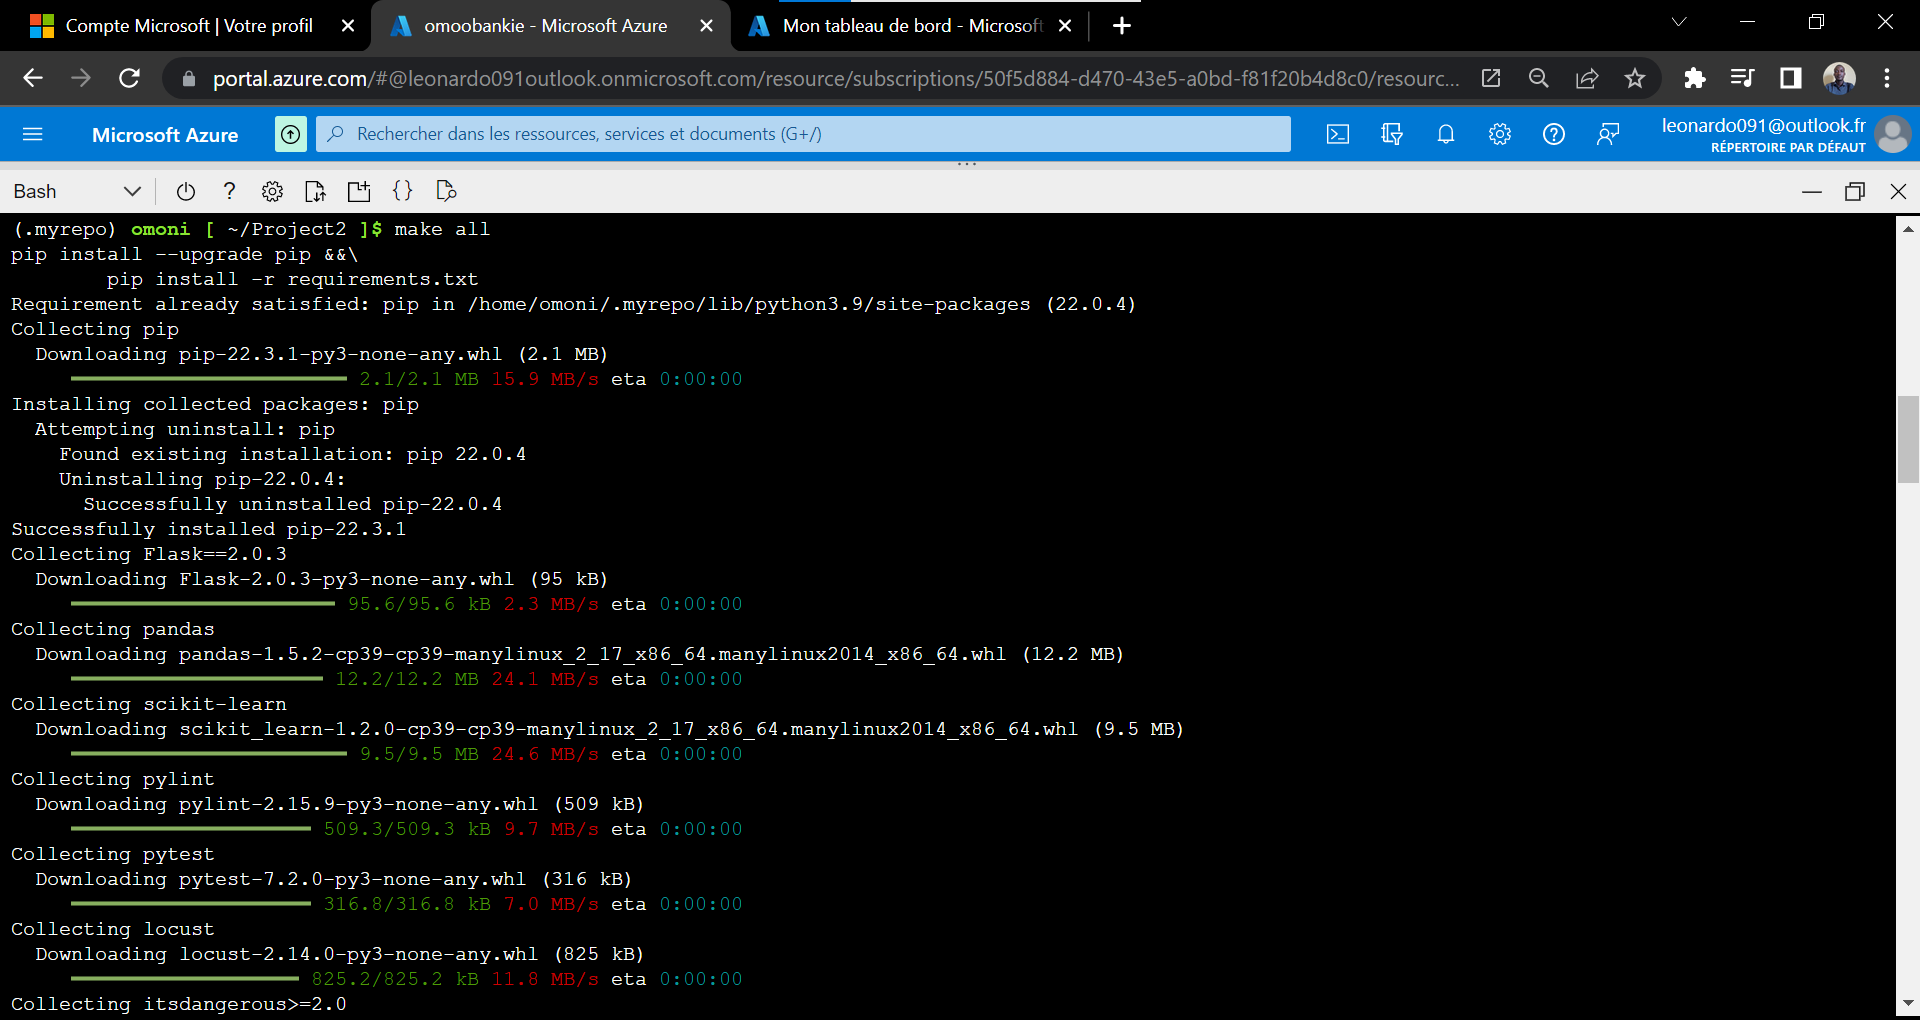
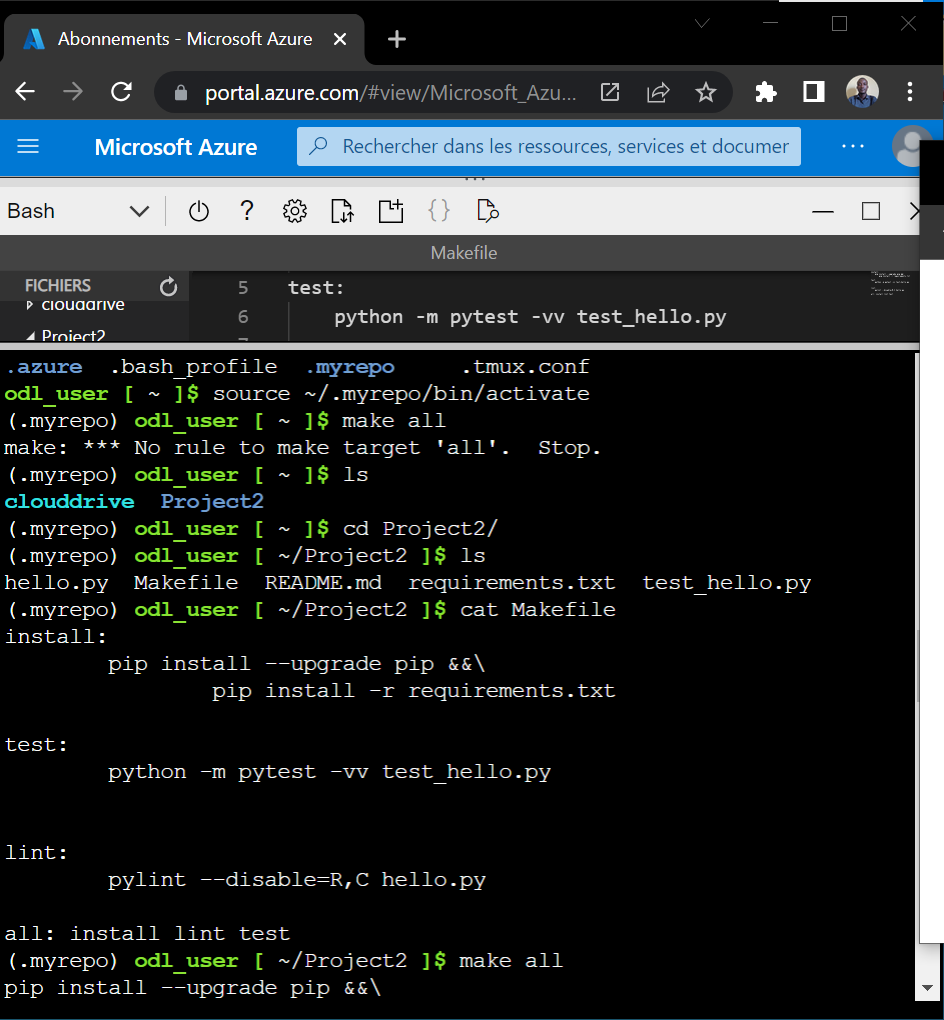
- To run the make all command locally:
Now that you are in the virtual environment named .myrepo, please navigate to the local cloned repo Project2.
Then run the below command
make all
An error was encounter upon the first run of the make all command, this was resolved by navigating into the right directory- the locally cloned repo Project2 within the virtual environment, see the image below.
The result of the make all command ran locally is:
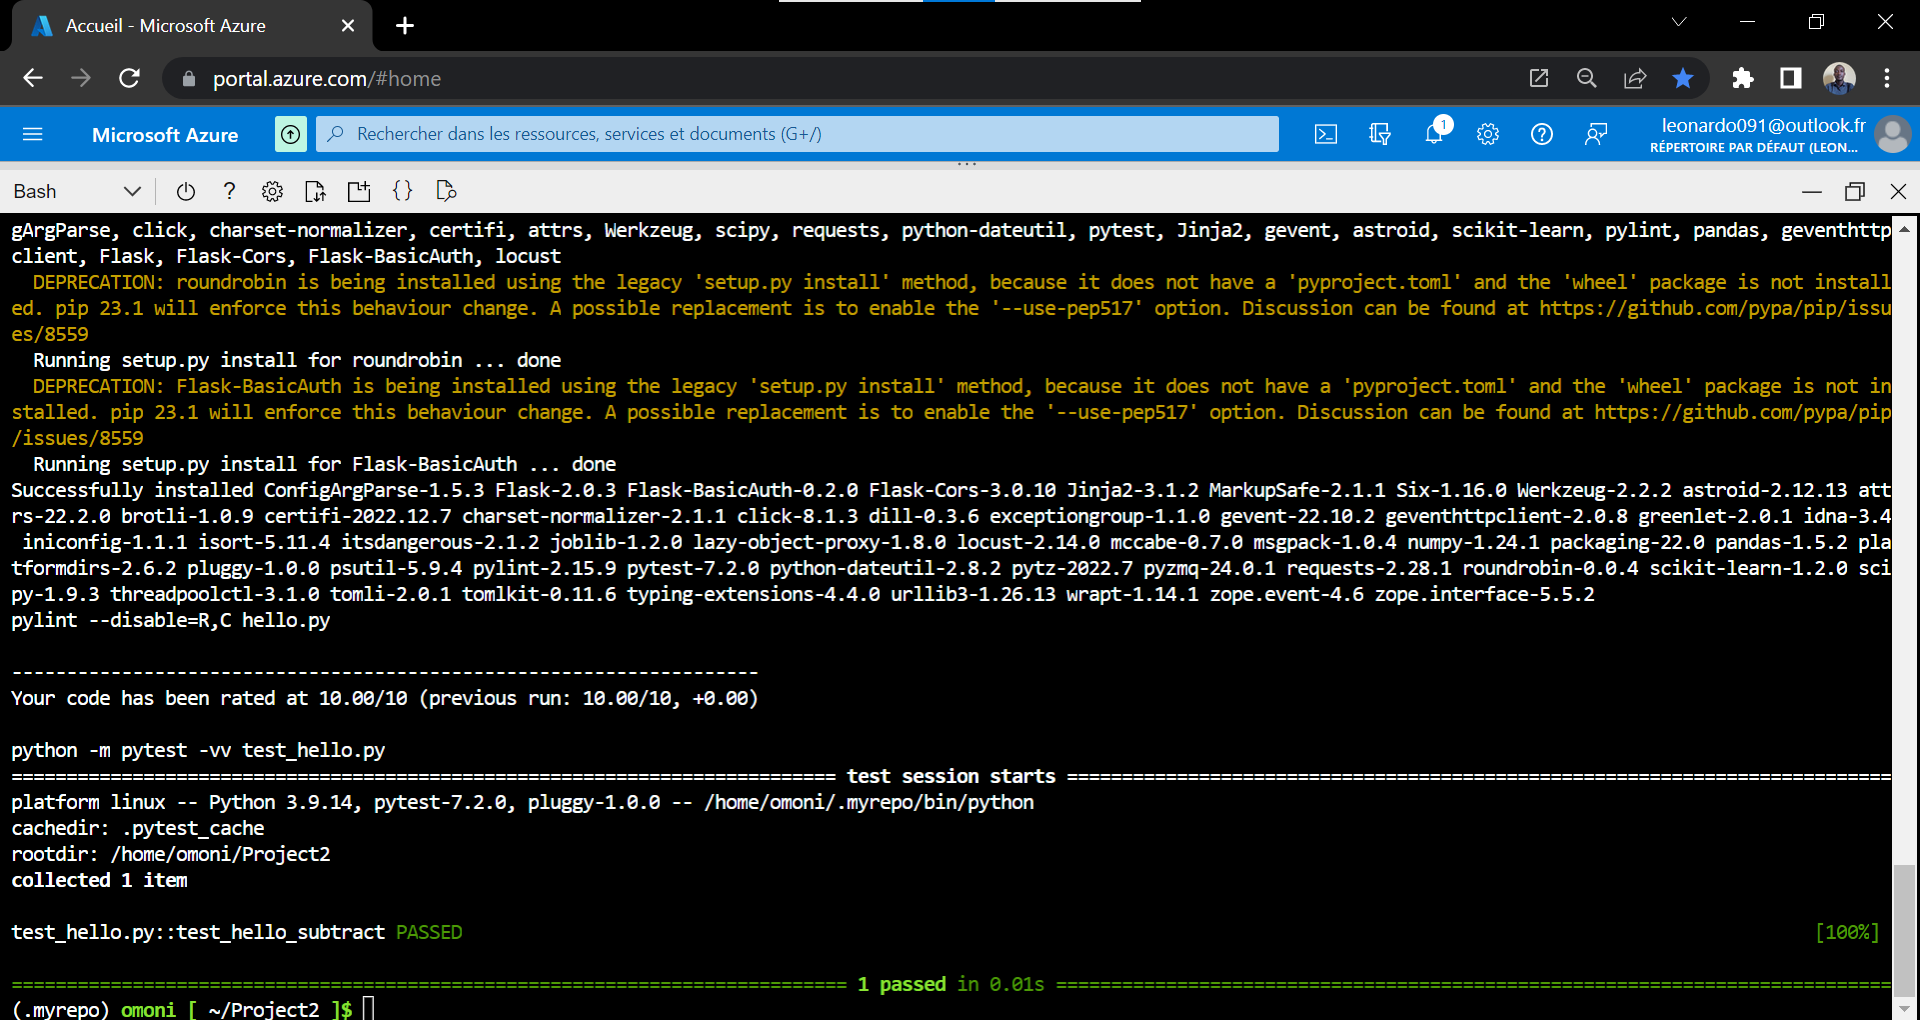
test_hello.py::test_hello_subtract PASSED [100%]
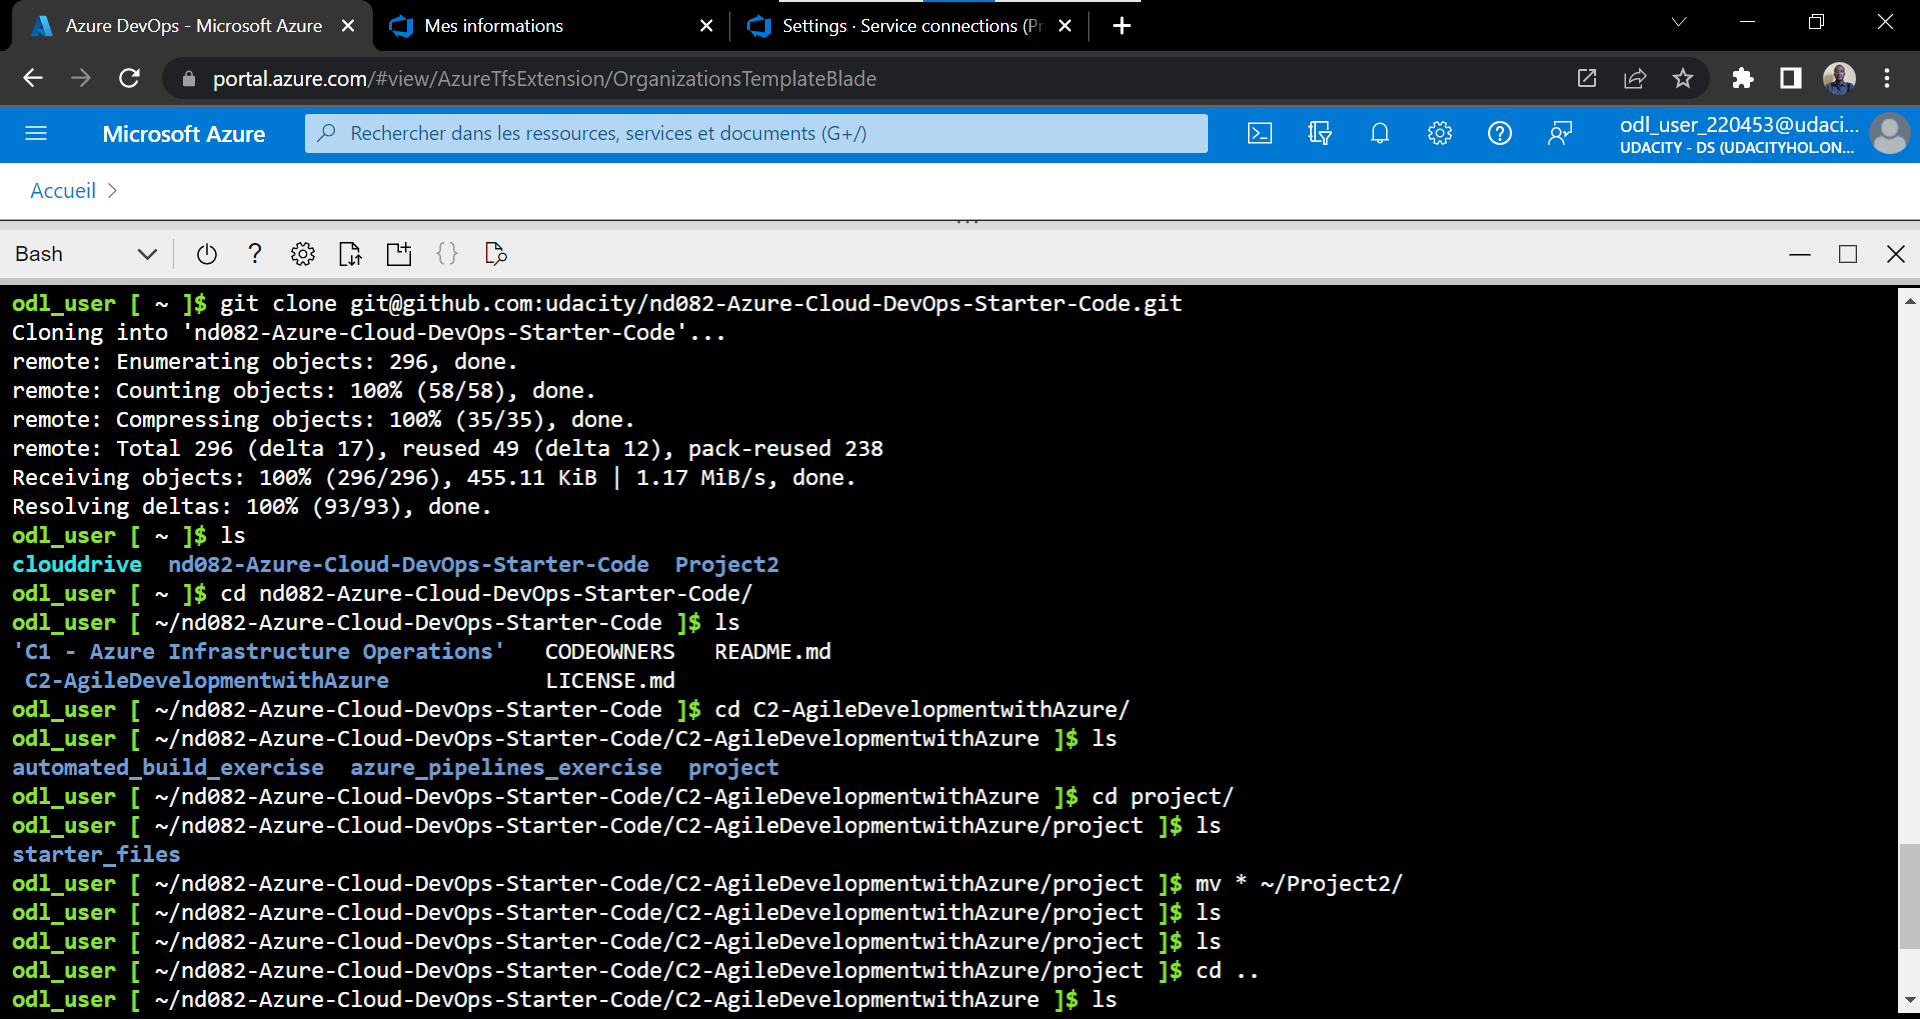
Get Flask Starter Code on the local machine
The folder was cloned and then moved to the project directory
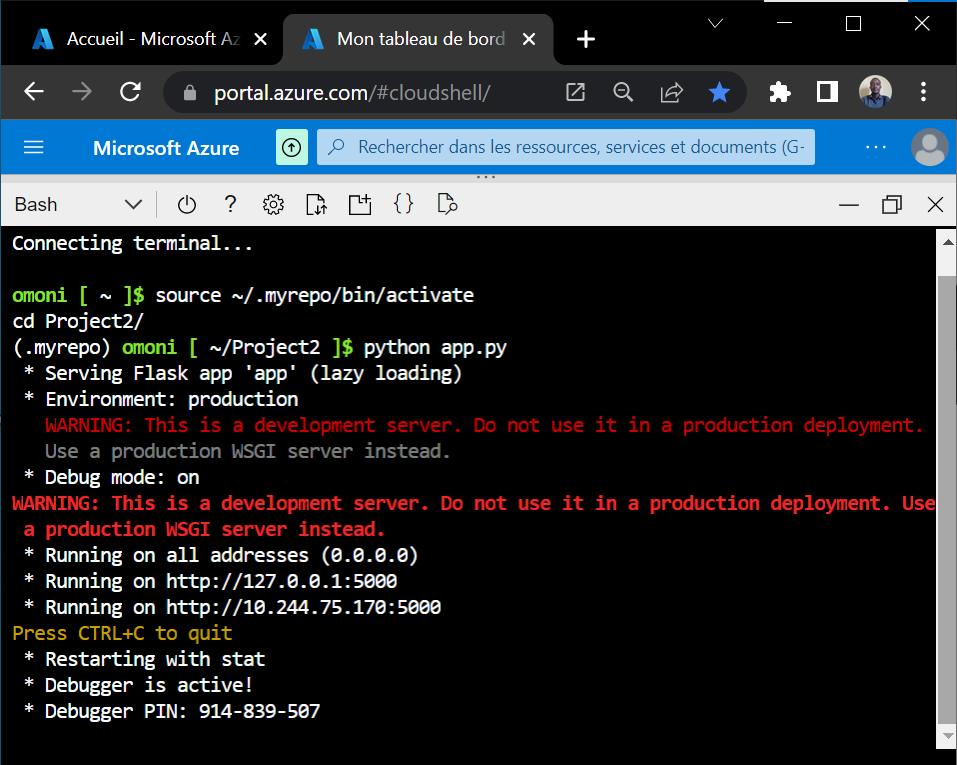
Before going into the GitHub Actions build proper, we need to start the application in a new cloud session, and then source into the python virtual environment ".myrepo"
source ~/.myrepo/bin/activate
cd Project2/
Next, we run "app.py" to start the application
python app.py
Before you run this command, ensure that you have the "make all" command already ran: which calls the Makefile installing all the modules or dependencies as listed in the requirements.txt file.

The app is now up and running on the localhost port 5000 (127.0.0.1:5000).
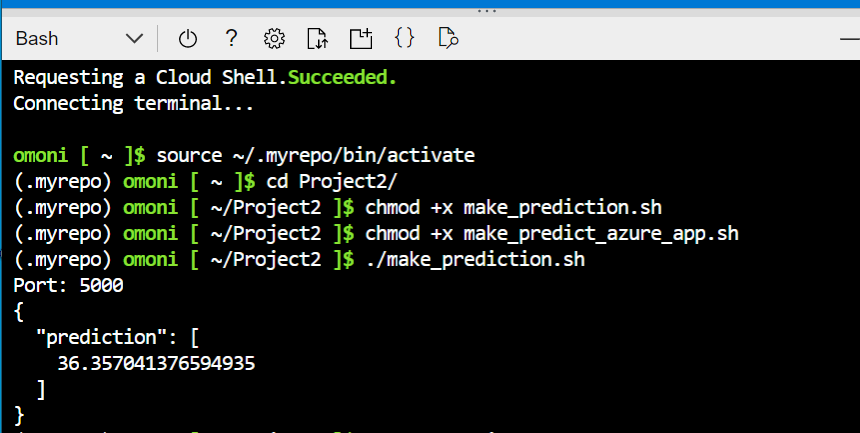
Next, the local prediction is obtained upon running the make_prediction.sh in another cloud session/environment.
./make_prediction.sh
Ensure that the above file is earlier granted the 'execution' permission, by the use of the command:
chmod +x ./make_prediction.sh
Also, the app.py must be running before the prediction is locally executed. Below is the result of the local prediction:
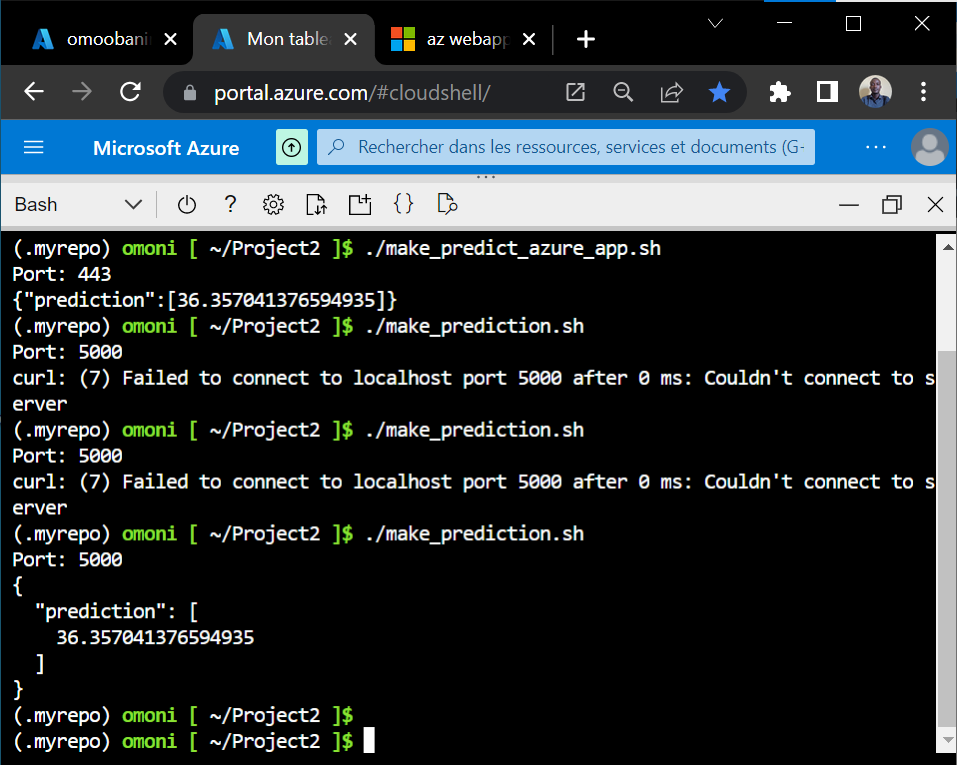
Next is to run the remote prediction, there is the need to first deploy the web app
az webapp up --name myflaskmlwebapp --resource-group omoobanimi234 --runtime "PYTHON:3.7"
The result produced was :
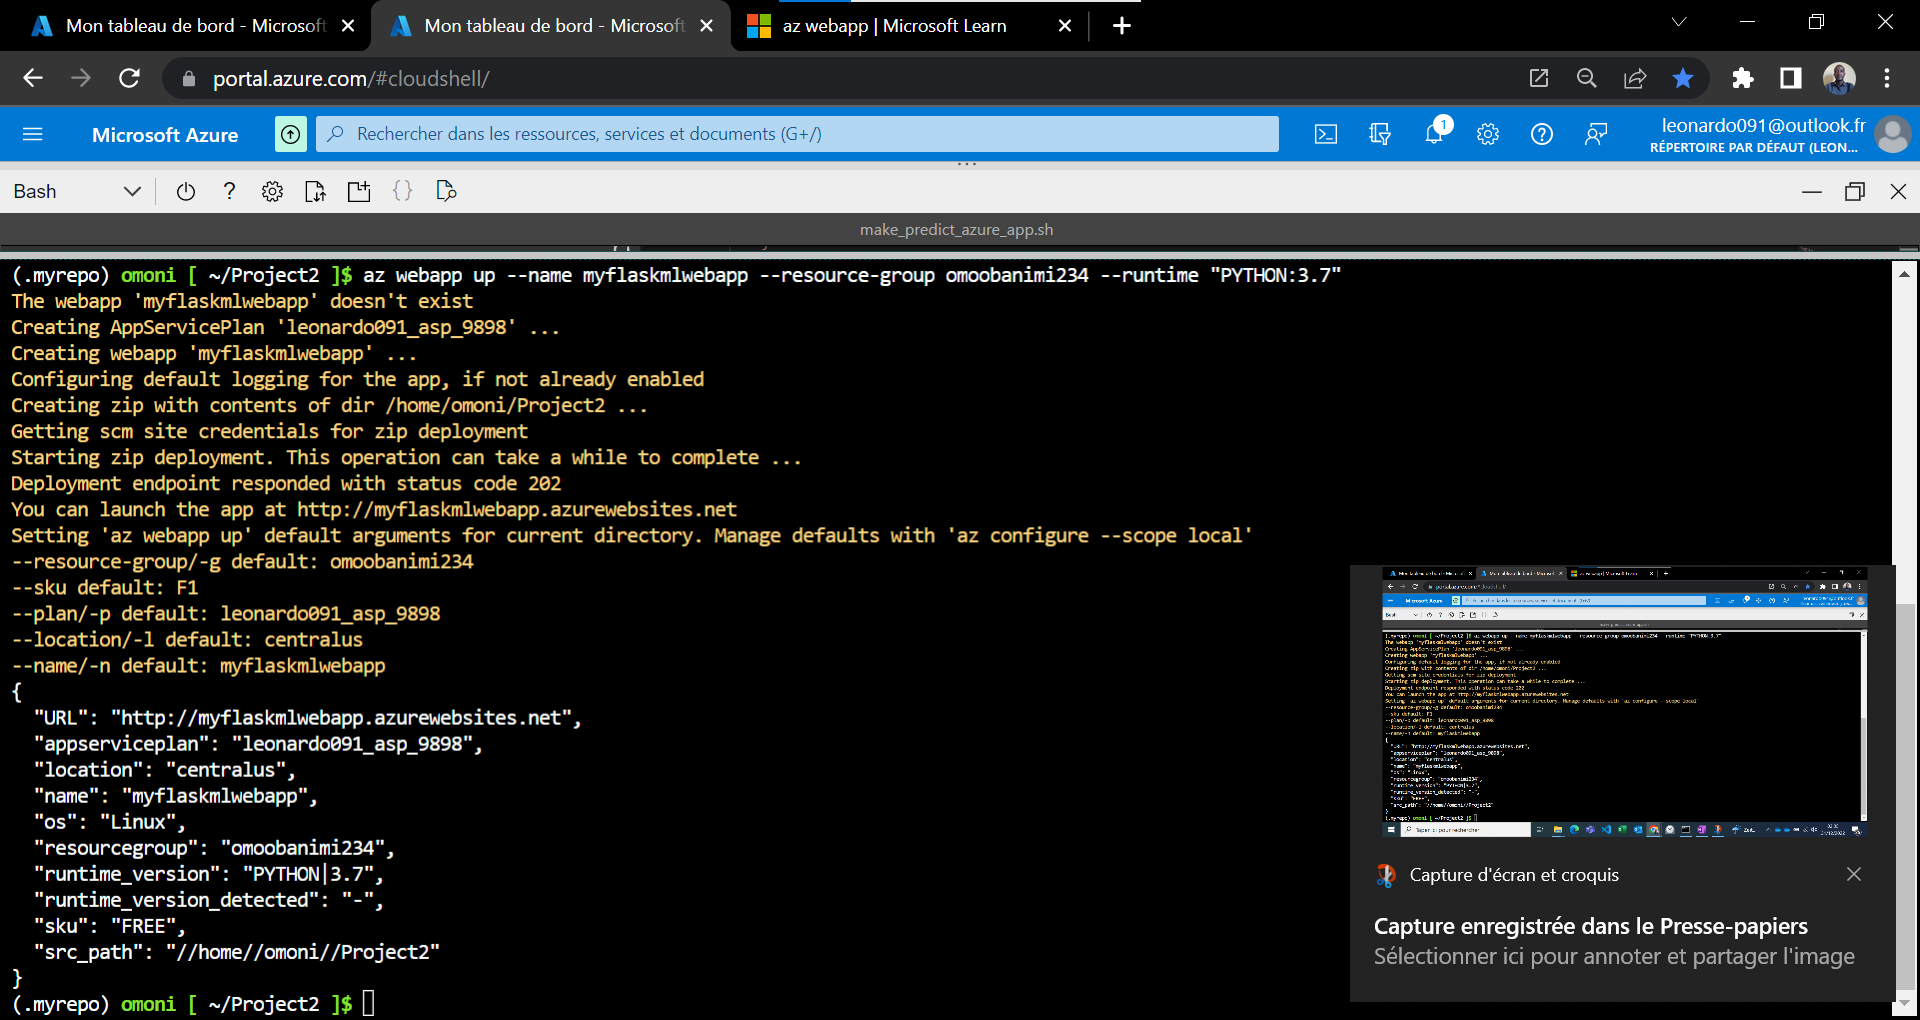
In the previously executed command, it is expedient to state the right -rg which is the -rg on the Azure portal of your Az subscription.
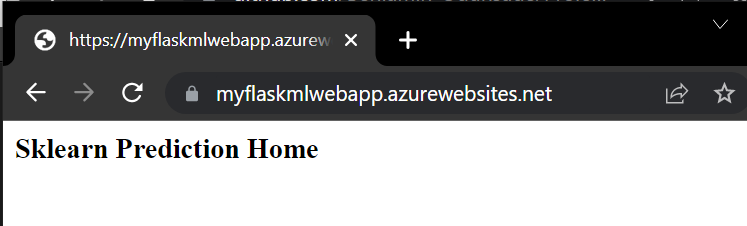
The app is now on the fly and publicly acccessibly via the URL (https://myflaskmlwebapp.azurewebsites.net/) provided in the result provided; the next image depicts the rendition of the URL.
The URL is now recovered and inserted in the make_predict_azure_app.sh, specifically in the POST url.
The app app.py must keep on runnning in the second cloud shell environment.
Thereafter, the make_predict_azure_app.sh is executed using:
./make_predict_azure_app.sh
Produces the result:
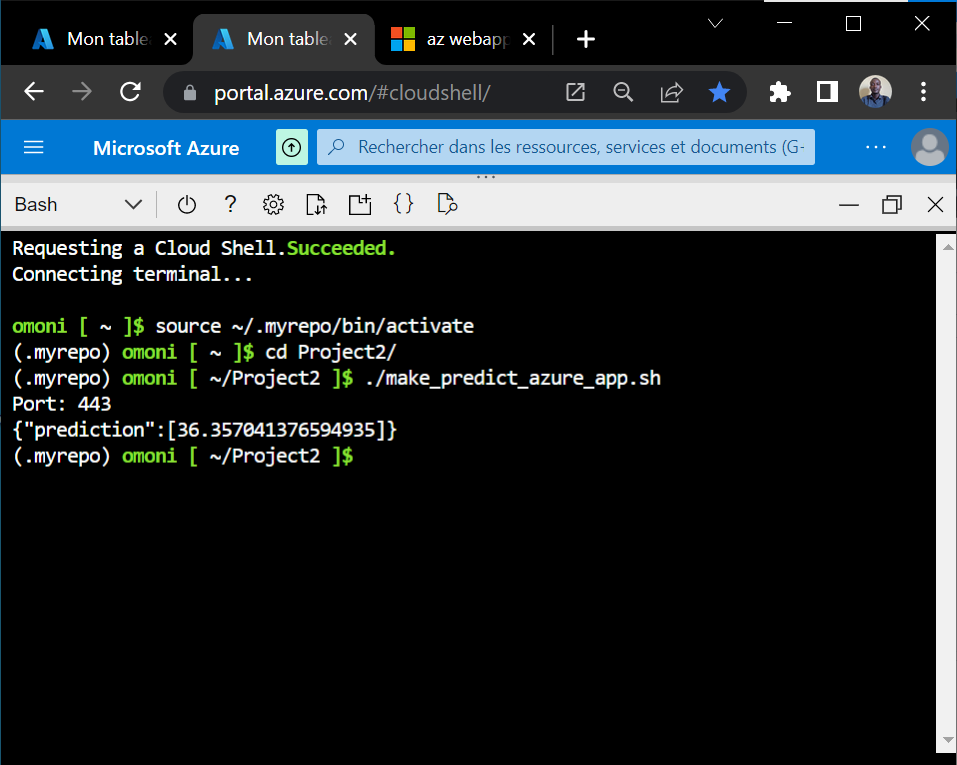
The result shows that the app runs on the port 443.
Next, we head to the Azure portal to located the deployed App Service Plan and the App Service.
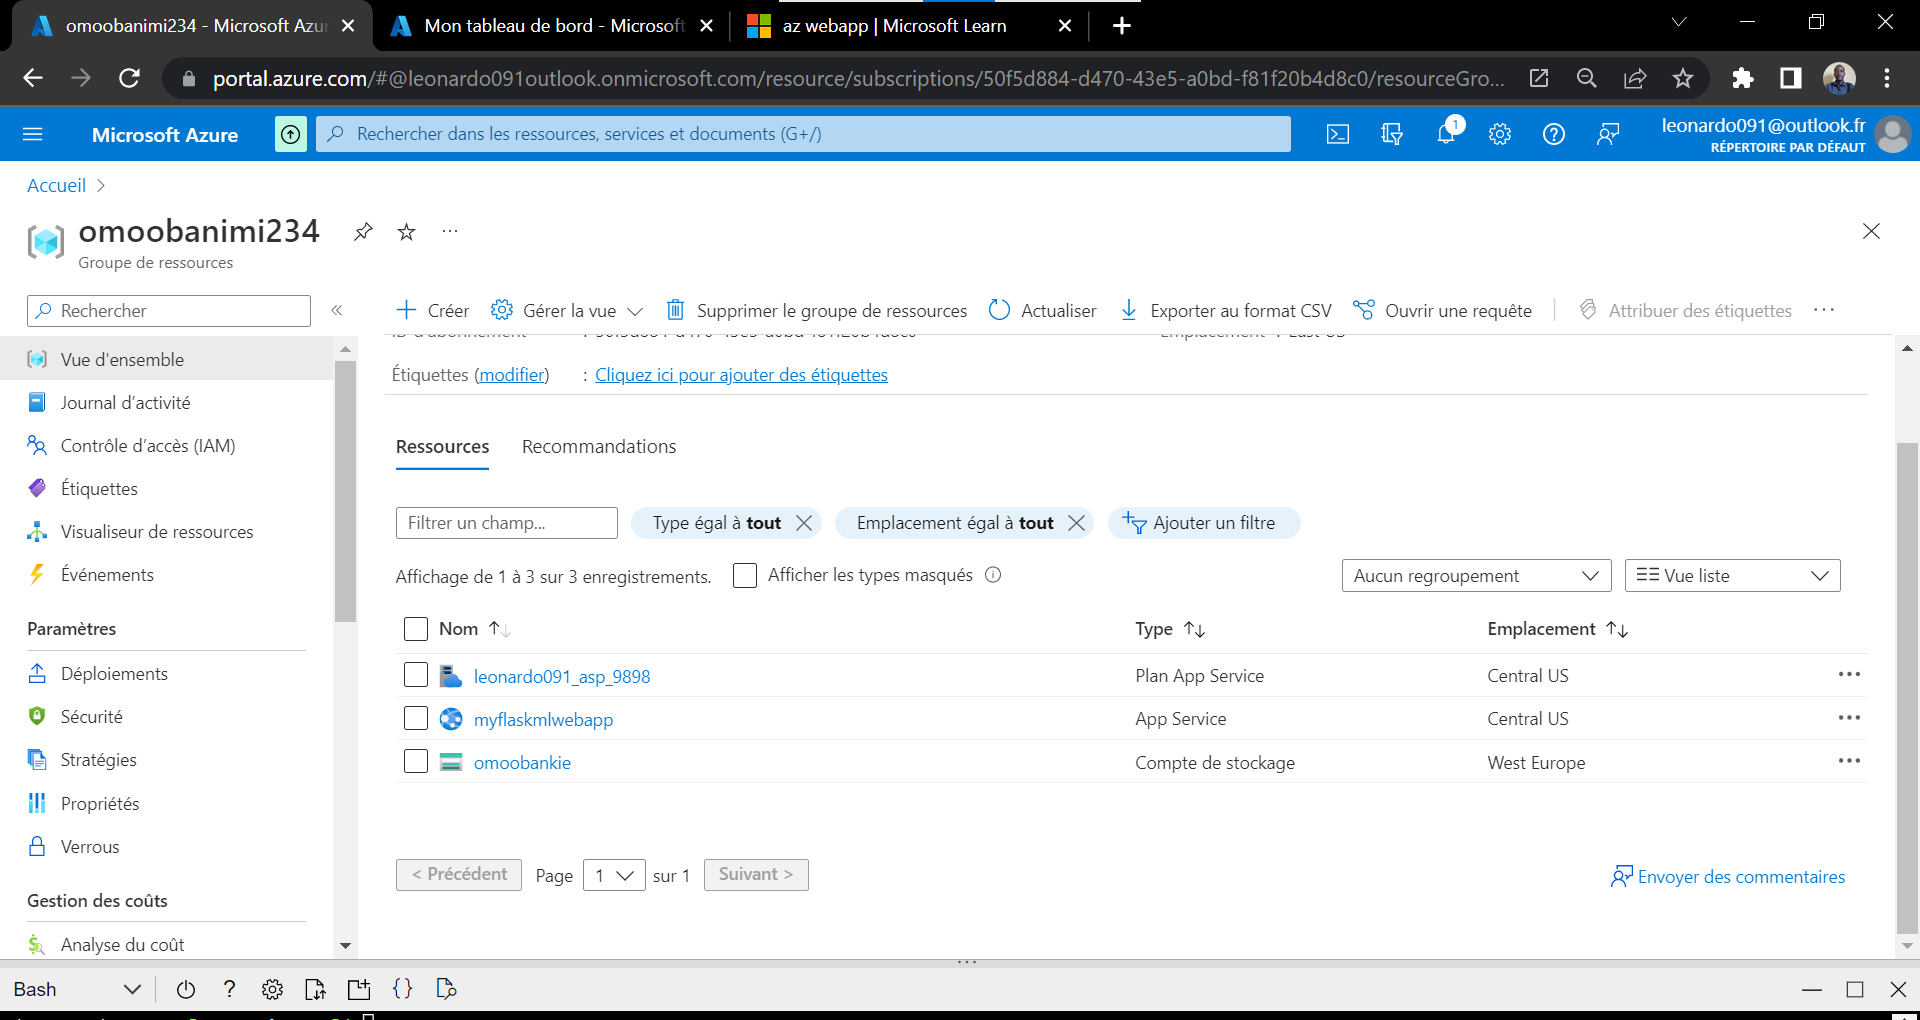
Inasmuch as the App Service is running, the URL will be accessible.
To generate the log, the following command is executed:
az webapp log tail
The following result is produced:

From the above result, it is evident that
- Container myflaskmlwebapp_0_3e8c32b2 for site myflaskmlwebapp initialized successfully and is ready to serve requests.
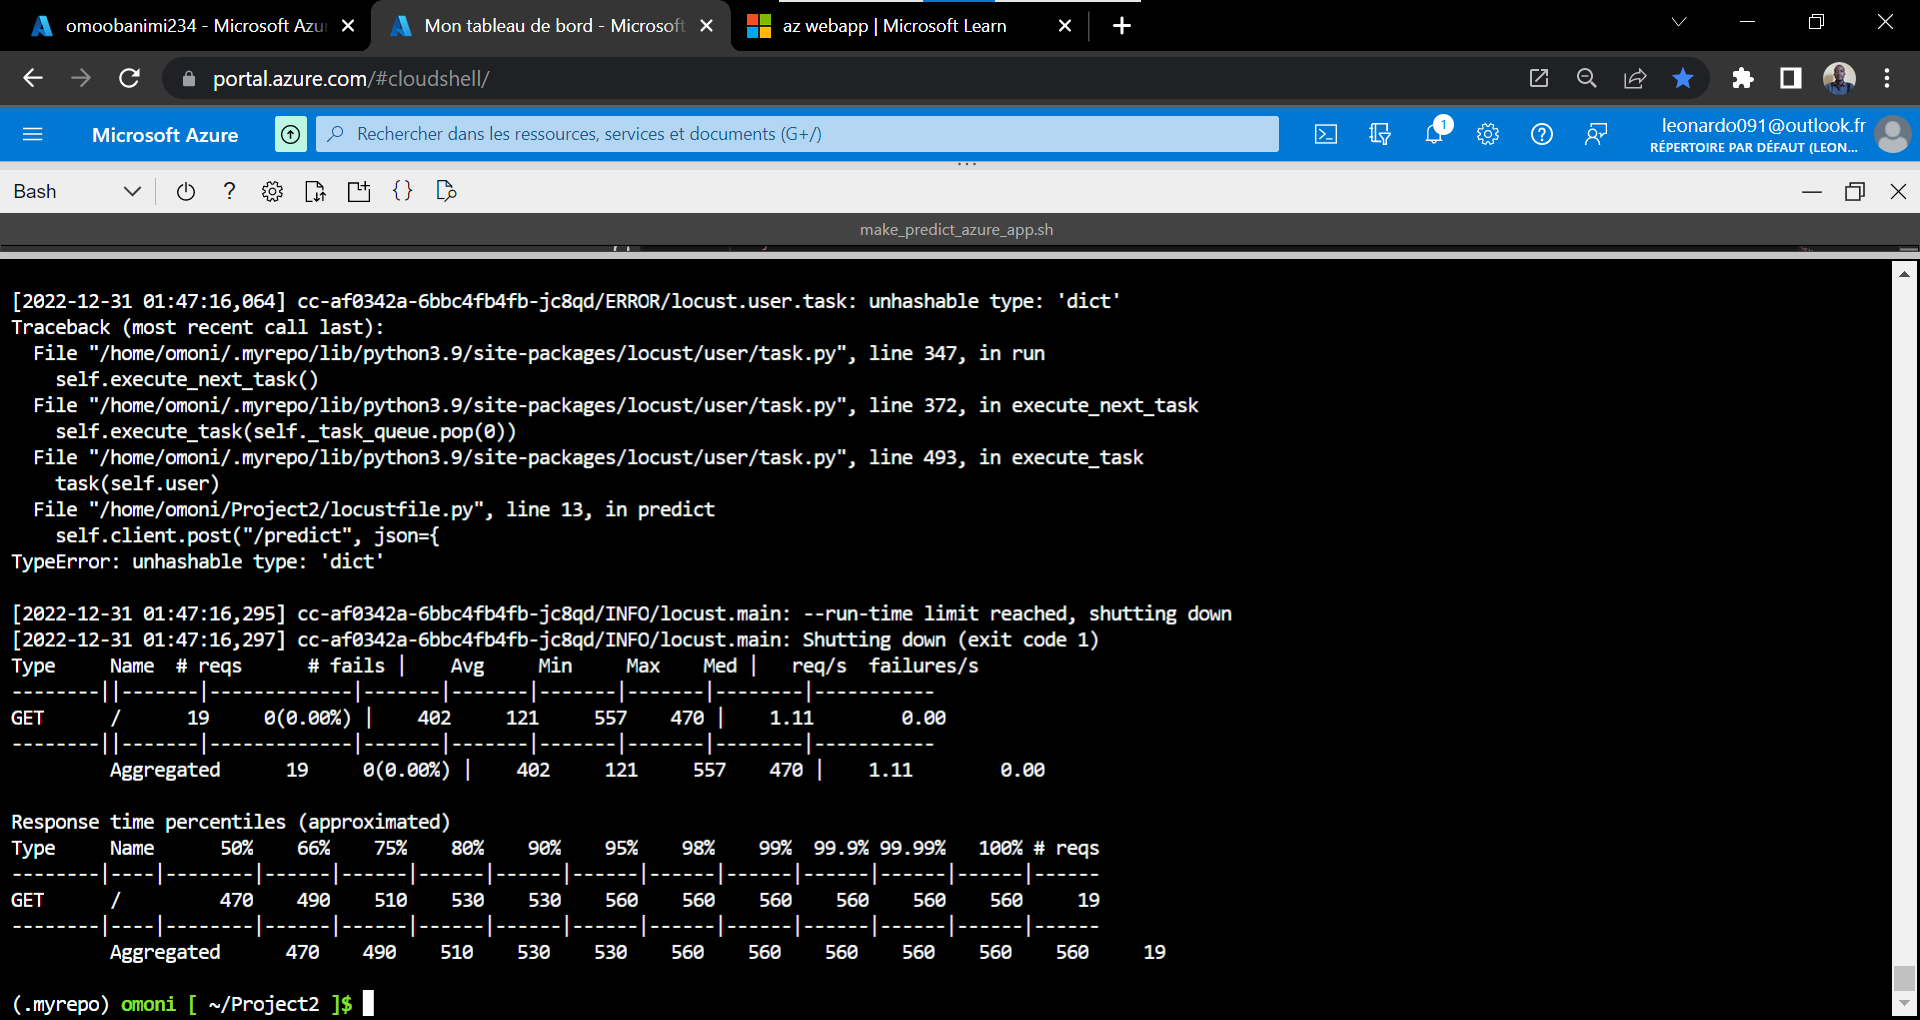
In order to check the performance validation using the locustfile.py file, the prediction parameters are correlated with that of the app.py file.
Next, the file is run
locust -f locustfile.py --headless -u 20 -r 5 -t 20s
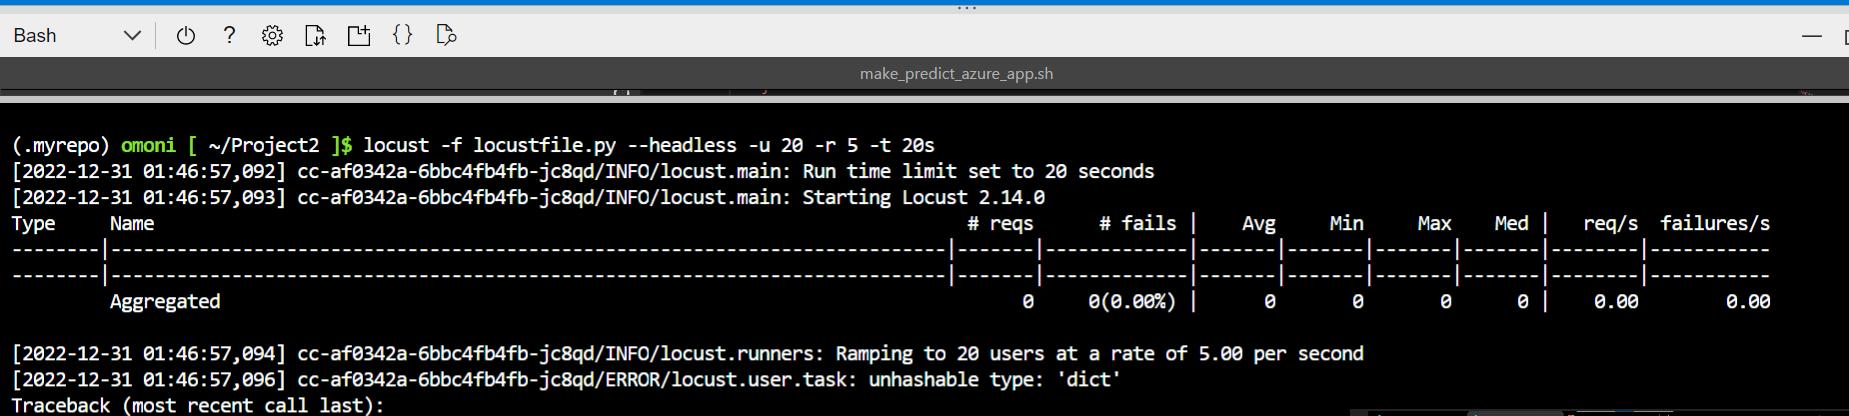
The result is :
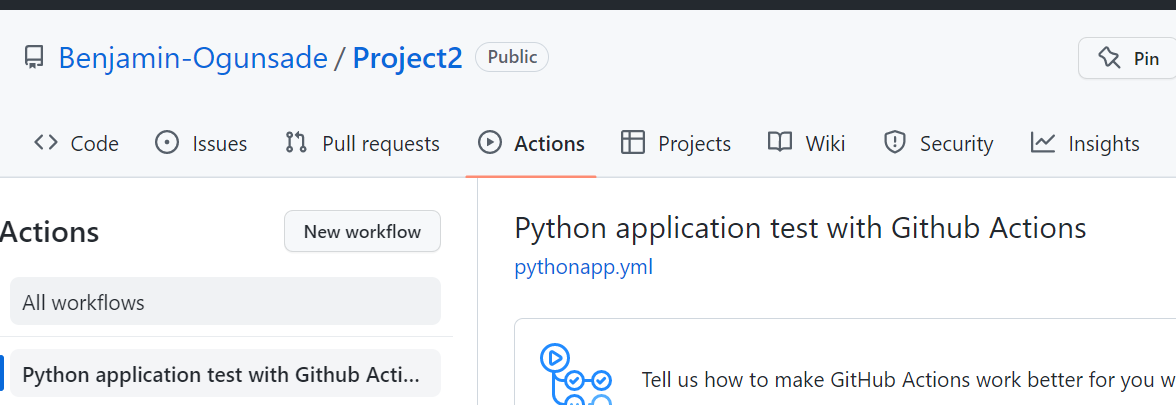
- Enable Github Actions
Go to your Github Account and enable Github Actions.

GitHub Actions is enabled and the a workflow name "Python application test with Github Actions" was created:
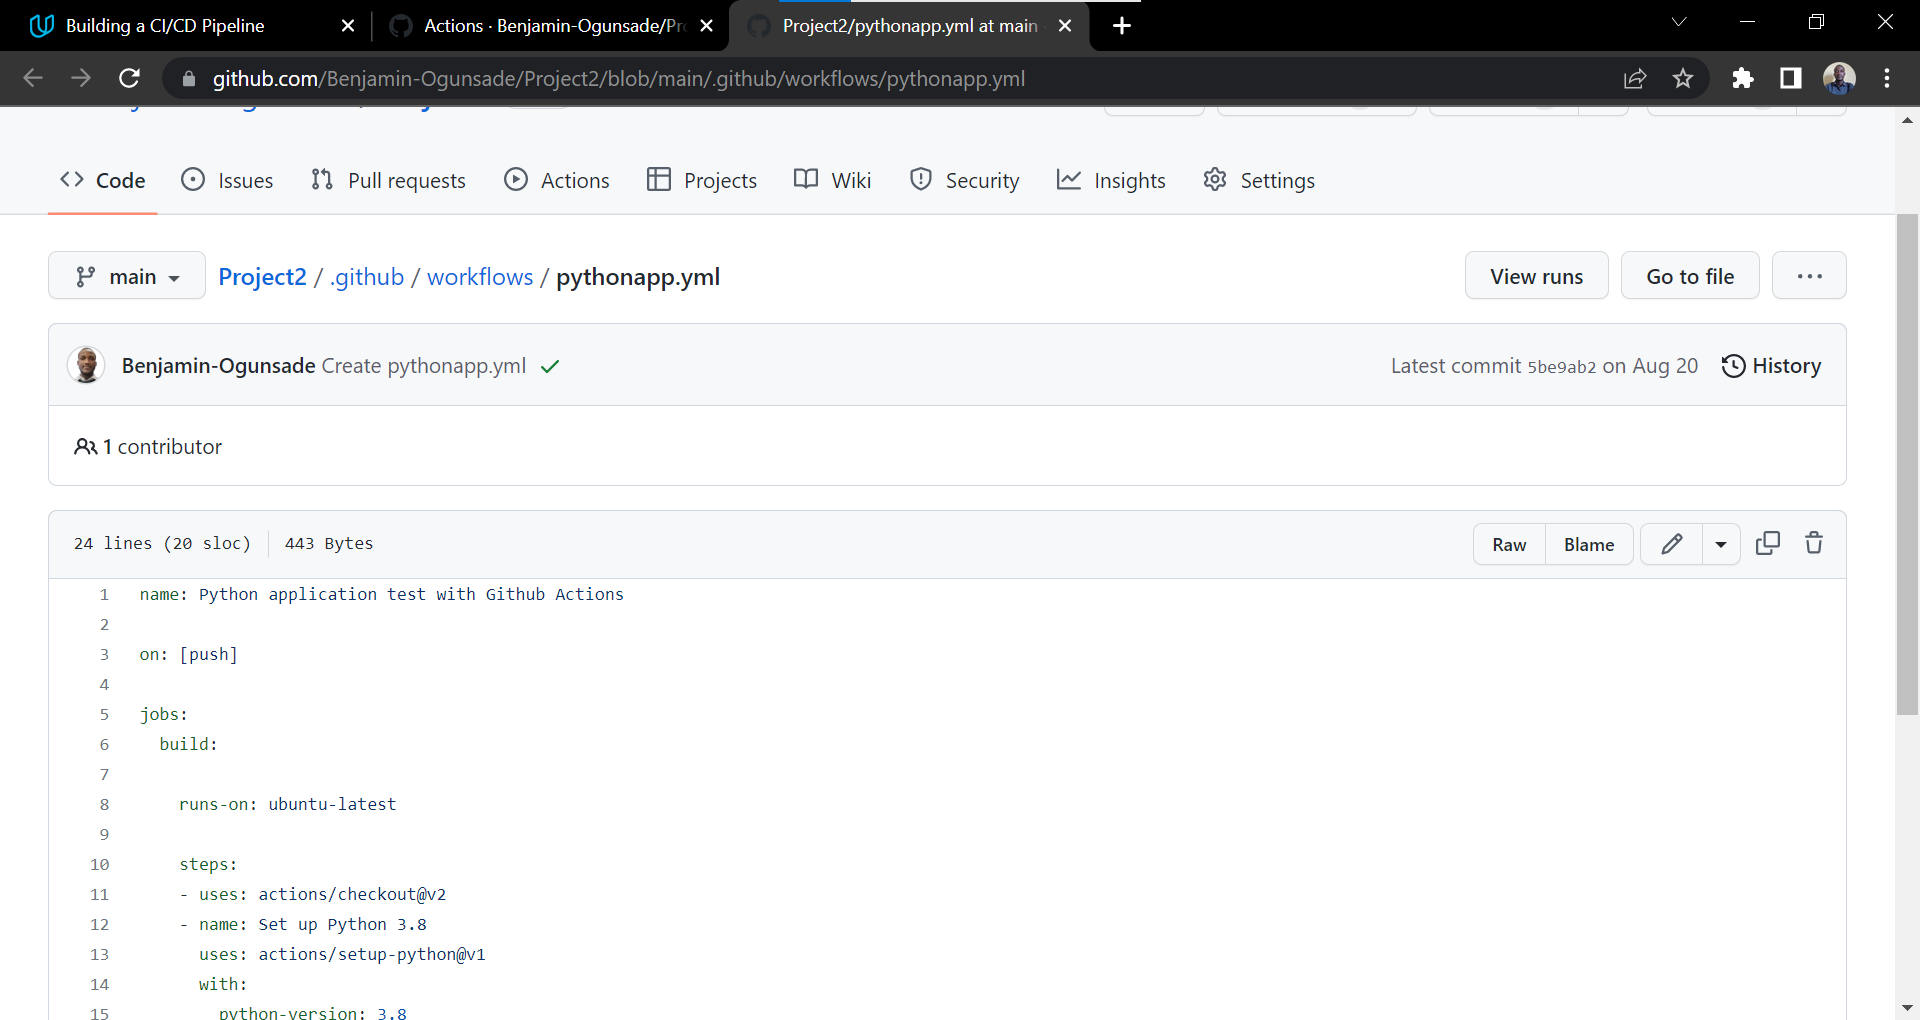
- Replace yml code
The pythonapp.yml code was replaced
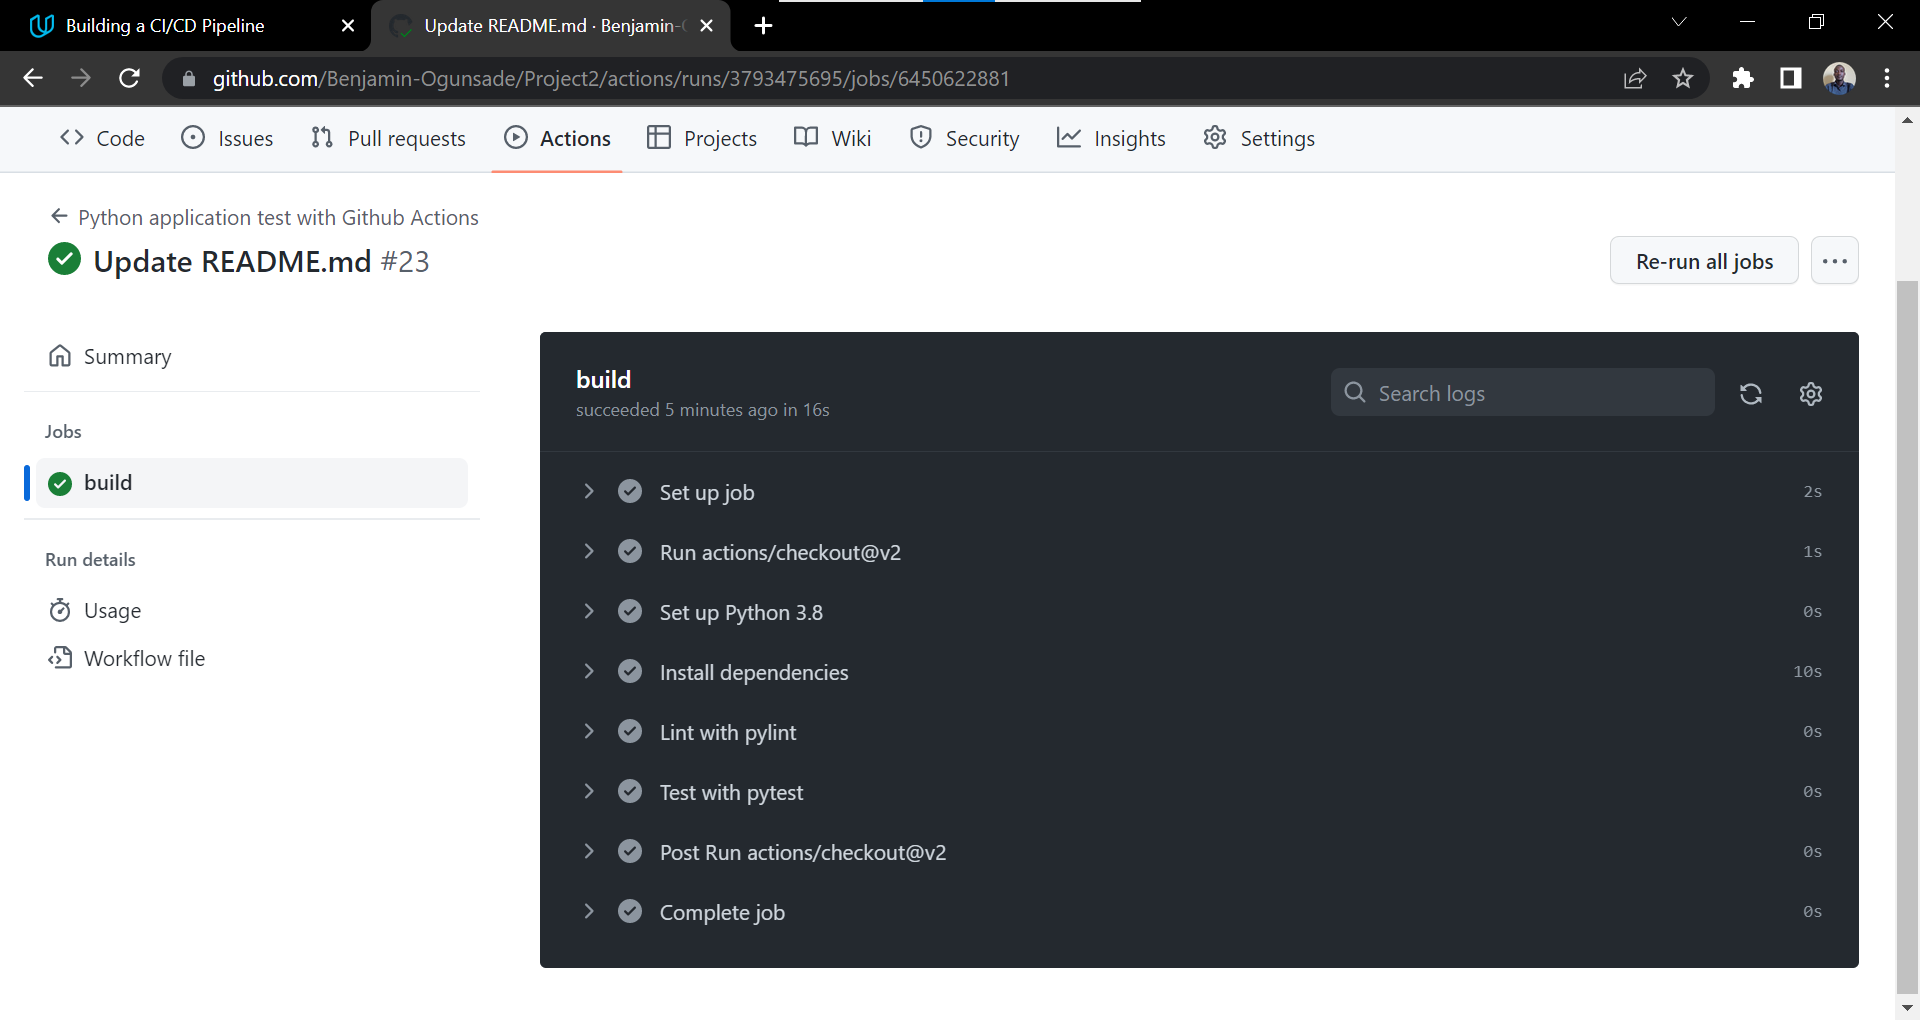
- Verify Remote Tests pass
The changes are push-ed to GitHub and both lint and test steps were verifed which passed test.
Below is a screenshot of the passed GitHub Actions build

The Build was successfull
The next phase of the project is to perform the Azure DevOps deployment using CI/CI Azure Pipeline.
- First, verify that the WebApp url is active via the command
./make_predict_azure_app.sh
And true is the case; it is still active on port 443.
- Second, verify this
./make_prediction.sh
Both works still as shown below :
There was an initial fail to connect error due to the fact that app.py was temporarily down.
In summary for the Cloud share, the local and remote predictions are working correctly.
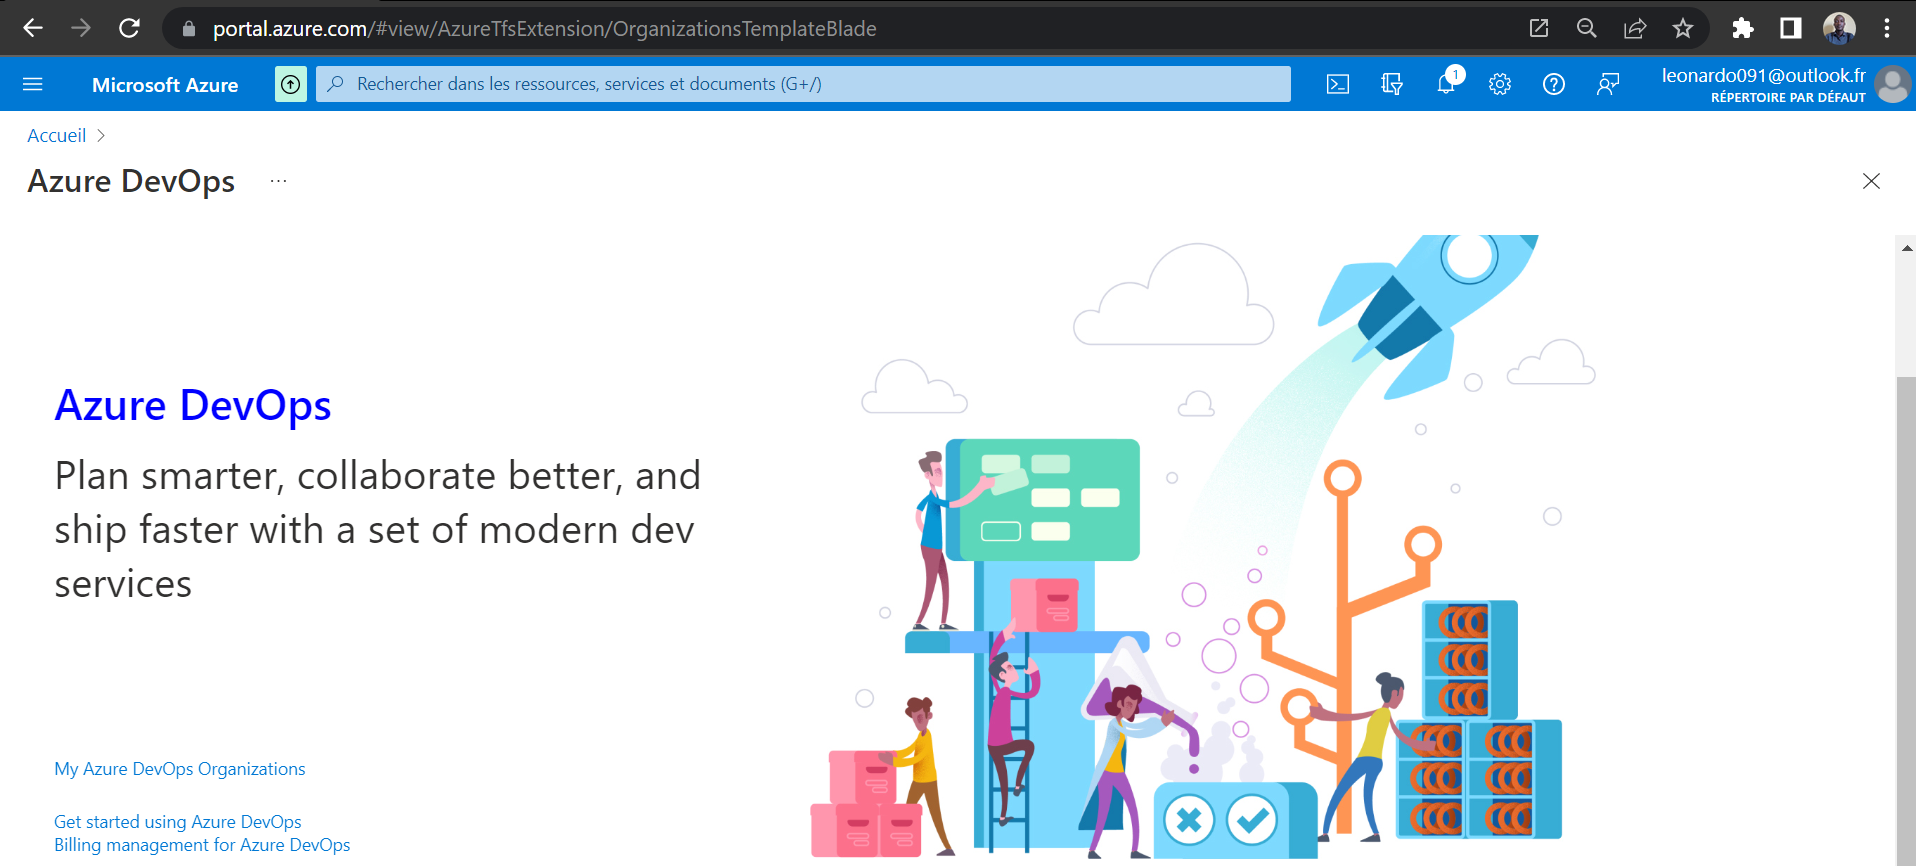
- Next, proceed to the Azure Portal to launch the "Azure DevOps Organization"
As a means of recapitulation,
-
The scaffolding code has been replaced with Flask Machine Learning code.
-
The Azure App services has been authorized and our deployed app is currently running on our instance on the Azure platform.
- Go to Azure DevOps organizations

Producing
Click "My Azure DevOps Organizations"
-
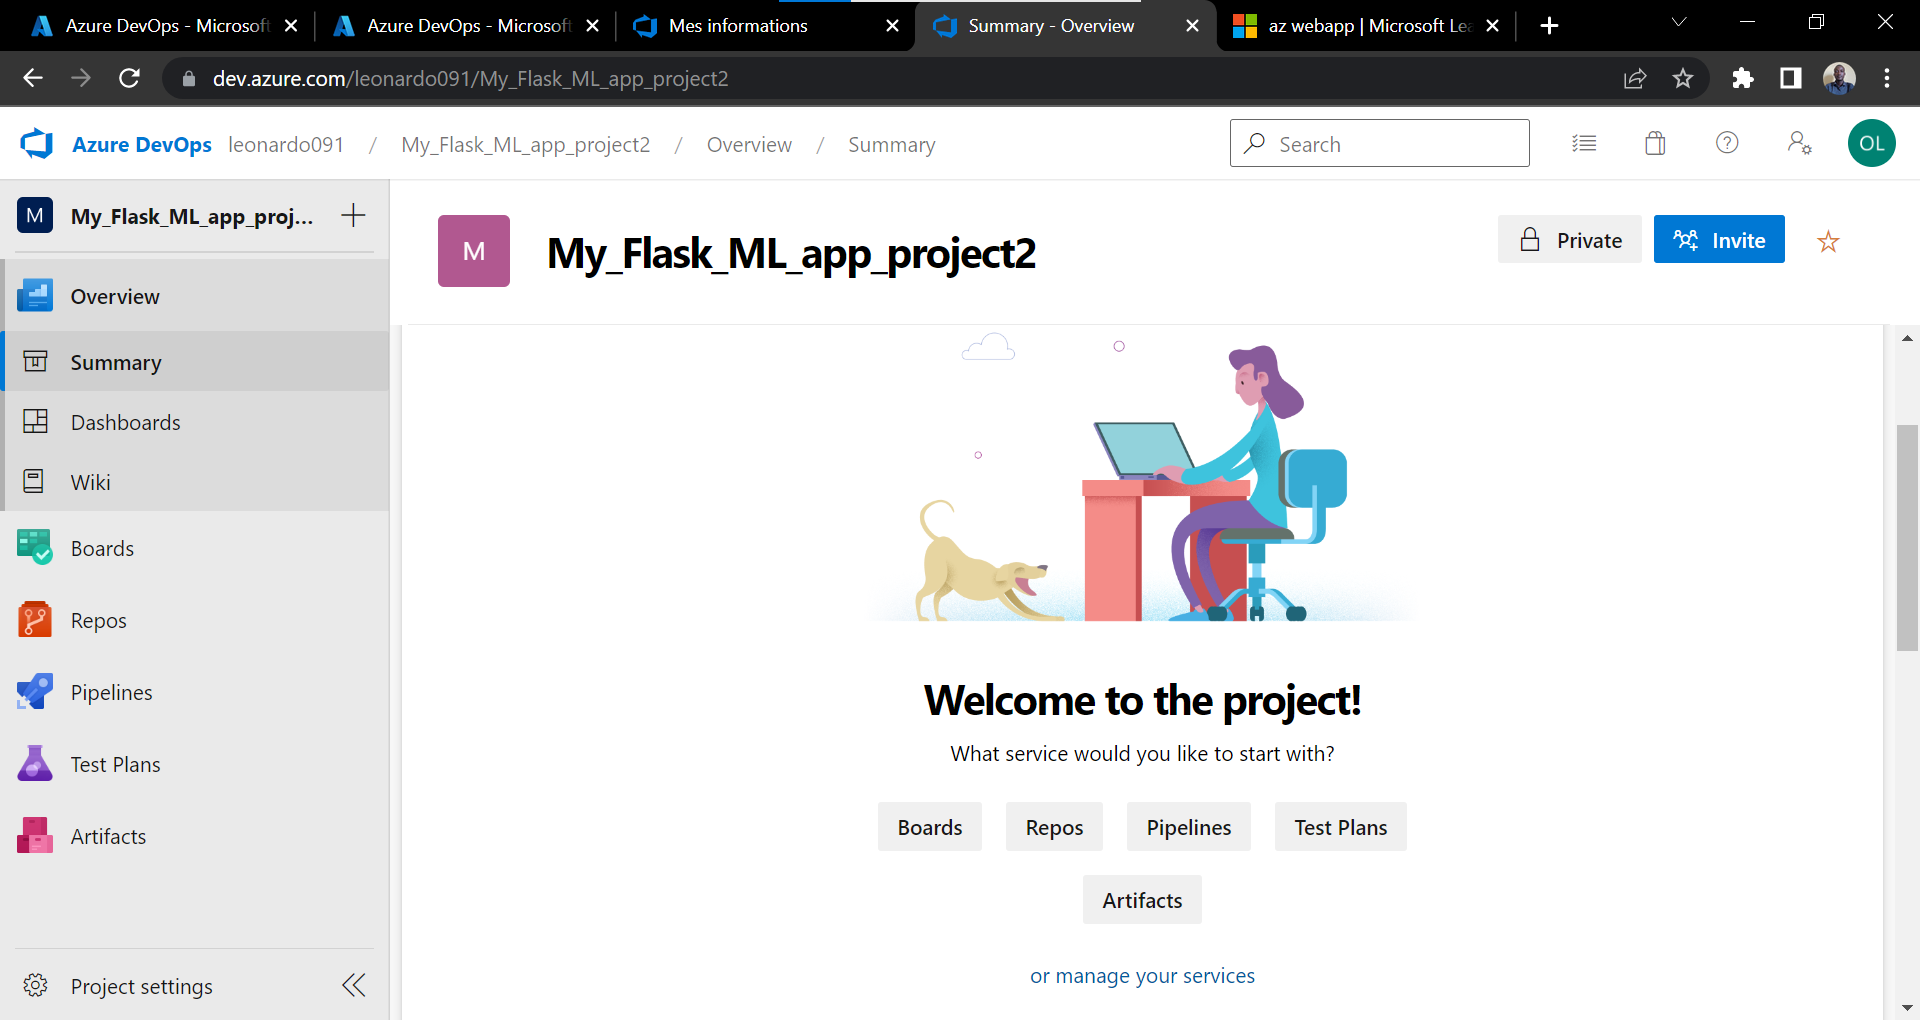
To create a new Project on Azure DevOps named "My_Flask_ML_app_project2" :
-
Visibility : 'Private'
The new project is now created, within which the Pipeline will be implemented
We configure the Pipeline before creating one:
- Configure the Pipeline
- Click 'Project Settings' --> Service Connections
- Creating a new service connection called the "Azure Resource manager"
- Click 'Create service connection'
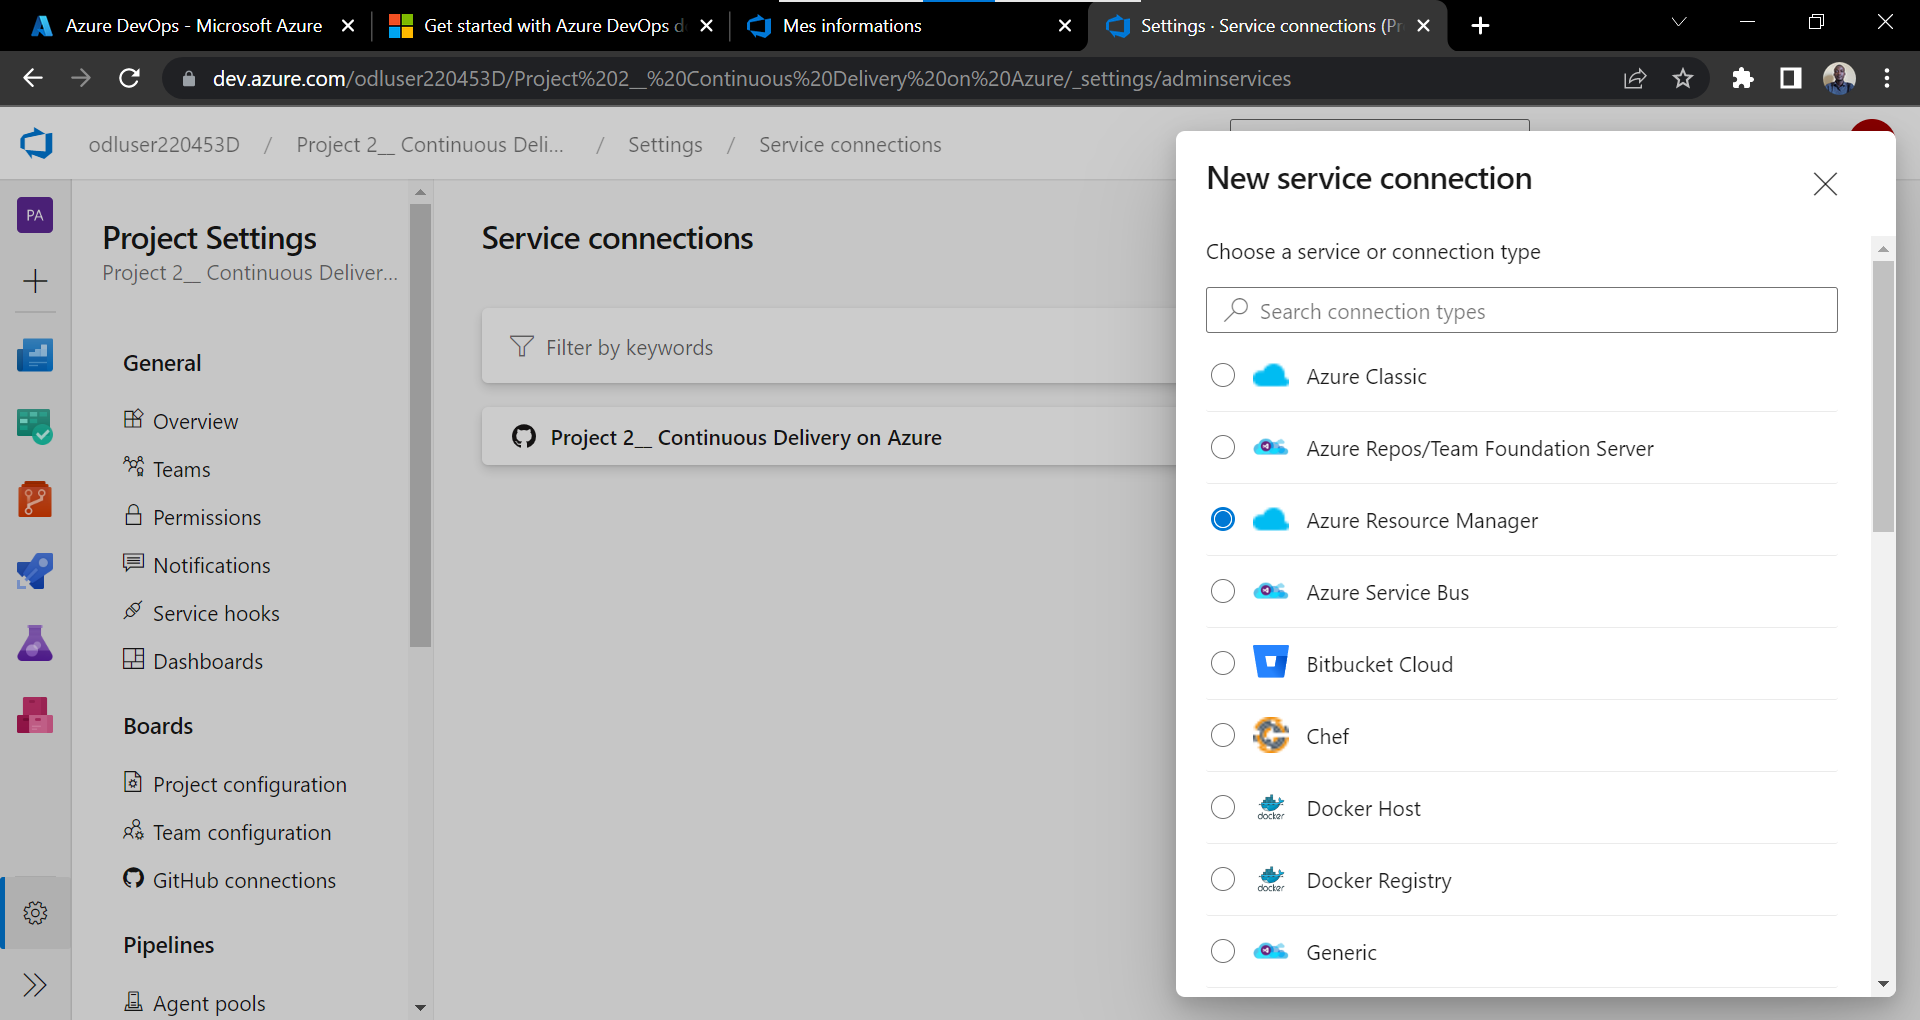
- Choose 'Azure Resource Manager'
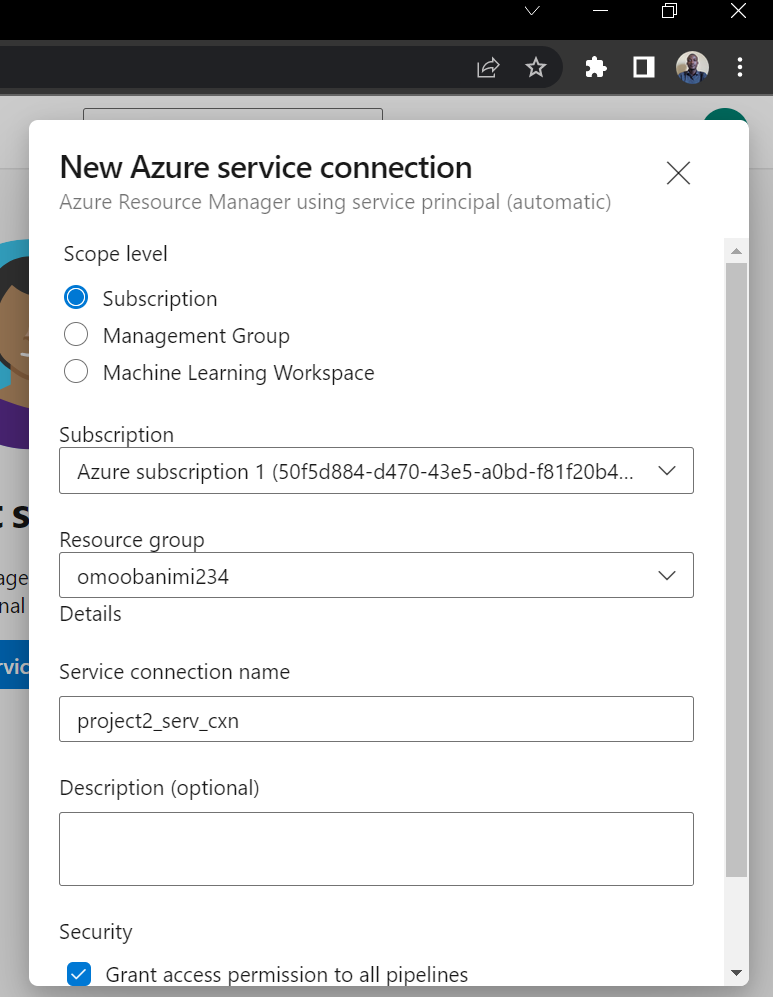
Choose 'Service principal (automatic) as authentication method, in order to enable the Build run automatically upon modification of the artifact.
Make the following choices to create a "New Azure service connection"
- Scope level: 'Subscription'
- Subscription: select your Azure subscription
- Resource group: select the resouce group of the earlier Azure deployed app
- Service connection: "project2_serv_cxn"
Ensure to check in 'Grant access permission to all pipelines'
Here is a brief re-cap in picture:
Please ensure your browser authorizes all automatic redirections to allow for the authentification page pop-up, then select the resource group in which the app was deployed in the Azure Portal.
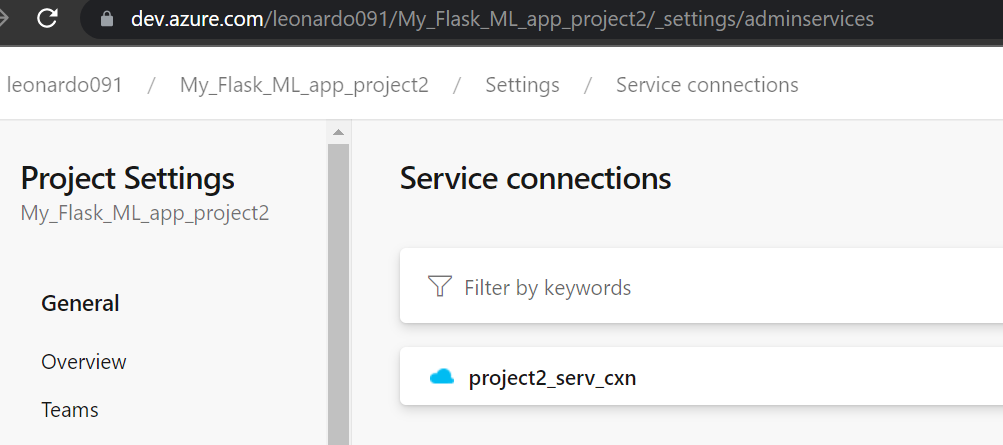
The service connection is finally established as depicted below:
Once the service connection is established between the AzureDevOps Organization project and the Azure Portal, one can proceed to configure the CI/CD Pipeline for the python ML Flask app.
-
Go to "Pipeline",
-
Click "Create Pipeline"
To create a pipeline
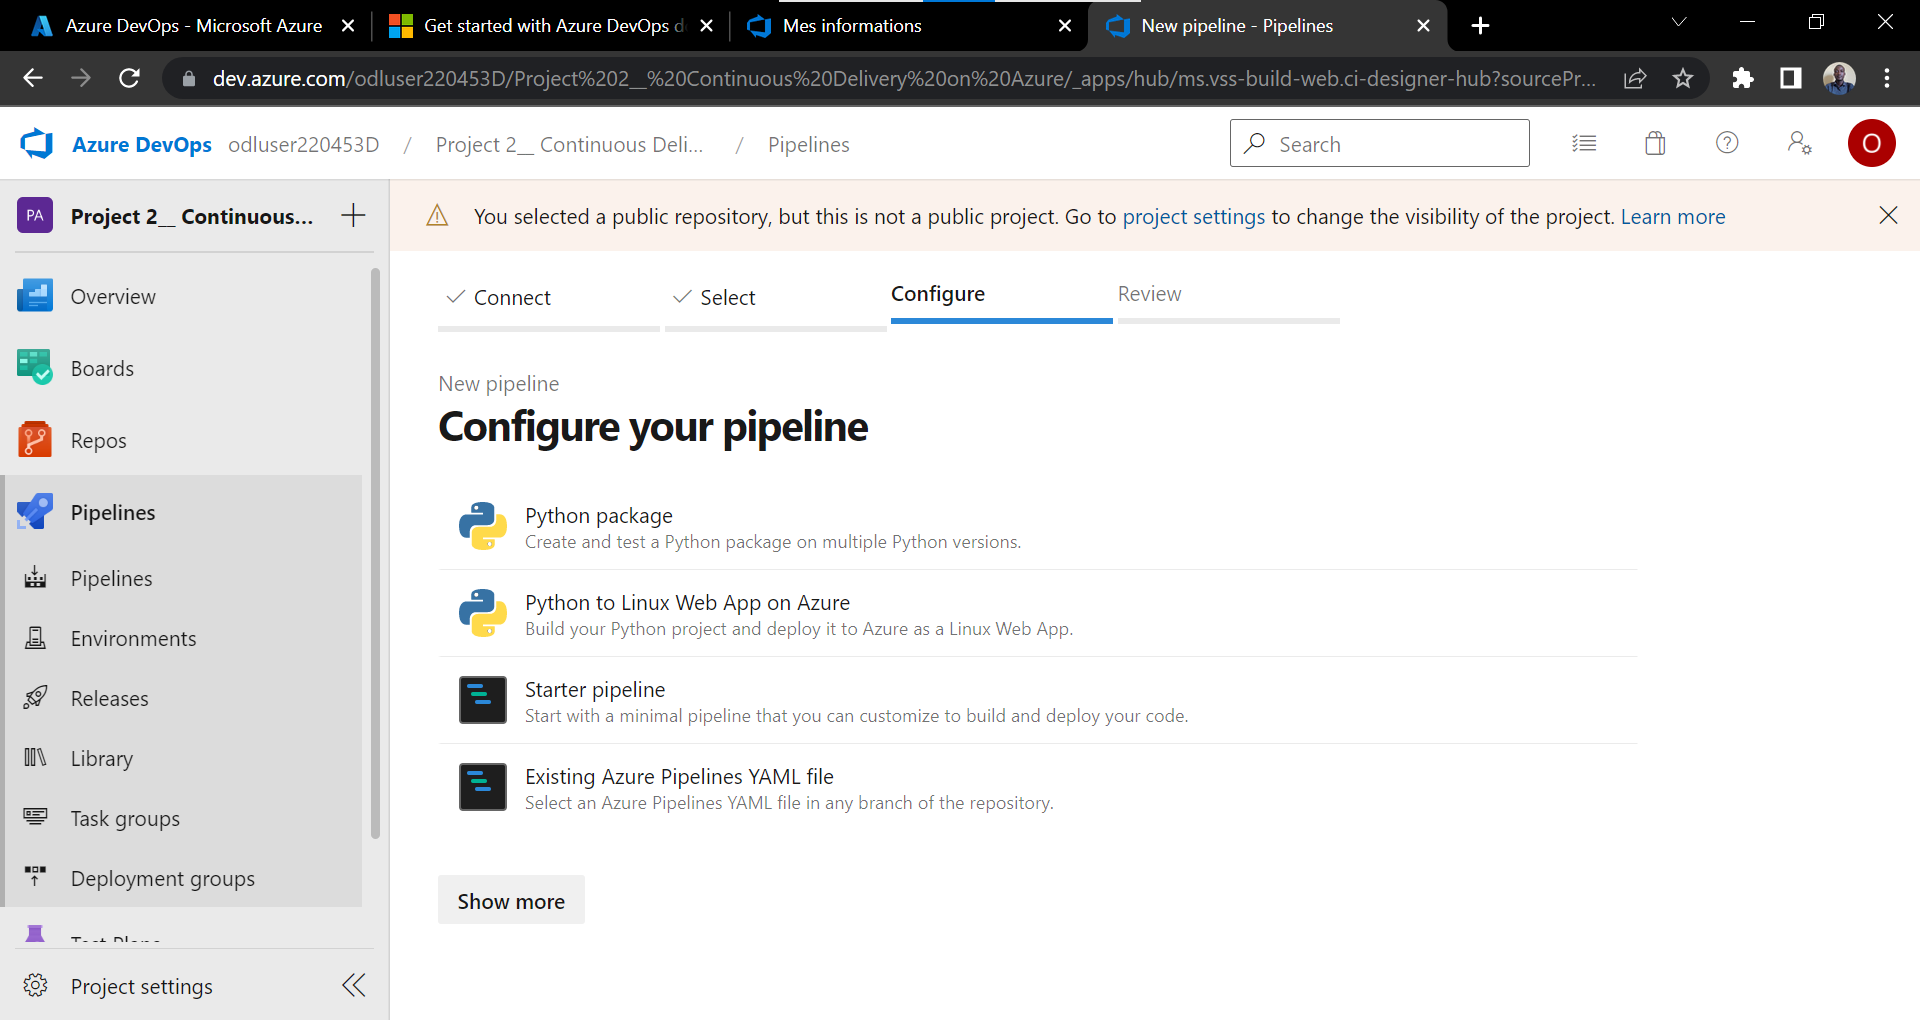
-
Select "GitHub (YAML)" as the YAML file will be stored on the Gitub repo
-
Select the project repo stored on GitHub "project2/"
-
Configure your Pipeline : "Python to Linux Web App on Azure" and select the Azure sub You need to sign-in here.
-
Web App name : "myflaskmlwebapp"
Validate and configure
Automatically, the YAML file is generated and the resources are configured, including the service connection details containing all the information necessary for its CI/CD functionalities.

Next,
- "save and run"
On run, it proceeds to the Build stage and Deploy stage.
The build and deploy were successful.

It is to note that a self-hosted agent was used to realise this project and the pool is Default with a Personal Access Token PAT created for the authentication of the AzurePipelines with Git hub.
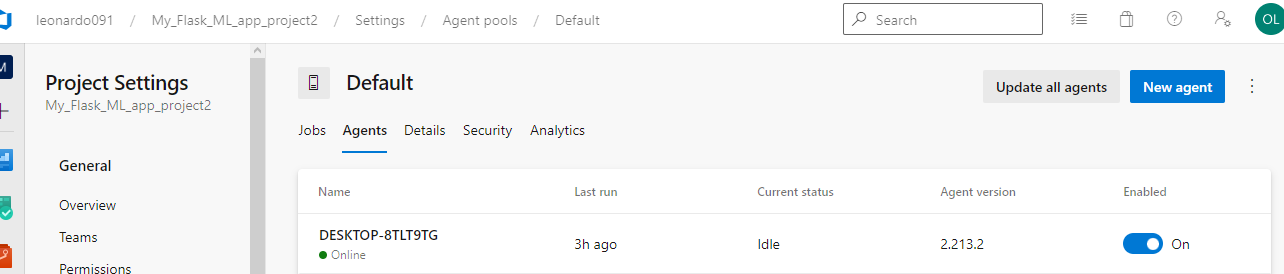
To set up the self-hosted agent, see here
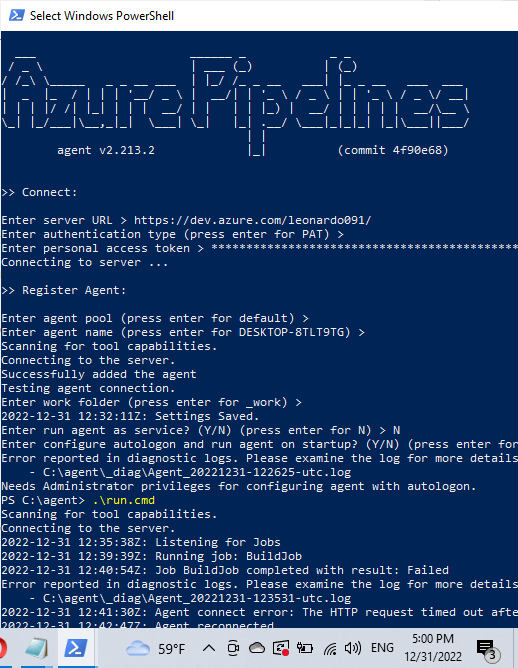
Also there were issues encountered concerning SSL certificates and Restricted permissions on the local host which were modified as depicted in the image below:
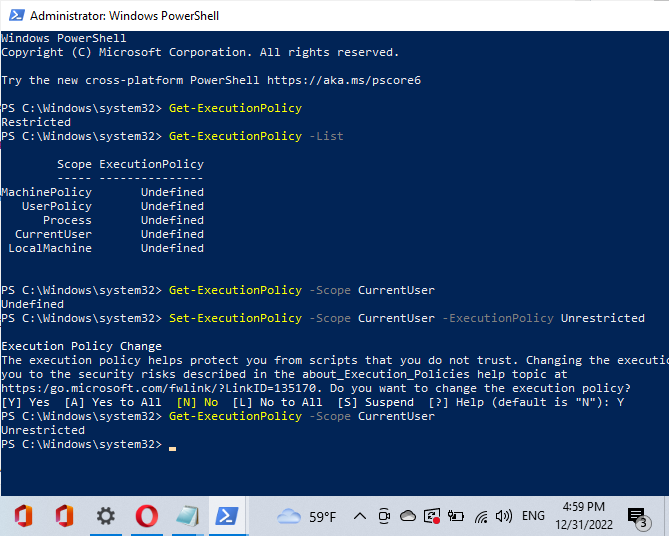
Doing this enables the python scripts to be downladed and built automatically from GitHub Actions.

The project was successfully executed