Main Authors:
- Carlos Gomez Cubero @carlos-biru
- Maros Pekarik @marospekarik
- Andreas k. Hansen @Kornmaaler
This repository contains the tools designed in the HRI lab of Aalborg University to control UR family robots It forks the following libraries https://github.com/Mandelbr0t/UniversalRobot-Realtime-Control, https://bitbucket.org/RopeRobotics/ur-interface/src https://github.com/robodave94/ur10DrawingSocial
EMCAR is a set of tools for rapid prototyping, and perform robot interactions. Focused on simplicity and not coding.
It's based on RTDE protocol (real time control for UR). It records the robot movements and drawings and reproduce them in real time.
More info in this publication https://www.frontiersin.org/articles/10.3389/frobt.2021.662249/full
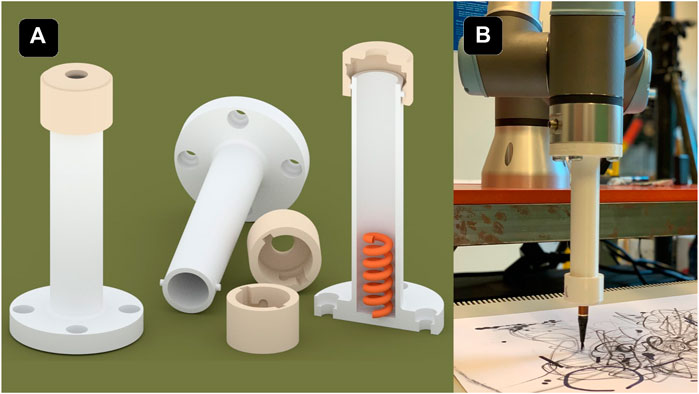
The repo provide with a set of 3D models for printing under the folder 3D models. It comes as well with the blender file for quick adjust to your needs.
- Drawing tip
- Corners
You will need a tablet for the drawings. We used Wacom Intuos Pro. Use duct tape around the button of the pen to keep it pressed.
Tested on Python 3.7 and 3.9
pip3 install opencv-python PyQt5 scipy numpy paho-mqtt sixOnce you have your drawing tip 3D printed measure it's length and create a installation file in the UR teach pendant. Configure TCP -> Z value to tool length (given model is 140 mm) and Payload ( 0.1kg)
🛑!!!Always!!! Inizialize the tcp and start the robot before running the app.
In App.py change host IP to your robot/simulator IP address, line 51
Run the script from your IDE or from the comand line
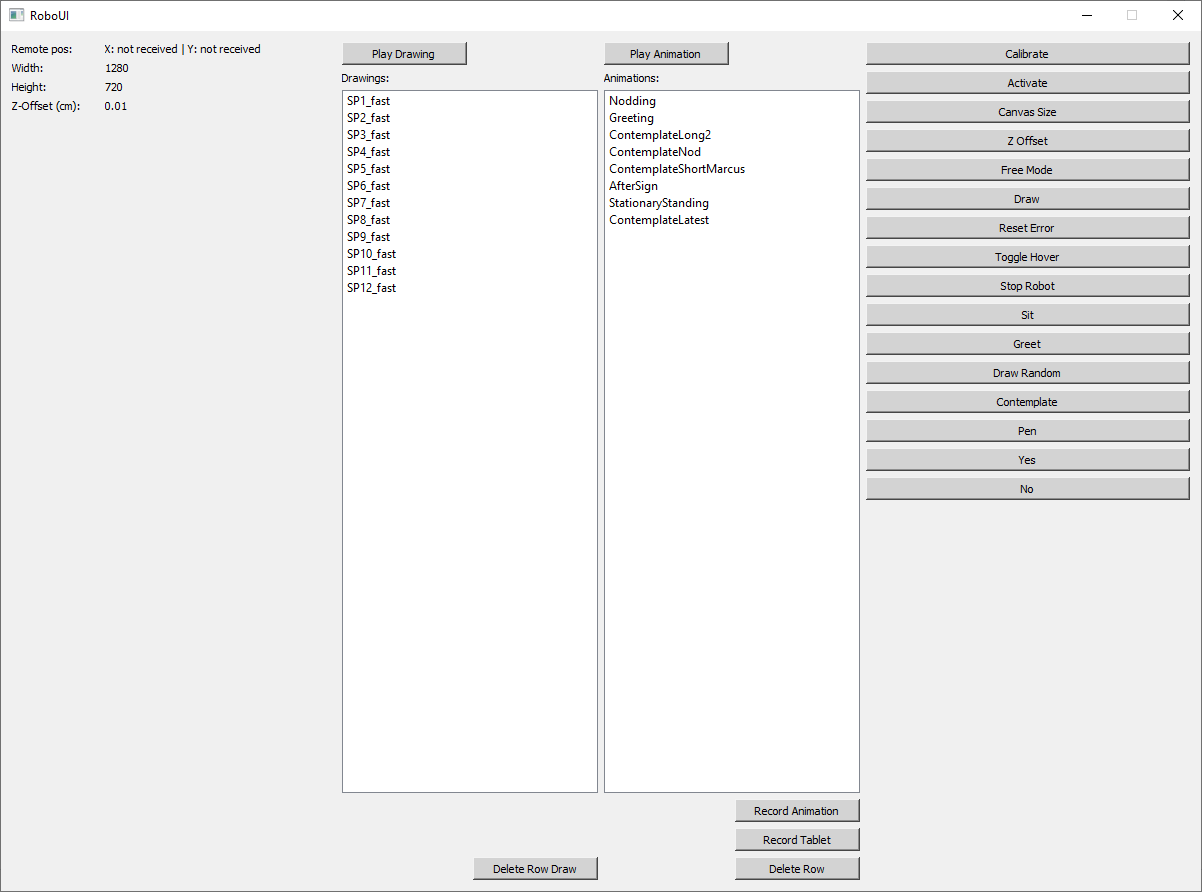
python App.pyThe following window should appear
Place a A3 paper on a leveled table in front of the robot. Use the corners 3D models and hot glue to accomodate it.
On the app click on Activate first to enable the robot, then click on Calibrate. Follow the steps given by the app, move the robot with your hands and touch with the pen the given corners.
Congrats the canvas is calibrated. Play one of the example drawings and use the button Z Offset to adjust the Z position of the canvas if needed.
The calibration is saved.
Click on Free mode, make sure the robot is in 0G mode now by gently touching it.
Click on Recod Animation, underneath the animations box, and move the robot. Click in Record Animation again and give a name to your animation. Now you can select it on the animations box and re-play it by clicking on Play Animation button.
Note: There is a smooth transition to the first frame of your animation before playing it for security reasons. You can addjust the speed of this transition changing the speed and acceleration in line 394 of Robot.py under your own risk.
Click on free mode and accomodate the robot to hover the center of the canvas.
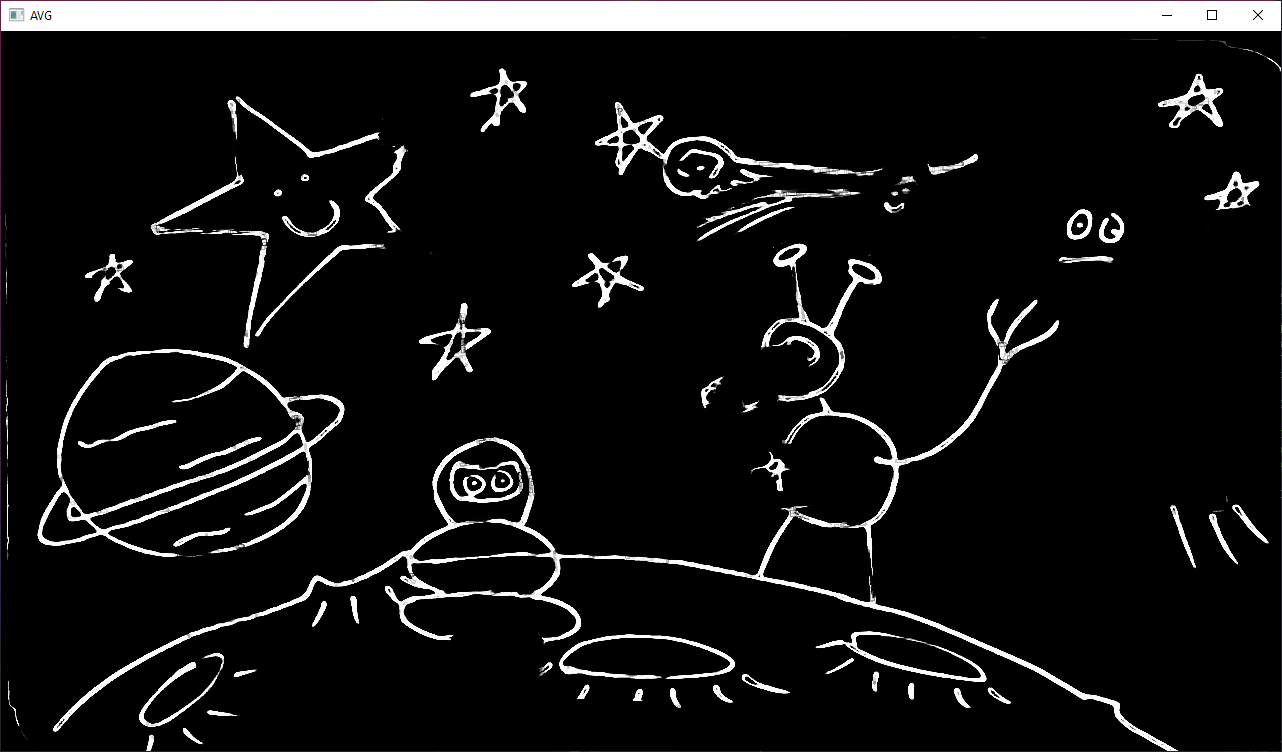
Connect the drawing tablet and click on the Draw button. A white window will appear. EMCAR will track the position of the tablet cursor on this window and command the robot over the canvas. By touching the tablet with the pen the robot will draw and by hovering the pen the robot will hover the canvas without drawing. The button of the pen must be pressed to be detected.
Click on Record Table, draw on it and clik again to save the drawing.
You can use the R key when on the drawing window to start and finish the record.
The drawing is stored as a sucession of points (X,Y,pen touching). The X and Y are mapped to a resolution of 1280x720 and will be convert to robot positions when drawing.
You need to provide EMCAR with the resolution of your monitor to do a correct mapping. In TabletWindow.py line 46 and 47 you must write the resolution of of the monitor, by default 1920x1200. If you change your monitor you need to repeat this. If is not set up correctly you can notice that either the robot gets out of the boundaries of the canvas or it can not reach part of it.
The data of the animations and calibration is stored under the folder data. The active files are:
- animations
- drawings
- calibration_points
The files with _Experiment sufix are the ones used in the examples of CODRA-CV, you can change the names to the one listed to make them visible to the app.
If you just start the app then click on Activate button.
Once you have your animations and drawings you can easily launch them one by one by selecting them and use the Play buttons.
While the robot is playing an animation or drawing the robot won't try to play any other. If you want to stop the ongoing animation you can use the Stop Robot button, still this is a functionality that is not very effective some times (extra development needed).
Keep the touch pendant close if an emergency stop is needed. You can reset posible errors using the Resset Error button in the App. You need to click on Activate after any error.
To make it easier you can create your own buttons on App.py to launch one or more animations. Use the buttons Greet, Draw Random, Contemplate, etc as an example.
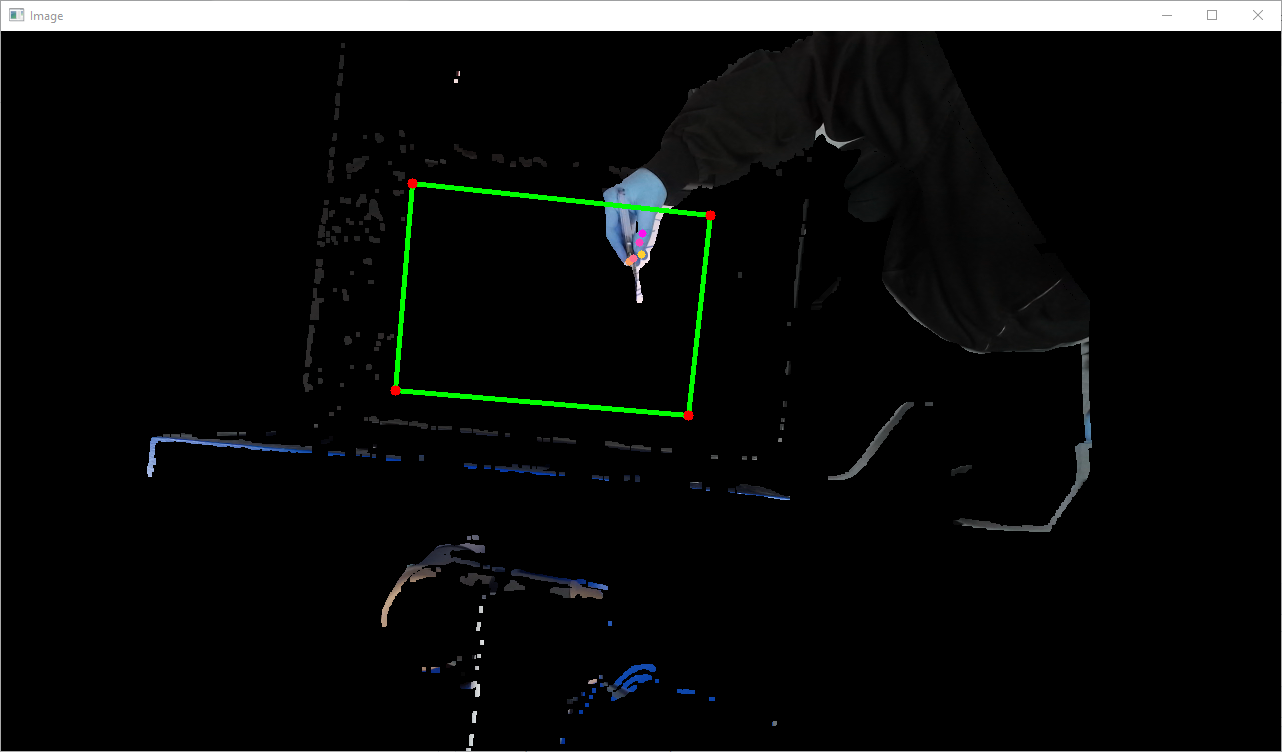
This a spin off EMCAR, that allows to automate the interaction based on the position of the hand of the human and the drawing using openCV.
It uses a kinect azure camera and the library PyK4A.
Run the script CodraCV_Calibration.py and calibrate the corners of the canvas aswell as the depth background by removing the robot and items around the canvas. Now the

This script contains the main functionalities.
- Find the fingers tips of the human
- Find the drawing of the human ( when human draw in red and robot in green)
Using the information provided by Codracv_Main and the saved animatios using EMCAR you can create your own automated interactions. The following scripts are examples:
- CODRACV_BluePrints
- CODRACV_WordSearch
- CODRACV_Landscape
In this interactions the robot waits for the human to draw in a part of the canvas and then proceed to draw one of the prerecorded drawings close to the hand of the participant. Use them as templates. In the data folder rename the files with sufix experiment to make their animations active. In the file Experiments.pfd you can find more info about them.
The script DemoFollowHand.py is an example that only uses the hand position and follows their index finger. Use it to troubleshoot that your canvas in the camera and robot are aligned. Use this script with discrection, you don't want your finger pierced.