
- Preparation
- HDR Video Streaming
- AutoHDR for MPV (RTX Video HDR Equivalent)
- HDR in Video Games with ProtonGE
- AutoHDR with Reshade and Proton
You will need the following tools installed on you distribution to get HDR working on Linux:
➡️ Make sure you have the latest Nvidia-Open drivers or the most recent Mesa version. Properly install the codecs and prerequisites according to your distribution.
HDR streaming is possible on Linux, but the features are still limited and require a carefully configured setup. The most reliable experience currently comes from using MPV under KDE Plasma 6.4+ with proper GPU support.
Required components are : KDE, Vk-Hdr-Layer, Chromium and mpv
Chromium offers experimental HDR support, but it's unstable and not ideal for platforms like Netflix.
chromium --enable-features=UseHDRTransferFunction,UseSkiaRenderer \
         --use-gl=egl --ozone-platform=wayland
You can also permanently enable HDR in Chromium in the flags. Search for HDR and enable the experimental feature. (you will need to restart the browser) -
Also add this environment variable ENABLE_HDR_WSI=1 in KDE application parameter.

MPV offers the most reliable HDR experience on Linux thanks to its advanced tone mapping and passthrough capabilities.
📌 To enable HDR in MPV, edit your mpv.conf file
tone-mapping=hdr
target-peak=1000
hdr-compute-peak=yes
📌 Ajust the target peak with the maximum luminosity 10% of your screen.
These settings ensure proper HDR rendering and dynamic peak brightness adjustment (you can check monitor reference on TFTcentral or RTINGS - If the whites are too bright or exaggerated, lower the value until you do not lose in constrast / detail.
ENABLE_HDR_WSI=1

📌 To watch an HDR video, simply open it with MPV as usual. Alternatively, you can paste the link to a YouTube video or another platform directly into MPV.

AutoHDR is a technology that automatically converts SDR (Standard Dynamic Range) content into HDR (High Dynamic Range), enhancing brightness, contrast, and color for a more vivid display. Reverse tonemapping works by reconstructing HDR-like details from SDR images, essentially estimating and restoring highlights and dynamic range that were previously compressed. Together, they allow older or non-HDR visuals to look more vibrant and immersive on modern screens.
With MPV you can get HDR rendering from SDR videos. It's quite similar to what Nvidia offers on Windows with its RTX Video HDR. Of course, the result isn't as good as native HDR, but it will greatly enhance your videos in terms of contrast and brightness.
📌 To enable Auto-HDR in MPV, edit your mpv.conf
vo=gpu-next
gpu-api=vulkan
hdr-compute-peak=yes
hdr-peak-detect=yes
target-peak=1300
target-prim=bt.2020
target-trc=pq
inverse-tone-mapping=yes
tone-mapping=spline
tone-mapping-mode=auto
target-colorspace-hint=auto
gamut-mapping=desaturate
Replace the target-peak with the maximum peak brigtness of your screen (you can check monitor reference on TFTcentral or RTINGS - If the whites are too bright or exaggerated, lower the value until you do not lose in constrast / detail.
ENABLE_HDR_WSI=1
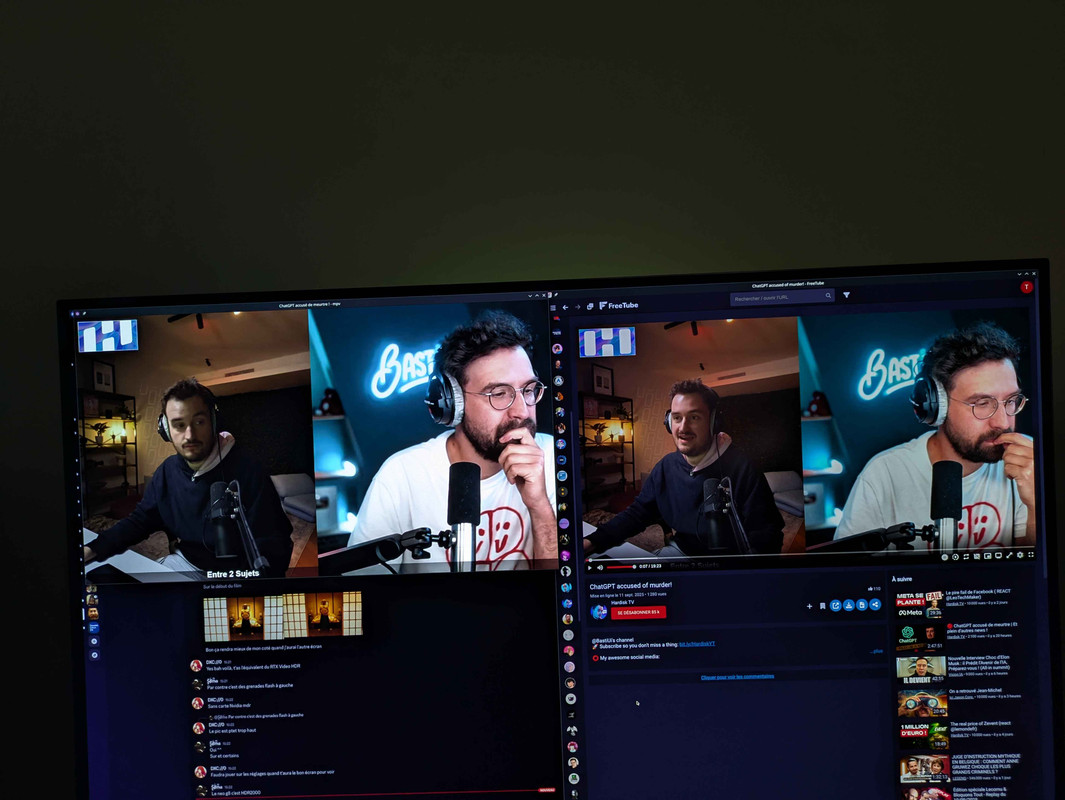
Here is an example comparing an SDR video and one with auto-HDR (Auto-HDR on the left, SDR on the right)
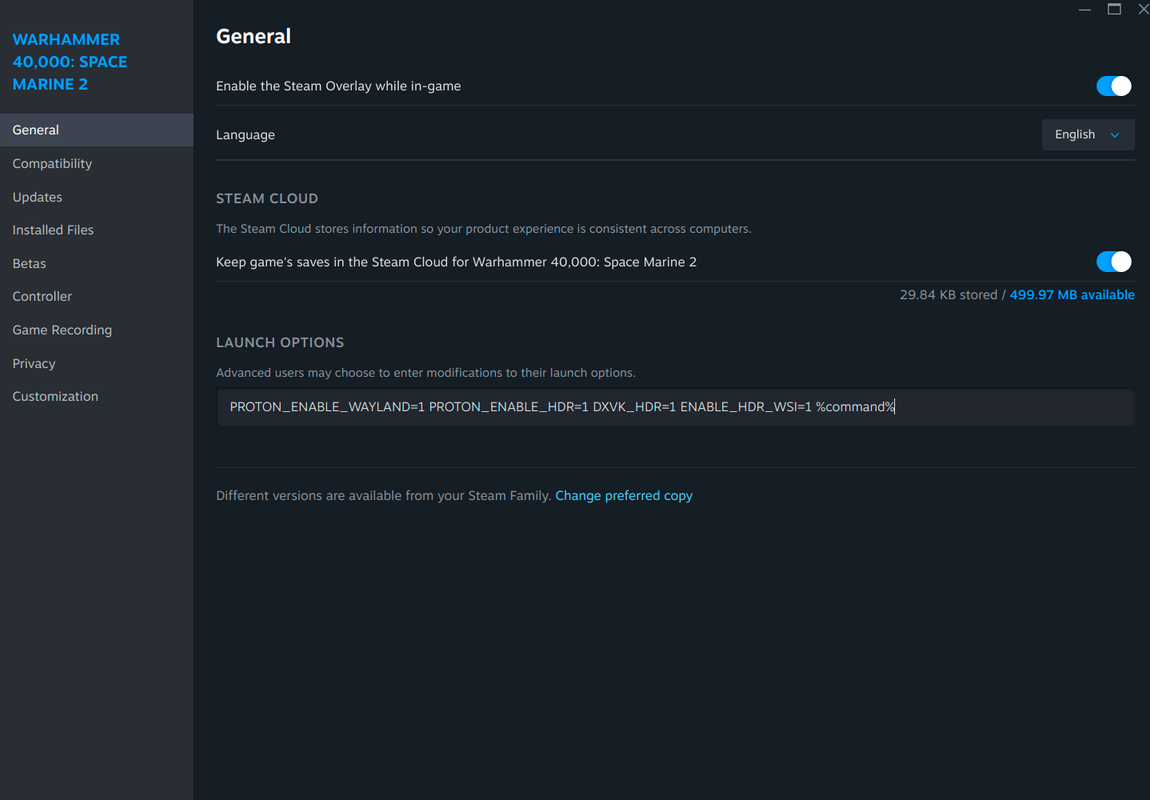
To launch a game with HDR, select protonGE in the compatibility options :

Paste this on steam launch options :
PROTON_ENABLE_WAYLAND=1 PROTON_ENABLE_HDR=1 DXVK_HDR=1 ENABLE_HDR_WSI=1 %command%
When you are in a game, check in the options if the HDR is available and activate it.
Remember to adjust your gamma to avoid an overly denatured image.
Download reshade with full add-on support here.
➡️ Launch this executable with wine or proton
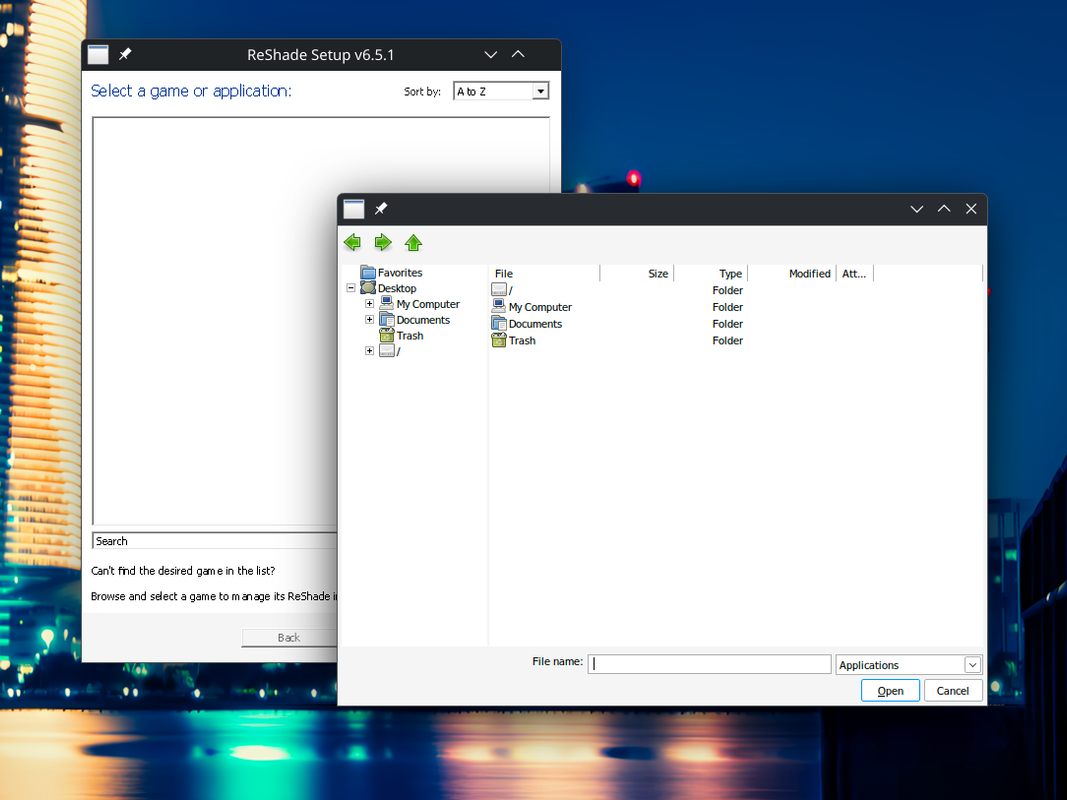
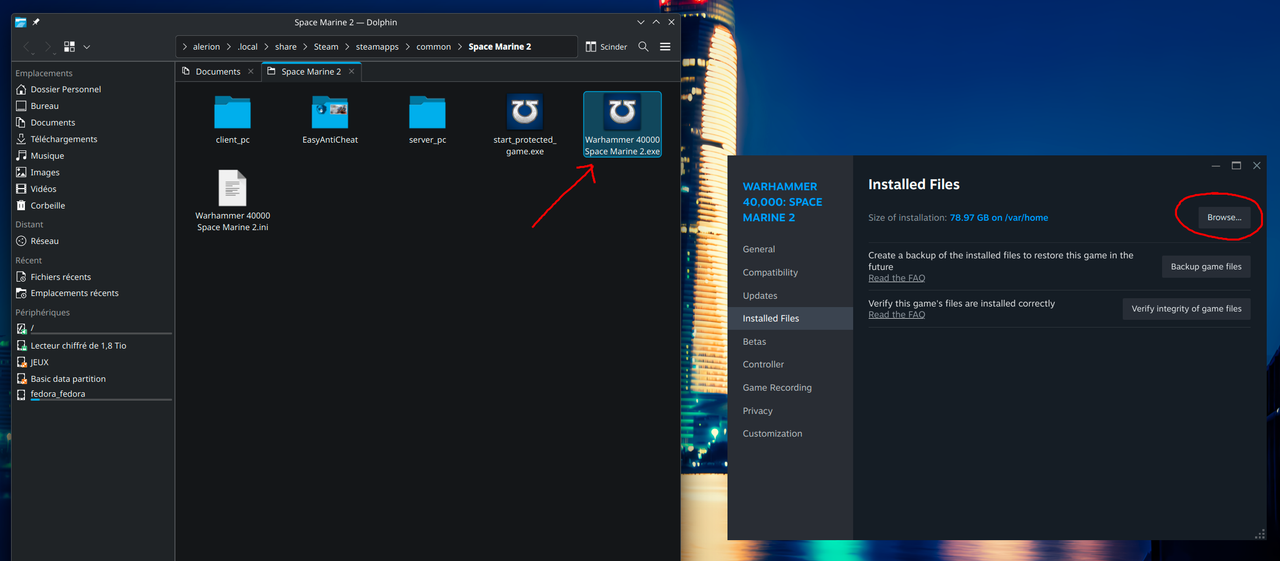
➡️ Open the directory of your steam game
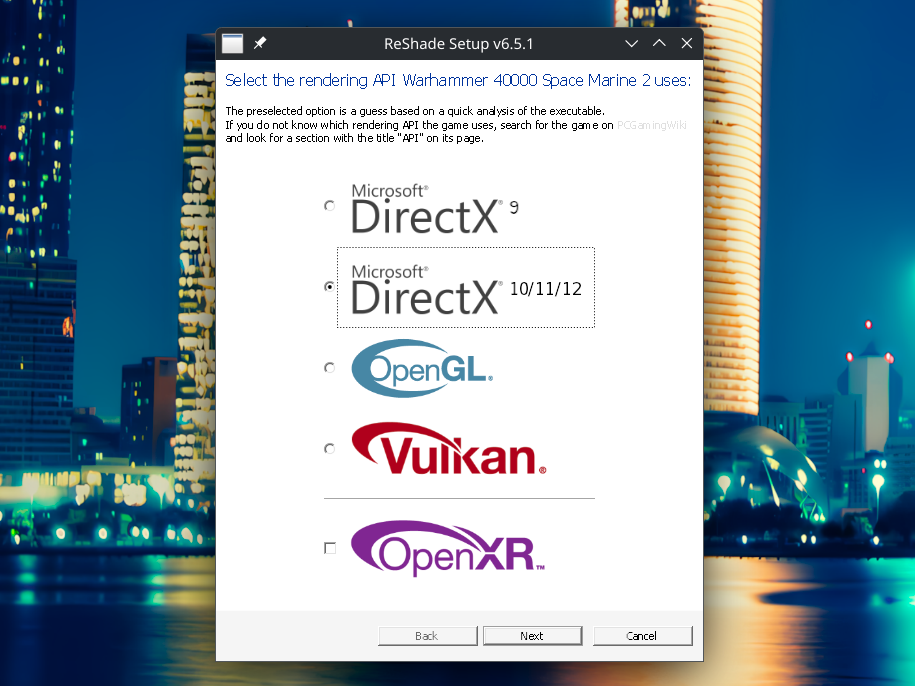
➡️ Pase the link and select the DirectX version of your game
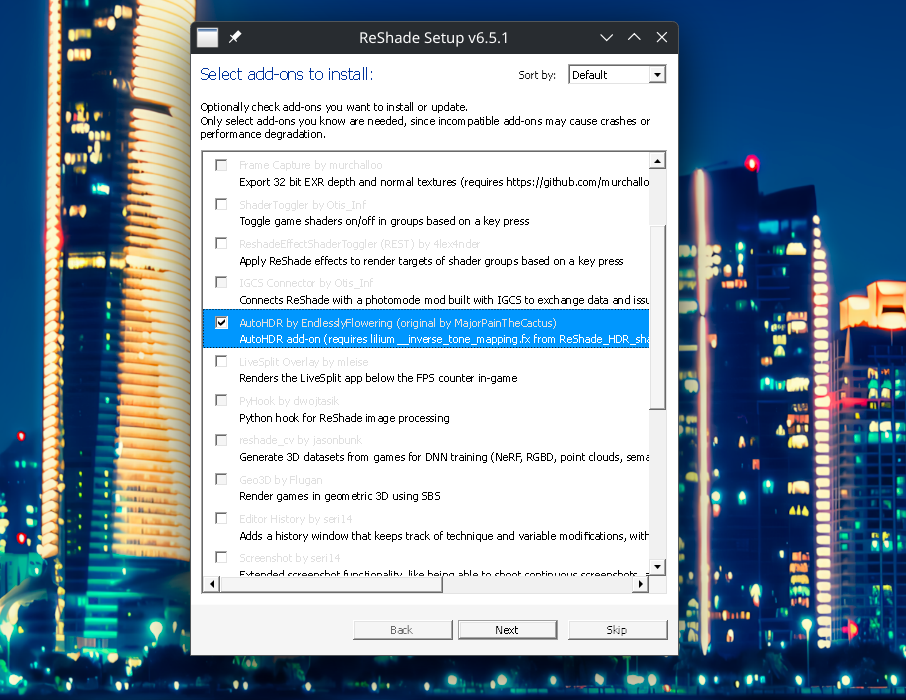
➡️ Install PumboAutoHDR

➡️ Install Lilium HDR Shaders
➡️ Launch your game with ProtonGE with the concerned launch option
➡️ In the game press "Home" keyboard key to open reshade.
➡️ Go the the addon section :

➡️ Enable HDR in the options :

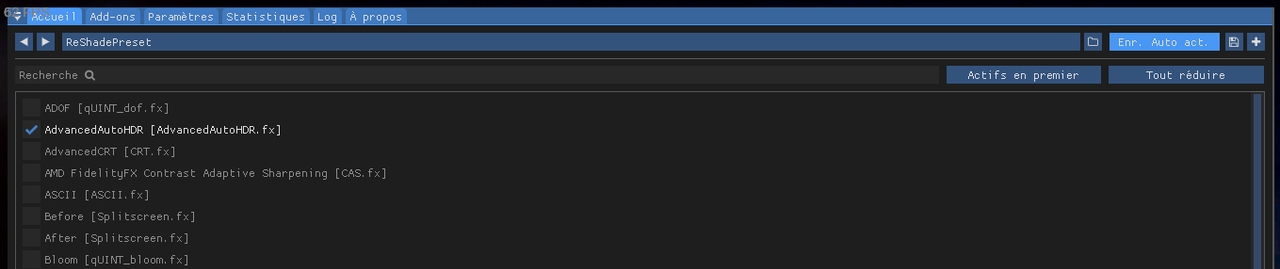
➡️ Select the AdvancedAutoHDR mod.
➡️ On HDR options, use in input the SDR Rec. 709 gamma 2.2. Ajust output at 400.

➡️ For the method, use Auto HDR (SDR->HDR) and set By luminance (color hue conserving). Ajust the max autohdr brightness at 750.

➡️ Enable autosave for the profile.

This reshade installation support addons :
RenoDX, short for "Renovation Engine for DirectX Games", is a toolset to mod games. Currently it can replace shaders, inject buffers, add overlays, upgrade swapchains, upgrade texture resources, and write user settings to disk. Because RenoDX uses Reshade's add-on system, compatibility is expected to be pretty wide. Using Reshade simplifies all the hooks necessary to tap into DirectX without worrying about patching version-specific exe files.
Go to the RenoDX HDR mod page and select desired game.
Download the add-on and paste on the game-folder.
Press the "Home" key to open reshade, renodx is present in the addon section and can be combined with the native HDR.

| Team | Description |
|---|---|
| PumboAutoHDR | Thanks to Filoppi, have created a Auto-HDR mod, it is incredible! Especially under Linux or are absent the car from Microsoft and the RTX-HDR ❤️ |
| renoDX | Special Thanks to the renodx team, having done incredible job for HDR 🙏 |
| HDR-Addon | Lilium, for this addon, improved version of AutoHDR |
| VK_hdr_layer | Thank Zamundaaa, for the incredible work on the HDR Vulkan compatibility layer for kwin |
| ProtonGE | Better Proton with full wayland HDR support |