Sample Django project for django-jinja-knockout: https://github.com/Dmitri-Sintsov/django-jinja-knockout

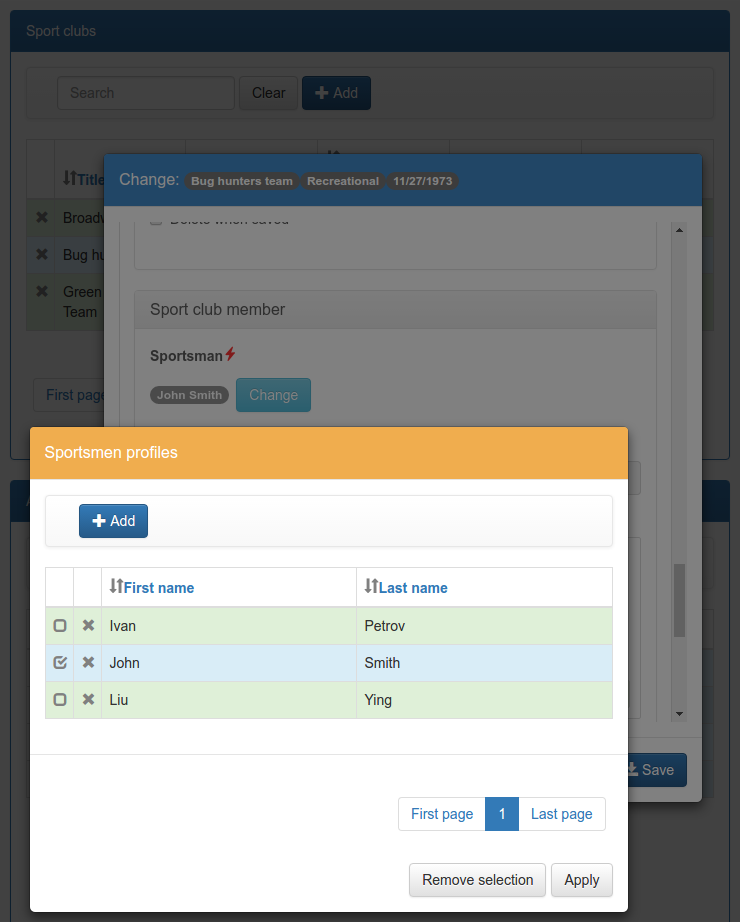
Screenshot:
Recorded video: https://www.youtube.com/watch?v=CJLdtFaXhKo
Tested in Ubuntu 20.04 LTS:
sudo apt-get install git
python3 -m venv djk-sample
cd djk-sample
source bin/activate
git clone https://github.com/Dmitri-Sintsov/djk-sample.git
cd djk-sample
# Uncomment next line to use v2.2.1 instead of development version:
# git checkout tags/v2.2.1
python3 -m pip install -U -r requirements.txt
To use the current stable Bootstrap 3 version of djk_ui:
python3 -m pip install -U -r requirements/bs3.txtor:
python3 -m pip install -U wheel/djk_bootstrap3-2.2.1-py2.py3-none-any.whlTo use the current stable Bootstrap 4 version of djk_ui:
python3 -m pip install -U -r requirements/bs4.txtor:
python3 -m pip install -U wheel/djk_bootstrap4-2.2.1-py2.py3-none-any.whlTo use the development Bootstrap 3 version:
./cli/3bs.shTo use the development Bootstrap 4 version:
./cli/4bs.shTo use the development Bootstrap 5 version:
./cli/5bs.shthen:
mkdir "$VIRTUAL_ENV/djk-sample/logs/"
mkdir "$VIRTUAL_ENV/djk-sample/fixtures/"
python3 manage.py makemigrations club_app event_app
python3 manage.py migrate
apt install gettext
python3 manage.py compilemessages
python3 manage.py runserver
Shell scripts cli/3bs.sh / cli/4bs.sh / cli/5bs.sh allow to switch the Bootstrap version on the fly, using the development
(not always stable) version of djk_ui.
Install Deno (optional):
curl -fsSL https://deno.land/x/install/install.sh | sh
export DENO_INSTALL=$HOME/.deno
Windows x64 (x86 is similar but needs 32-bit versions of Python package wheels).
- Download and install Python 3.9 / 3.10 / 3.11.
- Make sure
python.exe/pip3.exeare in your PATH.
Then issue the following commands:
python -m venv djk-sample
cd djk-sample
Scripts\activate.bat
python -m pip install -U pip
git clone https://github.com/Dmitri-Sintsov/djk-sample.git
cd djk-sample
rem Uncomment next line to use v2.2.1 instead of development version:
rem git checkout tags/v2.2.1
python -m pip install -U -r requirements.txt
To use the current stable Bootstrap 3 version of djk_ui:
python -m pip install -U -r requirements\bs3.txtTo use the current stable Bootstrap 4 version of djk_ui:
python -m pip install -U -r requirements\bs4.txtTo use the development Bootstrap 3 version:
cli\3bs.cmdTo use the development Bootstrap 4 version:
cli\4bs.cmdTo use the development Bootstrap 5 version:
cli\5bs.cmdthen:
mkdir "%VIRTUAL_ENV%\djk-sample\logs"
mkdir "%VIRTUAL_ENV%\djk-sample\fixtures"
python manage.py makemigrations club_app event_app
python manage.py migrate
python manage.py compilemessages
python manage.py runserver
Shell scripts cli\3bs.cmd / cli\4bs.cmd / cli\5bs.cmd allow to switch the Bootstrap version on the fly, using the development
(not always stable) version of djk_ui.
Install Deno (optional)
Run PowerShell then invoke:
irm https://deno.land/install.ps1 | iex

set DENO_INSTALL=%userprofile%\.deno
set the environment variable.
Use brew:
- Install Python3 from https://brew.sh/
- Follow Ubuntu instructions.
Install Deno (optional):
brew install denoSince django-jinja-knockout v2, django_deno could be used to generate / run Javascript bundle.
django_deno dependence is optional and is required only to run with old browsers (eg. IE11) or to create minimized production mode bundle.
deno rollup and system.js are used internally to create / load the production mode bundle.
- Use
manage.py runrollupcommand to debug with old browsers (eg. IE11) - Use
manage.py collectrollupcommand to create minimized bundle, compatible to old browsers - Use
cli/cherry_django.shto test generated bundle locally (emulation of production).
It's also possible to generate es6 minimized bundle to use with modern browsers (no IE11), with the following
DENO_OUTPUT_MODULE_TYPE value in settings.py:
DENO_OUTPUT_MODULE_TYPE = 'module'To automatically create the production Javascript bundle:
./cli/collectrollup.shTo run test server after the bundle has been created:
./cli/cherry_django.shterser is used to minimize the bundle. To create non-minimized bundle, one may turn off terser in settings.py:
DENO_ROLLUP_COLLECT_OPTIONS = {
    'terser': False,
}
DJANGO_DEBUG and CHERRYPY_STATIC environment variables are used by settings.py to select the debug /
production version of Javascript code, for example in the deno production script cherry_django.sh:
DJANGO_DEBUG='False'
CHERRYPY_STATIC='True'Inside project virtual environment install selenium 3.4 or newer:
pip3 install -r ./requirements/test.txtTo use Bootstrap 3 version:
./cli/3bs.shTo use Bootstrap 4 version:
./cli/4bs.shTo use Bootstrap 5 version:
./cli/5bs.shdjango-jinja-knockout version 2.2.1 release tests were performed with:
- Linux fv-az1787-568 6.11.0-1012-azure #12~24.04.1-Ubuntu SMP Mon Mar 10 19:00:39 UTC 2025 x86_64 x86_64 x86_64 GNU/Linux
- Ubuntu 24.04.2 LTS
- Python 3.13.3
- Google Chrome 135.0.7049.114
- ChromeDriver 135.0.7049.114 (63fd8a7d9d09e41ba37b84386c85d5f249f848f7-refs/branch-heads/7049@{#2175})
Preferable method of interactive running Selenium tests is to use recent version of Chrome with compatible version of
ChromeDriver. ChromeDriver binary should be extracted to one of the PATH directories or into
$VIRTUAL_ENV/bin directory.
Install latest versions of Chrome / ChromeDriver. Then run the following command:
DJK_WEBDRIVER='selenium.webdriver.chrome.webdriver' python3 manage.py testor, simply (will use default Selenium webdriver):
python3 manage.py testClose Chrome window when the tests are complete. It should print the following message in the console:
OK
Destroying test database for alias 'default'...Not every version of Firefox ESR runs Selenium tests successfully due to bugs / incompatibilities of geckodriver, so it's not an recommended method to run interactive tests anymore, but one may try.
Selenium 3.0 or newer requires geckodriver to run with Firefox, which should be extracted to one of the PATH
directories or into $VIRTUAL_ENV/bin directory.
Run the tests with the following command:
DJK_WEBDRIVER='selenium.webdriver.firefox.webdriver' python3 manage.py testWhen using remote shell, one may install Xvfb:
apt-get instal xvfbto run tests in console this way:
Xvfb :99 &
export DISPLAY=:99
python3 manage.py test
or this way:
apt-get instal xvfb
export DJK_WEBDRIVER='selenium.webdriver.chrome.webdriver'
xvfb-run python3 manage.py test
See also:
- http://stackoverflow.com/questions/6183276/how-do-i-run-selenium-in-xvfb
- https://gist.github.com/alonisser/11192482
Easiest way to run Selenium tests remotely is to use built-in headless Chrome driver. Headless mode is supported by recent versions of Chrome browser:
DJK_WEBDRIVER='django_jinja_knockout.webdriver.headless_chrome.webdriver' python3 manage.py testLinux Chromium usually is updated less often, providing more stable version of browser:
DJK_WEBDRIVER='django_jinja_knockout.webdriver.chromium.webdriver' python3 manage.py testTesting other Python versions with tox.
Note that python 3.5 tests requires tox 2.3.1 or newer version, while Ubuntu 14.04 LTS has older 1.6 version. In such case install newer version of tox in the project virtual environment:
pip3 install -U tox pip wheel setuptoolsTo run the test:
tox -r -e py36-django-111-bs3To skip all or part of already executed tests uncomment one of # fixtures = definitions located before
fixtures_order list in djk_sample/tests.py.
Newly introduced fixtures saved with dump_data Selenium command should be added in the proper place of fixtures_order list to retain proper loading / checking order of the has_fixture method.