- Introduction and Installation of Nodejs and Visual Studio Code.
- Fundamental concepts,
- Advance Techniques:
- Building projects faster and safer.
- Extra
Here in the Chrome Extension Development for this we need to have installed the Node.js for that we can just go to The link for an Indtallation of nodejs and download the current version of nodejs. After downloading the current version we can just simply install the nodejs by clicking the next, next, next and install (keep it easy and read the check box after moving on the other process). After the installation is done, it will also install the NPM package manager which we will be using in this while process of developing the chrome extension. For the IDE here we will be using the Visual Studio Code. And for that you can also download form the website Visual Studio Code installation link it’s very simple process and after clicking the next, next install then boom it is done.
So after we have installed it, we can just get the console and initialize the project.
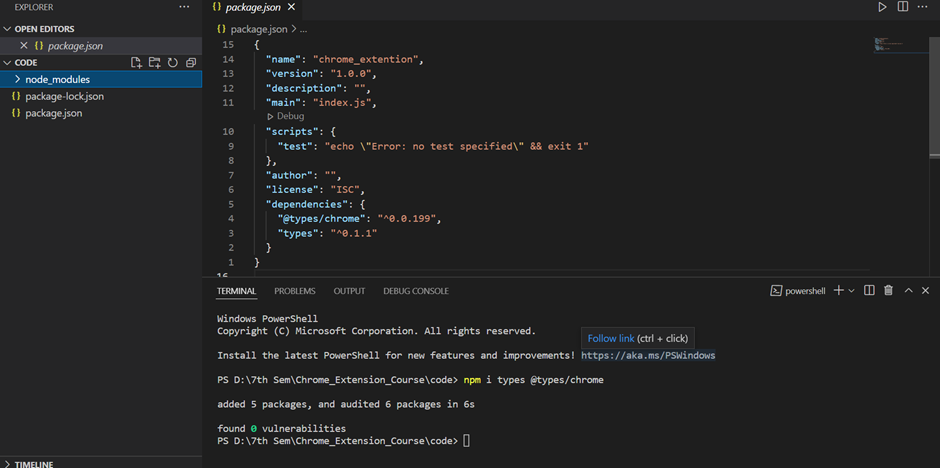
Let's head to the terminal and write "npm init".
This will initialize the project.
So the package name we can write chrome extension. Alright, we have to use the dash, chrome-extension.
The version 1.0, description, you can just skip through this.
Is this ok?
Yes it is. Now, we have initialized the package.json file. Package.json File just contains some
meta information about our project, but this is not related to the Chrome extension.
We'll just use this file to install any dependencies which will help us building the project.
So the first dependency is, we want intelli sense (autocompletion) for the Google Chrome API. We can do that by installing
an NPM type, which is:
"@types/chrome" and this will install our types for the project. As you can see, types chrome have been
added to the dependencies and we can also see that the log file has been created.
 We can just ignore it for now.
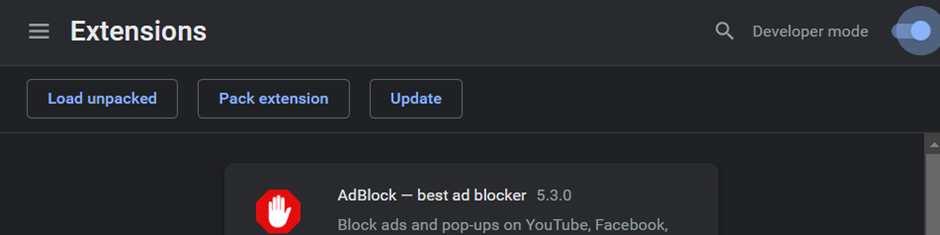
And also the node modules which contains the packages . The next step is to go to the chrome extension which is located under "chrome://extensions" and we can see our extensions here.
We have to turn on the developer mode.
So we will be able to load our extensions and debug them inside the chrome and also get the real time feedback. For the project we'll just require a small knowledge of JavaScript and also JQuery and other than that you should be pretty much good to go This was the set up the project and I hope you could follow along and then we can just get started and create some chrome extension. So let's do that.
We can just ignore it for now.
And also the node modules which contains the packages . The next step is to go to the chrome extension which is located under "chrome://extensions" and we can see our extensions here.
We have to turn on the developer mode.
So we will be able to load our extensions and debug them inside the chrome and also get the real time feedback. For the project we'll just require a small knowledge of JavaScript and also JQuery and other than that you should be pretty much good to go This was the set up the project and I hope you could follow along and then we can just get started and create some chrome extension. So let's do that.
What is Extension!!
So the chrome extension is the small software program which customize the browsing experience of the user. We can say that it can either enchance or add new feature to the browser and tailor the user experience.
 Ex: Ad Blocker or Adobe reader or JSON viewer.
These extension are just buit with the HTML, JavaScript and CSS, there is really no magic.
Extension 4 different types:
Ex: Ad Blocker or Adobe reader or JSON viewer.
These extension are just buit with the HTML, JavaScript and CSS, there is really no magic.
Extension 4 different types:
- The background Scripts
- Content Scripts
- Options page
- UI elements.
At the end the extensions which we are submitting to the chrome web store are just the bundle of HTML, CSS, JavaScript and images if you have any and it is zipped into “.crx” file which then user can download and install we can distribute the extension through the developer dashboard and then of course publish it to the Chrome Webstore,
Manifest file format (Every extension has a JSON-formatted manifest file, named manifest.json, that provides important information.) Back to our visual studio code project Here first we have create one file named manifest.json These file tells to the extension for ex: what is the name? what is the version? And the dicription of the extension. You can refer this documentation for more information: https://developer.chrome.com/docs/extensions/mv3/manifest/ But for now we will be only focusing on only description, manifest files, JSON file, so everything is in this object So in this manifest.json file Add:
{
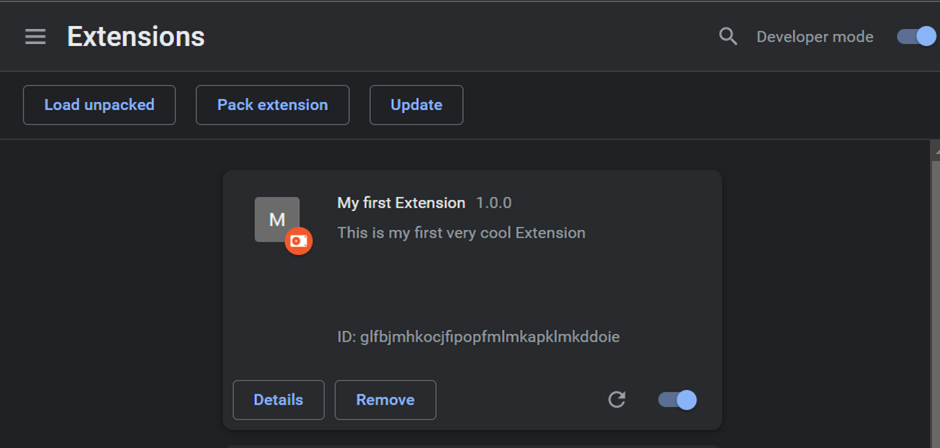
"name": "My first Extension",
"version": "1.0.0",
"description": "This is my first very cool Extension",
"manifest_version": 3
}
These things Currently in the manifest file, it is required to specify the manifest version name of the extension and also version of the extension. Then there are recommended fields such as description and then the icons for our extensions. But we don't have them yet, so we are not going to specify that.
Now let’s go back to the chrome extension turn on the developer mode. Then press on the load unpacked
After that navigate the folder for the extension.
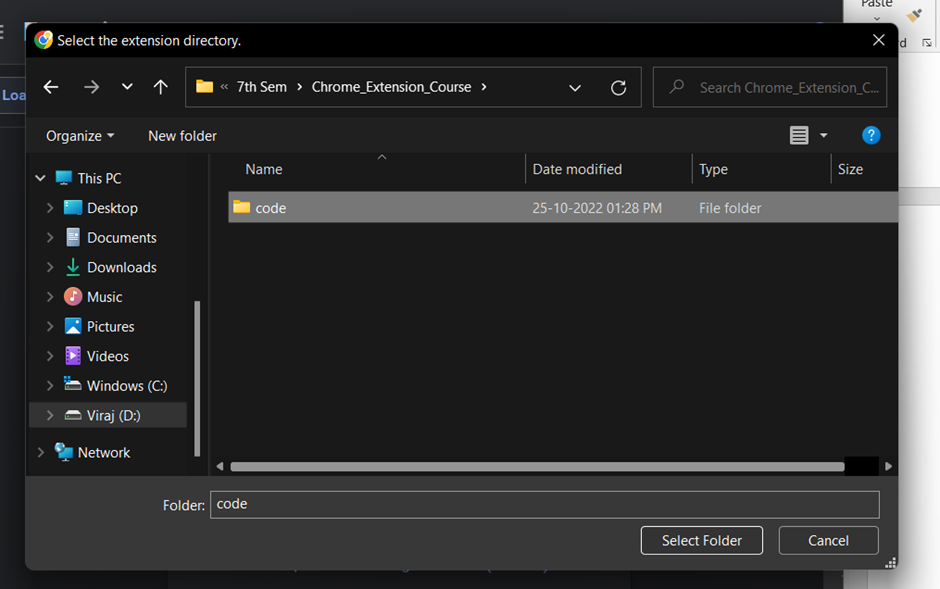 hit select Folder.
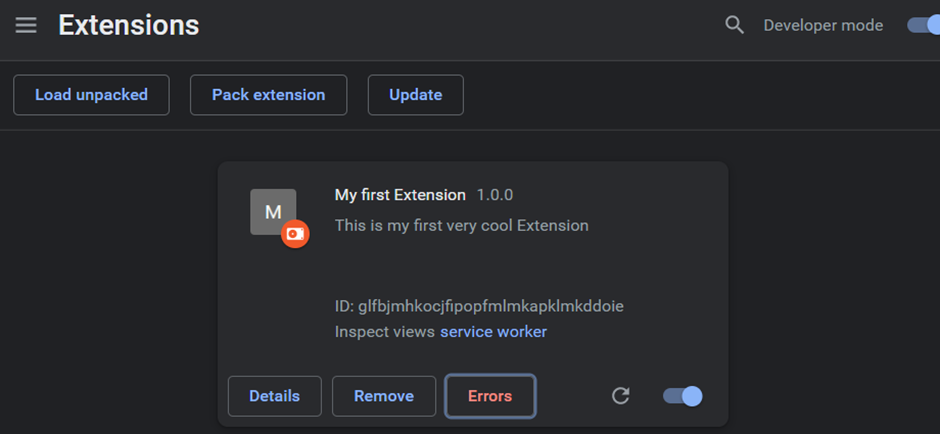
After that we can see the exptension name description and version. As we have mentioned in the manifest.json file
hit select Folder.
After that we can see the exptension name description and version. As we have mentioned in the manifest.json file
Right now the extension is enabled, but actually it’s not doing anything. So the manifest file is enough to tell the browser what your extension consists of and then you can load it and just use it. If you head to the actual documentation Documentation of manifest file extension we can find out there are much more fields, but right now they are not needed.
The extensions are based on the events, the events are the browser triggers such as closing the tab, opening the tab and navigating to a new tab or clicking anywhere in the window. Extensions are monitoring these events in their background script and acting appropriately. First thing which we have to do is to register the background script in the manifest.json We do that by specifying the background property. With two more keys the scripts which points to our background script. This takes an array of any background service_worker we have. If we are using more than one, we just we just separate them with the coma. For this purpose, we will just have one background script. And let's call it just background dogs. The second field is the persistent, which by default should be false. There is only one occasion which we could set it to true, and that is when the background script is actively communicating with the Chrome Web request API. But other than that, always just set it to false. That's a good rule Now, in manifest version three, the background scripts have been replaced with background service worker. So what change is here is how we register these in the manifest file. What we have to do is that we change these background scripts into background service worker instead. So in case throughout the course I will have more or multiple background scripts, you can just keep them in a single file called Background JS. So do everything there and this file will be registered. Now we have to create the background script background checks. background.js
chrome.runtime.onInstalled.addListener(()=> {
    console.log('installed mother');
})
After adding this we can see the console elements and all other stuff on our extension.
chrome.runtime.onInstalled.addListener(()=> {
    console.log('installed mother');
})
chrome.bookmarks.onCreated.addListener(() => {
    alert('Bookmark is Saved');
})
 After this on the chrome extension page we will be getting one error on the page.
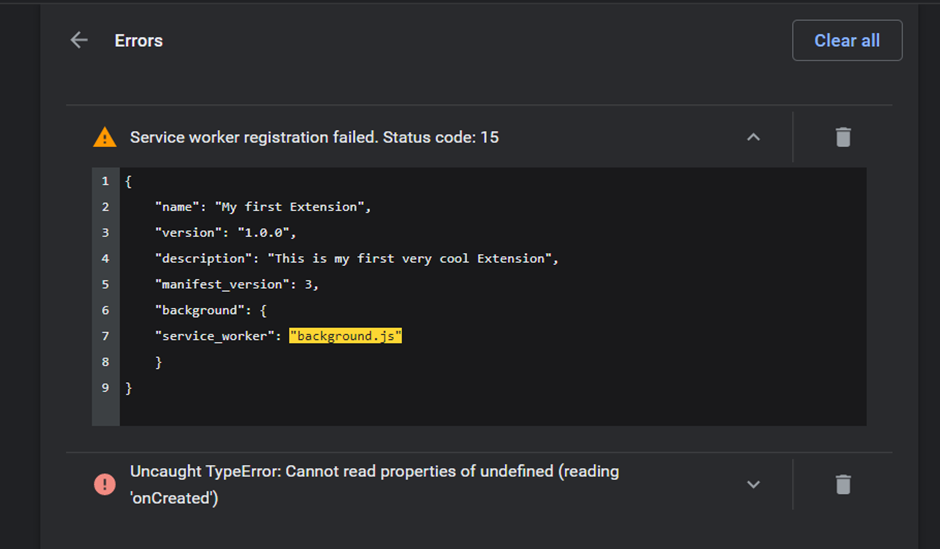 because we have not given the persmission in manifest.json file so for that we have to read the The manifest reference link this doc and copy paste the persmission line.
Background scripts are used to register the listeners and wait for a specific event to happen. When the event occurs, you react appropriately. Also, note that a lot of these Chrome APIs, they are, most of them only available through the background scripts because background script is the one which is responsible for reacting to the events which occurs over time, such as own installed on created, bookmarks, on created, and all these interesting things. So you can see by just tapping the chrome to which properties or namespaces you have access to. And there is a lot of them, there is cookies, devtools, page actions. So there is many, many of them and you can just access the ones which you are required to. But the background scripts does not really do much without the content script. So let’s move on to the next part, which is the content script.
The last time we talked about the background script and now we are going to take a look at the content scripts. Background and content scripts, usually go hand in hand, whereas the background script is responsible for reacting to events and adding listeners for specific events. The content script runs in the context of the web pages. They are able to read the details of the web page you visit, but also make changes and pass information to the background script. The first thing to do if you want to create a content script, we have to head to the manifest file and add a property called content scripts. Which takes an array of the objects of the content scripts. The object mainly takes three arguments. Matches, CSS and JavaScript file. For now let's just start with the JavaScript file which also takes an array of the scripts and lets just call it "content.js" Next we are going to create the file called "content.js" and here we are going to write the code. Let's say we want to add additional button on the YouTube website.  So whenever we visit the website we want to add a button over here and we want that button to change the background to black, to kind of apply a dark mode. We want to do that, when the website loads. So we call "window.onload" method. And assign a function to it. So basically now we have to "querySelect" specific buttons and append the new element there. So as we can see, if we select the search button, we can see that all buttons are inside the div with id - end.So we can just "querySelect" this one and prepend a new button to it.
So let's just try it in the console. We say "document.querySelector" and we pass the id which was "end" but the id we have to pass with the hash tag (#). We can close it. And as we can see we already have the selected buttons. So before you actually write the JQuery in the code, you can always test it in the console and see if you are selecting the correct elements. Now we can try it right now and prepend a text. Let's say dark mode and see what it does.Let's just select it, and as we can see it actually pretended the text. Of course is not clickable but now we have a way to select and insert a text directly. So let's go ahead and do it in our script. Save the file go to the extensions, refresh. Ah-ha! And we see, we didn't specify the matches. So we go ahead back to the "manifest.json" file and specify the next key which is - matches. And the matches, is a property which tells the contents scripts when to inject the JavaScript file. This takes a "glob pattern". If you've never heard about that, you can just google: "glob pattern" and there are a lot of websites describing how it does. But I can show you the basics.  So let's go ahead and do that. So because we want to do this only for the YouTube, we can say that we want to execute this script on any "youtube.com" website. Also with the "/". So this means, this script will run when we can be on any directory of YouTube. It doesn't matter. So any website which satisfy this condition, contains basically the "youtube.com" will run the script. So if we save, go ahead back to extensions refresh. Turn it on. So we have to specify also whether it is "http" or "https". In this case the YouTube is https. So this will run on any "https://*.youtube.com/*"
If we go ahead retry reload, come back here, run the script. We can actually see that it was injected and we have now here the button dark mode. If we go ahead to the console, inspect, go back to sources and press "CTRL+O" and search for content. We can actually see our script here, which run when the website was loaded. If we try and go to Google.com we can see that our script didn't run. If we go ahead and inspect the page, go to sources, try to search for a "content.js". We actually don't have any files. That means the script was not injected because it didn't matches our pattern. So this will get only injected to the website with this specific pattern. The matches also its counterpart, which is exclude the matches. The exclude matches, takes also an array and these matches will be excluded from already included matches. That means let's say we have the YouTube.com / anything and we really want anything, but we don't want to include any "/dirt" for example - links. We can do that by specifying again https and now we want anything. YouTube.com/* but now excluding - the /dirt that means, it will match any URLs without the /dirt keywords. For example when we don't want to include this group when we are watching the video, we can do that by simply typing a /watch here, because we know when we open the video it has the /watch and now if we save and refresh, so we can see on the home page we have injected the script, but as long as we go to some /watch we don't have the script. The thing is that the script gets injected as soon as we visit the website. So that means, because we visited the home page website, we have the script injected, but when we move to another video, as we can see we still have the dark mode here. The reason is, we are not hooking up to we are not watching for the URL changes. That's why. But as long as we refresh, the script is not matched. It's not executed. So let's go ahead and give the content some functionality. So currently we are just prepending a text. Let's make it a bit more interesting and create the button, which will be: let's create an element and we also have to give it some id "button.id" equals dark mode button. Let's go ahead save it, refresh and as we can see we still see the dark mode. The reason for that is, we have to first of all append the button. But second of all, we have to always save and refresh the extension over here. Then the new code will be pulled. And as we can see now, we can actually see the button. So we just need to give it some text - "textContent" equal Do it dark. Let's save, go ahead, refresh the extension, refresh the chrome and we can actually see the button. So to make it functional let's add the button and event listener and let's say on the click, we want to execute some function and this function let's call it enable dark mode. And let's go ahead and create a function. So what we are going to do is to go check the code and check which one is taking the space. So it's actually not the body, it's "ytd-app" So we should be able to get it, by query selecting or in this case "getElementsByTagName". We specify it's called "ytd-app" But first let's check it out. What we are selecting in the in the console. Let's go head back to YouTube. Select, so we can see it's actually HTML collection. That means we have to select the first, one which in this case is "ytd-app" Now we have access to it and then we should be able to style it. Right, yes. Now we can. We copy paste this and then call "style.backgroundColor" equals black. Now we go back to extensions, refresh. Check out the YouTube, refresh and hopefully when we press "do it dark" we get it dark. So of course this dark mode is not ideal, as you can see there is a lot of things which, could be improved and the text could be also inverted, text colors, but this is the basics, to give you an idea how the content scripts work. There is also one more parameter, which you should be familiar with. And that's called a "run at". You can, but you also don't have to specify it. This can be specified as when the script should be executed such as documents start or document end or when the document is idle. So for this purpose, we can set it to the document end and the script will be executed when the rendering is finished. So if we go ahead refresh, we can see the button is here. Do it dark, we get it dark. It's also important to note, that while the script is running in isolated world, which gives you a bit of layer protection, you should always try to communicate if you're communicating outside through the HTTPS And also if you are receiving any request, to filter for a cross site scripting attacks, before you are going to inject any end results into the page.
So let's summarize
- You create a content script. Yhe content strips consists of the javascript file, the matches.
- These are very important when the script will be injected. Exclude matches.
- If you want any and run at that's also optional.
- Then when you finish specifying these you had back to create the new file.
- In this case "content.js" and here we specify any functions or any modification, which we want our script to perform.
- This is just basic javascript file and this would mostly consist of selecting the elements modifying them creating the new one, appending, changing colors, styles. Any visual requirements, or any client side requirements, which you need to do.
- So those are the content scripts. Modifying the page or changing the visual appearance and being executed when necessary. When the specified match or the URL.
Mid Summary:
We have the manifest file, which describes our extension, also describes the background and content script and any permissions our extension also wants to access. The background scripts are specified in the background property, pointing to any background scripts we have and by the default we should have as rule of thumb, persistence set to false. The background scripts are chrome listeners, listening to browser specific events, such as "onInstalled" or "onCreated" and execute only within the background scripts and these API's most of them are not available in the content scripts. In the content scripts we have access usually to runtime, but not others, such as bookmarks or other API calls. If you want to inspect the background script we go ahead and click on the background page and we can see that our background script console logs installed, when the extension was successfully installed and also where we create the bookmark, which we can do for YouTube for example. Go ahead go here to bookmarks. Bookmark this page and we get an alert that the bookmark was successfully saved. On the contrast, when we check the content scripts, content scripts consist of one or multiple JavaScript files. It specifies when the context script will be executed. So we need to specify the matches and in case we need or we want, we can specify exclude matches, any patterns and also when the script will be run: at the document end or at the document start or at the document idle. The content scripts live in an isolate worlds and it modifies the page as well as reads from it if needed. We showed an example of injecting a button on a YouTube home page which toggles the dark mode. So if you refresh and click the button, we can see the background changes. Also remember whenever you save, head to extensions and hit the reload button, so you have always the newest code.
Here not exactly like the using Javascript which will inject the page and visualization of that, but things such as icon of our extension bar. We can just copy paste it here and the icon pops up. We go to the manifest file and we need to let the extension know that it actually has an icon. So let's start with the simple one, which is in the icons, we define a key icons, which takes on Here we have created two changes Created popup.html
<!DOCTYPE html>
<html>
    <head></head>
    <body>
        <img src="./icon.png" width="40" />
        head over to youtube and a new icon will appear!
        <a href="https://eurekachaman-fcabd.web.app/" target="_blank">
            <button>Visit my Homepage</button>
        </a>
        <script src="popup.js"></script>
    </body>
</html>
And changed in manifest.json
"icons": {
        "16": "icon.png",
        "48": "icon.png",
        "128": "icon.png"
    },
    "action":{
        "default_title": "Created by Viraj_Deshpande, enjoy!",
        "default_popup": "popup.html"
    }
That’s it.
We have created the manifest file, where we specified that our version will be 1.0.0 This is the name of the extension. We can just change it to the let's say "YouTube light mode" and let's write some more descriptive. This extension turns background to white YouTube background to white. Alright. So we have our extension and we are super excited! So let's expand this window so we can see more. And let's head over to the Web store for a Google. Let's visit the page and this is the place where we are uploading the extension. here
[Documentation](https://chrome.google.com/webstore/category/extensions)

after that except the package.json and package-lock.json files and node_modules folder we are taking seleting all of the files and converting into zip folder, if not having the winrar, then we can do this using one command, to be more specific on windows powershell.
compress-Archive src output.zip
src is the file name and output.zip is new file is creating.
Conclusion: it takes 5$ and I am poor to do that but you can follow some good resourses to do that: