(Updated) Now recommending using nvtop for both AMD and NVIDIA dGPUs)
nvtop (NVIDIA TOP) is a real-time GPU monitoring tool similar to htop.
It shows GPU utilization, temperature, memory usage, and active processes.
sudo apt update && sudo apt install nvtop
nvtop
sudo dnf install nvtop
nvtop
- Launch with
nvtopin the terminal - Navigate with the arrow keys
- Press
qto quit
- Download Steam from https://store.steampowered.com/about/
- Once the Deb package is downloaded, right click in, install via Software Center.
- Once installed, browse to Activities in the upper left corner, search for Steam, right click to open it selecting "Launch using integrated graphics."
(Linux Mint users, just run Steam, no special right clicking needed)

With Steam open.
-
Setup compatibility mode as shown below.

-
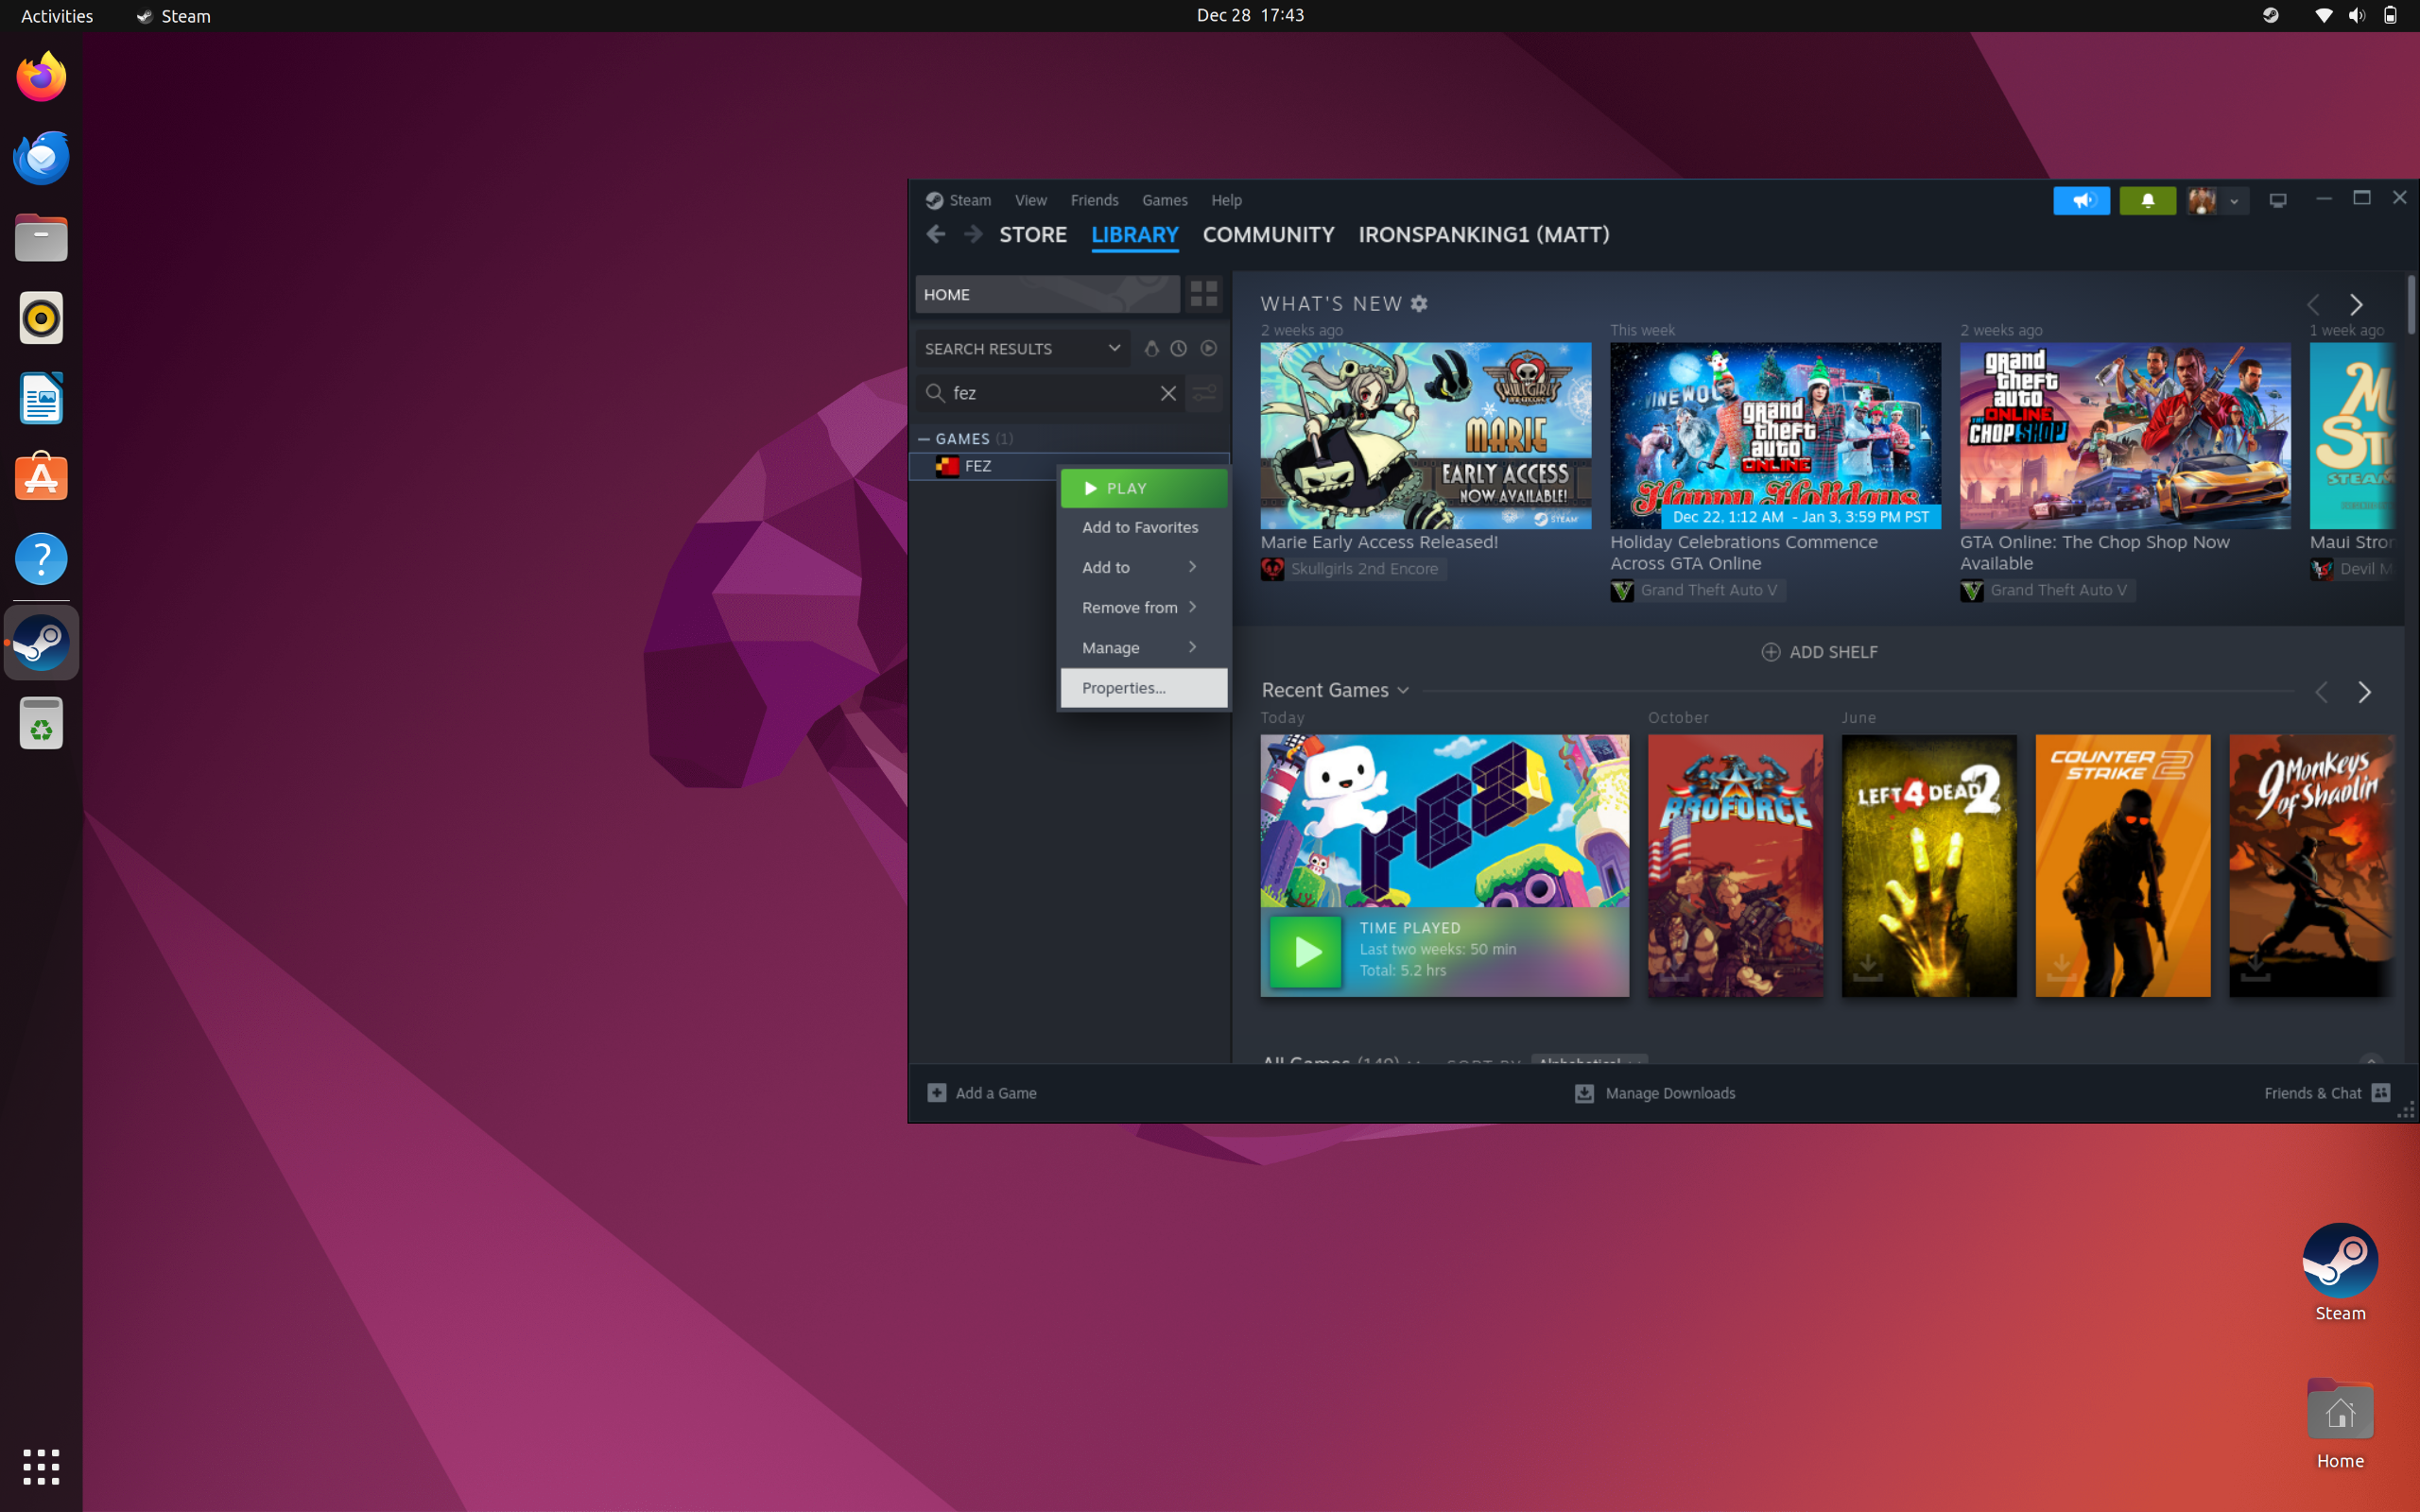
Locate your game installed already or install it.
-
Right click on the game, goto properties.
Launch options section for dGPU users
- Place the following into your launch options, to ensure you are using the discrete GPU and not the integrated GPU for your game.
DRI_PRIME=1 %command%
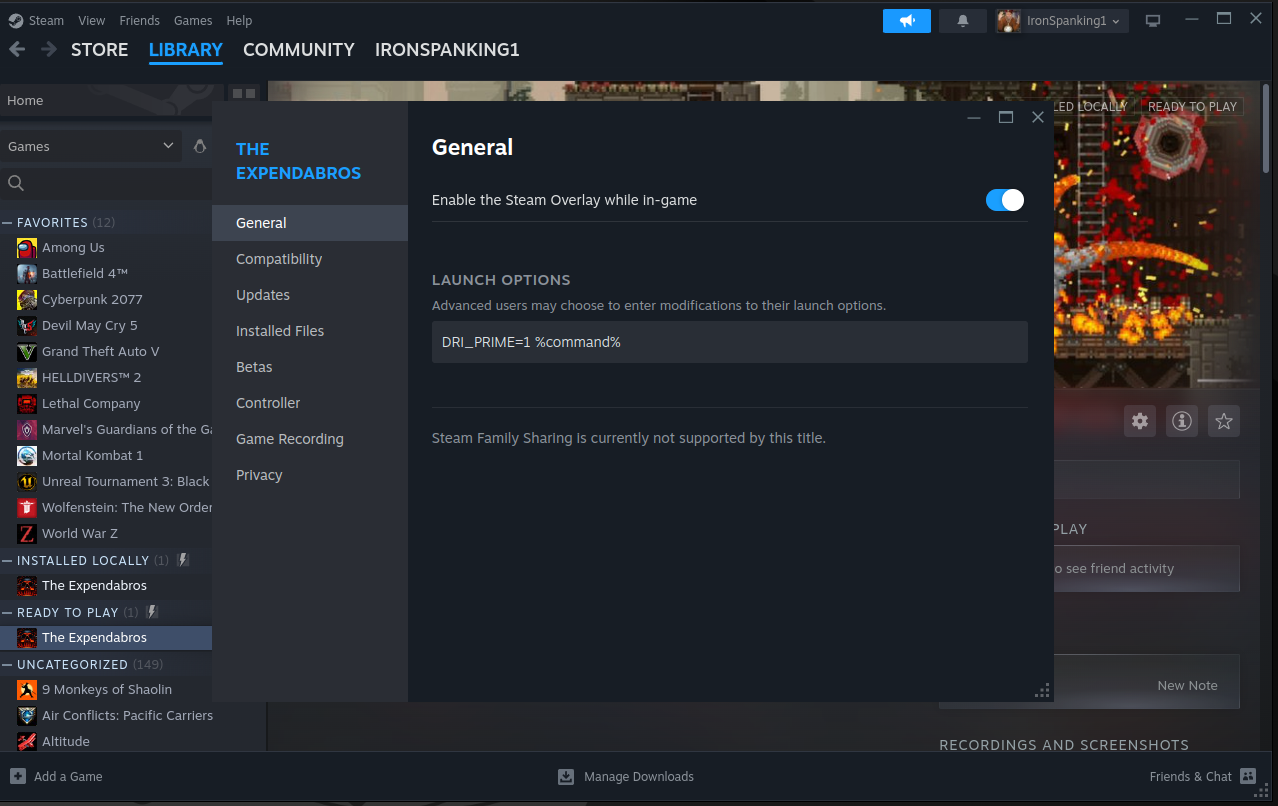
- Close the General box at the X, there is no save button or anything like that.
NOTE: Some games may need addtional GPU details In this case, we'd replace DRI_PRIME=1 %command% and test against:
sudo apt update && sudo apt install vulkan-tools -y && vulkaninfo | grep "GPU[0123]" -A 10
Verify GPU1 is indeed, AMD Radeon RX 7700S (RADV NAVI33).
Now in the launch options:
DRI_PRIME=1 DXVK_FILTER_DEVICE_NAME="AMD Radeon RX 7700S (RADV NAVI33)" %command%
Steam game setup instructions for Ubuntu LTS (Long Term Support) - Two NVMe drives, installing games to secondary drive
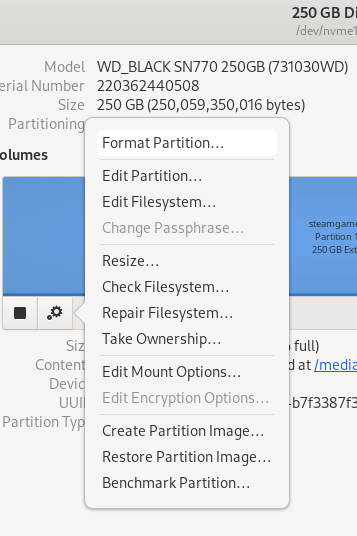
- Open Disks program, label as steamgames,format to Ext4. Close Disks.
Auto-mount second drive script.
- Open a terminal from the horizontal line in the upper left, search Terminal and open it.
cd /media && sudo mkdir steamgames
- Let's get the ownership and permissions sorted correctly.
sudo chown $USER:$USER steamgames/ && sudo chmod 700 steamgames/
Let's check our work:
ls -ld steamgames/
-
You should see something like: drwx------. 1 youruser youruser 0 Month day 00:00 steamgames/
-
Now, we need to get this directory to a place where it identifies as the secondary NVMe drive.
sudo blkid | grep 'steamgames' | awk '{print $0}'
- As we labeled the drive as steamgames, we were able use awk to easily locate it and see something like this:
/dev/nvme1n1p1: LABEL="steamgames" UUID="xxxxxxxxxxxxxxxxxxxxxxxxxxxxxxxxxxxx" BLOCK_SIZE="4096" TYPE="ext4" PARTUUID="xxxxxxxxxxxxxxxxxxxxxxxxxxxxxxxxxxxx"
-
We want the section (and yours will differ) UUID="b767cc57-0262-4ba5-be9d-b7f3387f3d59"
-
Now that we have this, we need to get this mounted by default and, make sure it plays nicely with Steam.
-
First, let's backup our fstab so if something goes horribly wrong, you can tell support you broke fstab, but you have a backup we can restore from. We'll open open the file from here as well.
sudo cp /etc/fstab /etc/fstab.bak && sudo nano /etc/fstab
- Append the following to the bottom of your file, remember, we are using YOUR UUID found in your blkid results:
UUID=xxxxxxxxxxxxxxxxxxxxxxxxxxxxxxxxxxxx /media/steamgames ext4 rw,users,exec,auto 0 0
-
Save the file with Ctrl X. Y key when asked.
-
Now reboot.
- Download Steam from https://store.steampowered.com/about/
- Once the Deb package is downloaded, right click in, install via Software Center.
- Once installed, browse to Activities in the upper left corner, search for Steam, right click to open it selecting "Launch using integrated graphics."
(Linux Mint users, just run Steam, no special right clicking needed)
With Steam open.
-
Setup compatibility mode as shown below.
-
Upper left menu option called "Steam", pull down, select "Settings", go down to "Storage".
-
Click Add Drive, choose Add a new Steam library folder - the option will appear like it does here. Close the settings dialog.
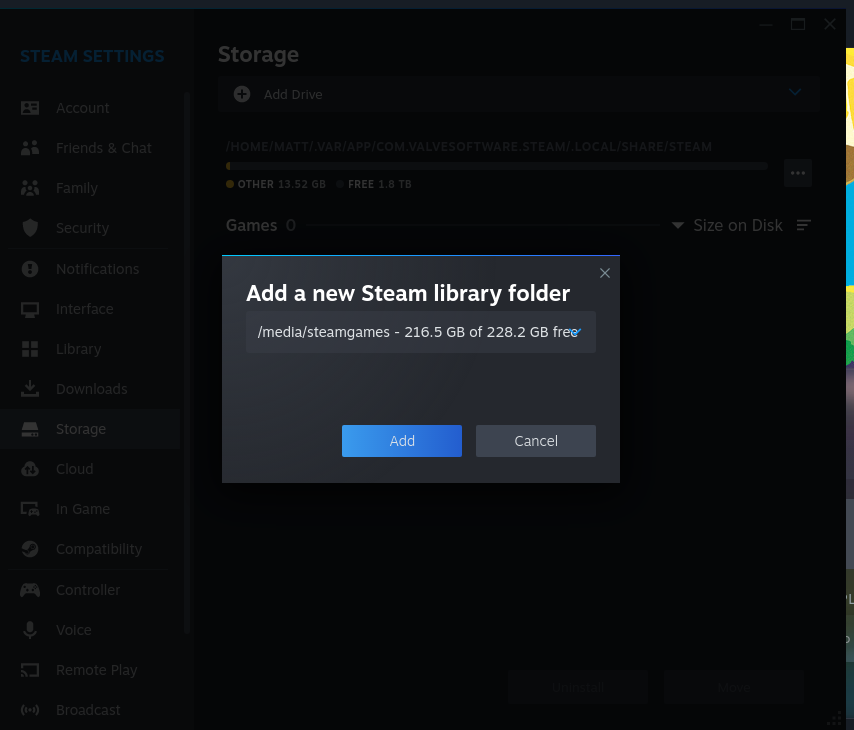
-
Locate your game, install it to steamgames drive.
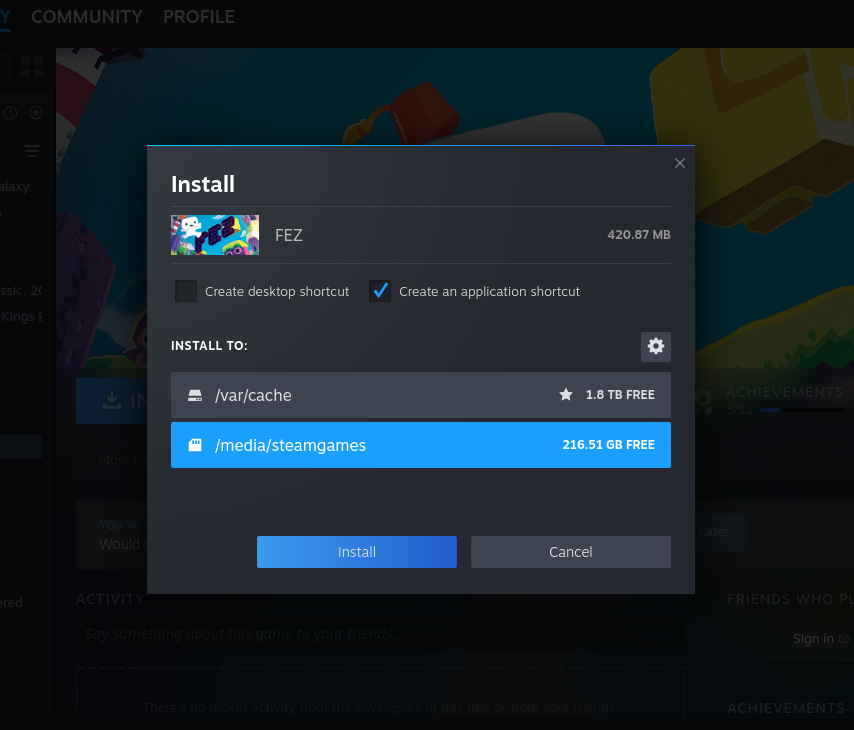
- Right click on the game, goto properties.
Launch options section for dGPU users
- Place the following into your launch options, to ensure you are using the discrete GPU and not the integrated GPU for your game.
DRI_PRIME=1 %command%
- Close the General box at the X, there is no save button or anything like that.
NOTE: Some games may need addtional GPU details In this case, we'd replace DRI_PRIME=1 %command% and test against:
sudo apt update && sudo apt install vulkan-tools -y && vulkaninfo | grep "GPU[0123]" -A 10
Verify GPU1 is indeed, AMD Radeon RX 7700S (RADV NAVI33).
Now in the launch options:
DRI_PRIME=1 DXVK_FILTER_DEVICE_NAME="AMD Radeon RX 7700S (RADV NAVI33)" %command%
- Install Steam from the Software application in the dock. Search for Steam install the Flatpak.
- Once installed, browse to the horizontal line in the upper left corner, click to open it, search for Steam.
With Steam open.
-
Setup compatibility mode as shown below.
-
Locate your game installed already or install it.
-
Right click on the game, goto properties.
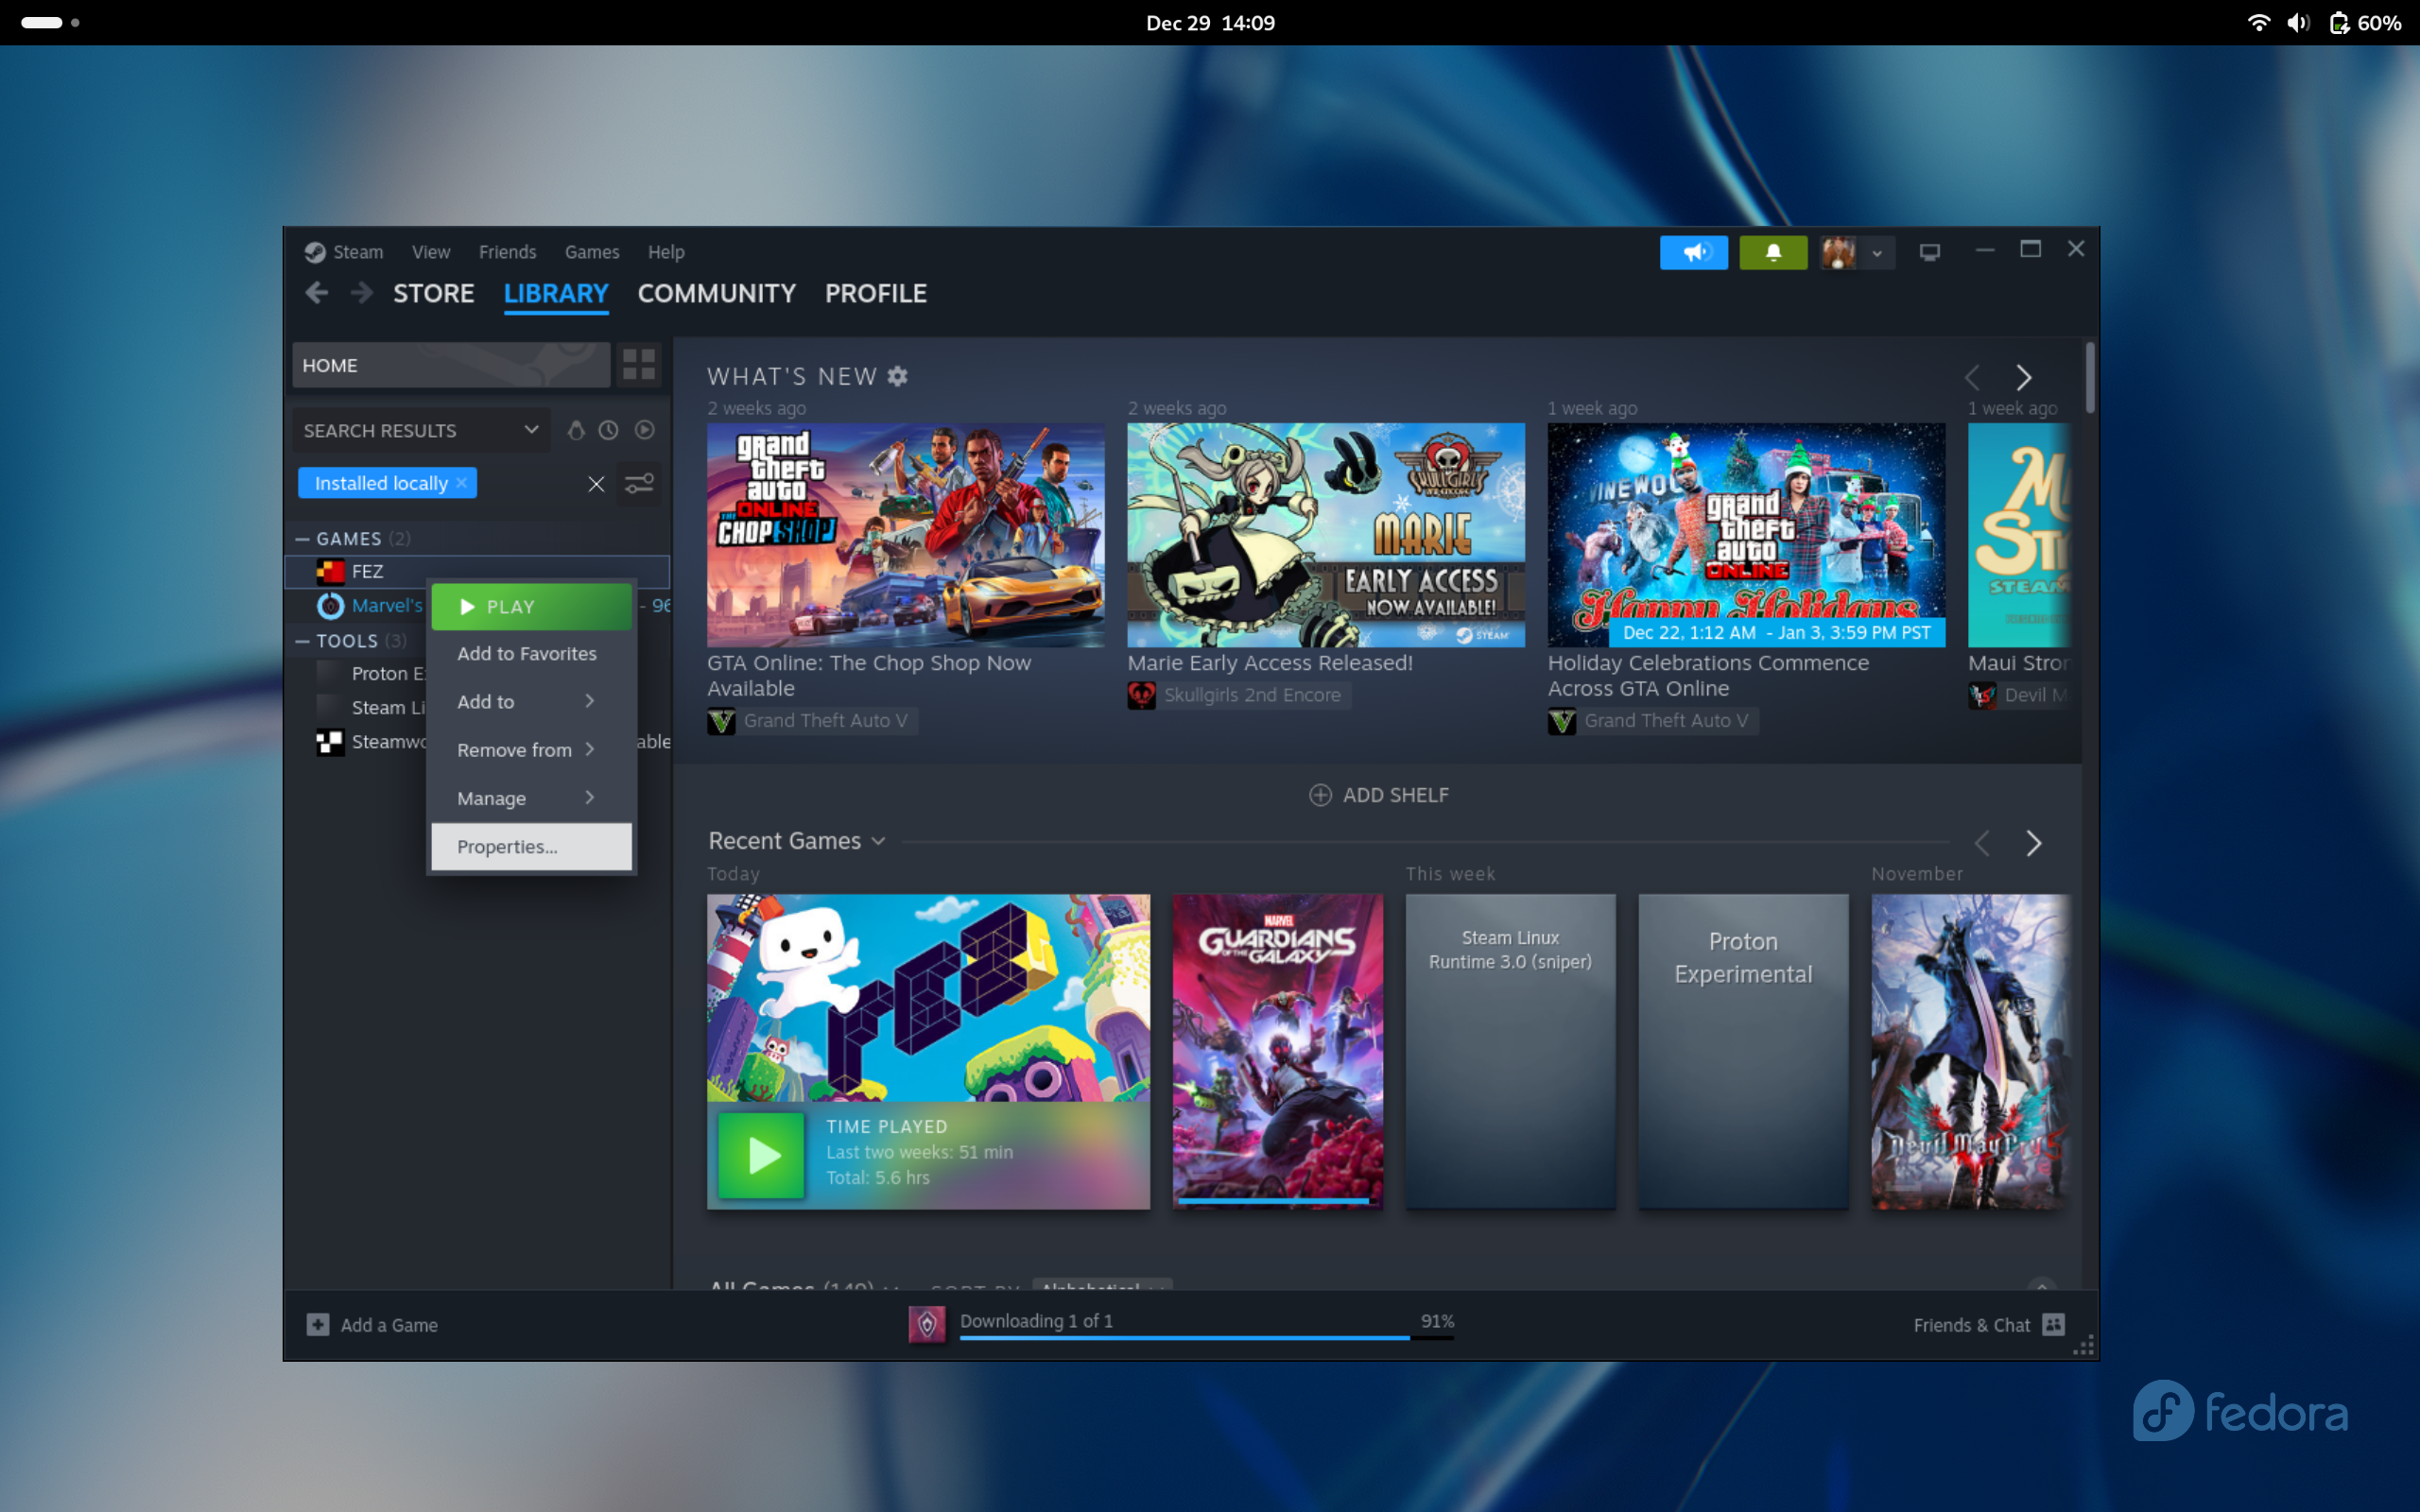
Launch options section for dGPU users
- Place the following into your launch options, to ensure you are using the discrete GPU and not the integrated GPU for your game.
DRI_PRIME=1 %command%
- Close the General box at the X, there is no save button or anything like that.
NOTE: Some games may need addtional GPU details In this case, we'd replace DRI_PRIME=1 %command% and test against:
sudo dnf install vulkan-tools -y && vulkaninfo | grep "GPU[0123]" -A 10
Verify GPU1 is indeed, AMD Radeon RX 7700S (RADV NAVI33).
Now in the launch options:
DRI_PRIME=1 DXVK_FILTER_DEVICE_NAME="AMD Radeon RX 7700S (RADV NAVI33)" %command%
Auto-mount second drive script.
-
Open Disks program, label as steamgames,format to Ext4. Close Disks.
-
Open a terminal from the horizontal line in the upper left, search Terminal and open it.
cd /media && sudo mkdir steamgames
- Let's get the ownership and permissions sorted correctly.
sudo chown $USER:$USER steamgames/ && sudo chmod 700 steamgames/
Let's check our work:
ls -ld steamgames/
-
You should see something like: drwx------. 1 youruser youruser 0 Month day 00:00 steamgames/
-
Now, we need to get this directory to a place where it identifies as the secondary NVMe drive.
sudo blkid | grep 'steamgames' | awk '{print $0}'
- As we labeled the drive as steamgames, we were able use awk to easily locate it and see something like this:
/dev/nvme1n1p1: LABEL="steamgames" UUID="xxxxxxxxxxxxxxxxxxxxxxxxxxxxxxxxxxxx" BLOCK_SIZE="4096" TYPE="ext4" PARTUUID="xxxxxxxxxxxxxxxxxxxxxxxxxxxxxxxxxxxx"
-
We want the section (and yours will differ) UUID="b767cc57-0262-4ba5-be9d-b7f3387f3d59"
-
Now that we have this, we need to get this mounted by default and, make sure it plays nicely with Steam.
-
First, let's backup our fstab so if something goes horribly wrong, you can tell support you broke fstab, but you have a backup we can restore from. We'll open open the file from here as well.
sudo cp /etc/fstab /etc/fstab.bak && sudo nano /etc/fstab
- Append the following to the bottom of your file, remember, we are using YOUR UUID found in your blkid results:
UUID=xxxxxxxxxxxxxxxxxxxxxxxxxxxxxxxxxxxx /media/steamgames ext4 rw,users,exec,auto 0 0
-
Save the file with Ctrl X. Y key when asked.
-
Now reboot.
- Install Steam from the Software application in the dock. Search for Steam install the Flatpak.
- Do the same by installing an application called Flatseal - this is what will bridge together your Steam flatpak and your games drive.
- Once installed, browse to the horizontal line in the upper left corner, click to open it, search for Steam.
Setup Flatseal
- Open Flatseal.
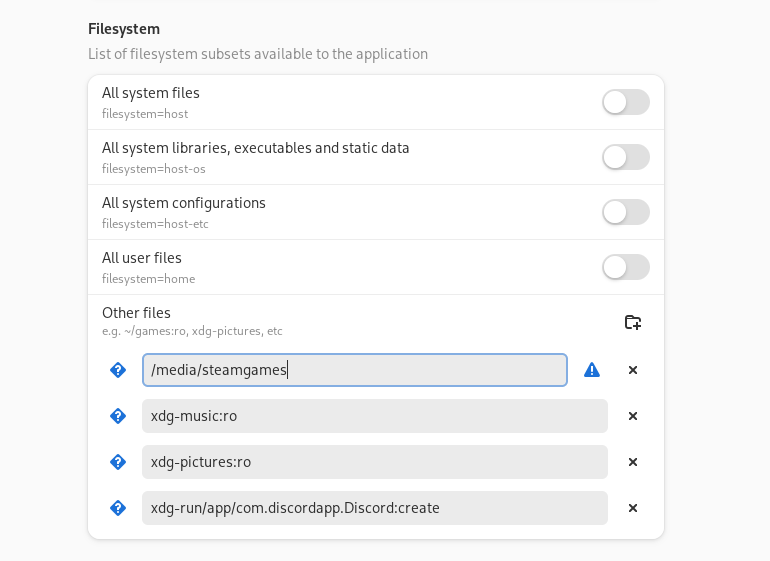
- In Flatseal, for Steam, set Filesystem, Other files as /media/steamgames (If you used the setup script, it will be /media/YourUserName/steamgames instead)
- Close Flatseal, just x out of it. Nothing to save.
- Open Steam, launch Steam normally with a single left click.
With Steam open.
-
Setup compatibility mode as shown below.
-
Upper left menu option called "Steam", pull down, select "Settings", go down to "Storage".
-
Click Add Drive, choose Add a new Steam library folder - the option will appear like it does here. Close the settings dialog.
-
Locate your game, install it to steamgames drive.
- Right click on the game, goto properties.
Launch options section for dGPU users
- Place the following into your launch options, to ensure you are using the discrete GPU and not the integrated GPU for your game.
DRI_PRIME=1 %command%
- Close the General box at the X, there is no save button or anything like that.
NOTE: Some games may need addtional GPU details - AMD Radeon RX 7700S only In this case, we'd replace DRI_PRIME=1 %command% and test against:
sudo dnf install vulkan-tools -y && vulkaninfo | grep "GPU[0123]" -A 10
Verify GPU1 is indeed, AMD Radeon RX 7700S (RADV NAVI33).
Now in the launch options:
DRI_PRIME=1 DXVK_FILTER_DEVICE_NAME="AMD Radeon RX 7700S (RADV NAVI33)" %command%