Mutian Xu
·
Chongjie Ye
·
Haolin Liu
·
Yushuang Wu
·
Jiahao Chang
·
Xiaoguang Han
SSE, CUHKSZ
·
FNii-Shenzhen
·
Guangdong Provincial Key Laboratory of Future Networks of Intelligence, CUHKSZ
·
Tencent Hunyuan3D
·
ByteDance Games
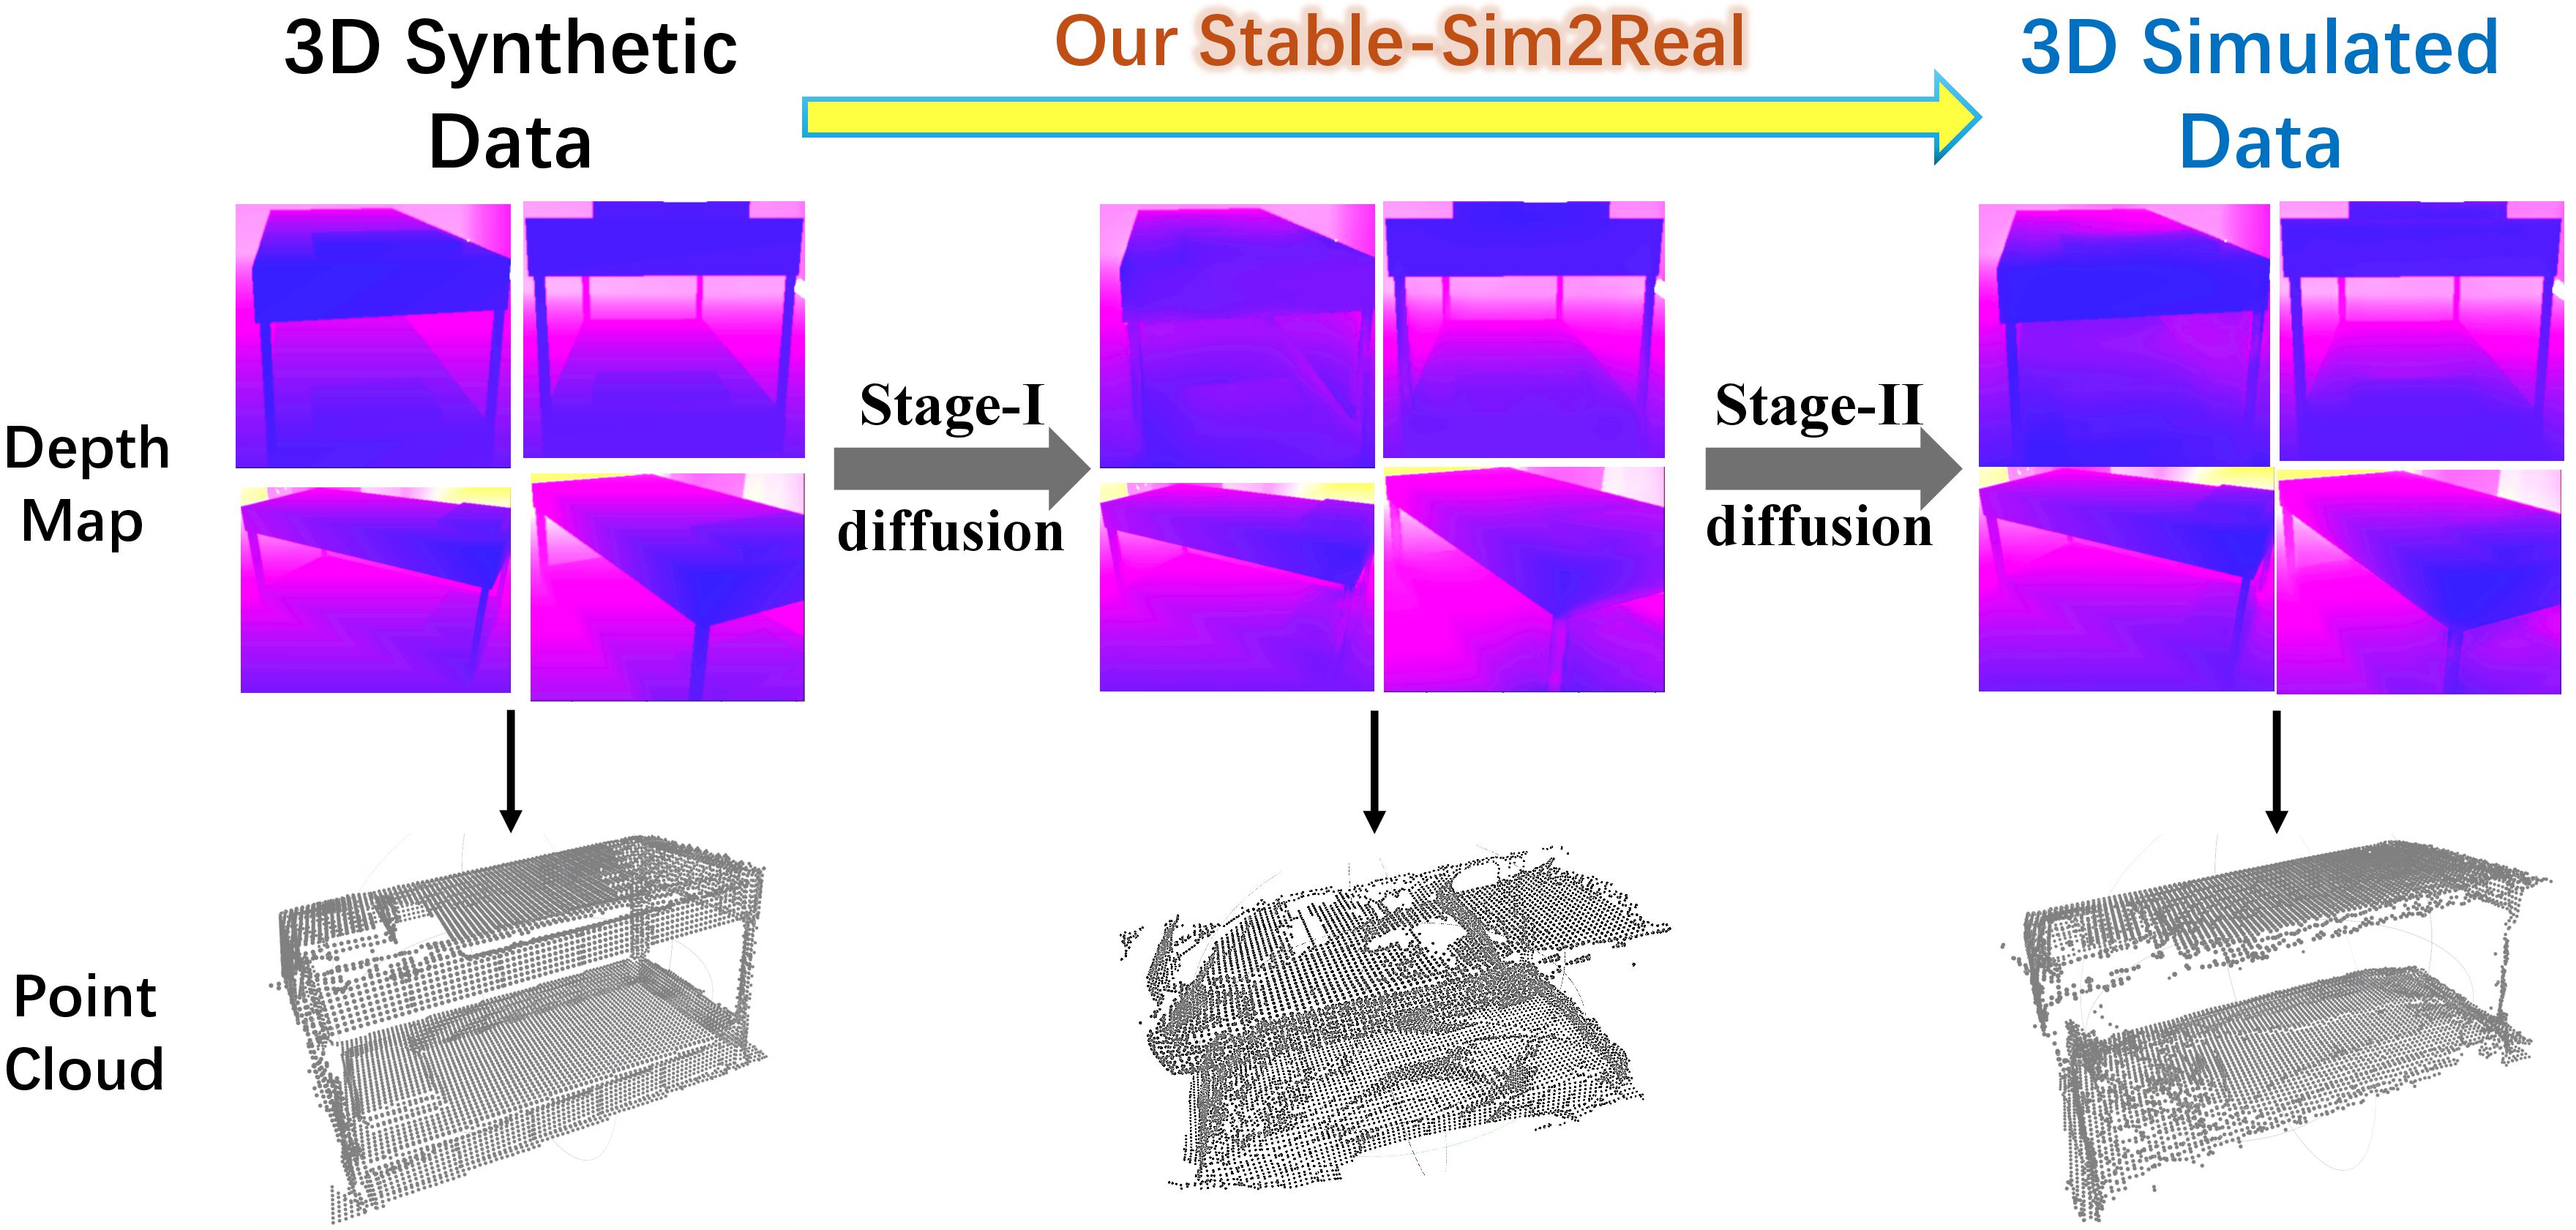
Stable-Sim2Real is a two-stage depth diffusion model for simulating real-captured 3D data.
If you find our code or work helpful, please cite:
@inproceedings{xu2025sim2real,
        title={Stable-Sim2Real: Exploring Simulation of Real-Captured 3D Data with Two-Stage Depth Diffusion},
        author={Mutian Xu and Chongjie Ye and Haolin Liu and Yushuang Wu and Jiahao Chang and Xiaoguang Han},
        year={2025},
        booktitle = {International Conference on Computer Vision (ICCV)}
  }
TABLE OF CONTENTS
Table of Contents
- The first major revision of code is out. Try the latest code to run Stable-Sim2Real on LASA! 💪💪💪 (Aug.28, 2025 UTC)
- The initial code is released, which is a simple script. (Aug.15, 2025 UTC)
For conducting the inference on a single depth image, at least 3GB GPU memory usage is required.
Start by cloning the repo:
git clone https://github.com/GAP-LAB-CUHK-SZ/stable-sim2real.git
cd stable-sim2real
First of all, you have to make sure that you have all dependencies in place. The simplest way to do so is to use anaconda.
You can create an Anaconda environment called stable-sim2real and install all the dependencies as below. For Linux, you need to install libopenexr-dev before creating the environment. Then install all the remaining dependencies:
sudo apt-get install libopenexr-dev # for linux
conda create -n stable-sim2real python=3.9 (recommended python version >= 3.9)
conda activate stable-sim2real
pip install -r requirements.txtNext, download all the pretrained models from OneDrive or Sharepoint, and put all of them into pretrained_weights folder.
Download the training dataset from OneDrive or Sharepoint, and put lasa_depth into dataset folder. It contains 40,000+ synthetic-real depth pairs with corresponding RGB images. It is processed from LASA, a large-scale aligned shape annotation dataset with CAD/real 3D data pairs.
Next, download the camera poses from OneDrive or Sharepoint, and put lasa_pose into dataset folder. This is for later depth fusion.
This involves generating and saving Stage-I outputs into .npy files, by simply running (you may also need to specify some path arguments by yourself):
CUDA_VISIBLE_DEVICES=x python eval_stage1.py
This involves generating and saving Stage-II outputs into .npz files, by simply running (you may also need to specify some path arguments by yourself):
CUDA_VISIBLE_DEVICES=x python eval_stage2.py
Finally, the Stage-II output depth will be fused (you may also need to specify some path arguments by yourself):
cd rgbd_fusion
python lasa_eval_fusion.py
After finishing this, the visualization result of the final 3D simulated mesh will be automatically 😊 saved as xxx_mesh.obj file.
- Provide demo code (will also support HuggingFace) to simulate and fuse your own CAD object/scene depth (including render, simulate, and fusion).
- Complete training code with training and inference of 3D-Aware Local Discriminating.
- Provide some sample data from OOD datasets (e.g., ShapeNet) for inference.
You are welcome to submit issues, send pull requests, or share some ideas with us. If you have any other questions, please contact Mutian Xu ([email protected]).
Our code base is partially borrowed or adapted from ControlNet, Stable-Normal, and LASA.