SonarQube is the leading tool for continuously inspecting the Code Quality and Security of your codebase and guiding development teams during code reviews. It is an open-source tool and has support for 29 languages as of 8th April 2022 and they are growing.
SonarQube features include:
- Code Quality: Check overall health of code and more importantly highlight code related issues which makes it a great tool to check code quality.
- Intelligent bug detection: It provides code analyzers and uses powerful path sensitive dataflow engines which can point mistakes like null deferences, logical errors, resource leaks.
- Multi language: It has more than 29 code analyzers for different languages/platforms like C/C++, JavaScript, C#, Java, COBOL, PL/SQL, PHP, ABAP, VB.NET, Python, RPG, Flex, Objective-C, Swift, Web etc.
- DevOps Integration: It can be easily integrated with CI/CD tools using webhooks and REST APIs.
SonarQube can be run on your local machine or as a docker container or can be hosted on an on-premises or cloud-based server. SonarQube comes in Community, Developer and Enterprise editions. While the Community Edition is free and open-source, the Developer edition comes with C, C++, Obj-C, Swift, ABAP, T-SQL, PL/SQL support, branch Analysis and Pull Request decoration.
In this blog we will be walking through hosting it locally and on an AWS EC2 instance.
You can either download the SonarQube Community/Developer Edition zip file from here, or you can use their Docker image. For this blog, we will be using SonarQube Developer Edition.
You can check the instructions here for installing the local instance using the zip file.
For using their Docker image for testing, start the Docker server using:
docker run -d --name sonarqube -e SONAR_ES_BOOTSTRAP_CHECKS_DISABLE=true -p 9000:9000 sonarqube:latest
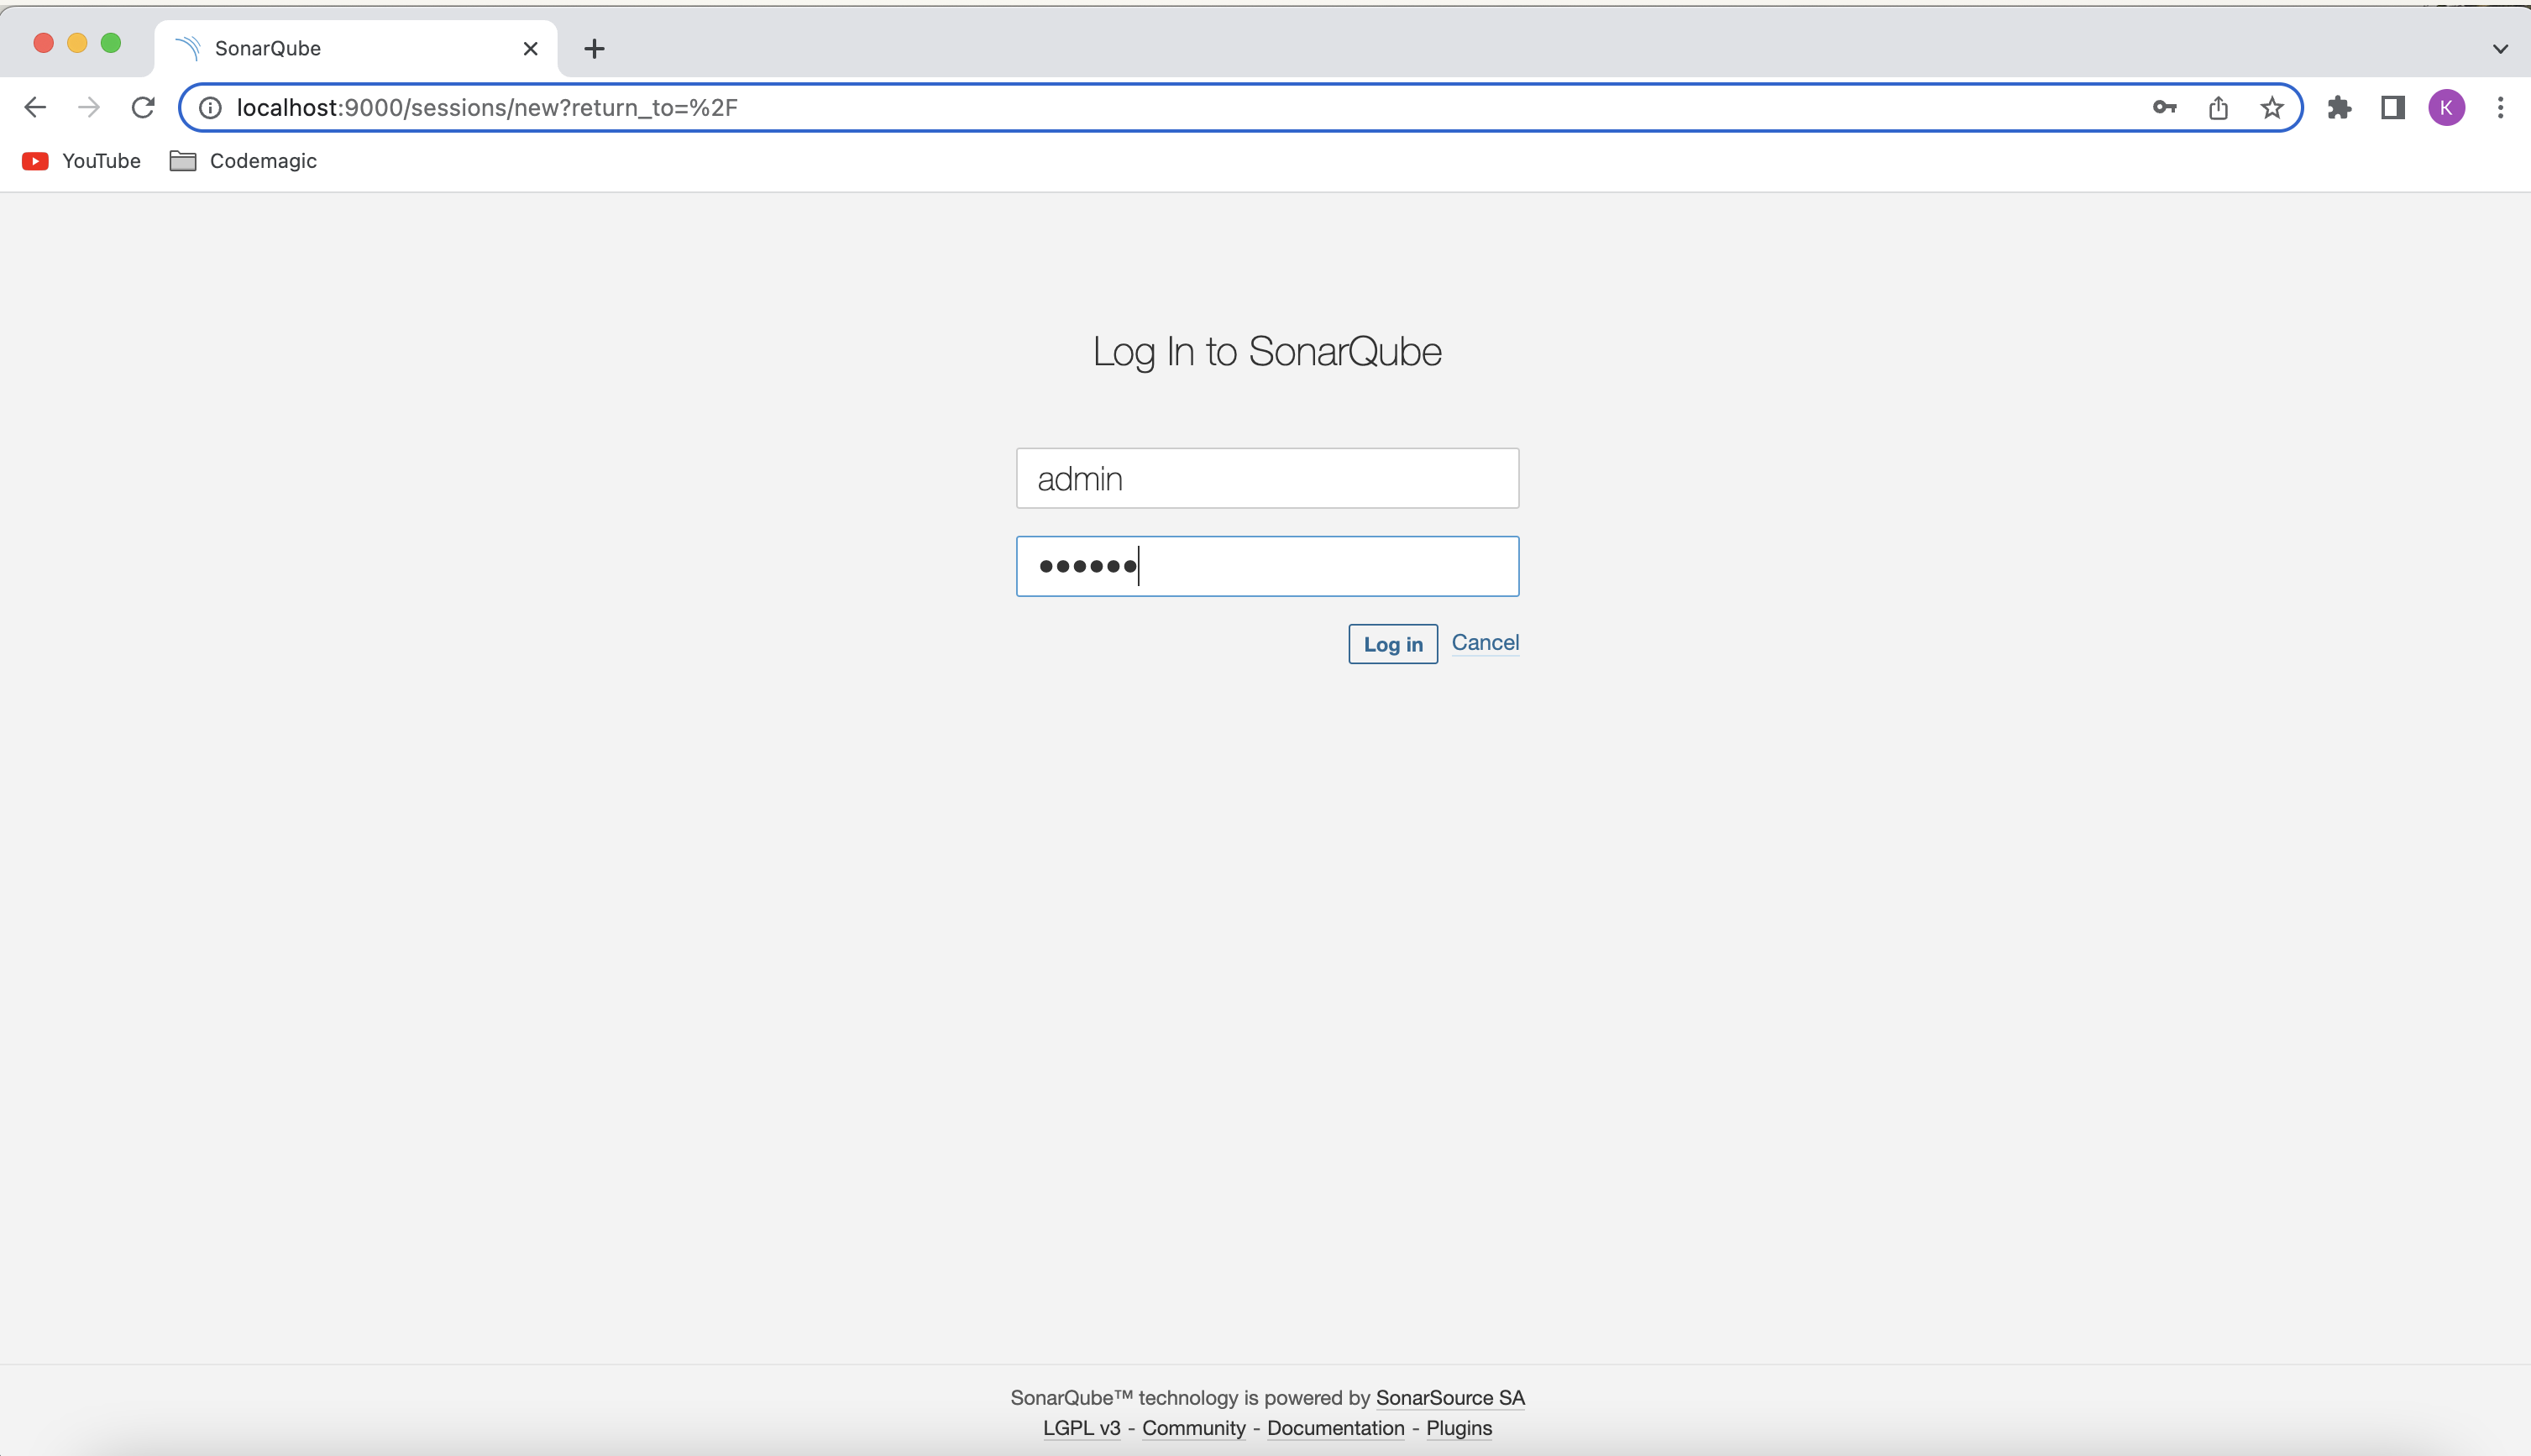
Now, log in to http://localhost:9000 with System Administrator credentials (login=admin, password=admin)
Click on the Create new project button. When asked how you want to create your project, select Manually.

Enter a Project key and a Display name, and click on Set Up.

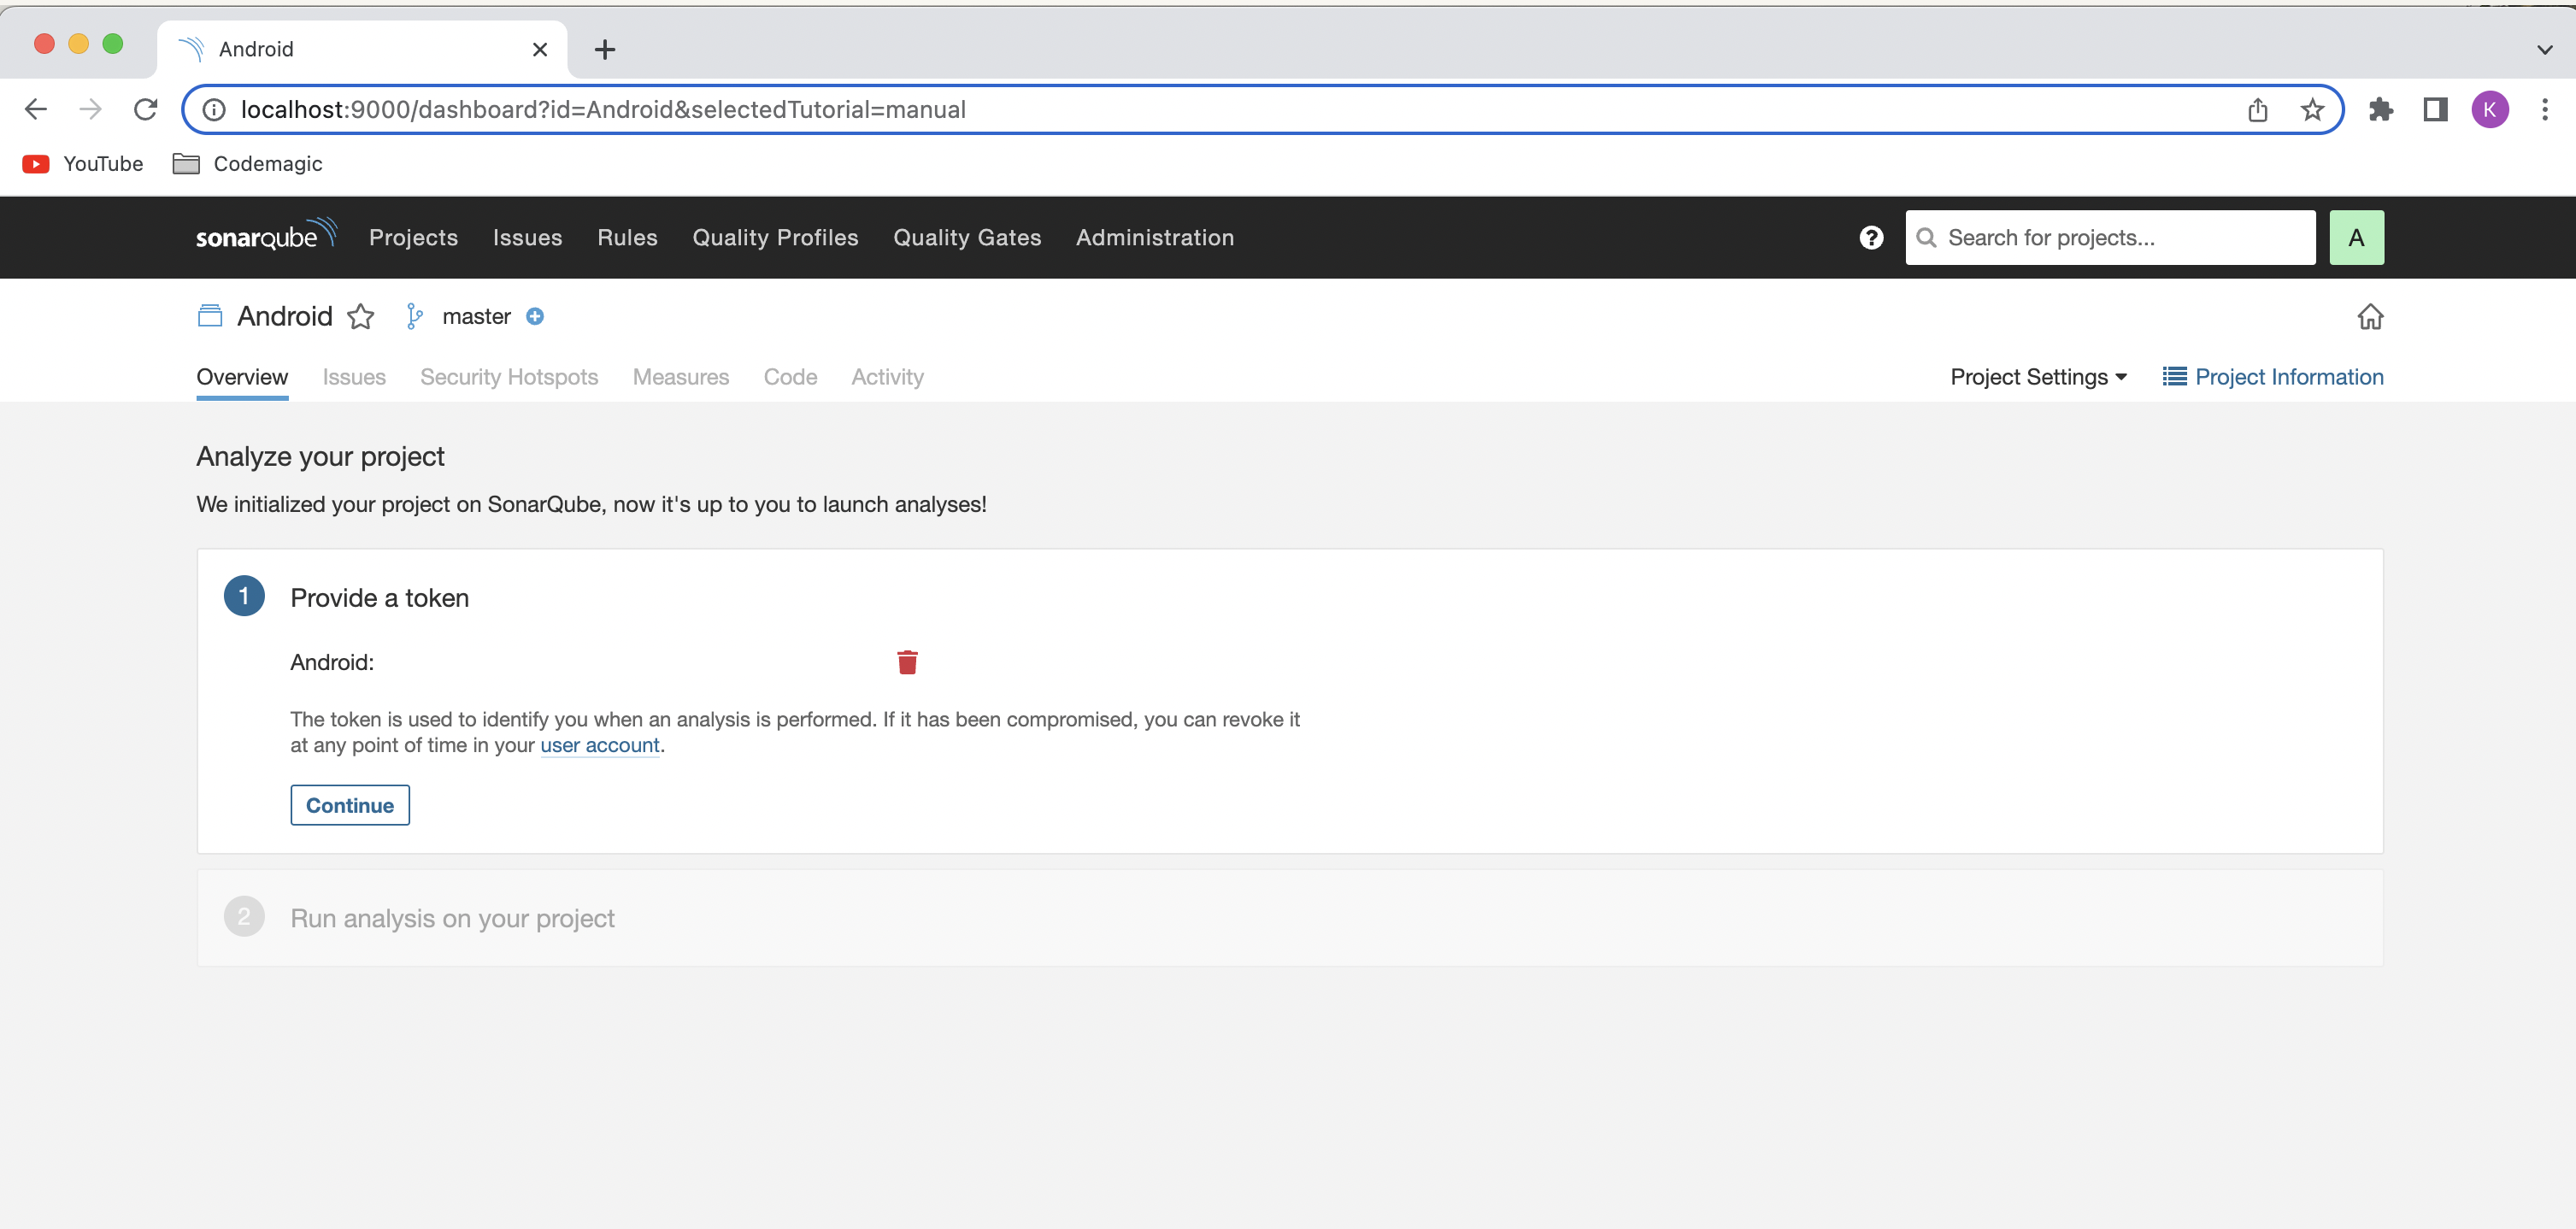
Under Provide a token, enter a token name, and click on Generate. Copy the token and click on Continue. You will need this while running the analysis CLI command.
Select your project’s main language, and follow the instructions.
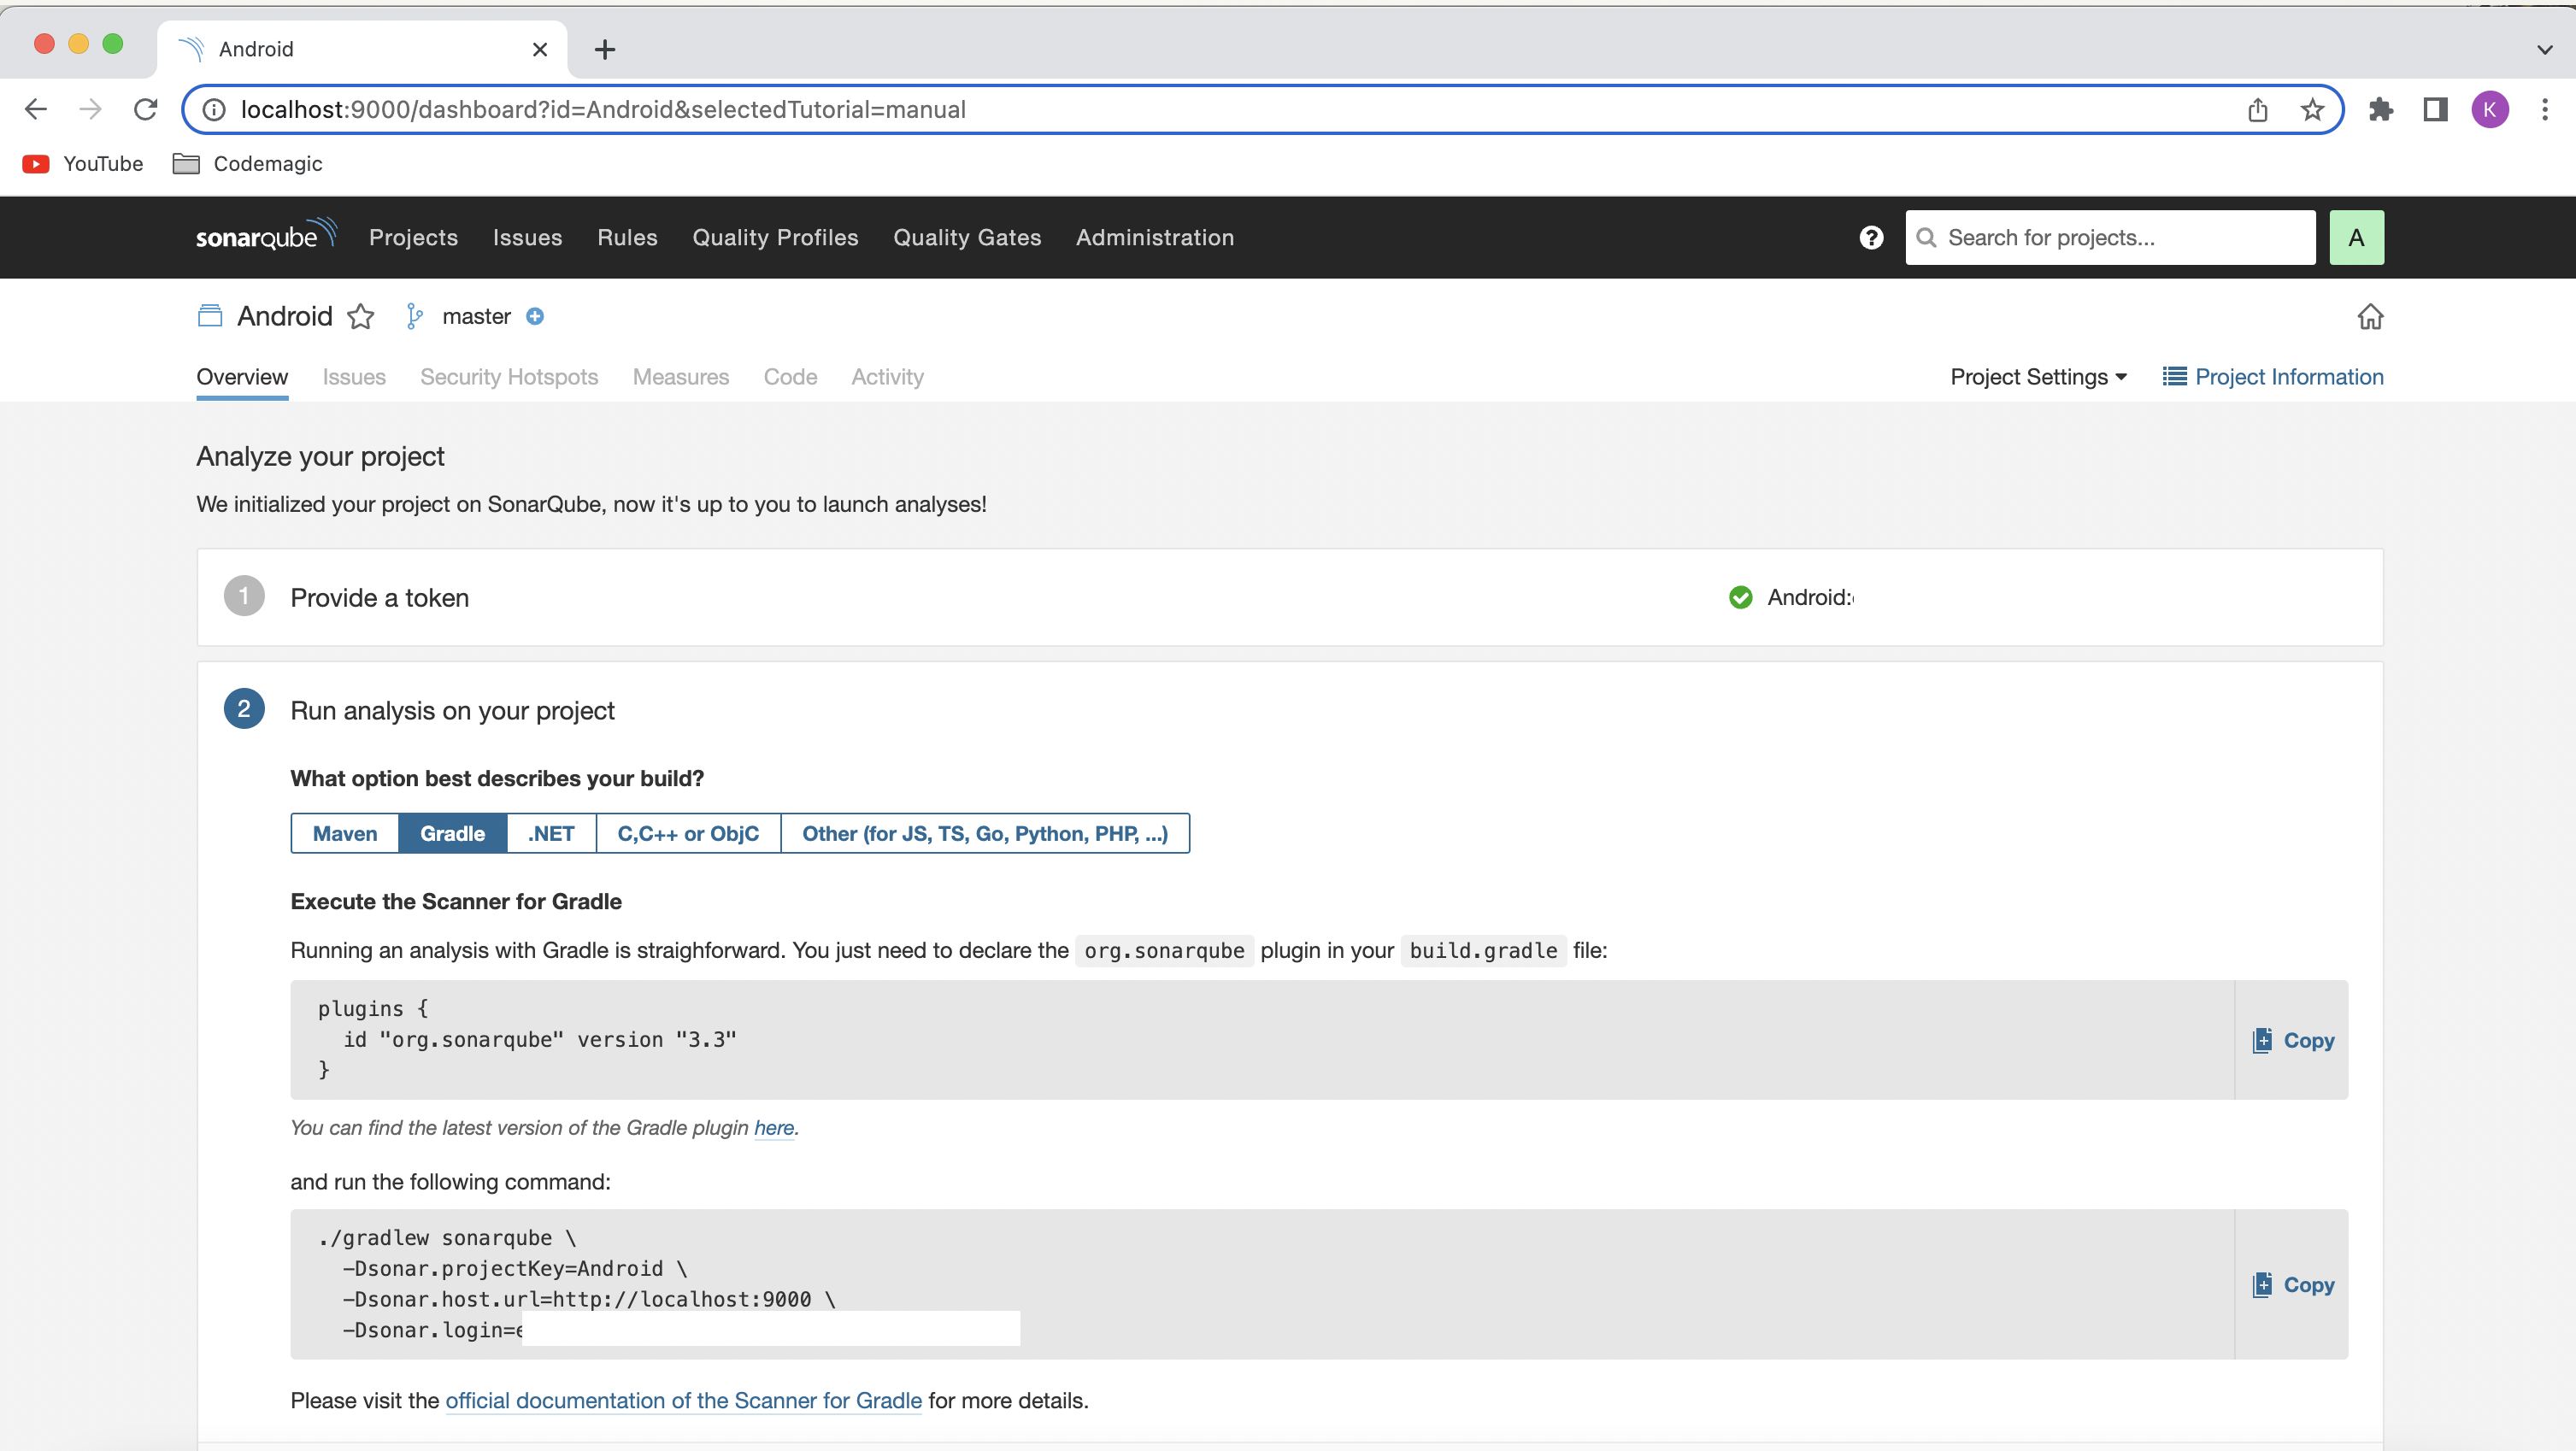
SonarQube has a dedicated Gradle plugin called SonarScanner for Gradle, which can be used for generating the SonarQube analysis for your Android project.
SonarQube provides Swift support in the Developer edition. Unfortunately, it is not supported in Community Edition. But you can use their SonarScanner as a CLI tool for generating the SonarQube analysis for your iOS project. You can always request a free trial of Developer Edition and try it out for yourself.
Integrating SonarQube with the Android project is pretty straightforward—follow the steps below:
Navigate to your app/build.gradle.
Add the SonarQube Gradle plugin:
plugins {
    id "org.sonarqube" version "3.0"
}
Run project sync
Then use the following command from the terminal:
./gradlew sonarqube \
  -Dsonar.projectKey=<project_key> \
  -Dsonar.host.url=http://localhost:9000 \
  -Dsonar.login=<login_token>
Download SonarScanner from here, and add the bin directory to the PATH environment variable.
Use the following command to upload the analysis results:
sonar-scanner \
  -Dsonar.projectKey=<project_key> \
  -Dsonar.sources=. \
  -Dsonar.host.url=http://localhost:9000 \
  -Dsonar.login=<login_token>

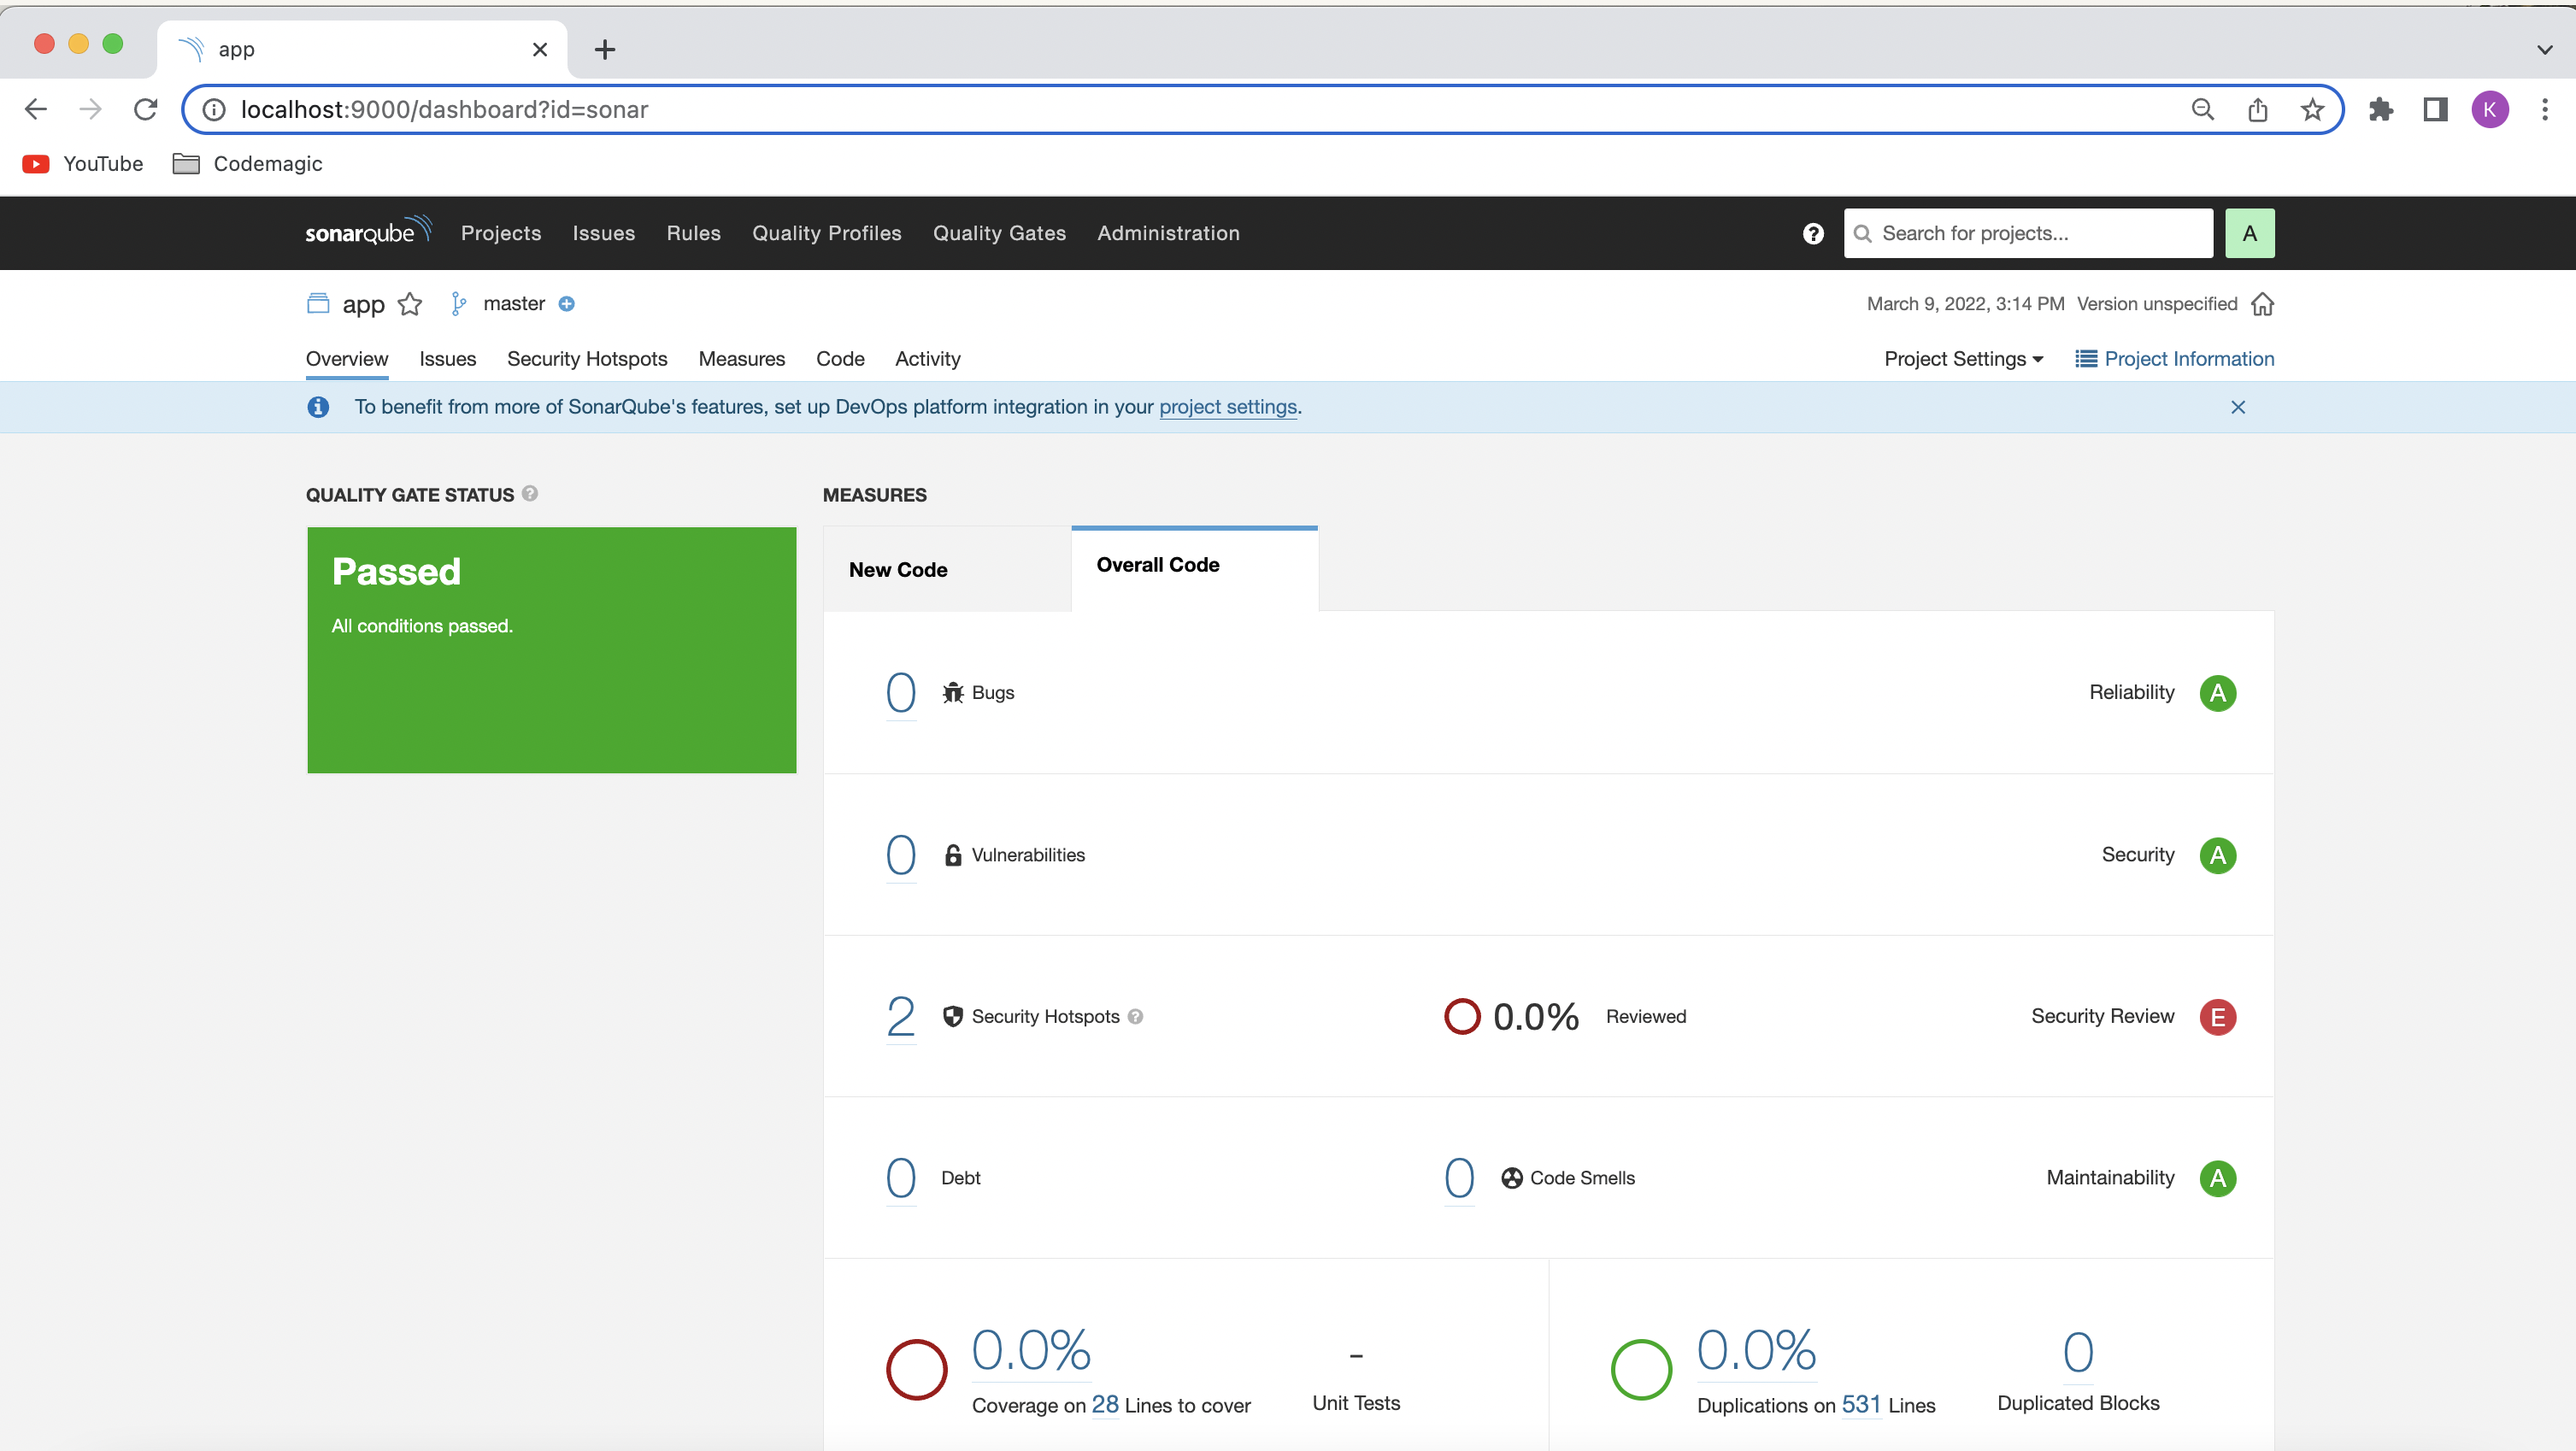
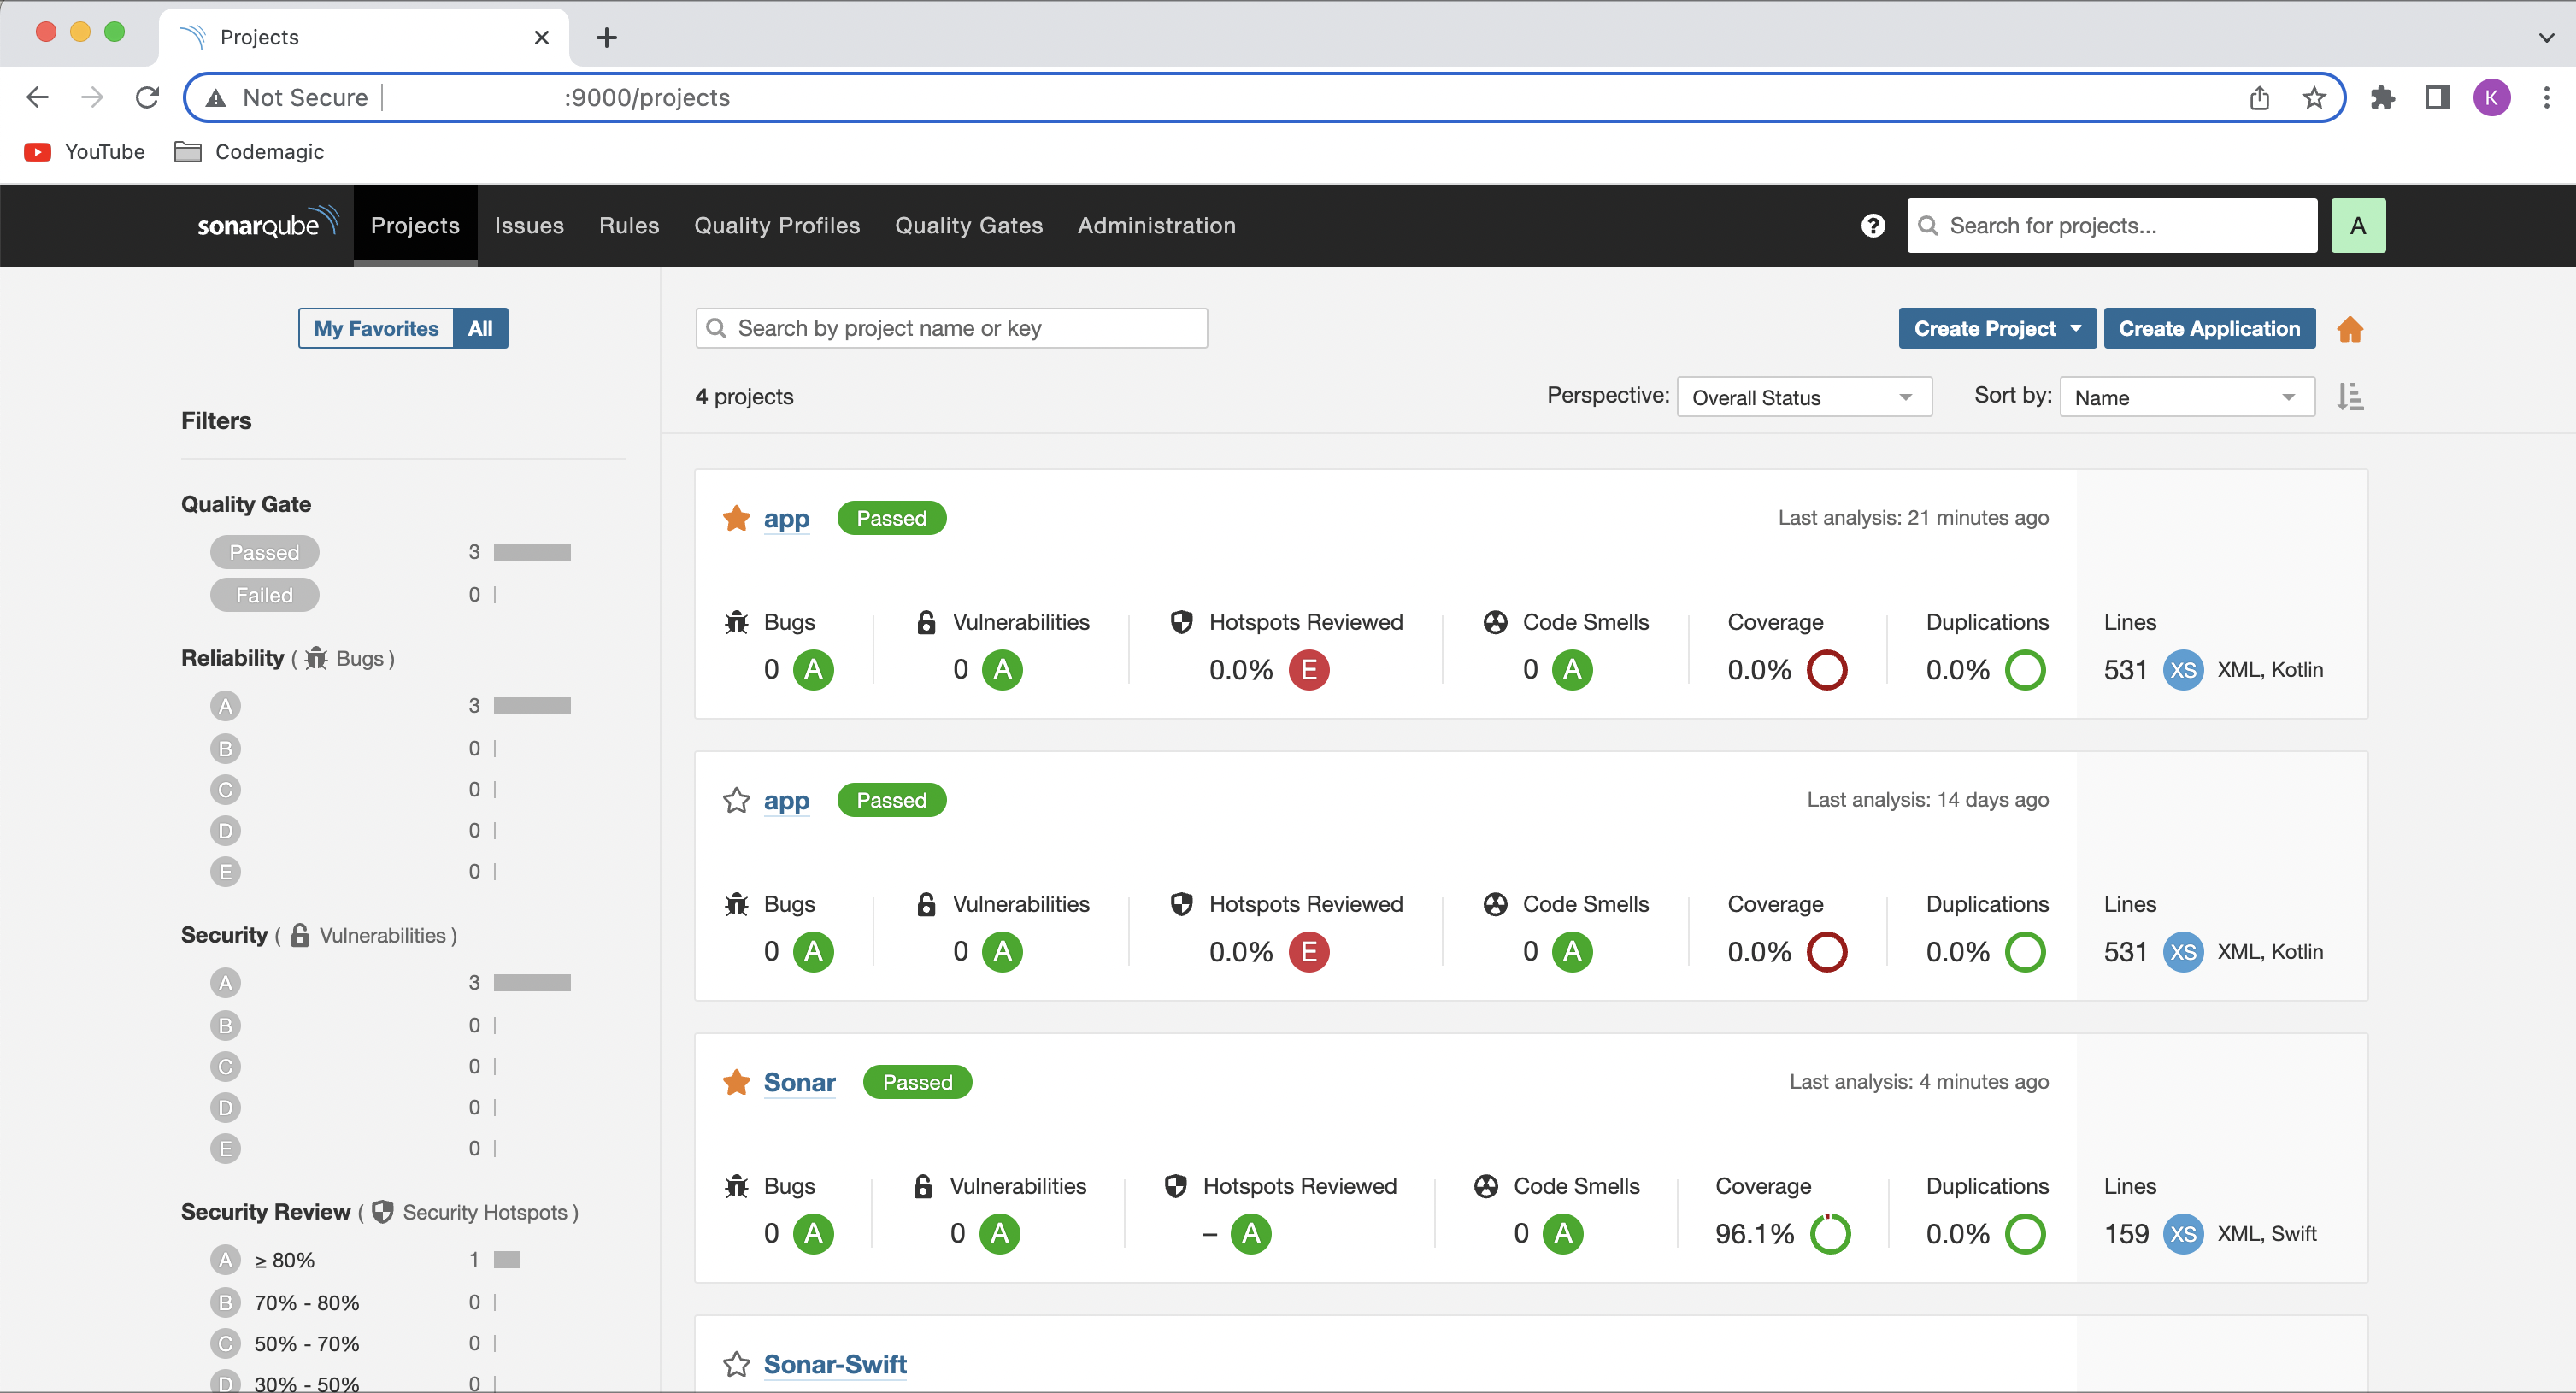
You will see the code analysis status displayed on the SonarQube dashboard. In order to connect Codemagic to your localhost SonarQube, you will need to make it accessible to the internet. In this case you can use ngrok. Download the tool and follow the instructions on their website.

When the requirement is for having it for the whole team and planning to integrate in the CI/CD pipeline, hosting it on the server is the best option. Now we will look into how to deploy SonarQube on an AWS EC2 instance and integrate it with Codemagic for generating code analysis of your Android and iOS projects.
We need an Linux EC2 server up and running, with sudo privileges before starting installing a sonar server. You can use a machine type of t2 medium or larger as we need at least 3GB of RAM to run SonarQube efficiently. Also, add a custom TCP security rule for EC2 instance to allow inbound traffic to the selected SonarQube port (default: 9000).
Connect to the EC2 instance using a secure shell:
ssh -i <<path to your .pem file>> ec2-user@<<ip address of your EC2>>
update the system packages on amazon linux 2:
sudo yum update
Install the vim, wget and curl on Amazon Linux 2:
sudo yum install vim wget curl -y
Increase the vm.max_map_count kernel ,file descriptor and ulimit for the current session at runtime:
sudo sysctl -w vm.max_map_count=262144
sudo sysctl -w fs.file-max=65536
ulimit -n 65536
ulimit -u 4096
To Increase the vm.max_map_count kernel, file descriptor and ulimit permanently. Open the below config file and Insert the below value as shown below:
 sudo nano /etc/security/limits.conf
 sonarqube   -   nofile   65536
 sonarqube   -   nproc    4096
Install Java: We need JDK 11 or higher to run SonarQube 7.9 or more.
sudo amazon-linux-extras install java-openjdk11
java -version  // To check java version
You can also install OpenJDK 11 using curl.
We have to setup a database for SonarQube to save the report analysis. This helps in maintaining the report versions as well. We will be using PostgreSQL as our database which can be configured on EC2 as follows:
Enable EPEL repository on Amazon Linux 2 using below command:
sudo amazon-linux-extras install epel
Add the postgresql 13 repo in Amazon Linux 2
sudo tee /etc/yum.repos.d/pgdg.repo<<EOF
[pgdg13]
name=PostgreSQL 13 for RHEL/CentOS 7 - x86_64
baseurl=https://download.postgresql.org/pub/repos/yum/13/redhat/rhel-7-x86_64
enabled=1
gpgcheck=0
EOF
Now let’s install & initialize PostgreSQL 13 on Amazon Linux using below command:
sudo yum install postgresql13 postgresql13-server
sudo /usr/pgsql-13/bin/postgresql-13-setup initdb
sudo systemctl enable --now postgresql-13
sudo systemctl status postgresql-13 //To check PostgreSQL service
Change the password for the default PostgreSQL user:
sudo passwd postgres
su - postgres  //Switch to postgres user
Create a new user by typing:
createuser sonar
Switch to the PostgreSQL shell:
psql
Create a user and database for sonar:
ALTER USER sonar WITH ENCRYPTED password 'sonar_password';
CREATE DATABASE sonarqube OWNER sonar;
GRANT ALL PRIVILEGES ON DATABASE sonarqube to sonar;
Exit from the psql shell:
\q
Switch back to the sudo user by running the exit command:
exit
We are going to download the binaries and use them to install. Note: Please be careful about the edition that you are going to install. As mentioned before we are going to use the Developer edition in this article. More details can be found here. Right click on the respective download button and choose copy link location if you aim to install other edition.
sudo wget https://binaries.sonarsource.com/CommercialDistribution/sonarqube-developer/sonarqube-developer-9.3.0.51899.zip
Unzip the sonarqube setup and move to /opt directory:
sudo unzip sonarqube-developer-9.3.0.51899.zip
sudo mv -v sonarqube-9.3.0.51899 /opt/sonarqube
Running the SonarQube instance as a root user causes it to stop running. We would advise create a new group and user to overcome this which can be done as follows:
Create Group and User:
sudo groupadd sonar
Now add the user with directory access
sudo useradd -c "user to run SonarQube" -d /opt/sonarqube -g sonar sonar
sudo chown -R sonar:sonar /opt/sonarqube
Open the SonarQube configuration file using your favorite text editor:
sudo nano /opt/sonarqube/conf/sonar.properties
Find the following lines:
#sonar.jdbc.username=
#sonar.jdbc.password=
Uncomment and type the PostgreSQL Database username and password which we have created in above steps and add the postgres connection string.
sonar.jdbc.username=sonar
sonar.jdbc.password=sonar
sonar.jdbc.url=jdbc:postgresql://localhost:5432/sonarqube
Edit the sonar script file and uncomment RUN_AS_USER and change it to RUN_AS_USER=sonar
sudo nano /opt/sonarqube/bin/linux-x86-64/sonar.sh
Type CTRL+X to save and close the file.
Now to start SonarQube we need to do following:
Switch to sonar user:
sudo su sonar
Move to the script directory:
cd /opt/sonarqube/bin/linux-x86-64/
Run the script to start SonarQube:
./sonar.sh start
Check SonarQube Running Status:
./sonar.sh status
To check sonarqube logs, navigate to /opt/sonarqube/logs/sonar.log directory
First stop the SonarQube service as we started manually using the above steps. Navigate to the SonarQube installed path:
cd /opt/sonarqube/bin/linux-x86-64/
./sonar.sh stop
Create a systemd service file for SonarQube to run as System Startup:
sudo nano /etc/systemd/system/sonar.service
Add the below lines,
[Unit]
Description=SonarQube service
After=syslog.target network.target

[Service]
Type=forking

ExecStart=/opt/sonarqube/bin/linux-x86-64/sonar.sh start
ExecStop=/opt/sonarqube/bin/linux-x86-64/sonar.sh stop

User=sonar
Group=sonar
Restart=always

LimitNOFILE=65536
LimitNPROC=4096

[Install]
WantedBy=multi-user.target
Save and close the file.
Now let's stop the sonarqube script earlier we started to run using as daemon:
./sonar.sh stop
Start the Sonarqube daemon by running:
sudo systemctl start sonar
Enable the SonarQube service to automatically start at boot time System Startup:
sudo systemctl enable sonar
sudo systemctl status sonar
If you are already inside your instance, you can get the public IP your linux ec2 instance using the below command:
curl -s v4.ident.me
Your sonar should be up now. You can access the sonarQube UI at http://<<EC2 instance public ip>>:9000/sonarqube. By default credentials remain login=admin, password=admin.
We can easily integrate SonarQube with Codemagic using the codemagic.yaml file. Codemagic recently worked together with Christophe Havard (Product Manager, SonarQube) in adding Codemagic to the list of supported CIs for branch and pull-request detection. You can check the SonarQube release notes here.
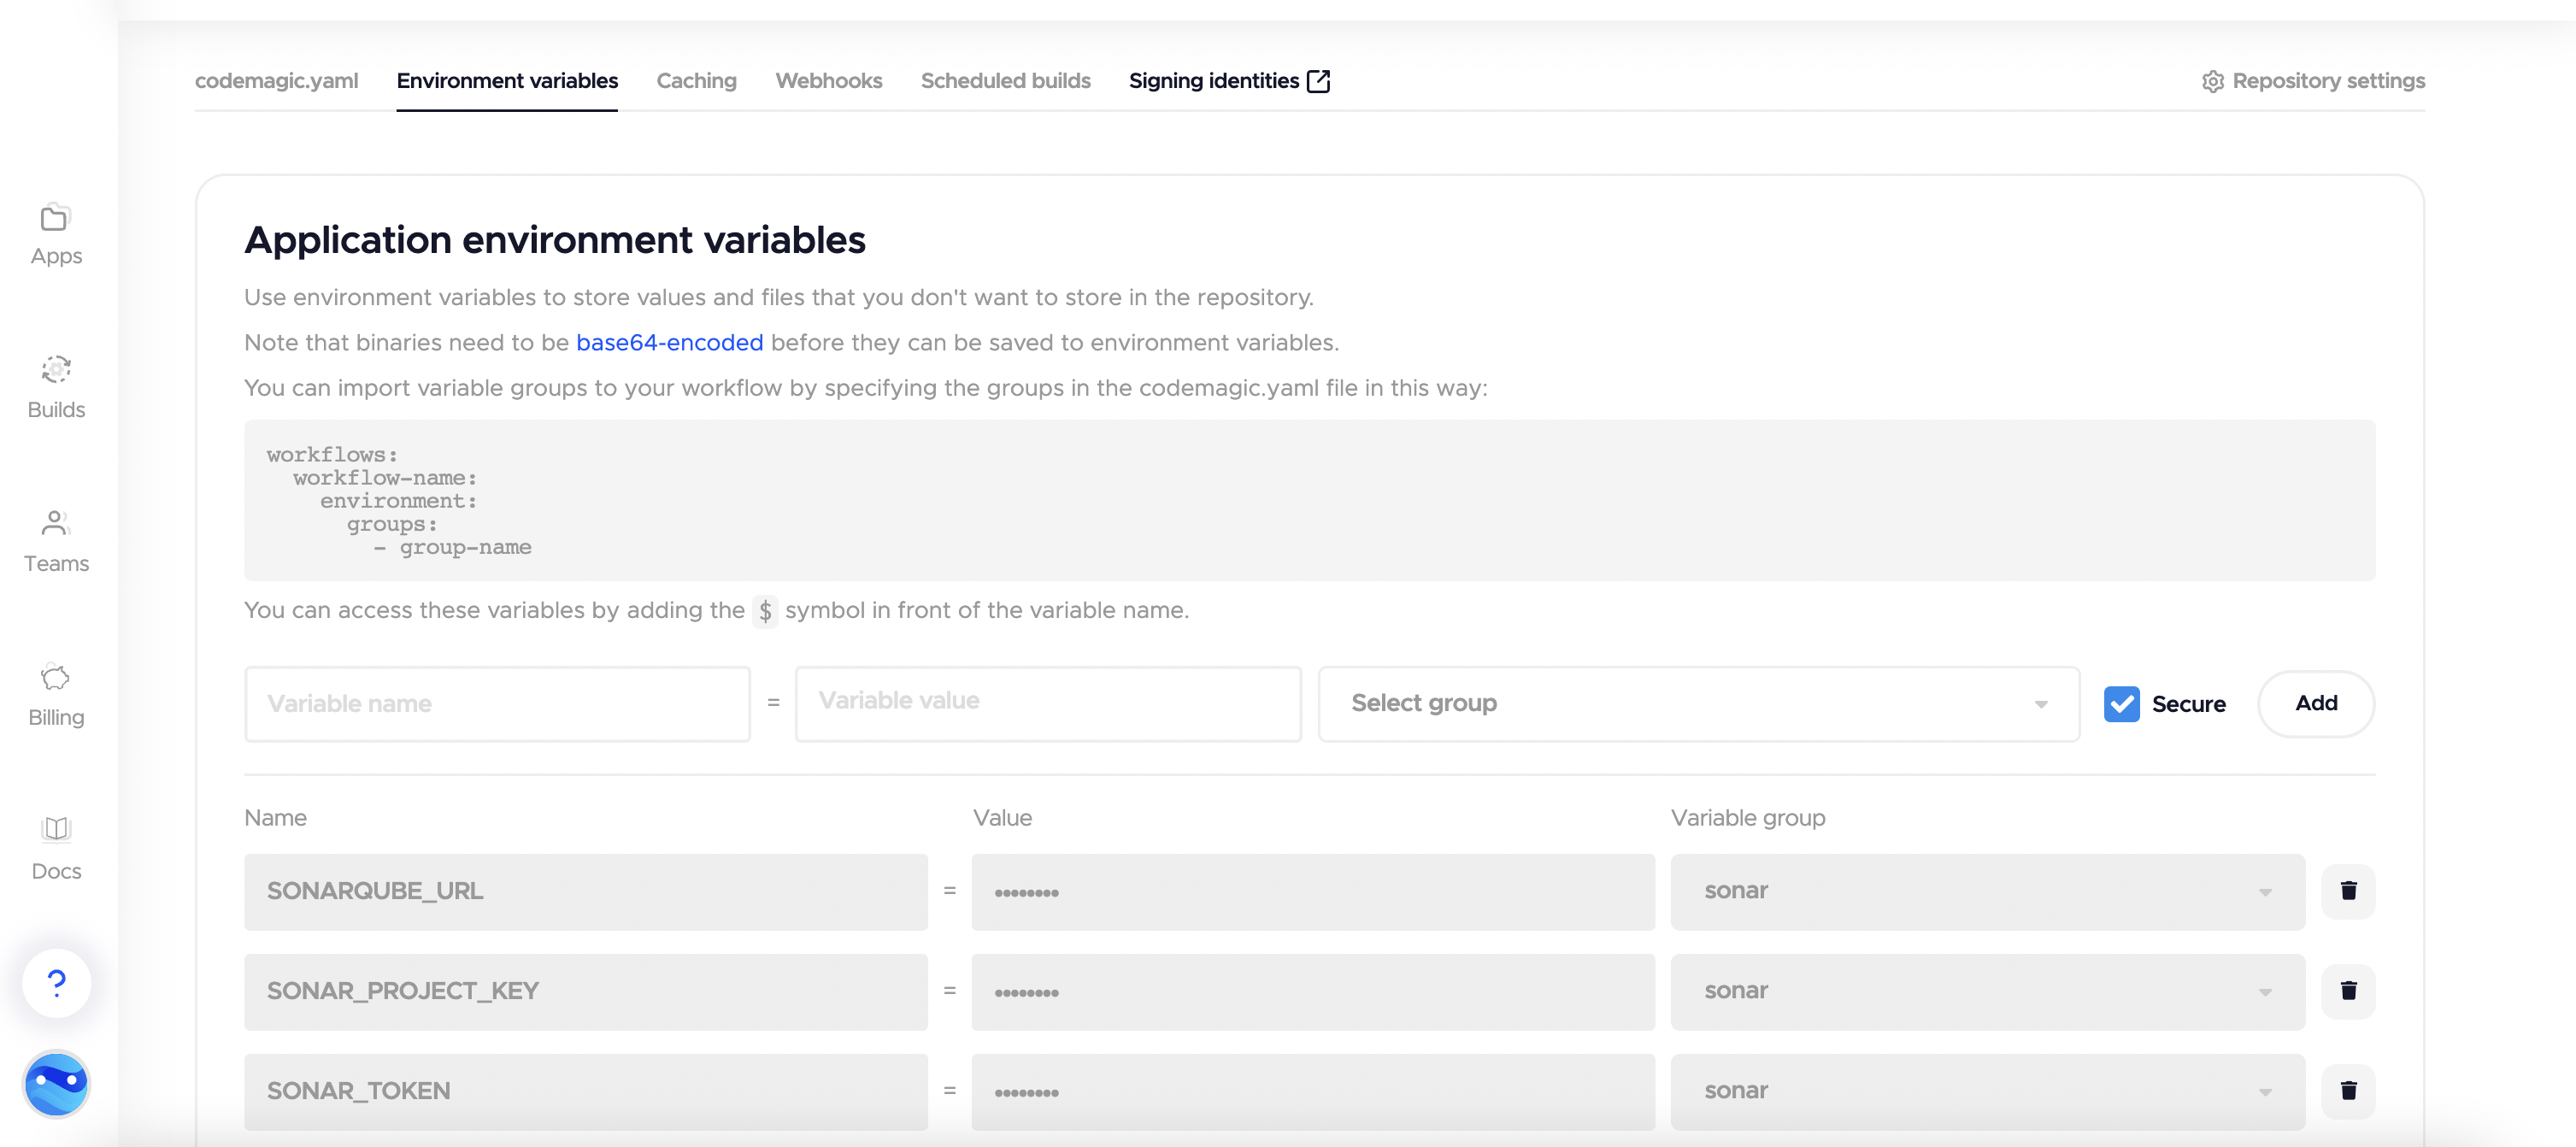
To integrate Sonarqube with Codemagic, we will need to set the Environment variables in the Codemagic UI as shown below. Mark the environment variables secure and add the respective group to the codemagic.yaml file.
Also, Navigate to your app/build.gradle and add the SonarQube Gradle plugin:
plugins {
    id "org.sonarqube" version "3.0"
}
Let’s define the build pipeline script in the codemagic.yaml file for both the Android and iOS projects.
workflows:
  android-workflow:
    name: Android Workflow
    instance_type: mac_pro
    cache:
      cache_paths:
        - ~/.sonar
    environment:
      groups:
        - sonarqube # includes SONAR_TOKEN, SONARQUBE_URL, SONAR_PROJECT_KEY
    triggering:
      events:
        - push
        - pull_request
      branch_patterns:
        - pattern: '*'
          include: true
          source: true
    scripts:
      - name: Build Android app
        script: |
          ./gradlew assembleDebug
      - name: Generate and upload code analysis report
        script: |
           ./gradlew sonarqube \
-Dsonar.projectKey=$SONAR_PROJECT_KEY \
-Dsonar.host.url=$SONARQUBE_URL \
-Dsonar.login=$SONAR_TOKEN
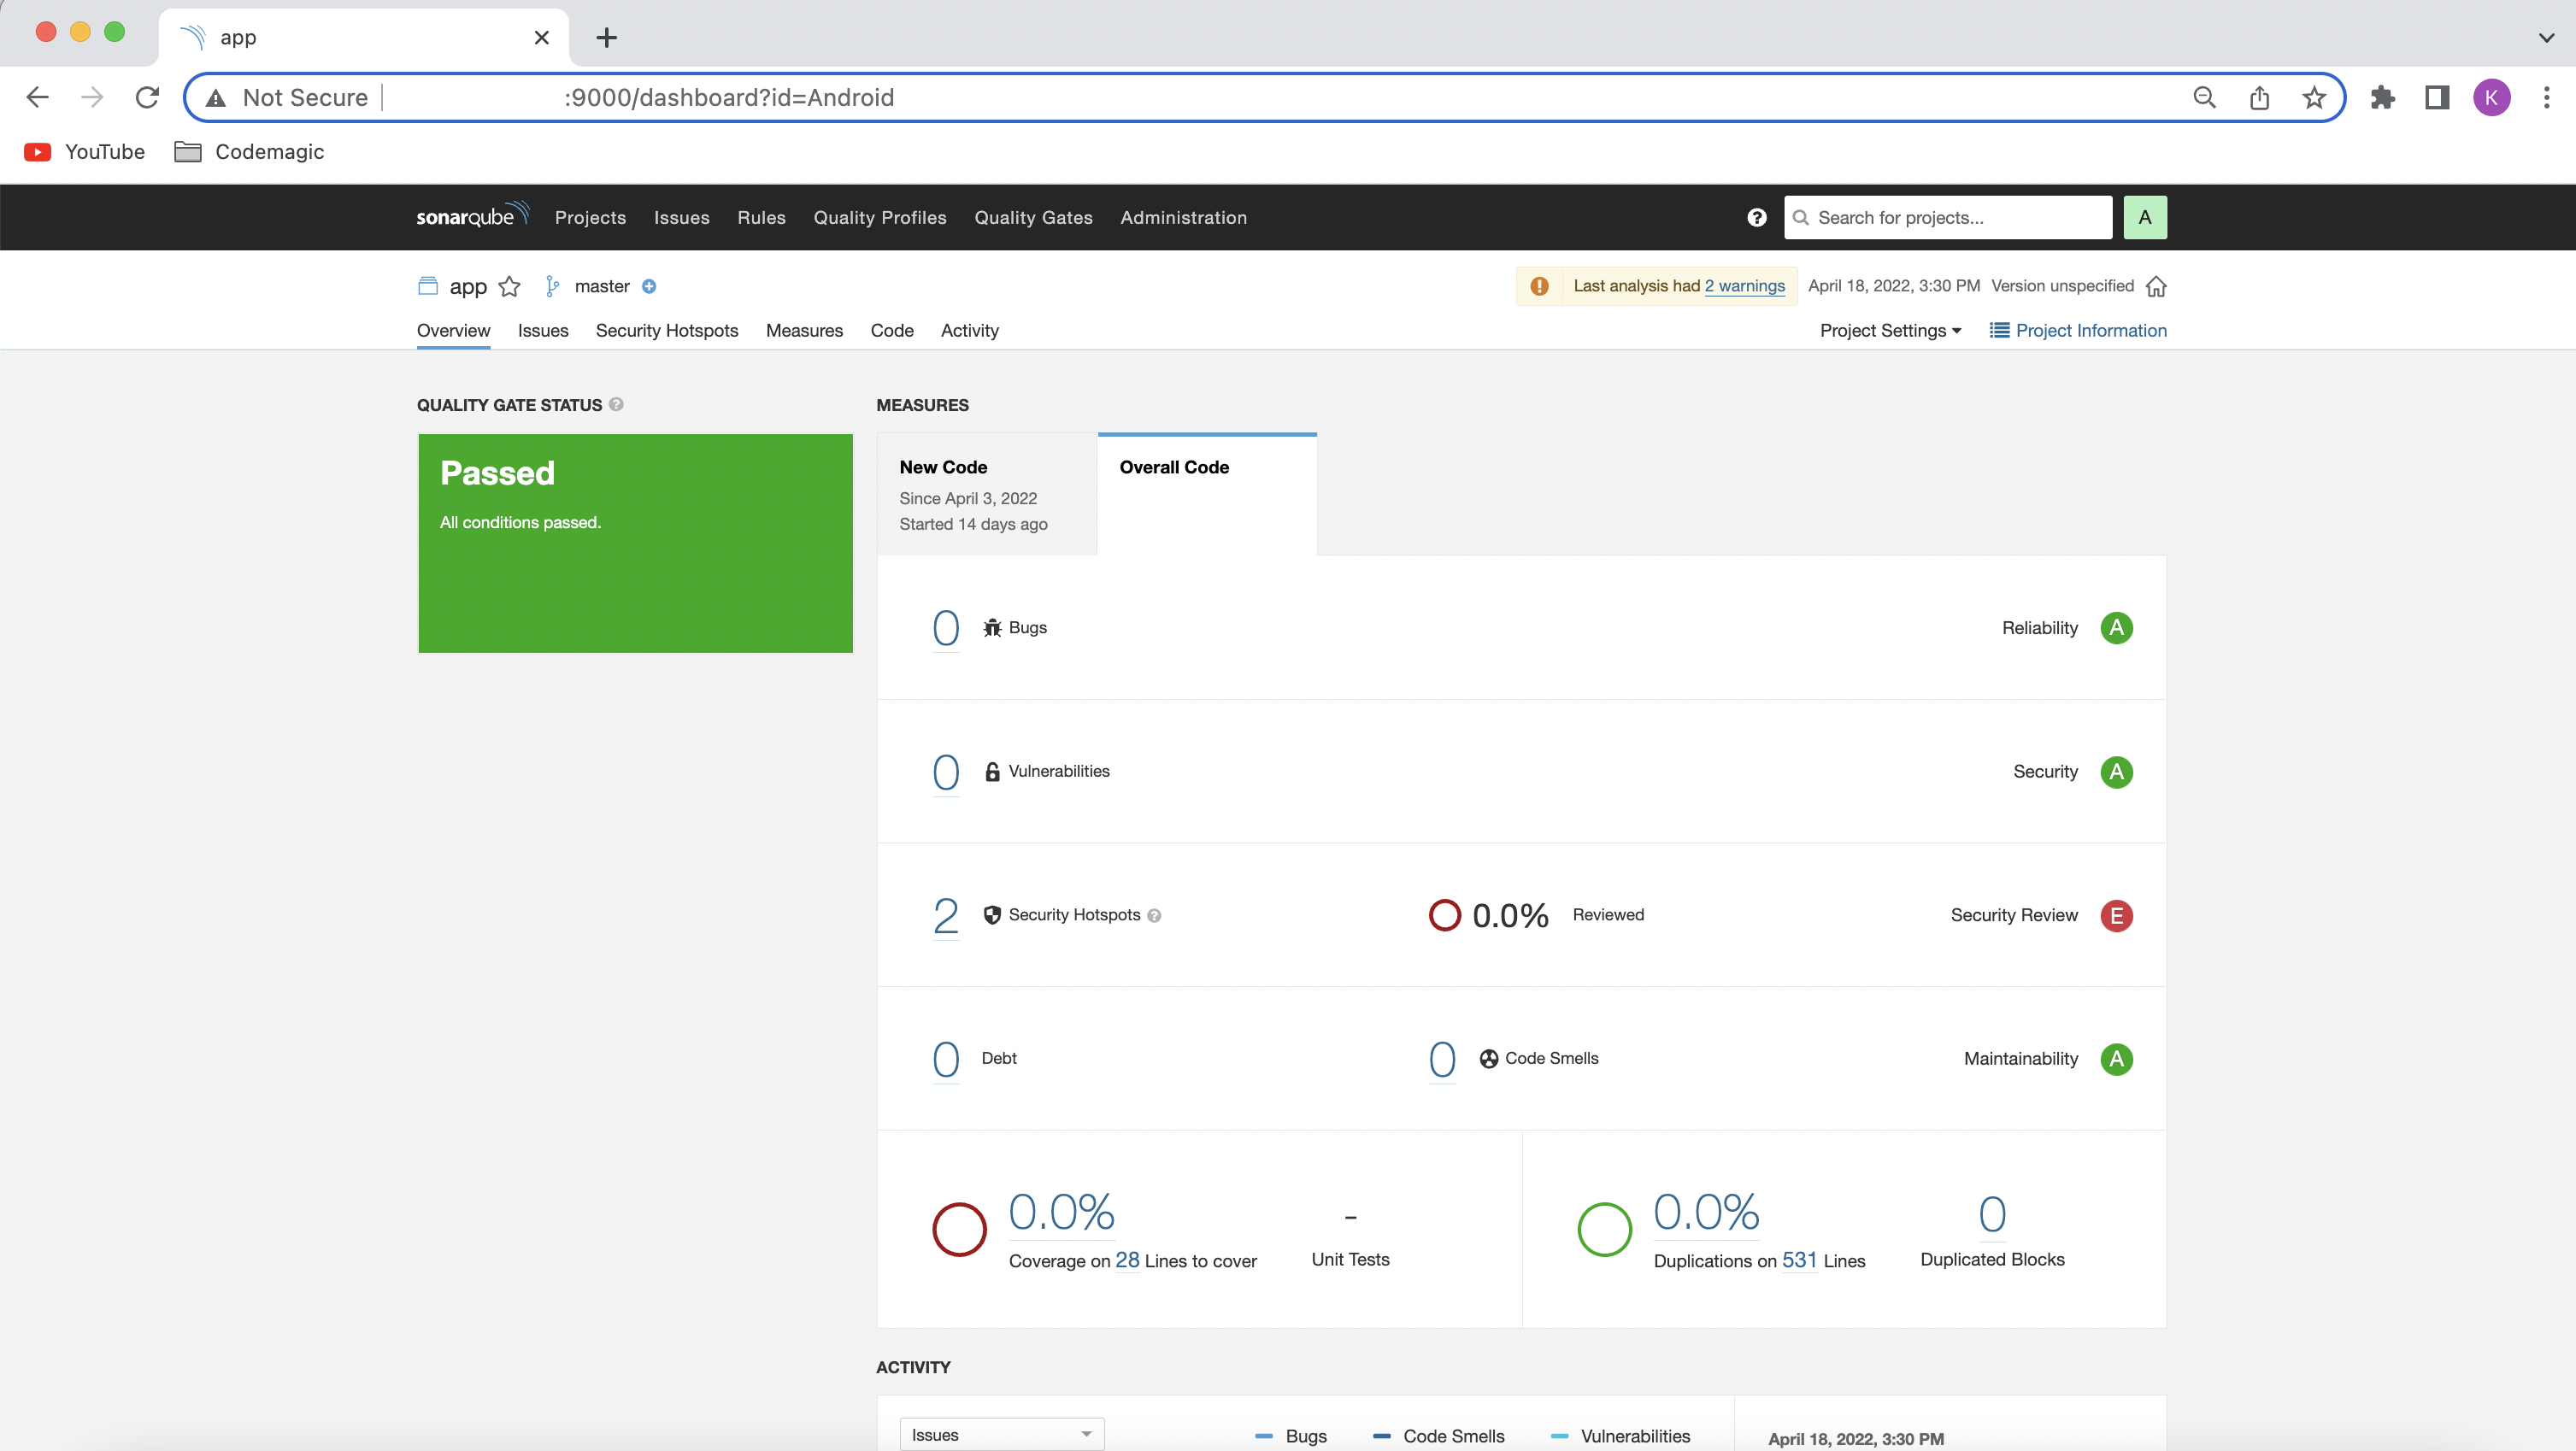
Once the build is successful, you can check your code analysis on SonarQube UI.
For the iOS build analysis, we have to first download and add the SonarScanner to the path. SonarScanners running in Codemagic can automatically detect branches and merge or pull requests in certain jobs.
workflows:
  ios-workflow:
    name: ios_workflow
    instance_type: mac_pro
    cache:
      cache_paths:
        - ~/.sonar
    environment:
      groups:
        - sonar
      vars:
        XCODE_WORKSPACE: "Sonar.xcodeproj"  # PUT YOUR WORKSPACE NAME HERE
        XCODE_SCHEME: "Sonar" # PUT THE NAME OF YOUR SCHEME HERE
      xcode: latest
      cocoapods: default
    triggering:
      events:
        - push
        - pull_request
      branch_patterns:
        - pattern: '*'
          include: true
          source: true
    scripts:
      - name: Run tests
        script: |
          xcodebuild \
          -project "$XCODE_WORKSPACE" \
          -scheme "$XCODE_SCHEME" \
          -sdk iphonesimulator \
          -destination 'platform=iOS Simulator,name=iPhone 12,OS=15.4' \
          clean build test CODE_SIGN_IDENTITY="" CODE_SIGNING_REQUIRED=NO
      - name: Build debug app
        script: |
          xcodebuild build -project "$XCODE_WORKSPACE" \
          -scheme "$XCODE_SCHEME" \
          CODE_SIGN_IDENTITY="" CODE_SIGNING_REQUIRED=NO CODE_SIGNING_ALLOWED=NO
      - name: Sonar
        script: |
            # download and install the SonarScanner
            wget -O $FCI_BUILD_DIR/sonar-scanner.zip https://binaries.sonarsource.com/Distribution/sonar-scanner-cli/sonar-scanner-cli-4.4.0.2170-macosx.zip
            unzip $FCI_BUILD_DIR/sonar-scanner.zip
            mv sonar-scanner-* sonar-scanner
      - name: Coverage tests
        script: |
            xcodebuild \
            -project "$XCODE_WORKSPACE" \
            -scheme "$XCODE_SCHEME" \
            -sdk iphonesimulator \
            -destination 'platform=iOS Simulator,name=iPhone 11 Pro,OS=15.4' \
            -derivedDataPath Build/ \
            -enableCodeCoverage YES \
            clean build test CODE_SIGN_IDENTITY="" CODE_SIGNING_REQUIRED=NO
      - name: convert coverage report to sonarqube format
        script: |
            bash xccov-to-sonarqube-generic.sh Build/Logs/Test/*.xcresult/ > sonarqube-generic-coverage.xml
      - name: Generate and upload code analysis report
        script: |
            export PATH=$PATH:$FCI_BUILD_DIR/sonar-scanner/bin
            sonar-scanner \
            -Dsonar.projectKey=$SONAR_PROJECT_KEY \
            -Dsonar.host.url=$SONARQUBE_URL \
            -Dsonar.c.file.suffixes=- \
            -Dsonar.cpp.file.suffixes=- \
            -Dsonar.coverageReportPaths=sonarqube-generic-coverage.xml \
    artifacts:
      - $HOME/Library/Developer/Xcode/DerivedData/**/Build/**/*.app
      - /tmp/xcodebuild_logs/*.log
      - $HOME/Library/Developer/Xcode/DerivedData/**/Build/**/*.dSYM
    publishing:
      email:
        recipients:
            - [email protected]
Coverage Reports cannot be uploaded in this format, so you have to use the following script to convert it from an .xcresult to an .xml file:
#!/usr/bin/env bash
set -euo pipefail

function convert_file {
  local xccovarchive_file="$1"
  local file_name="$2"
  echo "  <file path=\"$file_name\">"
  local line_coverage_cmd="xcrun xccov view"
  if [[ $@ == *".xcresult"* ]]; then
    line_coverage_cmd="$line_coverage_cmd --archive"
  fi
  line_coverage_cmd="$line_coverage_cmd --file \"$file_name\" \"$xccovarchive_file\""
  eval $line_coverage_cmd | \
    sed -n '
    s/^ *\([0-9][0-9]*\): 0.*$/    <lineToCover lineNumber="\1" covered="false"\/>/p;
    s/^ *\([0-9][0-9]*\): [1-9].*$/    <lineToCover lineNumber="\1" covered="true"\/>/p
    '
  echo '  </file>'
}

function xccov_to_generic {
  echo '<coverage version="1">'
  for xccovarchive_file in "$@"; do
    local file_list_cmd="xcrun xccov view"
    if [[ $@ == *".xcresult"* ]]; then
      file_list_cmd="$file_list_cmd --archive"
    fi
    file_list_cmd="$file_list_cmd --file-list \"$xccovarchive_file\""
    eval $file_list_cmd | while read -r file_name; do
      convert_file "$xccovarchive_file" "$file_name"
    done
  done
  echo '</coverage>'
}

xccov_to_generic "$@"
Run this script using:
bash xccov-to-sonarqube-generic.sh Build/Logs/Test/*.xcresult/ > sonarqube-generic-coverage.xml
Pass the result to SonarQube by specifying the following properties:
-Dsonar.cfamily.build-wrapper-output.bypass=true \
-Dsonar.coverageReportPaths=sonarqube-generic-coverage.xml \
-Dsonar.c.file.suffixes=- \
-Dsonar.cpp.file.suffixes=- \
-Dsonar.objc.file.suffixes=-
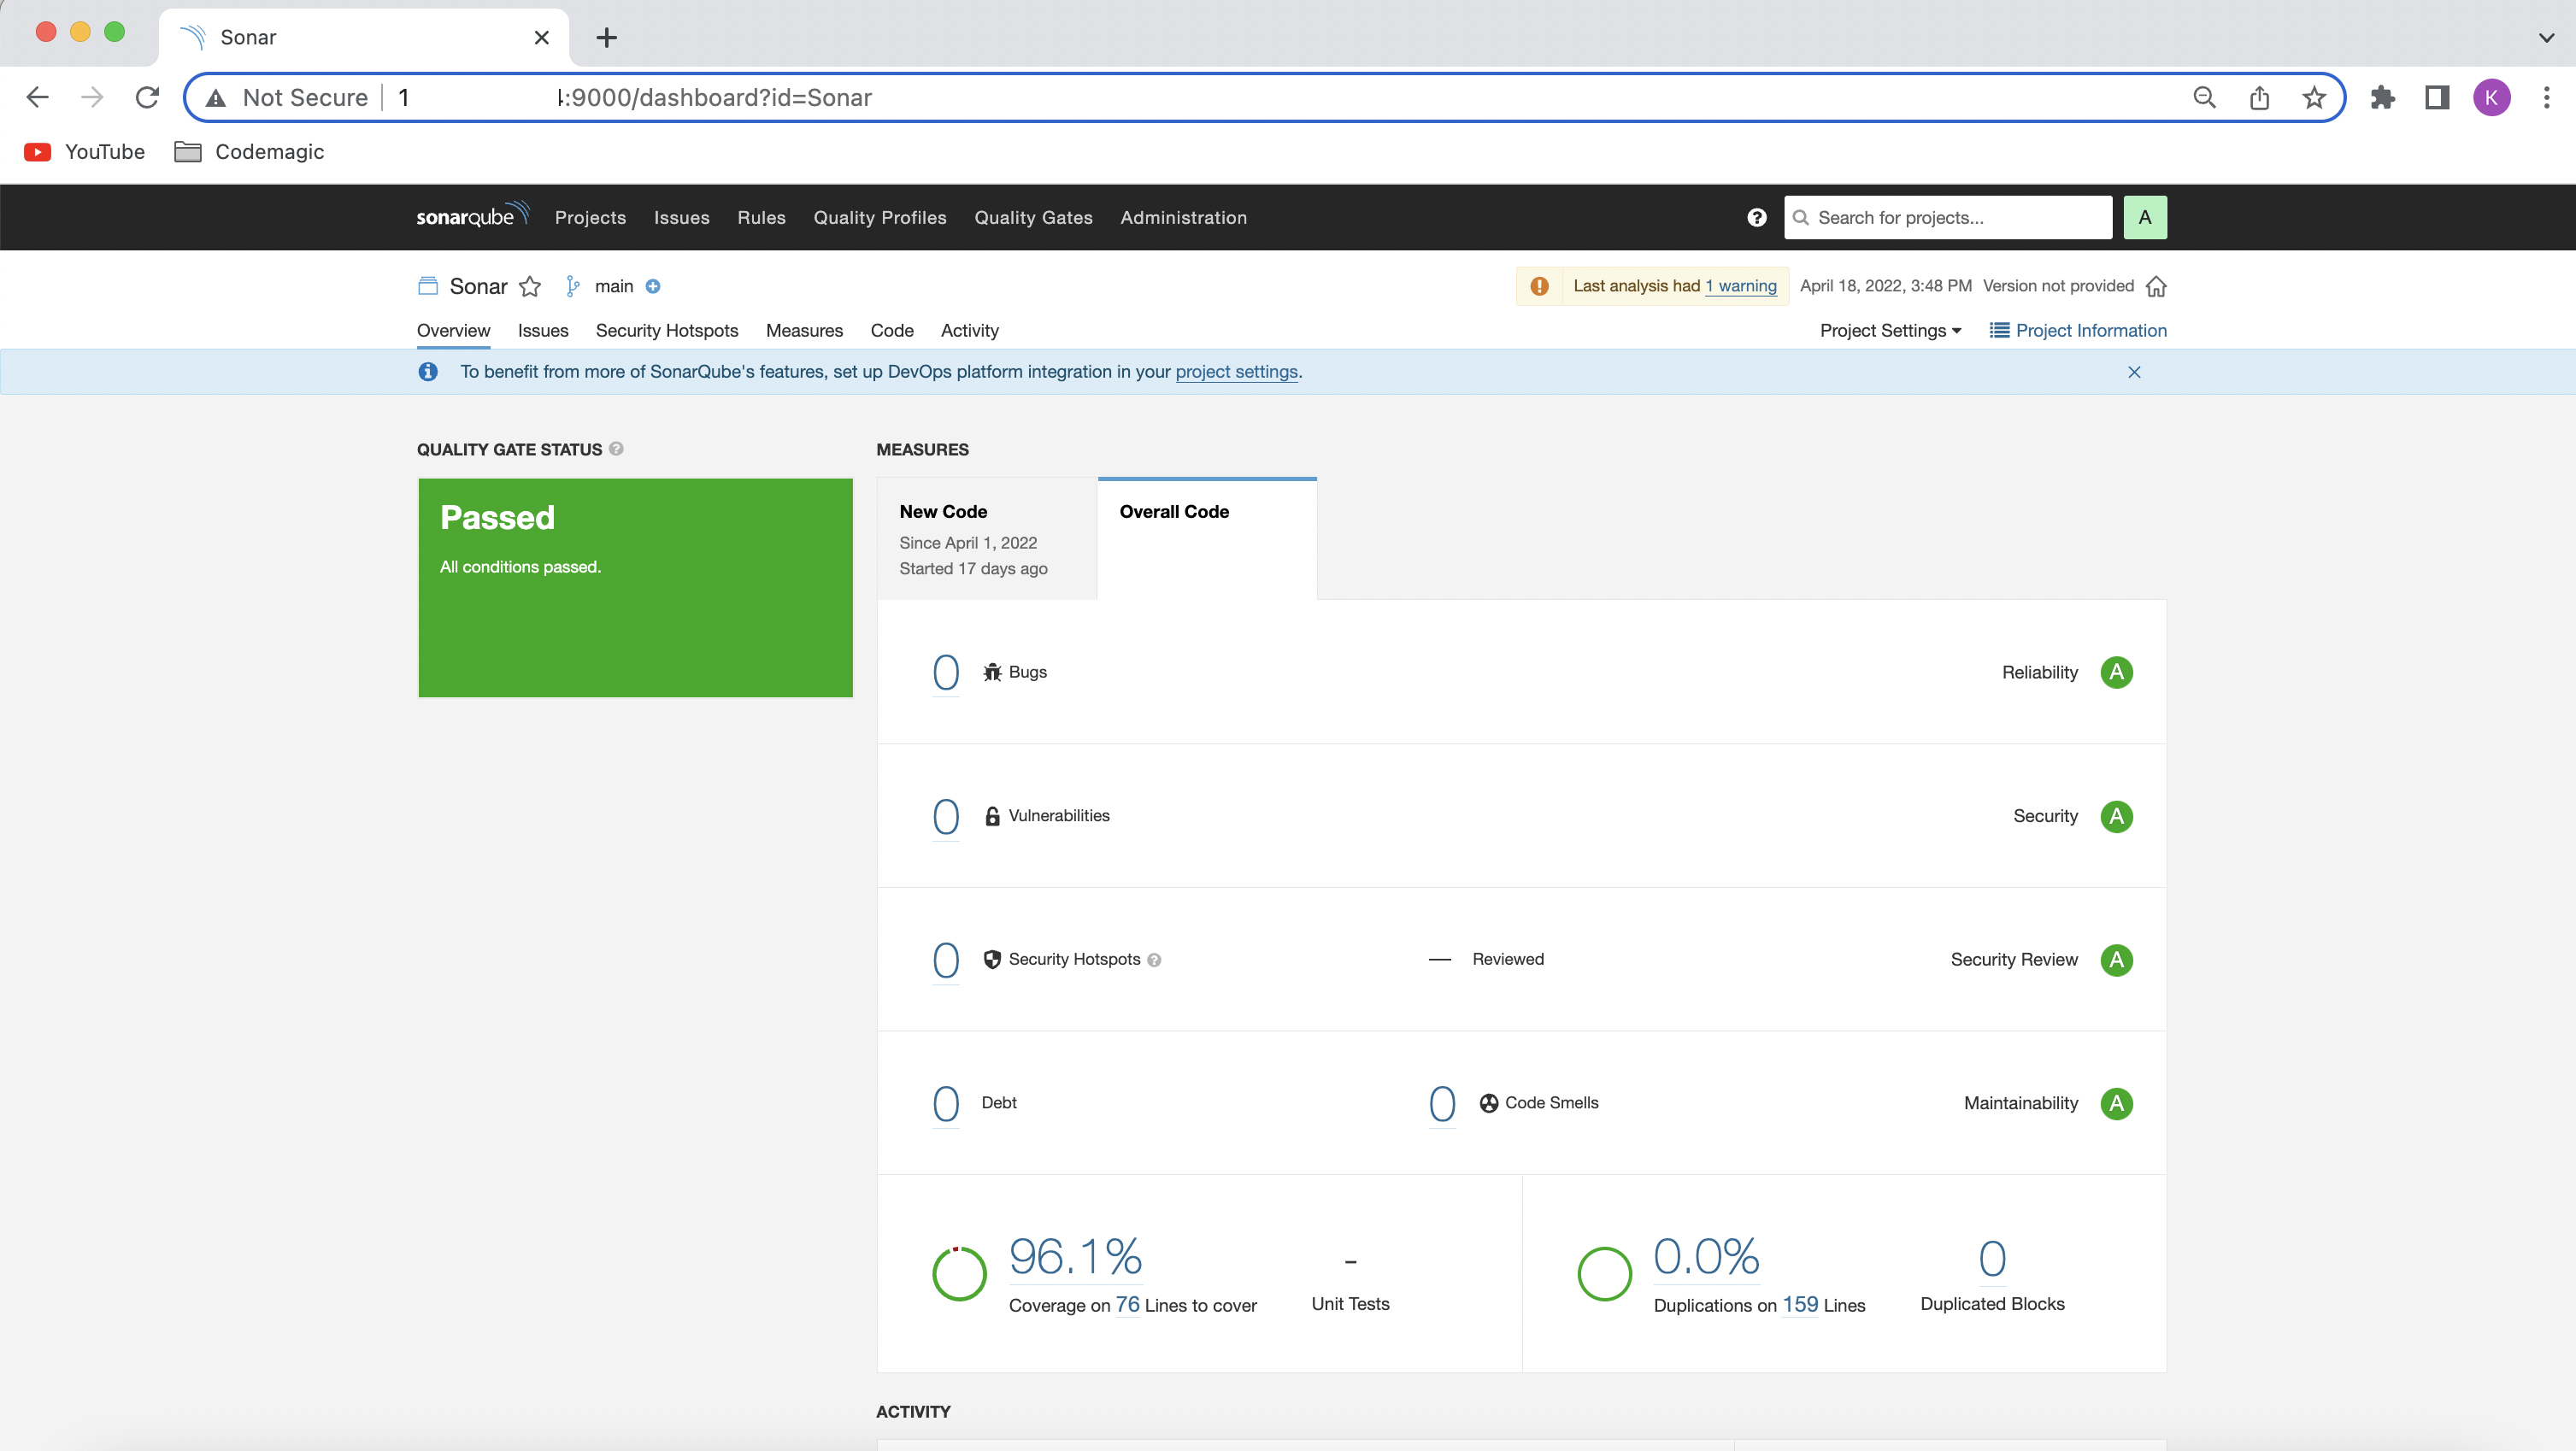
And that’s it! We have successfully integrated SonarQube with Codemagic.
For SonarQube to automatically detect pull requests when using Codemagic, you need to add an event in the triggering section of your codemagic.yaml file as shown in the following snippet:
    triggering:
      events:
        - pull_request
For triggering to work, you also need to set up webhook between Codemagic and your DevOps platform (Bitbucket, Github, etc.).
Caching the .sonar folder would save build time on subsequent analyses. For this, add the following snippet to your codemagic.yaml file:
    cache:
      cache_paths:
        - ~/.sonar
SonarQube integration with Codemagic is really simple using the codemagic.yaml file. Though I have covered the basic configuration required for generating the code analysis report, there are various other properties that you can specify while using SonarQube, especially with the SonarQube Developer Edition. You can always request a free trial of Developer Edition and try it out for yourself.