The Delft3D Flexible Mesh Processing Tool offers two key functions to enhance the use and visualization of modelling results from Delft3D FM:
-
Conversion of modelling results from Delft3D FM, which are in netCDF format using the UGRID convention, into a netCDF format that adheres to the Climate & Forecast (CF) Metadata Conventions. The CF conversion enables direct support and visualisation for the resulting data in various CF compliant software applications, particularly ArcGIS Pro.
-
Uploading the converted netCDF file into ArcGIS Online / ArcGIS Server as an Imagery Layer, allowing users to easily visualise the modelling results via a web browser.
Create a conda virtual environment of Python 3.9:
conda create -n D3DFM python=3.9
Set up the environment with environment.yml:
conda env update --file environment.yml --prune
 |
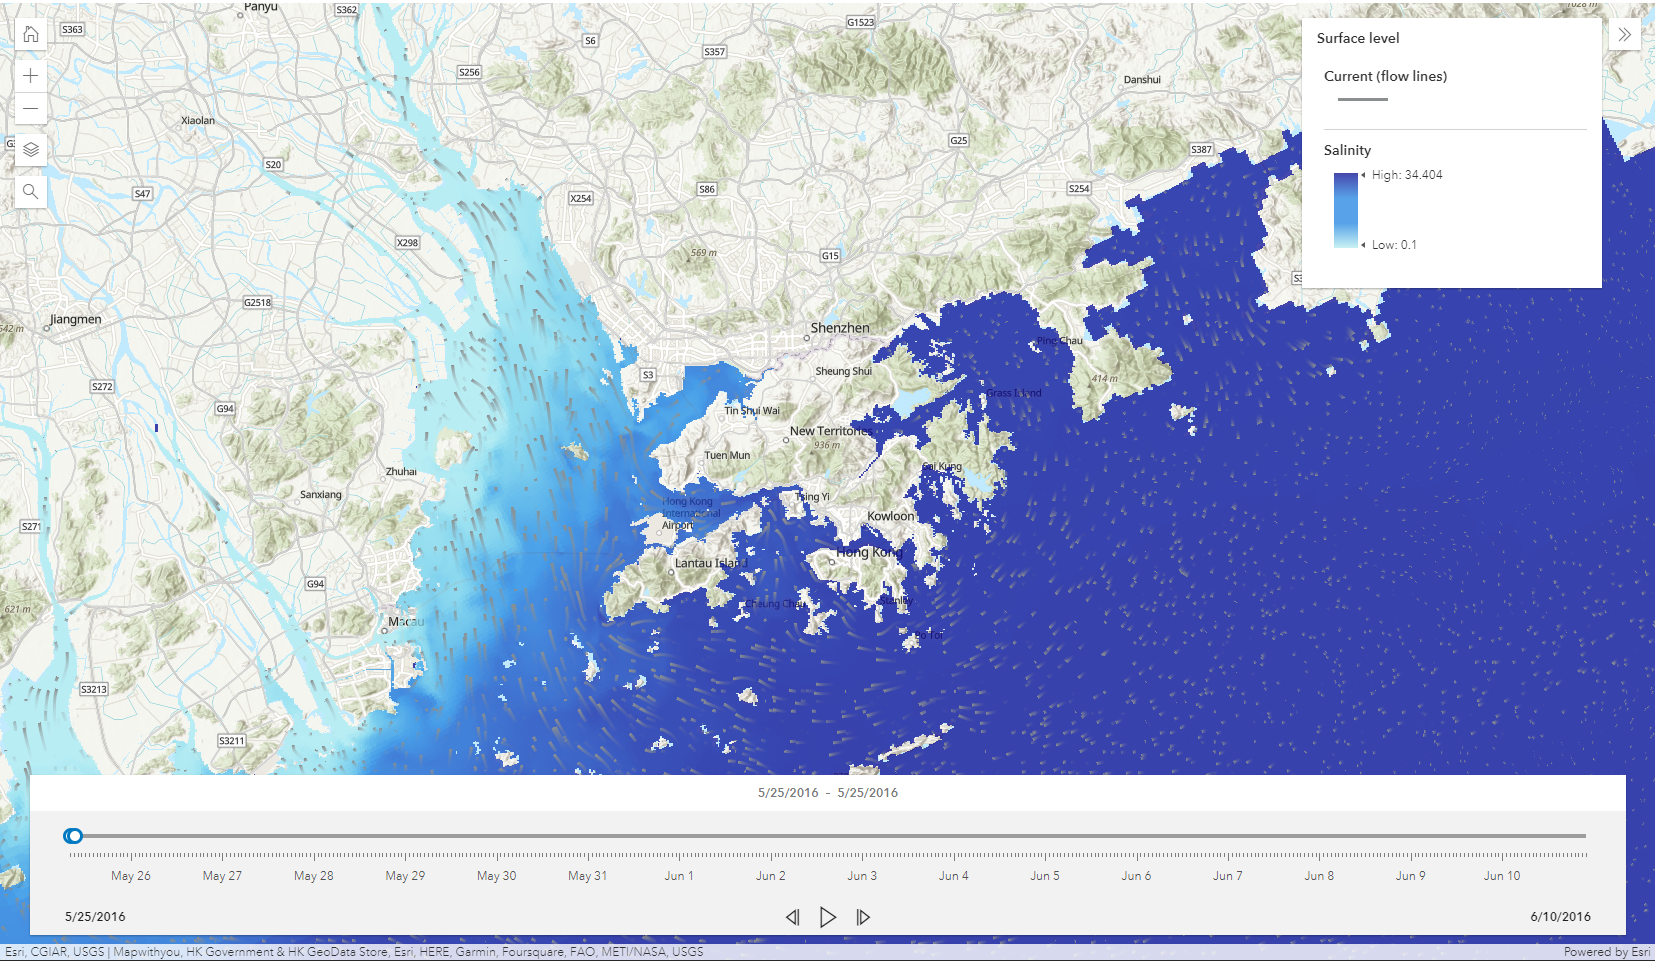 |
| Rasterized D3DFM NetCDF in ArcGIS Pro | Rasterized D3DFM NetCDF in a web browser. |
Command Line Interface (cli.py)
This script provides a command-line interface to rasterize and upload D3DFM NetCDF data to ArcGIS Online. The script includes three options:
rasterize: Rasterizes (i.e. converts from UGRID to CF) an input NetCDF file using information from an input file, and saves the output rasterized NetCDF file to a specified location.uploadagol: Uploads an input rasterized NetCDF to ArcGIS Online using information from an input file, and optionally generates a vector field from the uploaded data using the--vectorizeoption.vectorize: Generates a vector field from an uploaded NetCDF data item in ArcGIS Online.
Usage
Example 1: Rasterize a NetCDF file
python cli.py rasterize INPUTFILE1.TXT
In this example, the script will rasterize the D3DFM NetCDF file based on the input parameters in the INPUTFILE1.TXT file.
Example 2: Upload a rasterized NetCDF file
python cli.py uploadagol INPUTFILE2.TXT
In this example, the script will upload the rasterized NetCDF file to ArcGIS Online based on the input parameters in the INPUTFILE2.TXT file.
Example 3: Upload a rasterized NetCDF file and generate a vector field service from the uploaded data
python cli.py uploadagol INPUTFILE2.TXT --vectorize
In this example, the script will upload the rasterized NetCDF file to ArcGIS Online based on the input parameters in the INPUTFILE2.TXT file. The uploaded data will be used to generate a vector field service.
Example 4: Generate a vector field from an uploaded NetCDF data item in ArcGIS Online
python cli.py vectorize INPUTFILE3.TXT
In this example, the script will generate a vector field from an uploaded NetCDF data item in ArcGIS Online using the input parameters in the INPUTFILE3.TXT file.
Input File Format
The input files for rasterize, uploadagol, and vectorize should contain the following information:
rasterize:- Path to input NetCDF file
- Path to output NetCDF file
- Comma-separated list of variable names to rasterize
- Range of times to rasterize (in the format
start,end,steporYYYY-MM-DDTHH:mm:ss, YYYY-MM-DDTHH:mm:ss, step) - Comma-separated list of layer names to rasterize
- Comma-separated list of bounding box coordinates (in the format
xmin,ymin,xmax,ymax) - Number of cells in x direction
- Number of cells in y direction
- Data type for the output NetCDF file (int8 or int16 or none)
- Time shift in seconds
Each line should be separated by a newline character. A sample input file is as follows:
D:\temp\D3DFM_2022Sep\HK-FM_merged_mapSep.nc
D:\temp\D3DFM_2022Sep\HK-FM_merged_mapSep_raster4.nc
mesh2d_sa1
2023-06-01T00:00:00, 2023-06-30T00:00:01, 1
0, 10, 19
113.213111, 21.917770, 114.627601, 23.145613
800
800
int8
-28800
uploadagol:- ArcGIS Online username
- ArcGIS Online password
- Path to input rasterized NetCDF file
- Name of output service
- Name of x-component of vector field variable (if --vectorize is specified)
- Name of y-component of vector field variable (if --vectorize is specified)
- Name of output vector field service (if --vectorize is specified)
Each line should be separated by a newline character. A sample input file is as follows:
username
password
D:\temp\20230118_Tree\HK-FM_merged_map_ucxucy_dry1.nc
Test_Dry_ucxucy
mesh2d_ucx
mesh2d_ucy
Test_Dry_VecFie
vectorize:- ArcGIS Online username
- ArcGIS Online password
- Item ID
- Name of x-component of vector field variable
- Name of y-component of vector field variable
- Name of output vector field service
Each line should be separated by a newline character. A sample input file is as follows:
username
password
779aaa999bbbcccddd666eeefff333ff
mesh2d_ucx
mesh2d_ucy
Test_Dry_VecFie
Note that the vectorize option requires an uploaded rasterized NetCDF data item in ArcGIS Online.