A visual programming interface for Arduino controllers built with React and React Flow. This project allows users to create logic circuits using a block-based interface and generates optimized bytecode for Arduino microcontrollers.
Live Demo: https://merzsebastian.github.io/OpenPLC/
License: CC BY-NC 4.0
Weekend project with occasional updates. This is my first React project, so best practices may not always be followed.
things to keep in mind:
- only connect 1 line to a input of a block. if you want to connect more use a or element beforehand. I dont got any automation in there to do that automatically. will come
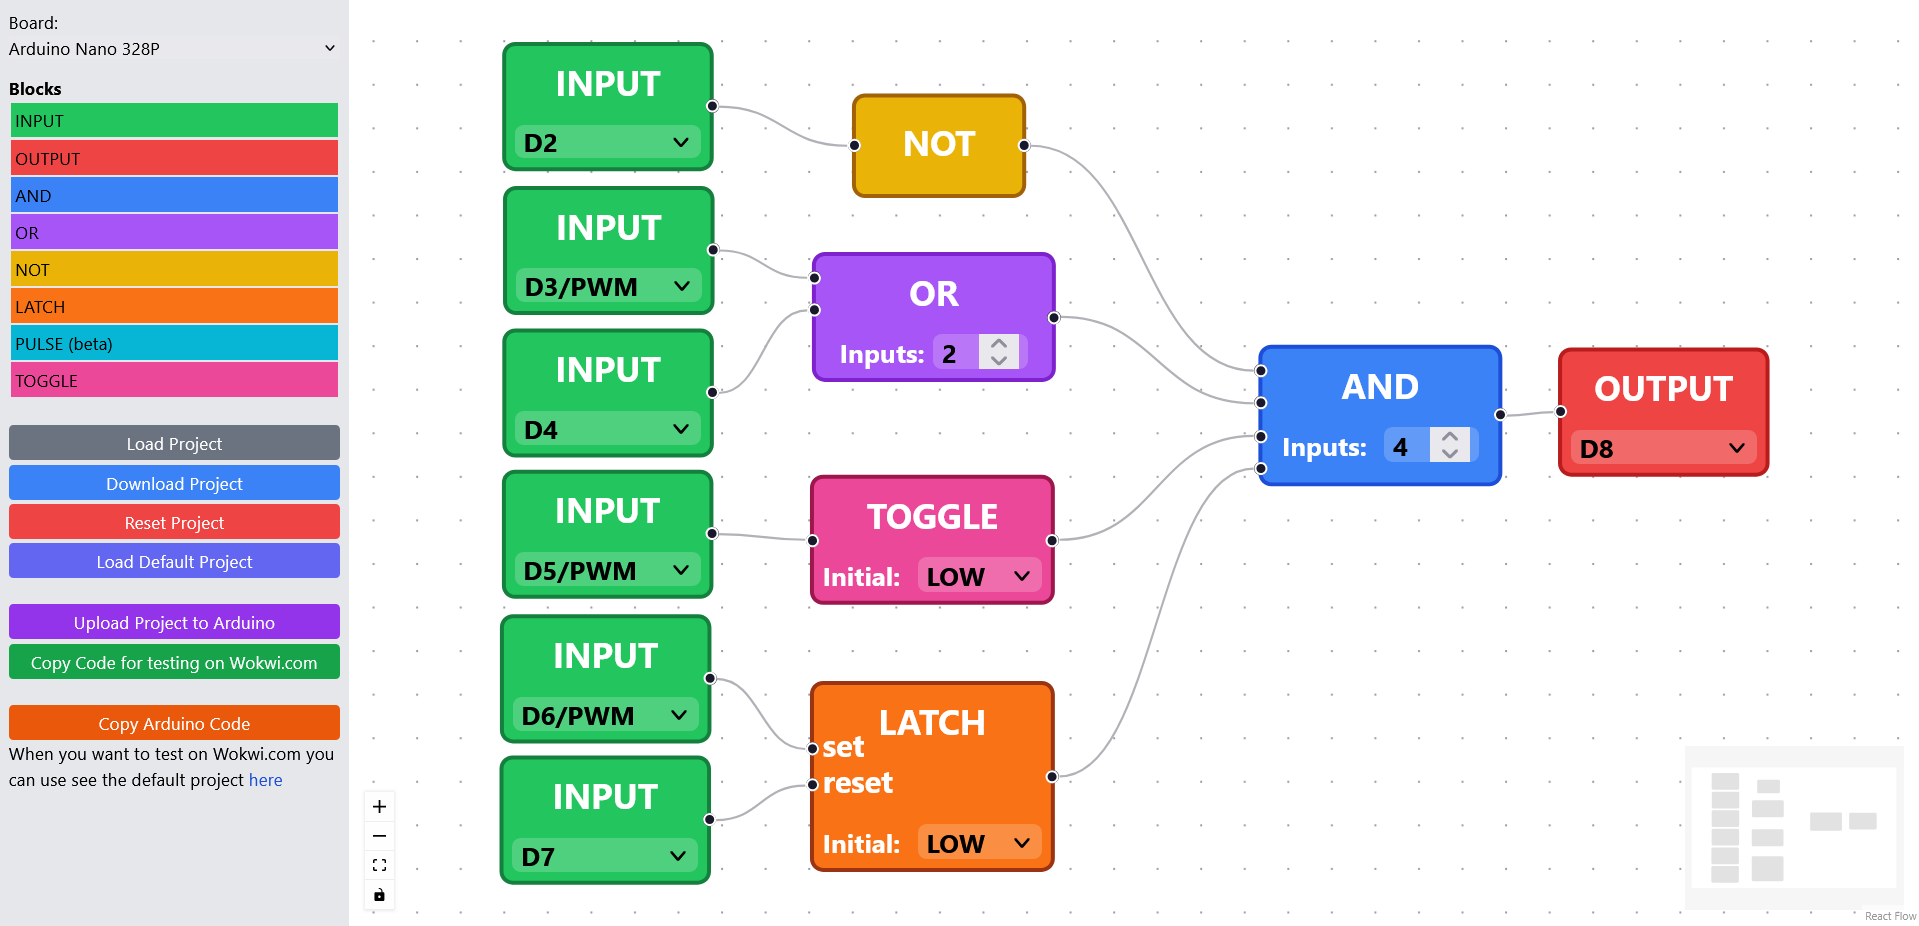
- Drag-and-drop block interface for Arduino programming
- Support for digital I/O blocks with Arduino pin mapping
- Logic gates (AND, OR, NOT, NAND, NOR, XOR) with configurable inputs
- SR Latch block with configurable initial state
- Pulse generator with adjustable timing
- Toggle block for edge-triggered toggling
- Project save/load functionality
- Bytecode generation optimized for Arduino
- WebSerial integration for direct programming of Arduino devices
- EEPROM storage on Arduino for program persistence
- Add components: Drag blocks from the left sidebar to the canvas
- Configure components: Click on components to set Arduino pins and parameters
- Connect components: Drag from output handles to input handles
- Generate and deploy code:
- Click "Copy for Wokwi" to get code for simulation (paste into Wokwi)
- Click "Upload via WebSerial" to send directly to Arduino hardware
-
Load the Arduino code:
- Copy the custom Arduino code from this project via the "Copy Arduino Code" button
- Paste it into the Arduino IDE
- Upload it to your Arduino board
-
Upload your logic:
- Design your circuit in the web interface
- Click "Upload via WebSerial"
- Select your Arduino when prompted by the browser
- The program will upload and run automatically
- Design your circuit in the web interface
- Click "Copy for Wokwi" to generate the bytecode
- In Wokwi, paste the bytecode into the Arduino code section
- Add
#define WOKWIat the top of your Wokwi sketch - Run the simulation to test your logic
This project includes custom Arduino code that implements:
- Bytecode interpreter for efficient execution
- WebSerial communication protocol
- EEPROM storage for program persistence
- Support for all logic operations and timers
The Arduino code is specifically optimized for:
- Arduino Nano 328P (tested platform)
- Efficient execution with minimal memory footprint
- Persistent storage across power cycles
The system uses a compact bytecode format optimized for Arduino:
[START_BYTE][LENGTH][DATA...][CHECKSUM]
- START_BYTE: 0x7E (marks message beginning)
- LENGTH: Number of bytes in DATA section
- DATA: Optimized bytecode instructions
- CHECKSUM: Sum of DATA bytes modulo 256 for verification
| Opcode | Instruction | Parameters | Description |
|---|---|---|---|
| 1 | SET_PIN_MODE_INPUT | pin | Set Arduino pin as input |
| 2 | SET_PIN_MODE_OUTPUT | pin | Set Arduino pin as output |
| 3 | READ_PIN | pin, var_index | Read digital pin to variable |
| 4 | WRITE_PIN | pin, var_index | Write variable to digital pin |
| 5 | READ_ANALOG_PIN | pin, var_index | Read analog pin to variable |
| 6 | WRITE_ANALOG_PIN | pin, var_index | Write variable to analog pin (PWM) |
| 10 | NOT | input_var, output_var | Logical NOT operation |
| 11 | AND | num_inputs, inputs..., output_var | Logical AND operation |
| 12 | OR | num_inputs, inputs..., output_var | Logical OR operation |
| 13 | NAND | num_inputs, inputs..., output_var | Logical NAND operation |
| 14 | NOR | num_inputs, inputs..., output_var | Logical NOR operation |
| 15 | XOR | num_inputs, inputs..., output_var | Logical XOR operation |
| 16 | LATCH | set_var, reset_var, output_var, initial_state | SR Latch implementation |
| 17 | PULSE | output_var, pulse_ms, interval_ms | Pulse generator |
| 18 | TOGGLE | input_var, output_var, initial_state | Toggle on rising edge |
- Use Chrome or Edge for best WebSerial support
- Ensure no other serial monitors are connected to the Arduino
- Disconnect components from pins 0 and 1 (RX/TX) during upload
- If upload fails, try manually resetting the Arduino just before uploading
- Verify your Arduino has the correct custom code uploaded
- Check that the EEPROM signature is valid
- Ensure you're not using the serial port for debugging while running
This project was bootstrapped with Create React App.
Runs the app in development mode at http://localhost:3000
Launches the test runner in interactive watch mode
Builds the app for production to the build folder
Note: this is a one-way operation. Ejects from Create React App
- Support for more Arduino board types
- Expanded library of logic blocks
- Real-time serial monitoring
- Enhanced simulation capabilities