
A simple, easy-to-use library for creating tabs (or chips) as a multi-entry input option. This library uses Bootstrap 5, and integrates nicely with Bootstrap code. No jQuery needed!
You only need the bootstrap library (and the JS and css files from this project) to make this work. You can either download the files yourself here, or you can use the CDN links provided by jsdelivr.com.
<!-- CDN Links -->
<link href="https://cdn.jsdelivr.net/gh/More-Than-Solitaire/bootstrap-tag-input@main/tags.css" rel="stylesheet">
<script src="https://cdn.jsdelivr.net/gh/More-Than-Solitaire/bootstrap-tag-input@main/tags.js"></script>This is a complete example that should run on your local machine if you'd like to try it out! Just paste this into a HTML document and fire up your favorite web browser!
<!-- Bootstrap -->
<link href="https://cdn.jsdelivr.net/npm/bootstrap@5.2.2/dist/css/bootstrap.min.css" rel="stylesheet">

<!-- Bootstrap Tag Input -->
<link href="https://cdn.jsdelivr.net/gh/More-Than-Solitaire/bootstrap-tag-input@main/tags.css" rel="stylesheet">
<script src="https://cdn.jsdelivr.net/gh/More-Than-Solitaire/bootstrap-tag-input@main/tags.js"></script>

<!-- initialize page (only needs to be called once, even for multiple inputs) -->
<script>
window.onload = function(event) {
    initTags();
}
</script>

<!-- Basic tags input  -->
<div class="input-group">
    <span class="input-group-text">Basic tags input</span>
    <div class="tags-input form-control"></div>
</div>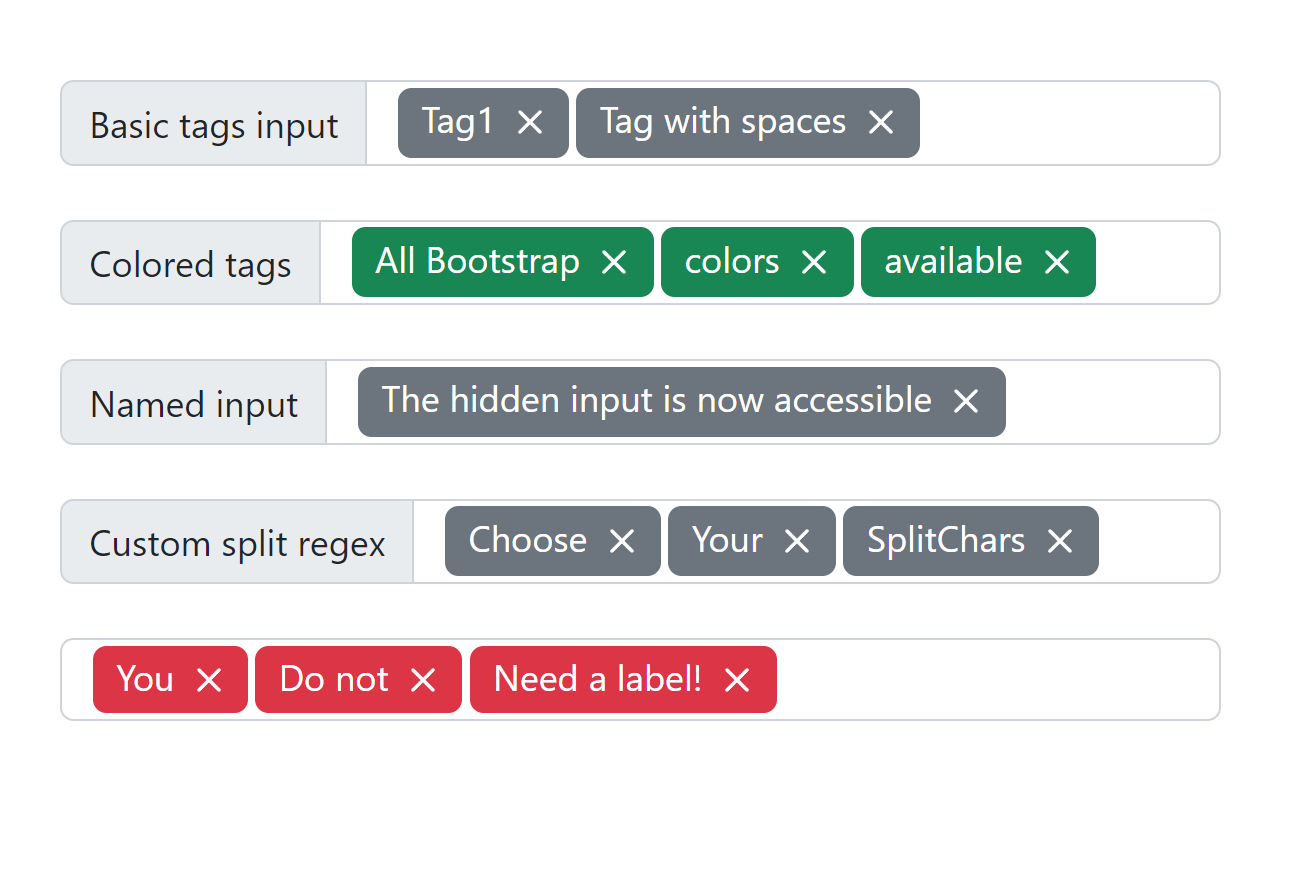
This is the simplest way to get started -- all defaults, no options! We use a div element to hold the tags and inputs that our code inserts behind the scenes.
<!-- Basic tags input  -->
<div class="input-group">
    <span class="input-group-text">Basic tags input</span>
    <div class="tags-input form-control"></div>
</div>
<br>You can use the bootstrap colors to style the tags, just by adding the appropriate color class with the prefix tag-bg-. For example, these are styled with the "success" color.
<!-- Use custom classes to style tags with Bootstrap styles -->
<div class="input-group">
    <span class="input-group-text">Colored tags</span>
    <div class="tags-input form-control tag-bg-success"></div>
</div>
<br>
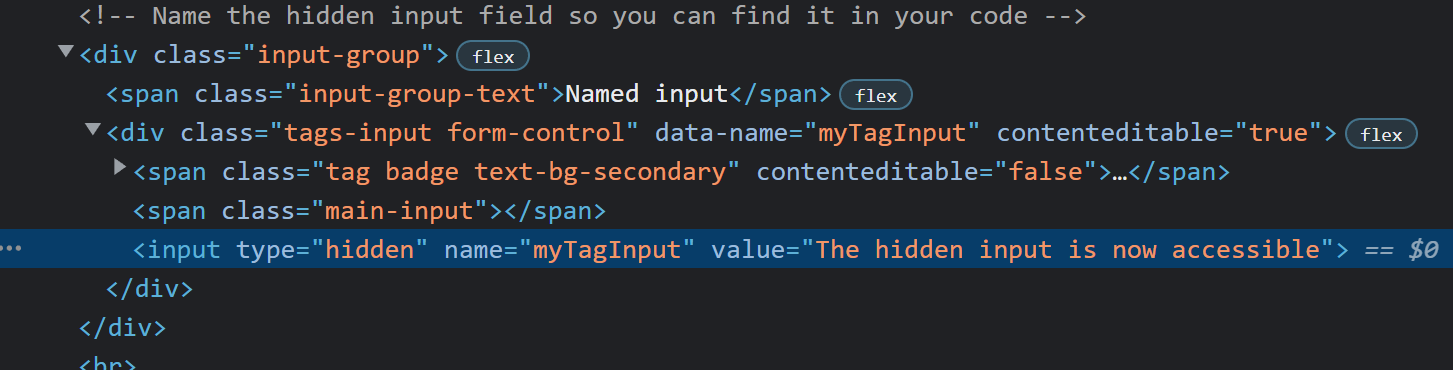
The tag input stores the actual data, comma separated, in a hidden input. You can choose the name attribute of that hidden input by entering it in the data-name attribute in your basic div. The contents of all the tags are stored in a comma separated list in the value field of the hidden input.
<!-- Name the hidden input field so you can find it in your code -->
<div class="input-group">
    <span class="input-group-text">Named input</span>
    <div class="tags-input form-control" data-name="myTagInput"></div>
</div>
<br>
That produces this HTML code - note the hidden input with name="myTagInput".
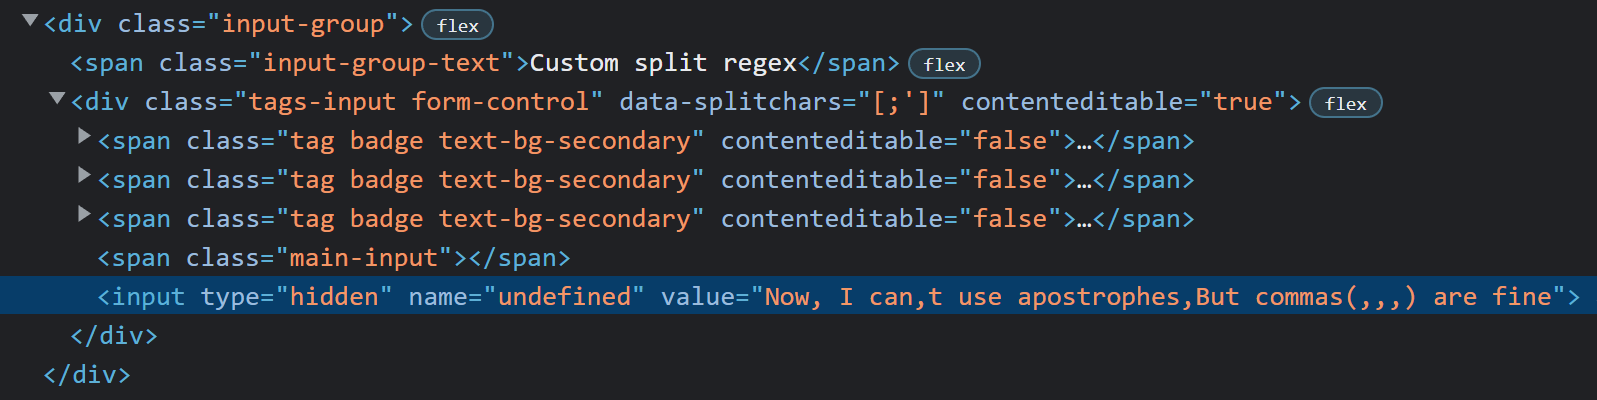
We also give you the option of providing a regular expression that we'll use to split your tags. Normally the default regex is [,;\n], but in this example below we've changed it to [;'] That means for this example, the tags will be separated when you enter a ; or a '. New tags will always be created by the enter key. Be careful if you don't use the comma as part of your split regex though! The hidden input that stores the data stores them in a comma-separated list. The view will work fine, but you'll have a hard time reading the data if you need to.
<!-- Choose your regex to split tags by -->
<div class="input-group">
    <span class="input-group-text">Custom split regex</span>
    <div class="tags-input form-control" data-splitchars="[;']"></div>
</div>
<br>
You don't need to include a label either: use a custom label, or forego it altogether!
<!-- No label -->
<div class="input-group">
    <div class="tags-input form-control tag-bg-danger"></div>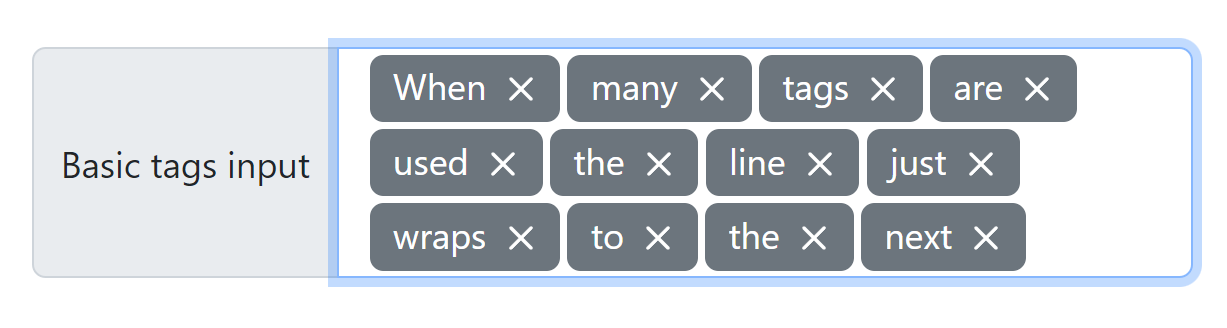
</div>When your users enter too many tags, the Tag Input just wraps around to a new line to make room for more!