Adds a 'Next Diffusion' tab to the webui that allows the user to generate a prompt from a subset of dropdown menus.
- Open your Stable Diffusion Web UI.
- Click on the "Extensions" tab.
- Navigate to the "Install from URL" subsection.
- Paste the following URL: https://github.com/NextDiffusion/next-diffusion-prompt-generator
- Click on the "Install" button.
- After installation go to the "Installed" tab and click on "Apply and restart UI".
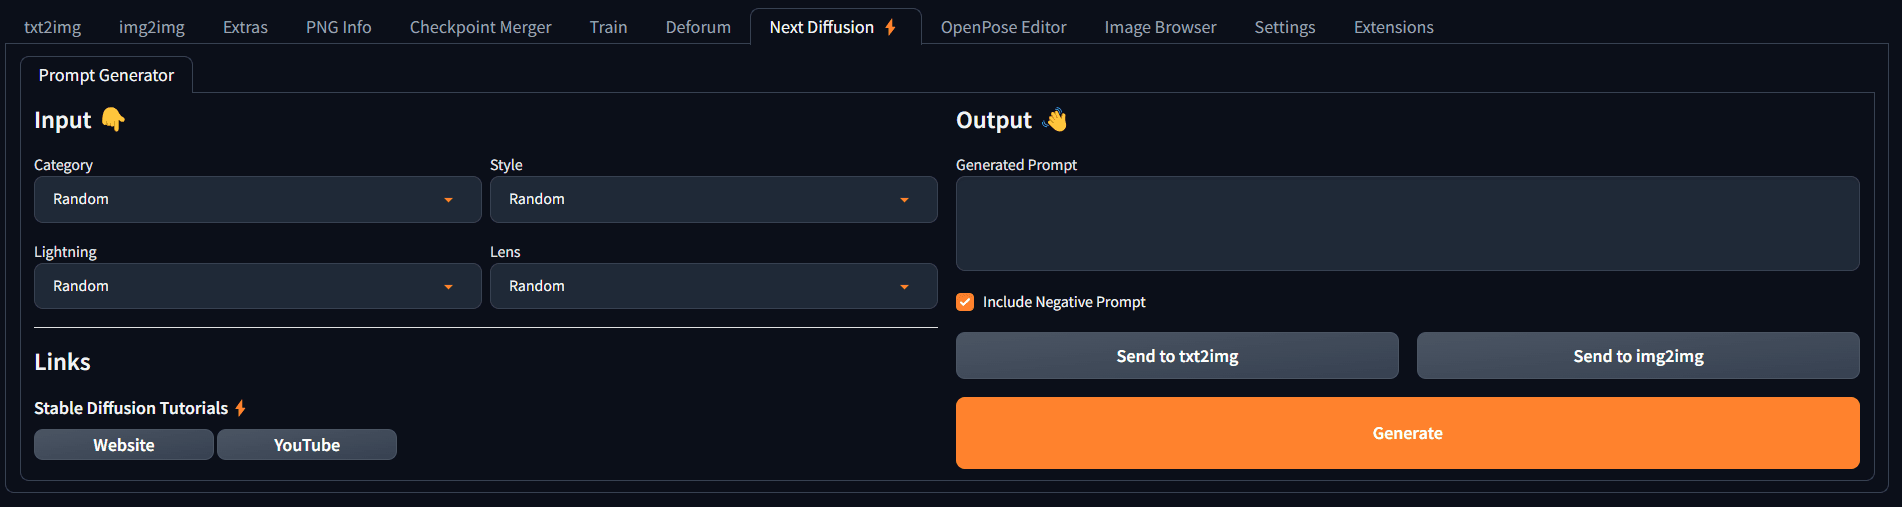
On the left side you have the Input section where you can adjust the following:
- Category: Refers to the primary category for the prompt output
- Style: Determines the main Style for the prompt output
- Lightning: Represents the lightning strategy used for the prompt output
- Lens: Specifies the lens parameter used for the prompt output

By simply selecting from the array of options in the dropdown menus, you can effortlessly fine-tune the output of your generated prompts. Each of the 4 input values starts with a "Random" default, so you can easily explore many possibilities and enjoy creative surprises along the way. After adjusting the input values to your preference, you are ready to click on the "Generate" button. This button can be found on the right side.
On the right side you have the Output section:
- Generate (Button): When clicked this will trigger the prompt generator to create a randomized output using a preset dataset.
- Generated Prompt (Textbox): A textbox where the generated prompt will appear after clicking the "Generate" button.
- Include Negative Prompt (Checkbox): When this checkbox is checked, which is de the default, will send a default negative prompt along the generated prompt.
- Send to txt2img (Button): This will send the "Generated Prompt" to the txt2img tab in Stable Diffusion UI.
- Send to img2img (Button): This will send the "Generated Prompt" to the img2img tab in Stable Diffusion UI.
