The Microsoft 365 Agents Toolkit Visual Studio Code v5 Guide
- Overview
- Core concepts
- Reference
- Debug (F5) in Visual Studio Code
- Examples
The Microsoft 365 Agents Toolkit enables developers to bring their existing internal and SaaS applications into Teams with Teams-native integration constructs such as messaging notifications, messaging interactions, and tab support.
At the same time, the Microsoft 365 Agents Toolkit helps developers simplify the cloud infrastructure and deployment processes that are required to run their application. Developers can leverage existing cloud resources, leverage existing cloud infrastructure source code, or use the Agents Toolkit’s opinionated templates to provision and deploy their application.
The Agents Toolkit consists of several tools that come together to enable you to build Teams applications:
- Agents Toolkit CLI / VS Code / VS “engine” – the “engine” enables you to build, provision, deploy, publish, and run applications
- Samples and templates - Samples and templates help developers start quickly with simple scaffolds
An Agents Toolkit project drives the Agents Toolkit engine – that is, what the Agents Toolkit engine does in each of the stages is defined by the project.
An Agents Toolkit project contains the following files:
| File | Required? | Description |
|---|---|---|
| m365agents.yml | Yes | This is the main Agents Toolkit project file. The project file defines two primary things: Properties and configuration Stage definitions. See m365agents.yml below for more details. |
| m365agents.local.yml | Yes (for local deployments) | This overrides m365agents.yml with actions that enable local execution and debugging. See m365agents.local.yml below for more details. |
| env/ | Depends on the contents of the yml file | Name / value pairs are stored in environment files and used by m365agents.yml to customize the provisioning and deployment rules. See environments below for more details. |
| .vscode/tasks.json and .vscode/launch.json | Yes for Visual Studio Code debugging, No otherwise | Used to configure the debugging process for Visual Studio Code. See Customize debugging process and infrastructure below for more details. |
The Agents Toolkit looks for m365agents.yml in the current directory when it runs. This file describes your application configuration and defines the set of actions to run in each lifecycle stages. It also looks for an m365agents.local.yml file if you are in a local environment. This overrides the stages with actions that support local development.
The Agents Toolkit generated projects include m365agents.yml and m365agents.local.yml files by default, you can customize them to fit your needs.
An app developed with Agents Toolkit goes through a few lifecycle stages as developers bring their application from source to production. Agents Toolkit lifecycles are defined in m365agents.yml and m365agents.local.yml files and can be customized to your liking.
| Stage | Description |
|---|---|
| Provision | Prepares the current environment. This can be creating cloud resources or installing local tools. |
| Deploy | Build and deploy the application to the environment infrastructure. Cloud resources don't have to be created by m365agents Toolkit; they can also be pre-created by your DevOps teams. |
| Publish | Publish the application to Teams |
Actions are individual blocks of processes used in yml files to describe what happens in each app stage. Agents Toolkit provides a set of pre-defined actions that your project can integrate with. You can also write your own script actions to customize Agents Toolkit apps.
The Agents Toolkit environments are principally a collection of cloud resources that are targets for a deployment. For example, the dev environment consists of a set of cloud resources that are used for development, and the prod environment consists of a set of cloud resources that are used for production.
The Agents Toolkit environments are defined in a .env file. There are several ways to create a .env file:
- Using the provisioning lifecycle stage. Agents Toolkit will generate an environment file for you
- Manually. If you are not using Agents Toolkit to provision your cloud environment, you can create an environment file manually
Environments are optional.
Your project file can hard code cloud resources in their deployment targets. When you do this, you do not need the Agents Toolkit environment.
However, your project file can reference values by name defined in the environment files. When you do this, you can supply different environment files and the Agents Toolkit will deploy to the cloud resources defined in the environment file. In this way you can have a single set of deploy rules for an arbitrary number of environments.
The .env files follow the naming convention of .env.{environment-name}. For each lifecycle execution you are required to provide an environment name (local, dev, etc) and the Agents Toolkit will load the corresponding .env.{environment-name} into the execution process.
You can also define variables in your current shell environment, the Agents Toolkit will load these environment variables when running a lifecycle stage. Environment variables defined in the current shell overwrites variables defined in .env files when there is a name conflict.
The Agents Toolkit templates store sensitive information in the environment's corresponding .user file, such as .env.dev.user. This file is gitignored by default.
By default, Agents Toolkit generated templates configures the project to store .env and .env.{environment}.user in the ~/<app>/env folder. You change this by configuring the project file - set the environmentFolderPath field in m365agents.yml appropriately.
There is nothing special from Team Toolkit's perspective about local environments.
However, Agents Toolkit templates and samples all come with an environment called local. This environment enables you to run and deploy your Azure components locally. Note App registrations and the Teams client itself still runs in the cloud.
The pattern that the templates follow is to use m365agents.local.yml to override the lifecycle stages with specific actions that run locally.
Learn more about how to customize actions in m365agents.local.yml
The Agents Toolkit yml files have the following lifecycle definitions:
- provision: provisions cloud resources and performs Teams app registration, e.g. provisioning cloud resources with ARM templates and registering a Teams app in developer portal
- deploy: deploys application code to cloud resources, e.g. deploying to Azure Storage
- publish: publishes a Teams app to the Teams app catalog
Lifecycles defined in the yml file are triggered by their corresponding commands in VSCode or CLI (atk provision, etc).
There are three files defining the details F5 steps, .vscode/launch.json, .vscode/tasks.json, and m365agents.local.yml.
-
launch.json- this is the entry point of VSCode F5. It defines the final launch target (for Teams App it's opening web client in browser) and thepreLaunchTaskto be executed before launching final target. -
tasks.json- this defines all tasks to be executed by VSCode. There is one entry task which consists of several small tasks, while some of those tasks referencem365agents.local.ymlto represent teams app lifecycle. -
m365agents.local.yml- this defines teams app specific lifecycles. Each lifecycle contains a set of teams app specific actions.
In addition, there is a .env.local file (by default under env/ folder) which includes environment variables referenced/generated by m365agents.local.yml.
Following shows the step-by-step flow after clicking F5, and the place where each step is defined in:

-
The
preLaunchTaskproperty inlaunch.jsonis pointed to a task defined intasks.json. That task is an entry point and consists of several other tasks. The task set can be customized intasks.json.// launch.json { ... "preLaunchTask": "Start Teams App Locally", ... }
// tasks.json
{
    "label": "Start Teams App Locally",
    // consists of other tasks
    "dependsOn": [
        "Validate prerequisites",
        "Start local tunnel",
        "Provision",
        "Deploy",
        "Start application"
    ],
    "dependsOrder": "sequence"
}
-
Task
Validate prerequisitesis to check and auto-resolve prerequisites required by debugging. This task can be customized intasks.json. -
If your Teams App has capability
bot, taskStart local tunnelis to launch a local tunnel service (dev tunnel) to make your local bot message endpoint public. This task can be customized intasks.json. -
Task
Provisionis to execute lifecycleprovisionto prepare Teams App related resources. It's referencing local environment so the steps and actions can be customized inm365agents.local.yml.// tasks.json { "label": "Provision", "type": "teamsfx", "command": "provision", "args": { // set env to local to reference m365agents.local.yml and .env.local "env": "local" } }
-
Task
Deployis to execute lifecycledeployto ensure local project is runnable. It's referencing local environment so the steps and actions can be customized inm365agents.local.yml.// tasks.json { "label": "Install tools and Build project", "type": "teamsfx", "command": "deploy", "args": { // set env to local to reference m365agents.local.yml and .env.local "env": "local" } }
-
Task
Start applicationis to launch local project. It usually contains one or more tasks to run different commandsnpm run xxxto launch local service directly or launch certain dependency service(s). All these tasks can be customized intasks.json. -
The
urlproperty inlaunch.jsondefines the target URL to be opened in browser. Usually it's in format ...teams.microsoft.com/...${{local:TEAMS_APP_ID}}?...${account-hint}.... The two place holders local:TEAMS_APP_ID and account-hint will be replaced dynamically by the Agents Toolkit to navigate to the correct Teams App.
Note, the place holder ${{local:TEAMS_APP_ID}} or ${{dev:TEAMS_APP_ID}} in
launch.jsonmeans to load Teams App ID from local or dev environment. If you creates your own environment (e.g., test01), you can change that to any environment (e.g., ${{test01:TEAMS_APP_ID}}).
Visit The Microsoft 365 Agents Toolkit v5 VS Code Tasks for more details.
There're 3 ways to add customized environment variables to teamsfx actions:
-
Update your machine's environment variables directly. You need to close all the opened VS Code instances and reopen VS Code again to let the environment variable changes take effect.
-
Add your environment variables to the
.env.{envName}and.env.{envName}.userfiles. See Environment sections for details.The Agents Toolkit scaffolded projects include
.env.{envName}.userin.gitignoreby default. Thus, if you want to commit your environment variables to git, you need to add them to.env.{envName}. Otherwise, you need to add them to.env.{envName}.user. -
Define temporary environment variables in your action's definition. You can refer to the following sample for syntax. These environment variables are only available to the specific action run.
- uses: <action name>
  env:
    # Defines an environment variable MY_ENV_A, and its value is "env-value"
    MY_ENV_A: env-value
    # This defines an environment variable MY_ENV_B, and its value is same with the NODE_ENV environment variable in your machine or the .env.{envName}/.env.{envName}.user file.
    MY_ENV_B: ${{NODE_ENV}}
Some local debug operations are not defined in m365agents.local.yml, for example npm run dev:teamsfx. You need to inspect the actual command in package.json to understand which file is used to define the npm command's input (usually in the form of environment variable) and update that file.
Most of the time, the npm command uses env-cmd -f .localConfigs to load environment variables. So you need to create a .localConfigs file in the same folder of package.json and add environment variables to it.
The Agents Toolkit uses Dev Tunnel for tunneling, but you could customize the tunneling settings or use your own tunneling service. Visit The Agents Toolkit tunnel for more details.
You can use your existing Teams app ID instead of registering a new one with Agents Toolkit.
You can do this by setting the TEAMS_APP_ID environment variable. When TEAMS_APP_ID has already been registered in the Teams Developer Portal, the teamsApp/create action won't register a new Teams app. The Teams manifest.json file can reference TEAMS_APP_ID. Learn more about the Microsoft 365 Agents Toolkit actions
If you are developing with the Agents Toolkit scaffolded project, you can set it in .env files listed under the env folder.

Also make sure your manifest.json file correctly reference it.

You can find your Teams app ID in Teams Developer Portal, under your app -> Configure -> Basic information -> App ID

If you are upgrading a project created by Agents Toolkit v4.x.x, the Teams app ID can be found in .fx/states/state.{env}.json under fx-resource-appstudio.teamsAppId

Agents Toolkit creates Microsoft Entra apps for projects with bot or single sign-on tab capabilities by default using a few actions:
However, the Agents Toolkit supports using existing Microsoft Entra app IDs. Learn more about the Microsoft 365 Agents Toolkit actions
If you are developing with an Agents Toolkit scaffolded project, you can set BOT_ID in .env files listed under the env folder, you can set SECRET_BOT_PASSWORD in .env.{envName}.user files.


You can find your app's BOT_ID and SECRET_BOT_PASSWORD in Microsoft Entra.
- Select your app under "App registration"
- In the "Overview" page,
BOT_IDis the value of "Application (client) ID"

- In the "Certificates & secrets" page, you can find the value for
SECRET_BOT_PASSWORD

If you are upgrading a project created by the Agents Toolkit v4.x.x, BOT_ID and SECRET_BOT_PASSWORD can be found in .fx/states/state.{env}.json under fx-resource-bot.botId and fx-resource-bot.botPassword.

{{fx-resource-bot.botPassword}} here references .fx/states/{env}.userdata.

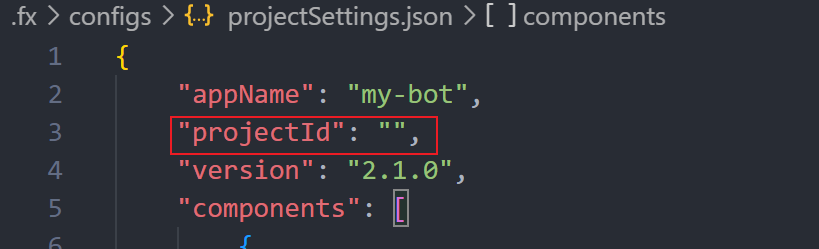
Note: if the value starts with crypto_, it is encrypted. Make sure to copy projectId from .fx/configs/projectSettings.json and paste it to the projectId field of m365agents.yml. This will ensure the Agents Toolkit can decrypt the secret correctly.
If you are developing with an Agents Toolkit scaffolded project, you can set the following environment variables in .env and .env.{envName}.user files listed under the env folder:
-
AAD_APP_CLIENT_ID- the client id of Microsoft Entra app -
AAD_APP_CLIENT_SECRET- the client secret of Microsoft Entra app -
AAD_APP_OBJECT_ID- the object id of Microsoft Entra app -
AAD_APP_TENANT_ID- the tenant id of Microsoft Entra app -
AAD_APP_OAUTH_AUTHORITY_HOST- the host of OAUTH authority of Microsoft Entra app -
AAD_APP_OAUTH_AUTHORITY- the OAUTH authority of Microsoft Entra app
You can find the values for these environment variables in [Microsoft Entra]:
- Select your app under "App registration"
- In the "Overview" page:
- "Application (client) ID" maps to
AAD_APP_CLIENT_ID - "Object ID" maps to
AAD_APP_OBJECT_ID - "Directory (tenant) ID" maps to
AAD_APP_TENANT_ID
- "Application (client) ID" maps to

- In the "Certificates & secrets" page, you can find the value for
SECRET_BOT_PASSWORD

Upgrading a project created by Agents Toolkit v4.x.x, the variable values can be found in .fx/states/state.{env}.json
-
fx-resource-aad-app-for-teams.clientIdmaps toAAD_APP_CLIENT_ID -
fx-resource-aad-app-for-teams.clientSecret() maps toAAD_APP_CLIENT_SECRET -
fx-resource-aad-app-for-teams.objectIdmaps toAAD_APP_OBJECT_ID -
fx-resource-aad-app-for-teams.tenantIdmaps toAAD_APP_TENANT_ID -
fx-resource-aad-app-for-teams.oauthHostmaps toAAD_APP_OAUTH_AUTHORITY_HOST -
fx-resource-aad-app-for-teams.oauthAuthoritymaps toAAD_APP_OAUTH_AUTHORITY

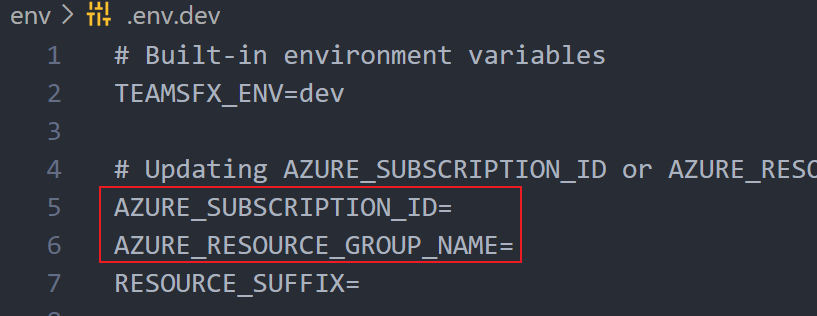
The Agents Toolkit scaffolded projects leverage ARM templates for provisioning. You can use the subscription ID and resource group of your choice by setting AZURE_SUBSCRIPTION_ID and AZURE_RESOURCE_GROUP_NAME in the .env files in the env folder.
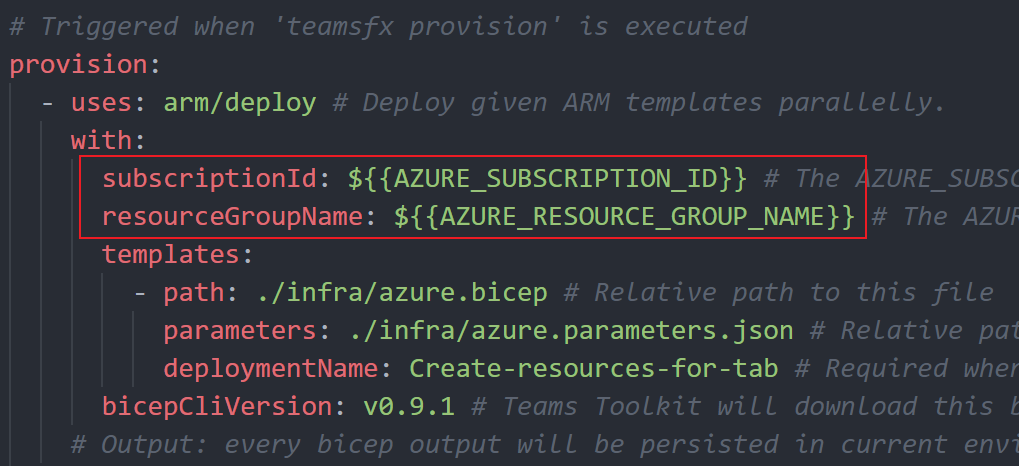
AZURE_SUBSCRIPTION_ID and AZURE_RESOURCE_GROUP_NAME are referenced by the arm/deploy action in m365agents.yml. Learn more about how to customize actions
The Agents Toolkit scaffolded bot projects use Azure Bot Service when provisioning remote resources. You can follow Using existing Microsoft Entra app ID for bot to use the existing bot ID and bot password. However, unlike configuring the debugging process, where BOT_DOMAIN is set to a tunneling URL that changes frequently, for deploying to an existing remote bot service, you need to leverage the existing BOT_DOMAIN.
You can find your existing messaging endpoint in your "Azure Bot Service" -> "Configuration" -> "Messaging endpoint". The value for BOT_DOMAIN is the URL between https:// and /api/messages, it should look like resourcegroup123.azurewebsites.net.

You can set BOT_DOMAIN in environment files under the env folder.

If you are upgrading a project created by Agents Toolkit v4.x.x, BOT_DOMAIN can be found in .fx/states/state.{env}.json under fx-resource-bot.domain.
