| description |
|---|
Overview of how to navigate and use the DEX in its current state. |
- Navigate to the DEX dashboard.
- Click
create an account.
.JPG)
3. Enter a Public Account Name which can contain alphabet, number or dash .
4. Copy the existing Password and paste in the Confirm Password tab.
5. Click create.
.JPG)
6. After Clicking Create , Important Instruction about Backup your keys is listed. Click Download & Take me to Dashboard option to download the keys.
.JPG)
{% hint style="info" %} If you forget the password, access to keys is the only option to recover the account. So, download and keep safe your keys and password. {% endhint %}
7. After downloading, it will direct to the Dashboard automatically.
.JPG)
If not already logged in, click the Log In button in the navbar.

Enter the account details and log in.

{% hint style="info" %} Lock Wallet - This helps in locking our wallet from any transaction based on the time set by the user. Use the drop down to select the desired time. {% endhint %}
{% hint style="info" %} WhaleVault extension - This is the third-party browser extension to save private keys. By using this, the keys can be automatically pulled from the extension to unlock the profile.
To use WhaleVault, it has to be installed and the details about account should be input to use them. {% endhint %}
Clicking the menu button located at the top left of the navbar will reveal buttons to navigate to different sections of the DEX.

By default, these sections include Dashboard, Exchange, My Assets, Blockchain , Voting & Vesting, Settings, Bitcoin Transactions, Withdraw HIVE/HBD.

Click the magnifying glass at the top right of the navbar to reveal search options.

Search can be done for Users, the two options are Blocks and Tokens. Partial search is implemented and data relevant to the characters typed will be displayed.

Click Bell icon in the Navbar to look for any notification.

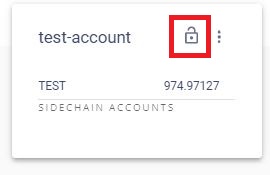
Click on the lock icon near the account name which prompts to enter the Password/active key to unlock profile. This helps user while performing many transaction/action in the webpage as the profile is unlocked there is no requirement to enter credentials for all actions.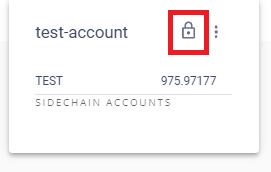
Click the accounts icon on the right side of Navbar which shows the "Account name" and click on the 3 dots which prompt to logout. This navigates the user out of account.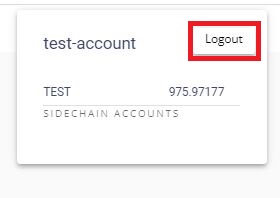
The dashboard consists of option to sell/buy and send option. Also it shows the details of your Activity and Assets.
.JPG)
This section enables users to quickly create market orders to buy assets.
- Enter the amount of paying asset in the first field - TEST.
- Enter the amount of the desired asset in the second field. The second field consists of list options to chose like BTC, HBD, HIVE, PBTC, PEOS, PETH, TEST.
- The fee for the filled out information will be shown.

4. On Clicking the buy button, directs to enter the Password/active key to Unlock the profile and transaction will be completed.
.JPG)
This section enables users to send assets to other users on the Peerplays blockchain.
- Enter a
quantityof the asset to send. - Enter the account name of the desired recipient.
- Select the desired asset.
- Optionally, add a memo message to send.
- Click
send.
The fee will be listed once the quantity and asset are selected.

6. On Clicking Send button directs to enter Password/active key to unlock the profile and transaction will be completed.
User activity can be viewed under this list. These activities include account creation, sending and receiving orders.

Assets owned can be viewed under this list. This includes the asset name, available Quote asset, price, change, volume, and actions.

To select an asset pair, click on the asset/asset button located at the top of the dashboard. and select the desired pair.
Click the tab to know about the Open Orders and Order History.
The order book is a quick way to fill out the buy and sell column with a defined amount of the asset pair selected.

Select the desired pair to check the Order book and History of the pair.

To buy or sell an asset, enter the price of the desired asset in terms of the paying asset and the quantity of the desired asset and click the buy asset or sell asset button. The total price before the fee will be displayed in the total field before the fee. The fees and current wallet balance will be shown before the order is placed.

Click the Buy BTC/ Sell BTC to buy and sell the orders respectively will prompt to Order preview tab to complete the transaction.

This will create a listing under the open orders section of the exchange.
To cancel an open order, move over the Cancel column on the desired open order to find the Trash Icon. Click on the icon to cancel that order.
.JPG)
Clicking on Trash Icon prompt to enter Password/active key to complete the order.

Assets owned can be viewed under this section. This includes the asset, available, quote asset, price, change, volume and actions.

Open orders for the account can be viewed under this section. This includes the trade, order ID, description, price, market price and value.

User activity can be viewed under this list. These activities include account creation, sending, and receiving orders.

TBD
A blockchain is a digital database that stores information about every transaction. A single person does not control that database, making the blockchain a more secure way to perform transactions and store data than a traditional database system. This makes it an ideal tool for tracking the progress of products through the supply chain, from inception to delivery.
This section explains about the details like Current block, Supply, Active witnesses, Confirmation time, Last irreversible block and stealth supply.

Assets section contain the details of asset , issuer and the supply.

The witnesses section features the details about Active & Current witness, No of missed, remaining budget and the next time stamp for vote update.

This section features about the Active & Pending details about name, votes and the URL of webpage.

This section features about the Operation, Price per Kbyte, Standard fee and Member fee. The Operation includes transfer, limit order to create/cancel/upgrade/whitelist/update, account creation, fill order, asset, proposal, and witness.

There are two options in vesting called "Power UP" and "Power Down". Vesting option is used to get the voting power. The power up option is to deposit GPOS balance for voting and incase if the user wants to withdraw GPOS balance then power down option can be used.
- The opening GPOS balance will be displayed.
- Increase the deposit as per your requirement and the new GPOS balance will be displayed.
- Click
VESTand it prompts to enter thepassword/active key. After clickingunlockoption GPOS will be added to the account.

- The GPOS opening and available balance is displayed.
- Increase/decrease the desired GPOS points and New GPOS balance, Fees will be displayed.
- Click
WITHDRAWoption which prompts to enter thepassword/active keytoUnlockthe profile and withdraw the GPOS.

The Voting performance, qualified reward, estimated rake reward and the time for next vote update will be displayed as section.
The voting section features the name, URL, vote count and option to vote for the desired accounts. The are two categories such as active and pending nodes which come under the witness, committee or son accounts.
The Active lists the accounts that are currently active in producing the blocks which are voted in and Pending nodes are waiting to be voted in to start their action.

To vote for any account hover over the Votes column of desired account name and it will show Thumps up/Like symbol (Highlighted below). Click on the symbol and it prompts to save changes/cancel option to vote. It also shows the commission that will be taken for voting.
.jpg)
If any detail information is required about any account click on the account name under Name column. It will redirects to a separate page as show below.
This section provide detailed information about the Account and by clicking each tab required information can be viewed. If any transaction need to done then hover over the Actions column and click on the arrow (Highlighted below) which prompts to enter the password/active key to complete the process.
.JPG)
Below image is the display of permission section for the asset and it can be altered based on the requirement.

The setting section has three tabs General, security, and membership. It helps the user to set language, notifications, time to lock wallet, membership details.
This section helps to set up the language options such as English, Russian. Also to enable the notification about the account transfer and faucet URL where the registration fee for new user is payed.

This section is to set time to lock the wallet.

This section provide an option to upgrade the subscription, the percentage of allocation and the fee statistics.

This section provides the steps in Bitcoins address generation using the User existing information. The user should have the following details to generate the address:
- Deposit Public key
- Withdraw Public key
- Withdraw address
Your deposit address is the address to which you’ll be depositing your Bitcoin. This Deposit address will be the address you’ll be sharing with others if you wish to receive Bitcoin.
Your withdraw address is the address to which you’ll be using to withdraw your deposit Bitcoin later on (when you decide to withdraw).
To generate a Bitcoin Address on Peerplays Wallet, simply head over to the top left of your screen and click on the 3 parallel lines.

Then, choose ‘Bitcoin Transactions.’

You’ll see this page.

You must enter the Public Key of your Deposit Address, the Withdraw Public Key, and the Withdraw Address.
Depending on the wallet that you’re using, you may have to use a tool like bitaddress.org in order to find your Public Key if it’s not already displayed in your wallet.
Wasabi Wallet, for example, displays your Public key.
But wallets like Trust Wallet and Exodus require you to use external tools like bitaddress.org to find your Public Key.
In this example, we’ll be using Wasabi Wallet as the Deposit address and Exodus as the Withdraw address.
As you can see in the image below, the Deposit Address (Wasabi Wallet) is bc1qhlu97p4ehnvt2274na5xqra5n8a8cnumavatn3
The Deposit Public Key is 02d5a014ec94974a01b5b81550bbcf6a629715140d38e7da5f1c2c71ccdcd8b61c

The Withdraw Address (Exodus Wallet) is bc1qrk768lztvrjduama2ruuut9eweamtz5ru4vmhl
But we must find the Withdraw Private Key.. Here’s how:

Open your wallet. As seen in the image above, click on the three dotted lines and click “View Private Keys.” Then Click ”Yes, I’m sure.”

Next, type your account password.

And now you’ll see your Bitcoin deposit Address as well as your Private Key. Copy the address that starts with bc1 and it’s Private key.

The Withdraw Private Key is L5896NkkABQ9PCcWHQiM1tAyFWoPtaEf1uLRQ5eG7nTvzXeXY29g
We will now use the Private Key to find out our Public Key. Simply head over to bitaddress.org. Then, click “Wallet Details”.

Paste your Private Key and click “View Details.”

You will find your Public Key over here. Make sure you copy and paste the compressed, 66 characters [0-9A-F] and NOT the 130 Characters key.

We now have the Deposit Public Key, the Withdraw Public Key, and the Withdraw Address.
Deposit Public Key (Wasabi Wallet – already displayed): 02d5a014ec94974a01b5b81550bbcf6a629715140d38e7da5f1c2c71ccdcd8b61c
Withdraw Public Key (Exodus Wallet – found through bitaddress.org): 038F14B6B61EF0AE7EF8317E757807CA8322257C96D54635979C1FBBB899621AF2
Withdraw Address (Exodus Wallet): bc1qrk768lztvrjduama2ruuut9eweamtz5ru4vmhl

Paste the Public Keys and Withdraw Address and click “Generate.”

Type your account password and click “Unlock.”

Congratulations, you have successfully generated a Bitcoin Sidechain deposit address! That wasn’t so hard, was it?


You can withdraw your BTC whenever you want to as well. Additionally, you can change your withdrawal address and update it to a new one too – all you have to do is paste the new Withdraw Public Key and the Withdraw Address and click on ‘UPDATE’.
IMPORTANT!: Always send your funds to the Deposit Address!
You’ll always be able to withdraw your funds to the Withdraw Address displayed on this page. To withdraw Bitcoin, ensure that you have access to your Bitcoin Withdrawal Address and choose the amount you want to withdraw and click “Withdraw.”
This section helps to withdraw HIVE/HBD to a hive blockchain account.
a. Enter the withdrawn amount of HIVE/HBD
b. Select the currency either HIVE or HBD
c. Enter the blockchain account name where fund is to be transferred.
d. Click WITHDRAW which prompts to enter the password/active key to initiate the transaction.
