TL;DR: This repo provide cross-domain pre-trained Point Transformer V3 for 3D point cloud downstream tasks, modified from Sonata and Concerto.
This repo is the official project repository of the paper Utonia: Toward One Encoder for All Point Clouds and is mainly used for providing pre-trained models, inference code and visualization demo.
[ Pretrain ] [ Utonia ] - [ Homepage ] [ Paper ] [ Weight ] [ Bib ]
- February, 2026 : We provide an easy-to-use inference demo and visualization with our pre-trained model weight in this repo. We highly recommend user begin with is repo for quick start.
This repo provide two ways of installation: standalone mode and package mode.
-
The standalone mode is recommended for users who want to use the code for quick inference and visualization. We provide a most easy way to install the environment by using
condaenvironment file. The whole environment includingcudaandpytorchcan be easily installed by running the following command:# Create and activate conda environment named as 'utonia' # cuda: 12.4, pytorch: 2.5.0 # run `unset CUDA_PATH` if you have installed cuda in your local environment conda env create -f environment.yml --verbose conda activate utonia
Make sure FlashAttention is installed by default.
-
The package mode is recommended for users who want to inject our model into their own codebase. We provide a
setup.pyfile for installation. You can install the package by running the following command:# Ensure Cuda and Pytorch are already installed in your local environment # CUDA_VERSION: cuda version of local environment (e.g., 124), check by running 'nvcc --version' # TORCH_VERSION: torch version of local environment (e.g., 2.5.0), check by running 'python -c "import torch; print(torch.__version__)"' pip install spconv-cu${CUDA_VERSION} pip install torch-scatter -f https://data.pyg.org/whl/torch-{TORCH_VERSION}+cu${CUDA_VERSION}.html pip install git+https://github.com/Dao-AILab/flash-attention.git pip install huggingface_hub timm # (optional, or directly copy the utonia folder to your project) python setup.py install
Additionally, for running our demo code, the following packages are also required:
pip install open3d fast_pytorch_kmeans psutil addict scipy camtools natsort opencv-python trimesh gradio numpy==1.26.4 # currently, open3d does not support numpy 2.x
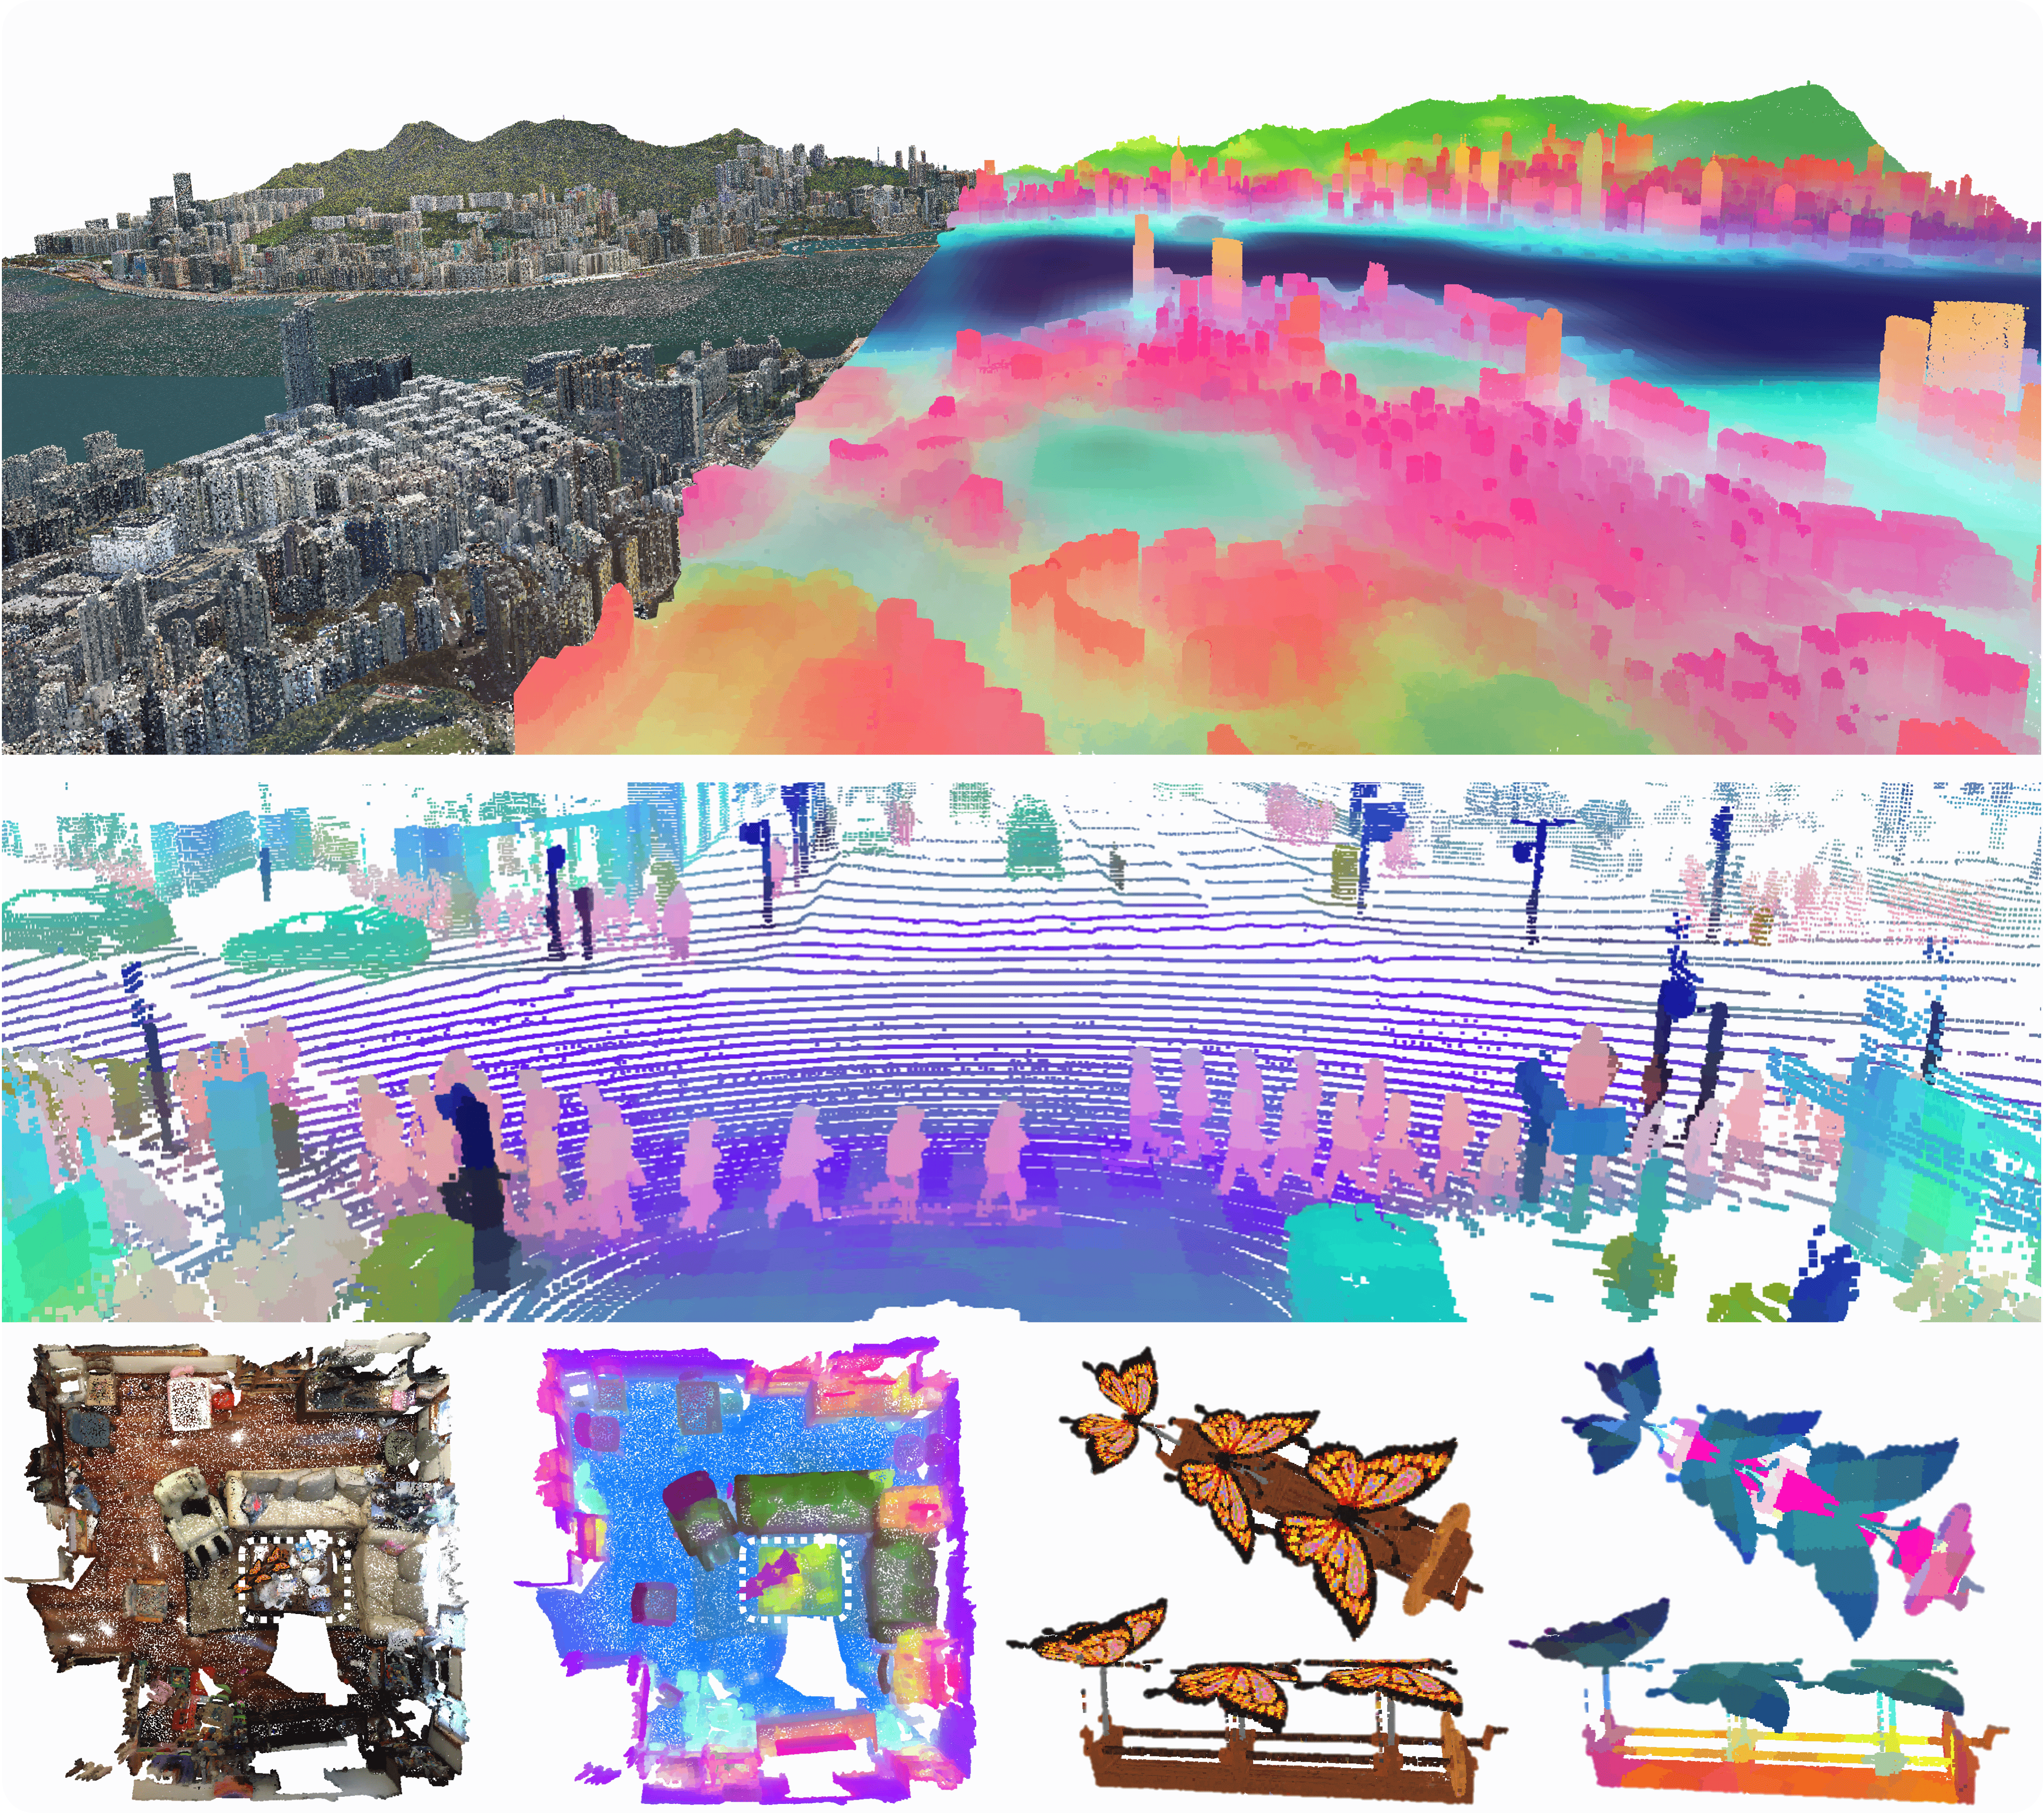
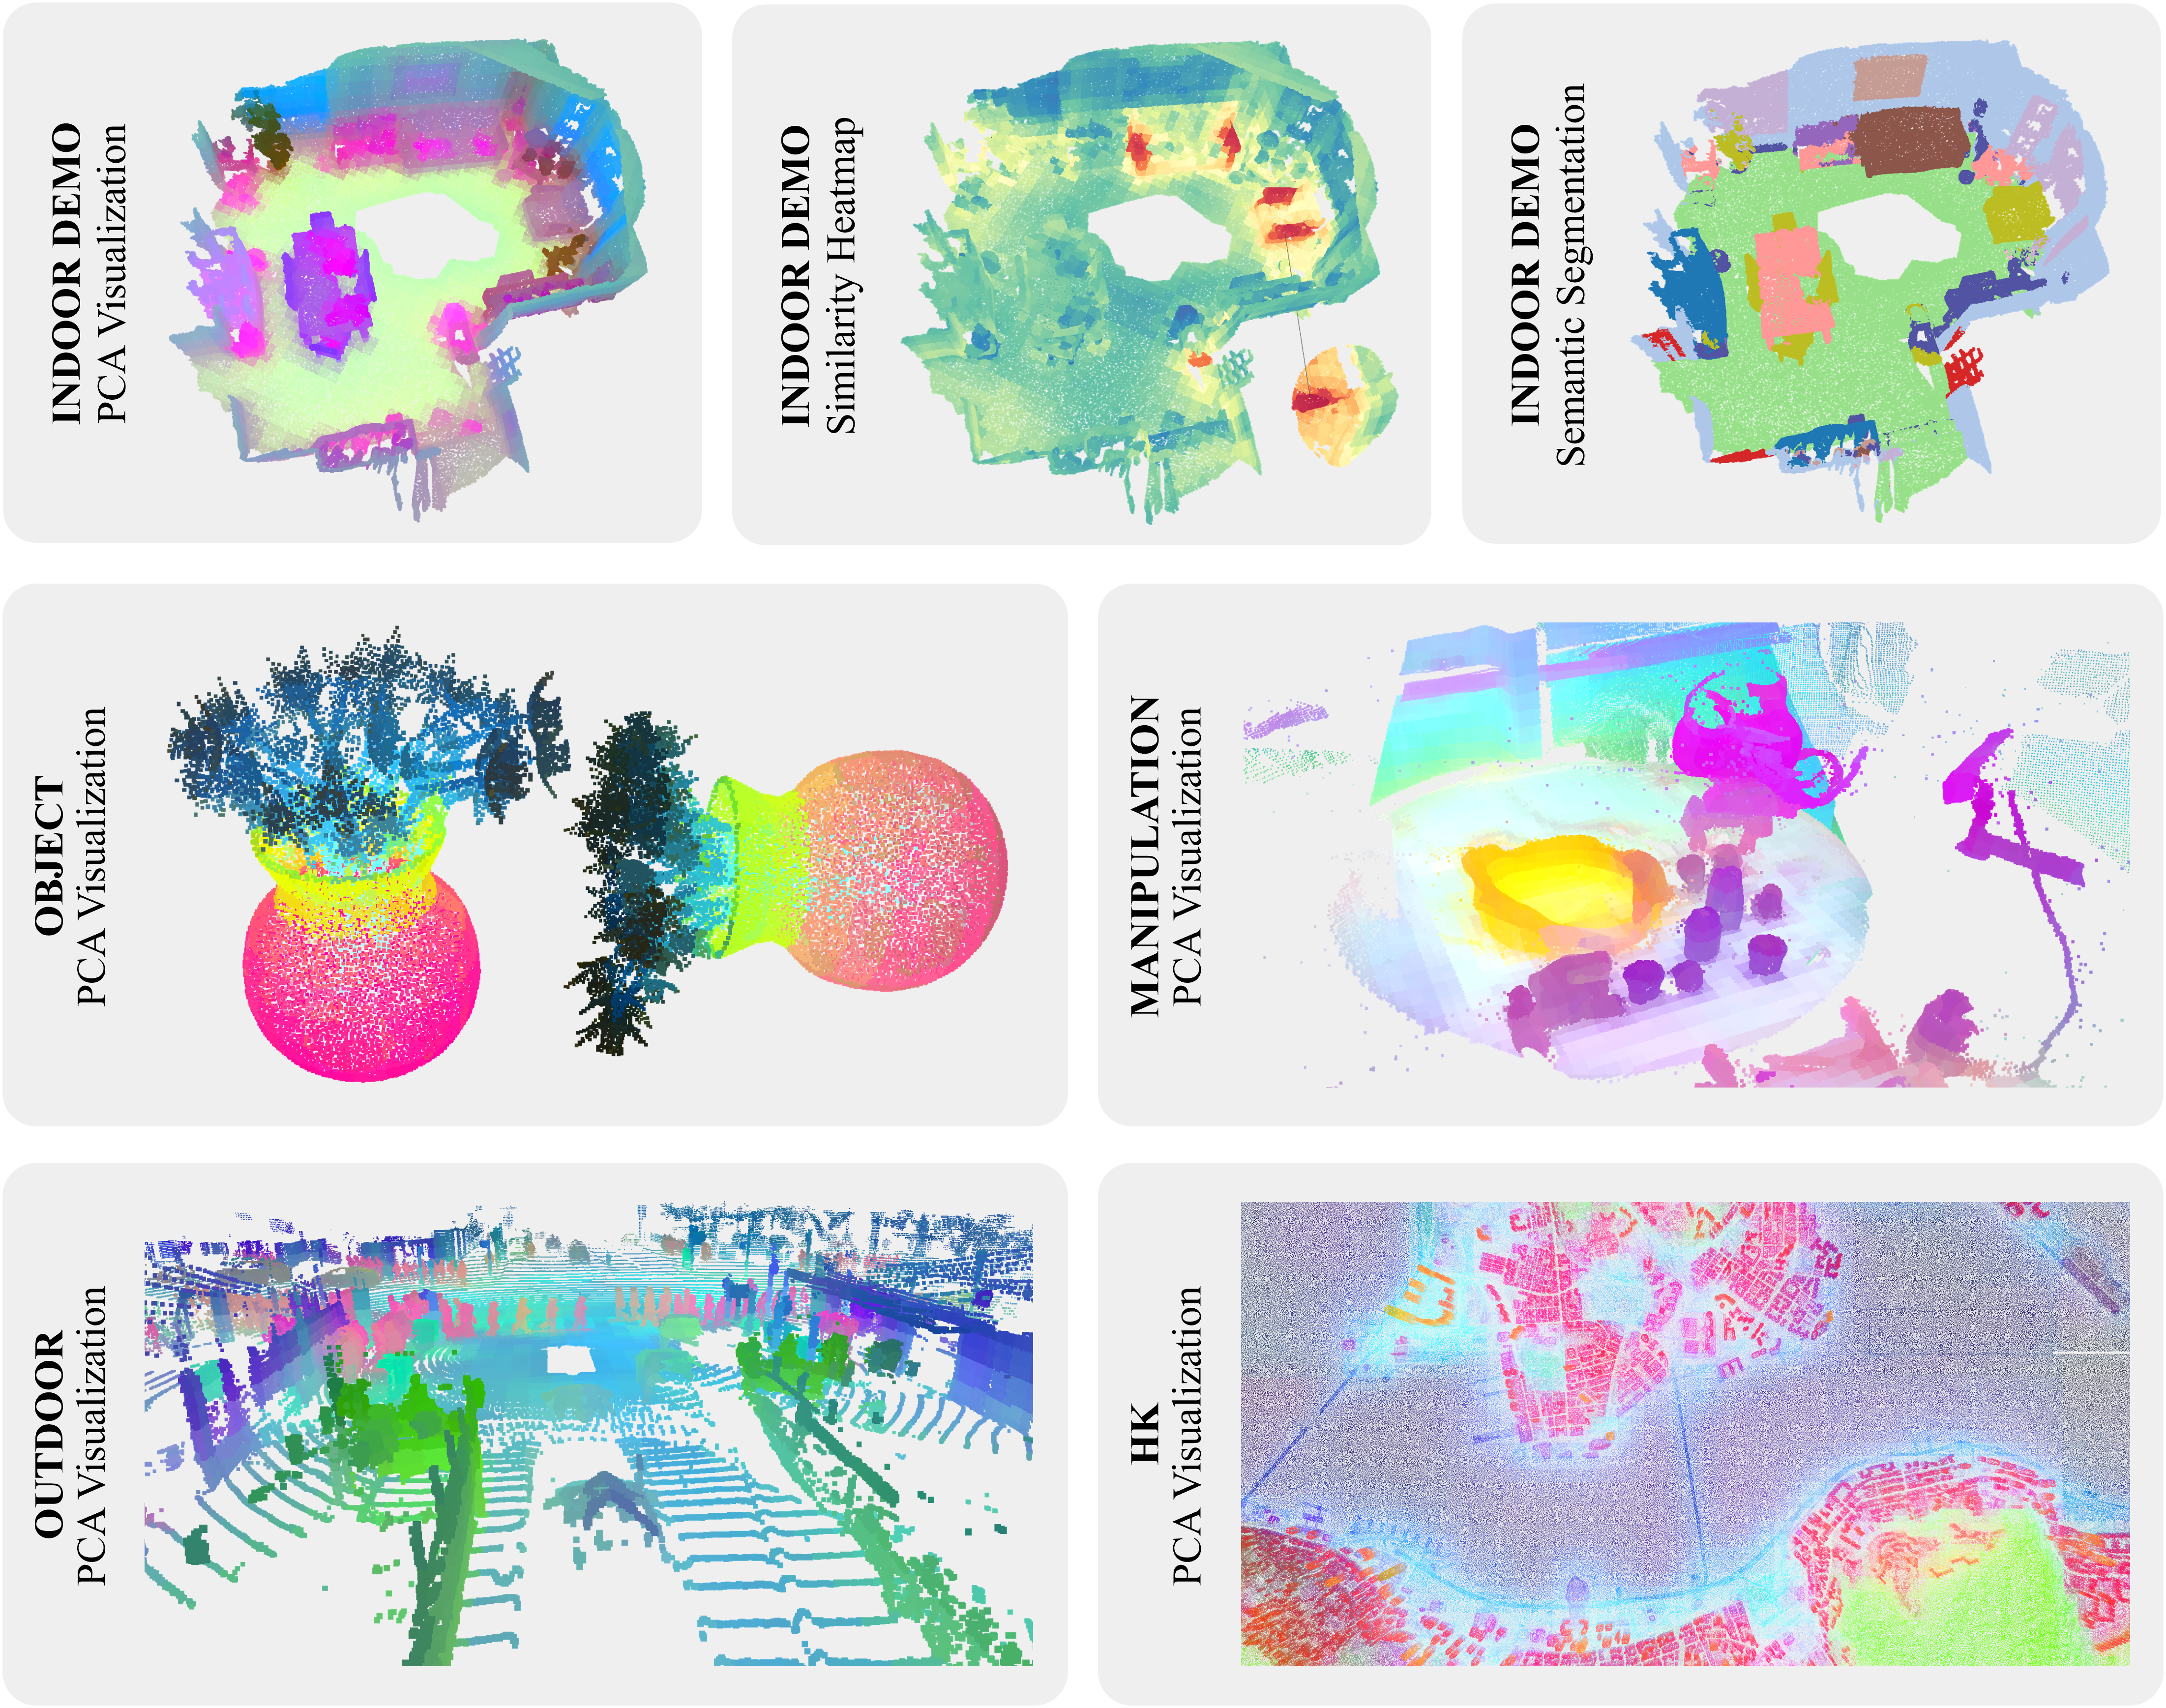
Let's first begin with some simple visualization demo with Utonia, our pre-trained PTv3 model:
-
Visualization. We provide the same visualization demos as Sonata and Concerto: the segmentation result, similarity heatmap, and PCA visualization demo in the
demofolder, including the visualization without color/normal input and the demo for videos lifted by VGGT. You can run the following command to visualize the result ofutonia:# For visualization demo without color and normal, use python demo/xxx.py --wo_color --wo_normal export PYTHONPATH=./ python demo/0_pca_indoor.py python demo/1_similarity.py python demo/2_sem_seg.py # linear probed head on ScanNet python demo/3_batch_forward.py python demo/4_pca_hk.py python demo/5_pca_manipulation.py python demo/6_pca_object.py python demo/7_pca_outdoor.py
For video demo, we need VGGT to lift video to point cloud. The additional installation for VGGT is as below:
git clone https://github.com/facebookresearch/vggt.git
cd vggt
pip install -e .
cd ..
# Or you can copy the vggt folder in the vggt repository to ./demo
# Then you can run the demo
python demo/8_pca_video.py \
--input_video ${YOUR_VIDEO_PATH} \
--conf_thres 0 \
--prediction_mode "Depthmap and Camera Branch" \
--if_TSDF \
--pca_start 1 \
--pca_brightness 1.2 # the usage of these inpputs can be found in 'help'.
Then, here are the instruction to run inference on custom data with our Utonia:
-
Data. Organize your data in a dictionary with the following format:
# single point cloud
point = {
  "coord": numpy.array,  # (N, 3)
  "color": numpy.array,  # (N, 3)
  "normal": numpy.array,  # (N, 3)
  "segment": numpy.array,  # (N,) optional
}

# batched point clouds

# check the data structure of batched point clouds from here:
# https://github.com/Pointcept/Pointcept#offset
point = {
  "coord": numpy.array,  # (N, 3)
  "color": numpy.array,  # (N, 3)
  "normal": numpy.array,  # (N, 3)
  "batch": numpy.array,  # (N,) optional
  "segment": numpy.array,  # (N,) optional
}
One example of the data can be loaded by running the following command:
point = utonia.data.load("sample1")
-
Transform. The data transform pipeline is different from previous Sonata and Concerto. You can use the following code to construct the transform pipeline:
# The choice of scale depends on the desired level of granularity. You may need to fine-tune this parameter to find the optimal value for your specific tasks. Generally, the larger the scale, the more fine-grained the results will be.
config = [
    # dict(type="NormalizeCoord"), # uncomment when applying to objects
    dict(type="RandomScale", scale=[scale, scale]),
    dict(type="CenterShift", apply_z=True), # remove this for outdoor LiDAR and ensure the ego-vehicle is at the origin (0, 0, 0), with the road plane aligned with the xy-plane
    dict(
        type="GridSample",
        grid_size=0.01,
        hash_type="fnv",
        mode="train",
        return_grid_coord=True,
        return_inverse=True,
    ),
    dict(type="NormalizeColor"),
    dict(type="ToTensor"),
    dict(
        type="Collect",
        keys=("coord", "grid_coord", "color", "inverse"),
        feat_keys=("coord", "color", "normal"),
    ),
]
transform = utonia.transform.Compose(config)
The above default inference augmentation pipeline can also be acquired by running the following command:
# apply_z_positive = False when applying to outdoor data to ensure the road is on xy-plane, normalize_coord = True when applying to the single object
transform = utonia.transform.default(scale = scale, apply_z_positive = True, normalize_coord = False)
-
Model. Load the pre-trained model by running the following command:
# Load the pre-trained model from Huggingface
# When color or normal is absent, please apply default zeros to the missing modality
# ckpt is cached in ~/.cache/utonia/ckpt, and the path can be customized by setting 'download_root'
model = utonia.model.load("utonia", repo_id="Pointcept/Utonia").cuda()

# or
from utonia.model import PointTransformerV3
model = PointTransformerV3.from_pretrained("Pointcept/Utonia").cuda()

# Load the pre-trained model from local path
# assume the ckpt file is stored in the 'ckpt' folder
model = utonia.model.load("ckpt/utonia.pth").cuda()

# the ckpt file store the config and state_dict of pretrained model
-
Inference. Run the inference by running the following command:
point = transform(point)
for key in point.keys():
    if isinstance(point[key], torch.Tensor):
        point[key] = point[key].cuda(non_blocking=True)
point = model(point)
As Utonia is a pre-trained encoder-only PTv3, the default output of the model is point cloud after hierarchical encoding. The encoded point feature can be mapping back to original scale with the following code:
# use range(4) to concatenate the features from all the upcast layers, here we use range 2 for visualization
for _ in range(2):
    assert "pooling_parent" in point.keys()
    assert "pooling_inverse" in point.keys()
    parent = point.pop("pooling_parent")
    inverse = point.pop("pooling_inverse")
    parent.feat = torch.cat([parent.feat, point.feat[inverse]], dim=-1)
    point = parent
while "pooling_parent" in point.keys():
    assert "pooling_inverse" in point.keys()
    parent = point.pop("pooling_parent")
    inverse = point.pop("pooling_inverse")
    parent.feat = point.feat[inverse]
    point = parent
Yet during data transformation, we operate
GridSamplingwhich makes the number of points feed into the network mismatch with the original point cloud. Using the following code to further map the feature back to the original point cloud:feat = point.feat[point.inverse]
If you find Utonia useful to your research, please consider citing our works as an acknowledgment. (੭ˊ꒳ˋ)੭✧
@inproceedings{zhang2025concerto,
  title={Concerto: Joint 2D-3D Self-Supervised Learning Emerges Spatial Representations},
  author={Zhang, Yujia and Wu, Xiaoyang and Lao, Yixing and Wang, Chengyao and Tian, Zhuotao and Wang, Naiyan and Zhao, Hengshuang},
  booktitle={NeurIPS},
  year={2025}
}@inproceedings{wu2025sonata,
title={Sonata: Self-Supervised Learning of Reliable Point Representations},
author={Wu, Xiaoyang and DeTone, Daniel and Frost, Duncan and Shen, Tianwei and Xie, Chris and Yang, Nan and Engel, Jakob and Newcombe, Richard and Zhao, Hengshuang and Straub, Julian},
booktitle={CVPR},
year={2025}
}@inproceedings{wu2024ptv3,
title={Point Transformer V3: Simpler, Faster, Stronger},
author={Wu, Xiaoyang and Jiang, Li and Wang, Peng-Shuai and Liu, Zhijian and Liu, Xihui and Qiao, Yu and Ouyang, Wanli and He, Tong and Zhao, Hengshuang},
booktitle={CVPR},
year={2024}
}@inproceedings{wu2024ppt,
title={Towards Large-scale 3D Representation Learning with Multi-dataset Point Prompt Training},
author={Wu, Xiaoyang and Tian, Zhuotao and Wen, Xin and Peng, Bohao and Liu, Xihui and Yu, Kaicheng and Zhao, Hengshuang},
booktitle={CVPR},
year={2024}
}@inproceedings{wu2023masked,
title={Masked Scene Contrast: A Scalable Framework for Unsupervised 3D Representation Learning},
author={Wu, Xiaoyang and Wen, Xin and Liu, Xihui and Zhao, Hengshuang},
journal={CVPR},
year={2023}
}@inproceedings{wu2022ptv2,
title={Point transformer V2: Grouped Vector Attention and Partition-based Pooling},
author={Wu, Xiaoyang and Lao, Yixing and Jiang, Li and Liu, Xihui and Zhao, Hengshuang},
booktitle={NeurIPS},
year={2022}
}@misc{pointcept2023,
title={Pointcept: A Codebase for Point Cloud Perception Research},
author={Pointcept Contributors},
howpublished={\url{https://github.com/Pointcept/Pointcept}},
year={2023}
}- Utonia code is based on Sonata code, which is released by Meta under the Apache 2.0 license;
- Utonia weight is released under the CC-BY-NC 4.0 license (restricted by NC of datasets like HM3D, ArkitScenes).