A powerful UART terminal application for debugging and communicating with microcontrollers, with built-in binary flashing capabilities.
DiagTerm is a cross-platform terminal application designed for working with serial devices. Whether you're debugging an ESP32, flashing an Arduino, or just monitoring serial communication, DiagTerm provides a clean interface with powerful features.
The app runs on Windows, Linux, and macOS, and handles everything from basic serial communication to complex multi-device flashing operations.
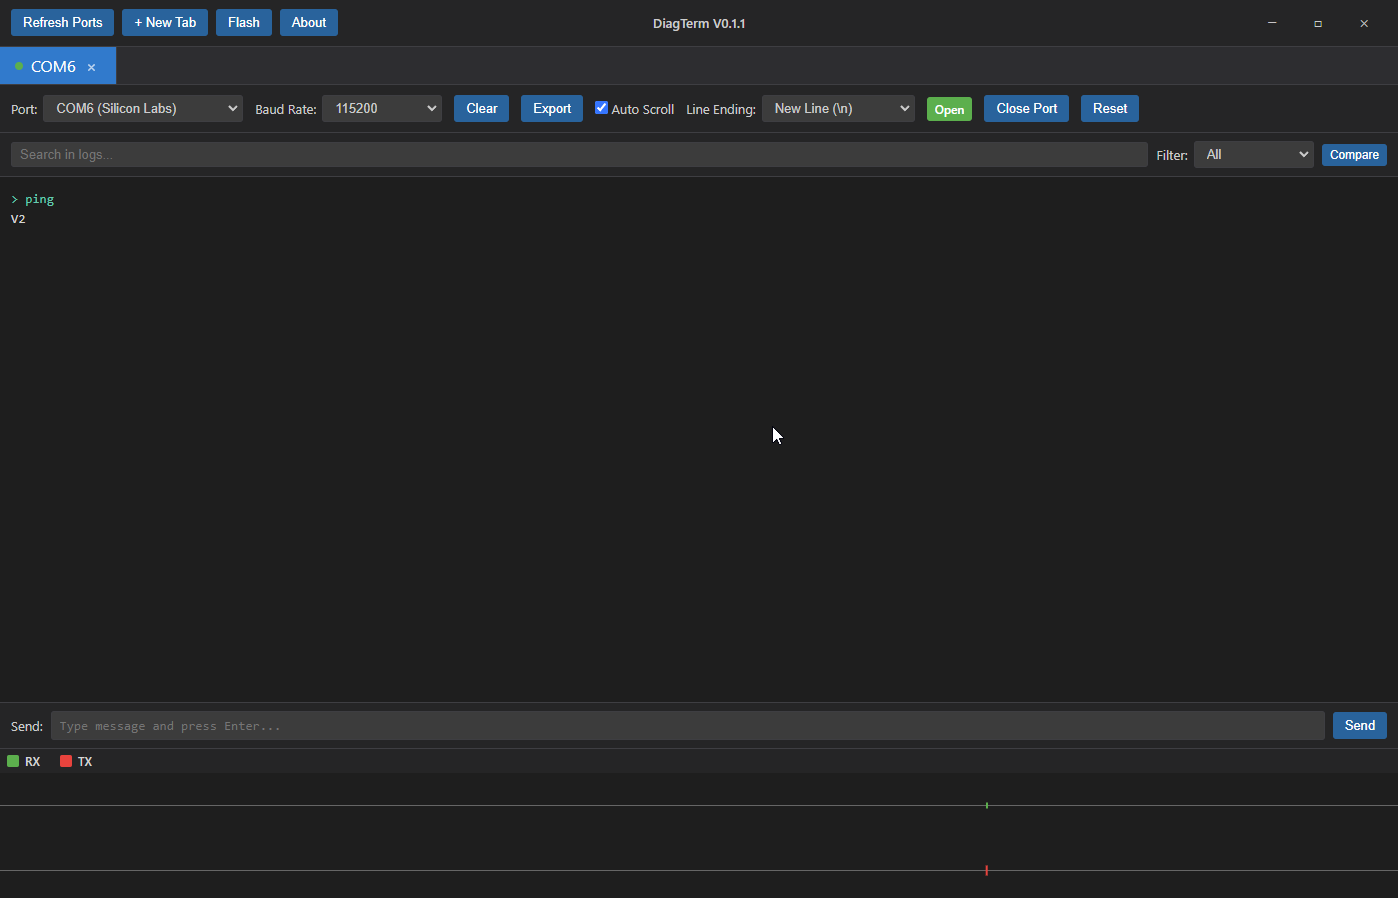
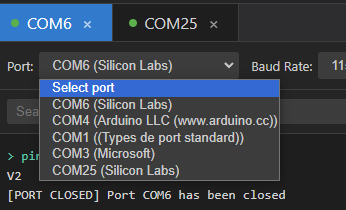
Work with multiple serial ports simultaneously. Each tab is independent, so you can monitor different devices at the same time. The interface shows a clear status indicator (green dot when connected) and gives you full control over baud rates, port opening/closing, and data transmission.
The timeline at the bottom of each tab provides a real-time graphical representation of bidirectional communication. It displays:
- RX signals (received data) in one color
- TX signals (transmitted data) in another color
- Temporal visualization showing when data flows in each direction
- Always visible axes even when no data has been transmitted yet
This visual feedback helps you understand the communication pattern at a glance. You can see if your device is responding, how frequently data is exchanged, and identify communication issues like timeouts or unexpected delays. The timeline updates in real-time as data flows, making it easy to debug protocol implementations or verify that your commands are being processed correctly.
Flash firmware to your devices directly from the application. Supports ESP32, ESP8266, and Arduino boards with automatic bootloader mode entry.
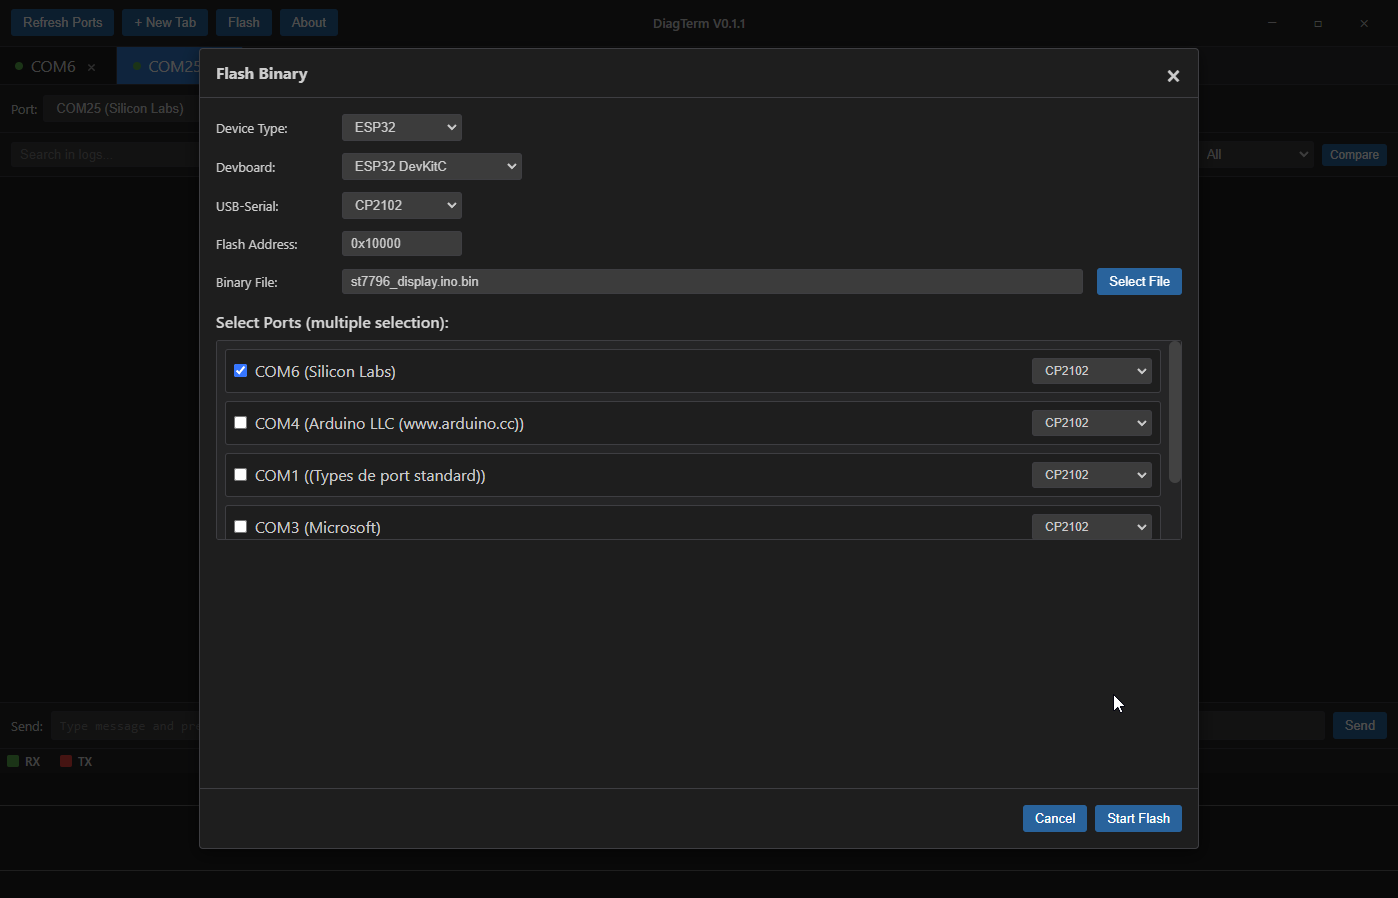
The multi-flash feature lets you flash multiple devices at once. Each port can have its own USB-Serial converter selection, which is useful when working with different board generations.
Right-click on any message in the terminal to get a detailed analysis:
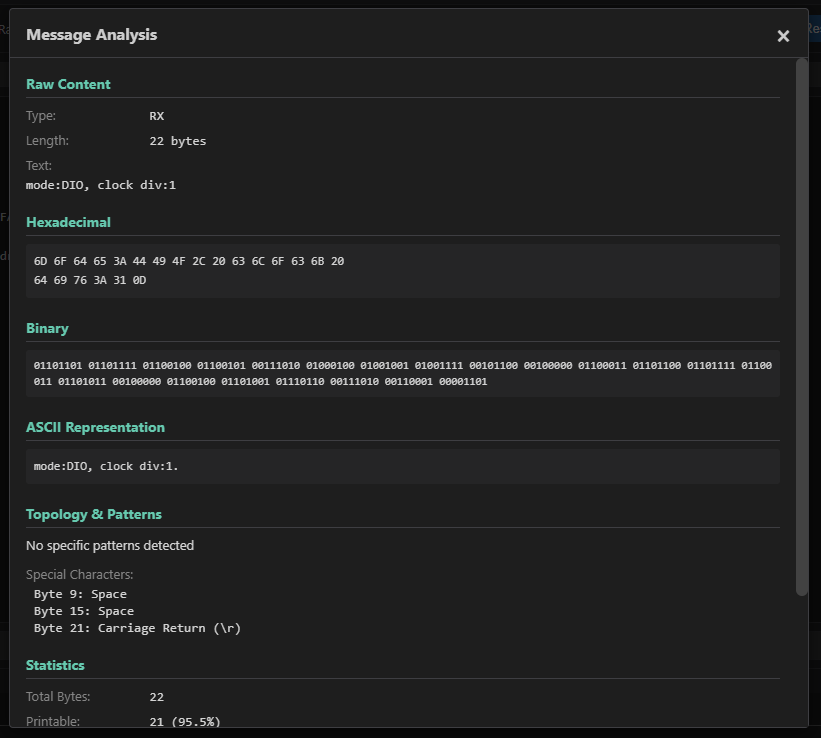
The analysis shows:
- Raw content (exact bytes received)
- Hexadecimal representation
- Binary breakdown
- ASCII interpretation
- Statistics (length, character distribution)
- Pattern detection
- Protocol decoding (Modbus RTU, NMEA, etc.)
Compare two log files side by side to spot differences:
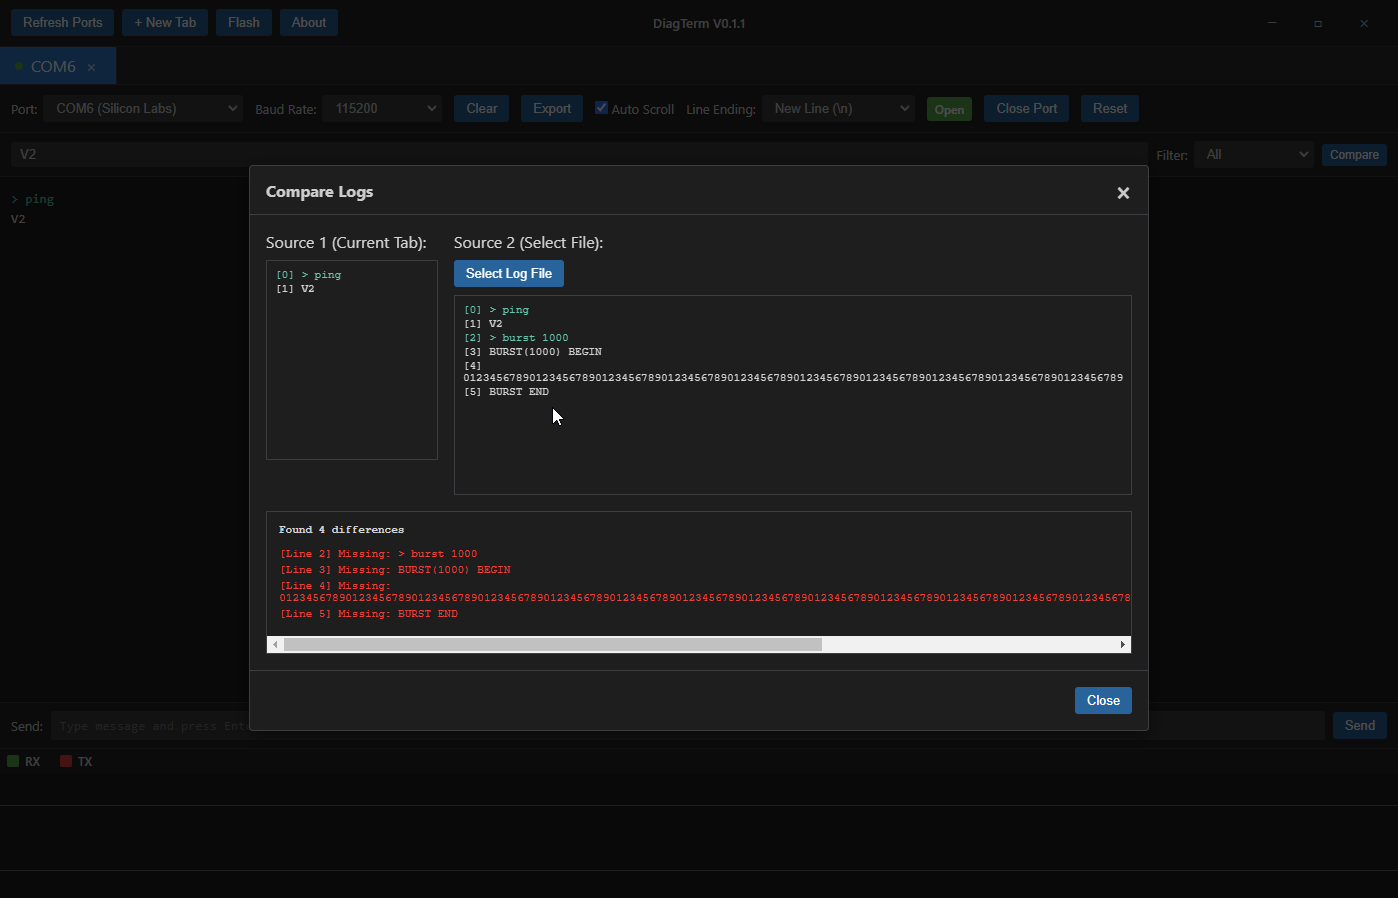
Useful for debugging communication issues or verifying firmware behavior across different versions.
Export your terminal data in multiple formats:
- CSV - For spreadsheet analysis
- TXT - Plain text backup
- HTML - Formatted web view
- XML - Structured data
- JSON - For programmatic processing
- Markdown - Documentation-friendly
- LaTeX - Academic papers
- Search and Filter: Find specific messages quickly
- Message Templates: Save and reuse common commands
- Communication Statistics: Track data rates, message counts, and more
- Pattern-Based Alerts: Get notified when specific patterns appear
- Keyboard Shortcuts: Work faster with hotkeys
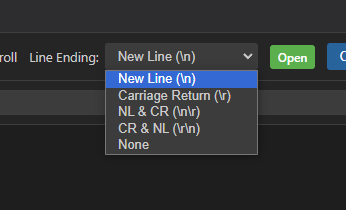
- Line Ending Options: Choose between None, LF, CR, or CRLF
- ESP32 DevKitC
- ESP32 DevKit V1
- ESP32-WROOM DevKit
- ESP32-WROVER Kit
- ESP32-S2 DevKitM
- ESP32-S2 Saola
- ESP32-S3 DevKitC
- ESP32-S3 DevKitM
- ESP32-C3 DevKitM
- ESP32-C3 DevKitC
- ESP32-C6 DevKitC
- ESP32-PICO Kit
- Generic ESP32
- NodeMCU
- ESP8266 DevKit
- Generic ESP8266
- Arduino Uno
- Arduino Nano / Nano v3
- Arduino Mega 2560
- Arduino Leonardo
- Arduino Micro
- Arduino Pro Mini
- Arduino ESP32
- Generic Arduino
The application supports various USB-Serial converters with automatic detection:
- CP2102 / CP2104
- FT232 / FT2232
- CH340 / CH341
- ATmega16U2 / ATmega32U4
- Generic converters
Download the latest version from the releases page or check for updates directly in the application.
git clone https://github.com/Pupariaa/DiagTerm.git
cd DiagTerm
npm install
npm run rebuild
npm start- Click "New Tab" to create a new terminal tab
- Select a port from the dropdown
- Choose your baud rate (common values: 9600, 115200, etc.)
- Click "Open Port"
- Start sending and receiving data
Type your message in the "Send" input field and press Enter. You can also use the up arrow key to recall previous messages. Choose your line ending mode (None, LF, CR, or CRLF) depending on what your device expects.
- Click the "Flash" button in the top menu
- Select your device type (ESP32, ESP8266, or Arduino)
- Choose the specific devboard model
- Select the USB-Serial converter (or leave as "Default")
- Browse for your binary file
- Optionally set a flash address (default: 0x10000 for ESP32)
- Click "Start Flash"
For multi-flashing:
- Open the Flash dialog
- Select multiple ports from the list
- Each port can have its own USB-Serial converter selection
- Start the flash operation
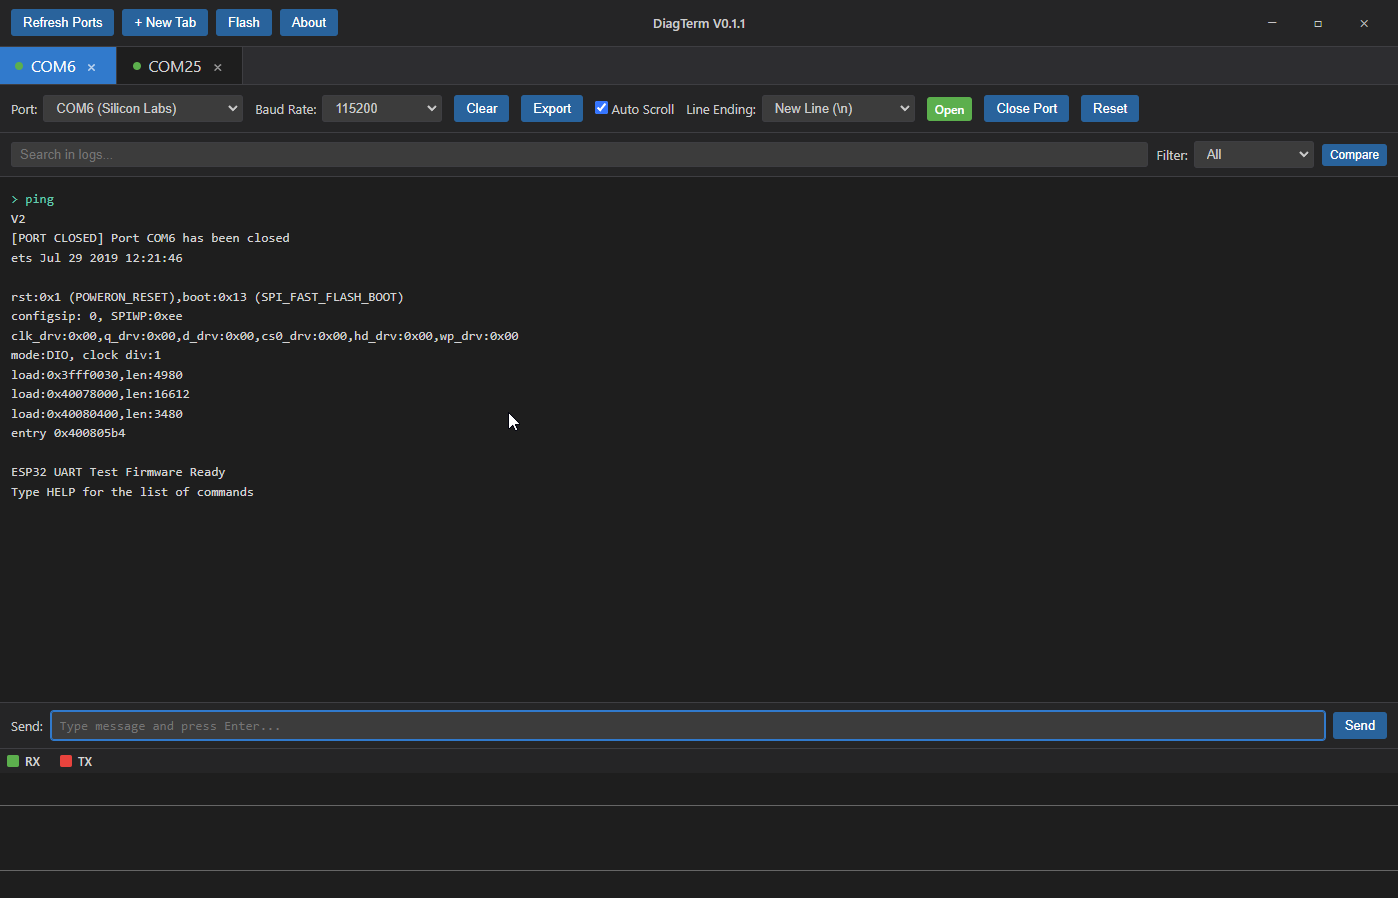
The application will automatically:
- Enter bootloader mode using DTR/RTS signals
- Flash the binary using esptool (ESP32/ESP8266) or avrdude (Arduino)
- Reopen the port after flashing
- Send a reset signal to boot the new firmware
Right-click on any message in the terminal to open the analysis dialog. This gives you detailed information about the message content, including hex, binary, ASCII, and protocol-specific decoding.
- Use the export button or press
Ctrl+E(Windows/Linux) orCmd+E(macOS) - Choose your export format
- Select a save location
- Optionally filter messages before exporting
DiagTerm supports keyboard shortcuts to speed up your workflow. Use Ctrl on Windows/Linux or Cmd on macOS:
Ctrl+F/Cmd+F: Focus the search bar to filter terminal contentCtrl+N/Cmd+N: Create a new terminal tabCtrl+W/Cmd+W: Close the currently active tabCtrl+E/Cmd+E: Open the export dialogCtrl+K/Cmd+K: Clear the terminal content in the active tabEscape: Close any open modal dialog
When typing in the "Send" input field:
Enter: Send the message↑(Up Arrow): Recall the previous message from history↓(Down Arrow): Navigate forward through message history
These shortcuts work contextually - for example, Ctrl+K only clears the terminal of the tab you're currently viewing, and the arrow keys for message history only work when the send input field is focused.
- Windows: Windows 10 or later
- Linux: Most modern distributions
- macOS: macOS 10.13 or later
- Python 3.x: Required for ESP32/ESP8266 flashing (auto-installed if missing)
- esptool: Automatically installed if not present
The application uses a self-signed certificate for code signing. This means:
- Windows will show a security warning during installation
- Users need to click "More info" then "Run anyway" to install
- Auto-updates require manual approval due to signature verification
For production use, consider purchasing a code signing certificate from a trusted Certificate Authority.
- ESP32/ESP8266: Requires Python and esptool (automatically installed)
- Arduino: Requires avrdude (usually comes with Arduino IDE)
- Some USB-Serial converters may need specific drivers installed
- Ports are detected automatically when the application starts
- Use the refresh button to rescan for new devices
- Disconnected ports are automatically detected and marked
- Make sure the device is connected and powered
- Check if drivers are installed for your USB-Serial converter
- Try clicking the refresh button
- On Linux, you may need to add your user to the
dialoutgroup
- Verify the binary file is correct for your device
- Check that the port is not open in another application
- Ensure the correct USB-Serial converter is selected
- Try a different baud rate (lower rates are more reliable)
- Some devices require holding a button during bootloader entry
- The application checks for updates on startup
- If updates are blocked by Windows security, use the manual download option
- Updates are signed with a self-signed certificate, so manual approval is required
npm run build:bugfix    # Increment bugfix version and build
npm run build:release  # Increment release version and build
npm run build:win      # Build for Windows only
npm run build:linux    # Build for Linux only
npm run build:mac # Build for macOS onlynpm run generate-certThis creates a self-signed certificate in certificates/diagterm-cert.pfx. For production, use a certificate from a trusted CA.
npm run deploy:win     # Build and upload to FTP server
npm run deploy:all # Build for all platforms and uploadMIT License - see LICENSE file for details
Developed by Techalchemy
Note: This application is designed for development and debugging purposes. Always verify firmware before flashing to production devices.