Installation of Docker, VSCode and its extensions
-
Install Docker
- To know more about Docker - 12 mins video to understand Docker:YouTube Bilibili
- If you have installation problems on Windows. Please refer to windows-docker-problem-solutions
-
Install VSCode
- For further using and learning VSCode - Learn to code with VSCode
- If you are using M1-chip machine and need debug/step-in your machine, please refer to GCP and M1-build then follow this wiki later.
*To install the extension, open the Extensions view (MAC: ⇧⌘X, Windows: Ctrl+Shift+X, Linux: Ctrl+Shift+X)
- Extension(1): Docker extension
- Search for
dockerto filter results and select Docker extension authored by Microsoft.
- Search for

- Extension(2): Dev Containers extension
- Search for
dev containersto filter results and select extension authored by Microsoft.
- Search for

Please check your machine's architecture and run one of the following commands to pull the image from Docker Hub:
-
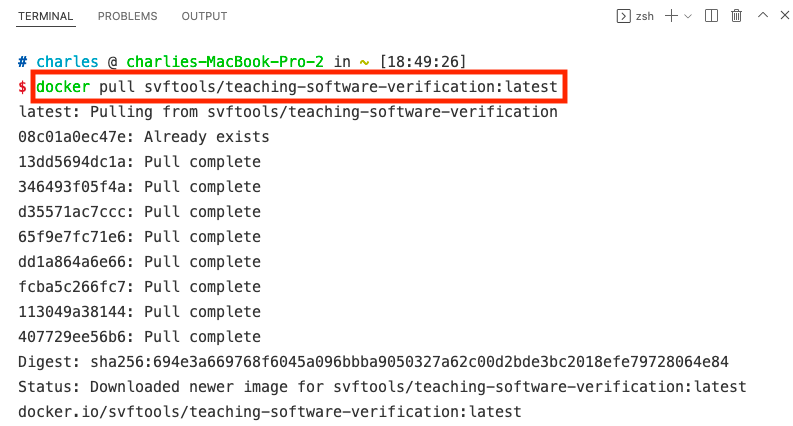
for x86_64: (x86 Windows Docker, Mac Intel, Linux x86_64)
docker pull svftools/teaching-software-verification:latest -
for arm64: (Mac M1, Linux arm64)
docker pull svftools/teaching-software-verification:latest-arm64
According to your machine's architecture, run one of the following commands to create and run a container of the image:
-
x86_64:
docker run -itd svftools/teaching-software-verification:latest /bin/bash -
Arm64:
docker run -itd svftools/teaching-software-verification:latest-arm64 /bin/bash

For further reading and using Docker: Build docker image of the Teaching-Software-Verification project using Dockerfile
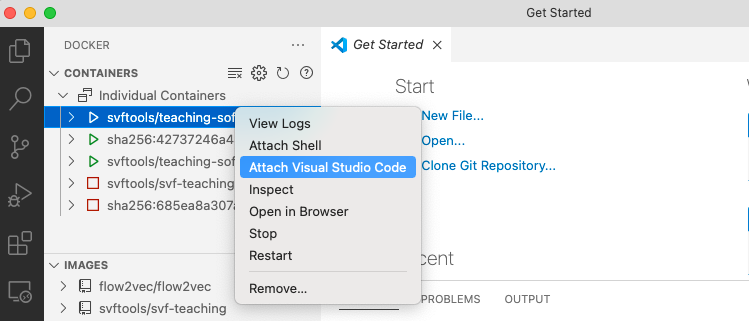
Right click the container item and select 'Attach to Visual Studio Code'
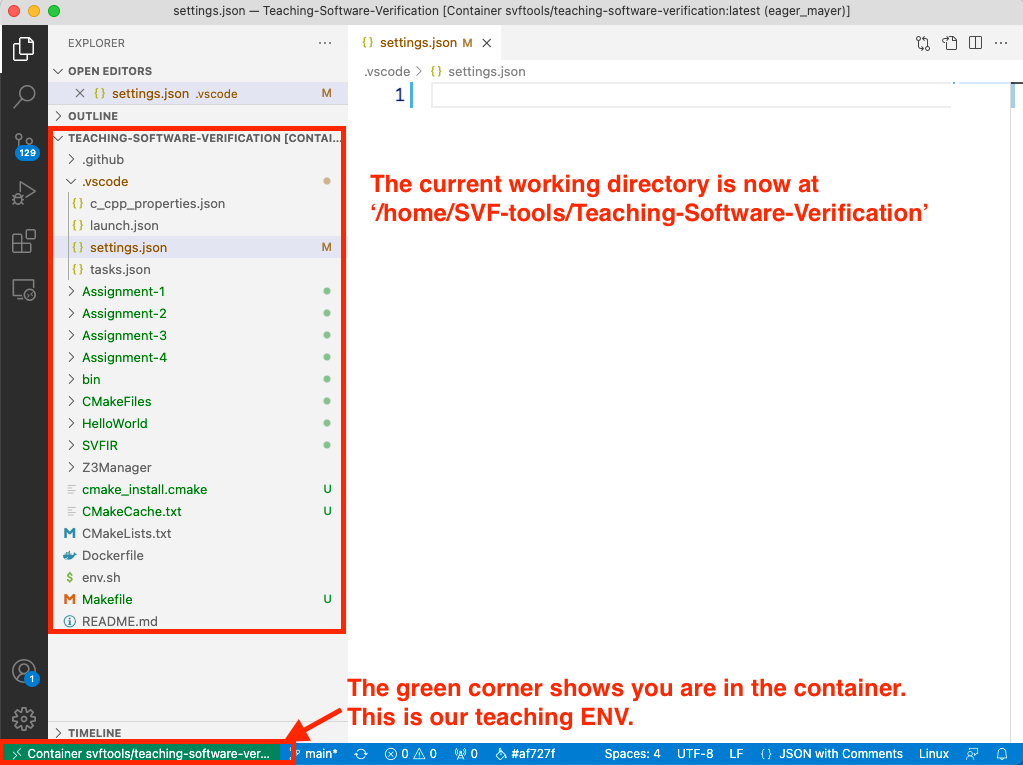
If you can't see the working directory, please select file -> open (folder)... then enter the /home/SVF-tools/Teaching-Software-Verification
- To install the extension, open the Extensions view (MAC: ⇧⌘X, Windows: Ctrl+Shift+X, Linux: Ctrl+Shift+X)

- To install the extension, open the Extensions view (MAC: ⇧⌘X, Windows: Ctrl+Shift+X, Linux: Ctrl+Shift+X)

- VSCode's built-in debugger helps your editing, compilation and debugging.
- SVF-Teaching has prepared configurations in
launch.jsonto debug hello.cpp - Select
(gdb) Launch C++ - Take a look at this page which contains several troubleshooting when configuring VSCode debugging environment.
- More information VSCode-debugging


When working on different assignments, change the "program" field in launch.json (line 8). Values can be assign-1 for Assignment 1, assign-2 for Assignment 2, assign-3 for Assignment 3, assign-4 for Assignment 4, hello for the hello world program, and codegraph for the code graph project.
- Select
Launch Python Script - Check the
launch.jsonfile in the.vscodefolder to see the configurations.
        {
            "name": "Launch Python Script",
            "type": "python",
            "request": "launch",
            "program": "${workspaceFolder}/python/Assignment-1/Assignment-1.py",  # Script Path
            "console": "integratedTerminal",
            "cwd": "${workspaceFolder}", # working directory
            "args": [] # arguments
        }

When working on different assignments, change the "program" field in launch.json and check the python folder to
see the script. Values can be ${workspaceFolder}/python/Assignment-1/Assignment-1.py for Assignment 1, or other scripts in the python folder.