Home
Welcome! Here you will find guides and documentation to get started with the iGotify Notification Assistent.
iGotify is a small notification assistant that encrypts messages and triggers push notifications to iOS devices via Apple's APNs using the SecNtfy service.
It bridges Gotify - a self-hosted push notification server - with iOS devices, allowing you to receive real-time notifications securely on your iPhone or iPad.
- End-to-end encrypted push notifications
- Seamless integration with Gotify
- Native iOS app with FaceID support
- Custom notification settings
- App and contact images for notifications (see note below)
Note
App and contact images only work when not using a local instance, as the app cannot access internal Gotify URLs to fetch icons.
or
flowchart LR
    A[Gotify Server] -->|WebSocket| B[iGotify Assistant]
    B -->|HTTPS| C[SecNtfy Service]
    C -->|APNs| D[iOS Device]
- Gotify receives a notification (e.g., from your server, automation, or app)
- iGotify Assistant connects to Gotify via WebSocket and listens for new messages
- When a message arrives, it encrypts and forwards it to SecNtfy
- SecNtfy sends a push notification through Apple's APNs to your iOS device
- The iGotify app receives and displays the notification
Note
Privacy at SecNtfy: SecNtfy only stores anonymized data (such as device tokens). The payload (your actual notification content) is never stored - it is forwarded 1:1 to Apple's APNs and immediately discarded.
iGotify uses multiple tokens to identify devices and connections:
| Token | Purpose |
|---|---|
| NTFY-Device Token | Unique identifier for your physical device (iPhone/iPad). Generated when you first register a device. |
| Client Token | Gotify client token. Generated for each Gotify instance you connect to. |
These tokens are stored in the iGotify Assistant database along with the Gotify URL for the WebSocket connection.
Adding a second Gotify account on the same device:
- You receive a new Client Token from Gotify
- Your NTFY-Device Token stays the same (same physical device)
- In the database, your NTFY-Device Token appears twice - once for each Gotify client
- You'll receive notifications from both Gotify instances on the same device
Multiple users (different devices):
- Each device gets its own unique NTFY-Device Token
- Each user has their own Client Token(s) for their Gotify connection(s)
- Notifications are routed to the correct device based on the NTFY-Device Token
You can run iGotify in two modes:
| Mode | Description | Gotify URL | iGotify URL | Environment Variables | Pros | Cons |
|---|---|---|---|---|---|---|
| External Instance | The iOS app communicates through the iGotify Assistant, automatic registration | Public | Public | Not required | App/contact images work, automatic registration | Requires exposing port 8681 |
| Local Instance | The iOS app communicates directly with Gotify, manual registration via environment variables | Public | Not required | Required (see table down below) | No need to expose iGotify port (8681) externally | App/contact images don't work, manual setup required |
Important
Gotify must always be accessible via a public URL, regardless of which setup you choose.
Tip
Use local instance if you primarily use iGotify within your home network and don't need app icons in notifications. Use external instance if you want full functionality including images, or need access from outside your network.
- Docker and Docker Compose (latest version recommended)
- A
docker-compose.yamlfile
| Variable | Description | External Instance | Local Instance | Default |
|---|---|---|---|---|
GOTIFY_DEFAULTUSER_PASS |
Password for the default user | Required | Required | - |
GOTIFY_URLS |
Gotify server URLs (e.g., http://gotify or https://mygotify.domain.tld) |
- | Required | - |
GOTIFY_CLIENT_TOKENS |
Client tokens from Gotify (e.g., cXXXXXXXX) |
- | Required | - |
SECNTFY_TOKENS |
SecNtfy tokens from the app (e.g., NTFY-DEVICE-XXXXXX) |
- | Required | - |
ENABLE_CONSOLE_LOG |
Enable/disable console logging | Optional | Optional | true |
ENABLE_SCALAR_UI |
Enable/disable the API endpoint page | Optional | Optional | true |
Note
GOTIFY_URLS, GOTIFY_CLIENT_TOKENS, and SECNTFY_TOKENS are only required when using a local instance in the iOS app. If you use an external instance (both Gotify and iGotify accessible via public URLs), these can be left empty.
Important: Gotify must always be accessible via a public URL, regardless of which setup you choose.
Warning
If you set any of the three variables (GOTIFY_URLS, GOTIFY_CLIENT_TOKENS, SECNTFY_TOKENS), you must set all three. If any value is missing, the connection will fail.
You can configure multiple Gotify instances by separating values with a semicolon ;:
GOTIFY_URLS='http://gotify;http://gotify2;http://gotify3'
GOTIFY_CLIENT_TOKENS='cXXXXXXXX1;cXXXXXXXX2;cXXXXXXXX3'
SECNTFY_TOKENS='NTFY-DEVICE-XXXXXX1;NTFY-DEVICE-XXXXXX2;NTFY-DEVICE-XXXXXX3'
Tip
All configuration values are displayed in the iOS app after setup.
Create a .env file in the same directory as your docker-compose.yaml:
# .env

# Required
GOTIFY_DEFAULTUSER_PASS=my-very-strong-password

# Connection settings (only required if NOT using a public domain)
# Examples for GOTIFY_URLS:
#   Internal: http://gotify (container name / local DNS)
#   External: https://mygotify.domain.tld
# For multiple instances, separate with semicolons
GOTIFY_URLS=
GOTIFY_CLIENT_TOKENS=
SECNTFY_TOKENS=

# Optional (write boolean values in single quotes)
ENABLE_CONSOLE_LOG='true'
ENABLE_SCALAR_UI='true'
Important
- Change the password to a secure one before starting the stack!
- Make sure to set proper permissions:
chmod 600 .env
Note
The iGotify port (8681) only needs to be exposed if you are not using a local instance in the iOS app setup. When using a local instance, the app communicates directly with Gotify and does not need external access to iGotify.
Standard
services:
  gotify:
    container_name: gotify
    hostname: gotify
    image: gotify/server          # Uncomment correct server image
    # image: gotify/server-arm7
    # image: gotify/server-arm64
    restart: unless-stopped
    security_opt:
      - no-new-privileges:true
    networks:
      - net
    ports:
      - "8680:80"
    volumes:
      - data:/app/data
    environment:
      GOTIFY_DEFAULTUSER_PASS: ${GOTIFY_DEFAULTUSER_PASS}
    healthcheck:
      test: ["CMD", "curl", "-f", "http://localhost:80/health"]
      interval: 5s
      timeout: 3s
      retries: 5
      start_period: 10s

  igotify:
    container_name: igotify
    hostname: igotify
    image: ghcr.io/androidseb25/igotify-notification-assist
    restart: unless-stopped
    security_opt:
      - no-new-privileges:true
    depends_on:
      gotify:
        condition: service_healthy
    networks:
      - net
    ports:
      - "8681:8080"
    volumes:
      - api-data:/app/data
    environment:
      GOTIFY_URLS: ${GOTIFY_URLS}
      GOTIFY_CLIENT_TOKENS: ${GOTIFY_CLIENT_TOKENS}
      SECNTFY_TOKENS: ${SECNTFY_TOKENS}
      ENABLE_CONSOLE_LOG: ${ENABLE_CONSOLE_LOG}
      ENABLE_SCALAR_UI: ${ENABLE_SCALAR_UI}
    healthcheck:
      test: ["CMD", "curl", "-f", "http://localhost:8080/Version"]
      interval: 5s
      timeout: 3s
      retries: 5
      start_period: 10s

networks:
  net:

volumes:
  data:
  api-data:
Thanks to The_Think3r and @herrpandora
With Traefik
services:
  gotify:
    container_name: gotify
    hostname: gotify
    image: gotify/server
    restart: unless-stopped
    security_opt:
      - no-new-privileges:true
    networks:
      - net
      - proxy
    ports:
      - "8680:80"
    volumes:
      - data:/app/data
    environment:
      GOTIFY_DEFAULTUSER_PASS: ${GOTIFY_DEFAULTUSER_PASS}
      GOTIFY_REGISTRATION: 'false'
    healthcheck:
      test: ["CMD", "curl", "-f", "http://localhost:80/health"]
      interval: 5s
      timeout: 3s
      retries: 5
      start_period: 10s
    labels:
      traefik.docker.network: proxy
      traefik.enable: "true"
      traefik.http.routers.gotify-secure.entrypoints: websecure
      traefik.http.routers.gotify-secure.middlewares: default@file
      traefik.http.routers.gotify-secure.rule: Host(`gotify.domain-name.de`)
      traefik.http.routers.gotify-secure.service: gotify
      traefik.http.routers.gotify-secure.tls: "true"
      traefik.http.routers.gotify-secure.tls.certresolver: http_resolver
      traefik.http.routers.gotify.entrypoints: web
      traefik.http.routers.gotify.rule: Host(`gotify.domain-name.de`)
      traefik.http.services.gotify.loadbalancer.server.port: "80"

  igotify:
    container_name: igotify
    hostname: igotify
    image: ghcr.io/androidseb25/igotify-notification-assist
    restart: unless-stopped
    security_opt:
      - no-new-privileges:true
    depends_on:
      gotify:
        condition: service_healthy
    networks:
      - net
      - proxy
    ports:
      - "8681:8080"
    volumes:
      - api-data:/app/data
    environment:
      GOTIFY_URLS: ${GOTIFY_URLS}
      GOTIFY_CLIENT_TOKENS: ${GOTIFY_CLIENT_TOKENS}
      SECNTFY_TOKENS: ${SECNTFY_TOKENS}
      ENABLE_CONSOLE_LOG: ${ENABLE_CONSOLE_LOG}
      ENABLE_SCALAR_UI: ${ENABLE_SCALAR_UI}
    healthcheck:
      test: ["CMD", "curl", "-f", "http://localhost:8080/Version"]
      interval: 5s
      timeout: 3s
      retries: 5
      start_period: 10s
    labels:
      traefik.docker.network: proxy
      traefik.enable: "true"
      traefik.http.routers.igotify-secure.entrypoints: websecure
      traefik.http.routers.igotify-secure.middlewares: default@file
      traefik.http.routers.igotify-secure.rule: Host(`igotify.domain-name.de`)
      traefik.http.routers.igotify-secure.service: igotify
      traefik.http.routers.igotify-secure.tls: "true"
      traefik.http.routers.igotify-secure.tls.certresolver: http_resolver
      traefik.http.routers.igotify.entrypoints: web
      traefik.http.routers.igotify.rule: Host(`igotify.domain-name.de`)
      traefik.http.services.igotify.loadbalancer.server.port: "8080"

networks:
  net:
  proxy:
    external: true

volumes:
  data:
  api-data:
Thanks to @majo1989
docker compose up -dYou can run the assistant as a service on any Linux distribution using the install script.
Warning
After updating your distribution, check if the iGotify service is running.
Important
.NET 10.0 requires GLIBC 2.34 or higher. Make sure your distribution meets this requirement. If your OS is too old, consider using the Docker installation instead.
| Distribution | Package Manager | Init System | Minimum Version (GLIBC 2.34+) |
|---|---|---|---|
| Debian | apt | systemd | Debian 12 (Bookworm) |
| Ubuntu | apt | systemd | Ubuntu 22.04 (Jammy) |
| RHEL / CentOS / Rocky / Alma | dnf / yum | systemd | Version 9 |
| Fedora | dnf | systemd | Fedora 35 |
| Arch Linux | pacman | systemd | Rolling release (always current) |
| Alpine | apk | OpenRC | Alpine 3.17 (uses musl instead of glibc) |
Run the following command as root:
curl -sSL https://raw.githubusercontent.com/androidseb25/iGotify-Notification-Assistent/main/install.sh | sudo bashWarning
Never run scripts from the internet without reviewing them first. Download and inspect the script before execution:
curl -sSL https://raw.githubusercontent.com/androidseb25/iGotify-Notification-Assistent/main/install.sh -o install.sh
less install.sh  # Review the script
chmod +x install.sh
sudo ./install.shTo remove iGotify, run:
curl -sSL https://raw.githubusercontent.com/androidseb25/iGotify-Notification-Assistent/main/install.sh | sudo bash -s -- --uninstallOr if you have the script locally:
sudo ./install.sh --uninstall# Systemd
systemctl status iGotify
# OpenRC
service iGotify status# Check dotnet version (must be 10.x)
dotnet --version
# Run in foreground for more debug info
export ASPNETCORE_URLS="http://0.0.0.0:8681"
export ASPNETCORE_ENVIRONMENT=Production
dotnet '/opt/iGotify/iGotify Notification Assist.dll'If you're running iGotify behind a reverse proxy, you may need additional configuration.
If you have problems with incoming notifications, add these options under "Advanced Settings":
proxy_set_header   Host $http_host;
proxy_connect_timeout   1m;
proxy_send_timeout      1m;
proxy_read_timeout      1m;
Important
Do not check the boxes "HTTP/2 Support" and "HSTS enabled".
Thanks to @TBT-TBT
After installation, open the iGotify app on your iOS device.
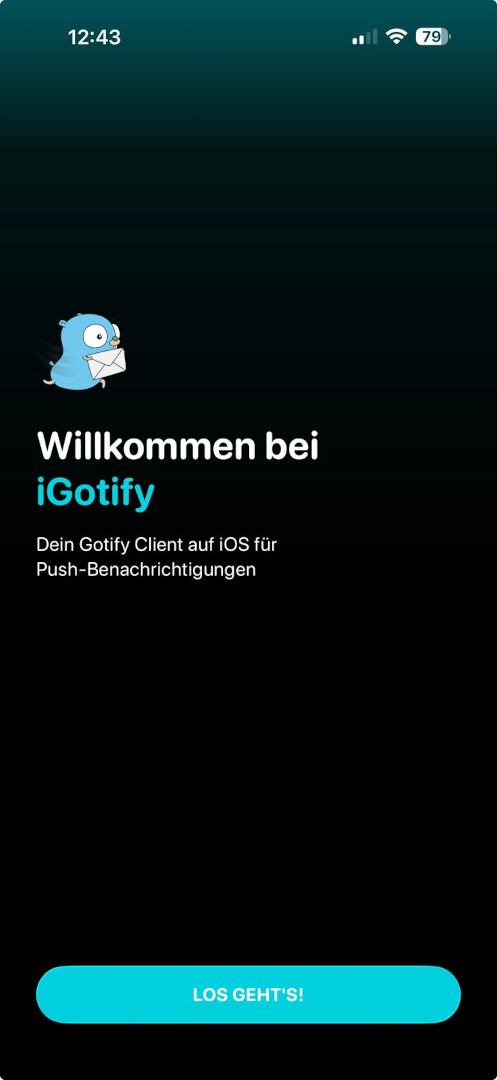
On the first start, you'll see the welcome screen. Tap the button to continue with the setup.
You can choose between two setup methods:
Option A: External Instance (Recommended)
Enter your server URLs in the corresponding fields:
-
Gotify Server URL - Your Gotify server address (e.g.,
https://gotify.domain.tld) -
iGotify Assistant URL - Your iGotify assistant address (e.g.,
https://igotify.domain.tld)
💡 Tip: If your server uses a non-standard port, enter it in the dedicated port field instead of including it in the URL.
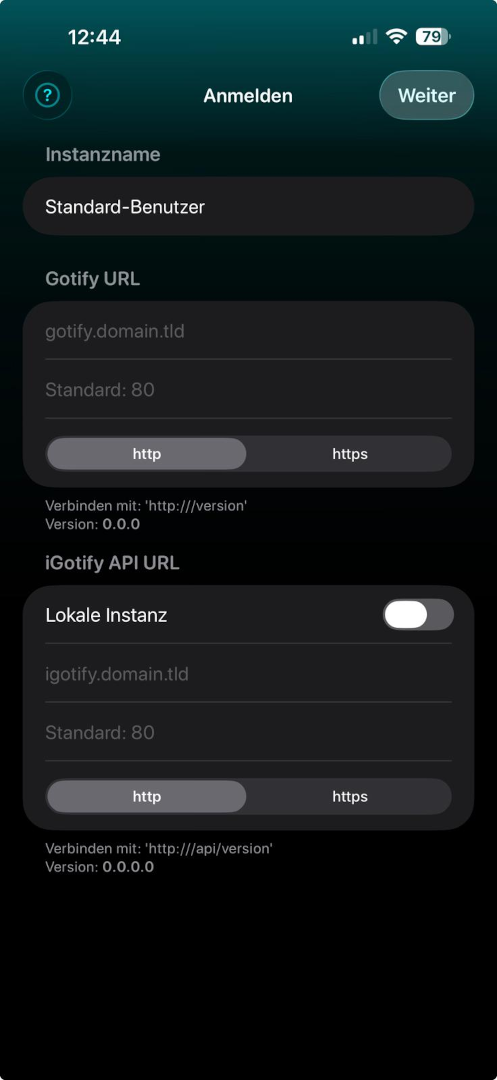
After the URL validation is complete, enter your Gotify login credentials.
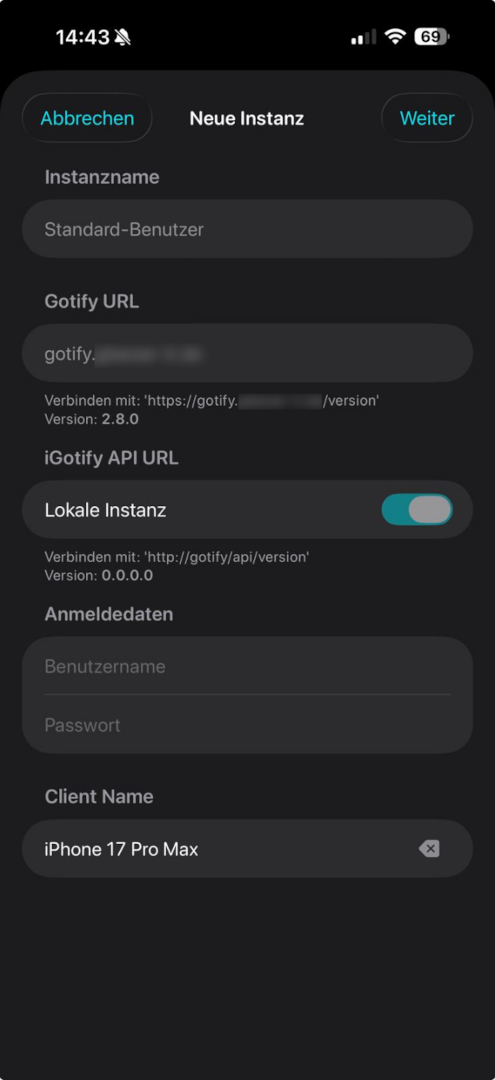
Option B: Local Instance
If you want to use iGotify without exposing the iGotify port (8681), you can use the local instance setup.
- Enter only your Gotify Server URL (e.g.,
https://gotify.domain.tld) - Enable the Local Instance toggle
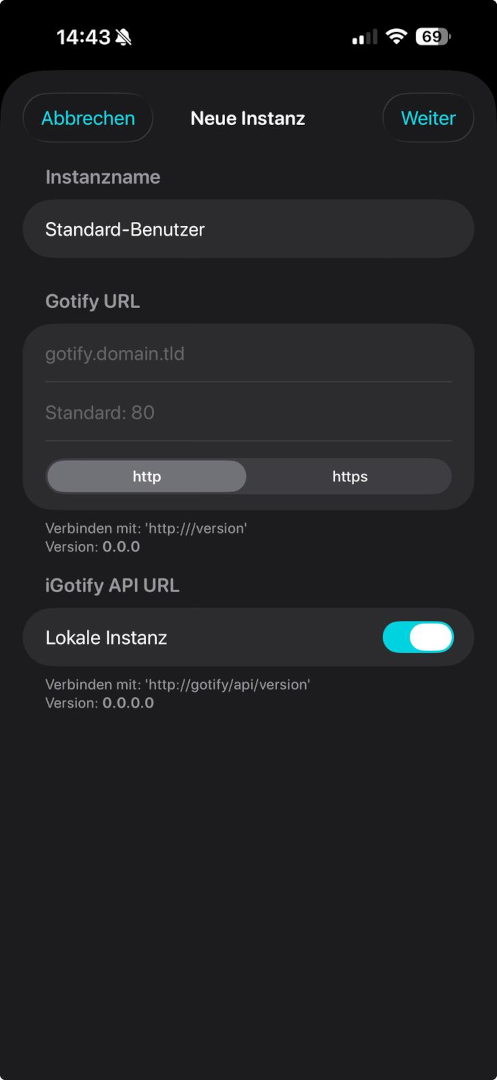
- Enter your Gotify login credentials
After successful login, you will see a configuration overview with the following values:
- Gotify URL - Your Gotify server address
- Gotify Client Token - The client token generated by Gotify
- SecNtfy Token - Your device's SecNtfy token
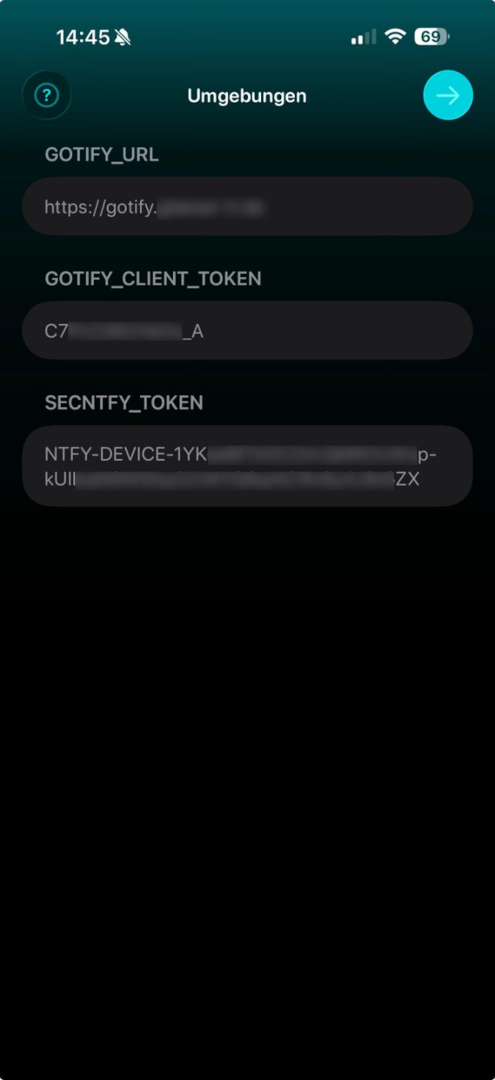
⚠️ Important: Copy these three values and add them to your iGotify Assistant environment variables. After updating, restart the iGotify Assistant container/service.
GOTIFY_URLS='https://gotify.domain.tld'
GOTIFY_CLIENT_TOKENS='cXXXXXXXX'
SECNTFY_TOKENS='NTFY-DEVICE-XXXXXX'If everything is configured correctly, you're logged in and ready to receive notifications.
You will now receive background notifications whenever Gotify receives a message.
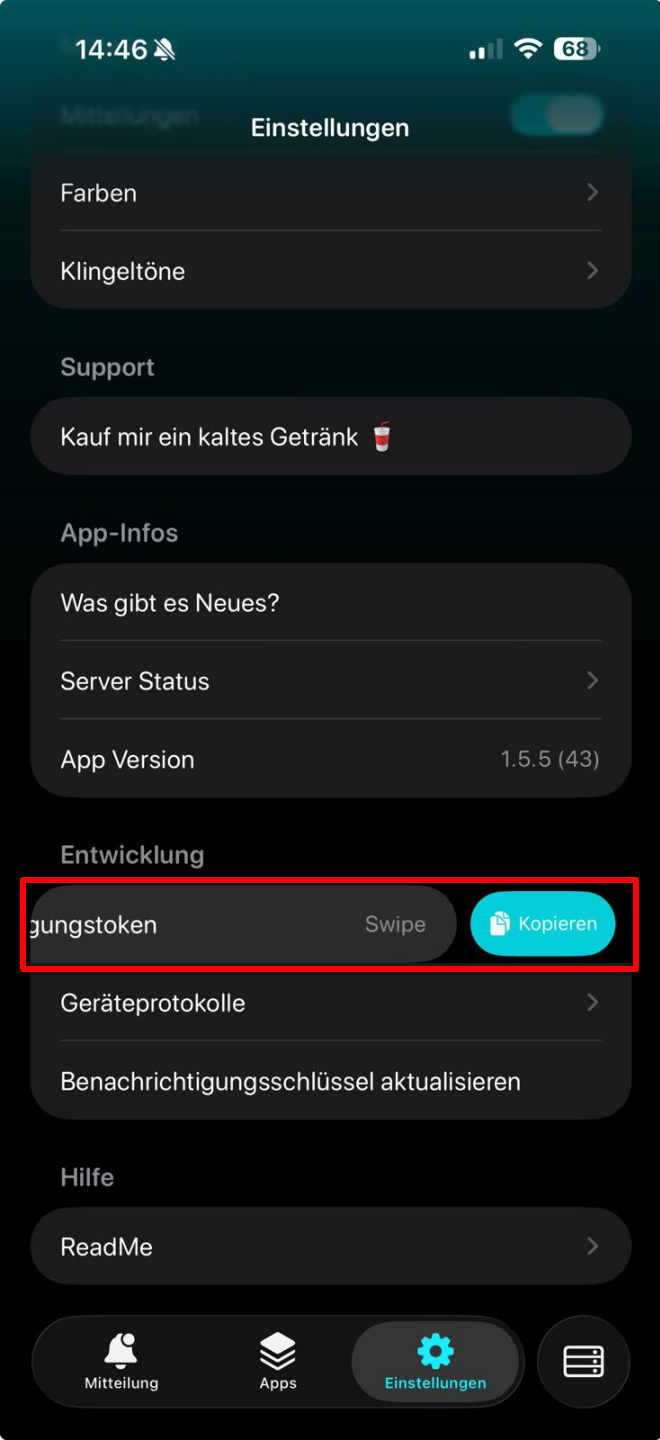
The Notification Token may be required for debugging issues with the developer.
To find it:
- Open the iGotify app
- Go to Settings
- Navigate to Development
- Swipe left on Notification Token to reveal and copy it
| Status | Feature | Issue |
|---|---|---|
| 📝 Planned 202X | macOS Native Application | #47 |
| 📝 Planned 2026 | Add Message Extras support | #139 |
| 📝 Planned 2026 | Custom sound and vibration | #141 |
| 📝 Planned 2026 | Show Expanded Notification in View | #163 |
| 📝 Planned 2026 | Show more Messages via filter | #191 |
Want to help or found a bug?
Read the Contributing Guide.
- RPICloud (German): iGotify Installation
- Gotify on Proxmox 8.1 with iGotify setup: homelab.casaursus.net (Thanks to @nallej)
Created a tutorial or review? Open an issue with the title [REFERENCE] <TITLE> and the URL.