MicroPython code to print from a BBC micro:bit to a thermal till-roll printer
A long time ago I made several printing gizmos (like The Little Box of Poems) with a Sparkfun thermal till-roll printer, driven by an Arduino or a Raspberry Pi. I thought it might be fun to see if you can drive the printer using a humble BBC micro:bit and some Python, and by golly you can!
To get this working you will need:
- a BBC micro:bit powered off batteries or a computer.
- a Chinese thermal till-roll printer as sold by Pimoroni, Sparkfun, Adafruit etc.
- a 5-9v 2A DC power supply for the printer.
- some jumper leads and a micro:bit breakout board like the Kitronik one.
- an old soap powder box or similar to mount the printer and micro:bit in.
Please note that I have only tested this code with a printer I bought many years ago, firmware version 2.64 - some of the features may not work on your printer, you should check with its manual to see if you need to alter any of the codes.
The wiring diagram looks like this:
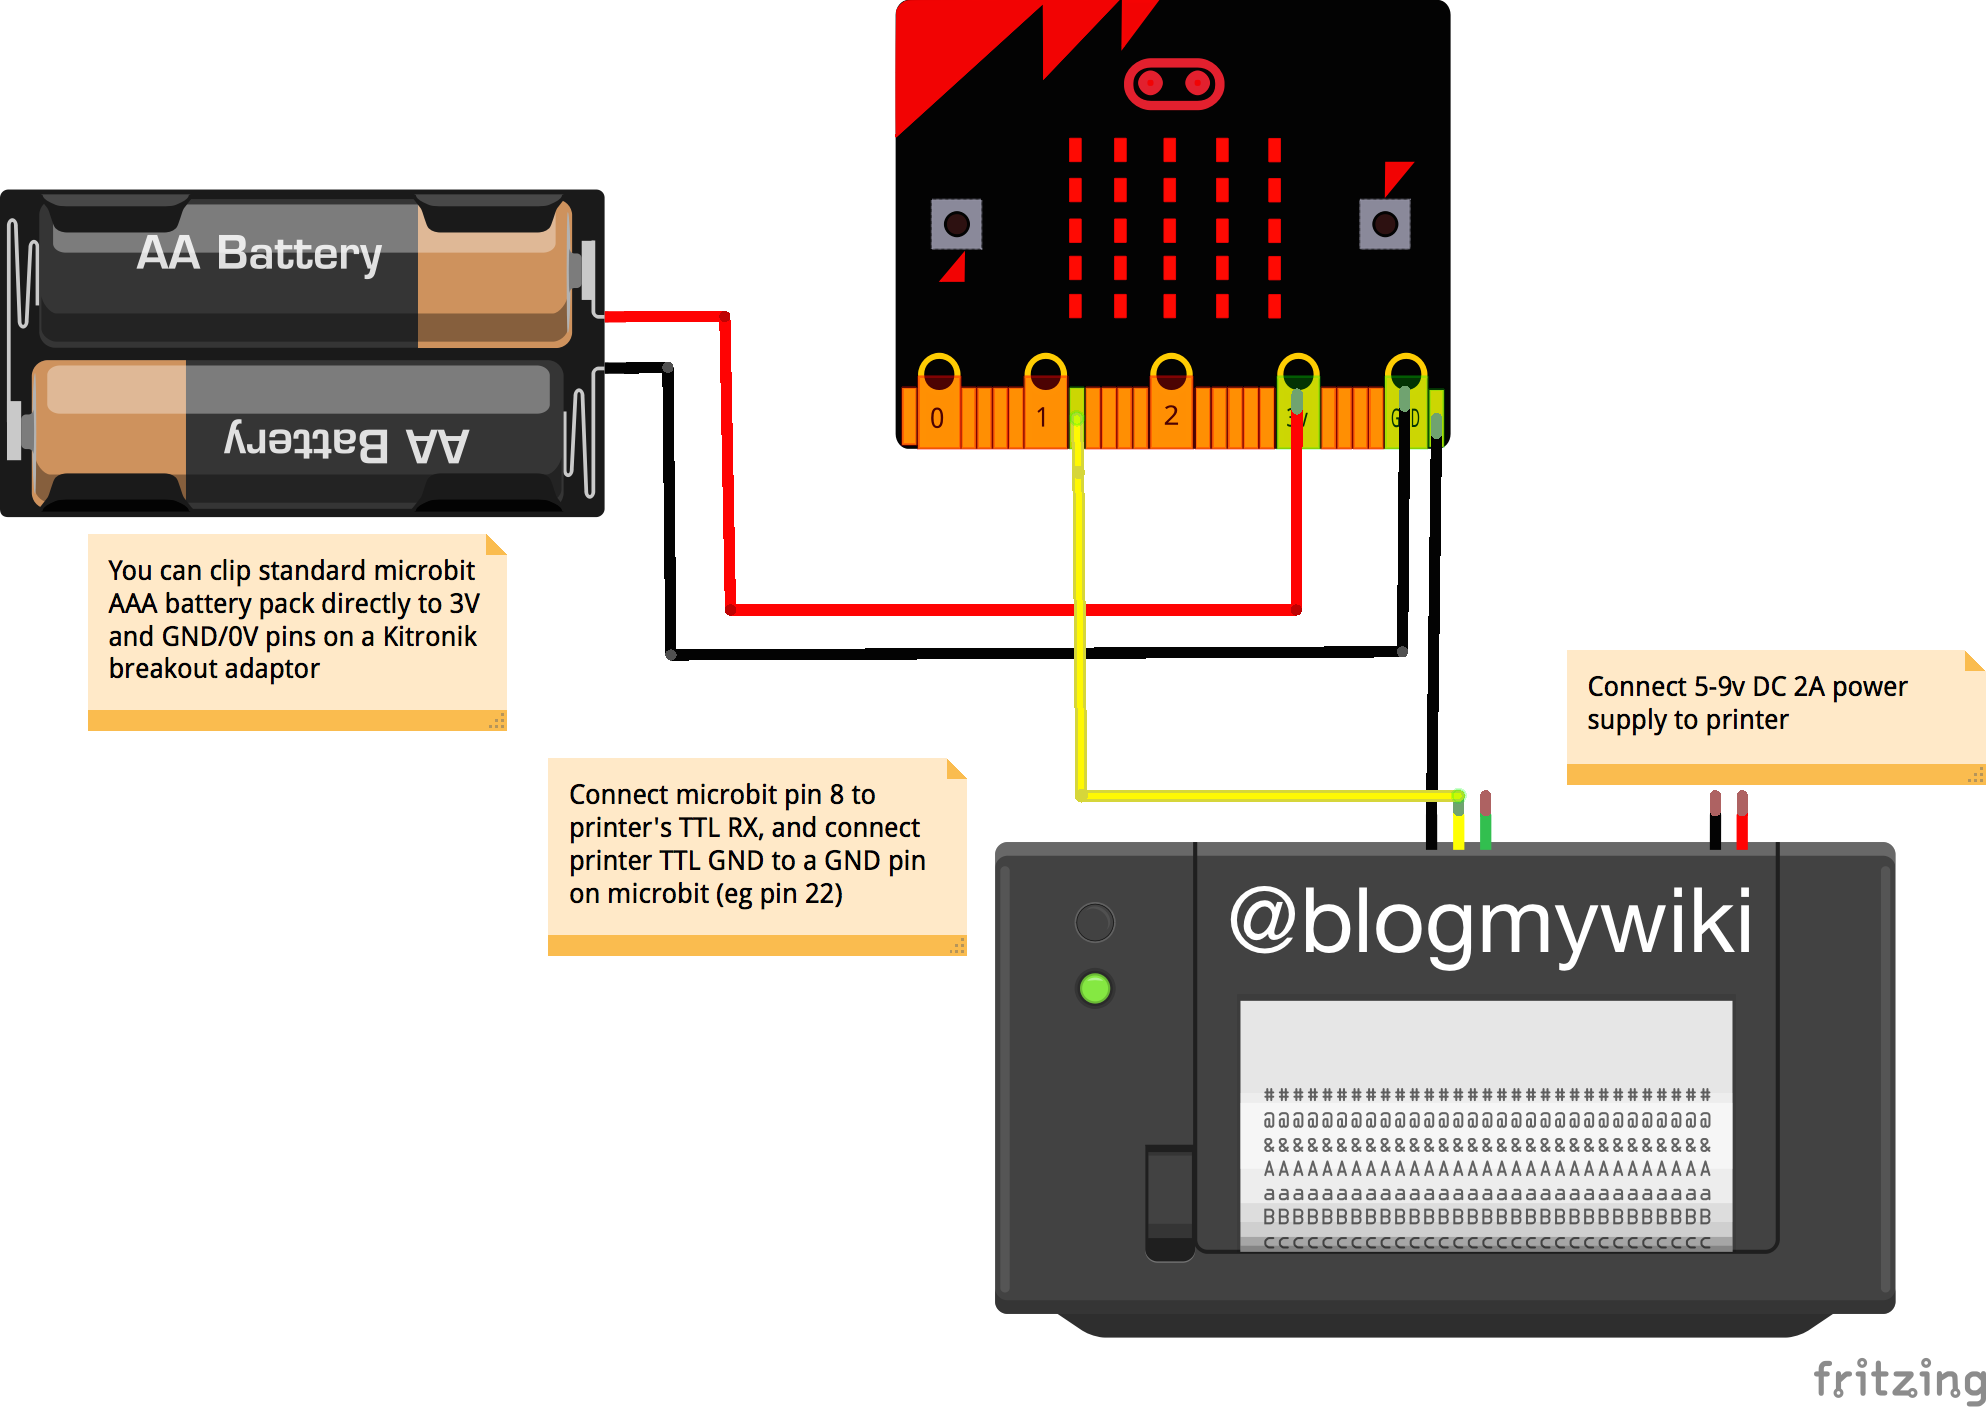
Flash the Python code on to your micro:bit using the Mu editor.
At its simplest you can print text to the thermal printer with just a few lines of Python:
import microbit
microbit.uart.init(baudrate=19200, bits=8, parity=None, stop=1, tx=microbit.pin8, rx=None)
microbit.uart.write("Hello to Jason Isaacs\n")
The only parts of the uart.init command you can change are the baudrate (the speed data is sent to your printer) and the microbit pin number for data transmission (I use pin 8). I'm pretty sure most printers run at 19200 baud but you can check your printer's by holding down the paper feed button as you power it on. The newline \n character is needed to tell the printer to print the contents of its buffer.
If you use this code you will also notice messages from the Python console on the printout. This is because when the program finishes running you still get messages from Python. This is actually quite useful for debugging - you get a hard copy of the error message rather than having to read scrolling text on the micro:bit display.
You can have a bit more control - and avoid seeing messages from the console - by adding button presses:
import microbit
microbit.uart.init(baudrate=19200, bits=8, parity=None, stop=1, tx=microbit.pin8, rx=None)

while True:
    if microbit.button_a.is_pressed() and microbit.button_b.is_pressed():
        microbit.uart.write("both buttons pressed\n")
    elif microbit.button_a.is_pressed():
        microbit.uart.write("message A\n")
    elif microbit.button_b.is_pressed():
        microbit.uart.write("message B\n")
    microbit.sleep(300)
I've written several functions to cover most text modes. These are all in thermal_print.py
Note that mixing text modes doesn't always work because I've had problems getting binary masking to work - that's something I hope to fix later. Each function just sends hex codes to the printer to enable or disable each mode.
The most important functions are thermal_print("text") and thermal_print_ln("text")
thermal_print("text") sends some text to the printer buffer but doesn't print it. It won't print anything until it receives a newline character \n. This function allows you to mix some different text modes on the same line.
The more useful function is thermal_print_ln("text") which will print a line with anything inside the brackets - it must be a string, and you do not need to add the newline character, the function does this for you.
Other functions are fairly obvious, you have the following modes available:
- left, right, centre align
leftAlign()centreAlign()rightAlign() - bold text
boldOn()boldOff() - underline (hard-coded to a thick line)
underlineOn()underlineOff() - inverse (white on black) text
inverseOn()inverseOff() - double-width
wideOn()wideOff() - double-height
doubleHeightOn()doubleHeightOff() - extra large font
largeFontOn()largeFontOff() - extra small font
smallFontOn()smallFontOff() - upside-down text
upsideDownOn()upsideDownOff() - reset the printer, clears all modes
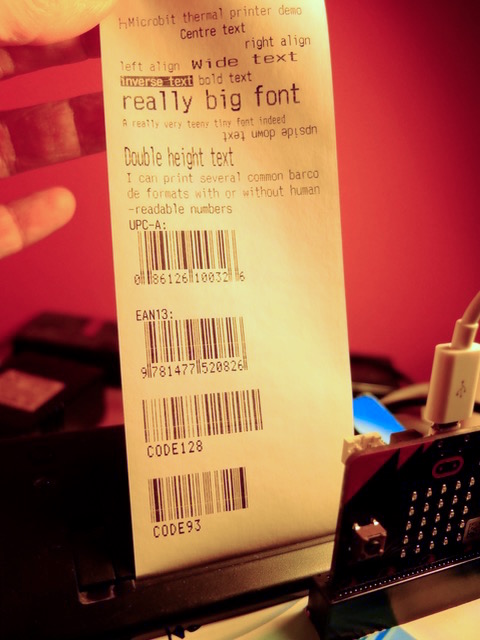
printerReset() - print the default test page showing character sets, baud rate, temperature and firmware version
printerTest() - barcodes in various formats
Four common barcode formats are supported: UPC-A (American Universal Product Code, must be 12 digits), EAN-13 (common European product barcode), Code 128 and Code 93. The last two formats support alphanumeric characters, not just numbers. It's not possible at the moment to specify the height or width of the barcode (I'm working on this), but you can add or supress human-readable numbers below the barcode with the barcodeHumanReadable() and barcodeNotHumanReadable() functions.
To print a 13-digit EAN barcode, for example, call the function with the text:
barcodeEAN13("9781477520826")
(This is the barcode from my book!)
The other barcode functions are barcodeUPCA(), barcode128() and barcode93()
You can also set up a thermal printer to work wirelessly with the micro:bit. The wireless_print_server.py file polls for incoming radio messages and prints anything it receives. Messages need to be short I've found. You can put the wireless_data_logger.py file on another micro:bit which will then transmit data about its x, y and z accelerometer readings plus temperature and compass heading every 10 seconds. When you first run it you have to calibrate the compass by tilting the micro:bit to draw a circle.
See my [blog post] (http://www.suppertime.co.uk/blogmywiki/2016/12/microbit-thermal/) for more background information and links to my other internet-connected thermal printing projects. I'd love to hear if you have ideas about how this can be used. I've made a box that prints random poems and Christmas cracker jokes (xmas-poems.py) - what can you think of?
- add options for barcode height and width
- add line-spacing and print-density options
- bitmap graphics and user-defined characters
- get binary masking working to enable better mixing of modes
- make a Python module out of the code