Releases: classicrocker883/MRiscoCProUI
Ender-3 V2 Build for December
DECEMBER 2025
Version: 2.1.3g-12-ender3
Continually updating with Marlin bugfix-2.1.x
⬂ List of recent updates ⬃
What's new in this release
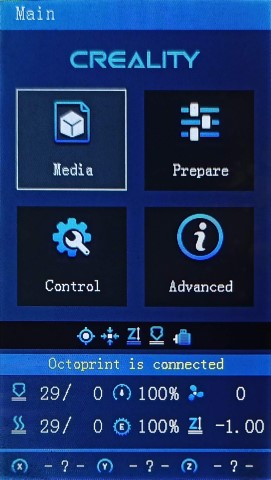
⍟ Firmware Selector ⍟

Tip
You can use the Firmware Selector to help choose which file to download.
How to install the firmware
To update the firmware, choose the file ending in .bin and place it in your SD card:
(You may need to rename the file if reinstalling or if it doesn't flash the first time)- For a Creality board, put it in the root folder of the drive
Or unless otherwise specified
please flash the new DWIN_SET now!
Important
🚩To use this version, you must✶ update the DWIN_SET to the LCD screen. New ICON's have been added, and others were remastered.
- Choose a DWIN_SET from the "display assets" folder
- Copy it to the root of an SD card
- Remove the name in ( ) from the folder
e.g. "DWIN_SET (Original)" => "DWIN_SET" - Open the back of the LCD, insert the card📲
- Turn on power, wait until the screen goes Blue🔵 to Red🔴
- Turn off, remove card⤵. Good to go!✅
✶ Technically you don't have to reflash the new DWIN_SET, but some ICON's will be missing if you do not.
Warning
🚧Please be aware of the following:
While using _BLT or _MM versions, if you encounter the bed Mesh not saving...
This workaround resolves the issue without having to redo the mesh again.
- Build Mesh (first time)
- Save Mesh
- After any time you Power Off and Power On -->
3a. Go to Control/Advanced Settings/Load Settings
-OR-
3b. Load this into your Start Gcode
G28 ; Home
M501 ; Load settings
M420 S1 ; Pull your mesh bed level
;(Remaining Gcode / Start Print)>>>
If you experience this issue as it starts printing --> Mesh leveling data is drawing over the printing screen
The correct way of set the start G-code script is detailed in: Slicer Gcode Scripts
Otherwise I would advice just not using G29 to build a mesh in the Gcode, but instead manually make one before printing, or just make one mesh for all prints.
⬇️Click to expand for detailed informationℹ️
This is a universal firmware that has been optimized and enhanced for both the Voxelab Aquila and Creality Ender-3 V2/S1.
This is based on MriscoC's Professional Firmware for the Creality Ender-3 V2/S1. This particular build release is for the LCD color displays of Creality Ender-3 V2 or similar variant.
- Aquila Build Voxelab Aquila S3/X3 - use _IND (Induction Probe)
- HC32 Build
- Aquila C2 Build Having monochrome 12864 LCD
🆕Recent Updates
EDITABLE_HOMING_FEEDRATEis now available in most, if not all, builds- BTT SKR Mini E3 V3 / V2 / V3.0.1 finally supported for ProUI - (4.3" Stock Aquila/Ender-3 V2 Color LCD)
- If you have a TFT or other display, you can request firmware *.bin files to be made, or compile your own
- BIQU MicroProbe V2.0 is now supported with _BMP prefix
- Creality Spider Speedy Ceramic Hotend is now supported with _SPDY5 prefix
- Creality E3 Free-runs + Ender-3 S1 | F1/F4 board support
- Creality Ender-3 S1 support for Creality Sprite Extruder
📚Versions
- These are the configurations offered:
Bed Leveling Options
- [ _Default-NP ]: Use if you have a near stock machine Default No Probe
- [ _MM ]: Create a bed mesh without an auto bed probe Manual Mesh Bed Leveling
- [ _BLT ]: Use if you have a CR/3D/BL-Touch level sensor installed. Bilinear Auto Bed Leveling
- [ _UBL ]: Similar to both MM and BLT - with more options. Recommended over BLT Unified Bed Leveling
Special Versions
- (List of file prefixes and suffixes)
- ProUI Extra Features
- [ -ProUI-EX ]
| Toolbar, change bed physical dimensions | (Change other special features and options without having to reflash) - Alternative Boards See under Aquila Model
- [ _SKR-Mini-E3- ]
| BTT SKR Mini E3 | (V2.0, V3.0, V3.0.1) -
V2:
STM32F103RCchip
V3:STM32G0B1REchip
V3_0_1:STM32F401RCchip
See under Ender Model
- [ _E3-Free-runs ]
| Creality E3 Free-runs | (Creality board - TMC2209 drivers) - [ -S1<F1/F4> ]
| Creality Ender-3 S1 | (Check to see whether you have F1 or F4) -
-S1-F1:
STM32F103RCchip andCREALITY_V24S1_301board
-S1-F4:STM32F401RCchip andCREALITY_V24S1_301F4board - LCD Displays
- [ DWIN ]
| Stock DWIN LCD | (No actual prefix) - [ TJC- ]
| Creality TJC LCD | (As aftermarket or sometimes used in stock Creality machines) - [ C2- ]
| Monochrome 128x64 LCD | (Used in Aquila C2 and original Ender-3/CR-10)
This has NO ProUI capabilities
- Features
- [ _SPRT13 ]
| Sprite Extruder | (Uses thermistor # 13) - [ _SPDY5 ]
| Spider Speedy Ceramic Hotend | (Uses thermistor # 5) - [ _IND ]
| Inductive Sensor | (Probe used on X3/S2 models) - [ _BMP ]
| BIQU MicroProbe V2.0 | (Alternative to CR/3D/BL/-Touch)
Use ONLY this firmware with _BMP if you DO have this probe
- Options
- [ -IS ]
| Input Shaping | (Similar to Linear Advance)
Use ONLY if you mean to do the initial calibration✶
- [ -MPC ]
| MPC Autotune | (Replaces PID for hotend)
Prints will be effected regardless. May require a special breakout board or test prints to calibrate.
See Related Information below
UBL Information
Binaries with UBL in their filename are similar to the bilinear leveling of BLT, but with extra features to provide users with more control and information. There are multiple guides about UBL, it's recommend reading about it before using this type of leveling system.
Contributors
Assets 674
HC32 for December
DECEMBER 2025
Version: 2.1.3g-12-HC32

Continually updating with Marlin bugfix-2.1.x
⬂ List of recent updates ⬃
What's new in this release
⍟ Firmware Selector ⍟
Tip
You can use the Firmware Selector to help choose which file to download.
How to install the firmware
To update the firmware, choose the file ending in .bin and place it in your SD card:
(You may need to rename the file if reinstalling or if it doesn't flash the first time)- For an Aquila board, put it inside a folder named "firmware"
- For a Creality board, put it in the root folder of the drive
Or unless otherwise specified
please flash the new DWIN_SET now!
Important
🚩To use this version, you must✶ update the DWIN_SET to the LCD screen. New ICON's have been added, and others were remastered.
- Choose a DWIN_SET from the "display assets" folder
- Copy it to the root of an SD card
- Remove the name in ( ) from the folder
e.g. "DWIN_SET (Original)" => "DWIN_SET" - Open the back of the LCD, insert the card📲
- Turn on power, wait until the screen goes Blue🔵 to Red🔴
- Turn off, remove card⤵. Good to go!✅
✶ Technically you don't have to reflash the new DWIN_SET, but some ICON's will be missing if you do not.
Warning
🚧Please be aware of the following:
The screen freezes and restarts when SD card is inserted. This means that everything so far seems to work correctly as it should, except for when an SD card is inserted, so printing may not be possible unless you use USB serial interface to upload the file (through a slicer or something like Pronterface).
While using _BLT or _MM versions, if you encounter the bed Mesh not saving...
This workaround resolves the issue without having to redo the mesh again.
- Build Mesh (first time)
- Save Mesh
- After any time you Power Off and Power On -->
3a. Go to Control/Advanced Settings/Load Settings
-OR-
3b. Load this into your Start Gcode
G28 ; Home
M501 ; Load settings
M420 S1 ; Pull your mesh bed level
;(Remaining Gcode / Start Print)>>>
If you experience this issue as it starts printing --> Mesh leveling data is drawing over the printing screen
The correct way of set the start G-code script is detailed in: Slicer Gcode Scripts
Otherwise I would advice just not using G29 to build a mesh in the Gcode, but instead manually make one before printing, or just make one mesh for all prints.
⬇️Click to expand for detailed informationℹ️
This is a universal firmware that has been optimized and enhanced for both the Voxelab Aquila and Creality Ender-3 V2/S1.
This is based on MriscoC's Professional Firmware for the Creality Ender-3 V2/S1. This particular build release is for the LCD color displays of Voxelab Aquila or similar variant. However, firmware for Aquila C2 monochrome LCD (128x64) are available. If you are using a Creality brand screen you can try the -TJC version.
- Aquila Build Voxelab Aquila S3/X3 - use _IND (Induction Probe)
- Ender-3 V2/S1 Build
- Aquila C2 Build Having monochrome 12864 LCD
🆕Recent Updates
EDITABLE_HOMING_FEEDRATEis now available in most, if not all, builds- Other Aquila Builds linked here
- Voxelab Aquila S3/X3 and use _IND - Induction Probe
- Aquila C2 w/ monochrome 12864 LCD is supported having standard UI
- BTT SKR Mini E3 V3 / V2 / V3.0.1 finally supported for ProUI - (4.3" Stock Aquila/Ender-3 V2 Color LCD)
- If you have a TFT or other display, you can request firmware *.bin files to be made, or compile your own
- BIQU MicroProbe V2.0 is now supported with _BMP prefix
- Creality Spider Speedy Ceramic Hotend is now supported with _SPDY5 prefix
- Creality E3 Free-runs + Ender-3 S1 | F1/F4 board support (See Ender-3V2 build)
📚Versions
- These are the configurations offered:
Bed Leveling Options
- [ _Default-NP ]: Use if you have a near stock machine Default No Probe
- [ _MM ]: Create a bed mesh without an auto bed probe Manual Mesh Bed Leveling
- [ _BLT ]: Use if you have a CR/3D/BL-Touch level sensor installed. Bilinear Auto Bed Leveling
- [ _UBL ]: Similar to both MM and BLT - with more options. Recommended over BLT Unified Bed Leveling
Special Versions
- (List of file prefixes and suffixes)
- ProUI Extra Features
- [ -ProUI-EX ]
| Toolbar, change bed physical dimensions | (Change other special features and options without having to reflash) - Alternative Boards See under Aquila Model
- [ _SKR-Mini-E3- ]
| BTT SKR Mini E3 | (V2.0, V3.0, V3.0.1) -
V2:
STM32F103RCchip
V3:STM32G0B1REchip
V3_0_1:STM32F401RCchip
See under Ender Model
- [ _E3-Free-runs ]
| Creality E3 Free-runs | (Creality board - TMC2209 drivers) - [ -S1<F1/F4> ]
| Creality Ender-3 S1 | (Check to see whether you have F1 or F4) -
-S1-F1:
STM32F103RCchip andCREALITY_V24S1_301board
-S1-F4:STM32F401RCchip andCREALITY_V24S1_301F4board - LCD Displays
- [ DWIN ]
| Stock DWIN LCD | (No actual prefix) - [ TJC- ]
| Creality TJC LCD | (As aftermarket or sometimes used in stock Creality machines) - [ C2- ]
| Monochrome 128x64 LCD | (Used in Aquila C2 and original Ender-3/CR-10)
This has NO ProUI capabilities
- Features
- [ _SPRT13 ]
| Sprite Extruder | (Uses thermistor # 13) - [ _SPDY5 ]
| Spider Speedy Ceramic Hotend | (Uses thermistor # 5) - [ _IND ]
| Inductive Sensor | (Probe used on X3/S2 models) - [ _BMP ]
| BIQU MicroProbe V2.0 | (Alternative to CR/3D/BL/-Touch)
Use ONLY this firmware with _BMP if you DO have this probe
- Options
- [ -IS ]
| Input Shaping | (Similar to Lin...
Contributors
Assets 146
C2 Build for December
DECEMBER 2025
Version: 2.1.3g-12-C2

Continually updating with Marlin bugfix-2.1.x
⬂ List of recent updates ⬃
What's new in this release
⍟ Firmware Selector ⍟
Tip
You can use the Firmware Selector to help choose which file to download.
How to install the firmware
To update the firmware, choose the file ending in .bin and place it in your SD card:
(You may need to rename the file if reinstalling or if it doesn't flash the first time)- For an Aquila board, put it inside a folder named "firmware"
- For a Creality board, put it in the root folder of the drive
Or unless otherwise specified
⬇️Click to expand for detailed informationℹ️
This is a universal firmware that has been optimized and enhanced for both the Voxelab Aquila and Creality Ender-3 V2/S1.
This particular build release is for the 128x64 monochrome LCD of Voxelab Aquila C2.
You can also use this on a Creality brand printer.
- Aquila Build Voxelab Aquila S3/X3 - use _IND (Induction Probe)
- HC32 Build
- Ender-3 V2/S1 Build
🆕Recent Updates
EDITABLE_HOMING_FEEDRATEis now available in most, if not all, builds- If you have a TFT or other display, you can request firmware *.bin files to be made, or compile your own
- BIQU MicroProbe V2.0 is now supported with _BMP prefix
- Creality Spider Speedy Ceramic Hotend is now supported with _SPDY5 prefix
📚Versions
- These are the configurations offered:
Bed Leveling Options
- [ _Default-NP ]: Use if you have a near stock machine Default No Probe
- [ _MM ]: Create a bed mesh without an auto bed probe Manual Mesh Bed Leveling
- [ _BLT ]: Use if you have a CR/3D/BL-Touch level sensor installed. Bilinear Auto Bed Leveling
- [ _UBL ]: Similar to both MM and BLT - with more options. Recommended over BLT Unified Bed Leveling
Special Versions
- (List of file prefixes and suffixes)
- LCD Displays
- [ C2- ]
| Monochrome 128x64 LCD | (Used in Aquila C2 and original Ender-3/CR-10)
This has NO ProUI capabilities
- Features
- [ _SPRT13 ]
| Sprite Extruder | (Uses thermistor # 13) - [ _SPDY5 ]
| Spider Speedy Ceramic Hotend | (Uses thermistor # 5) - [ _IND ]
| Inductive Sensor | (Probe used on X3/S2 models) - [ _BMP ]
| BIQU MicroProbe V2.0 | (Alternative to CR/3D/BL/-Touch)
Use ONLY this firmware with _BMP if you DO have this probe
- Options
- [ -IS ]
| Input Shaping | (Similar to Linear Advance)
Use ONLY if you mean to do the initial calibration✶
- [ -MPC ]
| MPC Autotune | (Replaces PID for hotend)
Prints will be effected regardless. May require a special breakout board or test prints to calibrate.
See Related Information below
UBL Information
Binaries with UBL in their filename are similar to the bilinear leveling of BLT, but with extra features to provide users with more control and information. There are multiple guides about UBL, it's recommend reading about it before using this type of leveling system.
- https://all3dp.com/2/marlin-ubl-unified-bed-levelin-simply-explained/
- https://www.3dmakerengineering.com/blogs/3d-printing/unified-bed-leveling-marlin
- https://hackaday.com/2022/01/14/3d-printering-getting-started-with-universal-bed-leveling/
Related Information
- All firmware version types have Linear Advance enabled
- Linear Advance - M900
- Input Shaping is enabled with files ending with "-IS"
- Input Shaping - M593
How to calibrate Input Shaping without extra hardware
Teaching Tech - Input Shaping: Step by Step guide
- MPC is enabled in firmware files containing "-MPC"
- Model Predictive Temperature Control
- MPC has proven to be a better algorithm for keeping the nozzle temperature stable, and is also very useful for high power heaters. It does take some getting used to how it works if you are unfamiliar with it. It's recommended for advanced users, so stick to the default PID versions, especially if your printer is relatively stock
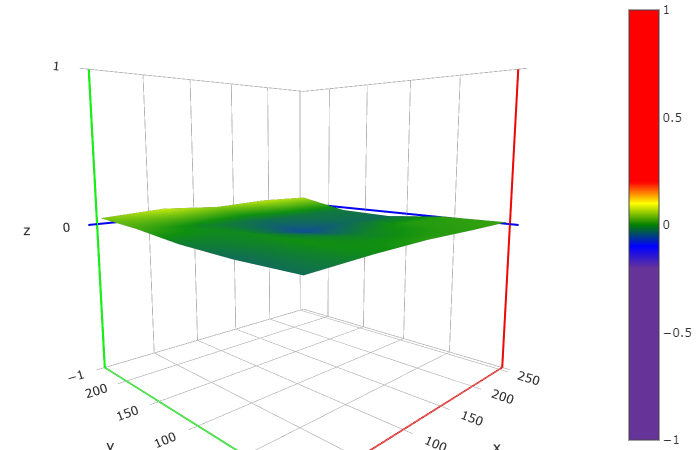
This shows the two types of meshviewer as an example;
the newer colorful one has a more rainbow like characteristic:
Select Color Menu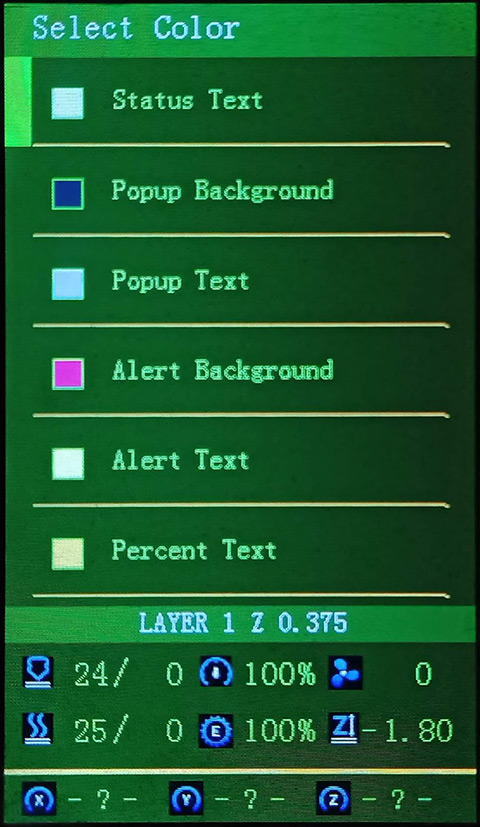
Aquila Build for December
DECEMBER 2025
Version: 2.1.3g-12
Continually updating with Marlin bugfix-2.1.x
⬂ List of recent updates ⬃
What's new in this release
⍟ Firmware Selector ⍟
Tip
You can use the Firmware Selector to help choose which file to download.
How to install the firmware
To update the firmware, choose the file ending in .bin and place it in your SD card:
(You may need to rename the file if reinstalling or if it doesn't flash the first time)- For an Aquila board, put it inside a folder named "firmware"
- For a Creality board, put it in the root folder of the drive
Or unless otherwise specified
please flash the new DWIN_SET now!
Important
🚩To use this version, you must✶ update the DWIN_SET to the LCD screen. New ICON's have been added, and others were remastered.
- Choose a DWIN_SET from the "display assets" folder
- Copy it to the root of an SD card
- Remove the name in ( ) from the folder
e.g. "DWIN_SET (Original)" => "DWIN_SET" - Open the back of the LCD, insert the card📲
- Turn on power, wait until the screen goes Blue🔵 to Red🔴
- Turn off, remove card⤵. Good to go!✅
✶ Technically you don't have to reflash the new DWIN_SET, but some ICON's will be missing if you do not.
Warning
🚧Please be aware of the following:
While using _BLT or _MM versions, if you encounter the bed Mesh not saving...
This workaround resolves the issue without having to redo the mesh again.
- Build Mesh (first time)
- Save Mesh
- After any time you Power Off and Power On -->
3a. Go to Control/Advanced Settings/Load Settings
-OR-
3b. Load this into your Start Gcode
G28 ; Home
M501 ; Load settings
M420 S1 ; Pull your mesh bed level
;(Remaining Gcode / Start Print)>>>
If you experience this issue as it starts printing --> Mesh leveling data is drawing over the printing screen
The correct way of set the start G-code script is detailed in: Slicer Gcode Scripts
Otherwise I would advice just not using G29 to build a mesh in the Gcode, but instead manually make one before printing, or just make one mesh for all prints.
⬇️Click to expand for detailed informationℹ️
This is a universal firmware that has been optimized and enhanced for both the Voxelab Aquila and Creality Ender-3 V2/S1.
This is based on MriscoC's Professional Firmware for the Creality Ender-3 V2/S1. This particular build release is for the LCD color displays of Voxelab Aquila or similar variant. However, firmware for Aquila C2 monochrome LCD (128x64) are available. If you are using a Creality brand screen you can try the -TJC version.
If you are using an Aquila S3, use firmware having _IND (Inductive Probe). You may need to adjust your Probe Offsets, specifically the Y Offset, set this to -20 or -25 as per this post here. From the Main Menu, go to Level > Probe Settings > Probe Y Offset.
- HC32 Build
- Ender-3 V2/S1 Build
- Aquila C2 Build Having monochrome 12864 LCD
🆕Recent Updates
EDITABLE_HOMING_FEEDRATEis now available in most, if not all, builds- BTT SKR Mini E3 V3 / V2 / V3.0.1 finally supported for ProUI - (4.3" Stock Aquila/Ender-3 V2 Color LCD)
- If you have a TFT or other display, you can request firmware *.bin files to be made, or compile your own
- BIQU MicroProbe V2.0 is now supported with _BMP prefix
- Creality Spider Speedy Ceramic Hotend is now supported with _SPDY5 prefix
- Creality E3 Free-runs + Ender-3 S1 | F1/F4 board support (See Ender-3V2 build)
📚Versions
- These are the configurations offered:
Bed Leveling Options
- [ _Default-NP ]: Use if you have a near stock machine Default No Probe
- [ _MM ]: Create a bed mesh without an auto bed probe Manual Mesh Bed Leveling
- [ _BLT ]: Use if you have a CR/3D/BL-Touch level sensor installed. Bilinear Auto Bed Leveling
- [ _UBL ]: Similar to both MM and BLT - with more options. Recommended over BLT Unified Bed Leveling
Special Versions
- (List of file prefixes and suffixes)
- ProUI Extra Features
- [ -ProUI-EX ]
| Toolbar, change bed physical dimensions | (Change other special features and options without having to reflash) - Alternative Boards See under Aquila Model
- [ _SKR-Mini-E3- ]
| BTT SKR Mini E3 | (V2.0, V3.0, V3.0.1) -
V2:
STM32F103RCchip
V3:STM32G0B1REchip
V3_0_1:STM32F401RCchip
See under Ender Model
- [ _E3-Free-runs ]
| Creality E3 Free-runs | (Creality board - TMC2209 drivers) - [ -S1<F1/F4> ]
| Creality Ender-3 S1 | (Check to see whether you have F1 or F4) -
-S1-F1:
STM32F103RCchip andCREALITY_V24S1_301board
-S1-F4:STM32F401RCchip andCREALITY_V24S1_301F4board - LCD Displays
- [ DWIN ]
| Stock DWIN LCD | (No actual prefix) - [ TJC- ]
| Creality TJC LCD | (As aftermarket or sometimes used in stock Creality machines) - [ C2- ]
| Monochrome 128x64 LCD | (Used in Aquila C2 and original Ender-3/CR-10)
This has NO ProUI capabilities
- Features
- [ _SPRT13 ]
| Sprite Extruder | (Uses thermistor # 13) - [ _SPDY5 ]
| Spider Speedy Ceramic Hotend | (Uses thermistor # 5) - [ _IND ]
| Inductive Sensor | (Probe used on X3/S2 models) - [ _BMP ]
| BIQU MicroProbe V2.0 | (Alternative to CR/3D/BL/-Touch)
Use ONLY this firmware with _BMP if you DO have this probe
- Options
- [ -IS ]
| Input Shaping | (Similar to Linear Advance)
Use ONLY if you mean to do the initial calibration✶
- [ -MPC ]
| MPC Autotune | (Replaces PID for hotend)
Prints will be effected regardless. May require a special breako...
Contributors
Assets 754
- 209 KB
2025-12-26T07:03:43Z - 215 KB
2025-12-26T06:54:54Z - 220 KB
2025-12-26T06:56:47Z - 214 KB
2025-12-26T07:05:32Z - 204 KB
2025-12-26T07:05:20Z - 210 KB
2025-12-26T07:04:24Z - 216 KB
2025-12-26T07:05:03Z - 210 KB
2025-12-26T07:05:09Z - 216 KB
2025-12-26T07:35:35Z - 222 KB
2025-12-26T07:20:17Z -
2025-12-26T04:57:54Z -
2025-12-26T04:57:54Z - Loading
Ender-3 V2 Build for November Rev.1
NOVEMBER 2025 REV.1
Version: 2.1.3g-11-ender3-1
Continually updating with Marlin bugfix-2.1.x
⬂ List of recent updates ⬃
What's new in this release
⍟ Firmware Selector ⍟
Tip
You can use the Firmware Selector to help choose which file to download.
How to install the firmware
To update the firmware, choose the file ending in .bin and place it in your SD card:
(You may need to rename the file if reinstalling or if it doesn't flash the first time)- For a Creality board, put it in the root folder of the drive
Or unless otherwise specified
please flash the new DWIN_SET now!
Important
🚩To use this version, you must✶ update the DWIN_SET to the LCD screen. New ICON's have been added, and others were remastered.
- Choose a DWIN_SET from the "display assets" folder
- Copy it to the root of an SD card
- Remove the name in ( ) from the folder
e.g. "DWIN_SET (Original)" => "DWIN_SET" - Open the back of the LCD, insert the card📲
- Turn on power, wait until the screen goes Blue🔵 to Red🔴
- Turn off, remove card⤵. Good to go!✅
✶ Technically you don't have to reflash the new DWIN_SET, but some ICON's will be missing if you do not.
Warning
🚧Please be aware of the following:
While using _BLT or _MM versions, if you encounter the bed Mesh not saving...
This workaround resolves the issue without having to redo the mesh again.
- Build Mesh (first time)
- Save Mesh
- After any time you Power Off and Power On -->
3a. Go to Control/Advanced Settings/Load Settings
-OR-
3b. Load this into your Start Gcode
G28 ; Home
M501 ; Load settings
M420 S1 ; Pull your mesh bed level
;(Remaining Gcode / Start Print)>>>
If you experience this issue as it starts printing --> Mesh leveling data is drawing over the printing screen
The correct way of set the start G-code script is detailed in: Slicer Gcode Scripts
Otherwise I would advice just not using G29 to build a mesh in the Gcode, but instead manually make one before printing, or just make one mesh for all prints.
⬇️Click to expand for detailed informationℹ️
This is a universal firmware that has been optimized and enhanced for both the Voxelab Aquila and Creality Ender-3 V2/S1.
This is based on MriscoC's Professional Firmware for the Creality Ender-3 V2/S1. This particular build release is for the LCD color displays of Creality Ender-3 V2 or similar variant.
- Aquila Build Voxelab Aquila S3/X3 - use _IND (Induction Probe)
- HC32 Build
- Aquila C2 Build Having monochrome 12864 LCD
🆕Recent Updates
EDITABLE_HOMING_FEEDRATEis now available in most, if not all, builds- BTT SKR Mini E3 V3 / V2 / V3.0.1 finally supported for ProUI - (4.3" Stock Aquila/Ender-3 V2 Color LCD)
- If you have a TFT or other display, you can request firmware *.bin files to be made, or compile your own
- BIQU MicroProbe V2.0 is now supported with _BMP prefix
- Creality Spider Speedy Ceramic Hotend is now supported with _SPDY5 prefix
- Creality E3 Free-runs + Ender-3 S1 | F1/F4 board support
- Creality Ender-3 S1 support for Creality Sprite Extruder
📚Versions
- These are the configurations offered:
Bed Leveling Options
- [ _Default-NP ]: Use if you have a near stock machine Default No Probe
- [ _MM ]: Create a bed mesh without an auto bed probe Manual Mesh Bed Leveling
- [ _BLT ]: Use if you have a CR/3D/BL-Touch level sensor installed. Bilinear Auto Bed Leveling
- [ _UBL ]: Similar to both MM and BLT - with more options. Recommended over BLT Unified Bed Leveling
Special Versions
- (List of file prefixes and suffixes)
- ProUI Extra Features
- [ -ProUI-EX ]
| Toolbar, change bed physical dimensions | (Change other special features and options without having to reflash) - Alternative Boards See under Aquila Model
- [ _SKR-Mini-E3- ]
| BTT SKR Mini E3 | (V2.0, V3.0, V3.0.1) -
V2:
STM32F103RCchip
V3:STM32G0B1REchip
V3_0_1:STM32F401RCchip
See under Ender Model
- [ _E3-Free-runs ]
| Creality E3 Free-runs | (Creality board - TMC2209 drivers) - [ -S1<F1/F4> ]
| Creality Ender-3 S1 | (Check to see whether you have F1 or F4) -
-S1-F1:
STM32F103RCchip andCREALITY_V24S1_301board
-S1-F4:STM32F401RCchip andCREALITY_V24S1_301F4board - LCD Displays
- [ DWIN ]
| Stock DWIN LCD | (No actual prefix) - [ TJC- ]
| Creality TJC LCD | (As aftermarket or sometimes used in stock Creality machines) - [ C2- ]
| Monochrome 128x64 LCD | (Used in Aquila C2 and original Ender-3/CR-10)
This has NO ProUI capabilities
- Features
- [ _SPRT13 ]
| Sprite Extruder | (Uses thermistor # 13) - [ _SPDY5 ]
| Spider Speedy Ceramic Hotend | (Uses thermistor # 5) - [ _IND ]
| Inductive Sensor | (Probe used on X3/S2 models) - [ _BMP ]
| BIQU MicroProbe V2.0 | (Alternative to CR/3D/BL/-Touch)
Use ONLY this firmware with _BMP if you DO have this probe
- Options
- [ -IS ]
| Input Shaping | (Similar to Linear Advance)
Use ONLY if you mean to do the initial calibration✶
- [ -MPC ]
| MPC Autotune | (Replaces PID for hotend)
Prints will be effected regardless. May require a special breakout board or test prints to calibrate.
See Related Information below
UBL Information
Binaries with UBL in their filename are similar to the bilinear leveling of BLT, but with extra features to provide users with more control and information. There are multiple guides about UBL, it's recommend reading about it before using this type of leveling system.
Contributors
Assets 626
HC32 for November Rev.1
NOVEMBER 2025 REV.1
Version: 2.1.3g-11-HC32-1
Continually updating with Marlin bugfix-2.1.x
⬂ List of recent updates ⬃
What's new in this release
⍟ Firmware Selector ⍟
Tip
You can use the Firmware Selector to help choose which file to download.
How to install the firmware
To update the firmware, choose the file ending in .bin and place it in your SD card:
(You may need to rename the file if reinstalling or if it doesn't flash the first time)- For an Aquila board, put it inside a folder named "firmware"
- For a Creality board, put it in the root folder of the drive
Or unless otherwise specified
please flash the new DWIN_SET now!
Important
🚩To use this version, you must✶ update the DWIN_SET to the LCD screen. New ICON's have been added, and others were remastered.
- Choose a DWIN_SET from the "display assets" folder
- Copy it to the root of an SD card
- Remove the name in ( ) from the folder
e.g. "DWIN_SET (Original)" => "DWIN_SET" - Open the back of the LCD, insert the card📲
- Turn on power, wait until the screen goes Blue🔵 to Red🔴
- Turn off, remove card⤵. Good to go!✅
✶ Technically you don't have to reflash the new DWIN_SET, but some ICON's will be missing if you do not.
Warning
🚧Please be aware of the following:
The screen freezes and restarts when SD card is inserted. This means that everything so far seems to work correctly as it should, except for when an SD card is inserted, so printing may not be possible unless you use USB serial interface to upload the file (through a slicer or something like Pronterface).
While using _BLT or _MM versions, if you encounter the bed Mesh not saving...
This workaround resolves the issue without having to redo the mesh again.
- Build Mesh (first time)
- Save Mesh
- After any time you Power Off and Power On -->
3a. Go to Control/Advanced Settings/Load Settings
-OR-
3b. Load this into your Start Gcode
G28 ; Home
M501 ; Load settings
M420 S1 ; Pull your mesh bed level
;(Remaining Gcode / Start Print)>>>
If you experience this issue as it starts printing --> Mesh leveling data is drawing over the printing screen
The correct way of set the start G-code script is detailed in: Slicer Gcode Scripts
Otherwise I would advice just not using G29 to build a mesh in the Gcode, but instead manually make one before printing, or just make one mesh for all prints.
⬇️Click to expand for detailed informationℹ️
This is a universal firmware that has been optimized and enhanced for both the Voxelab Aquila and Creality Ender-3 V2/S1.
This is based on MriscoC's Professional Firmware for the Creality Ender-3 V2/S1. This particular build release is for the LCD color displays of Voxelab Aquila or similar variant. However, firmware for Aquila C2 monochrome LCD (128x64) are available. If you are using a Creality brand screen you can try the -TJC version.
- Aquila Build Voxelab Aquila S3/X3 - use _IND (Induction Probe)
- Ender-3 V2/S1 Build
- Aquila C2 Build Having monochrome 12864 LCD
🆕Recent Updates
EDITABLE_HOMING_FEEDRATEis now available in most, if not all, builds- Other Aquila Builds linked here
- Voxelab Aquila S3/X3 and use _IND - Induction Probe
- Aquila C2 w/ monochrome 12864 LCD is supported having standard UI
- BTT SKR Mini E3 V3 / V2 / V3.0.1 finally supported for ProUI - (4.3" Stock Aquila/Ender-3 V2 Color LCD)
- If you have a TFT or other display, you can request firmware *.bin files to be made, or compile your own
- BIQU MicroProbe V2.0 is now supported with _BMP prefix
- Creality Spider Speedy Ceramic Hotend is now supported with _SPDY5 prefix
- Creality E3 Free-runs + Ender-3 S1 | F1/F4 board support (See Ender-3V2 build)
📚Versions
- These are the configurations offered:
Bed Leveling Options
- [ _Default-NP ]: Use if you have a near stock machine Default No Probe
- [ _MM ]: Create a bed mesh without an auto bed probe Manual Mesh Bed Leveling
- [ _BLT ]: Use if you have a CR/3D/BL-Touch level sensor installed. Bilinear Auto Bed Leveling
- [ _UBL ]: Similar to both MM and BLT - with more options. Recommended over BLT Unified Bed Leveling
Special Versions
- (List of file prefixes and suffixes)
- ProUI Extra Features
- [ -ProUI-EX ]
| Toolbar, change bed physical dimensions | (Change other special features and options without having to reflash) - Alternative Boards See under Aquila Model
- [ _SKR-Mini-E3- ]
| BTT SKR Mini E3 | (V2.0, V3.0, V3.0.1) -
V2:
STM32F103RCchip
V3:STM32G0B1REchip
V3_0_1:STM32F401RCchip
See under Ender Model
- [ _E3-Free-runs ]
| Creality E3 Free-runs | (Creality board - TMC2209 drivers) - [ -S1<F1/F4> ]
| Creality Ender-3 S1 | (Check to see whether you have F1 or F4) -
-S1-F1:
STM32F103RCchip andCREALITY_V24S1_301board
-S1-F4:STM32F401RCchip andCREALITY_V24S1_301F4board - LCD Displays
- [ DWIN ]
| Stock DWIN LCD | (No actual prefix) - [ TJC- ]
| Creality TJC LCD | (As aftermarket or sometimes used in stock Creality machines) - [ C2- ]
| Monochrome 128x64 LCD | (Used in Aquila C2 and original Ender-3/CR-10)
This has NO ProUI capabilities
- Features
- [ _SPRT13 ]
| Sprite Extruder | (Uses thermistor # 13) - [ _SPDY5 ]
| Spider Speedy Ceramic Hotend | (Uses thermistor # 5) - [ _IND ]
| Inductive Sensor | (Probe used on X3/S2 models) - [ _BMP ]
| BIQU MicroProbe V2.0 | (Alternative to CR/3D/BL/-Touch)
Use ONLY this firmware with _BMP if you DO have this probe
- Options
- [ -IS ]
| Input Shaping | (Sim...
Contributors
Assets 146
C2 Build for November Rev.1
NOVEMBER 2025 REV.1
Version: 2.1.3g-11-C2-1
Continually updating with Marlin bugfix-2.1.x
⬂ List of recent updates ⬃
What's new in this release
⍟ Firmware Selector ⍟
Tip
You can use the Firmware Selector to help choose which file to download.
How to install the firmware
To update the firmware, choose the file ending in .bin and place it in your SD card:
(You may need to rename the file if reinstalling or if it doesn't flash the first time)- For an Aquila board, put it inside a folder named "firmware"
- For a Creality board, put it in the root folder of the drive
Or unless otherwise specified
⬇️Click to expand for detailed informationℹ️
This is a universal firmware that has been optimized and enhanced for both the Voxelab Aquila and Creality Ender-3 V2/S1.
This particular build release is for the 128x64 monochrome LCD of Voxelab Aquila C2.
You can also use this on a Creality brand printer.
- Aquila Build Voxelab Aquila S3/X3 - use _IND (Induction Probe)
- HC32 Build
- Ender-3 V2/S1 Build
🆕Recent Updates
EDITABLE_HOMING_FEEDRATEis now available in most, if not all, builds- If you have a TFT or other display, you can request firmware *.bin files to be made, or compile your own
- BIQU MicroProbe V2.0 is now supported with _BMP prefix
- Creality Spider Speedy Ceramic Hotend is now supported with _SPDY5 prefix
📚Versions
- These are the configurations offered:
Bed Leveling Options
- [ _Default-NP ]: Use if you have a near stock machine Default No Probe
- [ _MM ]: Create a bed mesh without an auto bed probe Manual Mesh Bed Leveling
- [ _BLT ]: Use if you have a CR/3D/BL-Touch level sensor installed. Bilinear Auto Bed Leveling
- [ _UBL ]: Similar to both MM and BLT - with more options. Recommended over BLT Unified Bed Leveling
Special Versions
- (List of file prefixes and suffixes)
- LCD Displays
- [ C2- ]
| Monochrome 128x64 LCD | (Used in Aquila C2 and original Ender-3/CR-10)
This has NO ProUI capabilities
- Features
- [ _SPRT13 ]
| Sprite Extruder | (Uses thermistor # 13) - [ _SPDY5 ]
| Spider Speedy Ceramic Hotend | (Uses thermistor # 5) - [ _IND ]
| Inductive Sensor | (Probe used on X3/S2 models) - [ _BMP ]
| BIQU MicroProbe V2.0 | (Alternative to CR/3D/BL/-Touch)
Use ONLY this firmware with _BMP if you DO have this probe
- Options
- [ -IS ]
| Input Shaping | (Similar to Linear Advance)
Use ONLY if you mean to do the initial calibration✶
- [ -MPC ]
| MPC Autotune | (Replaces PID for hotend)
Prints will be effected regardless. May require a special breakout board or test prints to calibrate.
See Related Information below
UBL Information
Binaries with UBL in their filename are similar to the bilinear leveling of BLT, but with extra features to provide users with more control and information. There are multiple guides about UBL, it's recommend reading about it before using this type of leveling system.
- https://all3dp.com/2/marlin-ubl-unified-bed-levelin-simply-explained/
- https://www.3dmakerengineering.com/blogs/3d-printing/unified-bed-leveling-marlin
- https://hackaday.com/2022/01/14/3d-printering-getting-started-with-universal-bed-leveling/
Related Information
- All firmware version types have Linear Advance enabled
- Linear Advance - M900
- Input Shaping is enabled with files ending with "-IS"
- Input Shaping - M593
How to calibrate Input Shaping without extra hardware
Teaching Tech - Input Shaping: Step by Step guide
- MPC is enabled in firmware files containing "-MPC"
- Model Predictive Temperature Control
- MPC has proven to be a better algorithm for keeping the nozzle temperature stable, and is also very useful for high power heaters. It does take some getting used to how it works if you are unfamiliar with it. It's recommended for advanced users, so stick to the default PID versions, especially if your printer is relatively stock
This shows the two types of meshviewer as an example;
the newer colorful one has a more rainbow like characteristic:
Select Color Menu
Aquila Build for November Rev.1
NOVEMBER 2025 REV.1
Version: 2.1.3g-11-1
Continually updating with Marlin bugfix-2.1.x
⬂ List of recent updates ⬃
What's new in this release
⍟ Firmware Selector ⍟
Tip
You can use the Firmware Selector to help choose which file to download.
How to install the firmware
To update the firmware, choose the file ending in .bin and place it in your SD card:
(You may need to rename the file if reinstalling or if it doesn't flash the first time)- For an Aquila board, put it inside a folder named "firmware"
- For a Creality board, put it in the root folder of the drive
Or unless otherwise specified
please flash the new DWIN_SET now!
Important
🚩To use this version, you must✶ update the DWIN_SET to the LCD screen. New ICON's have been added, and others were remastered.
- Choose a DWIN_SET from the "display assets" folder
- Copy it to the root of an SD card
- Remove the name in ( ) from the folder
e.g. "DWIN_SET (Original)" => "DWIN_SET" - Open the back of the LCD, insert the card📲
- Turn on power, wait until the screen goes Blue🔵 to Red🔴
- Turn off, remove card⤵. Good to go!✅
✶ Technically you don't have to reflash the new DWIN_SET, but some ICON's will be missing if you do not.
Warning
🚧Please be aware of the following:
While using _BLT or _MM versions, if you encounter the bed Mesh not saving...
This workaround resolves the issue without having to redo the mesh again.
- Build Mesh (first time)
- Save Mesh
- After any time you Power Off and Power On -->
3a. Go to Control/Advanced Settings/Load Settings
-OR-
3b. Load this into your Start Gcode
G28 ; Home
M501 ; Load settings
M420 S1 ; Pull your mesh bed level
;(Remaining Gcode / Start Print)>>>
If you experience this issue as it starts printing --> Mesh leveling data is drawing over the printing screen
The correct way of set the start G-code script is detailed in: Slicer Gcode Scripts
Otherwise I would advice just not using G29 to build a mesh in the Gcode, but instead manually make one before printing, or just make one mesh for all prints.
⬇️Click to expand for detailed informationℹ️
This is a universal firmware that has been optimized and enhanced for both the Voxelab Aquila and Creality Ender-3 V2/S1.
This is based on MriscoC's Professional Firmware for the Creality Ender-3 V2/S1. This particular build release is for the LCD color displays of Voxelab Aquila or similar variant. However, firmware for Aquila C2 monochrome LCD (128x64) are available. If you are using a Creality brand screen you can try the -TJC version.
If you are using an Aquila S3, use firmware having _IND (Inductive Probe). You may need to adjust your Probe Offsets, specifically the Y Offset, set this to -20 or -25 as per this post here. From the Main Menu, go to Level > Probe Settings > Probe Y Offset.
- HC32 Build
- Ender-3 V2/S1 Build
- Aquila C2 Build Having monochrome 12864 LCD
🆕Recent Updates
EDITABLE_HOMING_FEEDRATEis now available in most, if not all, builds- BTT SKR Mini E3 V3 / V2 / V3.0.1 finally supported for ProUI - (4.3" Stock Aquila/Ender-3 V2 Color LCD)
- If you have a TFT or other display, you can request firmware *.bin files to be made, or compile your own
- BIQU MicroProbe V2.0 is now supported with _BMP prefix
- Creality Spider Speedy Ceramic Hotend is now supported with _SPDY5 prefix
- Creality E3 Free-runs + Ender-3 S1 | F1/F4 board support (See Ender-3V2 build)
📚Versions
- These are the configurations offered:
Bed Leveling Options
- [ _Default-NP ]: Use if you have a near stock machine Default No Probe
- [ _MM ]: Create a bed mesh without an auto bed probe Manual Mesh Bed Leveling
- [ _BLT ]: Use if you have a CR/3D/BL-Touch level sensor installed. Bilinear Auto Bed Leveling
- [ _UBL ]: Similar to both MM and BLT - with more options. Recommended over BLT Unified Bed Leveling
Special Versions
- (List of file prefixes and suffixes)
- ProUI Extra Features
- [ -ProUI-EX ]
| Toolbar, change bed physical dimensions | (Change other special features and options without having to reflash) - Alternative Boards See under Aquila Model
- [ _SKR-Mini-E3- ]
| BTT SKR Mini E3 | (V2.0, V3.0, V3.0.1) -
V2:
STM32F103RCchip
V3:STM32G0B1REchip
V3_0_1:STM32F401RCchip
See under Ender Model
- [ _E3-Free-runs ]
| Creality E3 Free-runs | (Creality board - TMC2209 drivers) - [ -S1<F1/F4> ]
| Creality Ender-3 S1 | (Check to see whether you have F1 or F4) -
-S1-F1:
STM32F103RCchip andCREALITY_V24S1_301board
-S1-F4:STM32F401RCchip andCREALITY_V24S1_301F4board - LCD Displays
- [ DWIN ]
| Stock DWIN LCD | (No actual prefix) - [ TJC- ]
| Creality TJC LCD | (As aftermarket or sometimes used in stock Creality machines) - [ C2- ]
| Monochrome 128x64 LCD | (Used in Aquila C2 and original Ender-3/CR-10)
This has NO ProUI capabilities
- Features
- [ _SPRT13 ]
| Sprite Extruder | (Uses thermistor # 13) - [ _SPDY5 ]
| Spider Speedy Ceramic Hotend | (Uses thermistor # 5) - [ _IND ]
| Inductive Sensor | (Probe used on X3/S2 models) - [ _BMP ]
| BIQU MicroProbe V2.0 | (Alternative to CR/3D/BL/-Touch)
Use ONLY this firmware with _BMP if you DO have this probe
- Options
- [ -IS ]
| Input Shaping | (Similar to Linear Advance)
Use ONLY if you mean to do the initial calibration✶
- [ -MPC ]
| MPC Autotune | (Replaces PID for hotend)
Prints will be effected regardless. May require a ...
Contributors
Assets 706
Ender-3 V2 Build for November
NOVEMBER 2025
Version: 2.1.3g-11-ender3
Continually updating with Marlin bugfix-2.1.x
⬂ List of recent updates ⬃
What's new in this release
⍟ Firmware Selector ⍟
Tip
You can use the Firmware Selector to help choose which file to download.
How to install the firmware
To update the firmware, choose the file ending in .bin and place it in your SD card:
(You may need to rename the file if reinstalling or if it doesn't flash the first time)- For a Creality board, put it in the root folder of the drive
Or unless otherwise specified
please flash the new DWIN_SET now!
Important
🚩To use this version, you must✶ update the DWIN_SET to the LCD screen. New ICON's have been added, and others were remastered.
- Choose a DWIN_SET from the "display assets" folder
- Copy it to the root of an SD card
- Remove the name in ( ) from the folder
e.g. "DWIN_SET (Original)" => "DWIN_SET" - Open the back of the LCD, insert the card📲
- Turn on power, wait until the screen goes Blue🔵 to Red🔴
- Turn off, remove card⤵. Good to go!✅
✶ Technically you don't have to reflash the new DWIN_SET, but some ICON's will be missing if you do not.
Warning
🚧Please be aware of the following:
While using _BLT or _MM versions, if you encounter the bed Mesh not saving...
This workaround resolves the issue without having to redo the mesh again.
- Build Mesh (first time)
- Save Mesh
- After any time you Power Off and Power On -->
3a. Go to Control/Advanced Settings/Load Settings
-OR-
3b. Load this into your Start Gcode
G28 ; Home
M501 ; Load settings
M420 S1 ; Pull your mesh bed level
;(Remaining Gcode / Start Print)>>>
If you experience this issue as it starts printing --> Mesh leveling data is drawing over the printing screen
The correct way of set the start G-code script is detailed in: Slicer Gcode Scripts
Otherwise I would advice just not using G29 to build a mesh in the Gcode, but instead manually make one before printing, or just make one mesh for all prints.
⬇️Click to expand for detailed informationℹ️
This is a universal firmware that has been optimized and enhanced for both the Voxelab Aquila and Creality Ender-3 V2/S1.
This is based on MriscoC's Professional Firmware for the Creality Ender-3 V2/S1. This particular build release is for the LCD color displays of Creality Ender-3 V2 or similar variant.
- Aquila Build Voxelab Aquila S3/X3 - use _IND (Induction Probe)
- HC32 Build
- Aquila C2 Build Having monochrome 12864 LCD
🆕Recent Updates
EDITABLE_HOMING_FEEDRATEis now available in most, if not all, builds- BTT SKR Mini E3 V3 / V2 / V3.0.1 finally supported for ProUI - (4.3" Stock Aquila/Ender-3 V2 Color LCD)
- If you have a TFT or other display, you can request firmware *.bin files to be made, or compile your own
- BIQU MicroProbe V2.0 is now supported with _BMP prefix
- Creality Spider Speedy Ceramic Hotend is now supported with _SPDY5 prefix
- Creality E3 Free-runs + Ender-3 S1 | F1/F4 board support
- Creality Ender-3 S1 support for Creality Sprite Extruder
📚Versions
- These are the configurations offered:
Bed Leveling Options
- [ _Default-NP ]: Use if you have a near stock machine Default No Probe
- [ _MM ]: Create a bed mesh without an auto bed probe Manual Mesh Bed Leveling
- [ _BLT ]: Use if you have a CR/3D/BL-Touch level sensor installed. Bilinear Auto Bed Leveling
- [ _UBL ]: Similar to both MM and BLT - with more options. Recommended over BLT Unified Bed Leveling
Special Versions
- (List of file prefixes and suffixes)
- ProUI Extra Features
- [ -ProUI-EX ]
| Toolbar, change bed physical dimensions | (Change other special features and options without having to reflash) - Alternative Boards See under Aquila Model
- [ _SKR-Mini-E3- ]
| BTT SKR Mini E3 | (V2.0, V3.0, V3.0.1) -
V2:
STM32F103RCchip
V3:STM32G0B1REchip
V3_0_1:STM32F401RCchip
See under Ender Model
- [ _E3-Free-runs ]
| Creality E3 Free-runs | (Creality board - TMC2209 drivers) - [ -S1<F1/F4> ]
| Creality Ender-3 S1 | (Check to see whether you have F1 or F4) -
-S1-F1:
STM32F103RCchip andCREALITY_V24S1_301board
-S1-F4:STM32F401RCchip andCREALITY_V24S1_301F4board - LCD Displays
- [ DWIN ]
| Stock DWIN LCD | (No actual prefix) - [ TJC- ]
| Creality TJC LCD | (As aftermarket or sometimes used in stock Creality machines) - [ C2- ]
| Monochrome 128x64 LCD | (Used in Aquila C2 and original Ender-3/CR-10)
This has NO ProUI capabilities
- Features
- [ _SPRT13 ]
| Sprite Extruder | (Uses thermistor # 13) - [ _SPDY5 ]
| Spider Speedy Ceramic Hotend | (Uses thermistor # 5) - [ _IND ]
| Inductive Sensor | (Probe used on X3/S2 models) - [ _BMP ]
| BIQU MicroProbe V2.0 | (Alternative to CR/3D/BL/-Touch)
Use ONLY this firmware with _BMP if you DO have this probe
- Options
- [ -IS ]
| Input Shaping | (Similar to Linear Advance)
Use ONLY if you mean to do the initial calibration✶
- [ -MPC ]
| MPC Autotune | (Replaces PID for hotend)
Prints will be effected regardless. May require a special breakout board or test prints to calibrate.
See Related Information below
UBL Information
Binaries with UBL in their filename are similar to the bilinear leveling of BLT, but with extra features to provide users with more control and information. There are multiple guides about UBL, it's recommend reading about it before using this type of leveling system.
Contributors
Assets 626
HC32 for November
NOVEMBER 2025
Version: 2.1.3g-11-HC32
Continually updating with Marlin bugfix-2.1.x
⬂ List of recent updates ⬃
What's new in this release
⍟ Firmware Selector ⍟
Tip
You can use the Firmware Selector to help choose which file to download.
How to install the firmware
To update the firmware, choose the file ending in .bin and place it in your SD card:
(You may need to rename the file if reinstalling or if it doesn't flash the first time)- For an Aquila board, put it inside a folder named "firmware"
- For a Creality board, put it in the root folder of the drive
Or unless otherwise specified
please flash the new DWIN_SET now!
Important
🚩To use this version, you must✶ update the DWIN_SET to the LCD screen. New ICON's have been added, and others were remastered.
- Choose a DWIN_SET from the "display assets" folder
- Copy it to the root of an SD card
- Remove the name in ( ) from the folder
e.g. "DWIN_SET (Original)" => "DWIN_SET" - Open the back of the LCD, insert the card📲
- Turn on power, wait until the screen goes Blue🔵 to Red🔴
- Turn off, remove card⤵. Good to go!✅
✶ Technically you don't have to reflash the new DWIN_SET, but some ICON's will be missing if you do not.
Warning
🚧Please be aware of the following:
The screen freezes and restarts when SD card is inserted. This means that everything so far seems to work correctly as it should, except for when an SD card is inserted, so printing may not be possible unless you use USB serial interface to upload the file (through a slicer or something like Pronterface).
While using _BLT or _MM versions, if you encounter the bed Mesh not saving...
This workaround resolves the issue without having to redo the mesh again.
- Build Mesh (first time)
- Save Mesh
- After any time you Power Off and Power On -->
3a. Go to Control/Advanced Settings/Load Settings
-OR-
3b. Load this into your Start Gcode
G28 ; Home
M501 ; Load settings
M420 S1 ; Pull your mesh bed level
;(Remaining Gcode / Start Print)>>>
If you experience this issue as it starts printing --> Mesh leveling data is drawing over the printing screen
The correct way of set the start G-code script is detailed in: Slicer Gcode Scripts
Otherwise I would advice just not using G29 to build a mesh in the Gcode, but instead manually make one before printing, or just make one mesh for all prints.
⬇️Click to expand for detailed informationℹ️
This is a universal firmware that has been optimized and enhanced for both the Voxelab Aquila and Creality Ender-3 V2/S1.
This is based on MriscoC's Professional Firmware for the Creality Ender-3 V2/S1. This particular build release is for the LCD color displays of Voxelab Aquila or similar variant. However, firmware for Aquila C2 monochrome LCD (128x64) are available. If you are using a Creality brand screen you can try the -TJC version.
- Aquila Build Voxelab Aquila S3/X3 - use _IND (Induction Probe)
- Ender-3 V2/S1 Build
- Aquila C2 Build Having monochrome 12864 LCD
🆕Recent Updates
EDITABLE_HOMING_FEEDRATEis now available in most, if not all, builds- Other Aquila Builds linked here
- Voxelab Aquila S3/X3 and use _IND - Induction Probe
- Aquila C2 w/ monochrome 12864 LCD is supported having standard UI
- BTT SKR Mini E3 V3 / V2 / V3.0.1 finally supported for ProUI - (4.3" Stock Aquila/Ender-3 V2 Color LCD)
- If you have a TFT or other display, you can request firmware *.bin files to be made, or compile your own
- BIQU MicroProbe V2.0 is now supported with _BMP prefix
- Creality Spider Speedy Ceramic Hotend is now supported with _SPDY5 prefix
- Creality E3 Free-runs + Ender-3 S1 | F1/F4 board support (See Ender-3V2 build)
📚Versions
- These are the configurations offered:
Bed Leveling Options
- [ _Default-NP ]: Use if you have a near stock machine Default No Probe
- [ _MM ]: Create a bed mesh without an auto bed probe Manual Mesh Bed Leveling
- [ _BLT ]: Use if you have a CR/3D/BL-Touch level sensor installed. Bilinear Auto Bed Leveling
- [ _UBL ]: Similar to both MM and BLT - with more options. Recommended over BLT Unified Bed Leveling
Special Versions
- (List of file prefixes and suffixes)
- ProUI Extra Features
- [ -ProUI-EX ]
| Toolbar, change bed physical dimensions | (Change other special features and options without having to reflash) - Alternative Boards See under Aquila Model
- [ _SKR-Mini-E3- ]
| BTT SKR Mini E3 | (V2.0, V3.0, V3.0.1) -
V2:
STM32F103RCchip
V3:STM32G0B1REchip
V3_0_1:STM32F401RCchip
See under Ender Model
- [ _E3-Free-runs ]
| Creality E3 Free-runs | (Creality board - TMC2209 drivers) - [ -S1<F1/F4> ]
| Creality Ender-3 S1 | (Check to see whether you have F1 or F4) -
-S1-F1:
STM32F103RCchip andCREALITY_V24S1_301board
-S1-F4:STM32F401RCchip andCREALITY_V24S1_301F4board - LCD Displays
- [ DWIN ]
| Stock DWIN LCD | (No actual prefix) - [ TJC- ]
| Creality TJC LCD | (As aftermarket or sometimes used in stock Creality machines) - [ C2- ]
| Monochrome 128x64 LCD | (Used in Aquila C2 and original Ender-3/CR-10)
This has NO ProUI capabilities
- Features
- [ _SPRT13 ]
| Sprite Extruder | (Uses thermistor # 13) - [ _SPDY5 ]
| Spider Speedy Ceramic Hotend | (Uses thermistor # 5) - [ _IND ]
| Inductive Sensor | (Probe used on X3/S2 models) - [ _BMP ]
| BIQU MicroProbe V2.0 | (Alternative to CR/3D/BL/-Touch)
Use ONLY this firmware with _BMP if you DO have this probe
- Options
- [ -IS ]
| Input Shaping | (Similar to Lin...