This README is for the backend api of a full stack web application - We Travellers. This API provides a backend database (models and logic) to allow the frontend React application to perform CRUD operations.
-
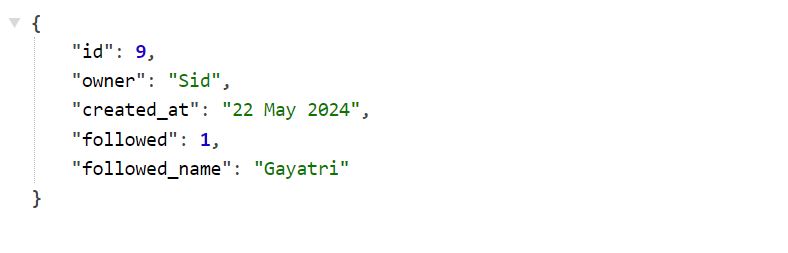
To view the api in a nicer format install a JSON extension like this one
-
Link to live API: We Travellers API
-
Link to the live site: We Travellers
-
Link to Front-End Repository: we-travellers-frontend
We Travellers website is developed as a Portfolio Project#5 (Advanced Front End / React) for the Code Institute's Full Stack Software Development Course.
- We Travellers
- User Experience and Design
"We Travellers" is a social media content sharing platform designed to bring together a vibrant community of travelers who love to share their experiences and discover new destinations. At We Travellers, every journey is a story waiting to be told. Whether it is a weekend getaway, an epic cross-country road trip, or an exotic international expedition, the platform allows users to share their travel experience through captivating posts, stunning photos and travel stories.
-
The aim of the website is to provide a simple, intuitive, visually appealing and user-friendly platform where users can post / share their travel moments, interact with each other by following, commenting, bookmarking and liking posts and comments. The website caters to a diverse audience, from young adults to older generations with an interest in exploring new places, sharing their travel stories or someone who wants an inspiration for their next travel destinations.
-
The application aims to provide a sleek and intuitive user interface, ensuring easy accessibility and seamless navigation across all features. Moreover, it is designed to be responsive, adapting to various screen sizes and devices.
-
The features are presented in a way that makes it easy for users to find what they're looking for.
-
Users can have access to complete features of the website with more personalized content when registered(logged-in). Users can sign in / sign-up to the website by filling out a simple form containing username and password. With logged-in status, users can create(add), update, retrieve and delete the travel posts.
-
Registered users can also like the posts and comments made by other community members. They can bookmark the travel posts they are interested in the most and save it to visit later. To interact with like-minded travelers and get involved with the community, users can create, retrieve, update or delete comments on posts. The follow / unfollow features allows users to access the posts by the users they are interested in as a separate feed.
-
Logged-in users can update their profiles for username, password, their bio and profile avatar. For a personlized user experience, users can view their username and profile avatar in navigation bar through all pages.
-
The posts are accessible to all the users regardless of their logged-in status. Users can also search for travel stories using search / filter functionality. Users can filter posts by title, profile username, region and place to easily find what they are looking for, making their experience smooth and enjoyable.
-
The website navigation provides easy access to all website sections, including personalized content for logged in users.
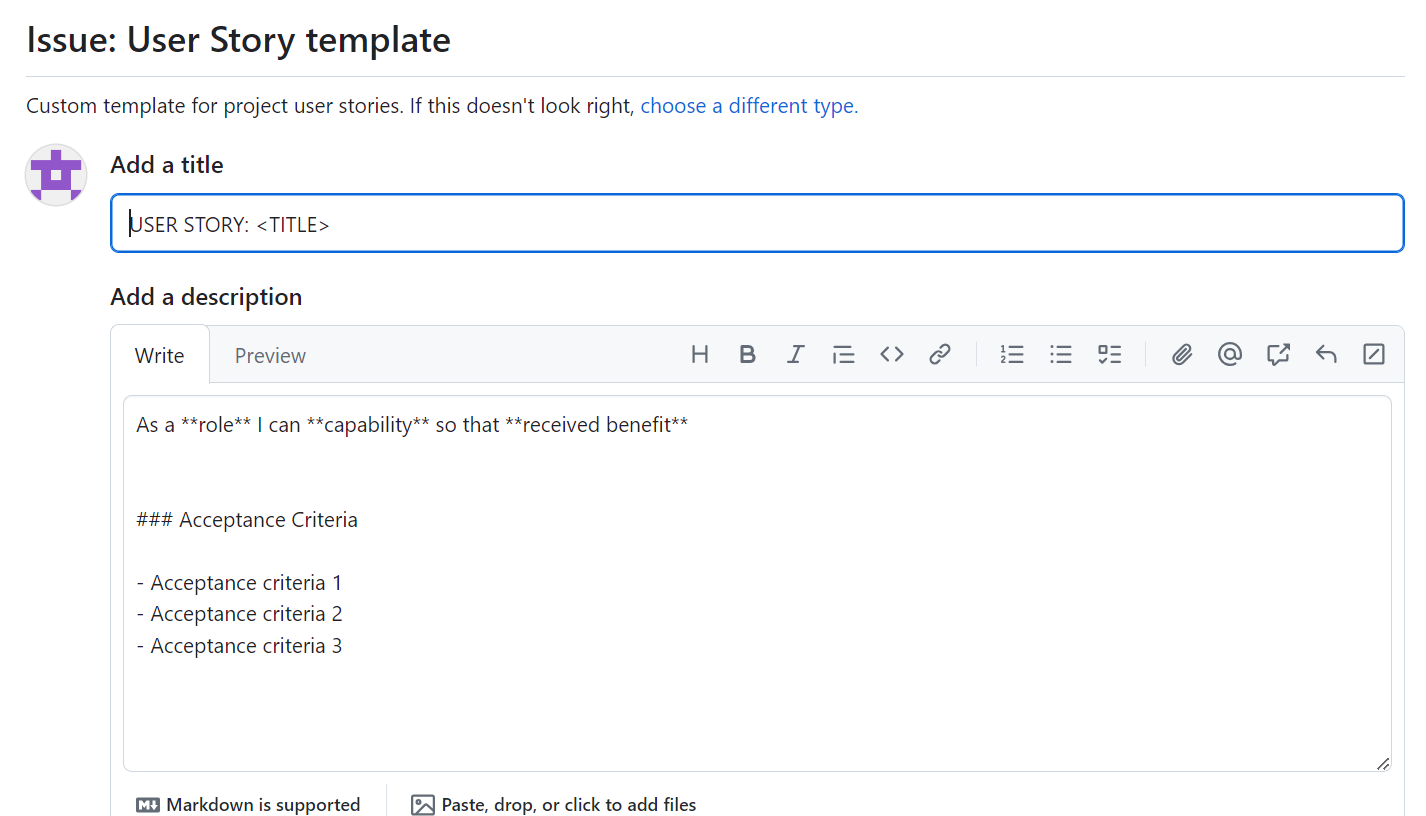
I employed the Agile methodology and utilized a GitHub project board to organize and develop my user stories starting from the project planning stage and continuing until the final product was built. To enhance clarity and structure, a user story template is designed that precisely outlines each user story with an acceptance criteria to be fulfilled. Small features have been assigned to 7 milestones.
-
All User Stories include:
- Acceptance Criteria
- Labels (MoSCoW Prioritization)
-
Labels have been used to mark which features the project : 'must have', 'should have', 'could have' and 'nice to have'. The prioritization was done so that a MVP for the project is created in time I have and only focus on the 'should haves' or 'could haves' if the time allows.
-
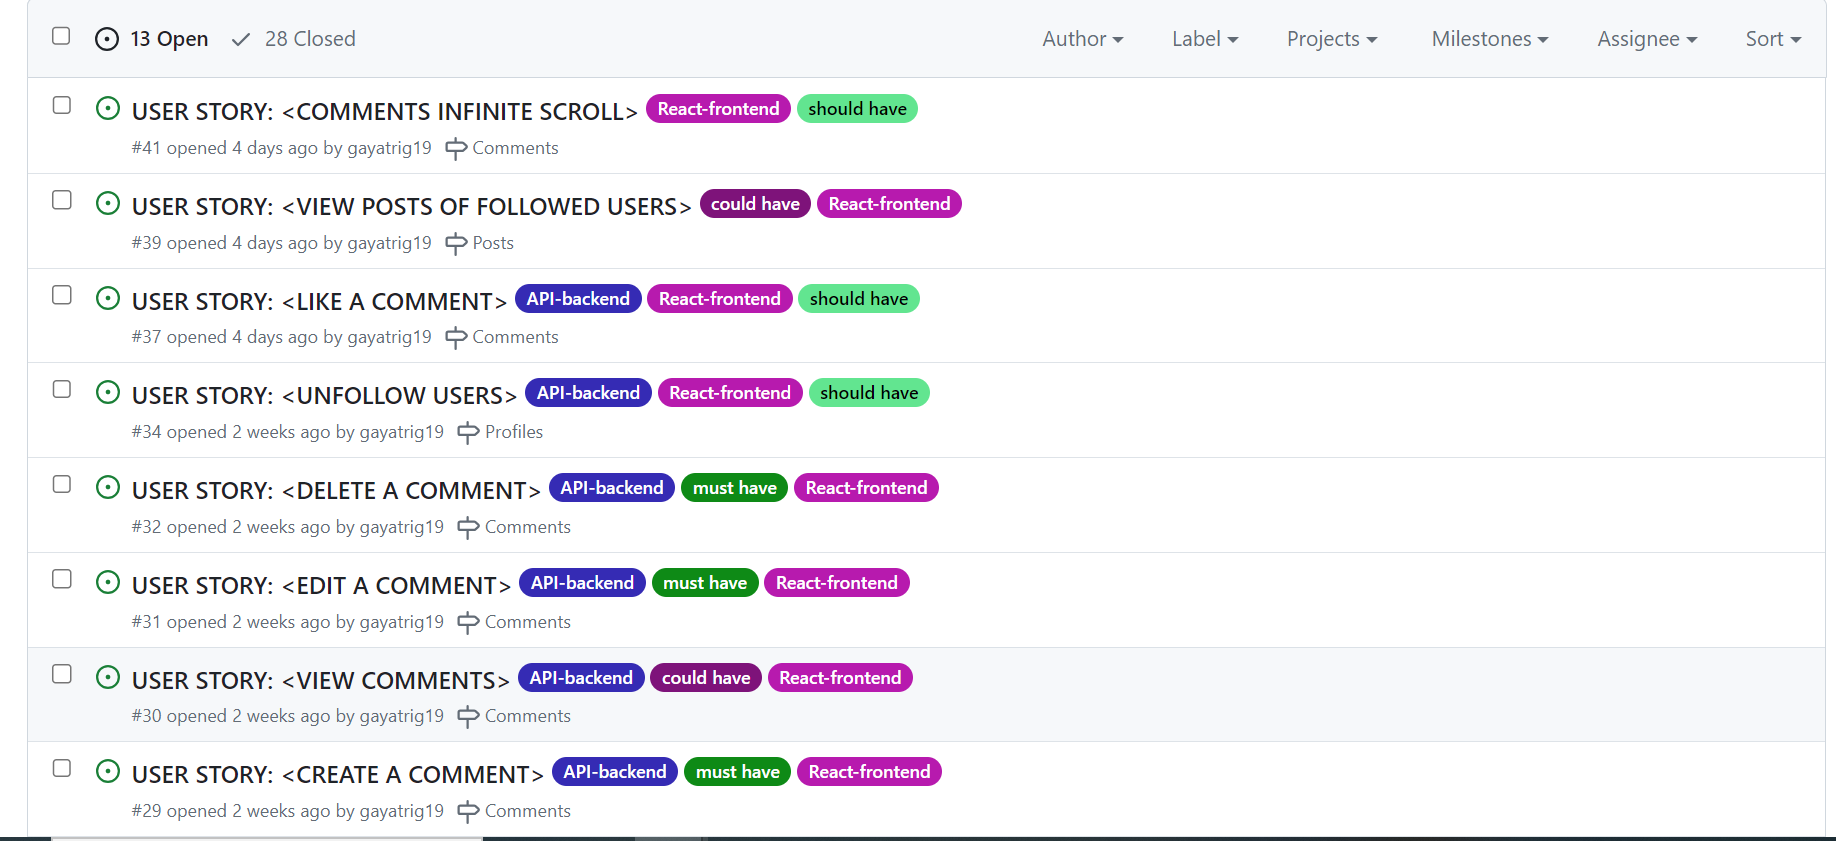
I have created two additional labels to indicate which stories required the backend work and which ones required the front-end work:
- API-backend - for backend api implementation
- React-frontend - for frontend react app
-
The user stories that have both labels is discussed in each README. Instead of creating separate 'developer stories' and 'user stories' for both API and React, I have incorporated both in a single workflow for more structured work with less chaos.
-
Each User story was checked for the acceptance criteria have been met and closed.
-
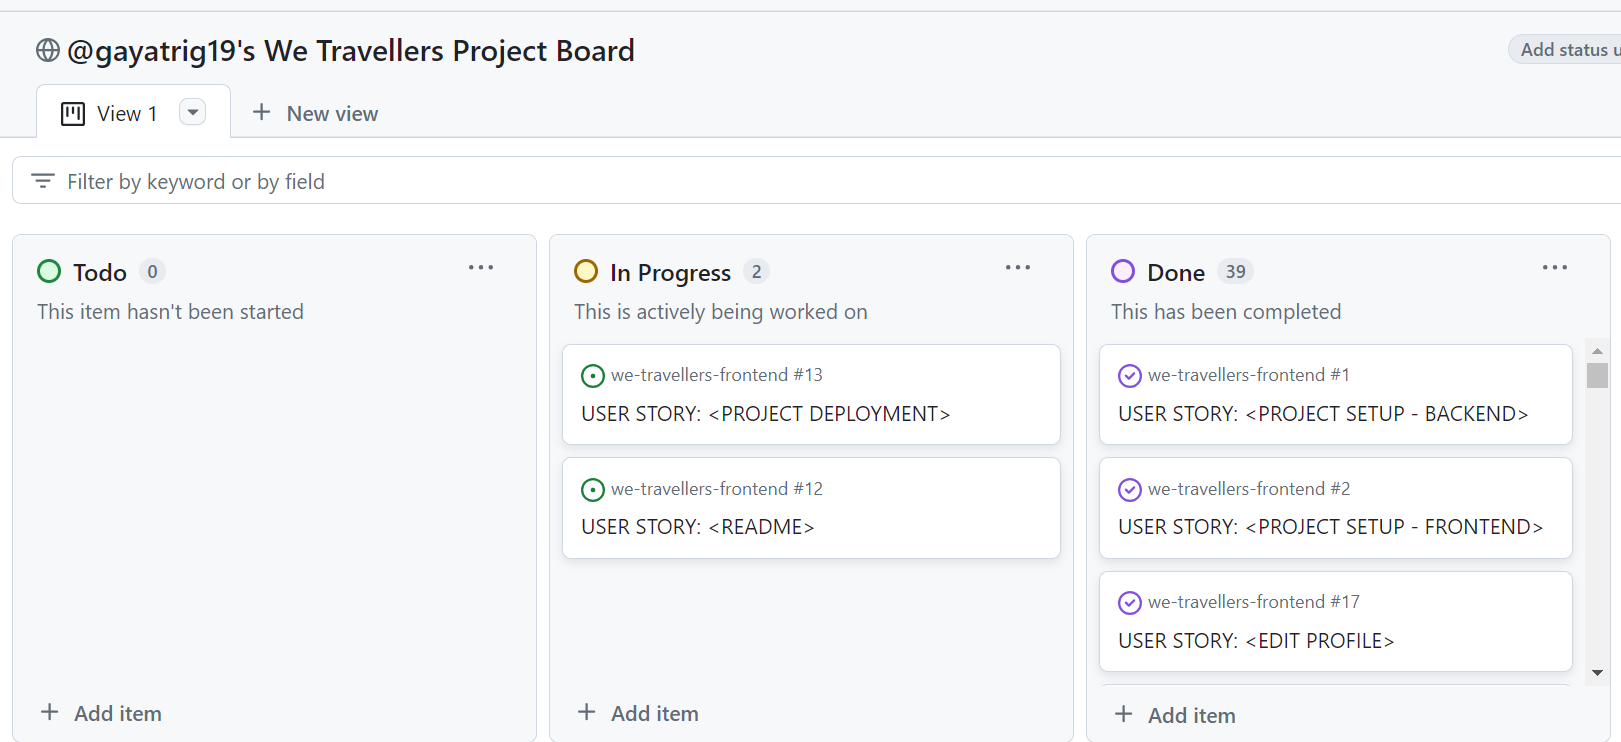
The detailed Project Board with all user stories can be found here. PROJECT BOARD-link
-
Issues Template
- Issues List
- Project Board
-
1- Initial Project Setup:The first task in starting the project was to set it up. All the tasks from setting up github repository to installing django, setting up django app and related packages and libraries were included in this milestone. The acceptance criteria was refined for each of the setup to be completed for clarity and ease of understanding.
-
2- Navigation and Authentication: This milestone covers user authentication and authorization i.e. user sign-up, sign-in and signout so that user can explore complete features and functionality of the website.
-
3- Profiles: Allows users to Create, Retrieve and Edit (CRE) own details. Also allows other users to find out more about a user.
-
4- Posts: This milestone includes all the features enabling the CRUD functionality for the user.
-
5- Comments: Includes all the features enabling the CRUD functionality for the user.
-
6.- Like and Bookmark Posts: Allows users to like / unlike and bookmark posts. Users can perform create, retrieve and delete (CRD) functionality on liked and bookmarked posts.
-
7- Documentation and Deployment: This milestone was needed so that I can document my project in-depth with all website features, testing, deployment information. Deployment section is included as it was absolutely necessary and important to have a live link of fully functional website with no errors so that everyone can have access to the application.
Each Milestone covers the user stories for small features allowing me to prioritize the most important ones to least in project development.
-
Milestone 1- Initial Project Setup
- As a developer, I need to set up the we-travellers api project with all the necessary components and configurations so that I can ensure a smooth API development and deployment process.
- Initialize and setup a GitHub repository with a README file using CI Gitpod template
- Install packages including Django, Cloudinary, Pillow.
- Create new Django Project.
- Add a requirements.txt file listing all project dependencies.
- Create env.py file to store sensitive information.
- Update the settings.py file to notify Django of the installed supporting libraries
- Configure the project to use ElephantSQL database.
- Deploy project to Heroku to test deployment is successful.
- As a developer, I need to set up the we-travellers api project with all the necessary components and configurations so that I can ensure a smooth API development and deployment process.
-
Milestone 2- Navigation and Authentication
- As a Admin/ User, I can register and sign in so that I can access content which requires to be authorised.
- install dj-rest-auth add to settings.py
- install simplejwt library
- create superuser for admin functionalities and website content management.
- As a Admin/ User, I can register and sign in so that I can access content which requires to be authorised.
-
Milestone 3- Profiles
- As a user, I can view other users profiles so that I can see their posts and learn more about them.
- As a user, I can view statistics about a specific user: bio, number of posts, follows and users followed so that I can learn more about them.
- As a logged in user, I can edit my profile details so that I can keep it up to date.
- As a logged in user (profile owner), I can update my username and password details so that I can change my display name and keep my profile safe.
- As a User, I can use a default profile image so that I don't have to upload my own.
- As a logged in user I can follow other users so that I can see posts by specific users in my posts feed and stay updated with any new posts that they create.
- As a logged in user I can unfollow other users so that I can remove posts by specific users from my posts feed.
-
Milestone 4- Posts
- As a logged-in User, I can post an image so that I can share my travel experience with others.
- As a logged-in post owner, I can edit my own posts so that I can make corrections or update my post after it was created.
- As a logged-in post owner, I can delete my own posts so that I can remove the posts I don’t want to share anymore.
- As a User, I can click on a post to view the post details so that I can find out more information about the post.
- As a user, I can view the list of all the most recent posts so that I can browse through them and keep up to date with the newest content.
- As a user, I can view all the posts by a specific user so that I can catch up on their latest posts, or decide I want to follow them.
- As a User, I can search / filter for posts with keywords so that I can find the posts and user profiles I am curious about and learn more about them.
-
Milestone 5- Comments
- As a logged in user, I can add comments to a post so that I can share my thoughts about the post and engage with the community.
- As a logged-in owner of a comment I can edit my comment so that I can fix or update my existing comment.
- As a user I can read comments on posts so that I can read what other users think about the posts.
- As an owner of a comment I can delete my comment so that I can remove the comments I don't want to be posted anymore.
- As a logged-in User, I can like other users' comments so that I can show my appreciation to their opinion.
-
Milestone 6- Like and Bookmark Posts
- As a logged in user, I can like a users' posts so that I can show my appreciation for the posts and authors that interest me.
- As a logged-in user, I can unlike a post so that I can remove a like if I don't feel to like the post anymore.
- As a logged-in User, I can bookmark the posts so that I can save posts and revisit them later.
- As a logged-in User, I can remove bookmark tags (labels) from the posts so that they are no longer displayed on the bookmarks page.
-
Milestone 7- Documentation and Deployment
- As a developer, I need to make sure the project is deployed to heroku so that everything works and looks as expected.
- As a developer, I need to create readme.md file so that the project is documented in detail.
All the features are implemented with user stories in mind. To see all the fields included in each model for API, see Database Design
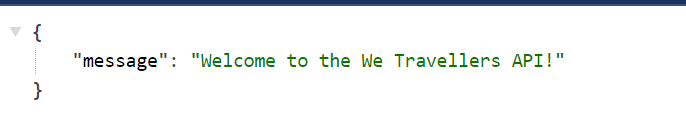
A welcome message is displayed on clicking the deployed link for the We Travellers API.
As a logged-in User, I can post an image so that I can share my travel experience with others.
As a user, I can view the list of all the most recent posts so that I can browse through them and keep up to date with the newest content.
Posts are the main feature of the application, all other features functions in relation with posts.
The posts list view can be accessed here: https://we-travellers-api-125fa063dfcb.herokuapp.com/posts/
  -Endpoint `/posts/`
    -Methods used:
    `GET`  used to list view posts
    `POST` used to create posts
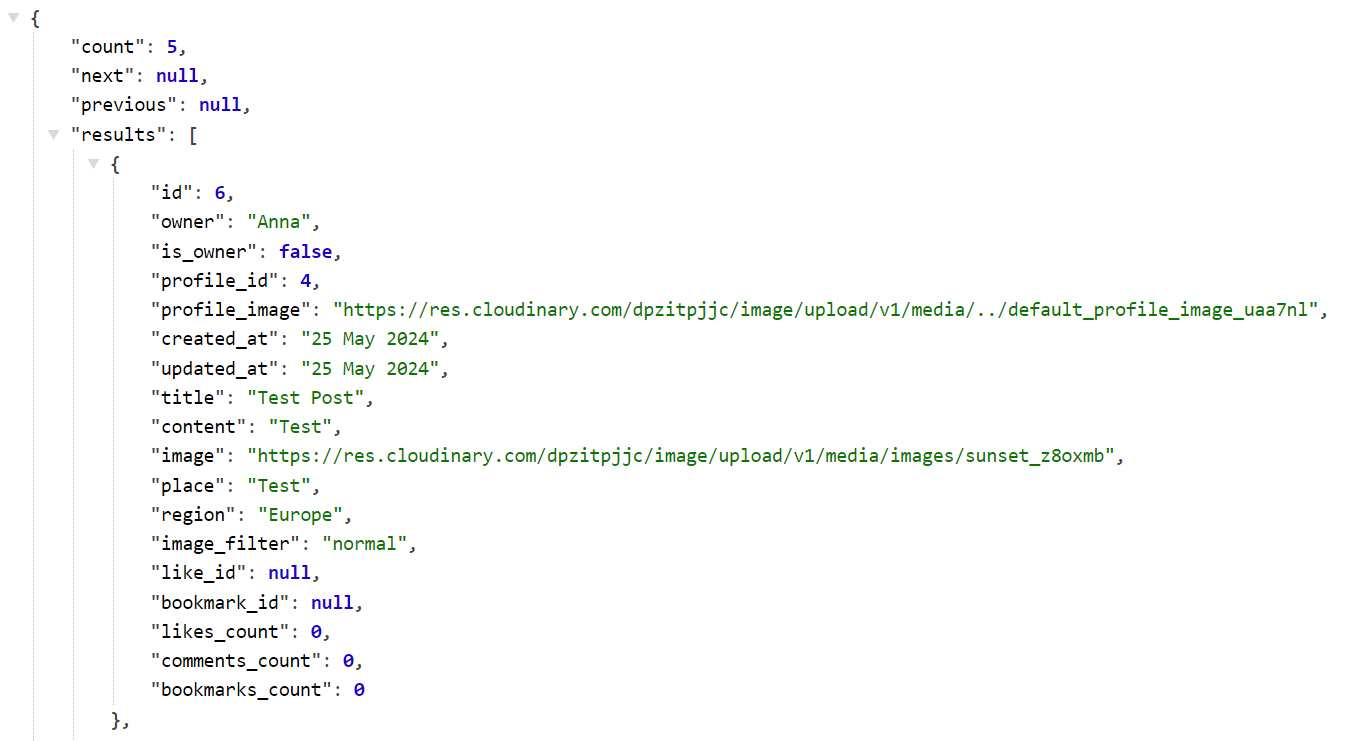
Additional fields added with the help of serializer to JSON data:
- is_owner
- profile_id
- profile_image
To get the like, comments and bookmark counts for each posts following fields are added:
-
like_id
-
bookmark_id
-
likes_count
-
comments_count
-
bookmarks_count
-
Filtering fields have been implemented to Search and Filter posts:
As a User, I can search / filter for posts with keywords so that I can find the posts and user profiles I am curious about and learn more about them.
- Text Search for posts can be performed using owner_username, title, place and region
- Filtering for posts can be performed as:
- Posts that are bookmarked by users to allow users to view a list of posts bookmarked by them
- Posts that are liked by users to allow them to view a list of liked posts by them on filtering
- Posts by users the user is following so that the posts can be viewed in the user feed.
- Posts that are created / added by user so that users can view a list of their own posts.
- To allow ordering of the posts list by likes_count, comments_count, bookmarks_count, likes_created_at and bookmarks_created_at
As a logged-in post owner, I can edit my own posts so that I can make corrections or update my post after it was created.
As a logged-in post owner, I can delete my own posts so that I can remove the posts I don’t want to share anymore.
As a User, I can click on a post to view the post details so that I can find out more information about the post.
   -Endpoint `/posts/int:pk/`
     -Methods:
     `GET`  used to get a post
     `PUT`  used to edit/update a post
     `DELETE` used to delete a post

User can only edit or delete their posts once they are logged in. Logged-in users can also view posts that they have liked and bookmarked. All the users can view number of likes, comments and bookmarks a post has received.
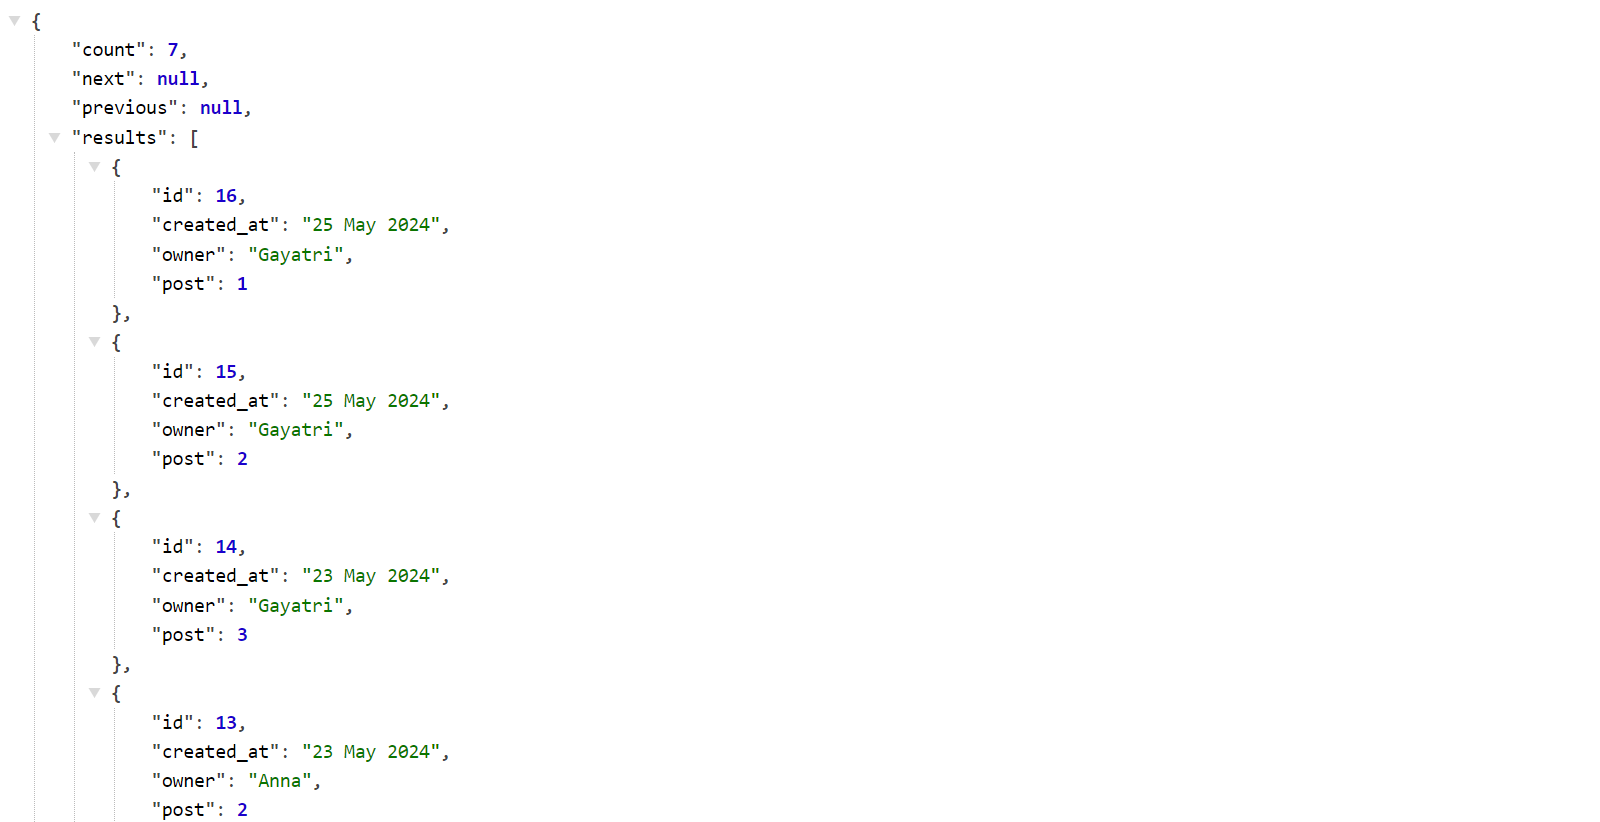
As a logged in user, I can add comments to a post so that I can share my thoughts about the post and engage with the community.
As a user I can read comments on posts so that I can read what other users think about the posts.
The comments list view can be accessed here: https://we-travellers-api-125fa063dfcb.herokuapp.com/comments/
 -Endpoint `/comments/`
   -Methods:
   `GET`  used to list view comments
   `POST`  used to create a comment
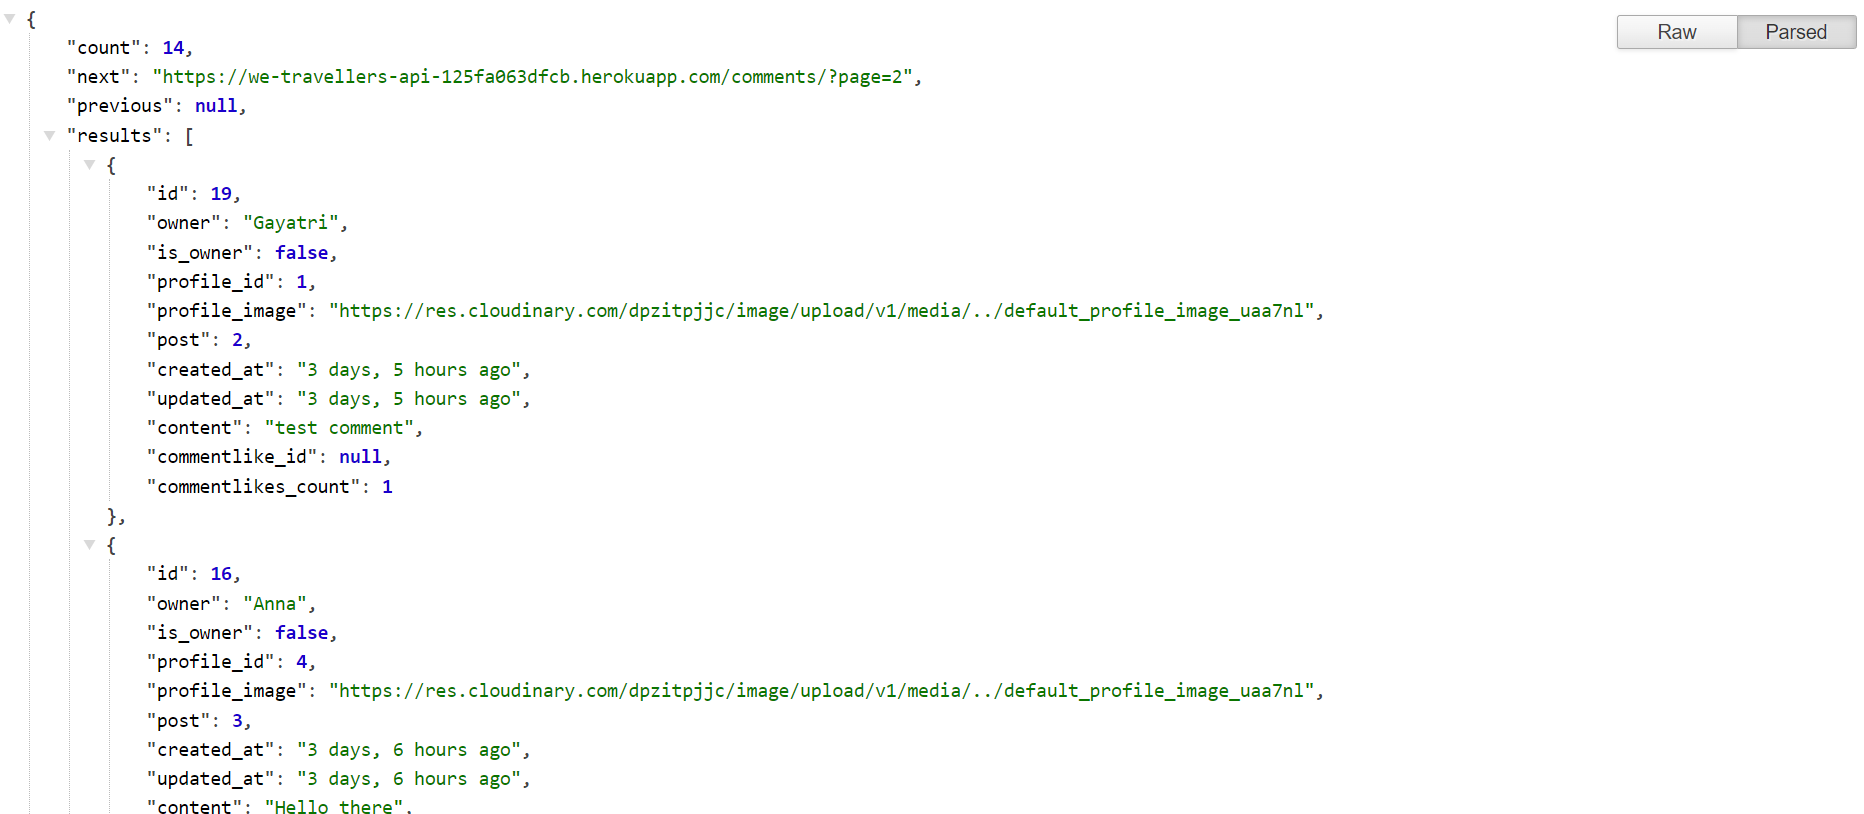
Additional fields added with the help of serializer to JSON data:
- is_owner
- profile_id
- profile_image
- commentlike_id
- commentlikes_count
- created_at
- updated_at
naturaltime is implemented fir created_at and updated_at for users to have time in human readable format.
Filtering is implemented to:
- Filter Backend by posts so that comments are displayed under correct post on front end. Comments are ordered in descending order so that newest comments appear at the top.
As a logged-in owner of a comment I can edit my comment so that I can fix or update my existing comment.
As an owner of a comment I can delete my comment so that I can remove the comments I don't want to be posted anymore.
  -Endpoint `/comments/int:pk/`
    -Methods:
    `GET`  used to list view comments
    `PUT`  used to edit/update a comment
    `DELETE` used to delete a comment
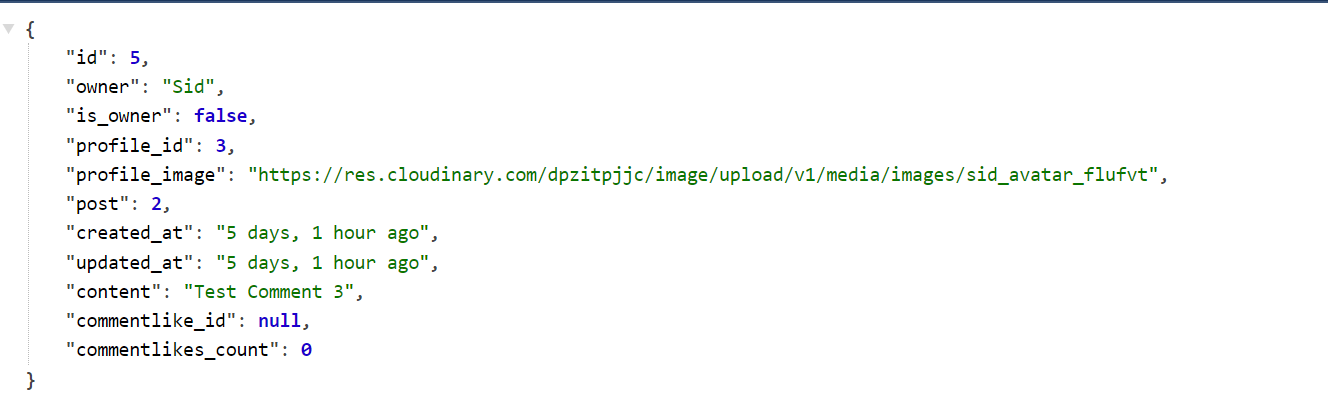
Users can edit or delete their comments only when logged-in. The commentlikes_count allow users to view number of likes on comments
As a logged-in User, I can like other users' comments so that I can show my appreciation to their opinion.
  -Endpoint `/commentlikes/`
    -Methods:
    `GET`  used to list view commentlikes
    `POST`  used to like a comment
The commentlikes list view can be accessed here: https://we-travellers-api-125fa063dfcb.herokuapp.com/commentlikes/
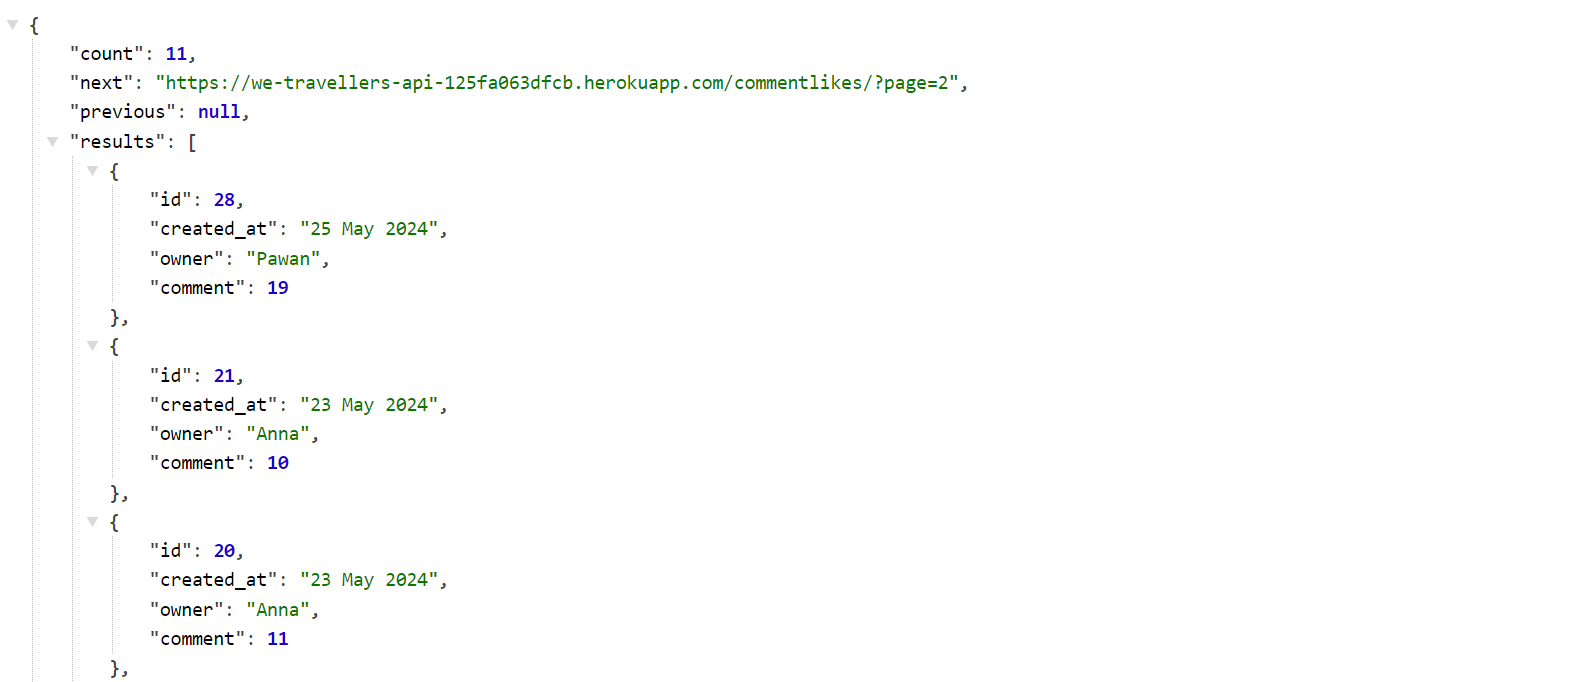
The unique together Meta class makes sure user can't like the same comment twice.
Users can unlike the comment by returning to the comment already liked. The endpoint for deleting commentlike is:
  -Endpoint `/commentlikes/int:pk/`
    -Methods:
    `GET` used to view comment likes
    `DELETE` used to unlike a comment
As a logged in user, I can like a users' posts so that I can show my appreciation for the posts and authors that interest me.
As a logged-in user, I can unlike a post so that I can remove a like if I don't feel to like the post anymore.
The likes list view can be accessed here:https://we-travellers-api-125fa063dfcb.herokuapp.com/likes/
  -Endpoint `/likes/`
    -Methods:
    `GET`  used to list view likes on posts
    `POST`  used to like a post
The unique together Meta class makes sure user can't like the same post twice. Users can view all the liked posts in a list view so that they can easily access the posts by other users that they have liked.
Users can unlike the posts by returning to the post already liked (either in a post list view or post detail view on front end) . The endpoint for deleting like is:
  -Endpoint `/likes/int:pk/`
    -Methods:
    `GET` used to view likes
    `DELETE` used to unlike a post
As a logged-in User, I can bookmark the posts so that I can save posts and revisit them later.
The bookmarks list view can be accessed here: https://we-travellers-api-125fa063dfcb.herokuapp.com/bookmarks/
  -Endpoint `/bookmarks/`
    -Methods:
    `GET`  used to list view the bookmarked posts
    `POST`  used to bookmark a post
The unique together Meta class makes sure user can't bookmark the same post twice. Users can view all the bookmarked posts in a list view so that they can easily access the posts by other users that they have bookmarked.
As a logged-in User, I can remove bookmark tags (labels) from the posts so that they are no longer displayed on the bookmarks page.
Users can remove the bookmark from the posts by returning to the post already bookmarked (either in a post list view or post detail view on front end) . The endpoint for deleting the bookmark on post is:
  -Endpoint `/bookmarks/int:pk/`
    -Methods:
    `GET` used to view bookmarks
    `DELETE` used to remove (delete) bookmark from a post
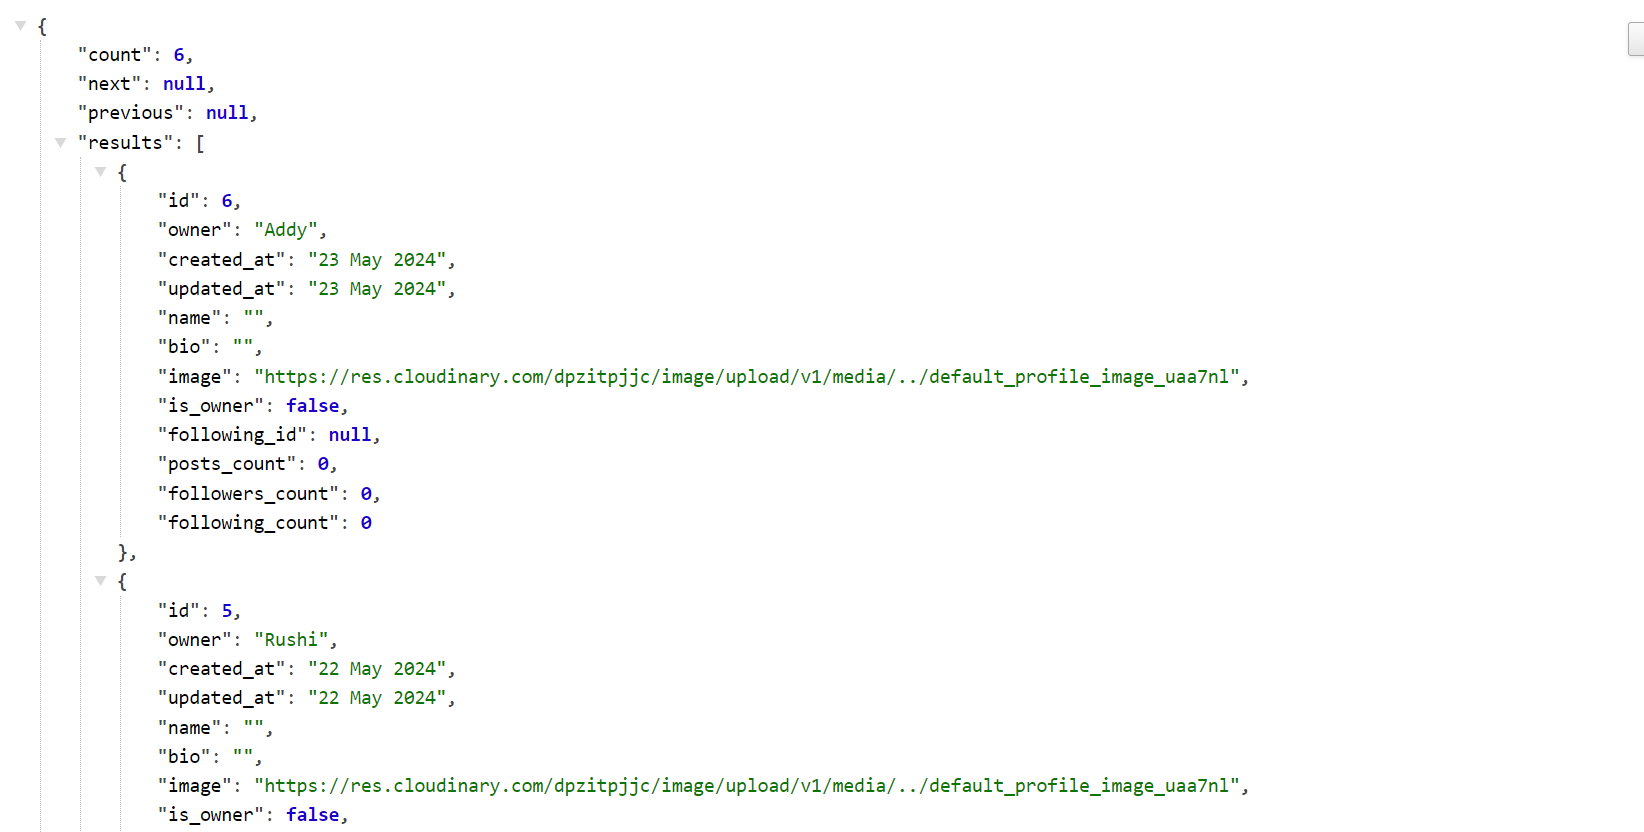
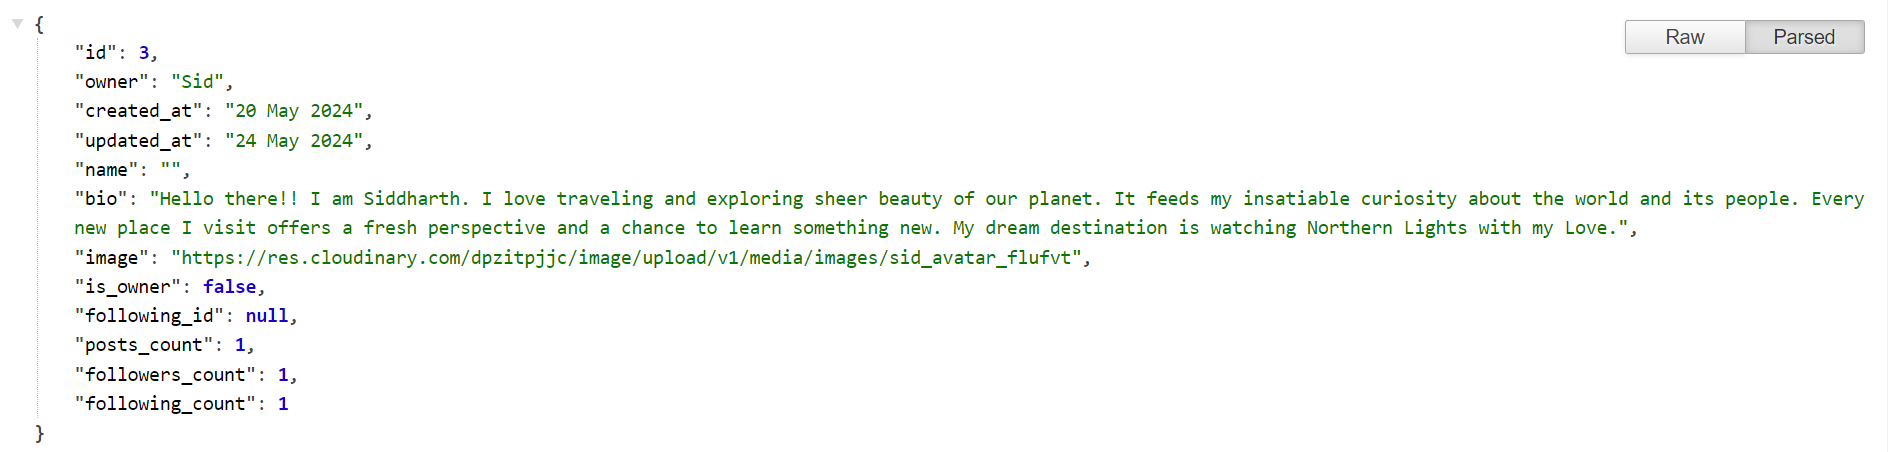
As a user, I can view other users profiles so that I can see their posts and learn more about them.
As a user, I can view statistics about a specific user: bio, number of posts, follows and users followed so that I can learn more about them.
The profiles list view can be accessed here: https://we-travellers-api-125fa063dfcb.herokuapp.com/profiles/
    -Endpoint `/profiles/`
    -Methods:
    `GET`  used to list view profiles
Additional fields added with the help of serializer to JSON data:
- is_owner
- following_id
- posts_count
- followers_count
- following_count
No option to create profile from list view as this is automatically done upon registration with the help of signal created.
If a user uses the id from the profile object and follows current URL with /id they can access profile detail view where if authorised (ie. profiles 'is_owner' field=true) they will be able to edit the profile.
Users can view the statistics of a specific user: their bio, profile avatar, total count of posts(posts_count), total number of users a user is following(following_count) and total number of followers a user has(followers_count).
Filtering is impelemented to:
- Filter backend
- By user profiles that are following users and profiles followed by user to display most popular profiles on front-end.
As a logged in user, I can edit my profile details so that I can keep it up to date.
As a logged in user (profile owner), I can update my username and password details so that I can change my display name and keep my profile safe.
As a User, I can use a default profile image so that I don't have to upload my own.
  -Endpoint `/profiles/int:pk/`
    -Methods:
    `GET`  used to view profile
    `PUT`  used to edit/update a profile
A default profile image is added in imagefield for the user, if user has not uploaded one.
As a logged in user I can follow other users so that I can see posts by specific users in my posts feed and stay updated with any new posts that they create.
The Followers list view can be accessed here: https://we-travellers-api-125fa063dfcb.herokuapp.com/followers/
  -Endpoint `/followers/`
    -Methods:
    `GET`  used to list view the followers
    `POST`  used to follow a user
Users can follow and unfollow user profiles they are interested in by either accessing the side panel for most popular profiles or by accessing detail view of user profiles on the front-end.
As a logged in user I can unfollow other users so that I can remove posts by specific users from my posts feed.
-Endpoint `/followers/int:pk/`
    -Methods:
    `GET` used to view followers
    `DELETE` used to unfollow a user
The unique together Meta class makes sure user can't follow the same user twice to avoid getting duplicate values stored in database.
The database ER diagram was designed using SmartDraw.
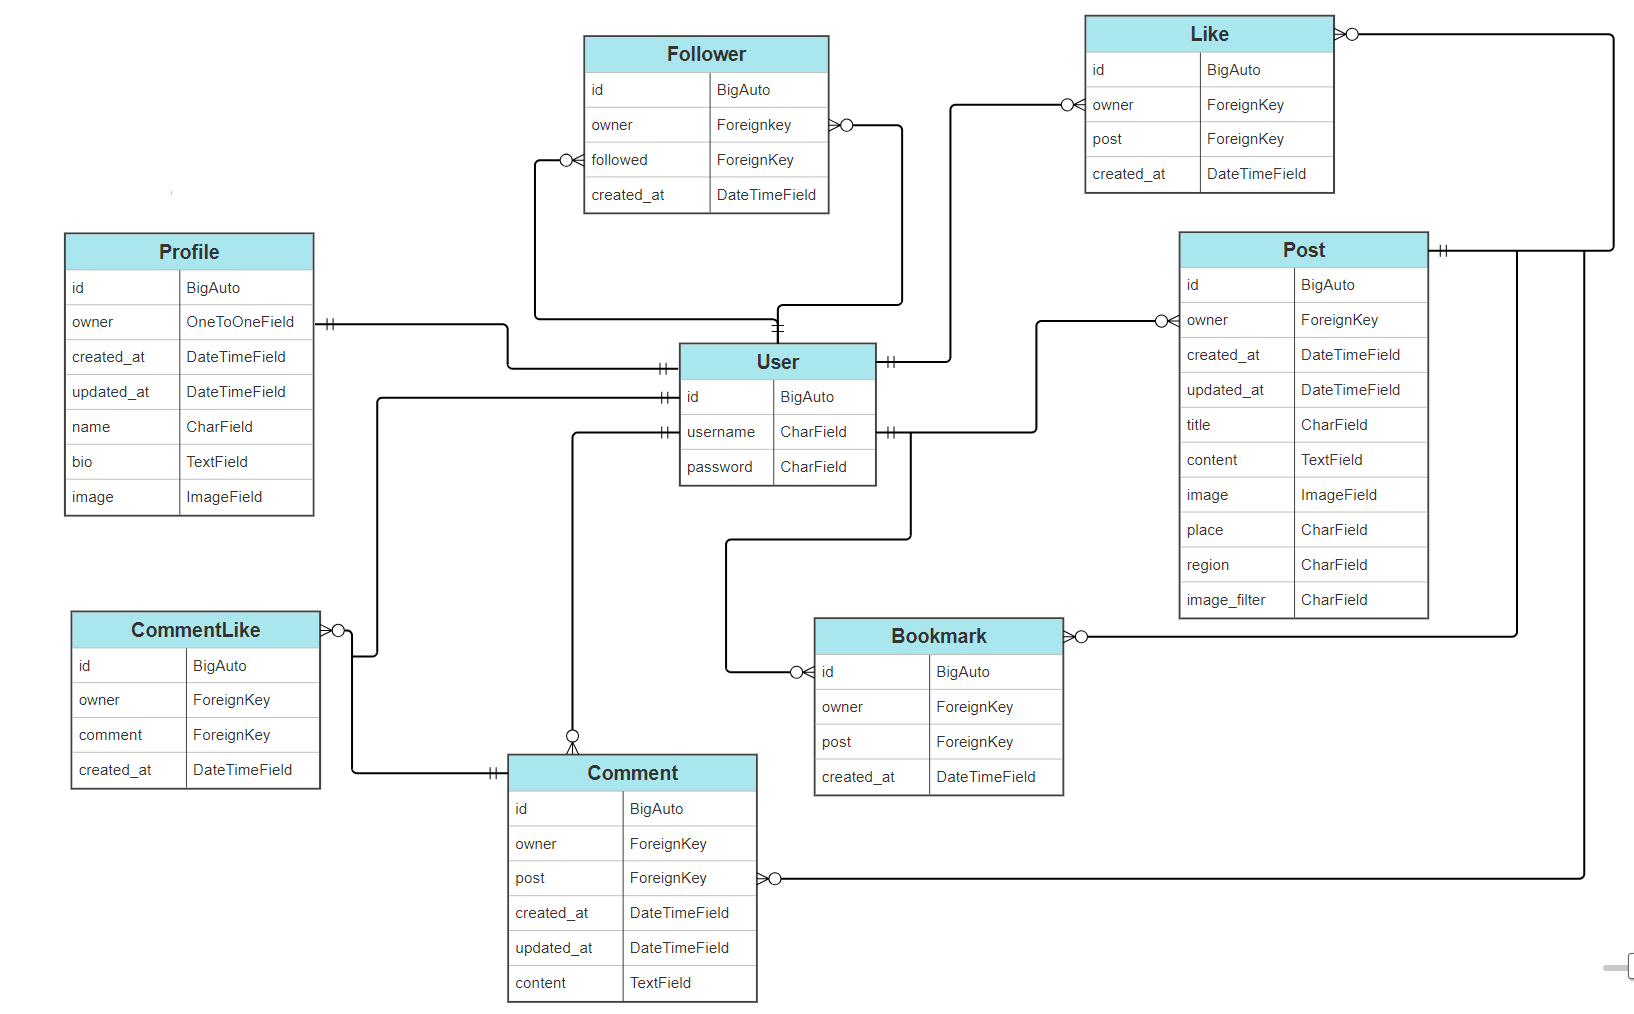
- The user model supports pretty much all existing features and allows users to interact with the posts when logged in with the help of foreign key. The breakdown of relationship of User model with other models in DB is as follows. The User Model:
- has a one-to-one relationship with Profile.
- has a one-to-many relationship with Post.
- has a one-to-many relationship with Comment.
- can have many followers (many-to-many self-referential relationship through Follower model).
- can follow many users (many-to-many self-referential relationship through Follower model).
- can like many posts (Like model).
- can like many comments (CommentLike model).
- can bookmark many posts (Bookmark model).
- Posts related to user model allowing users to perform CRUD functionality.
- Comments related to User and Posts model, allowing users to comment on specific user posts and performing CRUD functionality.
- Followers related to User allows users to follow other user profile and have followers to themselves too.
- Bookmarks related to Post and User allows users to bookmark(save) other users posts that they are most interested in.
- Likes related to Post and User allowing users to like posts and show their appreciation to the post and post author.
- CommentLikes related to Comment and User, allows users to like the comments made by other users on a post, to show their interest in the website content
- Gitpod - used to develop the website
- GitHub to host the source code.
- Git - used to provide the version control to commit and push code to the repository.
- Python - used as the main language to code the logic of the page
- Django==4.2 - framework used
- djangorestframework==3.15.1 - framework used to build API
- Heroku - to deploy the app
- CI Database Maker - for PostgreSQL database system used for the application database.
- SmartDraw used to generate the ER Diagram
- CI Python Linter - to check python code files for errors.
- cloudinary==1.40.0 - media managment cloudinary used to store images
- dj-database-url==0.5.0 - Django utility allows to utilize DATABASE_URL environment variable to configure Django application
- dj-rest-auth==2.1.9 - Drop-in API endpoints for handling authentication securely in Django Rest Framework. Works especially well with SPAs (e.g., React, Vue, Angular), and Mobile applications.
- django-allauth==0.44.0 - authentication in django allowing user to sign- up/ sign-in/log-out
- requests-oauthlib==2.0.0 - installed with the allauth above
- django-cloudinary-storage==0.3.0 - cloudinary storage
- psycopg2==2.9.9 - additional dependency needed to support PostgreSQL when deployed to heroku
- Pillow==10.3.0 - image processing capibilities
- asgiref==3.8.1 - ASGI is a standard for Python asynchronous web apps and servers to communicate with each other, and positioned as an asynchronous successor to WSGI.
- gunicorn==22.0.0 - Python HTTP server for WSGI applications.
- django-cors-headers==4.3.1 - A Django App that adds Cross-Origin Resource Sharing (CORS) headers to responses. This allows in-browser requests to your Django application from other origins.
- django-filter==24.2 - installed to use djangofilterbackend
- django-humanize and humanize - installed to use naturaltime for datetime format
- djangorestframework-simplejwt==5.3.1 - JSON Web Token authentication plugin for DRF.
Installed as dependencies with other packages:
- oauthlib==3.2.2
- PyJWT==2.8.0
- python3-openid==3.2.0
- sqlparse==0.5.0
- pytz==2024.1
No errors were found when passing each file through CI Python Linter
Each python file in this repository has been run through python linter. Minor indentation, trailing whitespace and no new line/blank line at end of file errors were corrected. No known errors are now present. Each of the files tested has received the same success result as below:
All functions have been manually tested to make sure each function works as intended and only for users as intended. Testing of the entire full stack application can be found within FRONT-END REPO
All functions have been tested to make sure no functions are availabale to unauthorised users etc. This was done throughout the entire development process. Full application testing can be found within FRONT-END REPO
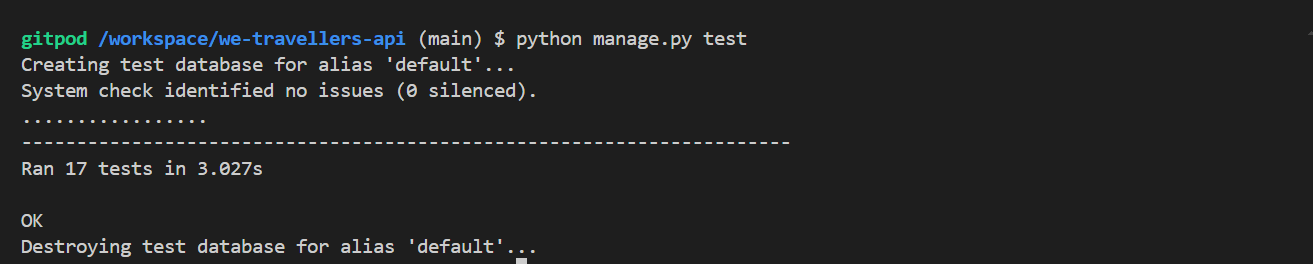
Unit tests have been created and run on the We Travellers API to test basic CRUD functionality and user permissions for the Post and Profile models.
-
Link to tests files can be found here:
-
Unit tests outcome when run
python manage.py test
-
During my first API deployment in Heroku, the app build was successful, but as I opened the app I received a 400 bad request. The issue was debugged through workspace terminal by logging in manually to heroku and detect the error.
- Fix: Corrected Procfile for typo in project name and removed the trailing slash from ALLOWED_HOSTS for the workspace URL.
- Result: The app was successfully deployed with the welcome message displayed.
-
All the minor issues were fixed during development. No bugs are present in the deployed API link. The link is working as expected.
-
The API is developed using CI gitpod template.
-
Code has been pushed to repository on Github with following git commands:
git add. - to add files ready to commitgit commit -m "message"- to commit the code to local repository ready to be pushedgit push- final command used to push committed code to remote repo on Github
-
The project has been deployed on Heroku as follows:
- In your workspace:
- install the following libraries to handle database connection:
- psycopg2
- dj-database-url
- configured dj-rest-auth library for JWTs
- set allowed hosts
- configured CORS:
- set allowed_origins
- set default renderer to JSON
- add Procfile with release and web commands
- gitignore the env.py file
- generate requirements.txt
- install the following libraries to handle database connection:
- Use:
pip freeze > requirements.txtto add external libraries to deployed app. - Create Heroku account
- In the top right, click 'New'
- Click 'Create new app'
- Give your app a name and select your region from drop down
- Click 'Create new app'
- Go to 'settings' tab, it's important you do it before deployment
- Scroll down to 'config vars' section and key:
- ALLOWED_HOST : add url to your heroku app link
- CLIENT_ORIGIN : frontend heroku url which will be making requests to this API
- CLIENT_ORIGIN_DEV: local front-end url
- CLOUDINARY_URL: 'API key to your cloudinary account'
- DATABASE_URL : 'URL from your database account'
- SECRET_KEY: 'Generate your own secret key'
- DISABLE_COLLECTSTATIC: set to '1'
- Scroll down to 'Buildpacks' section
- Click 'Add buildpack'
- Add Python as first dependency and select 'Save changes'
- Add node.js as a second dependency and save again (This is settings section done)
- Select 'Deploy' tab at the top
- Select ' Github' from 'Deployment method'
- type the name of how you called project in Github and click 'search'
- Scroll down and select manual deployment method
- You can also use Auto deployment method to allow the project to update every time you push the code.
- You can now click to view the app ready and running
- In your workspace:
-
For this project I used Manual deployment method to deploy the current state of the branch, every time I pushed the code from Gitpod.
- On Github navigate to the repository
- Click "Code" drop down menu - a green button shown right above the file list.
- Copy the URL of the repository using "HTTPS", "SSH" or "Github CLI".
- Open Git Bash.
- Change the current working directory to the location where you want the cloned directory.
- Type "git clone", and then paste the URL copied earlier.
- Press enter to create local clone. A clone of the repository will now be created.
For more details on how to clone the repository in order to create a copy for own use refer to the site: https://docs.github.com/en/repositories/creating-and-managing-repositories/cloning-a-repository
- On Github navigate to the repository.
- Click "Fork" located towards top right corner on GitHub page.
- Select "owner" for the forked repository from the dropdown menu under "owner".
- It will create forked repo under the same name as original by default. But you can type a name in "Repository name" or add a description in "Description" box.
- Click on "Create fork". A forked repo is created.
- Forking allows you to make any changes without affecting original project. You can send the the suggestions by submitting a pull request. Then the Project Owner can review the pull request before accepting the suggestions and merging them.
- When you have fork to a repository, you don't have access to files locally on your device, for getting access you will need to clone the forked repository.
- For more details on how to fork the repo, in order to for example suggest any changes to the project you can visit:https://docs.github.com/en/get-started/quickstart/fork-a-repo
- The default post placeholder image was used from the "Moments" walkthrough project.
- The default profile placeholder image was used from the "Moments" walkthrough project.
- The database ER diagram was designed using SmartDraw.
- The main code of this project is based on the tutorial "Django REST Framework" (DRF Walkthrough) by Code Institute. The project was expanded with custom models and functionality to suit my needs.
- Django REST Framework Documentation was used throughout the project to gain more knowledge about different concepts.