Getting Started with HydraBus and STM32CubeIDE
The aim of this page is to explain How to Build / Flash and Debug HydraBus firmware with STM32CubeIDE on Windows & Linux.
- HydraBus v1
- STLINK-V3SET (Programmer/Debugger)
- 10x high quality Dupont Wire 2.54mm female to female with min length 8cm (do not exceed 10cm if possible especially to reach maximum speed with SWD 24MHz...)
- Only 9x "Dupont Wire 2.54mm female to female" are required but it is always better to have more/spare ...

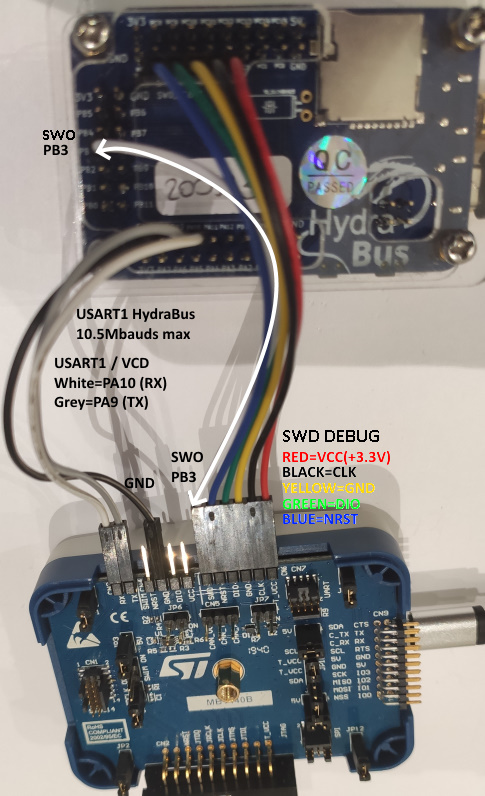
Support HydraBus v1 UART1(PA10/USART1_RX & PA9/USART1_TX) up to 10.5Mbaud
- Download and install STM32CubeIDE v1.4 or more for Linux or Windows
- Note1: STM32CubeIDE is free but it requires a registration on ST website to download it
- Note2: All steps in this page have been validated with STM32CubeIDE v1.4.2 and using firmware https://github.com/hydrabus/hydrafw/commit/0099a031d02c396ab06968420faf9eb08ecd2348
- Note3: STM32CubeIDE v1.4.x is officially supported since firmware release HydraFW v0.10
- Install git from http://msysgit.github.io
- Install Python 3.x see https://www.python.org/downloads/windows
- Default Install Example:
C:\Python3\ - Add in environment variable
PATHthe path to Default Install:C:\Python3\ - Open a Command Prompt window (
cmd.exe) and type following commands:
git clone https://github.com/hydrabus/hydrafw.git hydrafw --recursive
cd hydrafw/
cd ./scripts
python get-pip.py
python -m pip install GitPython --upgrade
python -m pip install intelhex --upgrade
Note: For get-pip.py if you need a proxy for internet access set following variables before to launch python get-pip.py:
set http_proxy=http://proxy.myproxy.com
set https_proxy=https://proxy.myproxy.com
cd ~
sudo apt-get install git dfu-util python putty
wget https://launchpad.net/gcc-arm-embedded/4.9/4.9-2015-q3-update/+download/gcc-arm-none-eabi-4_9-2015q3-20150921-linux.tar.bz2
tar xjf gcc-arm-none-eabi-4_9-2015q3-20150921-linux.tar.bz2
echo 'PATH=$PATH:~/gcc-arm-none-eabi-4_9-2015q3/bin' >> ~/.bashrc
source ~/.bashrc
git clone https://github.com/hydrabus/hydrafw.git hydrafw --recursive
cd ~/hydrafw
cd ./scripts
sudo python get-pip.py
sudo python -m pip install GitPython --upgrade
sudo python -m pip install intelhex --allow-external intelhex --allow-unverified intelhex
cd ..
- For Debian / Ubuntu on 64bits/amd64 system see https://wiki.debian.org/Multiarch/HOWTO in order to enable multi architecture for i386 support.
- When multiarch is enabled you shall also install libc6-i686:i386 (Debian) or libc6:i386 (Ubuntu)
Note: For get-pip.py if you need a proxy for internet access set following variables before to launch python get-pip.py:
export http_proxy=http://proxy.myproxy.com
export https_proxy=https://proxy.myproxy.com
sudo -E python get-pip.py
- Select menu
File -> Import...-
Select
General -> Existing Projects into Workspace -
Click on
Next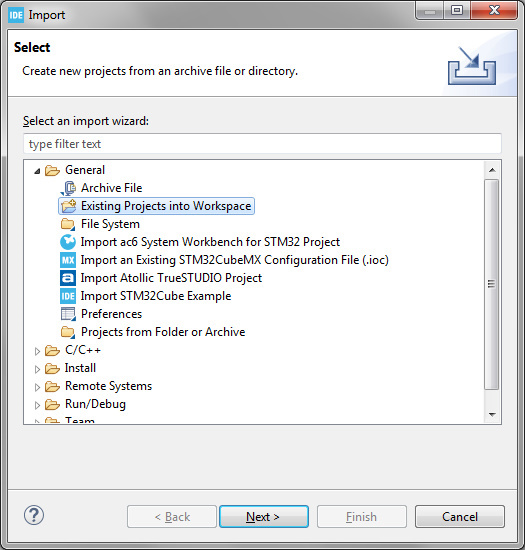
-
Unselect Option
Search for nested projects -
Now only
hydrafwproject is displayed -
Click on
Finish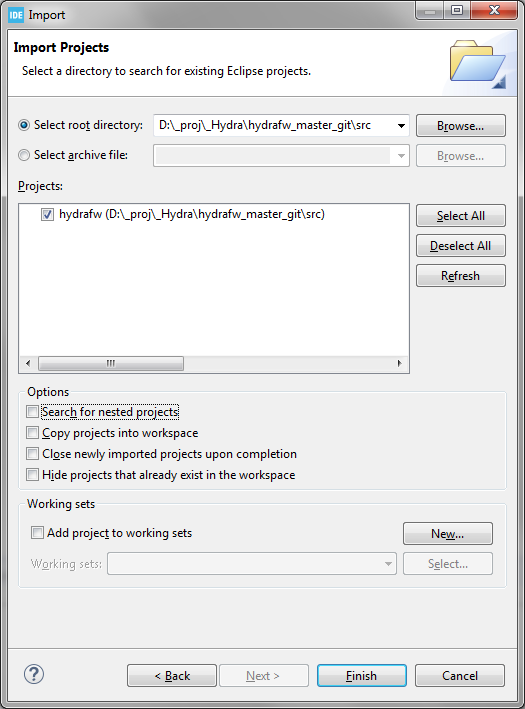
-
-
Select
hydrafwproject (click on project with right mouse button)- A contextual menu appears, select
Properties

- Click on
C/C++ Build=>Environmentand select configurationDebug - Add Variable
HYDRAFW_DEBUGwith value1
- A contextual menu appears, select
- Select
hydrafwproject (click on project with right mouse button)-
A contextual menu appears, select
Clean Project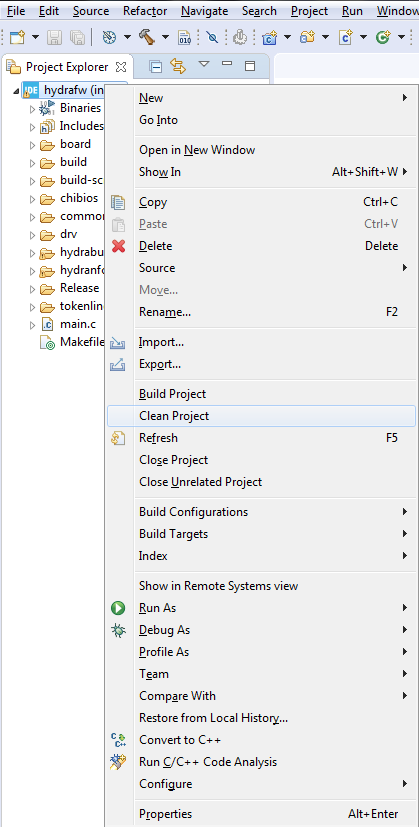
-
Clean shall display in Console
Build Finished. 0 errors, 0 warnings.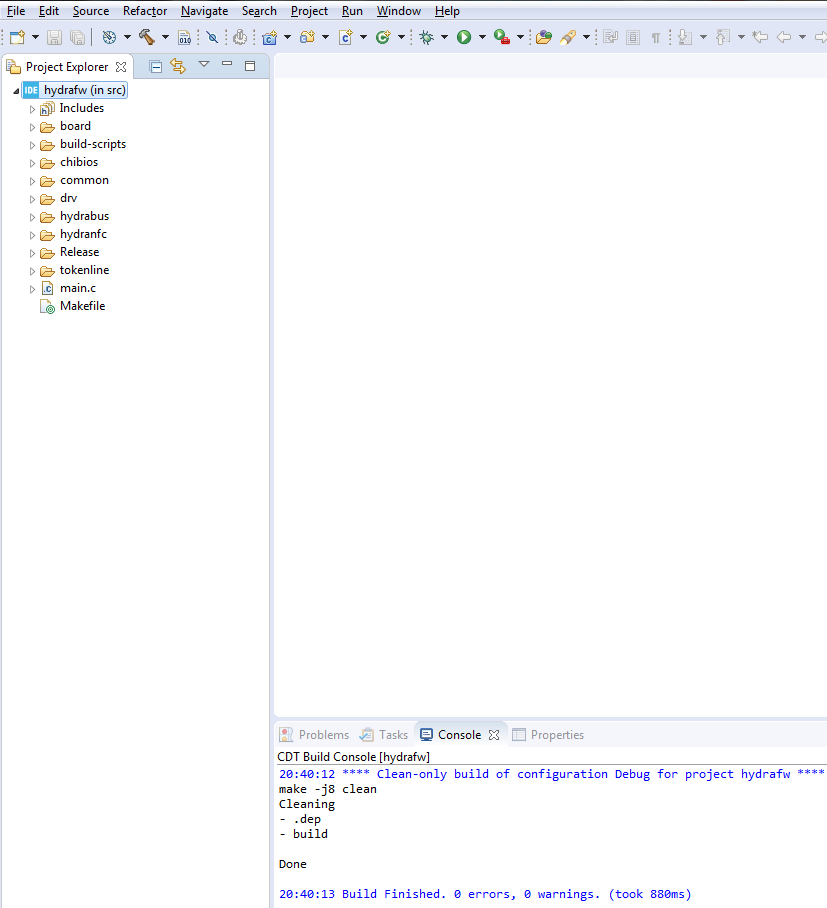
-
- Select
hydrafwproject (click on project with right mouse button)- A contextual menu appears, select
Build Project - Build shall display in Console
Build Finished. 0 errors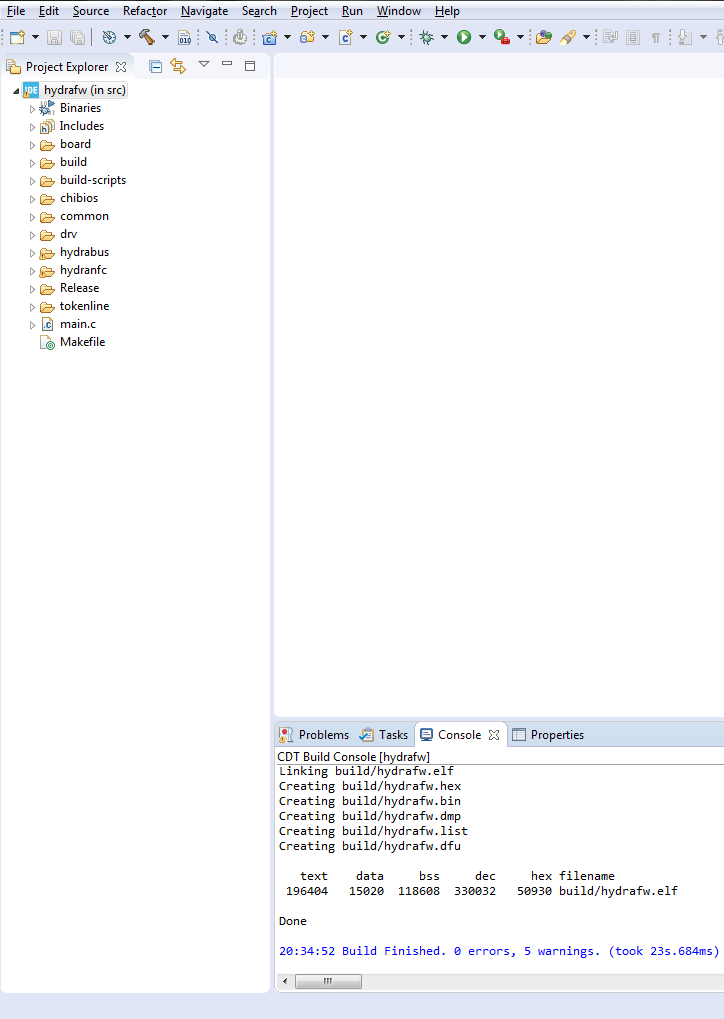
- A contextual menu appears, select
- Select
hydrafwproject (click on project with right mouse button)- A contextual menu appears, select
Debug As -> Debug Configurations...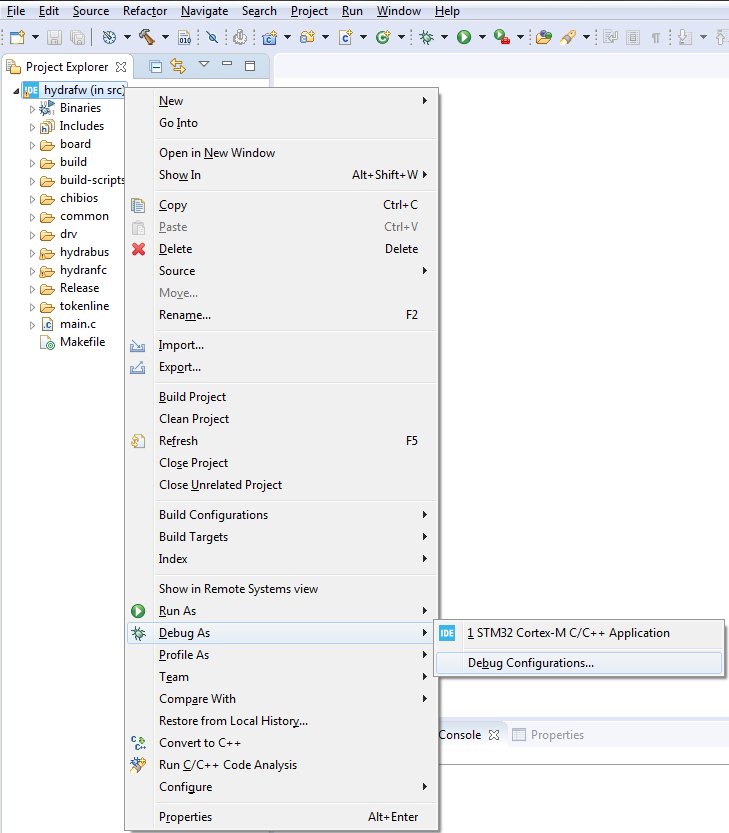
- Debug Configuration view appears, double click on
STM32 Cortex-M C/C++ Application- The entry
hydrafw Debugis automatically created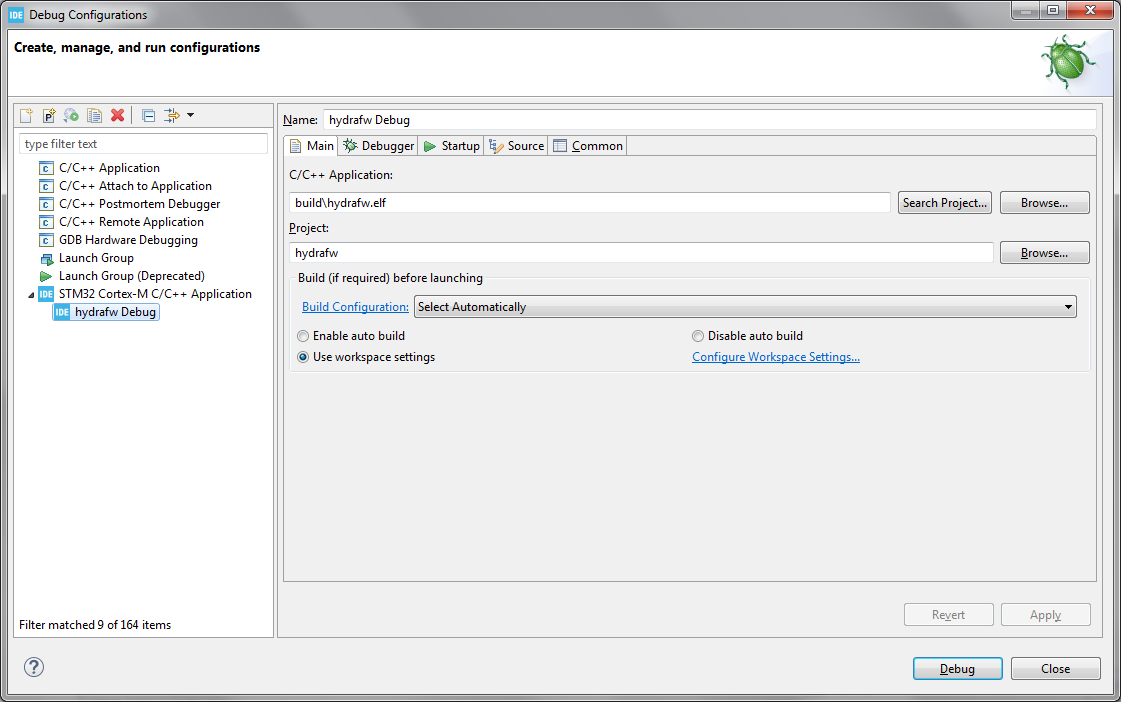
- The entry
- A contextual menu appears, select
- Select
DebuggerTab and configure it like in picture- When all is configured click on
Debugbutton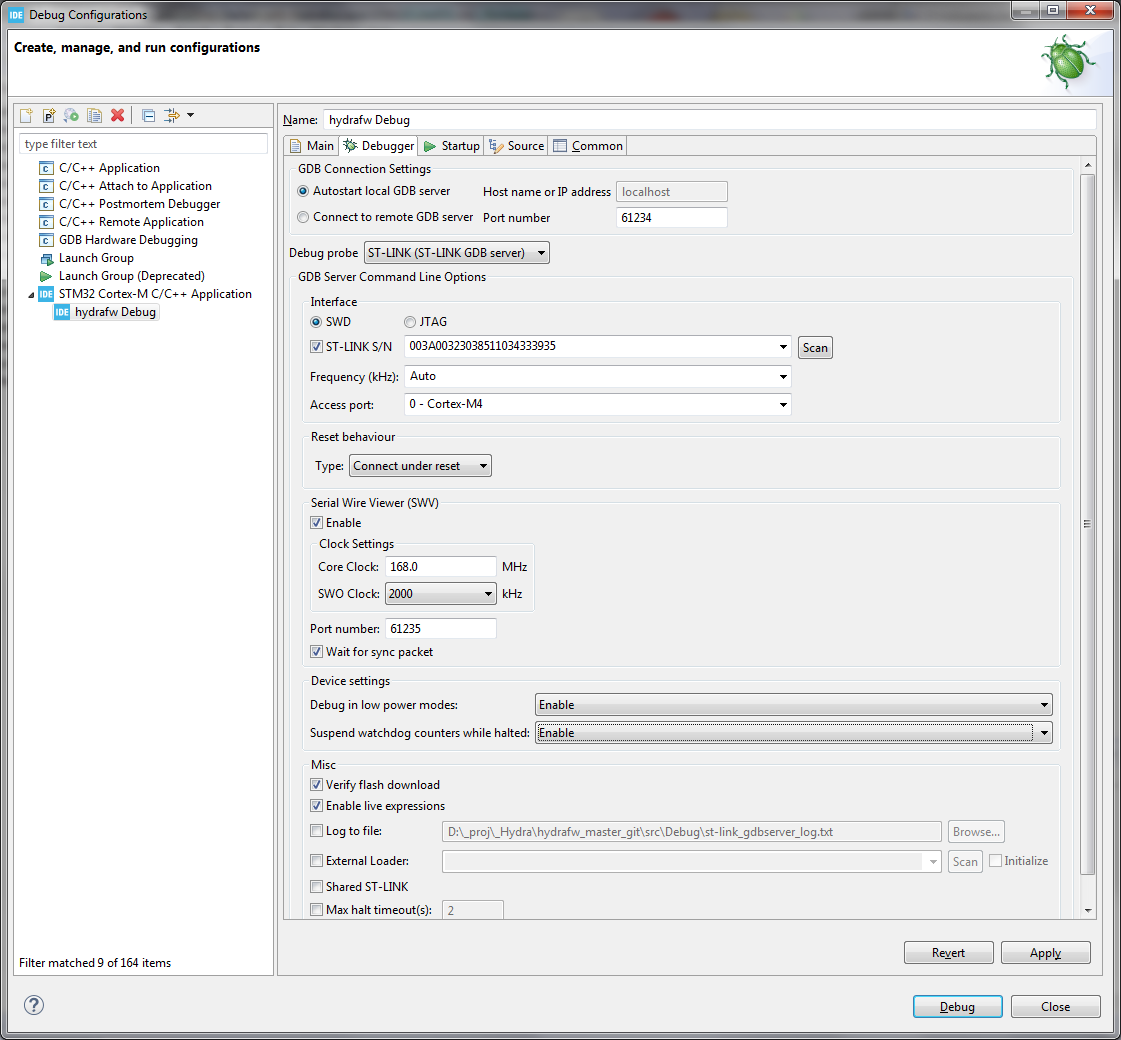
- When all is configured click on
- Debug session is started and program is stopped in start of main() code (you can click on
Resume (F8)to resume execution of code)
- Select menu
Window -> Show View -> Other... -> SVWto add all different Serial Wire Viewer features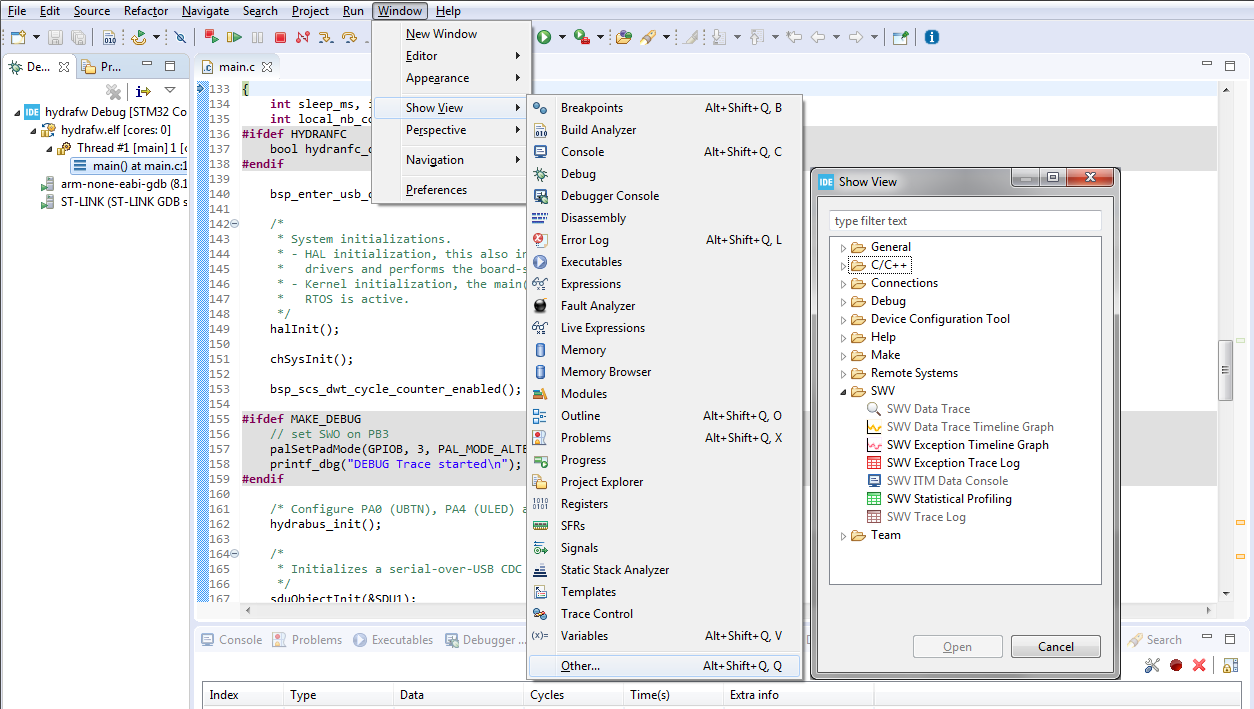
- Add
SWV TraceLog,SWV ITM Data ConsoleandSWV Data Trace Timeline Graph - Then select
SWV TraceLogand click onConfigure traceicon to configure SWV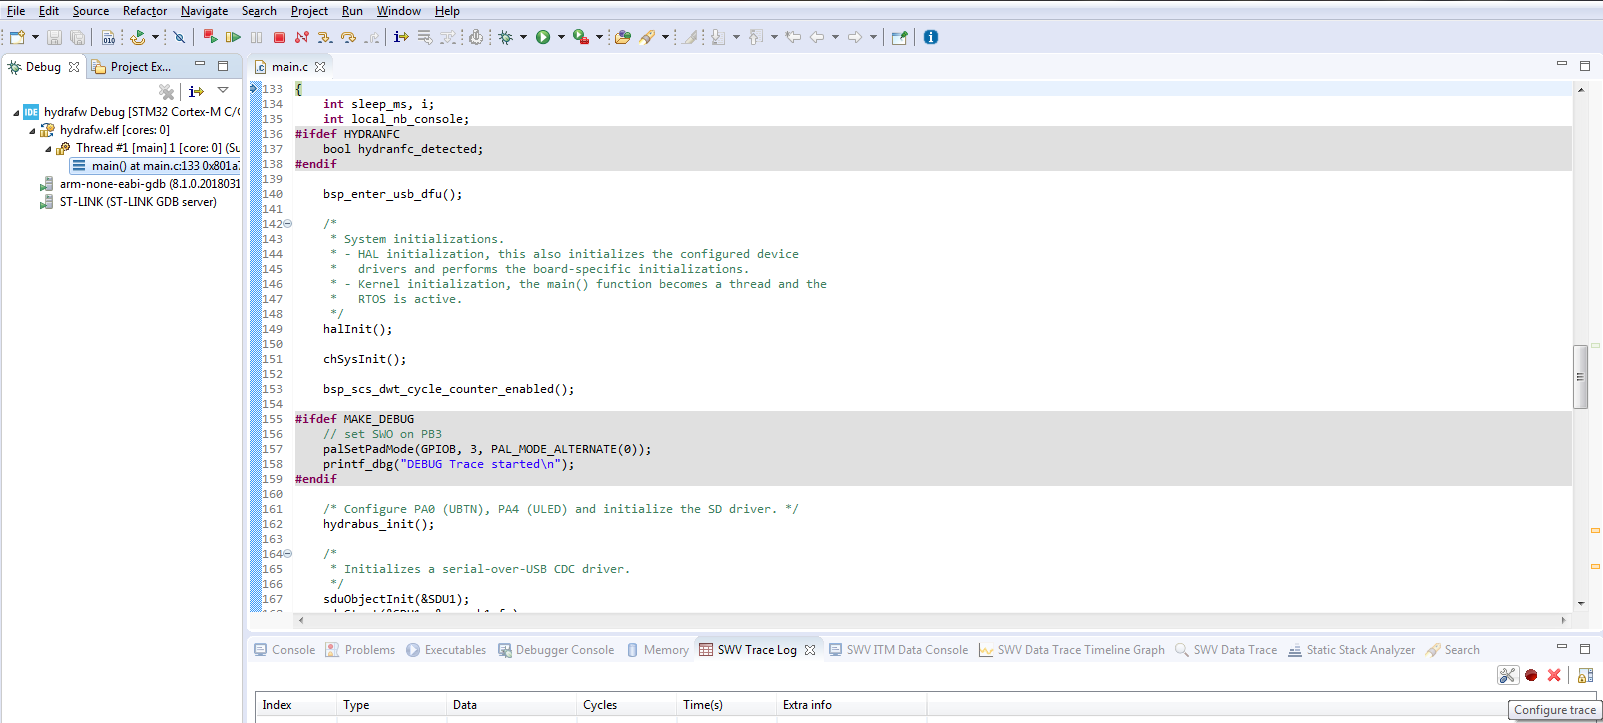
- Interesting things to configure are mainly to enable
TimestampsandITM Sitmulus Ports 0(for SWO/SWV ITM Data Console especially for debug trace and crash/exception details)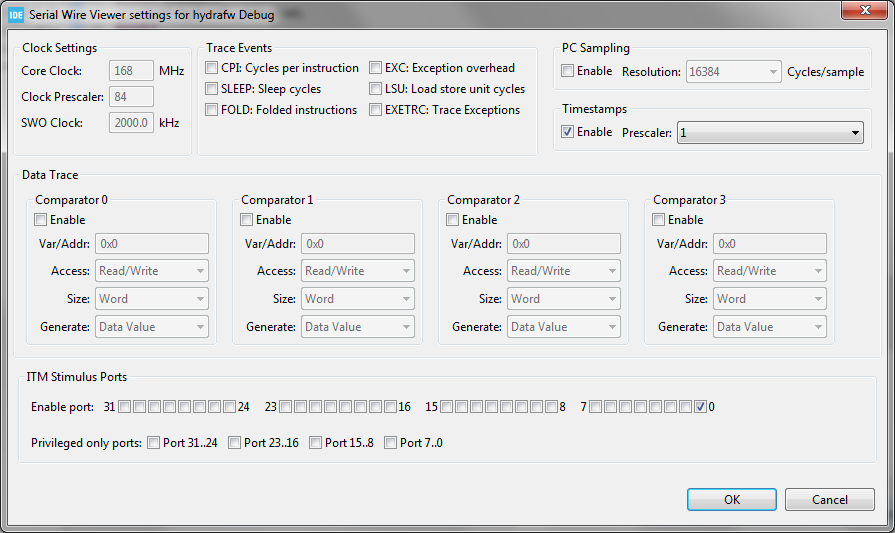
- Then click on
OKbutton - Last step is to start the Trace(using Serial Wire Viewer settings) by clicking on
Start Tracebutton and finally click onResume (F8)button to see the trace and data in live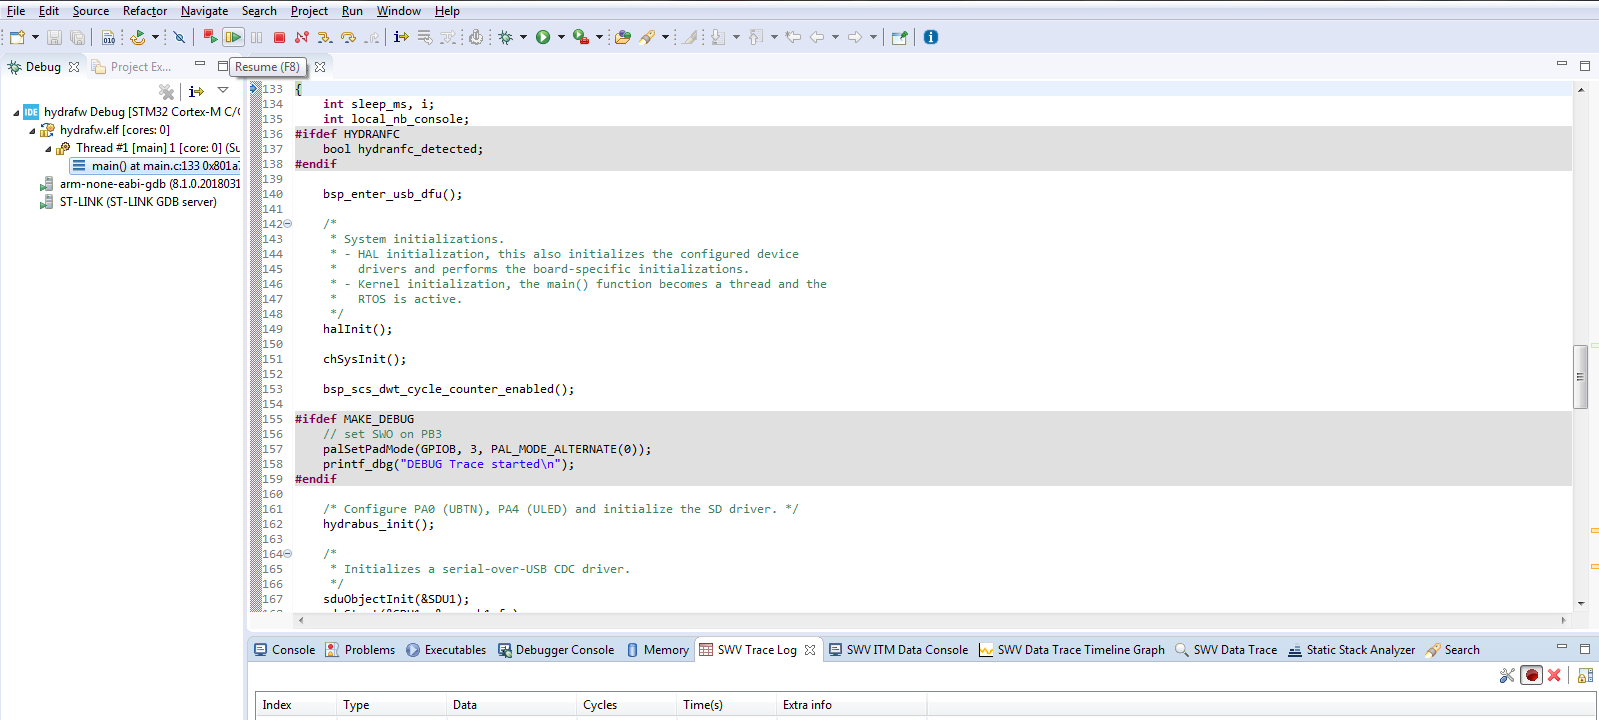
- Add
We can see in real-time the different trace and console data during execution of code
