Basically, this repo bloxone-azure-templates(https://github.com/infobloxopen/bloxone-azure-templates) which is used to store bloxone azure templates, this provides Azure Marketplace Cloud Offering for customers of Infoblox, while deploying the VM.
To do this, modify the template or UI experience we need to do changes/modify the code in two .json files mainly createUiDefinition.json and mainTemplate.json, and maybe other files based on the requirement.
In the context of Azure Managed Applications, createUiDefinition.json defines the user interface for creating the application, while mainTemplate.json specifies the Azure resources to be deployed.
This file defines the user interface elements (like text boxes, drop-downs, etc.) that users see in the Azure portal when creating a managed application. It allows publishers to customize the experience and guide users on how to provide input for parameters needed during deployment.
Typically, the createUiDefinition.json file is used in Azure Resource Manager (ARM) templates to define the user interface for deploying resources. It includes details such as:
Defines inputs required from the user, such as text boxes, dropdowns, and checkboxes.
Specifies the resources to be deployed.
Provides outputs that can be used by other templates or for display purposes.
This file is a standard Azure Resource Manager (ARM) template that specifies the resources to be deployed when the managed application is created. It defines things like web apps, databases, storage accounts, and virtual machines, and is no different than a regular ARM template.
createUiDefinition.json: focuses on the user experience of creating the application. mainTemplate.json: focuses on the deployment of resources when the application is created.
Description: Allows users to select the availability options for their virtual machine, such as Availability Zone, Availability Set, or No Redundancy. Dependencies:
Requires the VM to be deployed in a region that supports Availability Zones.
Requires the creation of an Availability Set resource.
Description: Allows users to select specific zones within a region for their resources. Dependencies: Requires the region to support Availability Zones. In this, we have added option for Availability zone, where customer can choose the availability zone and how many zones while deploying the VM. These are the supported regions - https://learn.microsoft.com/en-us/azure/reliability/regions-list
Deploying a VM in different configurations can impact its availability and resilience. Here's a comparison:
Description: A VM deployed without any specific availability configuration. Availability: No guarantees for high availability. If the underlying hardware fails, the VM may experience downtime. Use Case: Suitable for non-critical applications where occasional downtime is acceptable.
Description: A VM deployed in a single availability zone within an Azure region. Availability: Higher availability compared to a normal VM. Availability zones are physically separate locations within a region, designed to be resilient to local failures Use Case: Suitable for applications that require higher availability but can tolerate some downtime in case of zone-wide failures.
Description: VMs deployed across two availability zones within an Azure region. Availability: Even higher availability and resilience. If one zone fails, the VM in the other zone remains operational Use Case: Ideal for critical applications that require maximum uptime and resilience against zone-wide failures.
Normal VM: Basic deployment with no high availability guarantees. 1 Zone: Improved availability with resilience to local failures. 2 Zones: Maximum availability and resilience, ensuring uptime even if one zone fails. For more info: https://learn.microsoft.com/en-us/azure/virtual-machines/create-portal-availability-zone
When you don't select any while launching a VM with the Azure-selected zone option, Azure automatically selects the best availability zone for your VM based on current capacity and performance metrics. This helps to optimize the placement of your VM without requiring you to manually choose a specific zone.
And let's say you launched a VM with zone 1 and in future, if you want to move to zone 2, this can be done. On overview page of VM, you can see availability zone -> click on edit, then choose zone -> agree and ok. But this works based on the selected reqion has availability and quota.
Azure evaluates the available zones within the selected region and places your VM in the zone that offers the best performance and reliability at the time of deployment
You don't need to worry about selecting the zone yourself. This can be particularly useful if you're deploying multiple VMs and want to ensure they are distributed across different zones for redundancy
In the Azure portal, you can select the Azure-selected zone option during the VM creation process. The availability zone selection will be grayed out, indicating that Azure will handle the zone placement
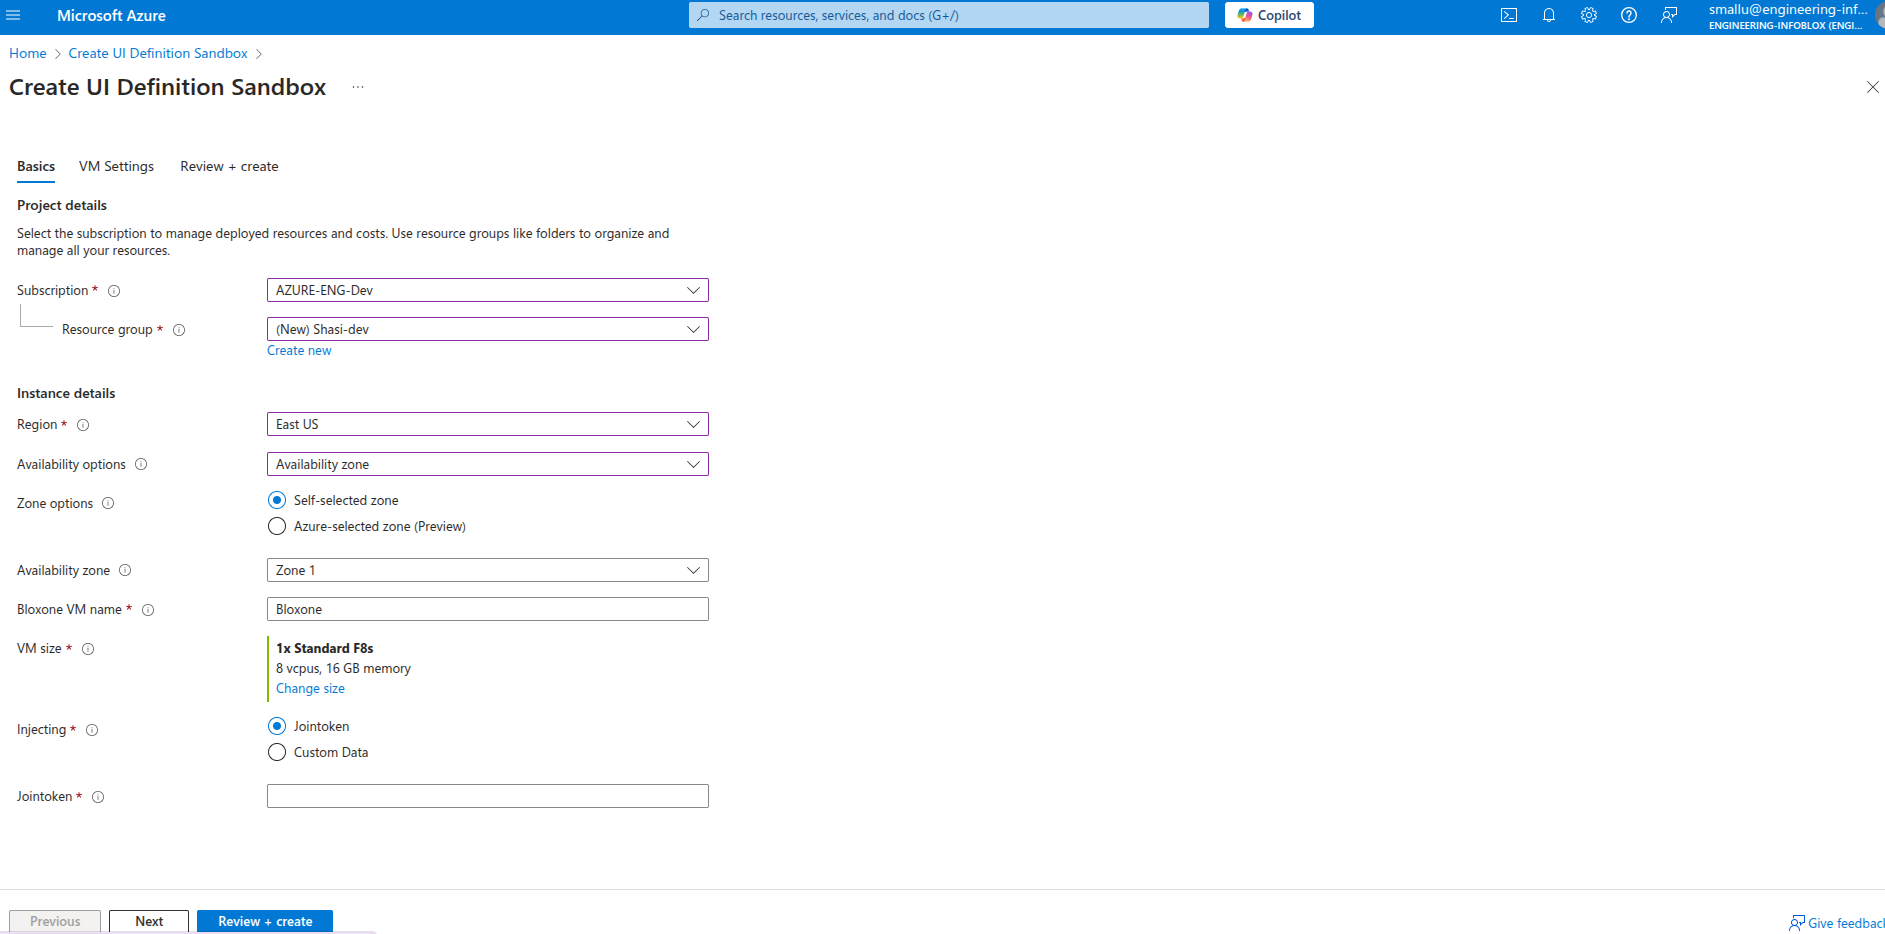
Initially do changes in CretaeUidefinition.json file, then Go to -> Create UI Definition Sandbox(https://portal.azure.com/?feature.customPortal=false#view/Microsoft_Azure_CreateUIDef/SandboxBlade) - Microsoft Azure and paste the json script & check the preview, once you are good with preview, save it. Below is the reference how it looks.
When availability zone supports for example: East US
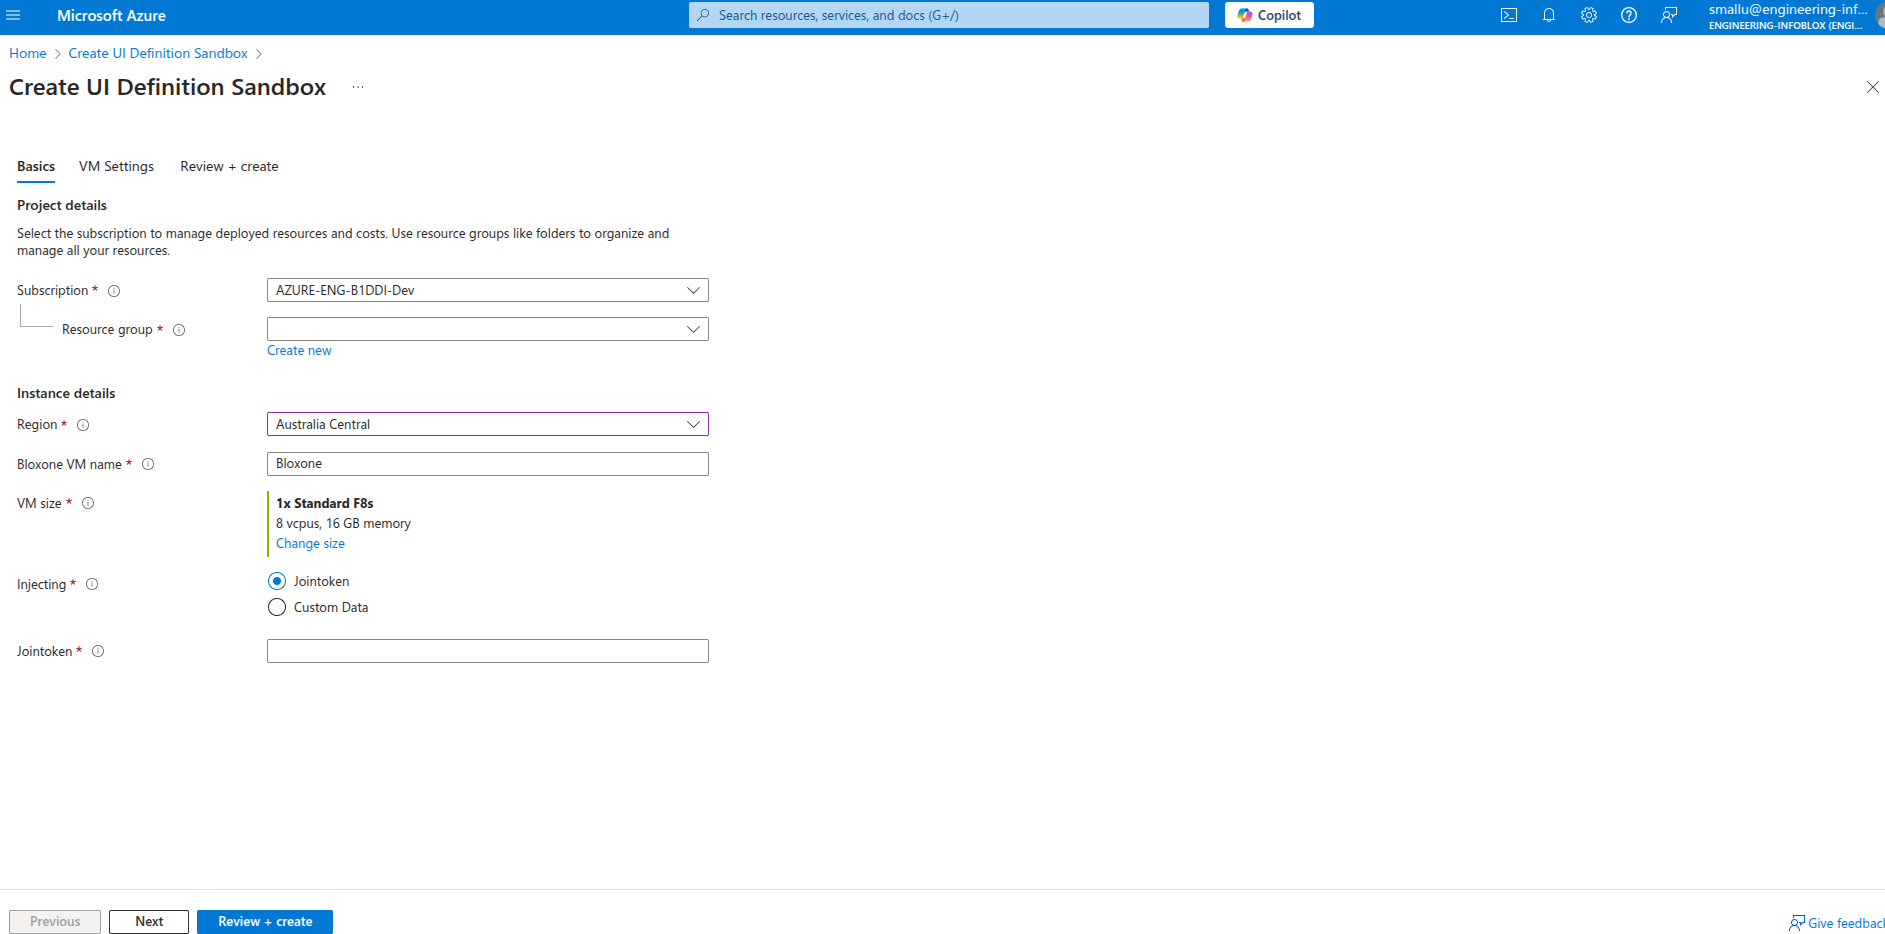
When availability zone doesn't support for example: Australia Central
Then modify mainTemplate.json accordingly and Go to -> Test UI(https://portal.azure.com/#create/Microsoft.Template) -> Build your own template -> paste the json content which you have modified -> save to preview
Use offerid -> infoblox-bloxone-34 & image version -> 3.4.1 - This can be checked with the team internally because this may change sometime.
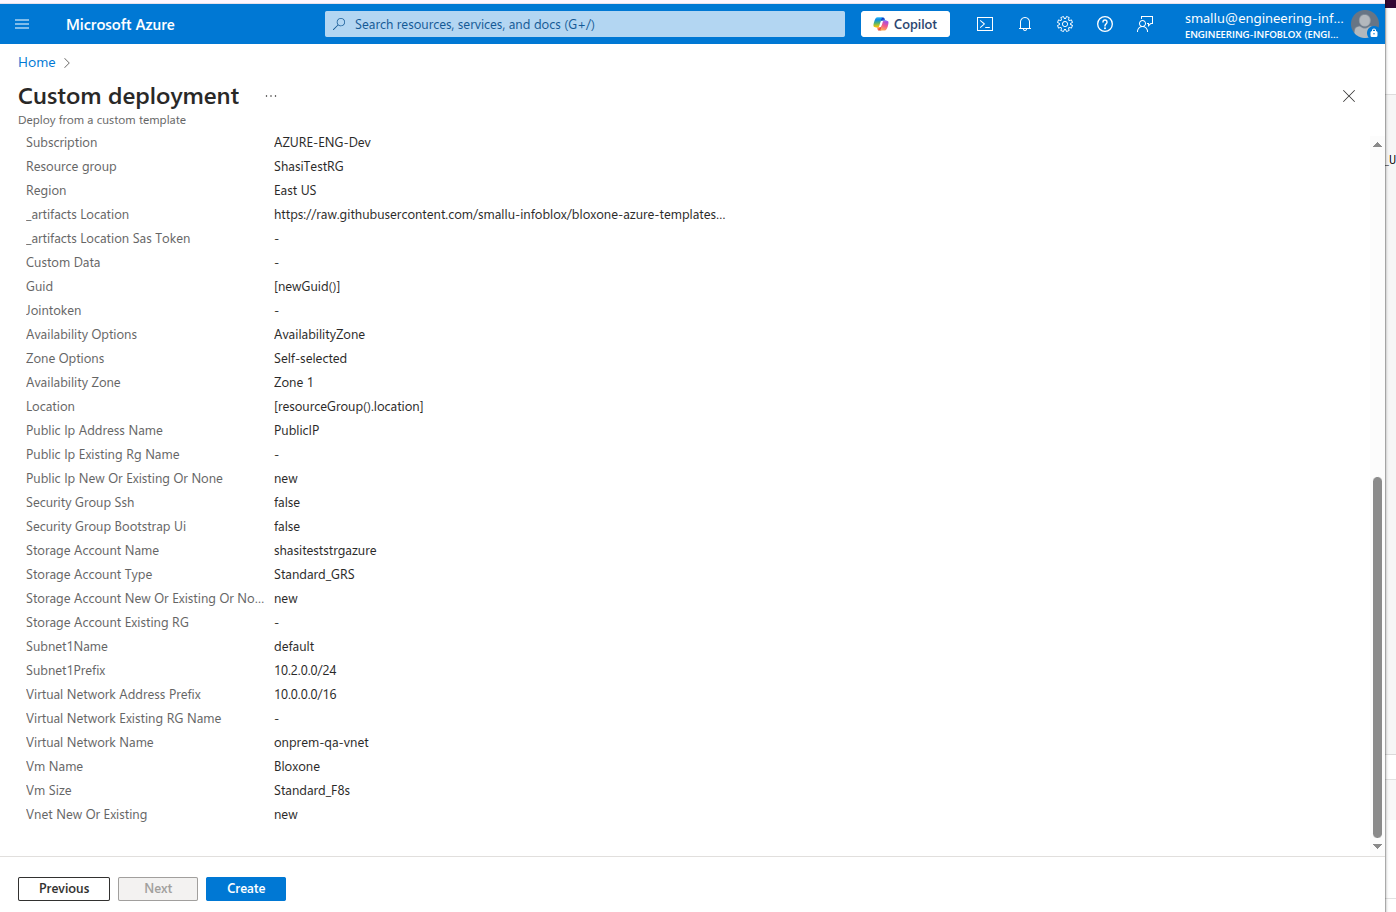
And check for final preview, if it is good then proceed for Next. Below is reference.
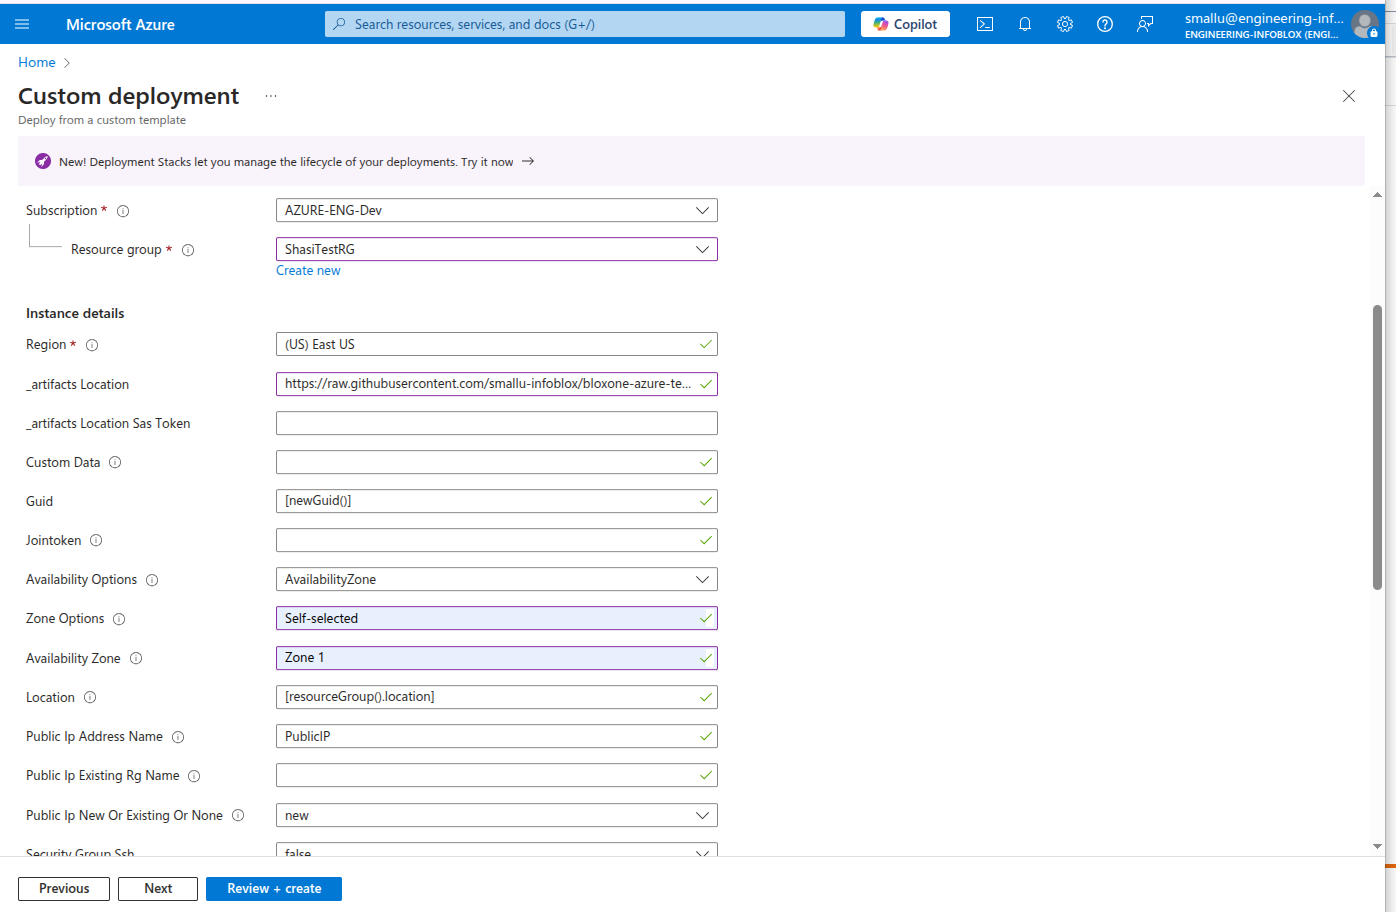
When it is success, it'll show Create option like below, here artifacts location we need to provide for manual testing purpose only.
Use this link for artifacts location -> https://raw.githubusercontent.com/infobloxopen/bloxone-azure-templates/refs/heads/main/main/
Provide the raw github link to access these files. Make sure both the files are in one location in git.
For other parameters, provide details correctly there shouldn't be any conflict like if you're providing existing storage account name then give existing and existing storage account name or new and unique storage account name.
Other way is, in artifacts location you can put all the content from git like above in Azure storage and provide storage-container link along with sas token.
And when you click on Create and Deployment is success then it shows like below.
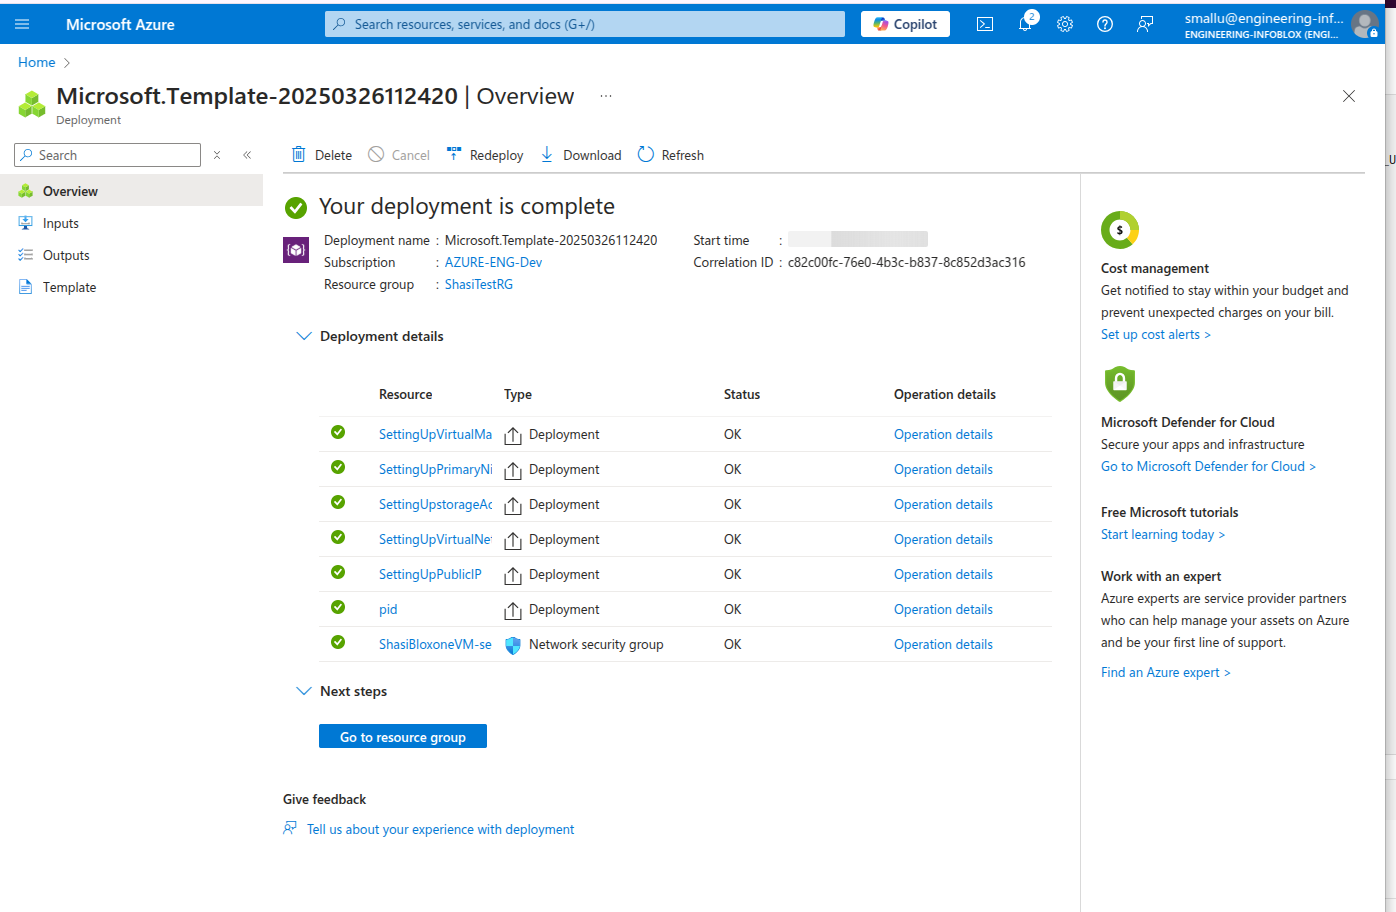
Once this is done, you can click on VM name, check its details and verify it.
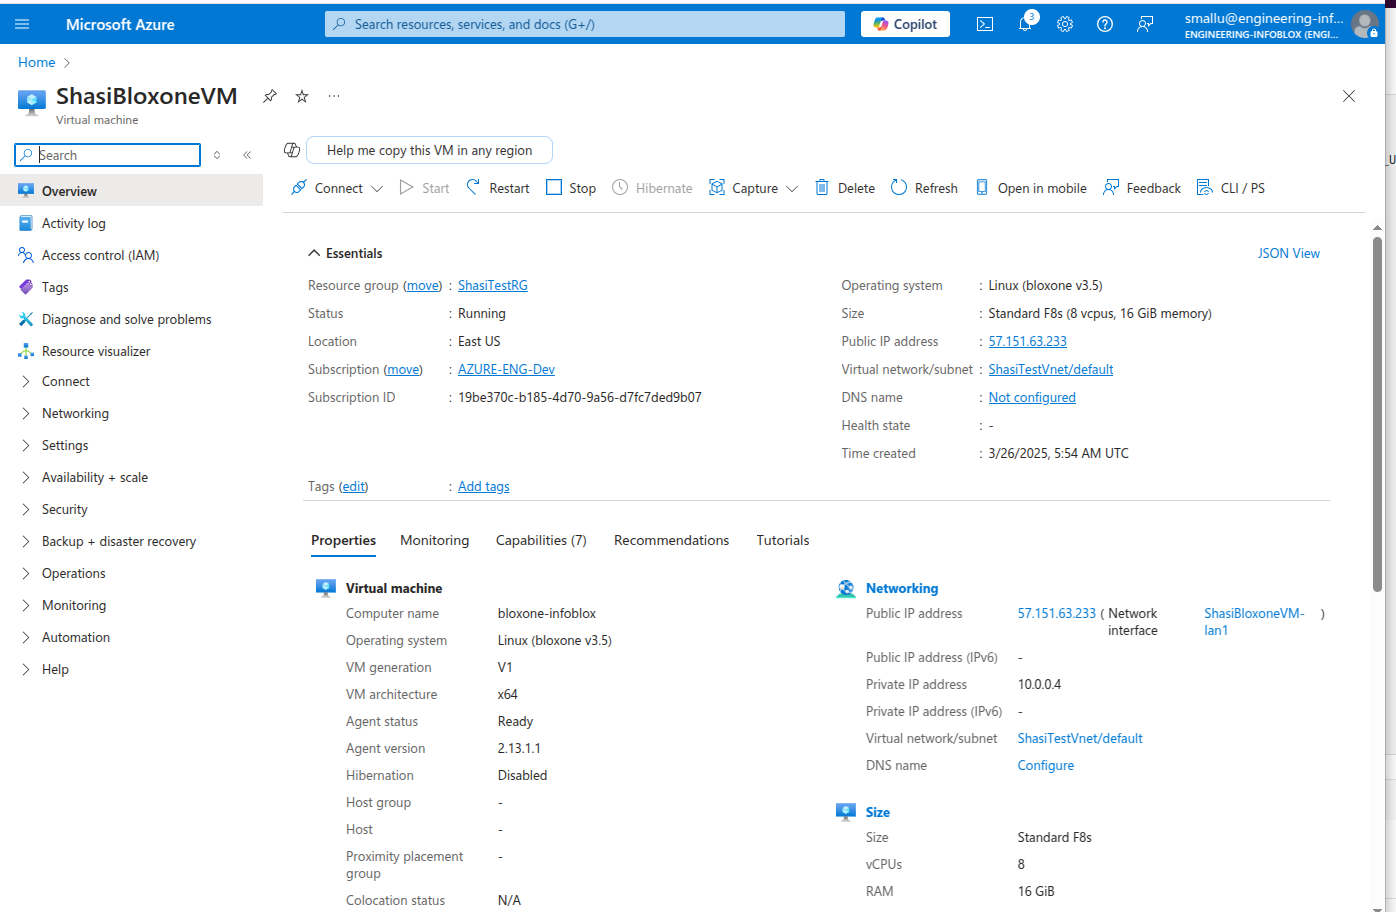
The above process is deploying a regular VM without availability zone
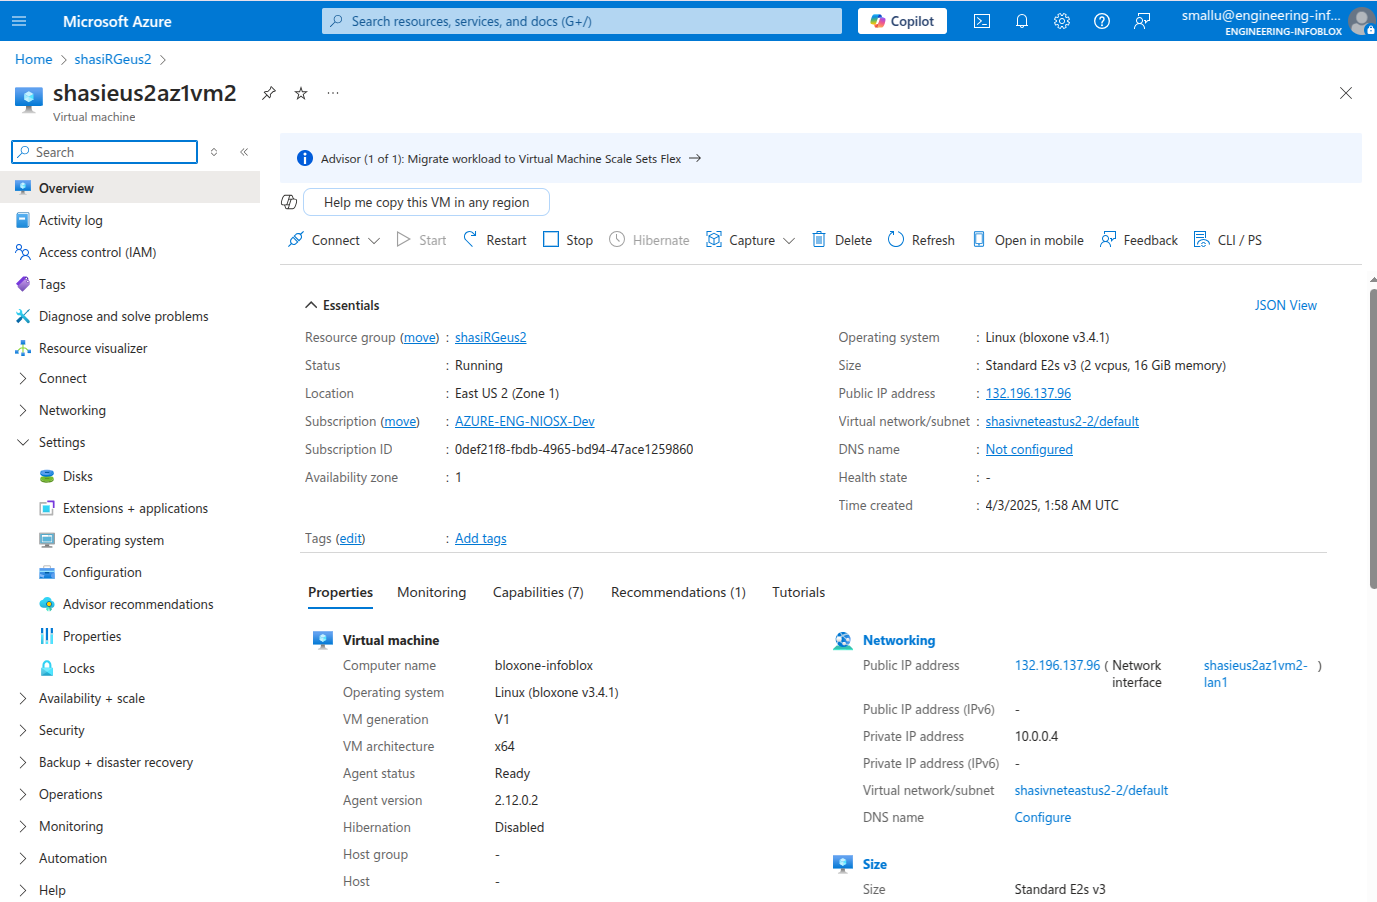
Below deployed a VM with Zone 1
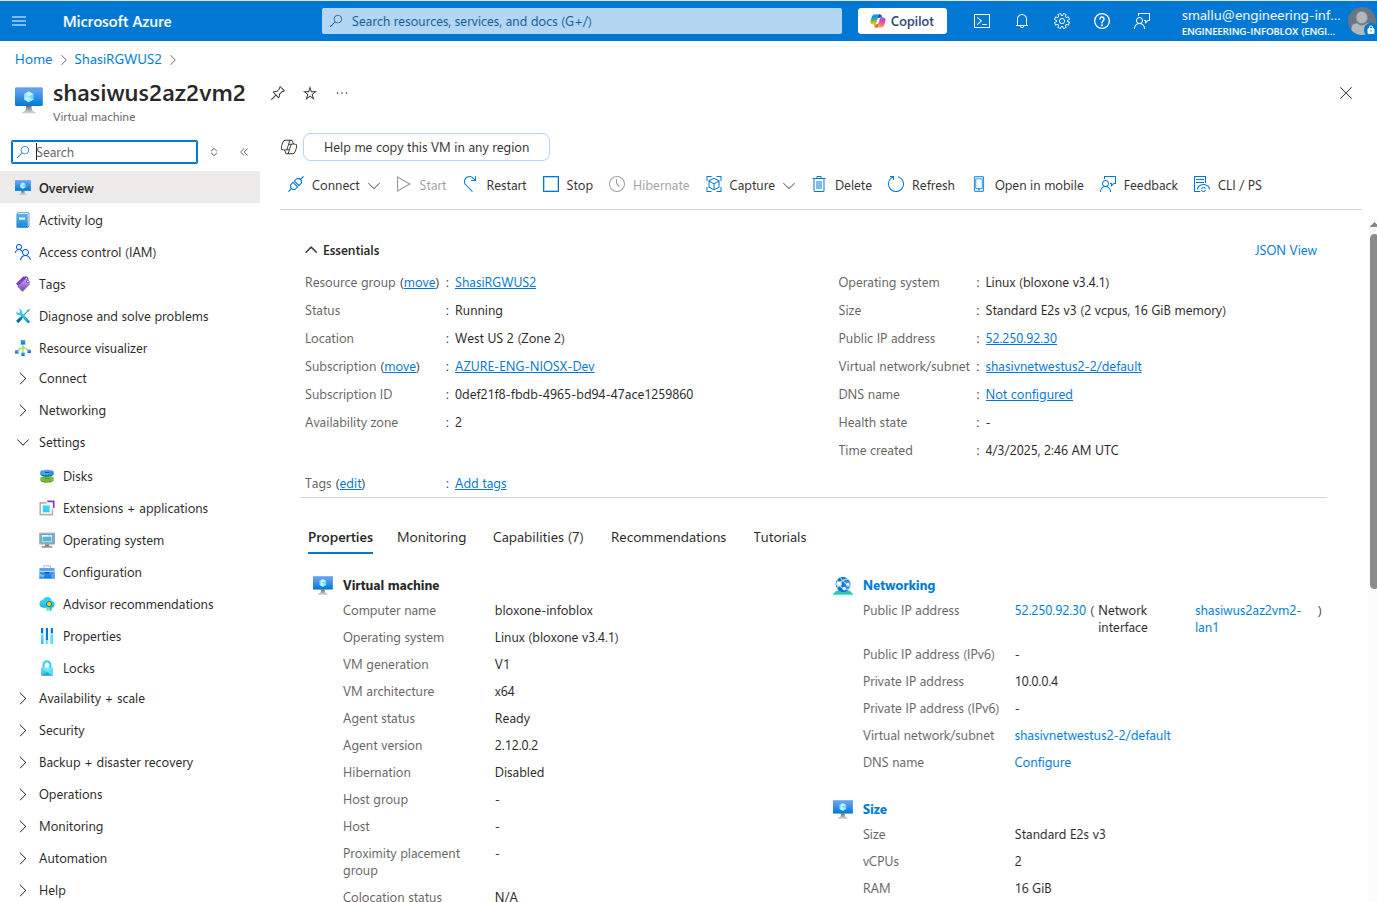
Below deployed a VM with Zone 2
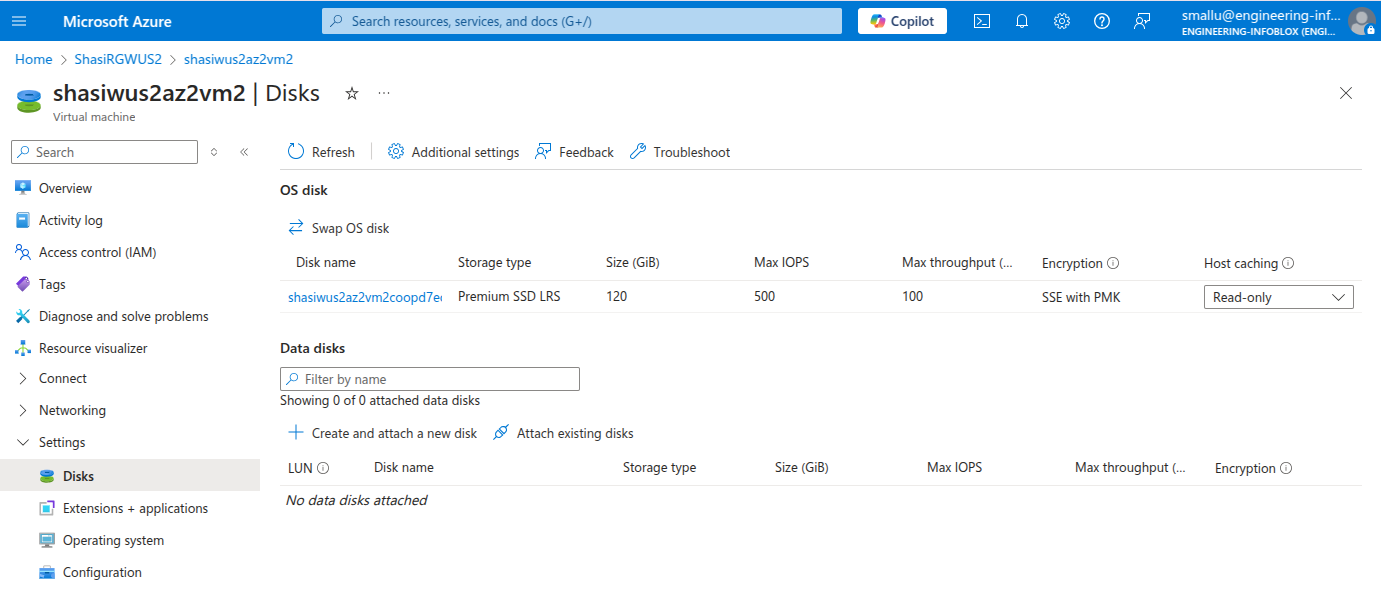
Here, I have tried deploying a VM with OS disk size of 120GB. Once you click on Settings tab left side as shown in below image -> click on Disks blade, you can see the disk related information, below is the reference.
So, basically createUiDefinition.json file is only a UI interface for viewing purpose. But mainTemplate.json file is something which takes the parameters behind and deploy a VM based on these values, along with other files in nested deployments.
Description: This term is not standard in createUiDefinition.json. Here which means injecting custom scripts or data, you might use customData.
Description: Allows users to provide custom data that can be used during the VM provisioning process. Dependencies: The VM must support custom data injection (e.g., cloud-init for Linux VMs).
Description: Specifies a token for joining a domain or a specific service. Dependencies: Requires the domain or service to accept the token for joining.
In this, we have added a feature for Enable IP Forwarding and Enable Accelerated Networking. Here's a comparison between IP forwarding and accelerated networking:
Description: Enables or disables IP forwarding for the NIC. Dependencies: None directly, but enabling IP forwarding can affect network traffic routing. IP forwarding in Azure allows a VM to act as a router, forwarding network traffic between different network interfaces. Here are some key points about IP forwarding:
Support Across Regions Availability: IP forwarding is generally supported across all Azure regions This means you can enable IP forwarding for VMs regardless of the region they are deployed in.
Support Across VM Sizes Compatibility: IP forwarding can be enabled on any VM size There are no specific restrictions based on VM size, making it a versatile feature for various deployment scenarios.
Use Cases Network Virtual Appliances (NVAs): Commonly used in NVAs like firewalls, load balancers, and WAN optimizers Routing Traffic: Useful for scenarios where the VM needs to route traffic between different subnets or networks
Configuration Enabling IP Forwarding: You can enable IP forwarding at the NIC level in Azure. This requires configuring the VM's network interface to allow traffic forwarding.
Operating System Configuration: You might need to enable IP forwarding within the VM's operating system to ensure it can forward traffic between private IP addresses assigned to Azure network interfaces
Impact Routing Capabilities: Allows the VM to handle network traffic routing, which can be essential for complex network setups
In summary, IP forwarding is a flexible feature supported across all Azure regions and VM sizes, making it suitable for various network configurations and scenarios.
By default, IP forwarding is disabled on Azure network interfaces. You need to explicitly enable it if you want your VM to forward traffic
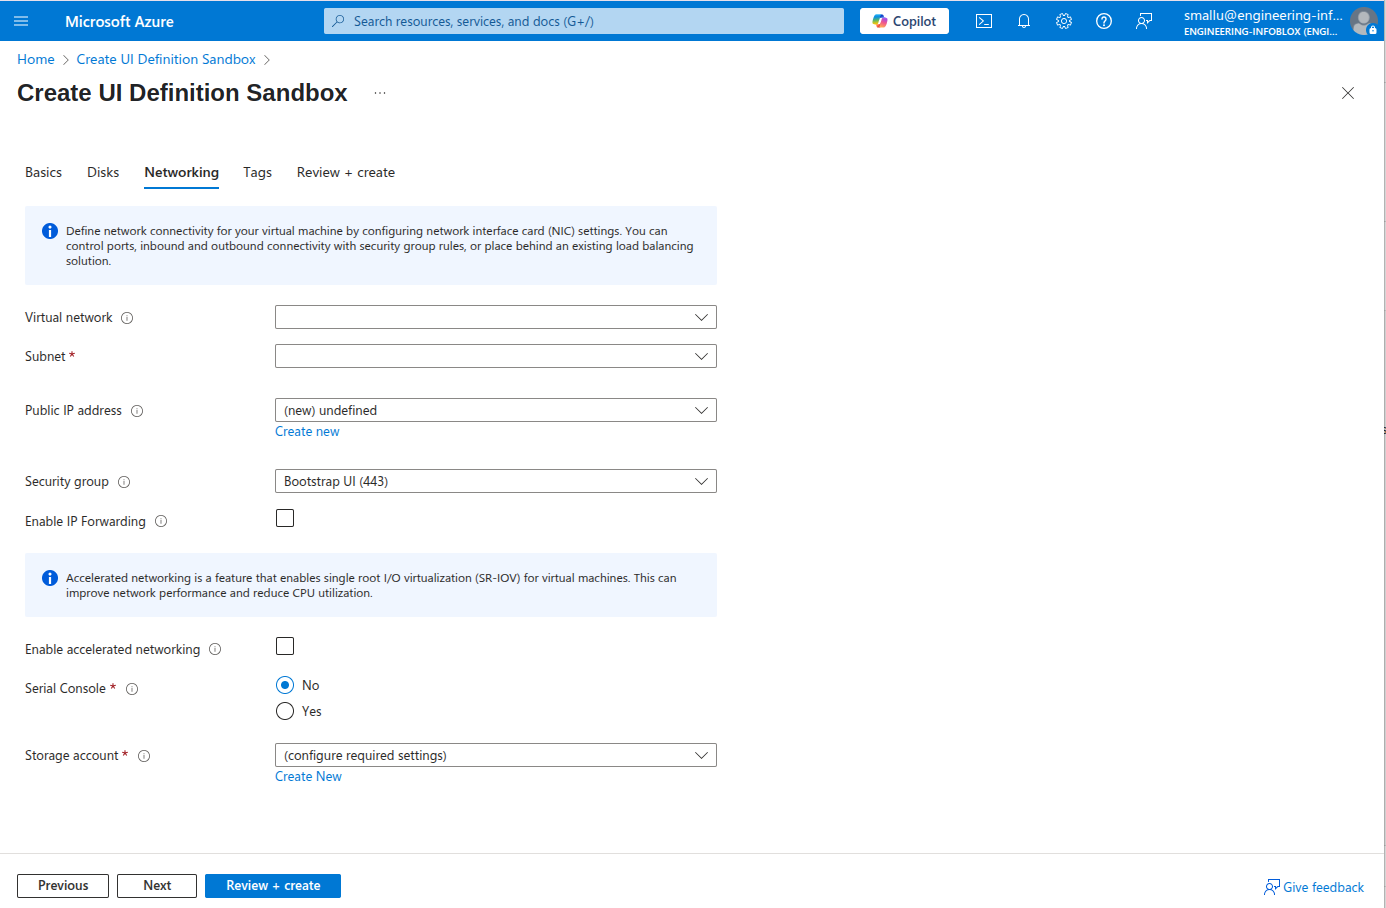
While deploying a VM, if we click the check box like below, enable IP Forwarding, below is reference.
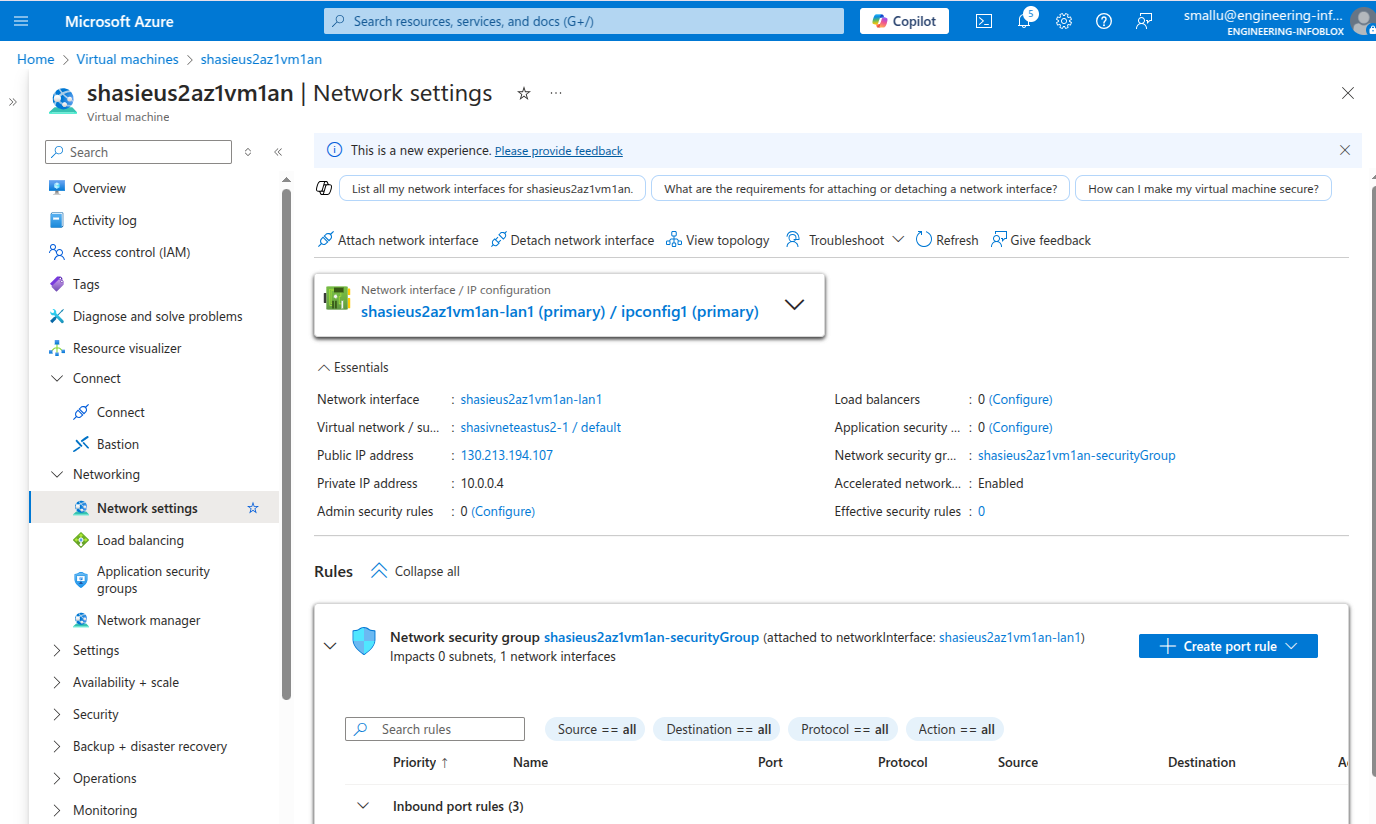
Here it is to check from portal, navigate to network settings from networking tab on left side, in essentials you can see network interface, if you click on network interface -> click on IP configurations on Settings tab left side, now you can see Enable IP forwarding

In future we can enable or disable, based on requirement.
Description: Enables or disables accelerated networking for the NIC. Dependencies: The selected VM size must support accelerated networking.
Purpose: Accelerated networking improves network performance by enabling single root I/O virtualization (SR-IOV) on supported VM types. This bypasses the host and virtual switch, reducing latency, jitter, and CPU utilization
Use Cases: Ideal for high-performance workloads that require low latency and high throughput, such as big data processing, high-performance computing, and real-time applications
Configuration: Enabled on supported VM sizes when the VM is stopped and deallocated
Impact: Provides lower latency, higher packets per second, reduced jitter, and decreased CPU utilization for network traffic
Supported VM Sizes for Accelerated Networking Accelerated Networking is supported on various VM sizes in Azure. Some of the commonly supported VM sizes include:
Dv2 and Dsv2-series
F-series
Fs-series
L-series
M-series
N-series (with some exceptions)
E-series
Es-series
H-series
For a complete list of supported VM sizes, you can refer to the Azure VM sizes documentation - https://learn.microsoft.com/en-us/azure/virtual-machines/sizes/overview
Custom images can support Accelerated Networking, but there are specific requirements that must be met: Drivers: The custom image must include drivers that enable Single Root I/O Virtualization (SR-IOV) for the network interface cards (NICs) used on Azure platforms Supported Hardware: The NICs must be compatible with Azure's Accelerated Networking feature. This includes hardware like NVIDIA ConnectX-3, ConnectX-4 Lx, ConnectX-5, and the Microsoft Azure Network Adapter (MANA) Configuration: You can also use Azure CLI or PowerShell to enable Accelerated Networking for a VM
In summary, IP forwarding is about routing traffic between networks, while accelerated networking is about enhancing network performance for specific VM sizes. Both features serve different purposes and are useful in different scenarios.
While deploying a VM, we can click the check box like below, if we want to enable accelerated networking
Here it is to check from portal, navigate to network settings from networking tab on left side, in essentials you can see Accelerated networking is enabled
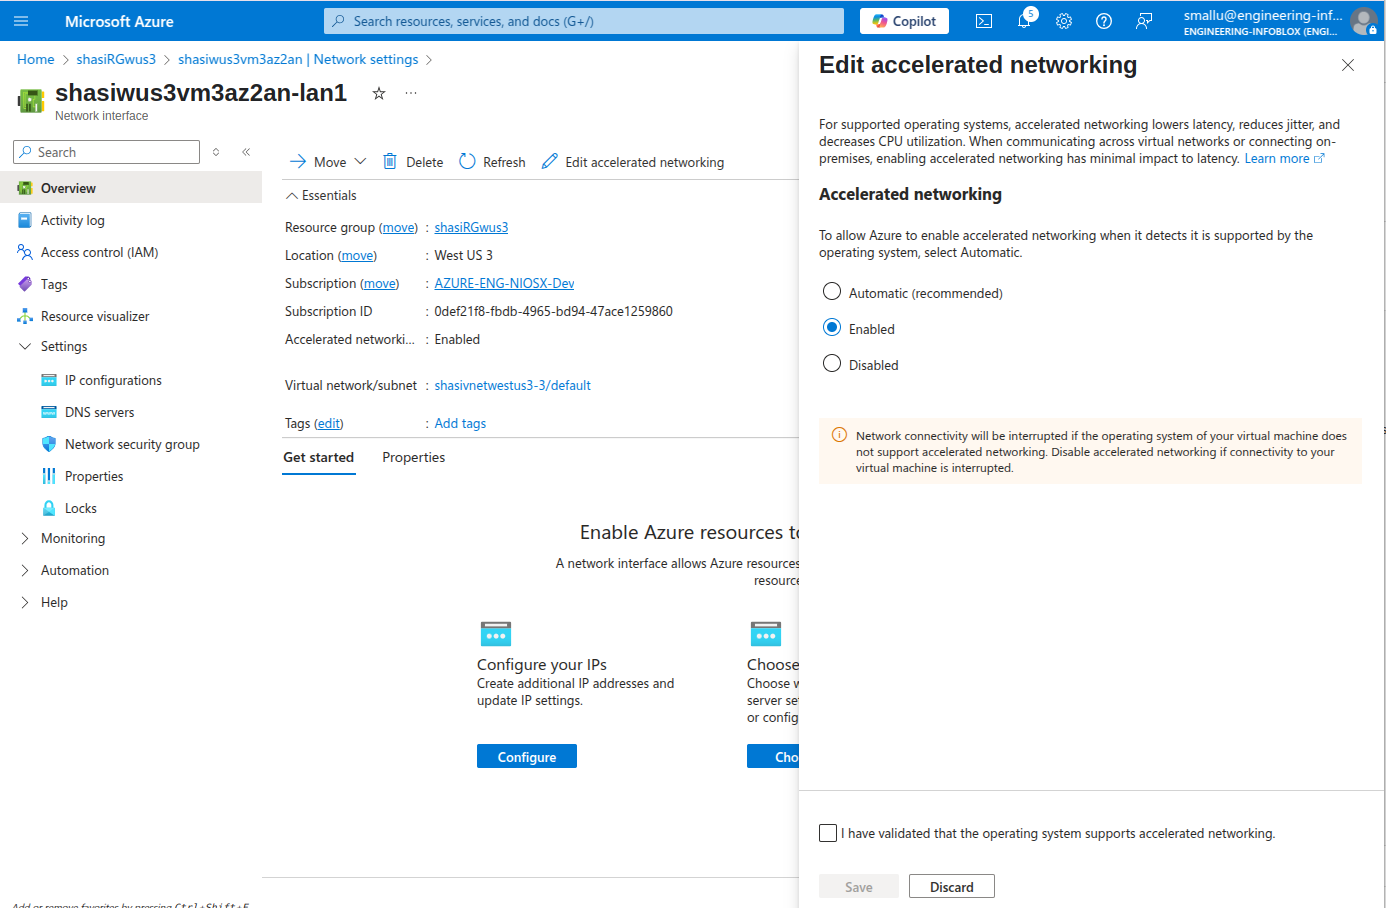
If you click on network interface, you can see Edit accelerated networking by clicking that a tab opens to enable or disable.
If you have any doubts, please reach out the author of this.
After any change in code, Please run ttk locally to check errors https://docs.microsoft.com/en-us/azure/azure-resource-manager/templates/test-toolkit
The Azure Resource Manager Template Test Toolkit (ARM‑TTK) is a test suite developed by Microsoft to validate ARM templates, parameter files, and CreateUiDefinition (CUID) files. It detects common issues, enforces best practices, and ensures the templates meet Marketplace and internal quality standards.
According to Microsoft Learn:
“The ARM template test toolkit checks whether your template uses recommended practices… When your template isn't compliant, it returns a list of warnings with suggested changes.” [https://learn.microsoft.com/en-us/azure/azure-resource-manager/templates/test-toolkit]
ARM‑TTK is implemented as a PowerShell module containing best‑practice validations used by:
Azure Marketplace Azure Quickstart templates Internal deployment pipelines
The GitHub repo states:
“These tests validate templates for Azure QuickStart and Azure Marketplace… ensuring consistent coding practices and catching issues such as unused parameters, security risks, and poor template structure.” [github.com]
1. Ensures Template Quality
ARM‑TTK identifies coding issues such as:
- Unused parameters
- Incorrect schema versions
- Hard‑coded values
- Missing location properties
- Mis‑structured CreateUiDefinition controls
These issues correspond to test cases documented by Microsoft:
“This test finds parameters that aren't used… delete any parameters that are defined but not used.” (Test: Parameters Must Be Referenced) [learn.microsoft.com]
2. Enforces Security Practices
ARM‑TTK flags insecure patterns like:
- Returning secrets via outputs
- Using secureString defaults improperly
- Exposing credentials in clear text
Microsoft notes:
“Secure parameters can't have a hard‑coded default value.” [learn.microsoft.com]
3. Mandatory for Azure Marketplace Publishing
Azure Marketplace certification requires that:
- ARM Templates must pass ARM‑TTK
- CreateUIDefinition must pass all UI tests
Without passing this tool, Marketplace submission will fail.
4. Improves Deployment Reliability
By eliminating structural issues, ARM‑TTK prevents:
- Runtime deployment failures
- Schema mismatches
- API version mismatches
- Incorrect resource wiring
Microsoft Learn provides the official installation steps for Windows, Linux, and macOS:
“Download the latest .zip… extract it… navigate to the arm‑ttk folder… Import the module with Import-Module ./arm-ttk.psd1.” [learn.microsoft.com]
macOS / Linux
# Install Powershell
$ brew install --cask powershell
$ pwsh
PowerShell 7.5.4
Full Test Suite
$ git clone https://github.com/Azure/arm-ttk.git
$ cd ./arm-ttk/arm-ttk/
$ Import-Module ./arm-ttk/arm-ttk.psd1
$ cd ~/bloxone-azure-templates/mytemplates/
$ Test-AzTemplate -TemplatePath .
$ Test-AzTemplate -TemplatePath . -Test "CreateUIDefinition_*"
This executes all test groups:
- deploymentTemplate
- deploymentParameters
- createUiDefinition [github.com]
Common ARM‑TTK Rules (You’ll See These)
Parameters Must Be Referenced – delete or reference unused parameters. Variables Must Be Referenced – delete or reference unused variables. Secure String Parameters Cannot Have Default – no hard‑coded default for secure values. Location Should Not Be Hardcoded – use resourceGroup().location when appropriate. Outputs Must Not Contain Secrets – never emit secrets in plain text. CreateUIDefinition Must Not Have Blanks – no empty regex or required fields. Textboxes Are Well Formed – TextBox controls must have regex with a length quantifier.
The official list shows examples that pass and fail, with exact rule names and remediations.
Run Only CUID Tests
Test-AzTemplate -TemplatePath . -Test createUIDefinitionRun Only ARM Template Tests
Test-AzTemplate -TemplatePath . -Test deploymentTemplateRun a Specific Test
Test-AzTemplate -TemplatePath . -Test "Parameters Must Be Referenced"Run Against a Specific File
Test-AzTemplate -TemplatePath . -Test "Resources Should Have Location" -File mainTemplate.jsonSkip a Test (not recommended for Marketplace)
Test-AzTemplate -TemplatePath . -Skip apiVersions-Should-Be-RecentPS /Users/shasidharreddy/bloxone-azure-templates/main> Test-AzTemplate -TemplatePath . -Test "CreateUIDefinition_*"
WARNING: Test 'CreateUIDefinition_*' was not found, all tests will be run
Validating main\createUiDefinition.json
JSONFiles Should Be Valid
[+] JSONFiles Should Be Valid (2 ms)
WARNING: Test 'CreateUIDefinition_*' was not found, all tests will be run
Allowed Values Should Actually Be Allowed
[+] Allowed Values Should Actually Be Allowed (51 ms)
Controls In Outputs Must Exist
...
...
Variables Must Be Referenced
[+] Variables Must Be Referenced (2 ms)
Virtual Machines Should Not Be Preview
[+] Virtual Machines Should Not Be Preview (3 ms)
VM Images Should Use Latest Version
[+] VM Images Should Use Latest Version (2 ms)
VM Size Should Be A Parameter
[+] VM Size Should Be A Parameter (28 ms)
Pass : 359
Total : 359
Fail : 0
PS /Users/shasidharreddy/bloxone-azure-templates/main>TTK says “Parameters Must Be Referenced”
Either delete the parameter or reference it in a valid expression (e.g., an outputs echo or a variable used later).
CUID “Textboxes Are Well Formed” fails
Ensure each Microsoft.Common.TextBox has a non‑empty regex and a length quantifier in that regex; include a validation message. [learn.microsoft.com]
API‑version runtime error (NoRegisteredProviderFound)
Switch to a supported apiVersion from the error’s list and/or register the provider namespace. [koskila.net], [github.com]
Preview the CUID without deploying
Use the Create UI Definition Sandbox to preview immediately and resolve UI property errors. [commandmasters.com]
- ARM‑TTK – Microsoft Learn: usage & install guides. [github.com]
- ARM‑TTK – GitHub README: commands, test groups, and examples. [learn.microsoft.com]
- Template Test Cases: full list of rules (parameters/variables referenced, secure defaults, etc.).
- CUID Sandbox: preview CreateUiDefinition quickly. [commandmasters.com]
- Provider Registration Troubleshooting: fix NoRegisteredProviderFound by using supported apiVersions or registering providers. [koskila.net], [github.com]
- CI ideas: running ARM‑TTK in pipelines. [docs.azure.cn]
Once arm-ttk is valid and pass, then we can create a template.
To create zip archive use archive.sh script from utils directory:
$ utils/archive.sh imageOffer="" imagePublisher="" imageSku="" imageVersion="" trackingId=""
You can get imageOffer, imagePublisher, imageSku and imageVersion in your virtual machine offer.
You can get trackingId in your application offer.
If you have any doubts, please reach out the author of this.