An AI driven Stellar based Decentralized Voting Application which empowers communities to make decisions collectively with confidence.
View Demo
·
Report Bug
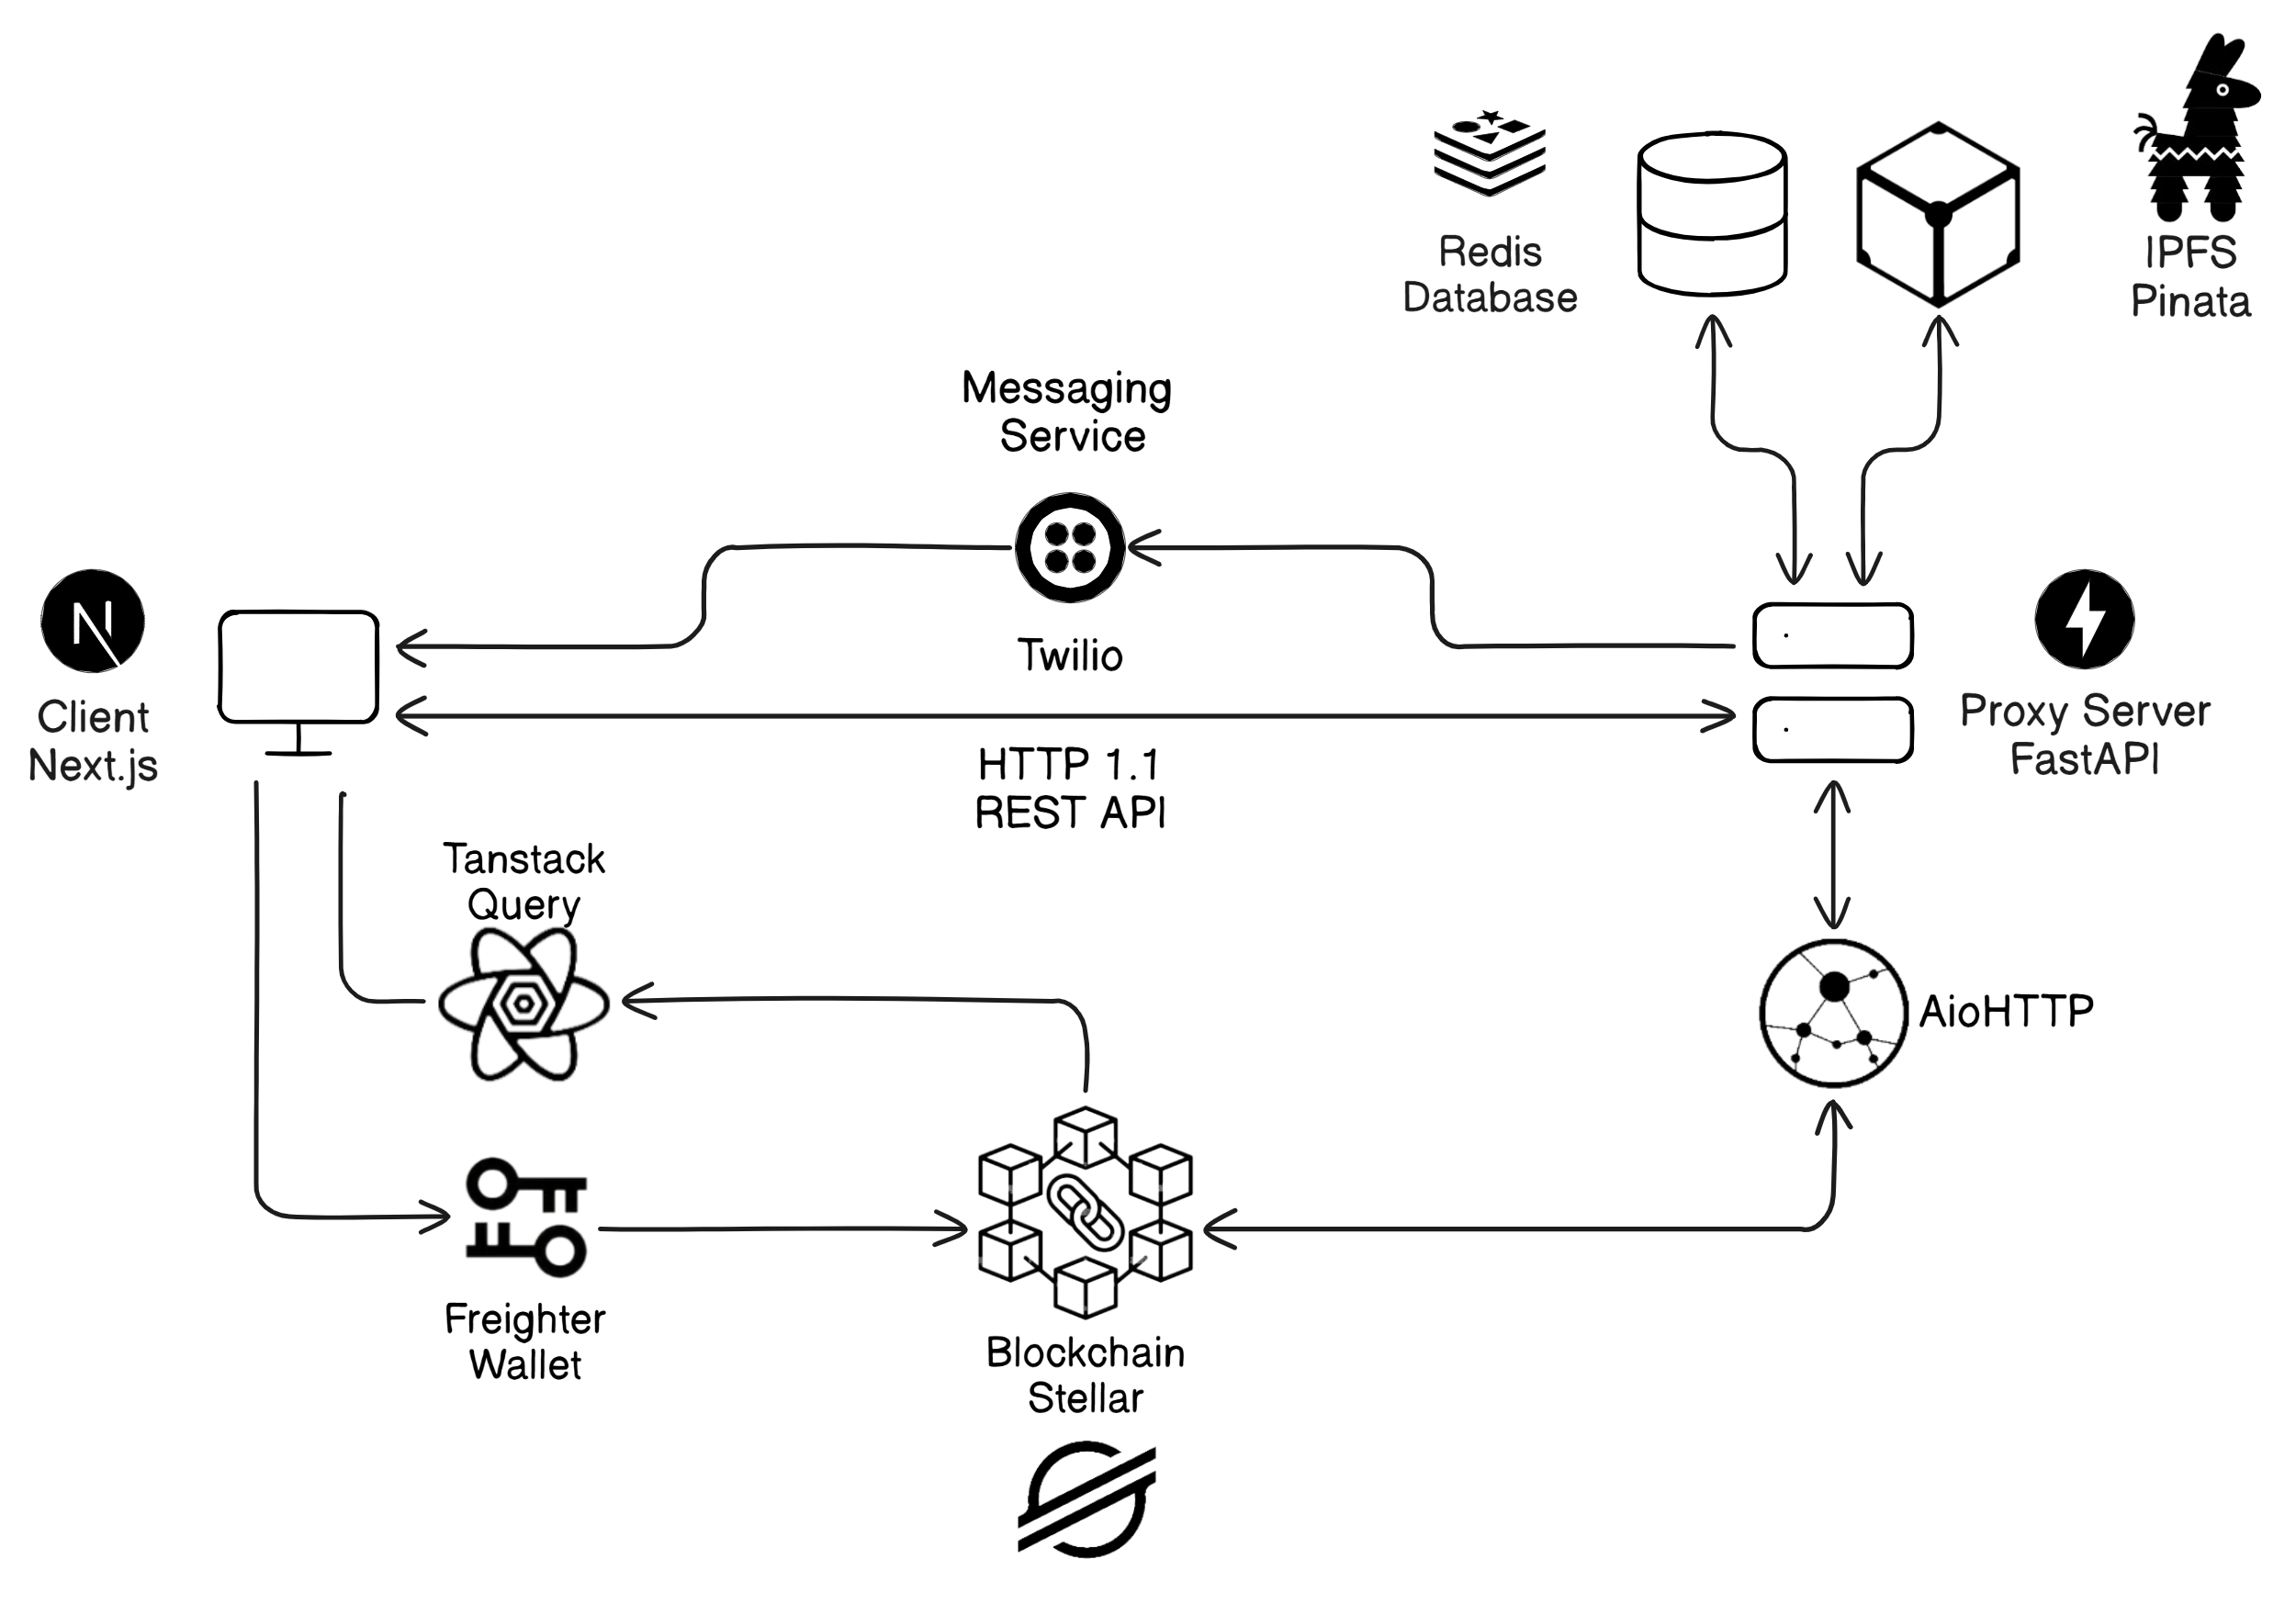
This project is a secure, AI-driven, decentralized voting application built on the Stellar blockchain with Soroban smart contracts to ensure transparency and immutability. The system leverages Next.js for the frontend, a Python-based proxy server, and Redis as the database.
- Decentralized & Secure – Built on Stellar blockchain with Soroban smart contracts for transparent voting.
- AI-Powered Authentication – Uses OCR for Aadhaar card recognition and face recognition models for enhanced security.
- Fast & Scalable – A Python proxy server optimizes API calls, and Redis ensures quick data access.
- User-Friendly Interface – A seamless Next.js frontend for an intuitive voting experience.
This system guarantees secure, verifiable, and tamper-proof elections with the power of AI and blockchain.
This is a set of instructions on how to set up your project locally. To get a local copy up and running follow these simple example steps.
These are the softwares required to run the project.
-
Clone the repository
git clone https://github.com/soorya-u/votex.git
-
Install Stellar CLI
-
Start the Stellar Service
docker compose up stellar --build -
Create a new Local Network
stellar network add <network-name> --rpc-url <rpc-url> --network-passphrase <passphase>
# for local network, rpc-url: `http://localhost:8000/soroban/rpc` and passphase: `"Standalone Network ; February 2017"`
-
To check the health of Stellar, run
docker exec votex-stellar /opt/stellar/bin/health-check.sh -
To check the running processes in Stellar, run
docker exec votex-stellar supervisorctl status -
If any of the process is not running, run
docker exec votex-stellar supervisorctl start <process-name>[friendbot, postgresql, ...]
-
-
Create a new Account using Stellar CLI
stellar keys generate <your-username> --network <network-name> --fund
-
Connect to Freighter Wallet by importing the account using the secret key
stellar keys show <your-username>
-
Navigate to web3 Directory
cd web3 -
Run the Deploy Command with Username and Network Options as Parameters to get the Deployed Contract Address
.\scripts\deploy.ps1 -Source <your-username> -Network <your-network>
./scripts/deploy.sh SOURCE=<your-username> NETWORK=<your-network>
-
Create
.envat the root of the project and fill the required variables# root .env cp .env.example .env -
Navigate to Client
cd client -
Create
.envand fill the required variablescp .env.example .env.docker
-
Navigate to Server
cd server -
Create
.envand fill the required variablescp .env.example .env.docker
-
Run the Client and Server Docker Images
# Starts up redis as well
docker compose up client server --build-
Clone the repository
git clone https://github.com/soorya-u/votex.git
-
Install Stellar CLI
-
Create a new Account using Stellar CLI
stellar keys generate <name> --network testnet --fund -
Navigate to web3 Directory
cd web3 -
Run the Deploy Command with Username and Network Options as Parameters to get the Deployed Contract Address
.\scripts\deploy.ps1 -Source <your-username> -Network testnet
./scripts/deploy.sh SOURCE=<your-username> NETWORK=testnet
-
Connect to Freighter Wallet by importing the account using the secrets
stellar keys show <your-username>
-
Retrieve API Keys from Pinata and Twilio
-
Navigate to Server
cd server -
Create
.envand fill the required variablescp .env.example .env
-
Install all the required packages
poetry install
-
Run the FastAPI Server
poetry run fastapi dev src
-
Navigate to Client
cd client -
Create
.envand fill the required variablescp .env.example .env
-
Install Dependencies
bun install
-
Run the Development Server
bun dev
- Rasa Chatbot Integration
See the open issues for a full list of proposed features (and known issues).