Replaced Copilot with Live Editor #851
There are no files selected for viewing
This file contains hidden or bidirectional Unicode text that may be interpreted or compiled differently than what appears below. To review, open the file in an editor that reveals hidden Unicode characters.
Learn more about bidirectional Unicode characters
This file contains hidden or bidirectional Unicode text that may be interpreted or compiled differently than what appears below. To review, open the file in an editor that reveals hidden Unicode characters.
Learn more about bidirectional Unicode characters
This file contains hidden or bidirectional Unicode text that may be interpreted or compiled differently than what appears below. To review, open the file in an editor that reveals hidden Unicode characters.
Learn more about bidirectional Unicode characters
| Original file line number | Diff line number | Diff line change |
|---|---|---|
| @@ -1,10 +1,10 @@ | ||
| --- | ||
| title: "Editing a Test Case Using Live Editor" | ||
| pagetitle: "Editing a Test Case Live Using Testsigma Live Editor" | ||
| metadesc: "Learn how to edit a test case live using Testsigma Live Editor | Testsigma Live Editor allows you to check step details of the test case without having to re-run on test failure" | ||
| noindex: false | ||
| order: 10.5 | ||
| page_id: "Editing a Test Case Using Live Editor" | ||
| search_keyword: "" | ||
| warning: false | ||
| contextual_links: | ||
|
|
@@ -14,13 +14,13 @@ contextual_links: | |
| name: "Prerequisites" | ||
| url: "#prerequisites" | ||
| - type: link | ||
| name: "Steps to Edit a Test Case Using Live Editor" | ||
| url: "#steps-to-edit-a-test-case-using-live-editor" | ||
| --- | ||
|
|
||
| --- | ||
|
|
||
| In Testsigma, Live Editor gives you complete control over test cases while executing, which helps fix issues or errors in real time. It eliminates the need to rerun the entire test after a failure, making debugging and test stabilization faster and more efficient. This article discusses editing test cases live while executing them using Live Editor. | ||
|
|
||
| --- | ||
|
|
||
|
|
@@ -32,16 +32,16 @@ In Testsigma, Copilot gives you complete control over test cases while executing | |
|
|
||
| --- | ||
|
|
||
| ## **Steps to Edit a Test Case Using Live Editor** | ||
|
|
||
|
|
||
| 1. In the left navigation bar, go to **Create Tests > Test Cases**. | ||
|  | ||
|
|
||
| 2. Create a new test case or open an existing one, and click **Live Editor** in the **Action Panel**. | ||
|  | ||
|
|
||
| 3. In the **Live Editor** overlay: | ||
| - Select a **Data Set Name** from the dropdown menu if the test case is data-driven. | ||
|  | ||
|
|
||
|
|
@@ -51,16 +51,16 @@ In Testsigma, Copilot gives you complete control over test cases while executing | |
| - Select the test step to debug up to. | ||
|  | ||
|
|
||
| 4. Click **Launch**. A new window opens with the **Live Editor**. | ||
|  | ||
|
|
||
| 5. The test steps execute until the selected debug point. | ||
|
|
||
| 6. When debugging is complete, click **Stop** to close the **Live Editor**. | ||
|  | ||
|
|
||
| [[info | **NOTE**:]] | ||
| | Clicking **Stop** stops the current execution but does not close the **Live Editor**. To close the **Live Editor**, open **Testsigma Terminal** application and click **Quit Live Editor**. | ||
| |  | ||
|
|
||
| --- | ||
This file contains hidden or bidirectional Unicode text that may be interpreted or compiled differently than what appears below. To review, open the file in an editor that reveals hidden Unicode characters.
Learn more about bidirectional Unicode characters
| Original file line number | Diff line number | Diff line change |
|---|---|---|
| @@ -1,10 +1,10 @@ | ||
| --- | ||
| title: "FAQs on Testsigma Terminal" | ||
| pagetitle: "FAQs on Testsigma Live Editor" | ||
| metadesc: "Find answers to frequently questions about Testsigma's Live Editor (Testsigma Terminal), including its features, installation, usage, and how it helps resolve issues in test cases in real time" | ||
| noindex: false | ||
| order: 10.6 | ||
| page_id: "Frequently Asked Questions on Live Editor" | ||
| search_keyword: "" | ||
| warning: false | ||
| --- | ||
|
|
@@ -14,7 +14,7 @@ warning: false | |
|
|
||
| ### **1. Can I run the old Java agent and Testsigma Terminal on the same machine?** | ||
|
|
||
| **Answer:** No, only one active agent can run at a time. Testsigma Terminal automatically detects an existing Java agent and uses it for **Live Editor** and test executions. | ||
|
|
||
| --- | ||
|
|
||
|
|
@@ -57,7 +57,7 @@ warning: false | |
|
|
||
| ### **7. Which agent is used for remote executions or ad-hoc runs?** | ||
|
|
||
| **Answer:** Testsigma Terminal integrates with the existing agent, which is used for remote executions, ad-hoc runs, and Live Editor. | ||
|
|
||
| --- | ||
|
|
||
|
|
@@ -73,7 +73,7 @@ warning: false | |
|
|
||
| #### **Managing Testsigma Terminal** | ||
|
|
||
| - **Stop:** Click **Quit Live Editor**. | ||
|
|
||
| - **Start:** Launch **Testsigma Terminal** from your applications. | ||
|
|
||
|
|
@@ -102,7 +102,7 @@ warning: false | |
|
|
||
| - Run: `sh Stop.sh` | ||
|
|
||
| - **Restart:** Relaunch **Testsigma Terminal** or click the **Restart** button on the **Live Editor** homepage. | ||
|
|
||
|
|
||
| --- | ||
|
|
@@ -162,15 +162,15 @@ warning: false | |
|
|
||
| --- | ||
|
|
||
| ### **15. What should I do if I see a port error during Terminal or Live Editor installation?** | ||
|
|
||
| **Answer:** You may see an error screen during the download of a new Terminal or Live Editor if all required ports are in use. This usually occurs when processes from a previous installation are still running. This article discusses resolving port-in-use errors when installing the Terminal. | ||
|
|
||
| 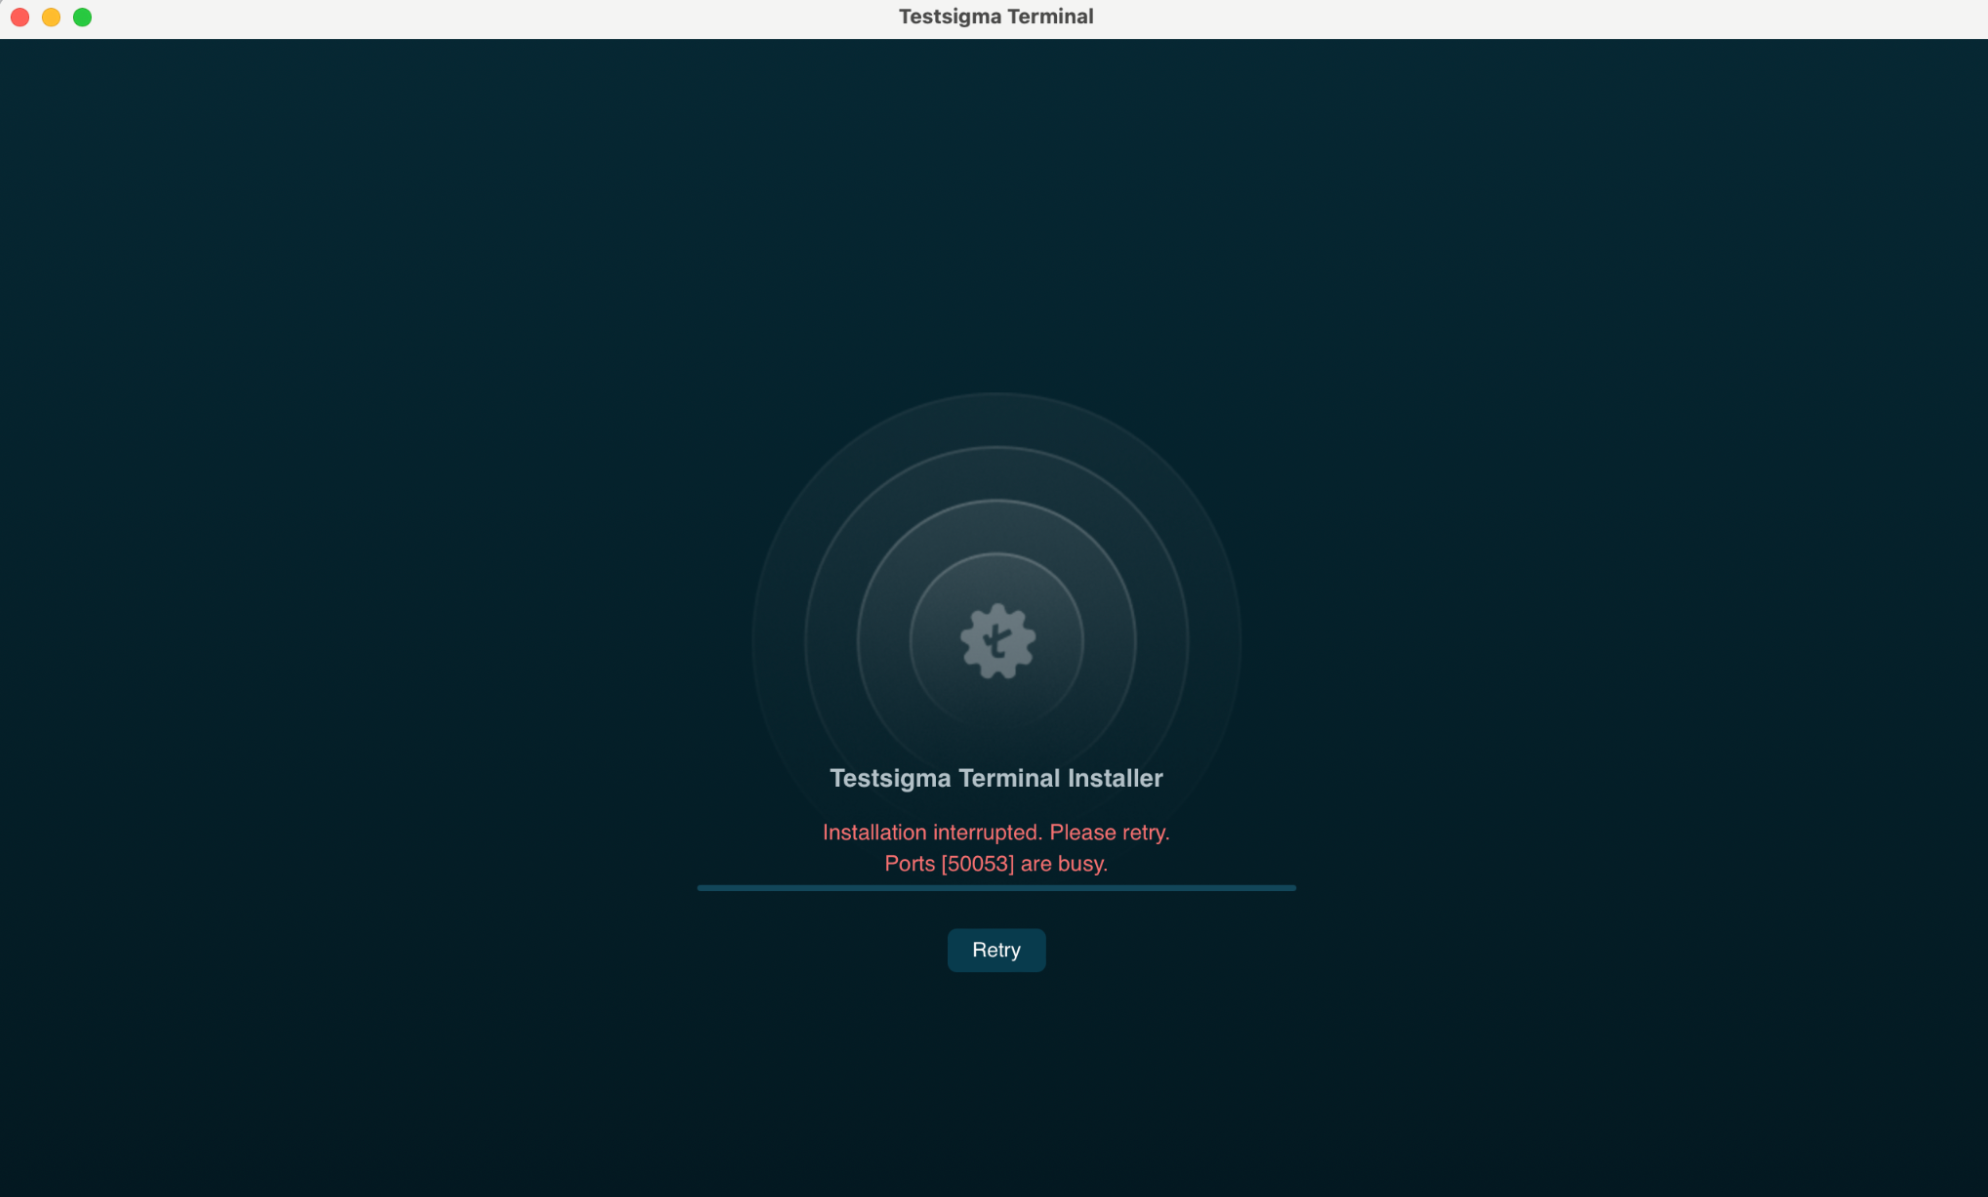 | ||
|
|
||
| **Steps to Resolve for macOS:** | ||
|
|
||
| 1. Quit the **Live Editor** if it is open. | ||
| 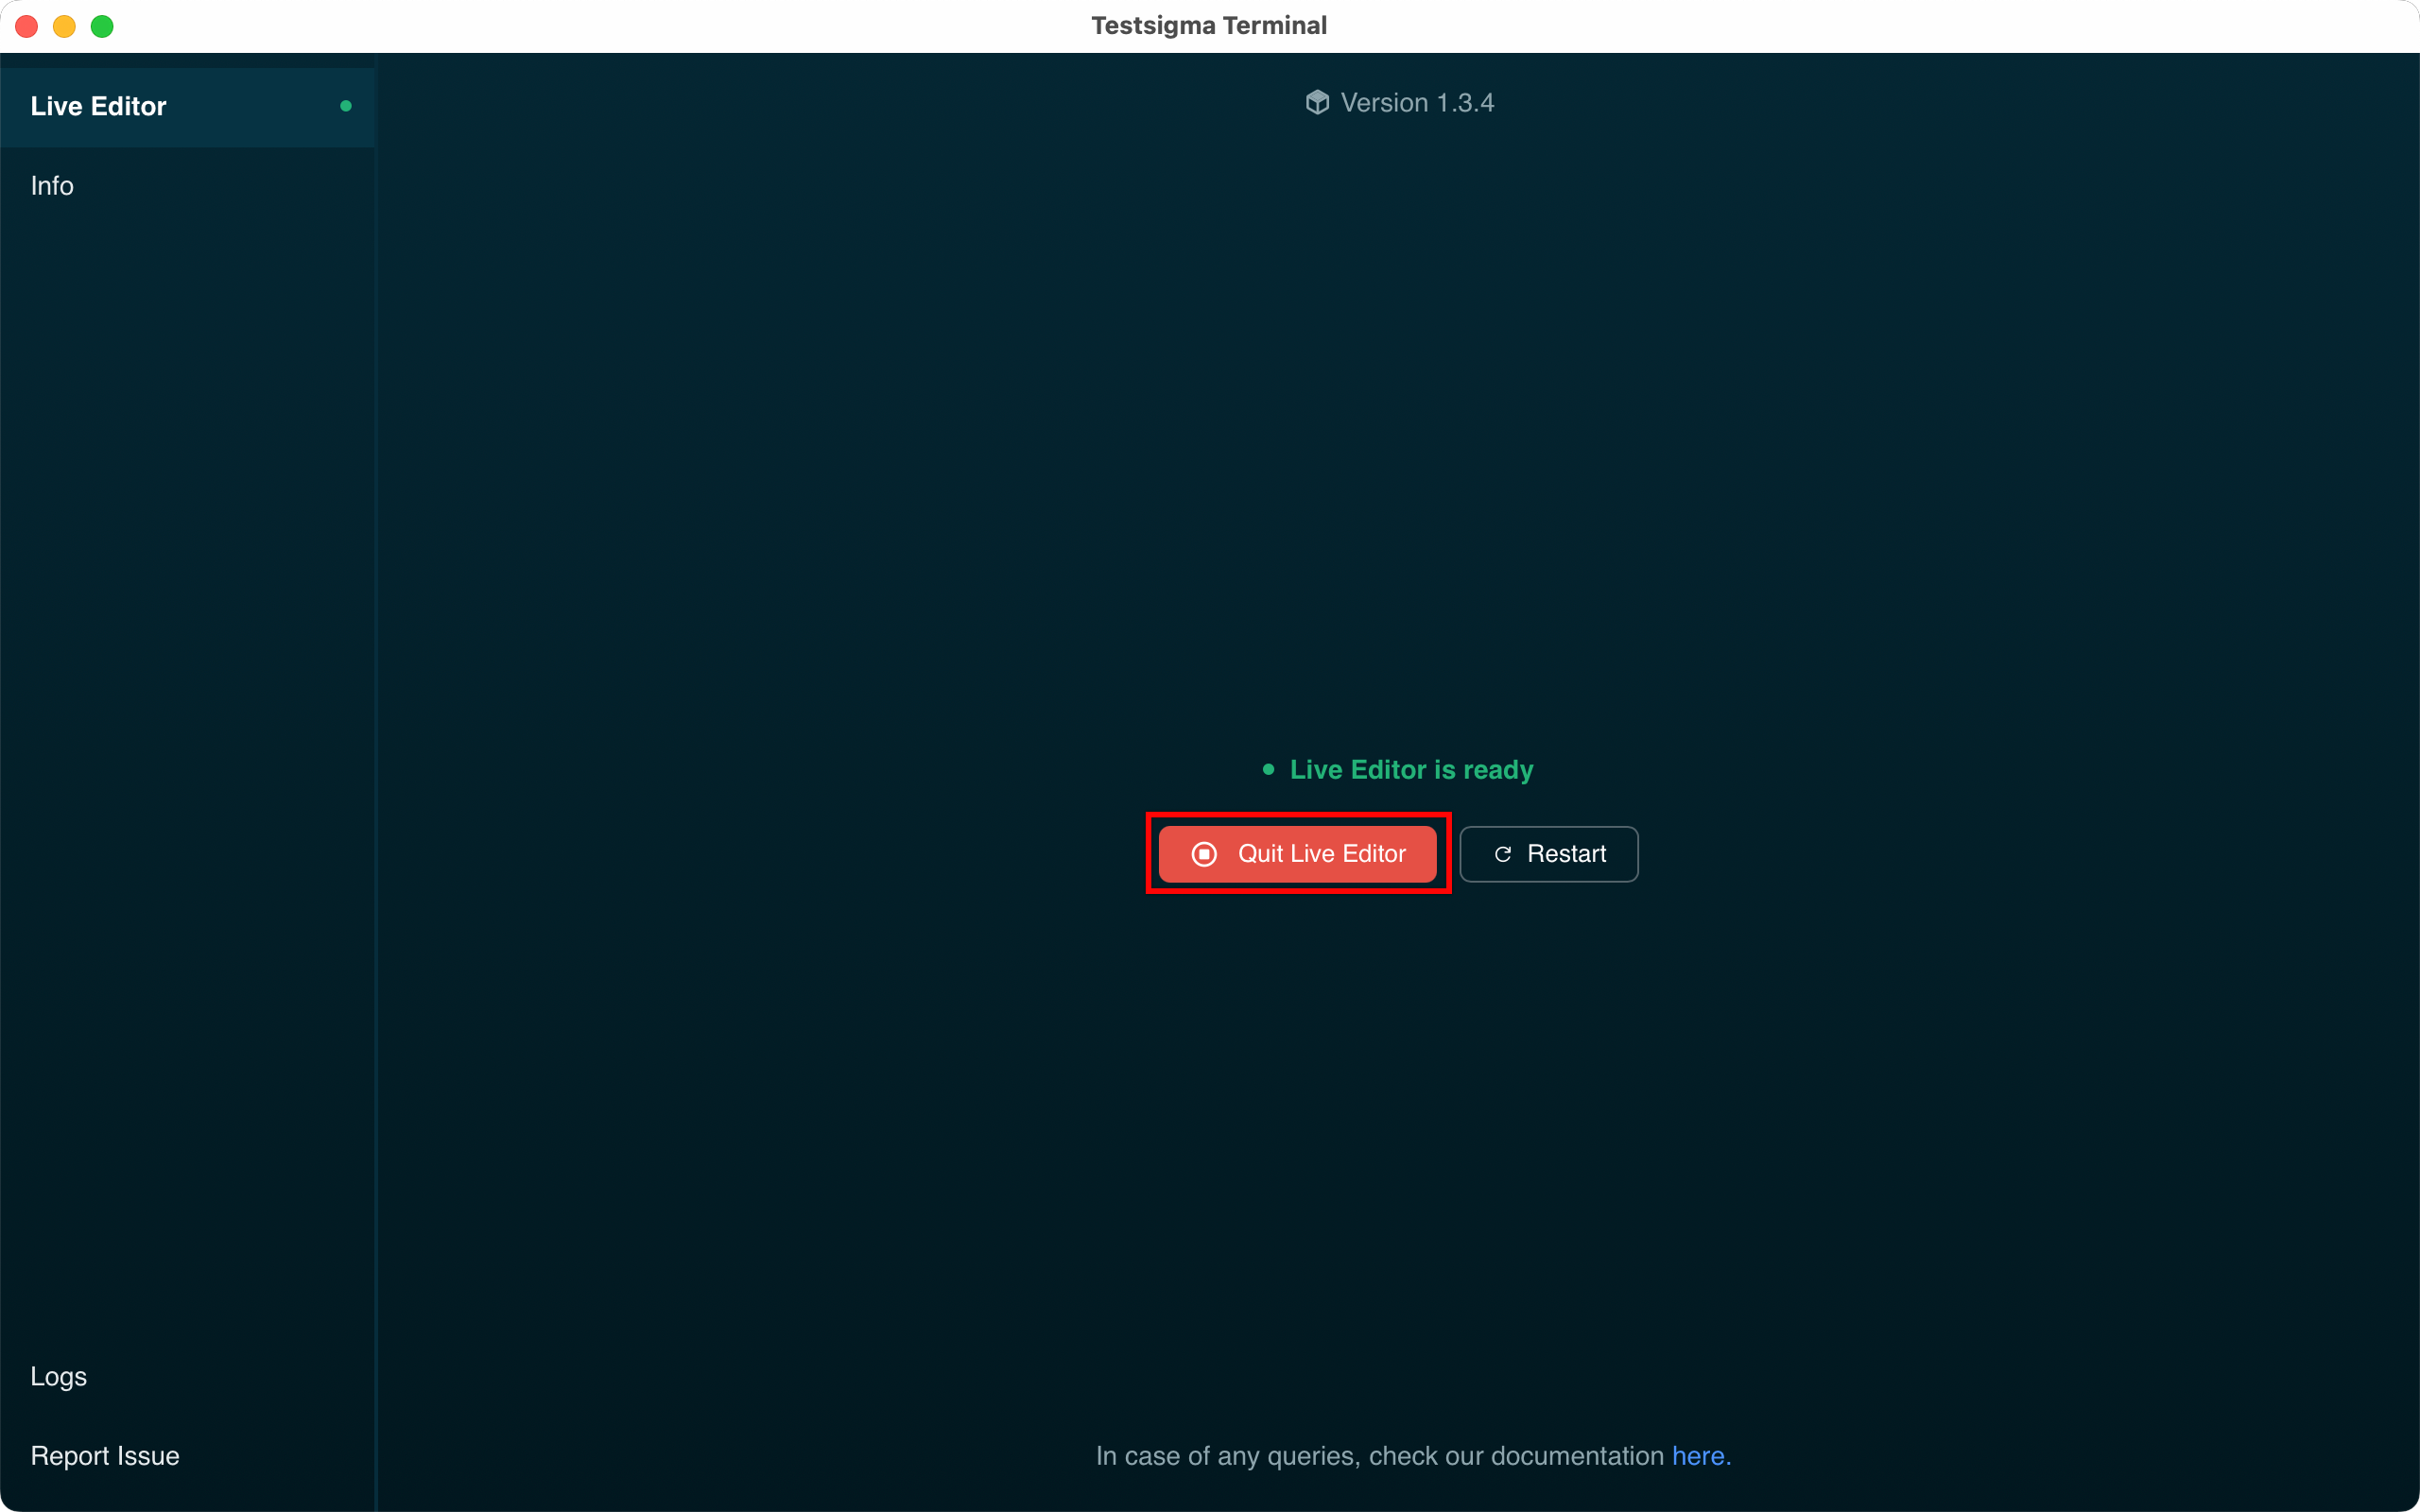 | ||
|
Contributor
There was a problem hiding this comment. Update image alt text to match updated terminology. The image caption at line 174 still references "Quit Copilot" while the text at line 173 has been updated to "Quit the Live Editor". Update the image caption to maintain consistency. -1. Quit the **Live Editor** if it is open.
- 
+1. Quit the **Live Editor** if it is open.
+ 
🤖 Prompt for AI Agents |
||
|
|
||
| 2. Open Activity Monitor and end any **wrapper** or **atto** processes. | ||
|
|
@@ -197,7 +197,7 @@ warning: false | |
|
|
||
| **Steps to Resolve for Windows:** | ||
|
|
||
| 1. Close the **Live Editor** and any previously running agent. | ||
|
|
||
| 2. Open **Task Manager** and end the following processes, if they are running: | ||
| - **abd** | ||
|
|
@@ -226,16 +226,16 @@ warning: false | |
| --- | ||
|
|
||
|
|
||
| **16. What should I do if I see an authentication error while installing the Terminal or Live Editor?** | ||
|
|
||
| **Answer:** Authentication errors during installation occur if the user switches accounts through the installation or if leftover processes or files from a previous installation remain. To resolve this, perform the common cleanup process as described in the port busy issue. | ||
|
|
||
| 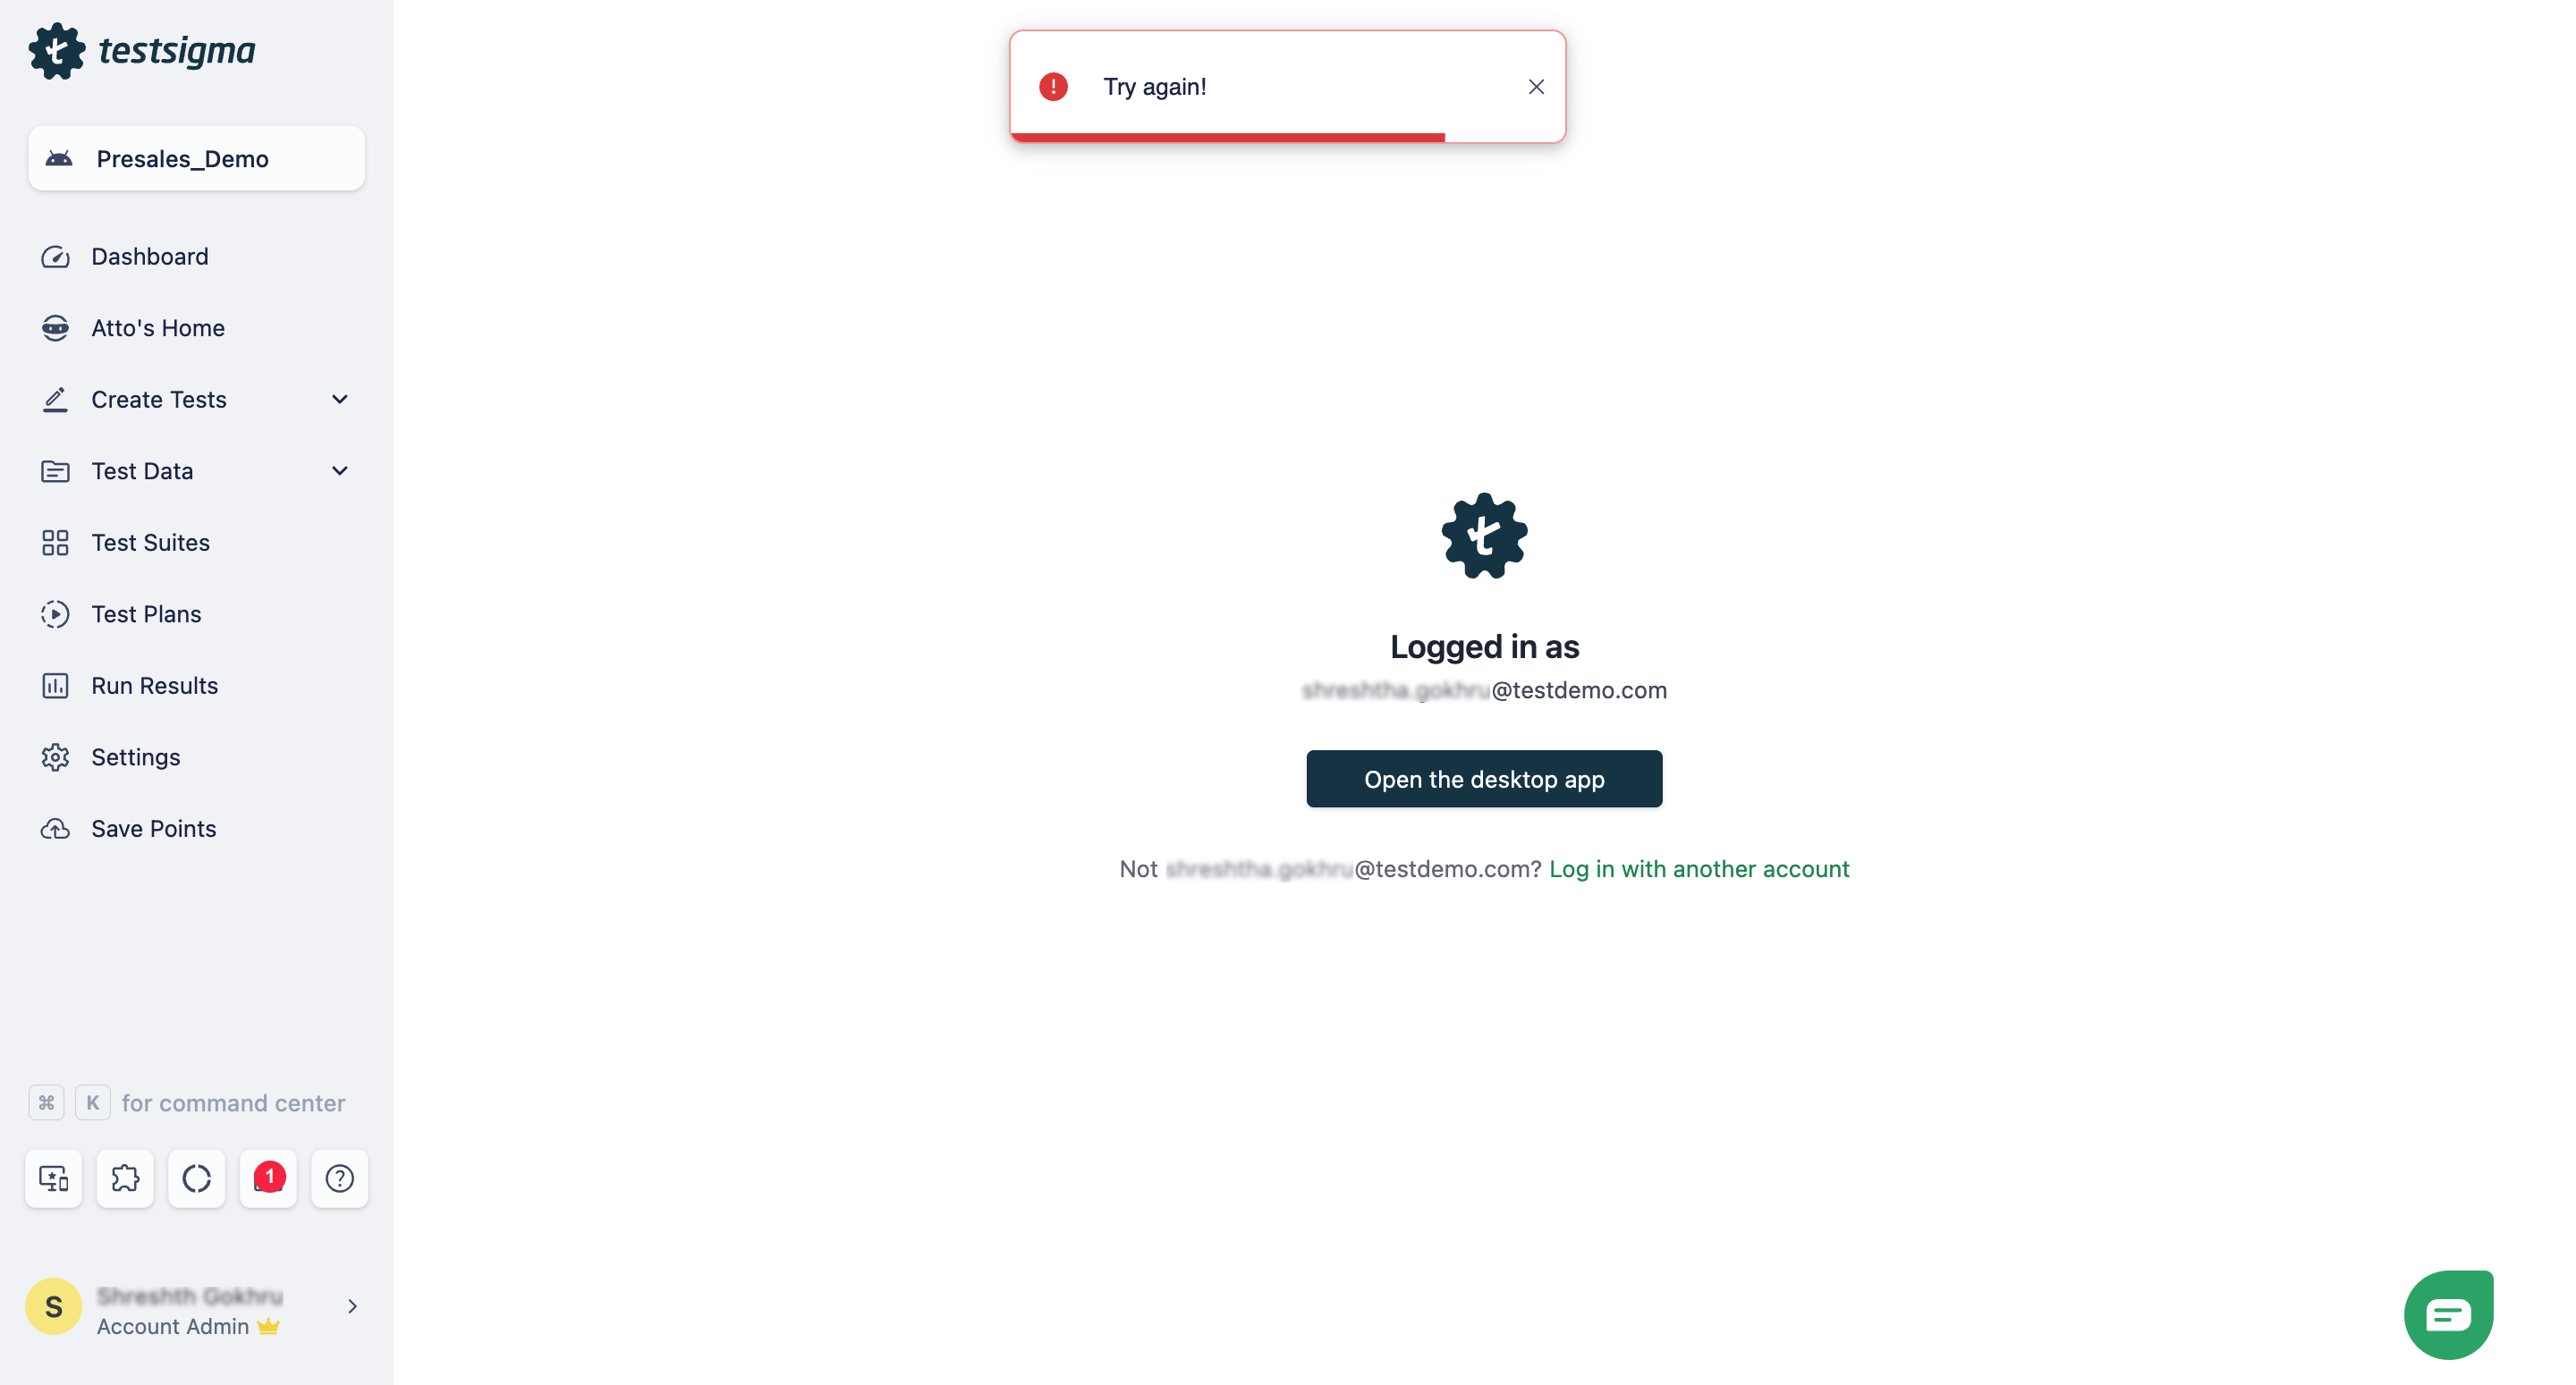 | ||
|
|
||
| --- | ||
|
|
||
| **17. Why do test steps not update and features not work in the Live Editor?** | ||
|
|
||
| **Answer:** The Live Editor may launch the local browser and execute test steps but fail to update results or allow recording additional steps due to agent incompatibility with Chrome version 139. To fix this issue, delete the entire **.testsigma** folder and restart the Terminal. This will trigger a new agent download and restore full Live Editor functionality. | ||
|
|
||
| --- | ||
This file contains hidden or bidirectional Unicode text that may be interpreted or compiled differently than what appears below. To review, open the file in an editor that reveals hidden Unicode characters.
Learn more about bidirectional Unicode characters
| Original file line number | Diff line number | Diff line change |
|---|---|---|
| @@ -1,7 +1,7 @@ | ||
| --- | ||
| title: "Installing Testsigma Terminal on Linux" | ||
| pagetitle: "Installing Testsigma Terminal on Linux" | ||
| metadesc: "Learn to install Testsigma Terminal on Linux. Gain full control over test execution and debugging with the Live Editor to modify and run test steps instantly." | ||
| noindex: false | ||
| order: 10.3 | ||
| page_id: "installing-testsigma-terminal-on-linux" | ||
|
|
@@ -16,7 +16,7 @@ contextual_links: | |
|
|
||
| --- | ||
|
|
||
| Live Editor helps you author and validate tests through local execution for Salesforce, Desktop, and Web applications. To use it on Linux, you need to install the Testsigma Terminal application. This section guides you through downloading, installing, and configuring it on your Linux system. | ||
|
|
||
| --- | ||
|
|
||
|
|
@@ -42,7 +42,7 @@ Copilot helps you author and validate tests through local execution for Salesfor | |
| 8. Click **Login to Testsigma**. You will be redirected to Testsigma. | ||
|
|
||
| [[info | **NOTE**:]] | ||
| | Once you log in, the session stays valid for 24 hours. After that, you'll need to log in and authorize yourself again to continue using the Live Editor. | ||
|
|
||
| 1. Click **Open the desktop** app. The **Testsigma Terminal** opens. | ||
|
|
||
|
|
||
This file contains hidden or bidirectional Unicode text that may be interpreted or compiled differently than what appears below. To review, open the file in an editor that reveals hidden Unicode characters.
Learn more about bidirectional Unicode characters
| Original file line number | Diff line number | Diff line change |
|---|---|---|
| @@ -1,7 +1,7 @@ | ||
| --- | ||
| title: "Installing Testsigma Terminal on Windows" | ||
| pagetitle: "Installing Testsigma Terminal on Windows" | ||
| metadesc: "Learn to install Testsigma Terminal on Windows. Take full control of test execution and debugging with Live Editor to modify and run test steps instantly." | ||
| noindex: false | ||
| order: 10.4 | ||
| page_id: "installing-testsigma-terminal-on-windows" | ||
|
|
@@ -16,7 +16,7 @@ contextual_links: | |
|
|
||
| --- | ||
|
|
||
| Live Editor is the primary tool for test authoring and validation through local execution for Salesforce, Desktop, and Web applications. To enable this on Windows, you must install the Testsigma Terminal application. This section explains how to download, install, and set it up on your Windows machine. | ||
|
|
||
| --- | ||
|
|
||
|
|
@@ -31,7 +31,7 @@ Copilot is the primary tool for test authoring and validation through local exec | |
| 4. Click **Login to Testsigma**. You will be redirected to Testsigma. | ||
|
|
||
| [[info | **NOTE**:]] | ||
| | Once you log in, the session stays valid for 24 hours. After that, you'll need to log in and authorize yourself again to continue using the Live Editor. | ||
|
|
||
| 1. Click **Open the desktop app**. The **Testsigma Terminal** opens. | ||
|
|
||
|
|
||
Oops, something went wrong.
Add this suggestion to a batch that can be applied as a single commit.
This suggestion is invalid because no changes were made to the code.
Suggestions cannot be applied while the pull request is closed.
Suggestions cannot be applied while viewing a subset of changes.
Only one suggestion per line can be applied in a batch.
Add this suggestion to a batch that can be applied as a single commit.
Applying suggestions on deleted lines is not supported.
You must change the existing code in this line in order to create a valid suggestion.
Outdated suggestions cannot be applied.
This suggestion has been applied or marked resolved.
Suggestions cannot be applied from pending reviews.
Suggestions cannot be applied on multi-line comments.
Suggestions cannot be applied while the pull request is queued to merge.
Suggestion cannot be applied right now. Please check back later.
There was a problem hiding this comment.
Choose a reason for hiding this comment
The reason will be displayed to describe this comment to others. Learn more.
Fix spacing error in metadesc.
The metadesc at line 4 contains "theLive Editor" with missing space. This affects search engine optimization and readability.
📝 Committable suggestion
🤖 Prompt for AI Agents