A simple, self-hosted FastAPI application for PyScript projects. Provides WebSocket-based pub/sub channels and HTTP API proxying along with simple user management and authentication.
Most of the functionality is exposed via the thub command line tool:
- Start the server in the current directory.
- Add / remove users.
- Create skeleton PyScript projects.
Configuration is via a config.json file in the root directory of your
project. Here's an example with user, API proxy and API token (JWT)
configuration:
{
  "users": {
    "username": ["sha256_of_password", "salt"]
  },
  "proxies": {
    "chatgpt": {
      "base_url": "https://api.openai.com/v1",
      "headers": {
        "Authorization": "Bearer YOUR_API_KEY",
        "Content-Type": "application/json"
      }
    }
  },
  "jwt": {
    "secret": "a-very-long-secret",
    "expiry_hours": 24
  }
}Use the command line tool for this; only edit the proxies section as
required.
These steps get you a working local copy fast. You can watch a truncated version of these steps in this video.
-
Clone this repository from GitHub.
-
In the root directory of this repository, on your computer, create a virtual environment (a sandbox for our work):
$ python -m venv venv- Activate the virtual environment, so all our work is contained within the safe sandbox:
$ source venv/bin/activate- Install the local version of this project into the virtual environment.
$ pip install -e ".[dev]"- You're all set. Perhaps try serving the sample apps? They're found in the
/examplesdirectory of this project. We'll use theproxyexample here:
$ cd examples/proxy- Start serving the app from inside its (
/examples/proxy) directory with thethubcommand (fully described below).
$ thub serve-
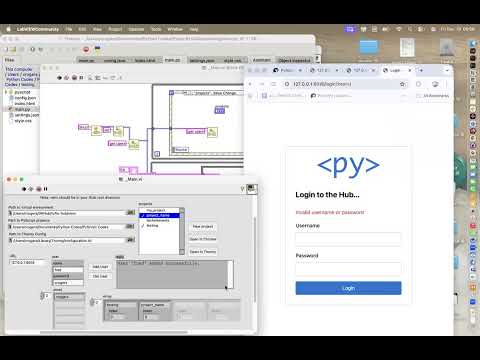
Go visit http://localhost:8000/ in your browser and use the username
testand passwordpassword123 -
Once logged in, click the "Continue" button to view the PyScript app.
-
Back in your console type
CTRL-Cto stop the server. -
Change to a completely new directory, into which you don't mind creating a new PyScript app. Then use
thubto create your new app (replacingmy_projectwith whatever you want your app to be called):
$ thub new my_project- Change into the new project's directory:
$ cd my_project- Add a user for your app, by giving the
thubcommand the new user's username and password (you choose):
$ thub adduser test password123-
Change the files in the project to reflect what you want your PyScript project to do. That's up to you! 😊
-
As before, serve your app with the
thubcommand.
$ thub serve-
Once again, go visit http://localhost:8000/ where your new app will be served.
-
That's it! Any questions? Read on below. Feedback welcome.
thub serve --host 0.0.0.0 --port 8000 --reloadThe thub serve command serves the hub from the current location. All the
endpoints described below become available, along with any static assets in
the current directory. This allows you to write a PyScript app locally, and
then spin up a server against your project with just a simple command.
The optional --host, --port and --reload arguments are passed onto the
underlying uvcorn server that actually serves the application. They allow
you to specify the hostname and port for the app, and signal that changes
within the served directory should cause a reload/refresh of the content
served.
If a host hostname is given, the thub command will look for the
ssl_keyfile and ssl_certfile in the current directory. If found the app
will be served using SSL/HTTPS.
To generate a local certificate, ensure the mkcert command is installed
(see: the project website) and follow this workflow:
$ mkcert -install
Created a new local CA 💥
The local CA is now installed in the system trust store! ⚡️
The local CA is now installed in the Firefox trust store (requires browser restart)! 🦊

$ mkcert example.com "*.example.com" example.test localhost 127.0.0.1 ::1

Created a new certificate valid for the following names 📜
 - "example.com"
 - "*.example.com"
 - "example.test"
 - "localhost"
 - "127.0.0.1"
 - "::1"

The certificate is at "./example.com+5.pem" and the key at "./example.com+5-key.pem" ✅thub adduser username passwordAdds a user for the app with the given username and password.
These credentials are stored in the local config.json file (if it doesn't
already exist, one will be created for you). The password is never shared,
but immediately hashed using sha256 and a salt.
Once added to the config.json the user will be able to access your
application. If they are not logged in, they are automatically redirected to
the /login endpoint to do so.
thub deluser usernameDeletes the user with the given username. Under the hood, the user's entry
in config.json is removed and the configuration is saved. If no such user
exists, the command has no side-effects.
thub new project_name --version 2025.11.2Will create a new directory named after the project_name into which will be
saved four files:
main.py- a simple Python script to be run by PyScript.settings.json- a skeleton of the settings for the PyScript environment.style.css- some simple default responsive styling for the app.index.html- the HTML page to serve that brings these files together.
The optional --version flag can be used to indicate a specific version of
PyScript to use when configuring the app. PyScript versions follow the
calver standard (e.g. 2025.11.2). If no version is given, the command will
hit the https://pyscript.net/version.json endpoint which serves a string of
the calver of the current latest version of PyScript. This will be used
instead.
This default manner of creating a new project references the online PyScript
assets. However, should you want your PyScript app to work completely offline
or in a self-contained manner you can use the --offline flag:
thub new my_project --version 2025.11.2 --offlineThis will download the offline only version of PyScript, for the referenced
release. The thub command will cache this asset so future uses of this
flag won't require network access.
You don't need to specify the version with the --offline flag:
thub new my_project --offlineIn this situation, thub checks for the latest version of PyScript and
defaults to that (downloading the offline version of that latest version if
it doesn't already exist in the cache). If you're not connected to the
internet thub will use the most recent version of PyScript found in its
cache (and warn you of this). If you don't have anything in the cache, thub
will display an error message explaining you need to connect to the internet
and fill the cache.
The following endpoints are available once the app is started via the thub
command.
{GET/POST} /login
Use a username and password to authenticate and get a JWT token. If the user is authenticated the appropriate session cookie is set and they see details of their JWT token (for API connections via PyScript). Otherwise, a username and password challenge is always displayed.
GET /logout
If needed, you can logout from the server by visiting this endpoint. Your session/cookie will no longer be valid, and further interactions with the server will require you to log back in again.
WS /channel/{channel_name}
Connect to a named channel. All messages sent are broadcast to other connected clients. The user must be authenticated for this to work.
{METHOD} /proxy/{api_name}/{path}
Proxy requests to configured third-party APIs. The proxy adds configured headers (like API keys) and removes sensitive headers from responses. The user must be authenticated for this to work.
The {api_name} should correspond to an entry in the proxies section of the
config.json file. The base_url for the remote calls should be defined so
the {path} in the local call can be appended to it. You should also define
any headers to use in proxy calls to the remote API (for example, an
Authorization header containing your API key for the proxied API).
GET /{path}
Assuming the names of the files and directories in the directory from where the
thub command was run do not clash with any of the other endpoints (described
above), then authenticated users can GET assets referenced by the {path}
that matches that raw asset on the local filesystem, relative to the current
directory.
The exceptions to this rule are the following files which are always ignored:
config.json- Any
.pemfiles (used for serving the site via SSL).
Tufts Hub uses structured JSON logging to stdout following 12-factor app principles. All logs are timestamped and include contextual information.
The following events are logged:
- Application lifecycle: Startup and shutdown.
- Configuration: Loading and validation (passwords obfuscated).
- HTTP requests: All incoming requests with method, path, and client.
- HTTP responses: Status codes for all responses.
- Authentication: Successful user authentication.
- WebSocket connections: Connection and disconnection events (not messages).
- Proxy requests: API name, path, method, and username.
- Proxy responses: Status codes for proxied responses.
- Exceptions: Full stack traces for all errors.
Furthermore, the following constraints always apply to logs:
- User passwords are never logged.
- API keys and authorization tokens are never logged.
- WebSocket message content is never logged (only connect/disconnect events).
- Usernames are logged for audit purposes.
The /examples directory contains example applications demonstrating how to
use Tufts Hub features with PyScript. DO NOT USE THESE IN PRODUCTION.
They are:
channels- a real-time messaging application that demonstrates WebSocket pub/sub channels.proxy- a playful Pokémon card viewer that demonstrates API proxy functionality.server- code demonstrating how to programmatically drive the Tufts Hub server.
Please see the README.md file in the /examples directory for more
information.
To try these examples on your local machine, follow our developer setup
instructions (see below). To run the channels and proxy examples, start
serving the PyScript app like this:
$ thub serveVisit http://localhost:8000/ to see the app. The
credentials you should use for logging in are listed in the afore mentioned
README.md in the /examples directory (hint: the default username and
password is, test and password123).
Alternatively, simply run the scripts in the server directory to see them
working.
We expect contributors to abide by the spirit outlined in our
CARE_OF_COMMUNITY.md file.
Fork the project, clone the repository, create a virtual environment, then:
pip install -e ".[dev]"Please read CONTRIBUTING.md for more details. Each new contribution should
be in an appropriately named branch of its own. Remember always to rebase with
main before submitting your contribution.
The Makefile contains some useful commands for developers, but the only one
you really need is:
$ make checkThis cleans the repository of temporary files, tidies the code, and runs the complete Pytest based test suite. Please run this command before submitting a pull request.
Listening to our community is vital. The work in this repository is derived from a call between Chris and Ethan at Tufts, and Nicholas and Andrea at PyScript. A video of this meeting is embedded below:

We had a follow up retrospective / feedback / next steps call two weeks later (after Chris and Ethan had a week to play with what we'd built):
More calls and practitioner feedback coming soon (and they'll be linked here).
Tufts Hub can be controlled programmatically from Python code via the
thub.server namespace, allowing you to start and stop the server as part
of automated workflows, testing, or integration scripts:
from thub.server import start_server, stop_server

# Start server in background
server = start_server(host="127.0.0.1", port=8000, block=False)

# Do your work...

# Stop server
stop_server(server)
The thub.server module provides three ways to control the server:
- Functional API:
start_server()andstop_server()for explicit control. - Context Manager:
run_server()for automatic cleanup. - CLI Mode:
start_server(block=True)- used by the CLI.
In addition, the module provides a way to automatically find and use SSL
certificates in your app's directory via the find_ssl_certificates()
function.
Perhaps the most common use case will be through the use of the context manager:
from thub.server import run_server

with run_server(host="127.0.0.1", port=8000) as server:
    # Server is running here.
    # `server` is the resulting `subprocess.Popen` object.
    do_work()
# Server automatically stopped and cleaned up here.
The source code for the thub.server module contains extensive docstrings to
more fully explain the subtleties of the API. If you're looking for practical
examples of how to use this module, look in /examples/server or read the
README.md contained in the /examples directory.
Thank you to Anaconda 🐍 for supporting the open-source work relating to PyScript.
Thank you to Tufts CEEO for their patience, collaboration and understanding as a band-aid 🩹 for their PyScript hosting problems was built together (i.e. this project).