




A desktop app written in Python, that exposes and unlocks the full power of Optimize Images in a nice graphical user interface, to help you reduce the file size of images.
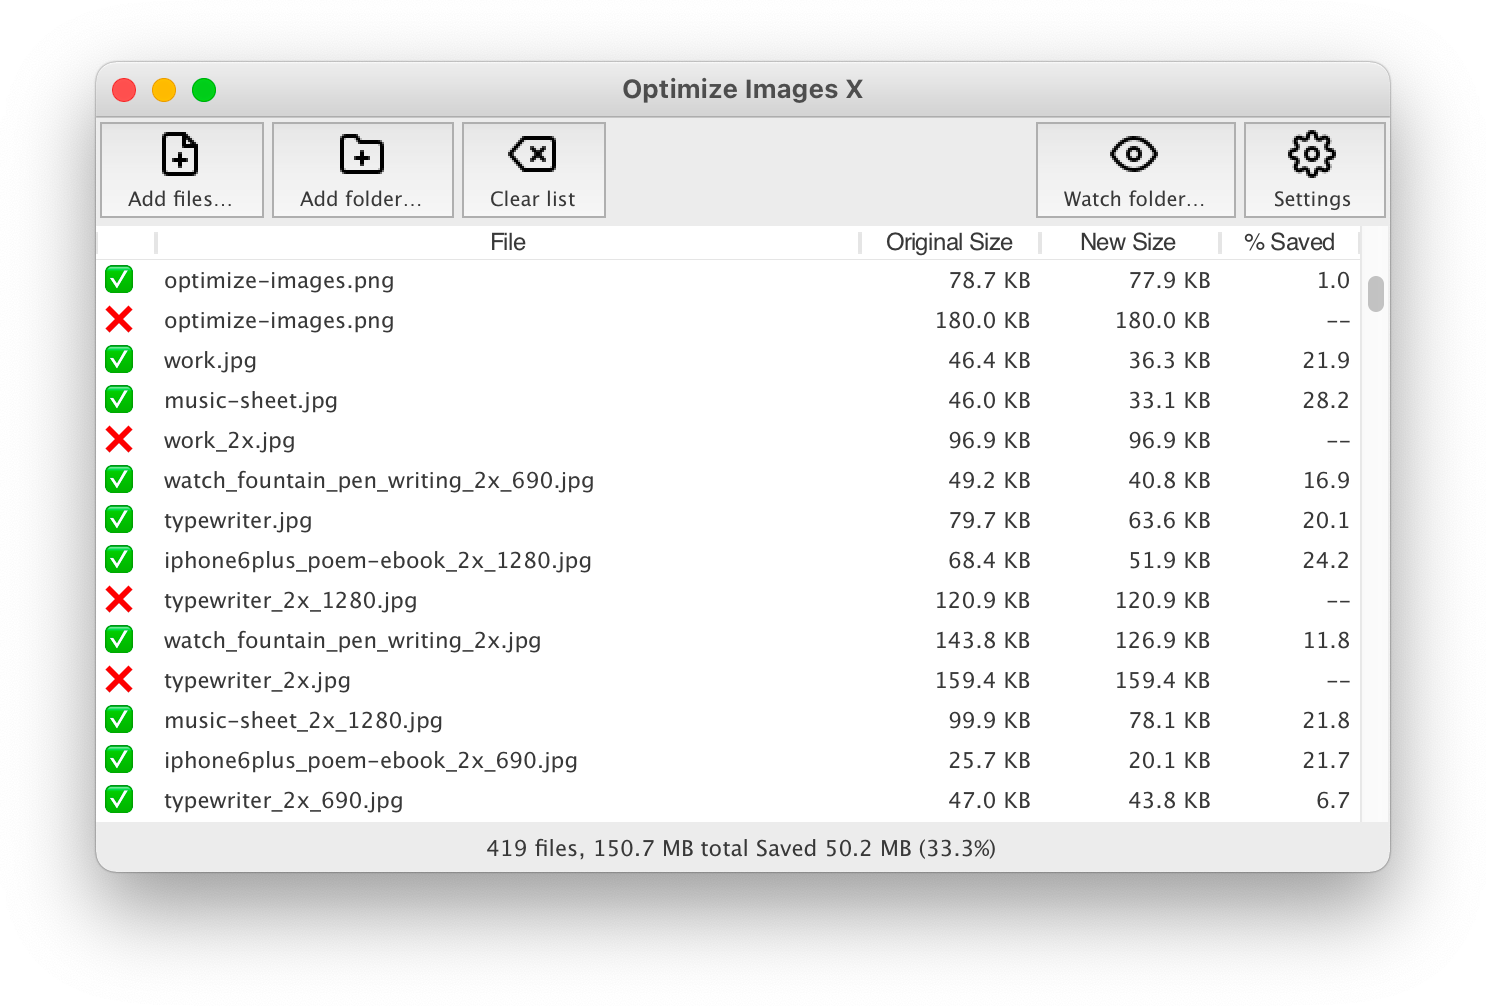
Optimize Images X and its CLI companion optimize-images offer some useful
features that are not always present in a single package, like batch downsizing
of images within a folder (and recursively though its
subfolders) based on specified maximum width and/or height.
If you were just looking for the original (and slightly faster) command-line user interface (CLI) version of this application, it's a separate project: Optimize Images.
To install and run this application, you need to have a working Python 3.10+ installation. We try to keep the external dependencies at a minimum, in order to keep compatibility with different environments. At this moment, we require:
- optimize-images==2.0.0
This single dependency is installed automatically when you install Optimize Images X and will also fetch Pillow and other dependencies.
If you want to use drag-and-drop, you will also need to install the TkinterDnD2 package.
There are a few ways to install Optimize Images X. The simplest, if you don't use Python yourself, is to download a prebuilt application from the project's GitHub releases page, when available for your system.
If you have Python on your system, you can also install the most recent release
from the PyPI repository using pip (the [dnd] part is optional, and only
needed if you want to use drag-and-drop):
python3 -m pip install optimize-images-x[dnd]
It can be a good idea to keep this kind of Python app isolated in its own virtual environment. Two convenient third-party tools for that are pipx and uv. Instead of the command indicated above, you could then use one of these:
pipx install optimize-images-x
uv tool install optimize-images-x
After that, to run the application, just type optimize-images-x in the
Terminal and press Enter.
Please note that, being a graphical application, Optimize Images X needs a Python installation that includes Tcl/Tk support. This is normally the case for the official Python distributions and most system packages. If you let a tool manage and download its own Python for you and the window fails to open, that particular build may be missing Tcl/Tk; in that case, install it against a Python that includes it.
To start compressing images, just add one or more files, or a folder. The process starts as soon as the files are added to the list.
You can also drag and drop files and folders onto the application's window, if you are using the binary or you have pip installed the TkinterDnD2 package (it also needs to be activated in the Settings).
After launching the application for the first time, make sure all settings are configured as desired. The application's default settings are similar to the ones in Optimize Images. Whenever you change a setting, it is applied immediately, and it's saved in the app's database, so that it will be can be used again the next time you run the app, without any need to go through all the settings.
In simple terms, always make sure you have configured Optimize Images X as you want it, but if you just want to use the same settings from last time, just add images.
To open the selected image in the system's default viewer, press Enter or
double-click it in the list (on macOS you can also press Cmd+Down). On
macOS, pressing the spacebar shows a Quick Look preview instead.
To inspect an image in detail, select it and press Cmd+I (Ctrl+I on
other systems), or use the corresponding entry in the File menu. This opens an
image info window showing the image's properties, the optimization results
(size before and after, and the space saved) and its EXIF metadata, grouped
into Image, Camera and GPS sections. Known values are shown in a readable form
(for example f/8, 1/250 s or 50 mm), and the colour profile description
and the file's creation and modification dates are included. The window is
non-modal and you can open one per image, so you can compare several at once.
If you have used Optimize Images before, you probably already know what options are available. If not, please take a few minutes to take a look at the Preferences window and its tabs. You will find a description of each option on the original documentation for the command-line based Optimize Images.


You can choose the graphical user interface theme in the More… tab of the
Settings Window. The list of available themes will vary depending on your
operating system, as well as Python and TK/tcl versions. Just click each one of
the radio buttons, and it will be applied immediately as you click.
There is also an option to enable or disable drag-and-drop support, in 'General'. This checkbox is only available if the app can find the TkinterDnD2 package.
One important feature of Optimize Images X is its opinionated choice of default
app and task settings, which have been defined with the web in mind and are
probably just fine when you just want to apply some compression to the final
images to be deployed with your website. So, being able to restore them is also
possible. You will find the Reset all settings button in the More… tab of
the Settings Window.
Restoring default settings requires that the application is restarted, which is done automatically. So, before resetting, you should make sure you there are no more tasks pending or being processed.
It's worth noting that this process will also reset previous choices regarding confirmation dialog boxes, so they will be shown up again even if you had chosen not to see them.
DISCLAIMER:
Please note that the operation is done DESTRUCTIVELY, by replacing the
original files with the processed ones. You definitely should duplicate the
source file or folder before using this utility, in order to be able to
recover any eventual damaged files or any resulting images that don't have the
desired quality.
If you would like to build a standalone, double-clickable application (a .app
on macOS, an .exe on Windows, or an executable on Linux), you can do so with
PyInstaller. The repository includes a ready-to-use
build recipe, optimize-images-x.spec.
A couple of things to know before you start. PyInstaller is not a cross-compiler, so you need to run the build on the same kind of system you are targeting: build the macOS app on a Mac, the Windows executable on Windows, and so on. Also, at the time of writing, PyInstaller does not yet support Python 3.15, so the build should be done with a supported version (for example, the standard, GIL-enabled Python 3.14). This does not affect which Python you use for everyday development; it only matters for the build.
On macOS or Linux, ./build.sh runs the whole process for you (creating the
virtual environment, installing dependencies, and invoking PyInstaller). It
also checks that the Python it's about to use actually has Tcl/Tk support
before building — see the note below on why that matters. If you have more
than one Python 3.14 installed and need a specific one, run it as
PYTHON=/path/to/python3.14 ./build.sh.
To do it by hand instead, it is a good idea to use a dedicated virtual environment for building:
python3.14 -m venv venv-build
source venv-build/bin/activate
pip install .
pip install tkinterdnd2
pip install pyinstaller
python -m PyInstaller optimize-images-x.spec
On Windows, activate the environment with venv-build\Scripts\activate
instead (there's no build.sh equivalent for Windows yet, so use the manual
steps there).
If your system has more than one Python 3.14 around (for example Homebrew's
python@3.14 alongside the official python.org build), make sure the one you
build with actually includes Tcl/Tk. A Python without it will let the build
finish, but PyInstaller will silently exclude tkinter from the app, and the
resulting app will crash immediately on launch. python3.14 -c "import tkinter" should run without errors before you build.
The result is placed in the dist folder: on macOS you get
dist/Optimize Images X.app, and on Windows and Linux you get a folder
containing the executable. The build and dist folders are build artifacts
and are not meant to be committed to the repository.
The standalone build bundles the compiled translation catalogs, so the
available languages (see Preferences) work the same way in the standalone app
as when running from source. You don't need to install anything extra for
this — Babel, which is only used to compile those catalogs, is fetched
automatically as a build-time dependency (declared in pyproject.toml) and is
not part of the app itself.
The application currently ships without a custom icon; you can add one by
editing the icon entries near the top of optimize-images-x.spec (use a
.icns file on macOS and a .ico file on Windows).
Optimize Images X uses Python's gettext for translations, with
Babel handling the extraction/compilation
tooling. Alongside the English source strings, Portuguese (pt) has a
complete hand-made translation; Catalan (ca), Spanish (es), French
(fr) and Mirandese (mwl) were generated with the help of an LLM and may
contain errors - corrections are very welcome.
Prerequisites (not needed to just run the app, only for translation work):
- Babel:
pip install -e .[dev](it's a build-time dependency, not installed by a normalpip install). - The GNU gettext command-line tools (
msginit,msgmerge) — on macOS,brew install gettext; on Linux they're usually already available or a single package away (e.g.apt install gettext).
Steps to add a language (example for Spanish, es):
-
Make sure the extraction template is current:
python setup.py extract_messagesThis (re)writes
optimize_images_x/locale/optimize_images_x.potwith every translatable string found in the source. -
Create the language's folder and a starter
.pofile from that template:mkdir -p optimize_images_x/locale/es/LC_MESSAGES msginit -i optimize_images_x/locale/optimize_images_x.pot \ -l es \ -o optimize_images_x/locale/es/LC_MESSAGES/optimize_images_x.po \ --no-translator(
--no-translatorskipsmsginit's translator/team lookup, which otherwise reads your terminal and reaches out to translationproject.org — harmless, but unnecessary here.) -
Translate it: open the new
.pofile and fill in eachmsgstrwith the translation of themsgidabove it (leave themsgidlines untouched). Any text editor works, or a dedicated tool like Poedit. -
Compile the translation to the binary format the app actually reads:
python setup.py compile_catalogThis regenerates
optimize_images_x/locale/es/LC_MESSAGES/optimize_images_x.mofrom the.po. The app won't pick up any.poedits until this is run. -
Add a display name for the new language in
optimize_images_x/gui/settings_window.py, in thelang_displaydictionary (search for'pt': 'Português') — for example, add'es': 'Español'. The language code itself is picked up automatically from thelocale/folder; this dictionary only controls what name shows up in the Preferences language dropdown (without an entry, it would still work, just showing the raw codeesinstead ofEspañol). -
Run the app (
python -m optimize_images_x) and switch to the new language in theMore…tab of Preferences to check it.
Once a language exists, use ./update-translations.sh afterwards instead of
repeating steps 1–4 by hand — it re-extracts the template, merges any new or
changed strings into every existing .po (keeping what's already
translated), and recompiles all of them in one go. It's the right tool after
adding new translatable strings to the source or hand-editing a .po, but
not for creating the very first .po for a new language (that's msginit,
step 2 above, done once per language).
Please let me know, by opening a new issue, or a pull request.