2. Body Construction
This is a brief overview of the process of building the frame for the pinball machine. I won't go into too much detail as the process of building a box is pretty self explanatory. Measure twice cut once should be your motto though and try your best to make everything level as a level play field makes for a better game.
The main box of the pinball machine is 45"x22"x18". This is based off of 1960's Williams pinball machine dimensions but you can resize this as you see fit. I like the profile of the box to be one continuous piece of wood so when building my box, I placed the front and back panels between the side panels. Each side panel is secured to the other with generous amounts of wood glue and 4 1-1/2 inch screws evenly spaced. After constructing the sides, you can place in a 43.5"x20.5" bottom panel. This panel is ideally tight enough that you have to tap it in with a mallet. This panel does not get secured directly into the sides though. Instead, place a 43.5" long rail underneath the panel on each side and secure those into the sides of the cabinet, securing the panel down on top of them. This provides more stability to the box and limits the number of exposed screws.
Installing pinball machine legs can be a challenge if you don't approach it correctly. Installing most pinball legs requires drilling directly through the corner of the box as the legs tend to wrap the corner. This means that drilling a straight hole is much more difficult. In order to be as accurate as possible, use your mounting bracket as a guide and take it slow. If your holes are off, though, they can easily be widened. The legs will be secured with large lag bolts which will hold the leg tight even if the hole is a little large.
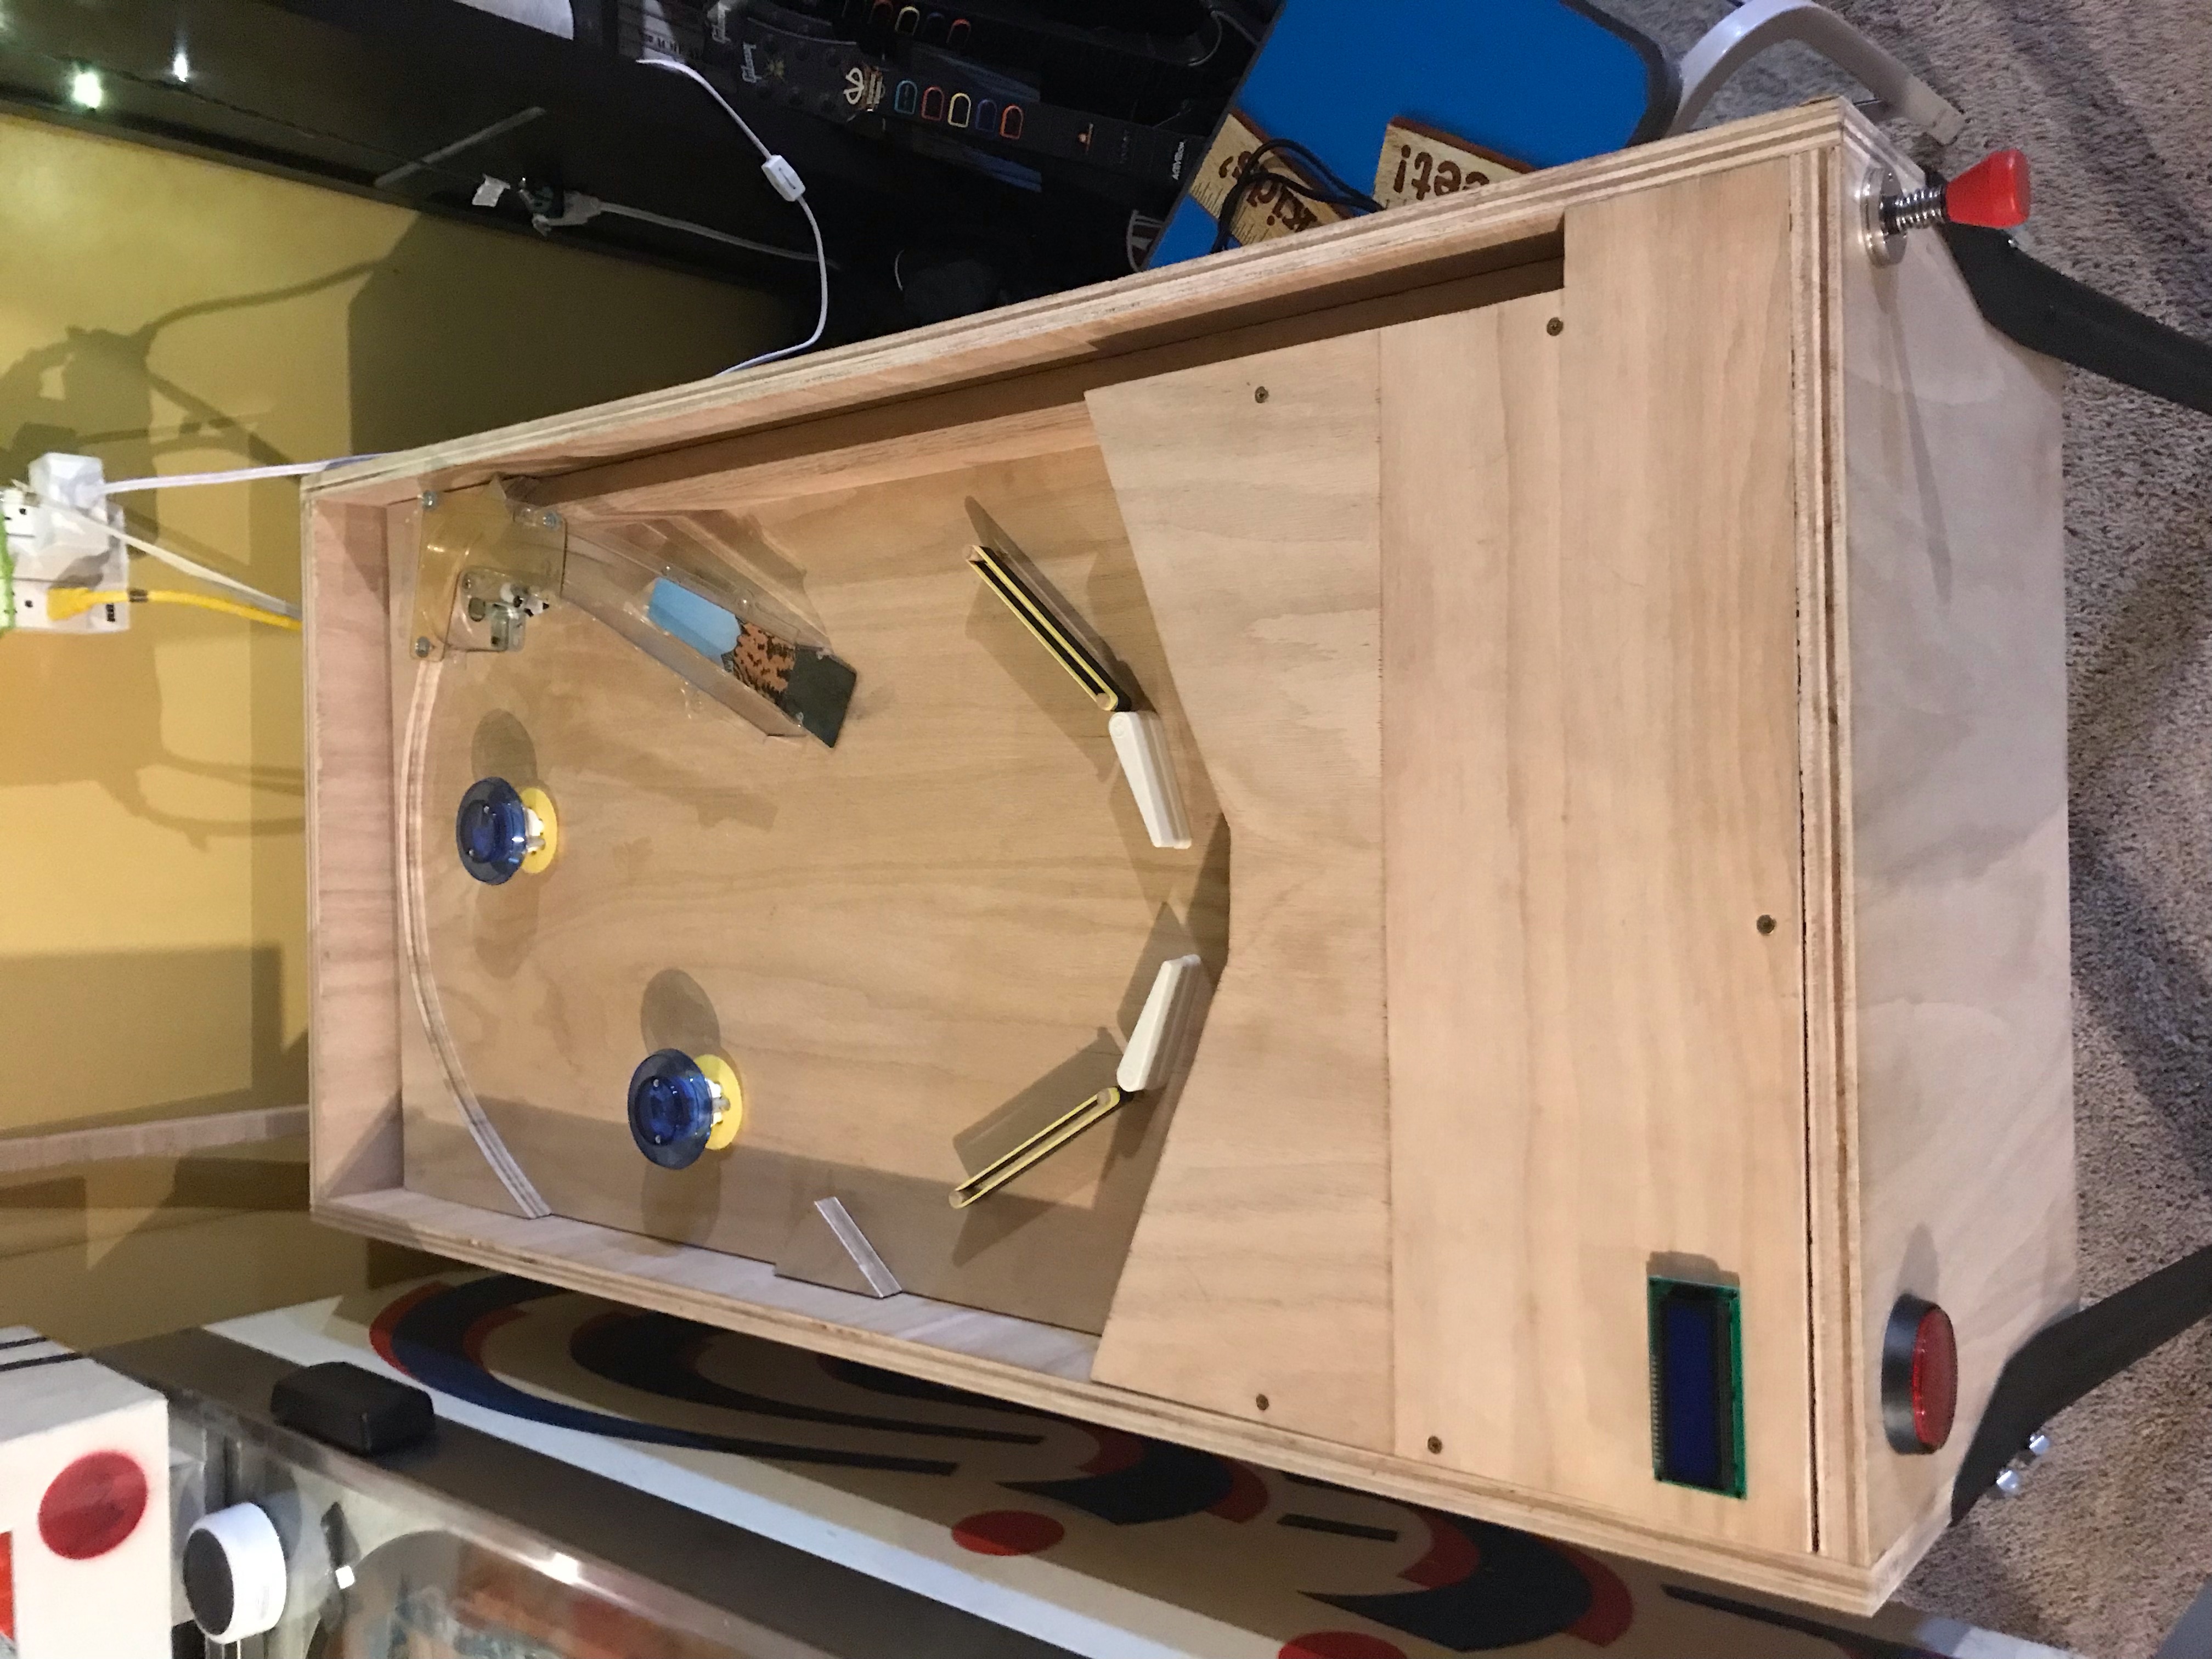
The field is a 42"x20.5" sheet of wood that is not secured to the box. It instead sits on two would rails that allow it to move freely. These wood rails should go about 3/4 of the way along the length of the box and have a 45 degree angle cut out the end towards the back of the box. These rails should then be mounted around 3" from the top of the box and field will sit on top of these. The field should fit with no large gaps on the sides but loose enough that you can move it slightly. If you've done things right, you can lift up on the front of the play field causing it to pivot upwards along the angle you cut in the rails. You can then use a stick to prop the field up enabling you to work on the internals of the pinball machine.
Depending on what elements you're installing, the finishing touches for you may be different but here are some of the things you may need to do. Holes will need to be drilled using the Forstner bits for: the power cable, ball plunger, flipper button on each side, start button in front, two pop bumpers and two flippers. Shallow holes should also be drilled using Forstner bits to hold any dowels you are using for rails. You will have to compare the diameter of the component you want to install with diameter of the bit and decide for yourself if it is the right size. Nothing should be bouncing around in its hole though. If you have a ramp like me, that can simply be secured into the play field using the 1/2 inch screws. A thin rail will need to be secured from underneath for the ball launch using the 1-1/4 inch screws. The curve for top of the play field can be cut using a jigsaw. Trace the curve before you cut in order to make it a smoother curve. Lastly, my ball return is a simple ramp angled back towards the ball launch. Test a couple of angles before you secure it in in order to make sure the ball has enough momentum to return and cut a cover to fit over it if you don't want to see the ball return like me.