Getting Started Guide
This Getting Started Guide has details and examples to support getting started from scratch, so if you're an experienced programmer and GitHub guru you may want to start with the Quick Start Guide section of the Documentation page.
Table of Contents
AntennaCAT is currently only compatible with Windows OS. It has been tested with both Windows 10 and Windows 11. Earlier versions of Windows and Linux-based systems are likely incompatible with the current version of AntennaCAT.
Some EM Simulation software may be compatible with non-Windows systems. AntennaCAT has not been tested with these software.
GitHub is a web-based platform for version control and collaborative software development, built around Git, a distributed version control system. It allows developers to store, manage, and track code changes in repositories (repos). GitHub enables team collaboration by allowing users to fork (copy) projects, create branches for new features, and propose changes via pull requests. It’s used widely for personal projects, team collaboration, and open-source contributions across various programming languages.
In less technical terms, GitHub works a little like a library. Each project has its own bookshelf (repository) where all its files and documentation are stored. Just like authors can write and revise books, developers can create and modify code. Multiple authors can work on the same book, collaborating on different chapters. You can also share, download, and leave reviews, just like checking out an eBook to a Kindle. Except you get to keep any code you download forever.
You do not need an account to download code from publicly available repositories. The main AntennaCAT software releases are publicly available, and downloading the code without an account is covered in the Downloading and Running AntennaCAT section below.
If you want to contribute to the project or report bugs, you will need an account. You can start here on the official signup page or refer to the official GitHub documentation.
You can work with GitHub as much (or as little) as you want with AntennaCAT. The code and documentation are hosted online, but AntennaCAT is designed to run locally.
The following references are recommended for those that are interested in using GitHub in their own workflow:
- The Main GitHub Documentation
- Creating an Account
- Customizing your Profile
- Getting Started with Git
- Cloning (copying) a Repository
- Adding a File
An IDE (Integrated Development Environment)is a software application that provides tools for software development. It is designed to streamline the process of writing, testing, debugging, and running code. IDEs combine multiple tools/features into one platform to make it more accessible. This is especially beneficial to those who are getting started or looking to jump into an existing project. These tools include things like a code editor (the text-editor optimized for code), a compiler or interpreter (which translate the code to a format that can be understood and run by computers), a debugger (which helps identify where issues/bugs happen), and other features such as build automation and version control (like GitHub).
Additionally, most IDEs offer tools for build automation to simply compiling code, running tests, and version control integration (such as by using Git). Popular examples of IDEs include Visual Studio, IntelliJ IDEA, Eclipse, and PyCharm, each catering to different programming languages.
It is not necessary to use an IDE to run programs, but we suggest using VSCode for the AntennaCAT project as it is intended as a research & development tool
It is extremely important to match your IDE to your programming language. Some IDEs are designed for a single language, while others have multiple language plug-ins available. For instance, IntelliJ IDEA is Java-focused and PyCharm works with Python.
AntennaCAT was developed using Visual Studio Code, so that is the suggested IDE for this project. Other Python-supporting IDEs should be compatible without issue, but this has not been tested.
If VSCode does all of this, why still need to download Python separately?
VSCode and Python are two different tools that are being used together for the AntennaCAT project.
Python is a programming language, so it needs the Python interpreter installed on the computer in order to run the code. This interpreter is what will "translate" the code as written in a human-understandable way into something that can be understood and run by the computer.
VSCode, as an IDE, is the environment where the code can be written, edited, and run. VSCode can handle many programming languages, but they aren't all included by default. So Python is required to run the code, while VSCode is a tool to make writing and managing the Python code easier and more efficient.
There is no specific reason AntennaCAT is written in Python. AntennaCAT does not rely on any specific EM Simulation Software integration libraries. Currently AntennaCAT remains in Python out of convenience for the development. No major rewrites are planned for the immediate future.
Refer to your specific IDE for requirements to integrate Python. When working locally, typically you will need to download and install Python from the official website onto the local machine.
The latest Python releases are available from python.org
AntennaCAT was developed with Python 3.9 and has not been tested with backwards compatibility. It has been tested with Python 3.12, and this version is featured in the example setup.
For an example of how to download and setup Python in Visual Studio Code, refer to the Visual Studio Code Setup Walk Through below.
AntennaCAT can be downloaded locally either as a .zip folder, or cloning the repository with Git.
If you do not have a GitHub account, you can still download the code as a zip folder and open it in your favorite IDE.
- If you aren't sure what an IDE is, please refer to this section in the Getting Started Guide.
- Otherwise, see Downloading Code as a Zip Folder
If you aren't sure how to set up an IDE with Python or install requirements, refer to other sections in this Getting Started Guide:
- Working with Python
- An example for setting up and configuring Visual Studio Code
If you need help importing downloaded code into the IDE:
- See the 'importing project code' in the Download and Run AntennaCAT section.
Code can de downloaded directly from the main repository page without a GitHub account.
Locate the green button that says 'Code' above the list of repository files, at the right.

Click the 'Code' button, and the following menu will appear. Click 'Dowload ZIP' and the download will begin.

Cloning is not covered in this guide due to the number of ways this can be accomplished. For more information on cloning refer to https://docs.github.com/en/repositories/creating-and-managing-repositories/cloning-a-repository
One method of streamlining this process is to install Git into VSCode and Clone the repository directly to the IDE. More information on this process can be found at https://code.visualstudio.com/docs/sourcecontrol/intro-to-git
Following that method, AntennaCAT can be cloned from the main repository page using the web URL.

Dependencies for running AntennaCAT are included in the requirements.txt file.
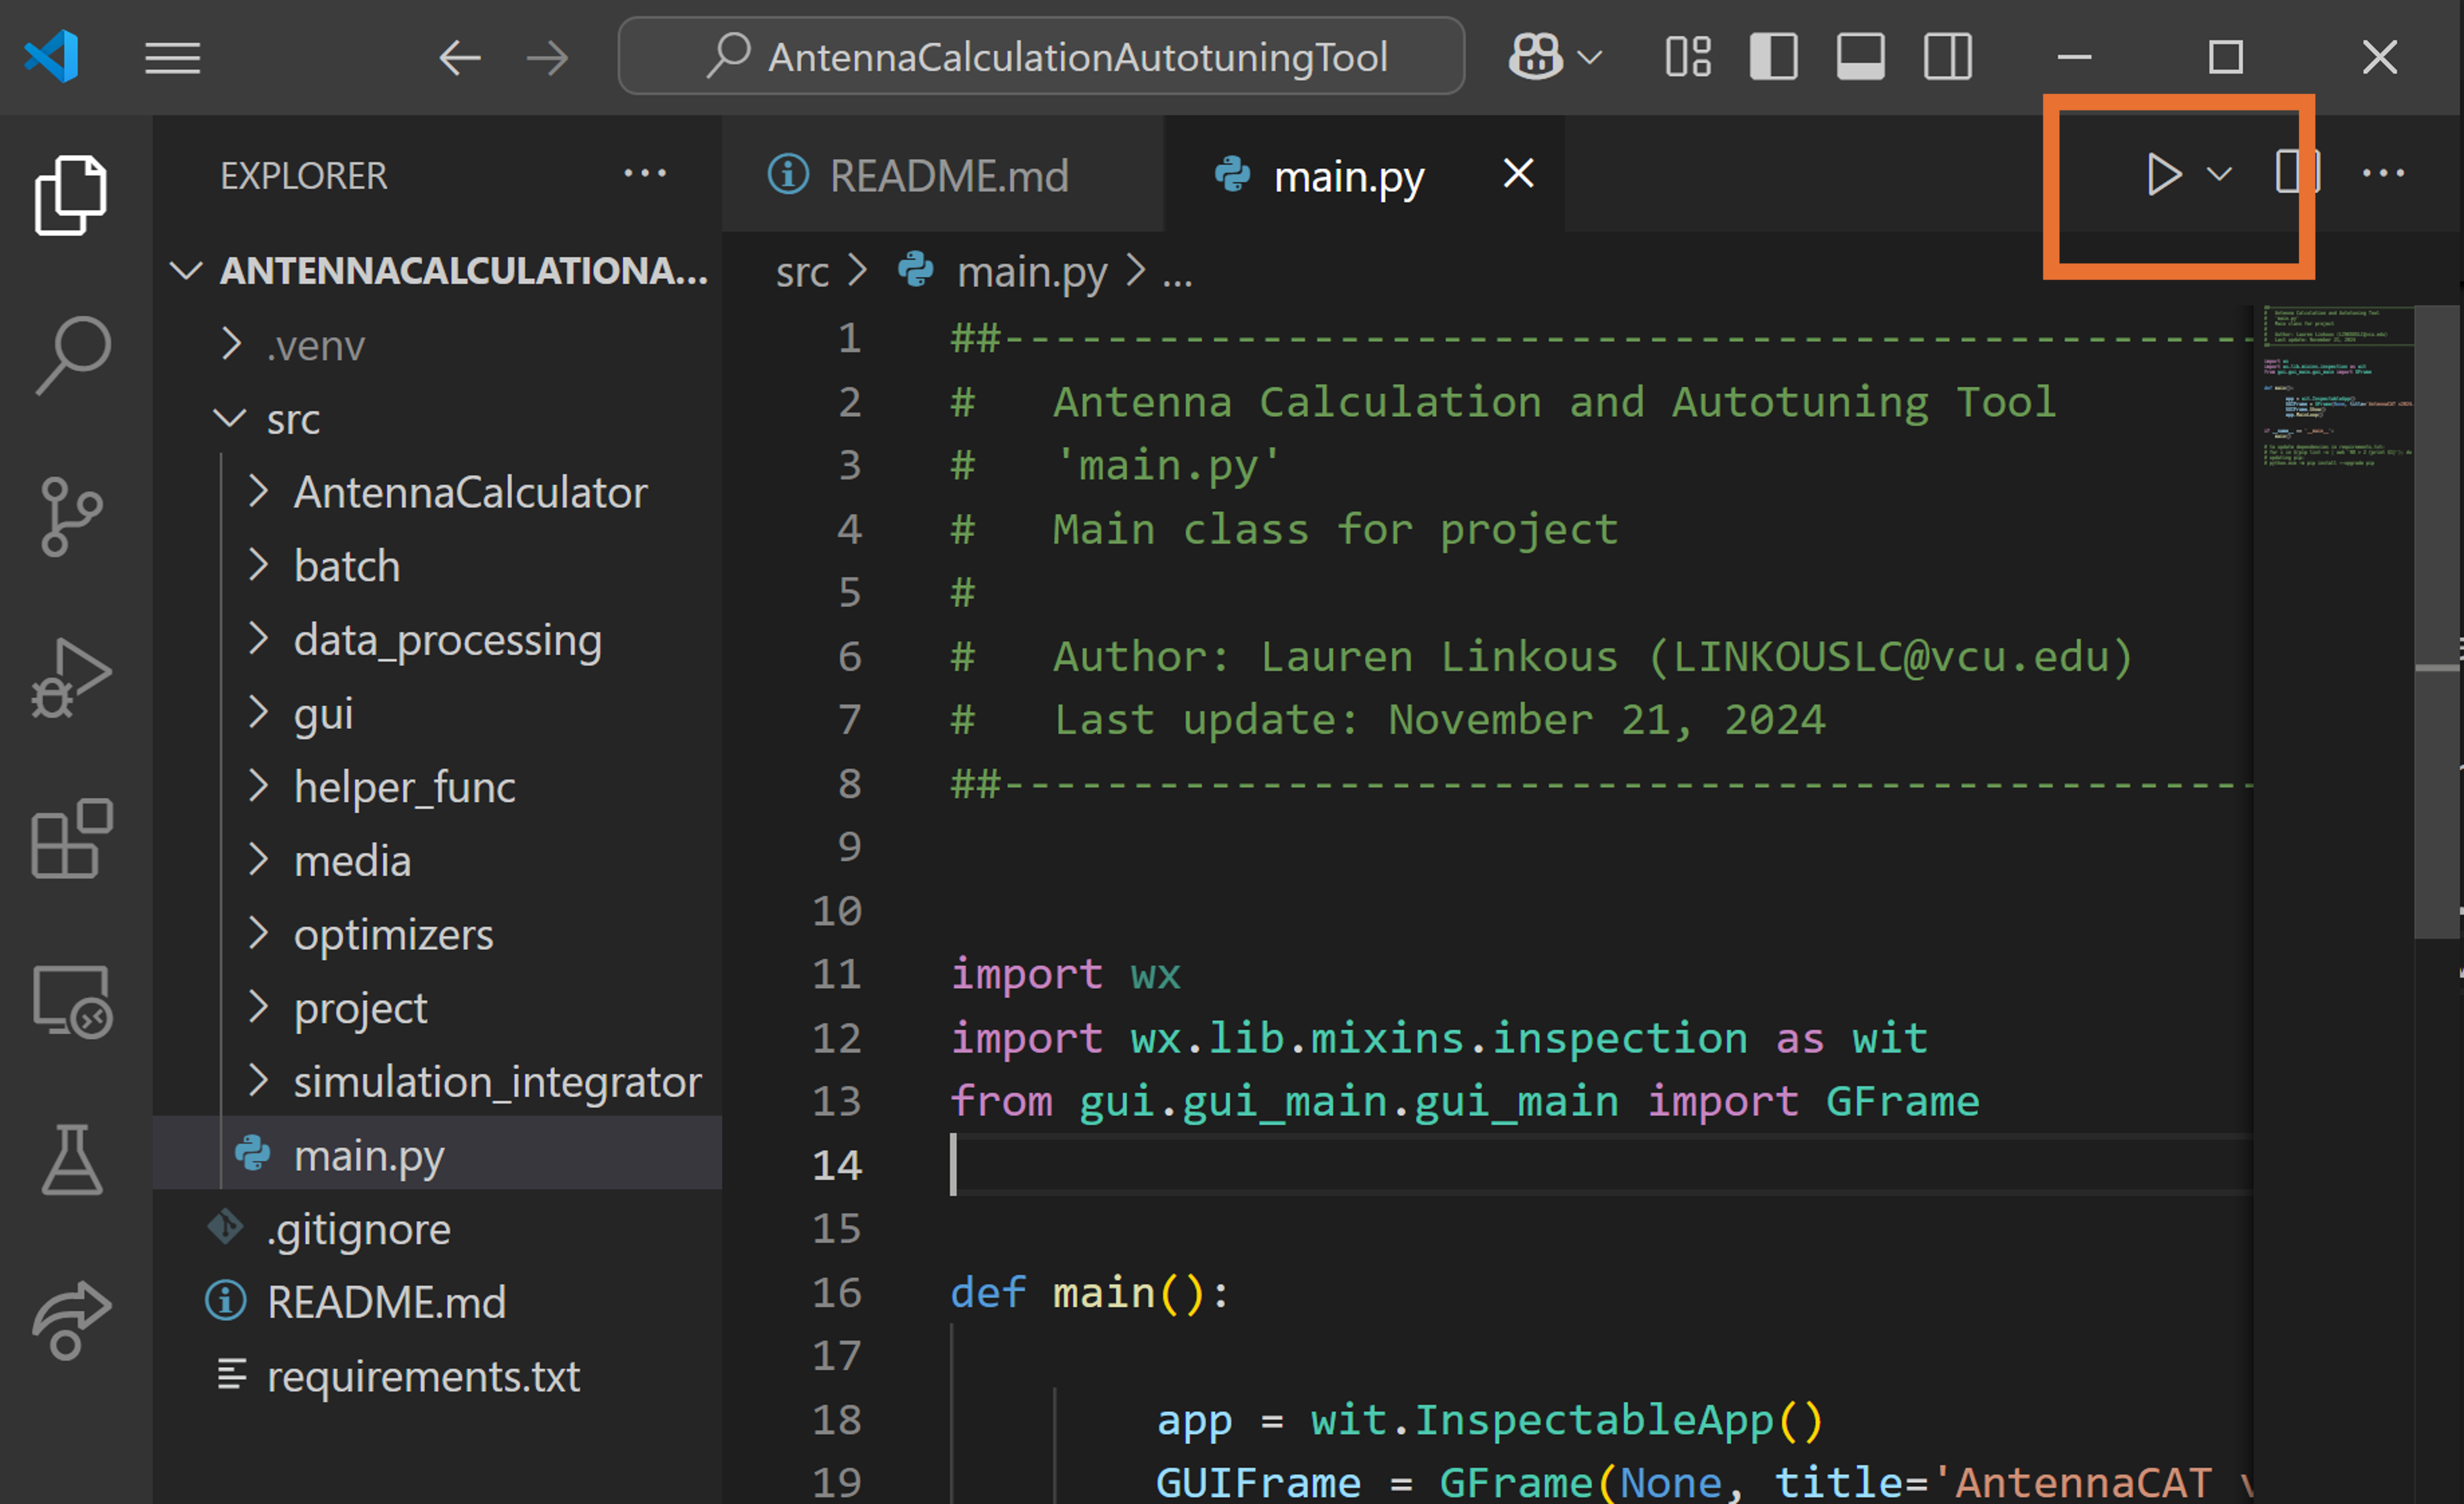
These be installed in two ways. For both, the commands must be typed into the Python terminal. To open a Python Terminal, open a .py (Python) file and click the 'Run' button at the top right of the screen.
A new Python terminal will open at the bottom of the screen. If dependencies have not been installed, the following message will appear:
import wxModuleNotFoundError: No module named 'wx'
To install, choose one of the following options.
Option 1:
Using the existing requirements.txt files.
In the Python terminal, type:
pip install -r requirements.txtHit 'ENTER' to start the dependency installations.
Option 2:
Installing requirements manually using 'pip'
In the Python terminal, type:
pip install wxPython, matplotlib, pandas, numpy, ezdxf, Pint, pcb-tools, pcb-tools-extension Hit 'ENTER' to start the dependency installations.
AntennaCAT and derivatives should be run from main.py, either in an IDE or with 'python main.py'. This program does not currently run as an independent .exe file, though that is planned for a mid-2025 release.
While there are unit testing artifacts in some code files, entry at other points in the program will cause some features to not work.
It is recommended to run AntennaCAT in a virtual environment, but it is not a requirement. If running AntennaCAT in VSCode, open the main.py file and use the 'run' arrow at the top right of the IDE, and VSCode will use a configured virtual enviornment if it exists.
To experiment on your own, check out the following Guides and Tutorials:
- Creating a New Project
- Settings Guide
- Design Guide
- Simulation Guide
- Batch Data Collection Guide
- Optimization Guide
For additional information, view the official tutorial: https://code.visualstudio.com/docs/python/python-tutorial
There are three downloads required for this setup:
- Visual Studio Code
- A Python interpreter
- The AntennaCAT code in a folder
VSCode and Python need to be downloaded from their respective websites. AntennaCAT should be downloaded from the main GitHub repositories.

The VSCode IDE can be downloaded from the main website at https://code.visualstudio.com/

Clicking "Download For Windows" will start the .exe download automatically. Go to the location of the .exe and double click to install it.
When you open VSCode for the first time, you will be prompted for setup preferences, including cosmetic features.
The latest versions of Python can be found at: https://www.python.org/downloads/
This example uses Python 3.12. We do NOT guarantee that AntennaCAT is compatible with versions earlier than 3.9 or later than 3.12.
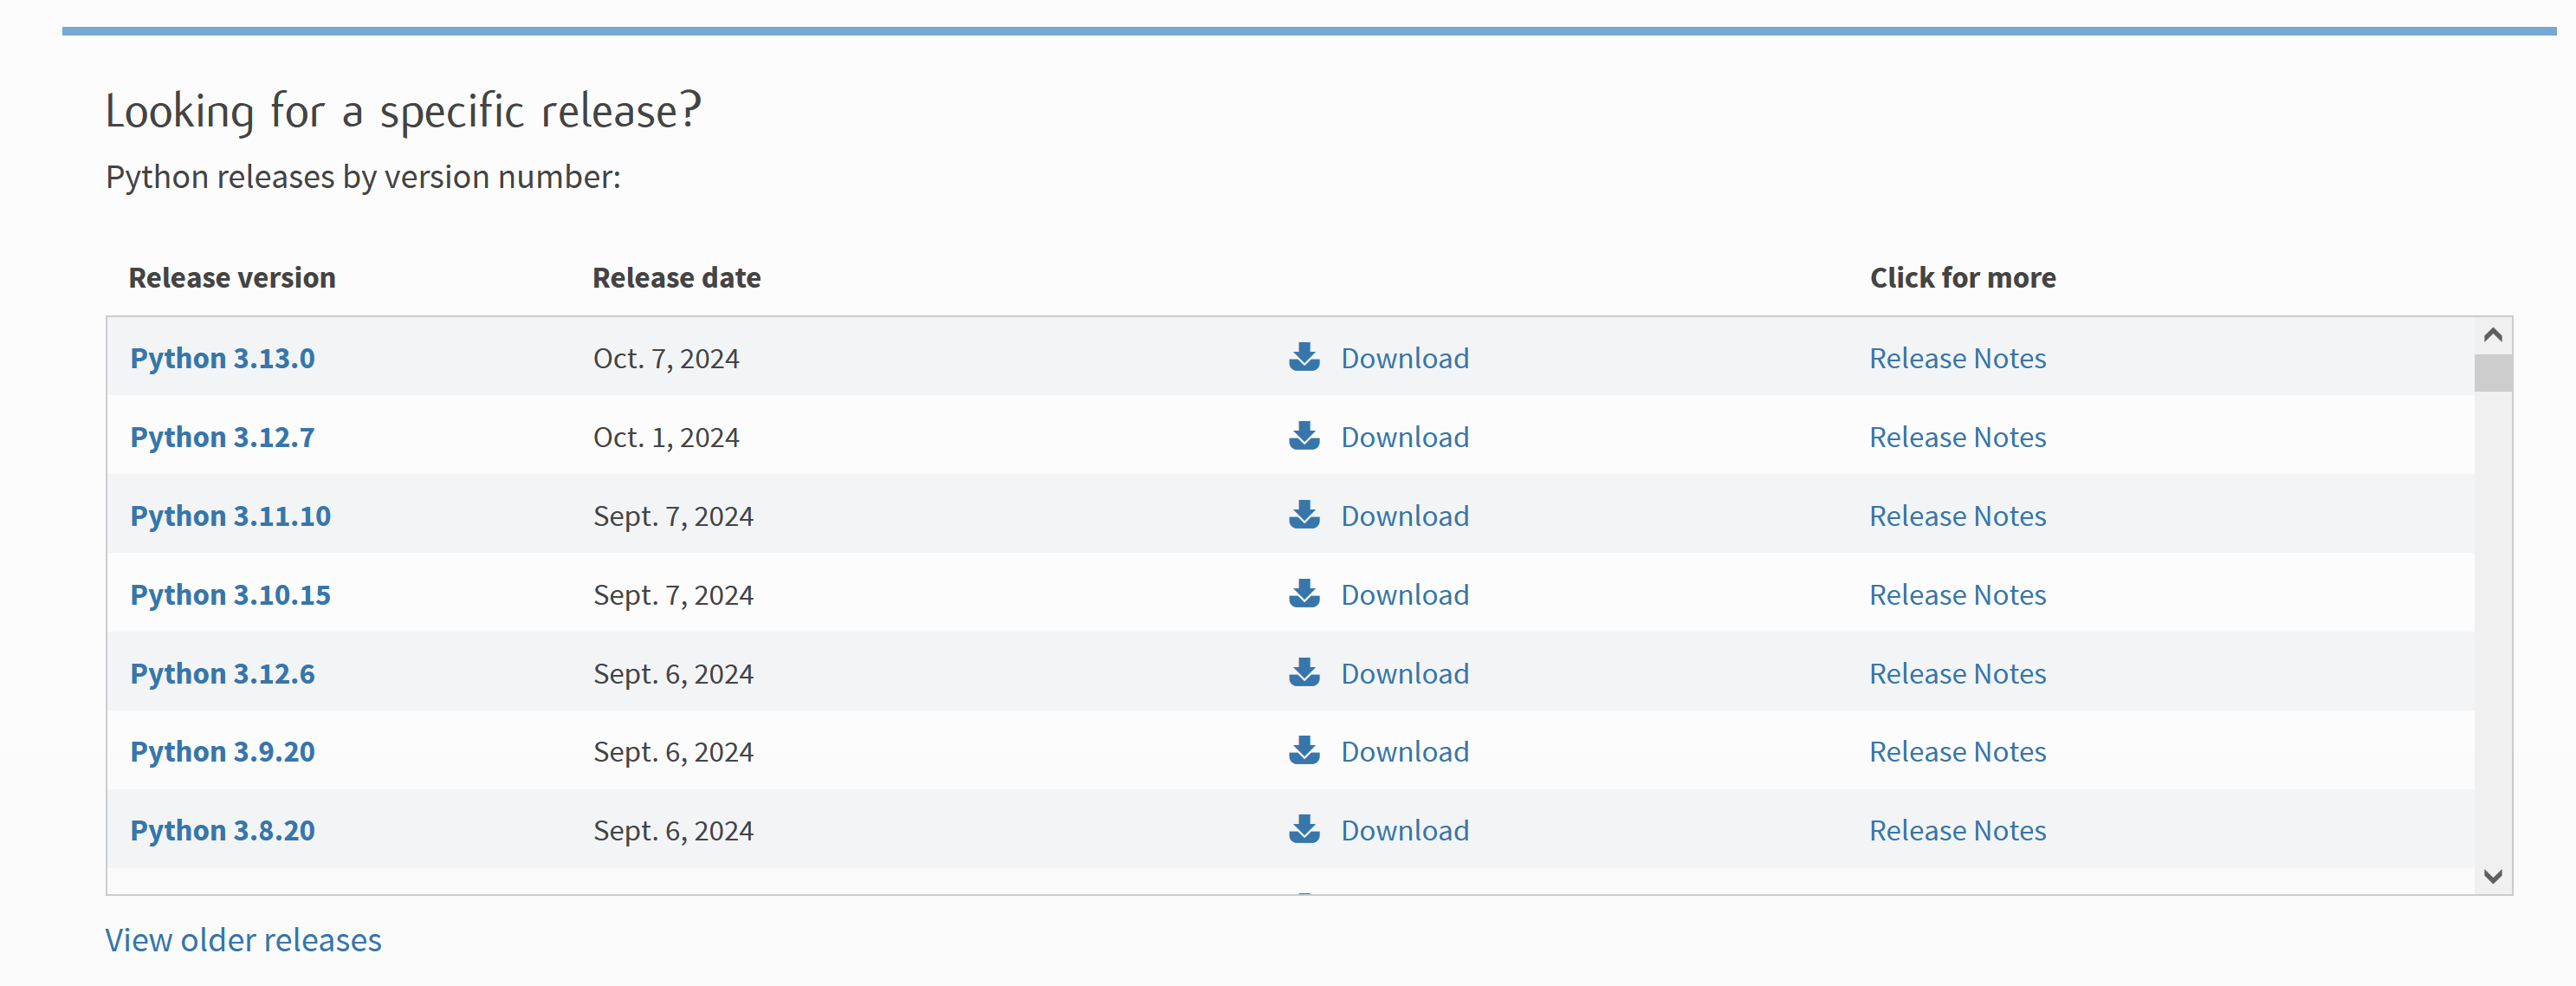
Click the most recent version of Python that begins with 3.12
At the time of writing, this version was used: https://www.python.org/downloads/release/python-3127/
You will be re-directed to an update page specific to that version. Scroll down to the files:
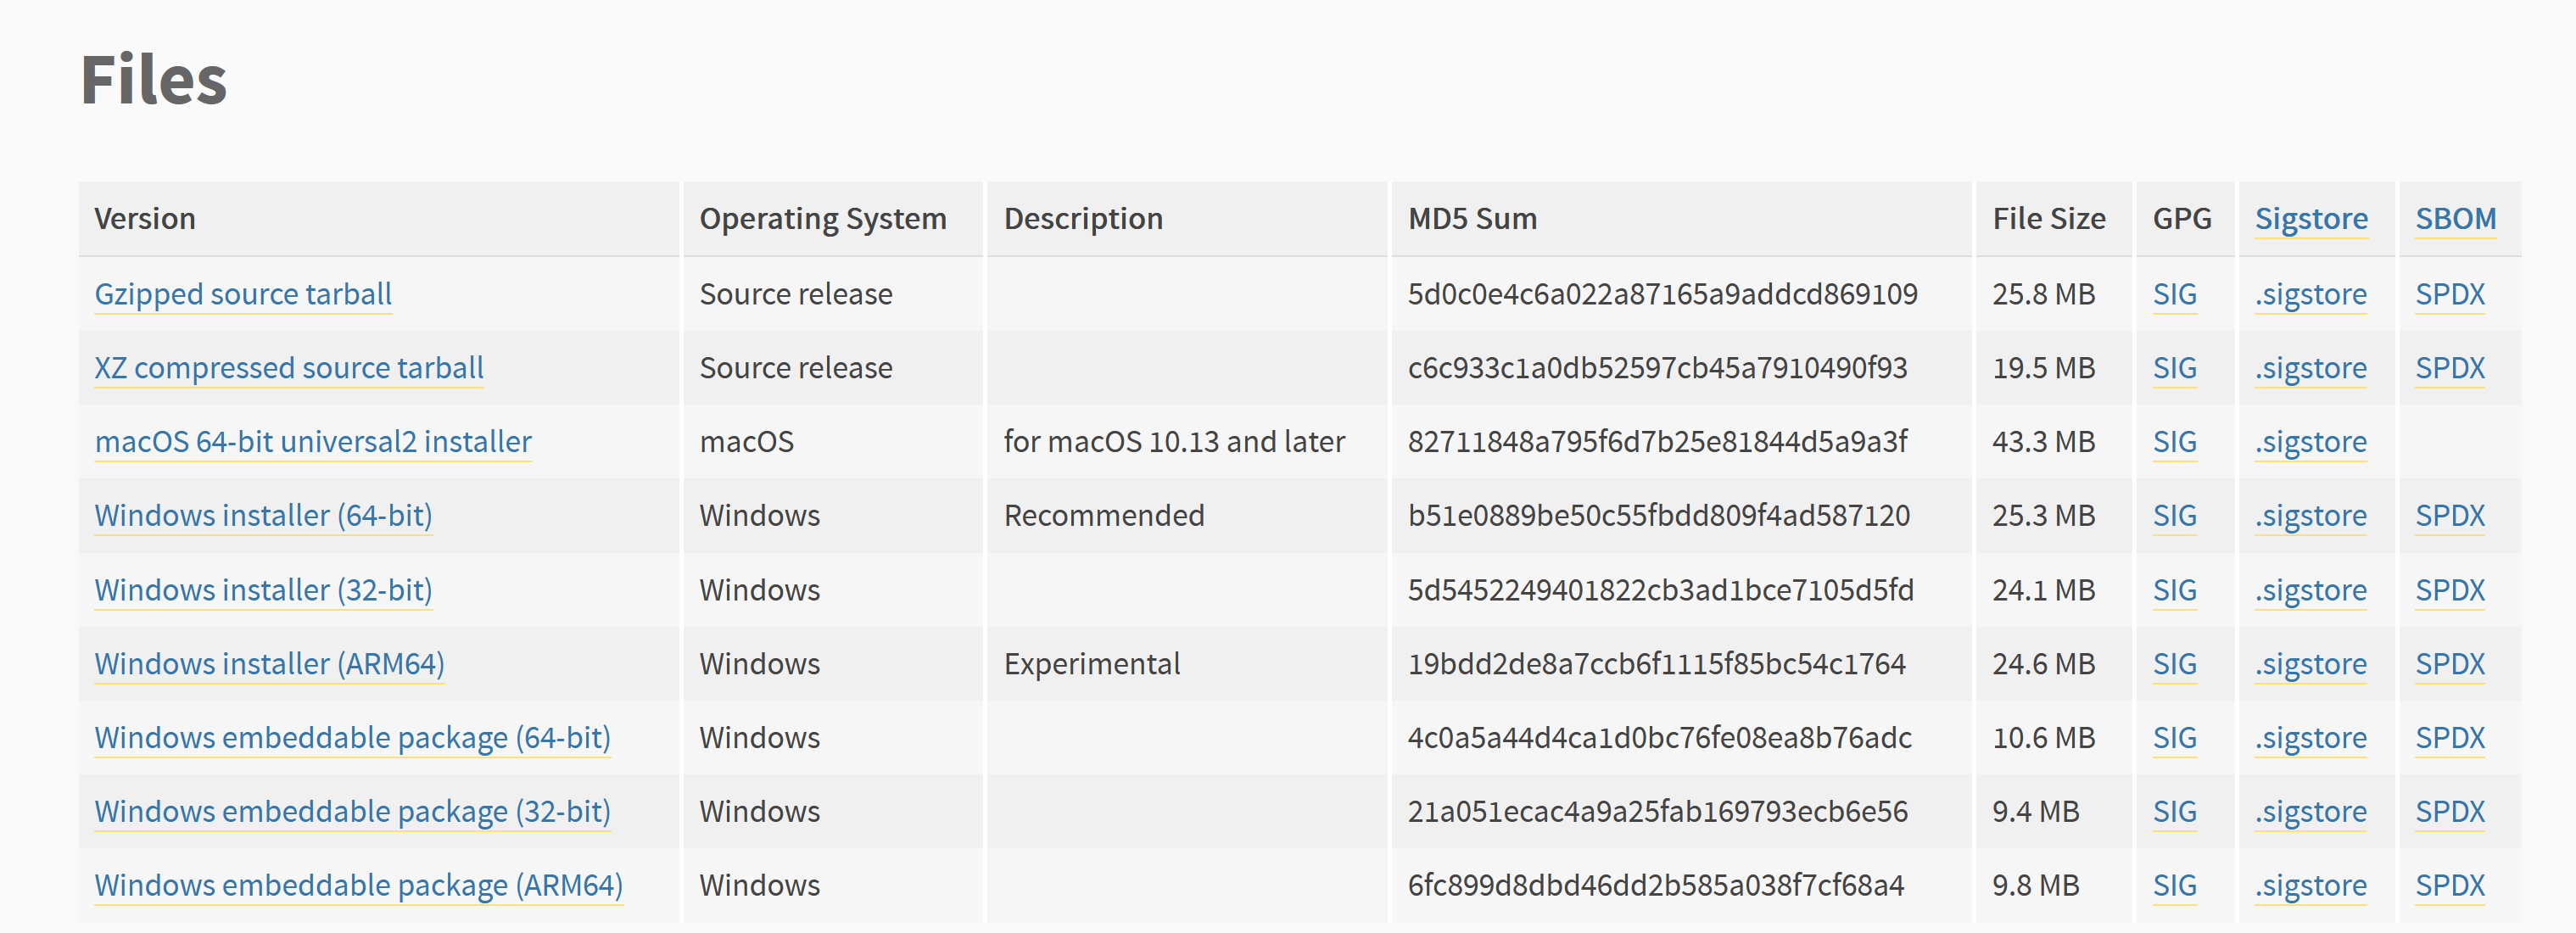
Select the Python installer (likely "Windows installer (64-bit)).
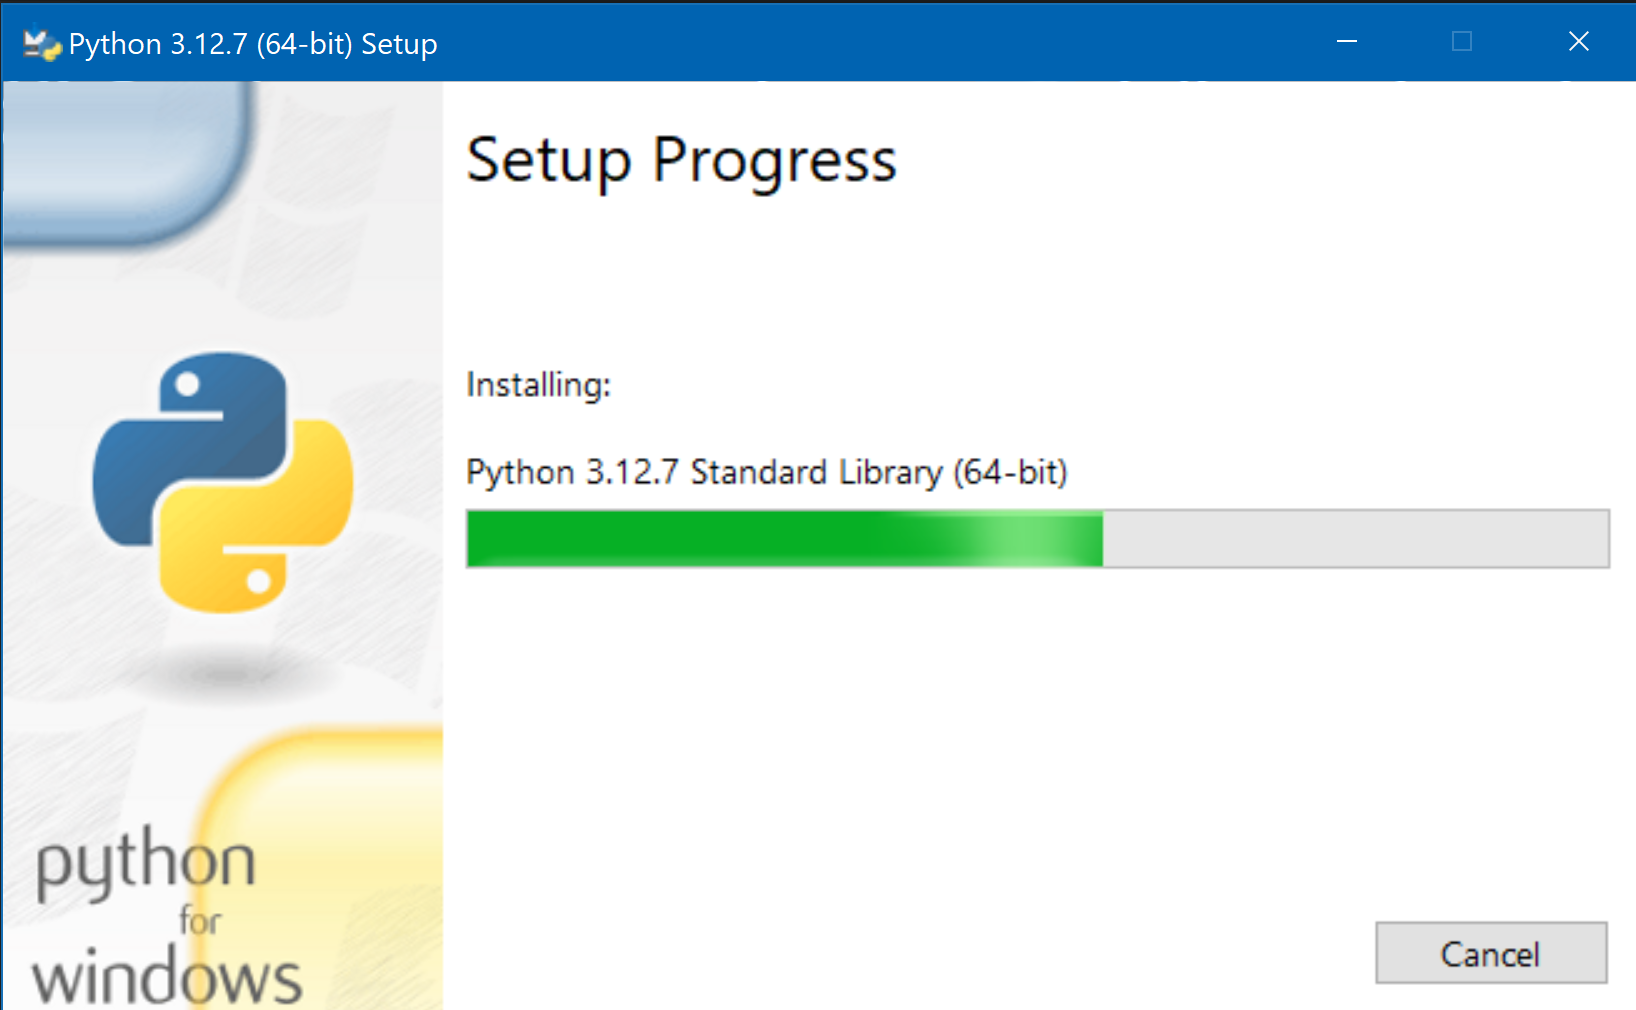
When the download is complete, navigate to the .exe and double click it to begin the installation.
On the first screen, select 'Add python.exe to PATH' and then select 'Install Now'.
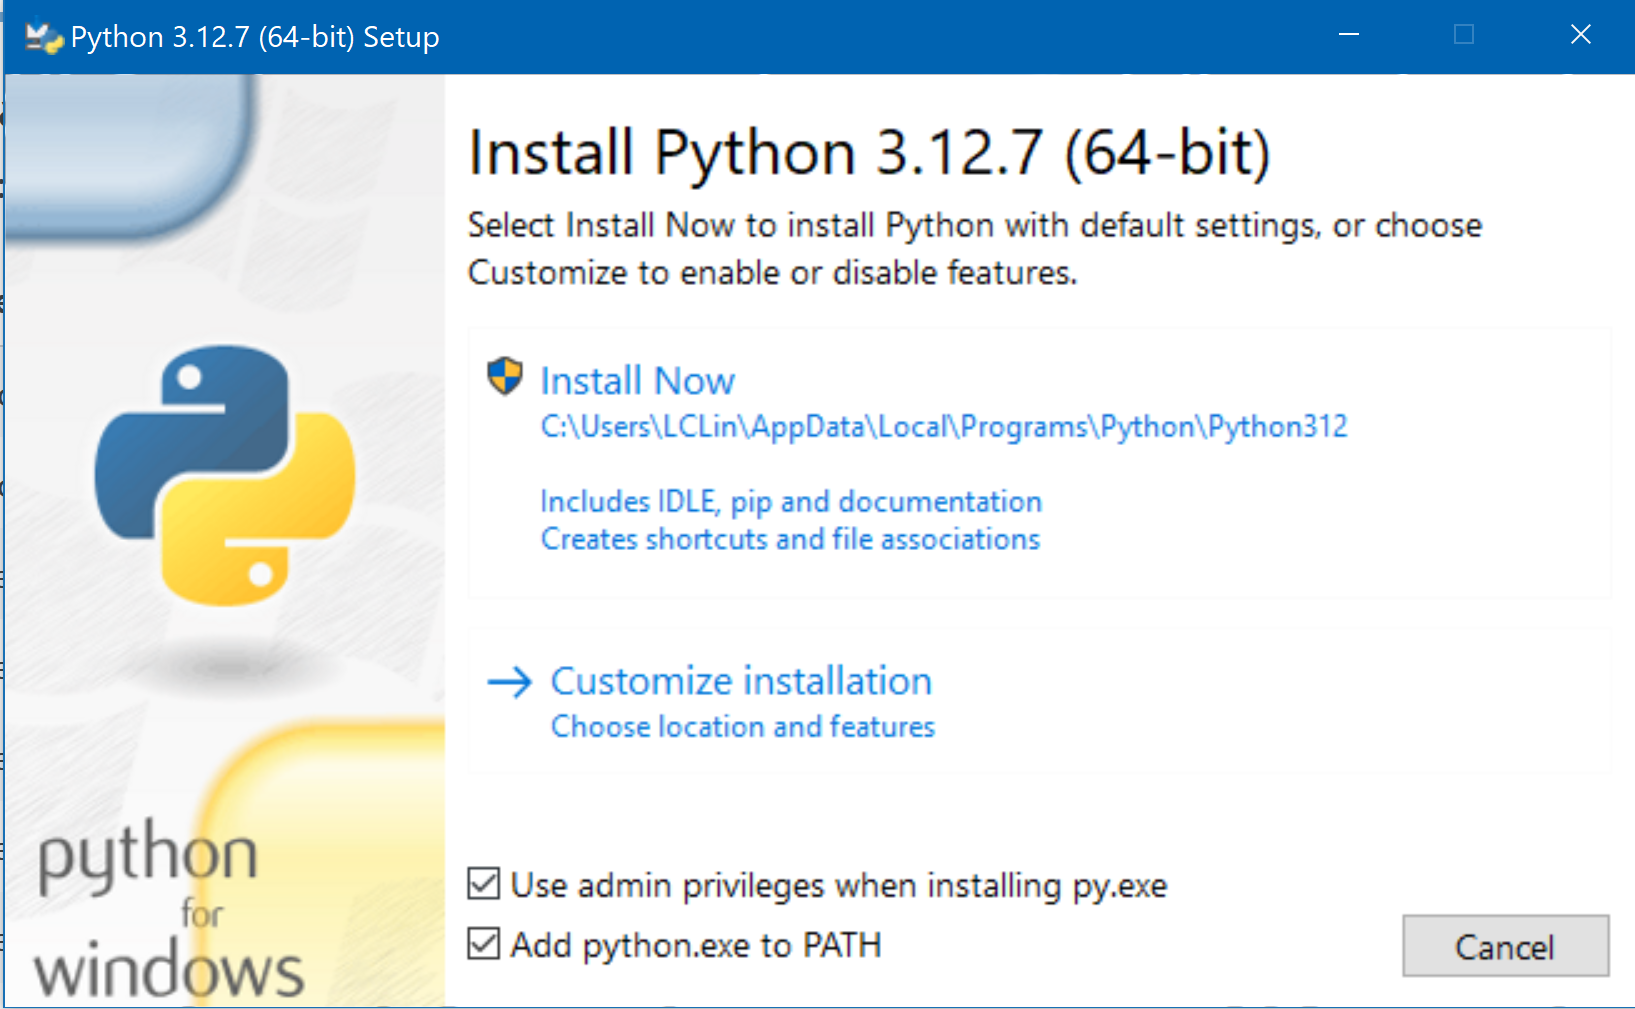
The setup and install may take a few minutes.
If you choose to install Git and Clone AntennaCAT, then skip to Adding Python to Visual Studio Code
Otherwise, continue here by downloading AntennaCAT as instructed in the Downloading Code as a Zip Folder section.
After downloading AntennaCAT, extract the contents from the zipped folder.
There will be two folders with the same name inside each other. It is suggested to take the inner folder and drag that to your workspace. Otherwise, when opening the project you will need to make sure to grab the inner folder.
The inner folder, which is our root project directory, contains the following:

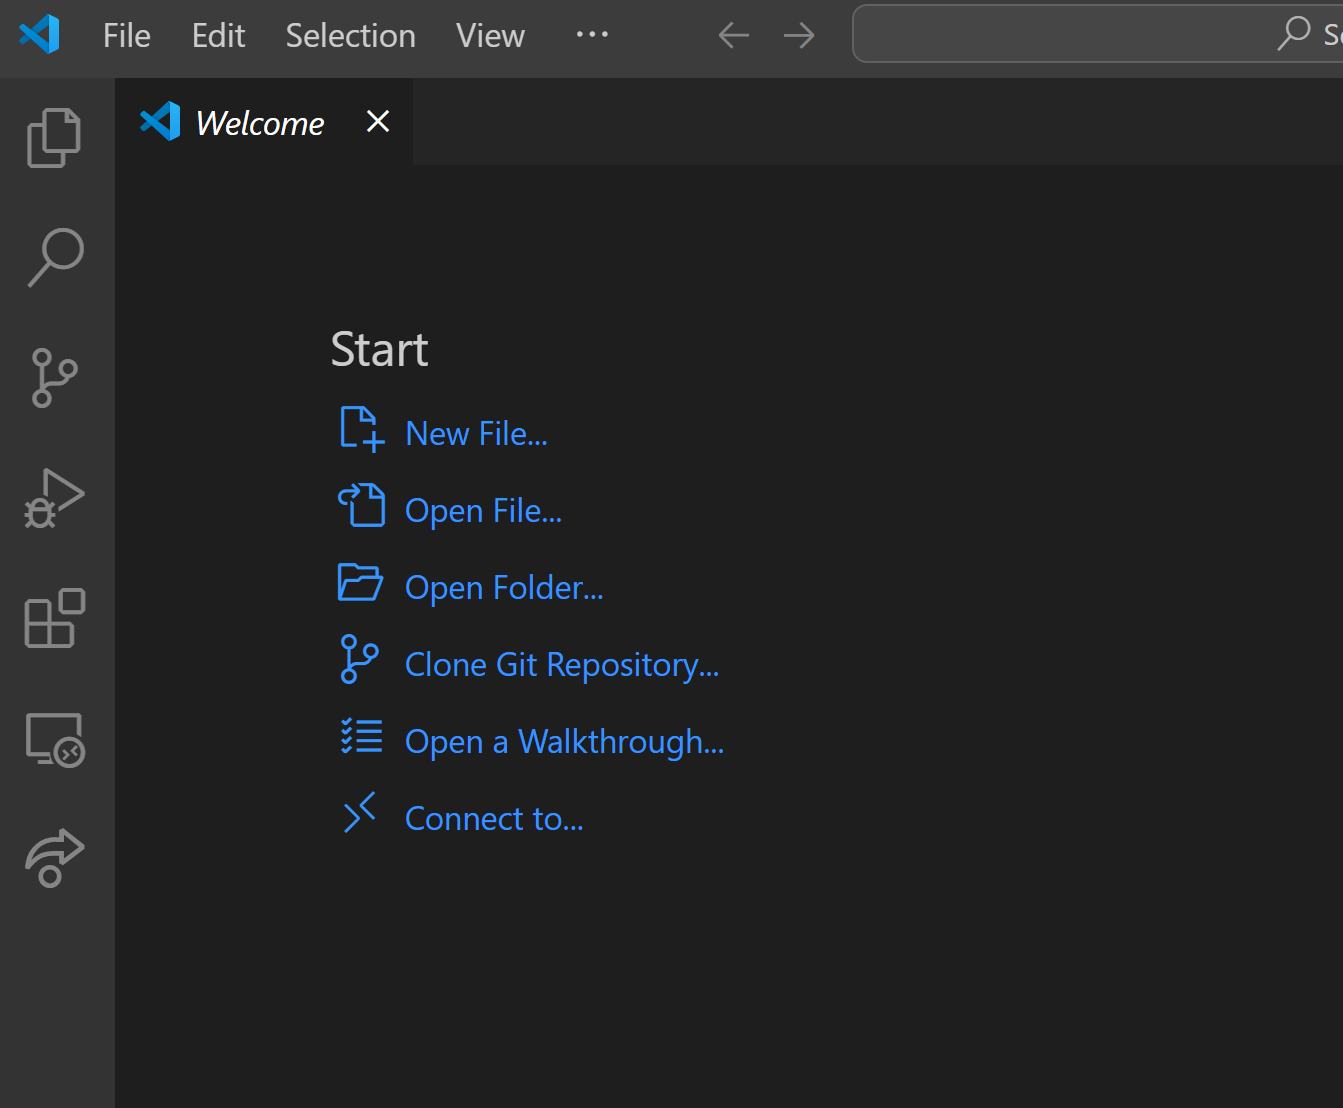
Open a New Window in VSCode.
Select 'Open Folder' and navigate to the inner 'AntennaCalculationAutotuningTool-main' folder. Select the 'AntennaCalculationAutotuningTool-main' folder. Do NOT select the 'src' folder or any of the files inside.

The opened project should look something like the above.
Select the icon of 2 pieces of paper on top of each other (the top left) to see the sidebar on the left if it is not already shown.
This is a 2 step process.
First, add the Python Extension through the sidebar, and then select the Python interpreter.
Selecting the Extension:

Select the icon of 4 blocks on the left side (5th down) to open the Extensions manager.
Type in 'Python' at the top, and select the Microsoft official Python extension. This will open a page in the IDE with a description of the Extension. Select 'Install'.
This process may take a few minutes.
Selecting the Interpreter:
When the Extension is installed, then navigate back to the AntennaCAT files (the 2 pieces of paper in the sidebar), and scroll down to find 'main.py'. Click this file and open it in the main IDE. Note the yellow rectangle on the lower right.

Click "Select Interpreter". A dropdown menu will open at the top. Select the Python Interpreter. Note that there are two versions that appear in this example, we are using 3.12

This is an optional step, but strongly recommended.
A virtual environment will keep all of the downloaded libraries and requirements in one place while you work. This way, if you have multiple projects that need different Python versions or libraries, there are no conflicts between projects. Additionally, if you can delete the virtual environment without deleting the project if you have difficulties updating libraries.
An official tutorial for setup is available at https://code.visualstudio.com/docs/python/environments, with the differences explained in detail.
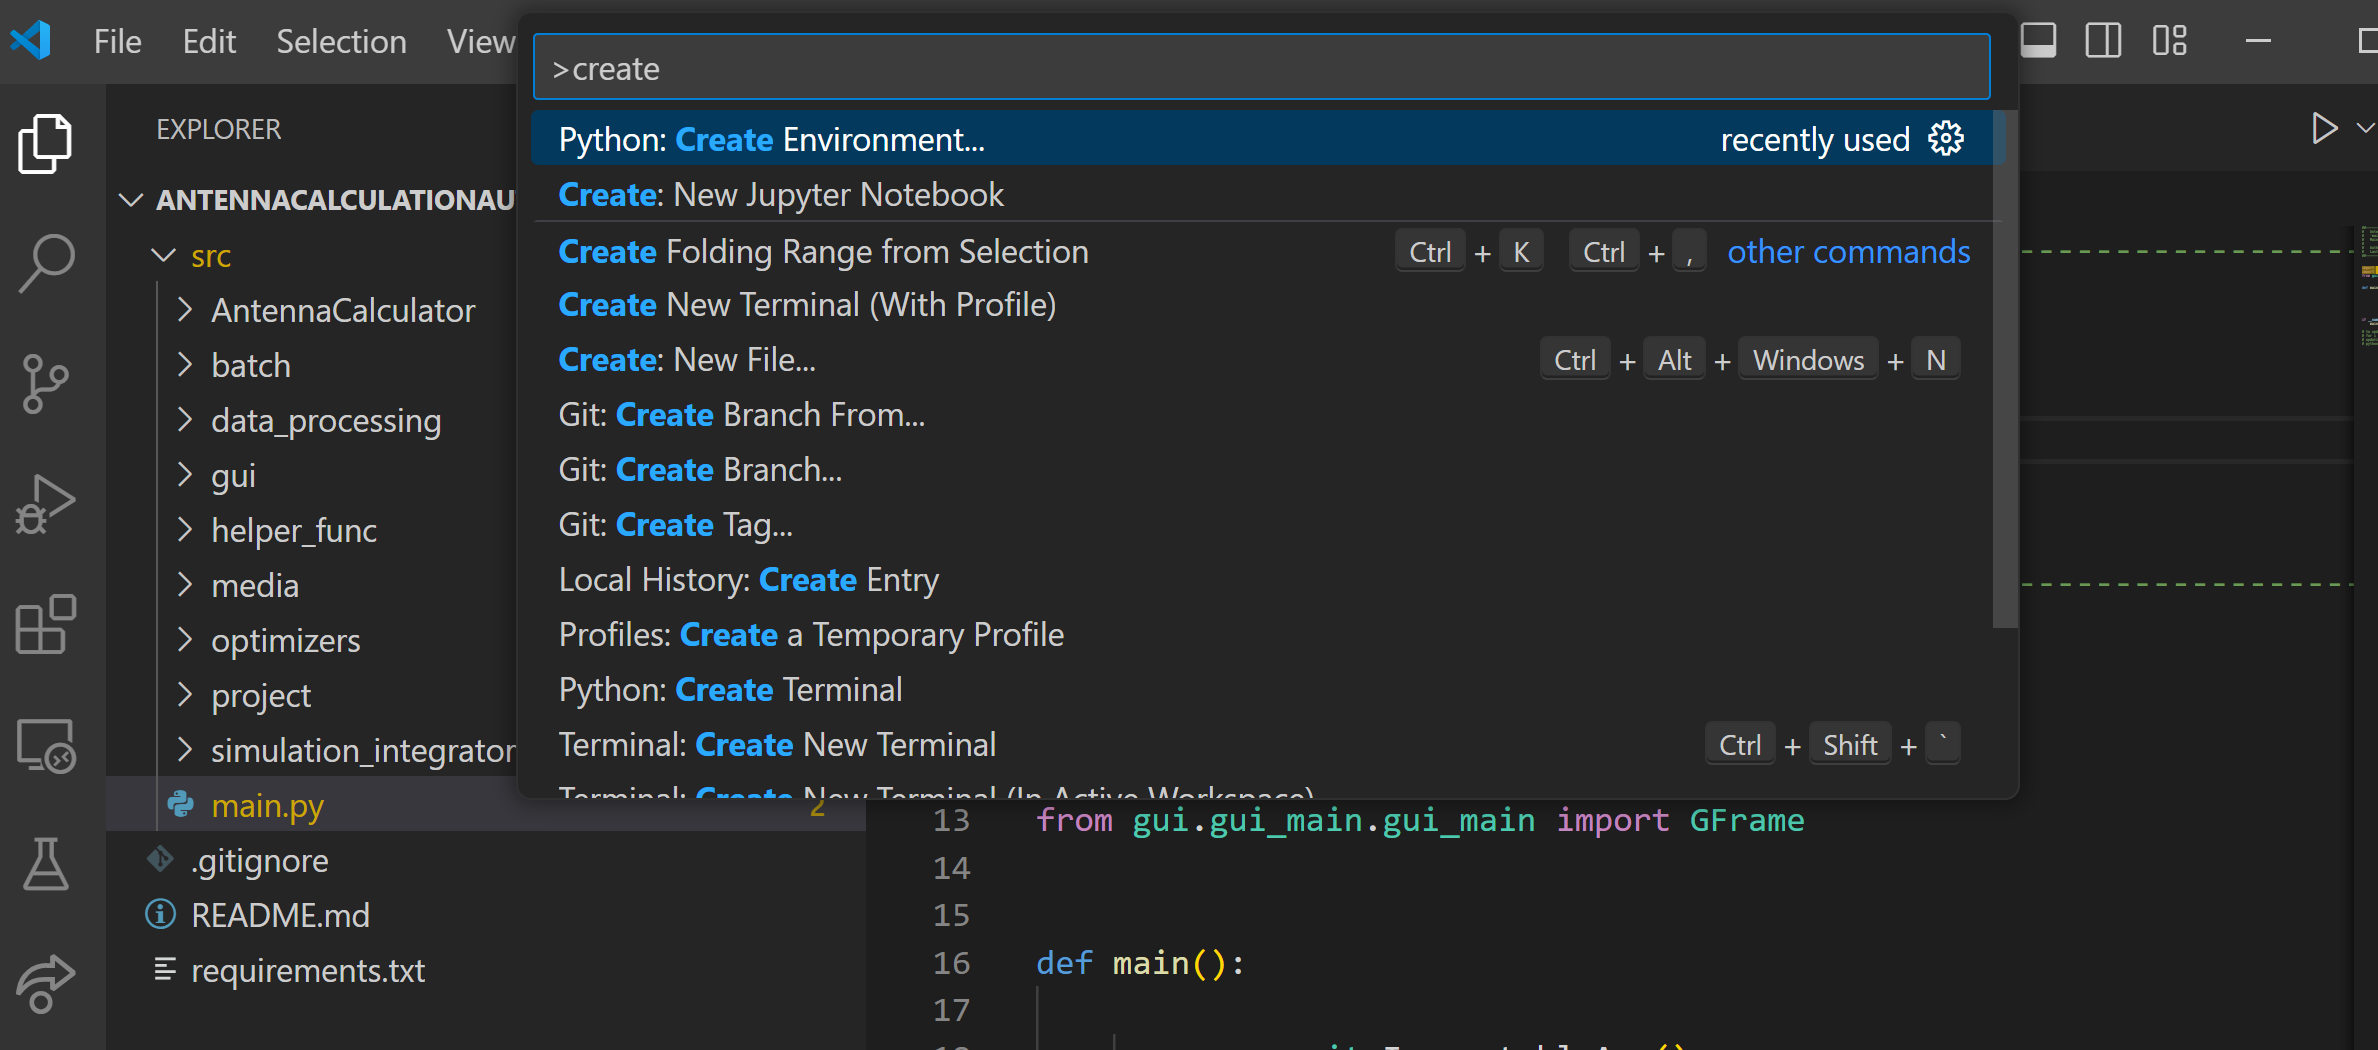
To open the control pallet, click into the main.py file (any Python file will work), and press the CTRL + SHIFT + P keys at the same time.
If you have issues with this method, refer to this guide for other tips: https://docs.github.com/en/codespaces/reference/using-the-vs-code-command-palette-in-codespaces
The command pallet will open in the same location as the search bar.
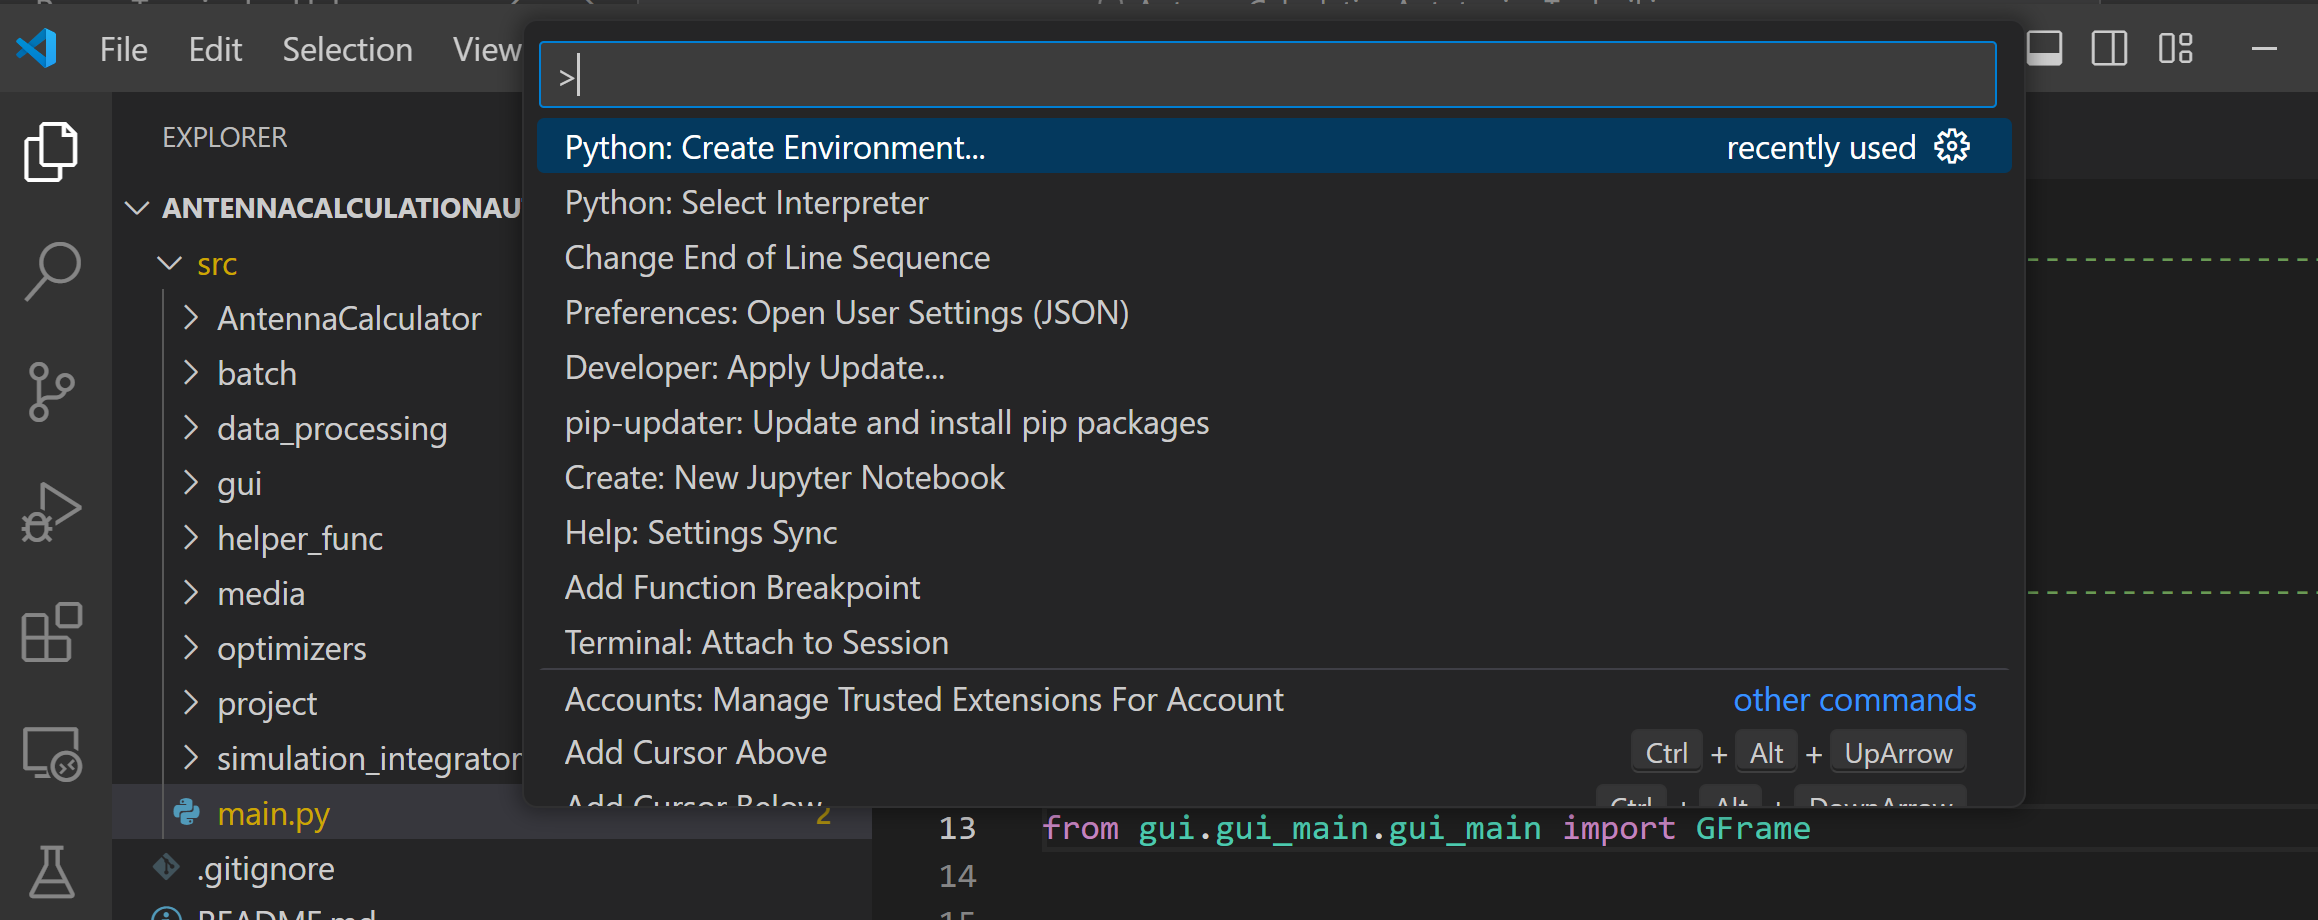
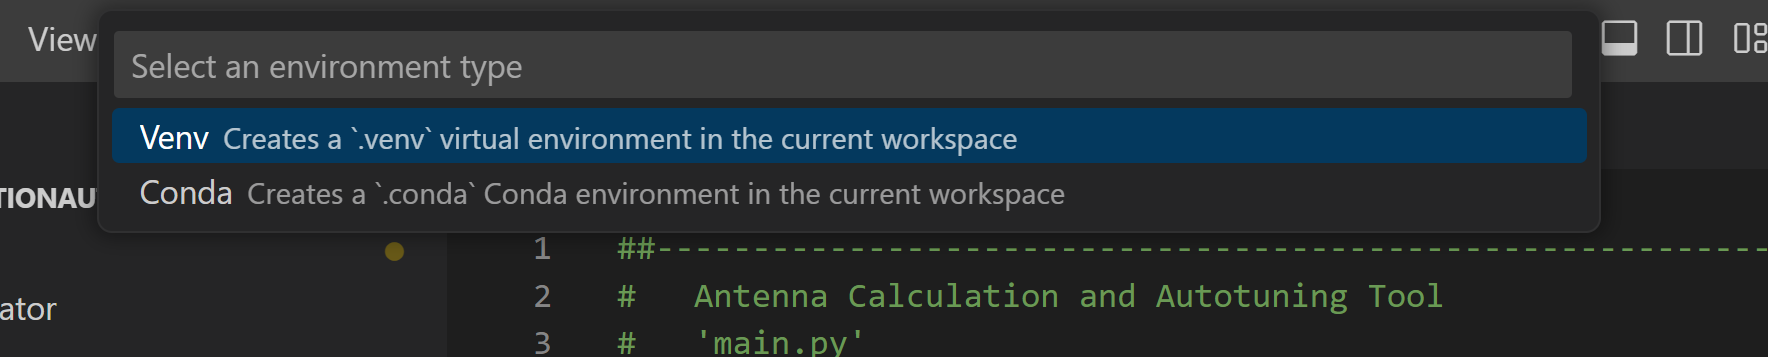
Type in "create environment" and select "Python: Create Environment"
Select "Venv" for the virtual environment
Select the Python interpreter 3.12

When prompted, select the requirement.txt file to automatically install the listed requirements.

You may be prompted to select the 'venv' virtual environment python interpreter after this process. Select this and follow any prompts. Some systems detect this automatically. When using the virtual environment, you want to use the 'venv' interpreter option. Otherwise, the interpreter selected in the previous subsection is fine.

The virtual environment may take several minutes to setup. This is normal. The program cannot be run until the virtual environment has been setup.
If there is an error installing the requirements automatically, then they can be installed manually. See Installing Project Dependencies
After dependencies have been installed, AntennaCAT can be run as described in downloading and running AntennaCAT under Running AntennaCAT