Barcode labels
This tutorial assumes that an administrator has already configured the barcode module appropriately and that a Dymo label printer is connected to your computer. Furthermore, you have to make sure that the barcode addin, which is needed to access printing is activated (see Customization). Per default you can create labels for Genes, VectorCombinations (clones) and CellLineData (cell recombinants). In this tutorial we want to create a barcode for a CellLineData object.
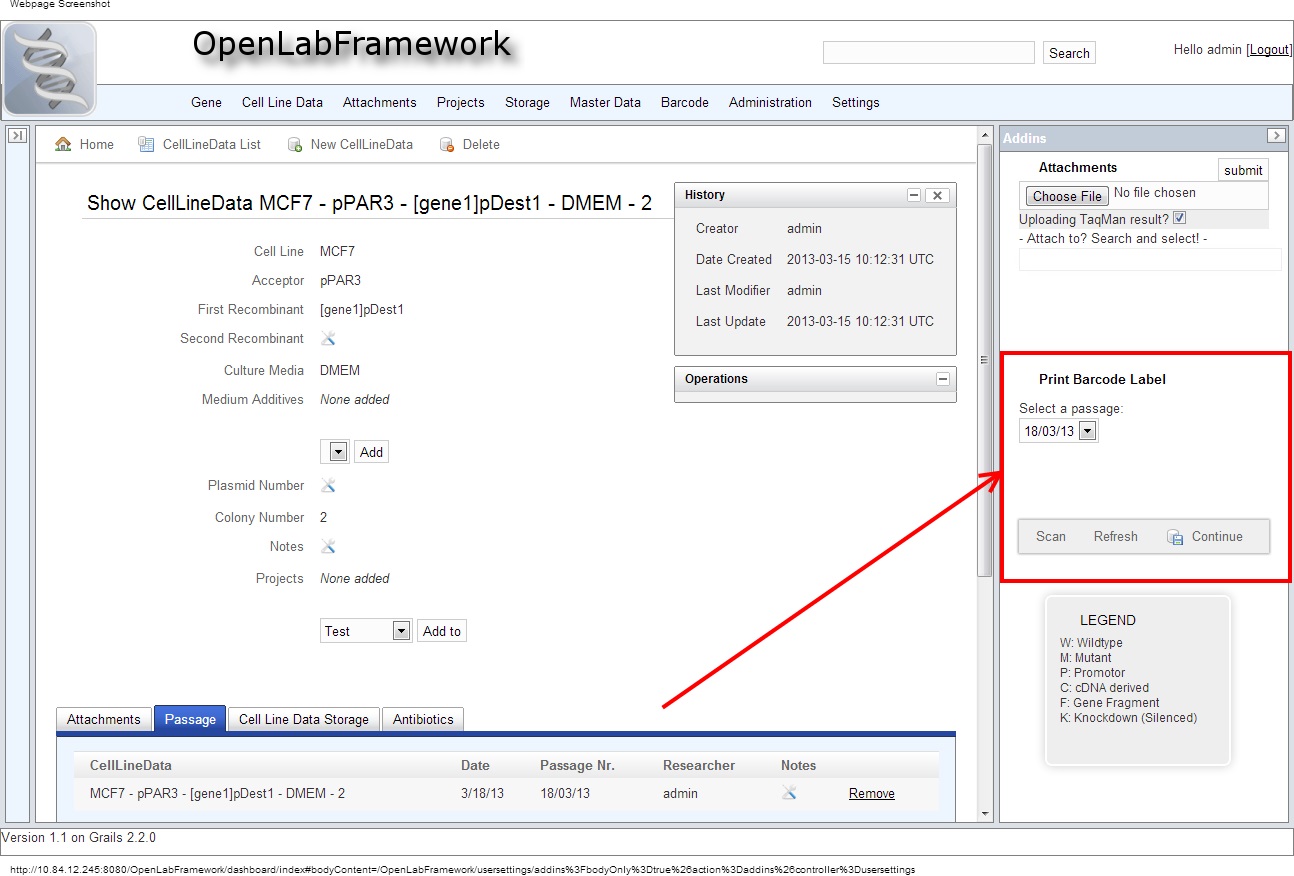
As you can see in the figure above, a CellLineData object is shown in the main view-port. On the right side (red box) is the barcode addin which at this point has switched from scan- to print-mode. You can switch back to scan mode by clicking on the respective button. The barcode label addin can assume different states that are depicted below:
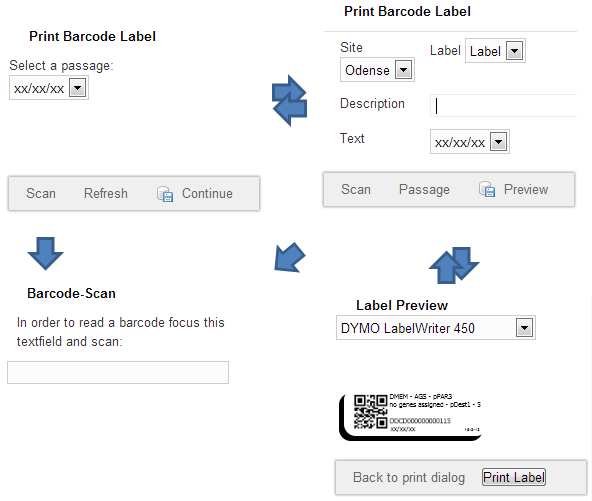
##Scan Mode In scan mode you can paste a barcode ID to get to a sample quickly. You can also paste barcode IDs through the quick search field at the top-right corner of OLF. Barcode IDs can be read using regular USB-barcode scanner, which will usually work as a keyboard and automatically type the ID to the text field when selected.
##Passage For CellLineData we first need to select a specific passage for the barcode label. That is why you are presented with an intermediate step depicted in the top-left corner.
##Print Settings In the print barcode label dialog you can usually choose a barcode site (e.g. your location), a label (if several formats are offered), a short pregnant user-defined text, and an additional description. When creating a CellLineData label the text field is automatically replaced with the passage number. Note that the description field will only be printed if there is enough space left on the label.
##Print Preview When a printer has been recognized and all necessary information has been added, a small preview image of the label will be shown. A click on the print button will then send a new label job to the printer.