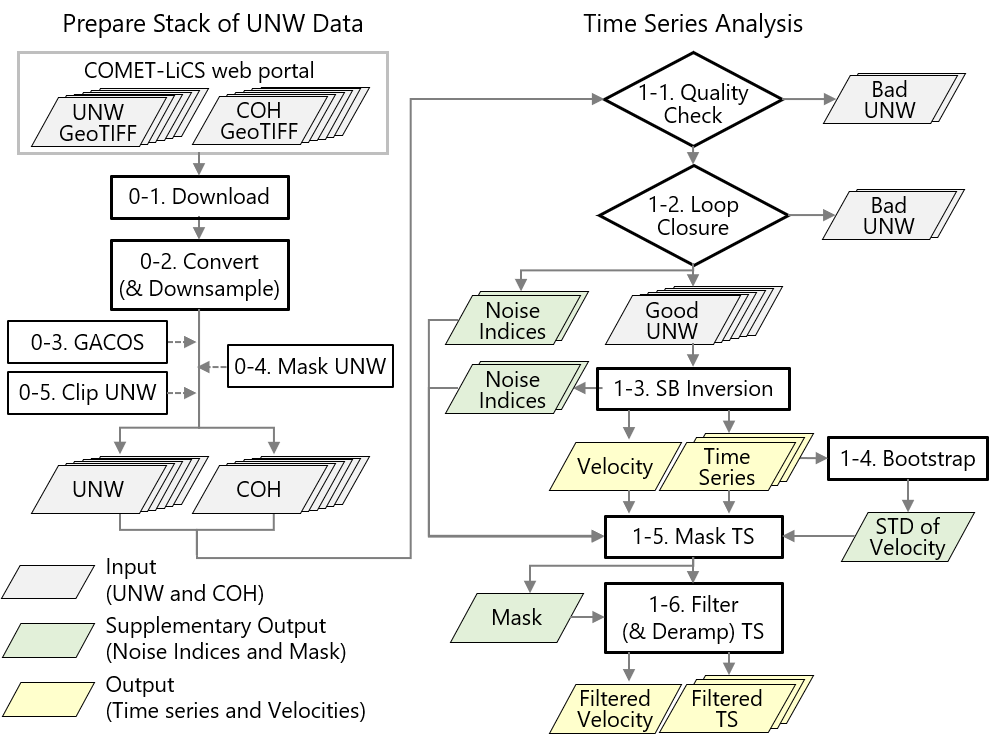
2_0_workflow
Make a working directory with the frame ID of interest and move, e.g.,
mkdir 124D_04854_171313
cd 124D_04854_171313
Copy the batch script:
copy_batch_LiCSBAS.sh
then edit the copied batch_LiCSBAS.sh , e.g., for Campi Flegrei from September 2016 to May 2018:
cat << EOF > params.txt
do05op_clip y
p05_clip_range_geo 14.03/14.22/40.78/40.90
p01_start_date 20160909
p01_end_date 20180508
EOF

edit_batch_LiCSBAS.sh batch_LiCSBAS.sh params.txt
Run the batch script:
./batch_LiCSBAS.sh
then all steps from 0-1 (downloading GeoTIFF files) to 1-6 (time series analysis) will run, and GEOC, GEOCml1, GEOCml1clip, TS_GEOCml1clip and log directories (~26 GB in total) will be created.
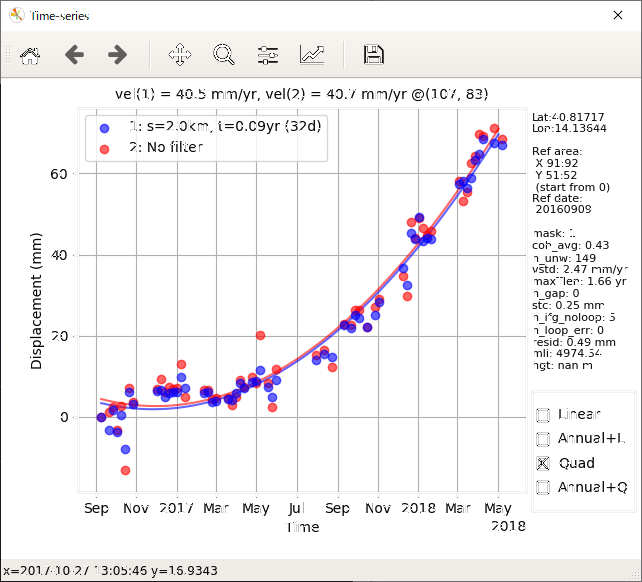
You can display the derived time series and velocity:
LiCSBAS_plot_ts.py -i TS_GEOCml1clip/cum_filt.h5 &

To improve the result, edit parameters in batch_LiCSBAS.sh and re-run it.
Details can be found in the following pages.