Change Kernel for Jupyter Notebook
Sometimes, one might wants to change the kernel in the Jupyter Notebook. This guide shows how one can do so.
- One important requirement for this Wiki to works is for both the environments to have
ipykernelinstalled. You can do so by
source activate myenv
conda install ipykernel
- Go to the first environment and install a
Python (myenv)kernel in it with the following:
source activate myenv
python -m ipykernel install --user --name myenv --display-name "Python (myenv)"

- Then go to the second environment and install another kernel:
source activate other-env
python -m ipykernel install --user --name other-env --display-name "Python (other-env)"

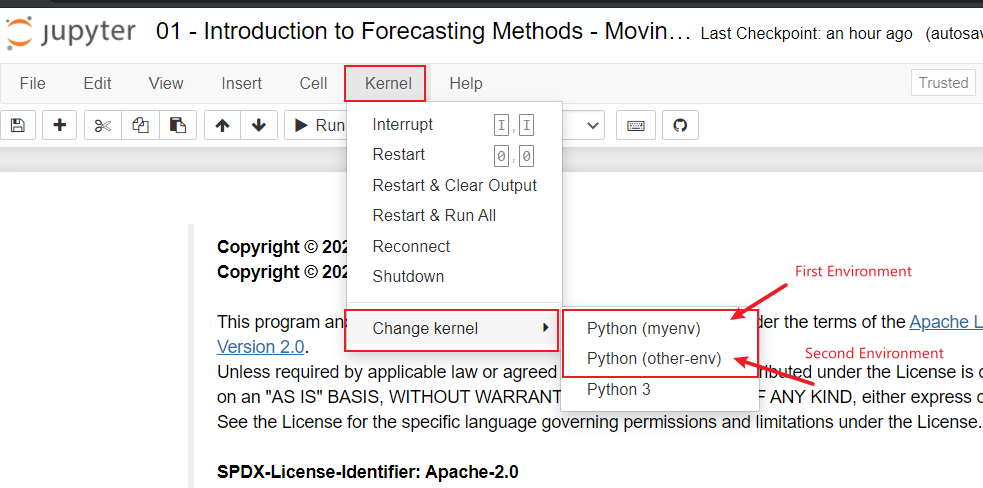
Now if you open Jupyter Notebook, you will be able to change the kernel by following the image below.
You can double whether the right kernel is selected by using the following code. It will print out the environment that the kernel is operating on.
import sys
sys.executable

Reference https://ipython.readthedocs.io/en/stable/install/kernel_install.html