Basic operations
This guide outlines the essential steps to quickly get started with CloudBeaver.
When you open CloudBeaver in your browser for the first time, you’ll land directly on the login page. After logging in, you can start working with your databases right away.

Tip: For a detailed understanding of CloudBeaver interface, refer to the Application Window Overview article.
After logging in, you’ll see the Database Navigator. It’s your main workspace for accessing and managing databases.

-
To start, create a connection to a database.
-
To explore the database objects, click on the arrow next to a database name to expand and see tables, views, and other metadata objects.
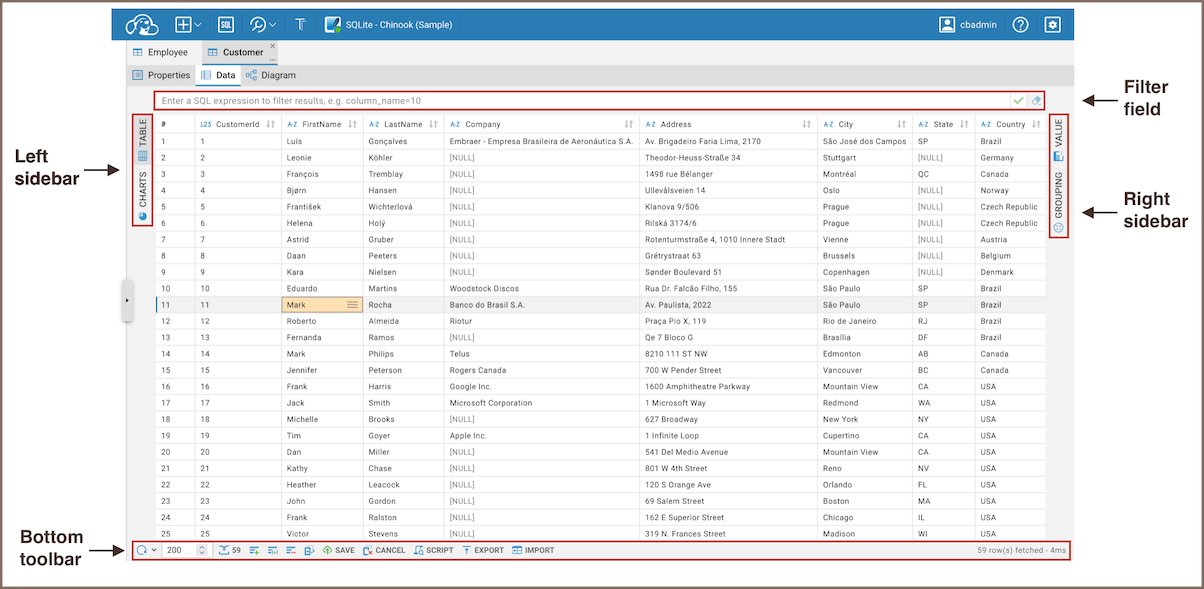
From the Database Navigator, you can open the Object Editor to explore and manage database objects.
Double-click a table or other object to open it. The Object Editor provides detailed tabs for working with your data.

The Object Editor has three tabs to organize your work:
| Tab | Description | Reference article |
|---|---|---|
| Properties | View and edit the properties of the database object. | Properties Editor |
| Data | Open the Data Editor to manage table and view data. | Data Editor |
Diagram 
|
Visualize table relationships with Entity-Relationship Diagrams. | Diagrams |
Now let’s explore how to manage your data in CloudBeaver.
After logging in, create your first database connection:
-
Click New Connection on the welcome page.

-
Select your database type from the list.
-
Enter connection details:
- Host.
- Port.
- Database name.
- Database credentials.
-
Test the connection, then click Finish.
Tip: For a full list of supported databases, see Supported Databases.
Create new objects like tables, views, or schemas using SQL scripts.
-
In the Database Navigator, locate your database.
-
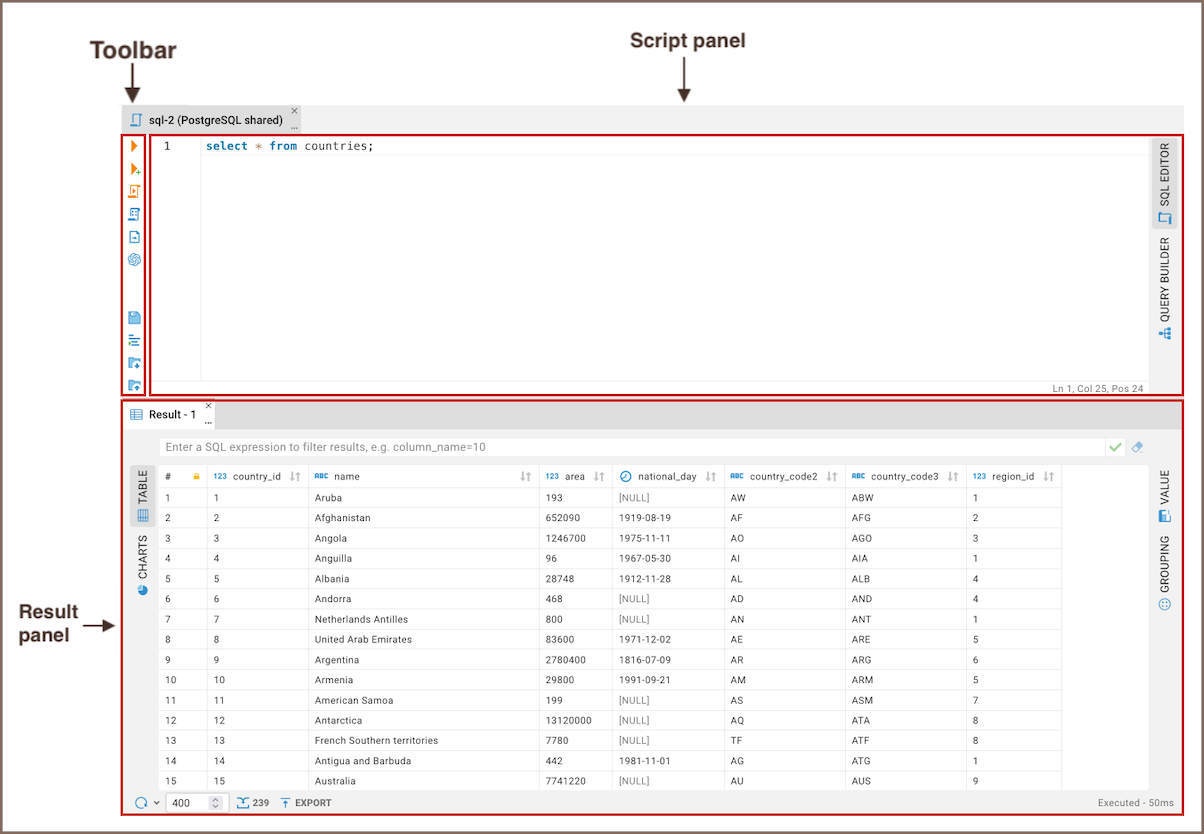
Click Open SQL Editor button in the top toolbar.
-
Write your SQL script:
Example:
CREATE TABLE example_table (
    id INT PRIMARY KEY,
    name VARCHAR(100)
);
-
Run the script:
- Click the Execute SQL Statement button
 or press
Ctrl+Enter to run it and create the object.
or press
Ctrl+Enter to run it and create the object.
- Click the Execute SQL Statement button
Tip: See more information on SQL Editor.
-
View and edit data:
- Double-click a table in the Database Navigator, or right-click it and select Open.
- Edit data directly in the grid and click Save.
-
Insert new data:
- Click the Add button
 to add new records.
 - Fill out the row and click Save.
- Click the Add button
-
Delete data:
- Select rows and click the Delete selected button
 .
. - Confirm and save changes.
- Select rows and click the Delete selected button
Tip: See more information on Data Editor.
-
In the Database Navigator, locate your database.
-
Click Open SQL Editor button in the top toolbar.
-
Write your query:
-
In the SQL Editor, type your SQL query.
Example:
SELECT * FROM Album;.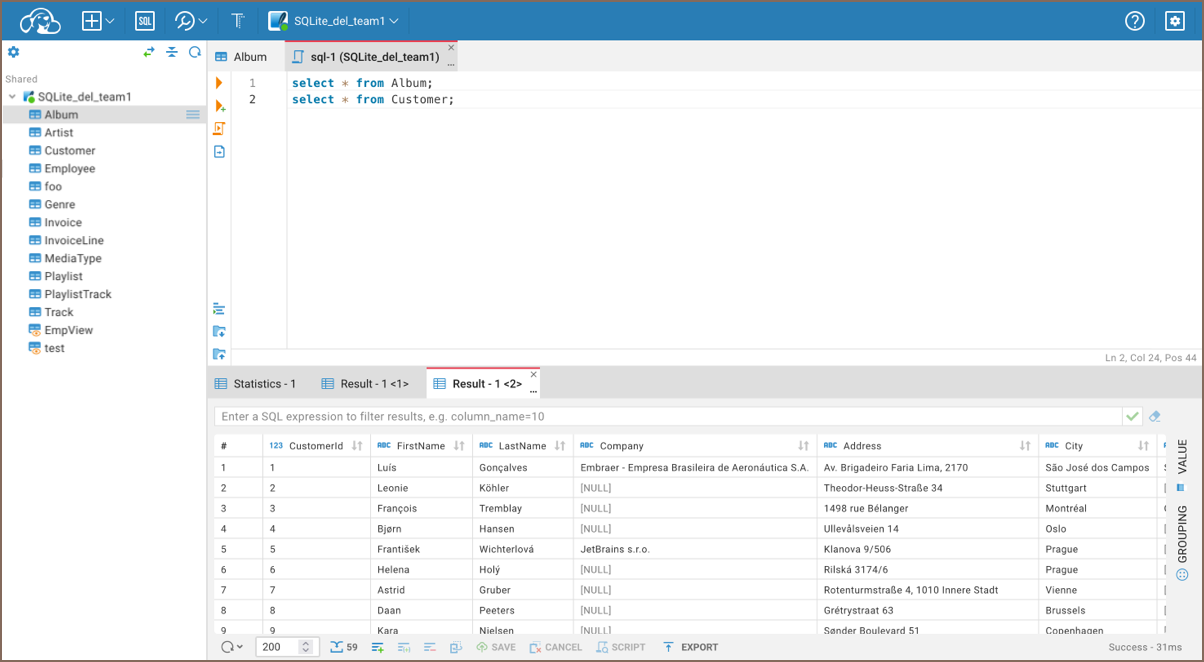
Tip: Use AI SQL Assistance to improve your SQL scripts.
-
Press Ctrl+Enter or right-click the query and click Execute SQL Statement button.
-
-
View results:
- Results appear in the bottom panel of the SQL Editor.
Tip: Want to work faster? Check out the list of available keyboard shortcuts in Shortcuts.
- Getting started
- Create connection
- Connection network options
- Supported databases
-
Drivers management
- Database authentication methods
- Database navigator
- Properties editor
- Data editor
- SQL editor
-
Entity relation diagrams
- Cloud services
-
AI Smart assistance
- Data transfer
- General user guide
- Administration
- Server configuration
-
Server security and access configuration
- Authentication methods
- Access management
- Proxy configuration
-
Secret management
- Logs
-
Query manager
- Workspace location
- Command line parameters
-
Session manager
- Deployment options
- CloudBeaver Editions
- FAQ
- Development