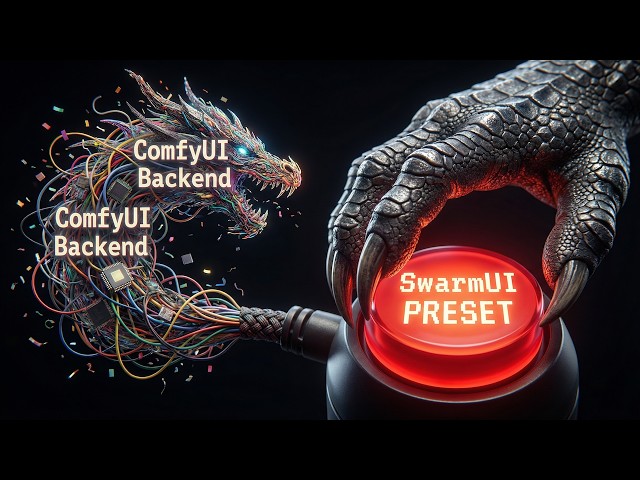
How to Use SwarmUI Presets and Workflows in ComfyUI Custom Model Paths Setup for ComfyUI and SwarmUI
Full tutorial link > https://www.youtube.com/watch?v=EqFilBM3i7s


Generating workflow inside SwarmUI and using in ComfyUI is literally 1-click. In this tutorial I will show you how to use our 40+ amazing generative AI presets made for SwarmUI in ComfyUI with most easy way. You will be able to get very best outcomes of all AI models such as SDXL, FLUX, Z Image Turbo, Wan 2.1, Wan 2.2, FLUX 2, Qwen Image, Qwen Image Edit, FLUX Kontext, Image Outpainting, Image Inpainting and many more. Moreover, I will show how to use custom model paths in ComfyUI and SwarmUI to unify your models in same folder and avoid model duplication and save massive amount of disk space.
📂 Resources & Links:
ComfyUI Installer: [ https://www.patreon.com/posts/ComfyUI-Installers-105023709 ]
SwarmUI Installer, Model Auto Downloader and Presets: [ https://www.patreon.com/posts/SwarmUI-Install-Download-Models-Presets-114517862 ]
SwarmUI & ComfyUI Setup Guide for Windows: [ https://youtu.be/c3gEoAyL2IE ]
SwarmUI & ComfyUI Setup Guide for RunPod & Massed Compute: [ https://youtu.be/bBxgtVD3ek4 ]
Qwen Image Models Training Tutorial: [ https://youtu.be/DPX3eBTuO_Y ]
Wan 2.2 Model Training Tutorial: [ https://youtu.be/ocEkhAsPOs4 ]
Z Image Turbo Model Training Tutorial: [ https://youtu.be/ezD6QO14kRc ]
FLUX Models Fine Tuning / DreamBooth Training Tutorial: [ https://youtu.be/FvpWy1x5etM ]
FLUX Models LoRA Training Tutorial: [ https://youtu.be/nySGu12Y05k ]
Upload / Download Big Files Guide for RunPod & Massed Compute: [ https://youtu.be/X5WVZ0NMaTg ]
⏱️ Video Chapters:
00:00:00 Introduction to SwarmUI Presets in ComfyUI & Z Image Turbo Showcase
00:00:50 How to Update ComfyUI to the Latest Version Manually
00:01:24 Running the Windows Install or Update ComfyUI Script
00:01:45 Installing SwarmUI Extra Nodes for ComfyUI Compatibility
00:02:06 How to Update SwarmUI to the Latest Version
00:02:38 Importing the Newest SwarmUI Presets & Clearing History
00:03:00 Downloading Z Image Turbo Models & ControlNet Union via Script
00:03:40 Configuring Z Image Turbo Workflow with ControlNet in SwarmUI
00:04:11 Setting ControlNet Preprocessor, Aspect Ratio & Preview
00:04:43 Exporting the SwarmUI Workflow to ComfyUI JSON Format
00:05:16 Configuring extra_model_paths.yaml to Share SwarmUI Models
00:05:46 Editing the YAML File to Point to SwarmUI Directories
00:06:01 Understanding YAML Keys, Relative Paths & Checkpoint Folders
00:06:30 Loading the Exported SwarmUI Preset into ComfyUI
00:06:50 Replacing SwarmUI Load Image Node with ComfyUI Node
00:07:33 Adding ComfyUI Save Image Node for Output Storage
00:07:55 Running the Z Image Turbo Workflow & Performance Check
00:08:37 Reviewing the Generated Image & Z Image Turbo Training Tutorials
00:09:23 Preparing Wan 2.2 Image to Video Workflow in SwarmUI
00:09:52 Exporting the Video Generation Workflow to ComfyUI
00:10:17 Adjusting Load Image & Upscale Nodes for Video Workflow
00:10:40 Adding Create Video & Save Video Nodes for Output
00:10:54 Setting FPS & Connecting Video Save Sequence with RIFE
00:11:18 Executing the Video Workflow & VRAM Optimization Info
00:12:17 High/Low Noise Generation & RIFE Frame Interpolation Process
00:13:02 Using SwarmUI & ComfyUI on Cloud GPUs (RunPod & Massed Compute)
00:13:33 How to Use ComfyUI Models Inside SwarmUI (Reverse Setup)
00:14:02 Adjusting Folder Names (LoRAs) in Server Configuration
00:14:23 Upcoming Trellis 2 Premium 3D Generation Application
00:15:33 Upcoming Ultimate Video & Image Upscaler Application
In this comprehensive tutorial, I demonstrate how to seamlessly use high-quality SwarmUI generated workflows and presets directly inside ComfyUI. If you love the ease of SwarmUI's presets but need the flexibility of ComfyUI, this guide covers the entire process from start to finish.
I showcase complex workflows, including Z Image Turbo with ControlNet Union and the new Wan 2.2 Image to Video generation (4 steps). You will learn how to export these presets as JSON files and properly configure the necessary custom nodes to get them running perfectly in ComfyUI.
Key Topics Covered:
Workflow Migration: Step-by-step guide on exporting SwarmUI presets and importing them into ComfyUI, including fixing "Load Image" and "Save Video" nodes.
Model Unification: A crucial guide on using the extra_model_paths.yaml file. I explain how to point ComfyUI to your SwarmUI model folders (and vice versa) so you never have to duplicate massive checkpoint or LoRA files again, saving huge amounts of disk space.
Installation & Updates: How to manually update both ComfyUI and SwarmUI to the latest versions and install the required "SwarmUI Extra Nodes."
Cloud Usage: Tips for running these workflows on cloud GPU services like Massed Compute and RunPod.
Featured Workflows:
Z Image Turbo: High-quality image generation with ControlNet integration.
Wan 2.2: Image-to-Video generation with RIFE frame interpolation for smooth results.
Upcoming Tools Teased:
Trellis 2 Premium: An insane 3D generation app for high-quality meshes and textures.
Ultimate Upscaler: A new application for image and video upscaling supporting SeedVR 2 and Flash VSR.
-
00:00:00 Greetings everyone. Today I am going to show you how to use SwarmUI generated workflows, presets in
-
00:00:07 ComfyUI. This is Z Image Turbo with ControlNet. This is Wan 2.2 Image to Video 4 steps. This
-
00:00:16 is Qwen Image Edit 25+11. And you know we have amazing presets in SwarmUI and a lot of people
-
00:00:24 were asking me how you can use these presets in ComfyUI with easiness. Furthermore, I will show
-
00:00:31 you by using extra model paths.yaml file, how you can use your existing model files inside SwarmUI
-
00:00:41 or how you can use your existing models in ComfyUI in SwarmUI. So you won't be doing duplicate of
-
00:00:50 models. For this tutorial, you need to update your ComfyUI to the latest version. You see we
-
00:00:56 have ComfyUI version 70. It may get updated when you are watching this tutorial. The link will be
-
00:01:02 in the description of the video. Move the zip file into your existing installation. You can also make
-
00:01:07 a fresh installation. If you don't know how to install ComfyUI, we have a tutorial. It is here.
-
00:01:14 The link will be also in the description of the video so watch it. Then extract everything inside
-
00:01:19 this file into here and overwrite everything. This is important. Then first of all run the
-
00:01:24 windows install or update comfyui.bat file. We have improved our installer into UV so it is
-
00:01:32 super fast to install and update. Moreover, this will install the necessary additional custom nodes
-
00:01:39 to run the SwarmUI workflows inside ComfyUI. So everything is updated and installed. One
-
00:01:45 another thing you need to run windows custom node install swarmui extra nodes. Double click and run
-
00:01:51 it. This will be automatically installed with the Massed Compute and RunPod so both of them
-
00:01:59 will be fully automatic. You don't need this one. Okay it is also done. So our ComfyUI is now up
-
00:02:06 to date. And as a next step we will update our SwarmUI and our presets. So download the latest
-
00:02:12 zip file from here. The link will be also in the description of the video. If you don't know how
-
00:02:17 to install and use SwarmUI, this tutorial is here so watch it. Move the SwarmUI installer into here
-
00:02:24 and extract it and overwrite all the files. So you need to run the windows update swarmui.bat
-
00:02:31 file. This will update your SwarmUI to latest and start it. Then you need to import newest
-
00:02:38 presets. You can use import choose file, select the latest amazing SwarmUI presets, overwrite,
-
00:02:45 or better alternative is while the SwarmUI is running, use the windows preset delete import.
-
00:02:53 This will clear your history with a backup and import everything. Then click refresh and you
-
00:02:59 will have all the up to date presets. So how you can use a preset? I want to show you Z Image Turbo
-
00:03:08 quality 1 with newest ControlNet. To have the newest ControlNet, start the windows
-
00:03:15 start download models.bat file. We also have updated this application. It is now much faster,
-
00:03:21 better. And in the Z Image Turbo Core Bundle, you can download the entire bundle. So let's download
-
00:03:28 it. It will only download your missing files. The new ControlNet is the Z Image Turbo Fun ControlNet
-
00:03:35 Union 2.1 8 steps. So I already have it. What I am going to do is quick tools, reset params
-
00:03:41 to default and I am going to apply my preset, direct apply. For Z Image Turbo with a ControlNet,
-
00:03:49 I am going to use my trained LoRA, this one. I will use this prompt and as a ControlNet image,
-
00:03:56 I am going to choose file, select this file. You see this is 3 to 2 aspect ratio. I did it this
-
00:04:03 way and I will change the aspect ratio from here to same and I will set the control preprocessor
-
00:04:11 to Canny Edge preprocessor. When you click preview it will show us the preview. All of the ControlNet
-
00:04:18 necessary models are also automatically installed with our installers. So you don't spend any time.
-
00:04:24 Okay it is accurate. You see this is matching to this. This preview is generated according to
-
00:04:30 your resolution. Then as a ControlNet strength I recommend 0.6. And as a ControlNet model we
-
00:04:37 select this new one. This is better than the older version I have compared. Now the entire workflow
-
00:04:43 is ready. So go to ComfyUI workflow, import from generate tab. Wait for this screen to get updated.
-
00:04:52 You can also remove and click again to be sure. You see it is updated. Now click this menu icon,
-
00:05:00 go to file, export. Give a name like Z Image Turbo Tutorial and it will be saved into your downloads
-
00:05:08 folder. Now our ComfyUI workflow is ready. I will close my SwarmUI and I will start my
-
00:05:16 ComfyUI. There is one additional thing that you need to do to use your models saved inside your
-
00:05:23 SwarmUI. You see we have extra model paths.yaml file. Copy it into your ComfyUI folder like this.
-
00:05:31 Then open this file with any text editor. I am going to use Notepad++. All you need to
-
00:05:38 do is changing this, wherever you have installed your SwarmUI. So my SwarmUI is installed here. I
-
00:05:46 copy this path and I paste it like this and put a backslash to end of it like this and save. So it
-
00:05:53 is going to check these folders and assign them to these keys. So these keys are checkpoints,
-
00:06:01 text encoders are same as inside your ComfyUI models folder. So these are keys, you see. And
-
00:06:07 these are the relative paths that whatever folder you are giving. You can also add here more folder
-
00:06:15 options and these will be extra to your ComfyUI folders. So it will see both the files inside
-
00:06:22 here and also whatever are inside here. Then I will start my ComfyUI and run. So this way we are
-
00:06:29 unifying our folder structure and we are avoiding model duplication. Okay so my ComfyUI started. I
-
00:06:37 will show how to open that preset. So the preset was downloaded into my downloads folder. I will
-
00:06:44 drag and drop it here and it is loaded. There is few key things that you need to fix. First of all
-
00:06:51 SwarmUI uses its own load image and save image, save video. Therefore you need to change this. So
-
00:06:59 it is so easy. Add node, image and you see there is load image like this. Then click choose file,
-
00:07:08 choose your ControlNet image in this case. If it was init to image then you would choose init
-
00:07:13 image. It is same. Then click here and drag and drop it to here. So you see now this Canny Edge
-
00:07:21 which is going to pre process this image and use as a Canny is connect to this load image.
-
00:07:26 Okay that's it. And in the save, if you want to save auto generated images, we need to add a save
-
00:07:33 image node. This is not saving in the ComfyUI unfortunately. So add a node and image and you
-
00:07:40 see there is save image. And all I need to do is connect this. So it will both show and save. You
-
00:07:46 can have both of them and run. Now let's watch the CMD window and the nvitop. So it is going to use
-
00:07:55 ComfyUI with full features with full optimization with the very best configuration workflow because
-
00:08:03 our presets are extremely well prepared. This workflow even upscales the generated image. So
-
00:08:10 this is a very good workflow. It is also using the ControlNet. You see the final image is being
-
00:08:16 2272 to 1552. So this way you can prepare your workflow in SwarmUI then use it in ComfyUI.
-
00:08:29 Okay. So you see the image is generated. Now I can see it inside my ComfyUI inside output and
-
00:08:37 it is here. So you see it is saved. When I open it I can see it full size. And this newer ControlNet
-
00:08:44 is really good. So you see it is even matching the background and it is generating my trained
-
00:08:50 self. If you don't know how to train yourself with Z Image Turbo, we have an amazing tutorial
-
00:08:56 here. So you see this tutorial is a masterpiece to learn Z Image Turbo training. We also have Wan 2.2
-
00:09:04 training which is very recently published. It is also amazing. We also have Qwen Image training
-
00:09:10 tutorial. We have FLUX training tutorials. We have training tutorials for all the major very
-
00:09:16 best AI models at the moment. Okay so this worked really great. What about running a video workflow?
-
00:09:23 So I will start my SwarmUI again to generate the workflow and use it inside ComfyUI. So again quick
-
00:09:30 tools reset params to default. Go to presets. My recommended image to video is this one. This is
-
00:09:38 amazing. So direct apply. Then let's select our init image. So let's select this one for example.
-
00:09:45 Let's make the use closest aspect ratio. So the prompt is a man is talking in an award ceremony.
-
00:09:52 Everything is set. All I need to do is ComfyUI workflow, import from generate tab, updated. File,
-
00:10:00 export. Let's say Wan 2.2 image to video. Then I will close my SwarmUI. Go back into our ComfyUI
-
00:10:09 and let's load new. Open. Select the downloaded JSON file. And you see the workflow is loaded. Now
-
00:10:17 I need to change the SwarmUI load image again. So add node, image, load image. Then I will move this
-
00:10:25 to here and also you see there is upscale image here. That's it. You can delete this one if you
-
00:10:33 want like remove. Then I also need to add a save. So this save doesn't work in the ComfyUI and you
-
00:10:41 see we are also using RIFE 2x frame interpolation. So for saving, right click add node, image,
-
00:10:49 video. And from here you see there is create video, save video. Let's say create video.
-
00:10:54 This is taking images, image sequence. So drag and drop this here and set the FPS as 30 or 32.
-
00:11:03 This will create a video but not save it. Then add node, image, video and save video. Then connect
-
00:11:11 this. So this will save the video as well. So you can remove this and run. Let's see the process.
-
00:11:18 So now it will use the entire workflow. We only change load image, save image, save video and
-
00:11:26 if necessary load video. So you need to do this manually unfortunately because SwarmUI handles
-
00:11:32 it differently than the ComfyUI but the rest is all working. With perfect accuracy, same results
-
00:11:40 as in the SwarmUI because SwarmUI uses ComfyUI as a backend. So it is starting. It is fully
-
00:11:46 optimized. If your VRAM is like 6 gigabyte it will still work. It will do automatic block swapping.
-
00:11:52 How do I know? For example I can even use BF 16 model. It is 40 gigabytes. It doesn't fit into
-
00:11:59 my VRAM but it fully works with full speed. So as long as you have sufficient amount of RAM memory,
-
00:12:05 every model will work. Okay it is getting generated right now. You may also get this
-
00:12:10 Unet unexpected. It is unimportant. You can ignore it. Okay the first part of the video generated.
-
00:12:17 You know the Wan 2.2 uses both high noise and low noise. High noise generates the initial video, low
-
00:12:24 noise adds details. And it is almost done. Let's see. Now it will do the RIFE frame interpolation.
-
00:12:32 Yes it is running here. You see the running node is highlighted like this. Okay almost done. Yes
-
00:12:40 now saving video and it is saved. Oh we have given the inaccurate image. However it is working. Which
-
00:12:47 image did we give? Yes we given this image. This is not the image that we were going to give but it
-
00:12:54 worked as you can see. So this is how you use the SwarmUI presets in ComfyUI. Don't worry it will
-
00:13:02 work exactly same in the RunPod and Massed Compute in the cloud because I did the installation fully
-
00:13:09 automatic for there as well. If you don't know how to install and use SwarmUI and ComfyUI in
-
00:13:15 cloud like RunPod and Massed Compute, we also have amazing tutorial for that. You see this is
-
00:13:20 ComfyUI and SwarmUI on cloud GPUs. So if you are GPU poor, you can watch this tutorial to use it
-
00:13:27 on the cloud like Massed Compute or RunPod. And finally how you can use the models inside ComfyUI
-
00:13:33 in SwarmUI. So for SwarmUI go to server, go to server configuration. You need to change your
-
00:13:39 model root. So you see I need to give the model root of the ComfyUI. It is here as models. So I
-
00:13:48 will copy paste this. Then I will save and it is saved. Then you can change the some of the model
-
00:13:54 names. For example SD LoRA folder. This is not matching with the ComfyUI. The ComfyUI uses LoRAs.
-
00:14:02 Therefore you need to change this to LoRAs and save. So pay attention to these factors then it
-
00:14:09 will see your ComfyUI folder structure in SwarmUI. This way you can avoid duplicating models.
-
00:14:16 Don't forget the save. Whenever you make a change it will ask you to save. So today's tutorial was
-
00:14:23 this much and I am working on Trellis 2 premium application. This model is insane. It can generate
-
00:14:30 very high resolution very high quality both mesh and texture. You see currently this is only 512
-
00:14:37 resolution with 1024 texture and it is already amazing. I am working on all kind of possible
-
00:14:44 optimizations. If you are very professional you will be able to run it in the cloud with maximum
-
00:14:50 quality or in your local computer. It will save all the generated files like this. So you will
-
00:14:57 have all the GLB, GLTF, binary, object, PLY, STL. We will have everything, the material file. We
-
00:15:07 will save it. We will save the previews like this. So this application will be hopefully amazing. I
-
00:15:13 am about to complete it. There is also view 3D files, texturing help guide. I am also working on
-
00:15:20 to implement batch processing so you will give a folder and it will process all the files. We also
-
00:15:26 have config preset save and load. Furthermore our ultimate video and image upscaler application is
-
00:15:33 also getting done. It is going to support SeedVR 2 with full features, face restoration, RIFE FPS,
-
00:15:41 image based, Flash VSR. So this is a massive application. Hopefully it will be also done. These
-
00:15:48 errors are because the application is not running. So stay subscribed, leave a comment. You can ask
-
00:15:53 me any questions from Patreon, from YouTube, wherever you want. Hopefully see you later.