Transform Your Sketches into Masterpieces with Stable Diffusion ControlNet AI How To Use Tutorial
Full tutorial link > https://www.youtube.com/watch?v=YJebdQ30UZQ


Our Discord : https://discord.gg/HbqgGaZVmr. In this video, You will see the new amazing Stable Diffusion technology - #ControlNet. If I have been of assistance to you and you would like to show your support for my work, please consider becoming a patron on 🥰 https://www.patreon.com/SECourses
Playlist of #StableDiffusion Tutorials, Automatic1111 and Google Colab Guides, DreamBooth, Textual Inversion / Embedding, LoRA, AI Upscaling, Pix2Pix, Img2Img:
https://www.youtube.com/playlist?list=PL_pbwdIyffsmclLl0O144nQRnezKlNdx3
ControlNet GitHub repo : https://github.com/lllyasviel/ControlNet
Paper Adding #Conditional Control to Text-to-Image Diffusion Models :
https://github.com/lllyasviel/ControlNet/raw/main/github_page/control.pdf
Anaconda download link : https://www.anaconda.com/products/distribution
GitBash download link : https://git-scm.com/downloads
Pre-trained models repo link : https://huggingface.co/lllyasviel/ControlNet
00:00:00 What is revolutionary new Stable Diffusion AI technology ControlNet
00:00:36 What is ControlNet with Canny Edge
00:00:49 What is ControlNet with M-LSD Lines
00:01:17 What is ControlNet with HED Boundary
00:01:41 What is ControlNet with User Scribbles
00:01:58 What is ControlNet Interactive Interface
00:02:08 What is ControlNet with Fake Scribbles
00:02:28 What is ControlNet with Human Pose
00:02:45 What is ControlNet with Semantic Segmentation
00:03:02 What is ControlNet with Depth
00:03:15 What is ControlNet with Normal Map
00:03:35 How to download and install Anaconda
00:04:33 How to download / git clone ControlNet
00:05:25 How to download ControlNet models from Hugging Face repo
00:06:37 Which folder is the correct folder to put ControlNet models
00:07:03 How to install ControlNet to generate virtual environment with correct dependencies
00:08:53 How to start run first app Canny Edge
00:09:59 Correct local URL of the app
00:10:11 Testing first test image bird with Canny Edge
00:11:42 How to start M-LSD lines ControlNet app
00:12:10 How to set low VRAM option in configuration
00:13:20 Start again M-LSD lines ControlNet app
00:13:37 Running Hough Line Maps app example
00:14:28 Example of Control Stable Diffusion with HED Maps
00:14:45 Testing ControlNet with User Scribbles
Used lineart source :
https://www.deviantart.com/basiliskzero/art/Free-Dragon-Lineart-285772092
From official paper of Adding Conditional Control to Text-to-Image Diffusion Models
We present a neural network structure, ControlNet, to control pretrained large
diffusion models to support additional input conditions. The ControlNet learns
task-specific conditions in an end-to-end way, and the learning is robust even when
the training dataset is small ( 50k). Moreover, training a ControlNet is as fast as
fine-tuning a diffusion model, and the model can be trained on a personal devices.
Alternatively, if powerful computation clusters are available, the model can scale to
large amounts (millions to billions) of data. We report that large diffusion models
like Stable Diffusion can be augmented with ControlNets to enable conditional
inputs like edge maps, segmentation maps, keypoints, etc. This may enrich the
methods to control large diffusion models and further facilitate related applications.
1 Introduction
With the presence of large text-to-image models, generating a visually appealing image may require only a short descriptive prompt entered by users. After typing some texts and getting the images, we may naturally come up with several questions: does this prompt-based control satisfy our needs? For example in image processing, considering many long-standing tasks with clear problem formulations, can these large models be applied to facilitate these specific tasks? What kind of framework should we build to handle the wide range of problem conditions and user controls? In specific tasks, can large models preserve the advantages and capabilities obtained from billions of images? To answer these questions, we investigate various image processing applications and have three findings. First, the available data scale in a task-specific domain is not always as large as that in the general image-text domain. The largest dataset size of many specific problems (e.g., object shape/normal, pose understanding, etc.) is often under 100k, i.e., 5 × 10⁴ times smaller than LAION5B. This would require robust neural network training method to avoid overfitting and to preserve generalization ability when the large models are trained for specific problems. Second, when image processing tasks are handled with data-driven solutions, large computation clusters are not always available. This makes fast training methods important for optimizing large models to specific tasks within an acceptable amount of time and memory space (e.g., on personal devices).
-
00:00:00 Greetings everyone.
-
00:00:01 In this video I am going to show you what is ControlNet and how to use it.
-
00:00:06 ControlNet is a neural network structure to control diffusion models by adding extra conditions.
-
00:00:12 There is a paper of official implementation of adding conditional control to text-to-image
-
00:00:18 diffusion models.
-
00:00:19 You can click this link, download it, and read it if you want.
-
00:00:23 So what does ControlNet do?
-
00:00:25 They have released 9 apps to use ControlNet.
-
00:00:30 They have released their pre-trained models as well.
-
00:00:33 So the first app is Canny Edge.
-
00:00:36 With the Canny Edge and Stable Diffusion 1.5 we are able to upload an image like this.
-
00:00:43 Then this image is turned into this and based on the prompt we enter, it is turned into
-
00:00:48 this.
-
00:00:49 The second released app is ControlNet with M-LSD Lines.
-
00:00:54 So Stable Diffusion 1.5 plus ControlNet using simple M-LSD straight line detection.
-
00:01:01 With this app we are able to upload an image like this.
-
00:01:05 Then this image is turned into this.
-
00:01:08 Then based on the prompt we provide, we are getting results like this.
-
00:01:13 Don't worry I will show you how to install and run these apps.
-
00:01:17 The one another app they have released is ControlNet with HED Boundary.
-
00:01:23 So with this app, we are able to upload a base image like this.
-
00:01:28 Then we are providing our prompt like this.
-
00:01:31 This image turned into this image.
-
00:01:34 Then these images are generated based on our uploaded image and the prompt.
-
00:01:40 The one another app they have released is ControlNet with User Scribbles.
-
00:01:46 So with User Scribbles, we are uploading a sketchy image like this.
-
00:01:50 Then it is turned into this and based on the prompt we provide, they are turned into these
-
00:01:56 images.
-
00:01:58 One another app they have provided is interactive interface.
-
00:02:02 In this interface you are drawing the sketch yourself but it is up to you.
-
00:02:06 This is harder to do.
-
00:02:07 Then they have released another app ControlNet with Fake Scribbles.
-
00:02:12 With Fake Scribbles we are able to upload base image like this.
-
00:02:15 Then it is turned into a scribble like this.
-
00:02:18 Then based on this, these images are generated by using our provided prompt.
-
00:02:25 You see it is just looking awesome.
-
00:02:27 And another one is ControlNet with Human Pose.
-
00:02:30 In here we are uploading a human pose, human image.
-
00:02:34 Then the pose is generated like this and based on the prompt we provide, it is using this
-
00:02:40 generated human base and generating the images based on the prompt we have provided.
-
00:02:46 And there is one another app they have provided ControlNet with Semantic Segmentation.
-
00:02:52 In this one we are uploading a base image.
-
00:02:54 It is generating a segmented image like this.
-
00:02:57 Then based on the prompt, it is generating these images by using this segmented image.
-
00:03:02 And another app they have released is ControlNet with Depth.
-
00:03:06 So with depth it is generating depth of the image and based on the prompt we provide it
-
00:03:11 is generating these images.
-
00:03:14 And one another app is ControlNet with Normal Map.
-
00:03:18 With normal map it is generating a normal map depth like this or maybe we can say normal
-
00:03:25 map and based on the prompt, these images are generated as you can see.
-
00:03:31 Alright let's start to download these models and using them.
-
00:03:35 To use these apps we are going to use Anaconda installation.
-
00:03:40 You can install Anaconda from here.
-
00:03:42 Just click download.
-
00:03:43 After downloaded let's go to the downloads folder and in here we see: Anaconda.
-
00:03:50 I right click run as administrator, then click next.
-
00:03:54 Click I agree.
-
00:03:55 If you have previous installation, you can uninstall it and install the latest version.
-
00:04:01 Okay I am going to use just me as recommended.
-
00:04:04 Then you need to select the destination folder.
-
00:04:07 I am going to install it inside my c folder c drive like this.
-
00:04:11 Click next.
-
00:04:12 Add Anaconda 3 to my path environment.
-
00:04:15 It says it is not recommended so I'm not going to do that.
-
00:04:18 Register Anaconda 3 as my default python 3.9.
-
00:04:21 I am also not going to register it like this because it may break my other python installations.
-
00:04:30 Okay just click next.
-
00:04:31 The installation has been completed.
-
00:04:33 Click next.
-
00:04:35 Click next and finish.
-
00:04:37 Now we will start with cloning this GitHub repository into our target folder that the
-
00:04:44 folder we want.
-
00:04:45 To clone it.
-
00:04:46 You need to have a git and to use git, you can use git bash which I am showing in my
-
00:04:52 videos.
-
00:04:53 Just type git bash to Google and open this link.
-
00:04:58 Download for windows and install it if you haven't yet.
-
00:05:01 So I am going to generate a folder in my c drive.
-
00:05:04 Let's click hit.
-
00:05:06 I am naming as experiment.
-
00:05:08 Enter inside the folder and type here cmd.
-
00:05:12 It will open the cmd window with this with starting the folder that you have typed.
-
00:05:18 Then type git clone and paste the link like this.
-
00:05:22 It will clone everything into this repository.
-
00:05:26 ControlNet also released their pre-trained models which are hosted on the Hugging Face
-
00:05:31 page.
-
00:05:32 There are a lot of files to download, so instead of downloading them one by one manually, I
-
00:05:37 am going to download all of them.
-
00:05:39 How am I going to do that?
-
00:05:40 Copy the link then go to inside ControlNet and inside models.
-
00:05:44 This is where I am downloading.
-
00:05:46 Then I will cut them and put them inside the target folder.
-
00:05:50 Type cmd here.
-
00:05:51 So right now I am in this folder.
-
00:05:54 Then git clone and right click and hit enter.
-
00:05:58 By the way: there is no messages when downloading Hugging Face files so just open your task
-
00:06:04 manager and in the ethernet tab you will see the download process so you will understand
-
00:06:10 when the download has been completed by following here.
-
00:06:15 All files have been downloaded.
-
00:06:16 How do I know?
-
00:06:18 When I check the ethernet now there is no such download.
-
00:06:22 Let me show you how much space it is taking how many megabytes have been downloaded.
-
00:06:27 Let's click properties as you can see over 87 gigabytes of file have been downloaded
-
00:06:34 so it will take a lot of time if you have slow internet connection.
-
00:06:39 Now we need to put these three folders into the correct folder to do that.
-
00:06:44 I am selecting all three cut, then go to the main installation folder ControlNet and paste
-
00:06:51 it there.
-
00:06:52 Now I will show you the path with a bigger resolution like this.
-
00:06:57 So you are going to paste these three folders into the main installation where it has been.
-
00:07:03 Now time to install ControlNet.
-
00:07:07 To install it we are going to use Anaconda that we have installed.
-
00:07:11 Since we didn't set a default path, we need to run the Anaconda prompt.
-
00:07:17 Type Anaconda into your search bar and it will bring up Anaconda prompt as you can see
-
00:07:23 in here.
-
00:07:24 Then we need to move inside this folder the folder where we have downloaded the GitHub
-
00:07:32 repository of ControlNet.
-
00:07:34 I am copying the path like this.
-
00:07:37 Actually, it is easier to do this way.
-
00:07:39 Just drag and drop the folder inside your Anaconda cmd window.
-
00:07:44 Hit enter.
-
00:07:45 Oh by the way, we need to type cd first, then do again.
-
00:07:50 Okay, now we are inside our installation folder inside the Anaconda prompt.
-
00:07:56 Then we are going to run this command.
-
00:08:00 By the way, I will put the link of this GitHub repository into description.
-
00:08:04 Just copy and paste it.
-
00:08:05 For pasting it I did right click my mouse and it pasted the text.
-
00:08:10 You can also right click here and from here you can edit and paste as well and it is going
-
00:08:16 to generate the virtual environment with the necessary configuration for us.
-
00:08:23 All the necessary dependencies for ControlNet have been installed.
-
00:08:28 Let me show you quickly what were installed if you also want to compare in your computer.
-
00:08:34 So all of these packages have been installed, then it has generated transaction.
-
00:08:39 Prepare, transaction, verify, transaction, execute, transaction, execute transaction,
-
00:08:45 install pip dependencies.
-
00:08:46 A lot of dependencies were installed and I don't see any warnings or error messages.
-
00:08:52 That is awesome.
-
00:08:53 Now we are ready to launch the apps to do that.
-
00:08:57 We are going to use conda activate control and how we are going to do that.
-
00:09:02 First type Anaconda prompt like this because we didn't set a default path.
-
00:09:08 So Anaconda prompt started with base.
-
00:09:11 First we need to move into our installation folder.
-
00:09:15 So now we are in the experiment ControlNet which is my installation folder.
-
00:09:21 Next we will run this command just right click and hit enter.
-
00:09:25 Okay, now we are in the control folder.
-
00:09:28 Now we can start using apps.
-
00:09:31 The first app that I am going to test is Control with Canny Edge.
-
00:09:36 So I am copying this prompt and pasting it in here.
-
00:09:40 For pasting also you can use right click in here and edit and paste.
-
00:09:45 You can see here: ctrl v. Hit enter and it will start the app.
-
00:09:50 Okay, the app has been started.
-
00:09:52 However, the running on local url.
-
00:09:55 The displayed url is incorrect.
-
00:09:57 The correct url is.
-
00:09:59 Let me refresh this.
-
00:10:02 127.0.0.1 let me also show you the url like this.
-
00:10:08 So this is the correct url that it has been started.
-
00:10:12 Then I will use the test images they have provided inside test images folder.
-
00:10:18 So the first one is bird image like this the prompt is just bird.
-
00:10:23 When you hit the advanced options, you will see number of images that you want to generate,
-
00:10:27 image resolution.
-
00:10:28 Unfortunately since there is no included xformers yet, it is not able to run as efficient as
-
00:10:37 Automatic1111 Web UI when we are using the Stable Diffusion.
-
00:10:42 There is also Canny low threshold, Canny high threshold.
-
00:10:45 You can play with them.
-
00:10:46 There are steps, number of steps to generate the image.
-
00:10:50 Guidance scale which is equal to CFG in Web UI and there is this seed value that you can
-
00:10:56 also change it.
-
00:10:57 There are also added prompt and negative prompt.
-
00:11:00 Now I will hit enter but before doing that I will pause video because it is using a lot
-
00:11:05 of GPU.
-
00:11:06 Even though I have paused the video, I have got memory error.
-
00:11:10 Not enough memory error as you can see.
-
00:11:12 The error is displayed here and also in here.
-
00:11:16 So what am I going to do is I will refresh, drag and drop the image once again, type bird
-
00:11:22 but I will change the target resolution to 448 pixels like this.
-
00:11:29 Then I will hit run and I got the output as you can see which is similar to the one they
-
00:11:35 are displaying on the GitHub page.
-
00:11:38 Now time to try the next app which is ControlNet with M-LSD Lines.
-
00:11:45 To do that I will just close this.
-
00:11:47 I am running Anaconda prompt once again.
-
00:11:50 I am copy pasting my cd like this.
-
00:11:53 Then I will start conda activate control then I will execute this command.
-
00:11:59 The app has been started.
-
00:12:01 Also I have opened a discussion and issue on the official GitHub repository.
-
00:12:07 So they okay I see that they have added a new low VRAM.
-
00:12:12 Let's check it out.
-
00:12:13 Okay for low VRAM it says that save memory equal to true.
-
00:12:18 So I am going to set the save memory equal to true.
-
00:12:21 With updating the code repository.
-
00:12:24 To update it let's use git pull command and see if it will work.
-
00:12:29 And yes it worked.
-
00:12:31 It updated the latest version and let's also set the save memory true inside the config
-
00:12:36 file.
-
00:12:38 Let's find the config file in here config.py open it with notepad plus plus.
-
00:12:44 Okay there is only one command.
-
00:12:46 I am setting it true and I will run this first one once again which throw the low VRAM error
-
00:12:54 for us.
-
00:12:55 I am starting with python gradio canny2image which our graphic card were thrown an error.
-
00:13:02 Okay the app has been started so let's try the bird once again I am going to hit run
-
00:13:08 now and amazing.
-
00:13:10 It worked very well with a very decent speed.
-
00:13:12 As you can see it only took like 20 seconds for 20 steps and it uses like this kind of
-
00:13:19 memory.
-
00:13:20 Unfortunately still very high but it works.
-
00:13:22 Now let's start the next app.
-
00:13:24 As you can see I have did condo activate control and now I am going to execute the command
-
00:13:30 here.
-
00:13:31 Okay, the app has been started.
-
00:13:32 Let's refresh the ui so you see now it displays control Stable Diffusion with Hough Line Maps
-
00:13:39 and I am going to use the same sample that they have used.
-
00:13:42 Let's open it from the sample images the test images I am dragging and dropping the room
-
00:13:49 here and I am just typing room.
-
00:13:51 There are also advanced options in here that you can try just hit run!
-
00:13:56 By the way, if you want to get different results, don't forget to change the seed.
-
00:14:00 It did run very well.
-
00:14:02 It took less than 20 seconds and we got the result like this: if you change seed then
-
00:14:07 you will get different results.
-
00:14:09 You can also change these values.
-
00:14:11 Now time to start the next app.
-
00:14:13 To start it I am going to use the command in here.
-
00:14:16 Let's just copy paste it.
-
00:14:19 Before starting any apps make sure that you are inside the correct folder and it displays
-
00:14:24 here control.
-
00:14:25 Otherwise it won't work.
-
00:14:26 Let's refresh, put the ultimate image here and let's copy paste the prompt they have
-
00:14:32 written in here.
-
00:14:33 Let's just paste and run and we got the results with within less than 20 seconds.
-
00:14:40 As as you can see the result is here.
-
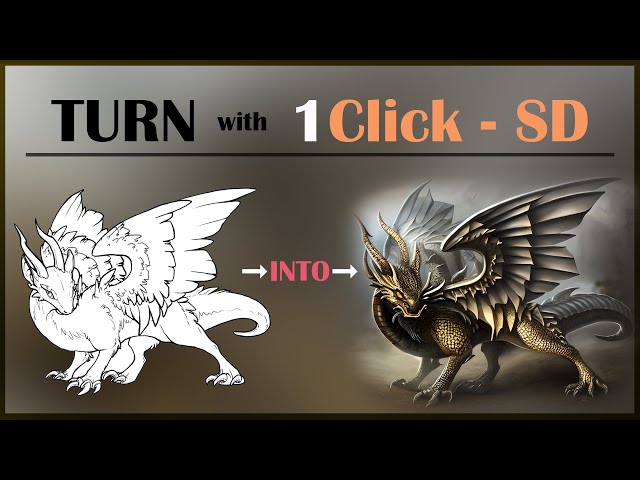
00:14:42 Now I am going to test my most wanted most awaited feature ControlNet with User Scribbles.
-
00:14:50 Okay, the app has been loaded, let's refresh and we now see control Stable Diffusion with
-
00:14:56 scribble maps.
-
00:14:58 For this I am going to use a custom image that I have downloaded from Deviantart which
-
00:15:03 is a free line art and I will use a different prompt for this.
-
00:15:08 I have used fantastic dragon, intricate details masterpiece artstation and the result is just
-
00:15:15 amazing.
-
00:15:16 Yeah this is my first tried prompt.
-
00:15:20 I am sure that this can be improved a lot so it is working just great.
-
00:15:26 I can see it keeps the shape.
-
00:15:29 This is definitely much better than image to image in Stable Diffusion Automatic1111
-
00:15:34 Web UI.
-
00:15:35 If you don't know what is Stable Diffusion, how to use Stable Diffusion, how to use Automatic1111
-
00:15:39 Web UI and other things.
-
00:15:42 I have excellent video tutorials on my channel.
-
00:15:46 Just go to our playlist section and in here you will see Stable Diffusion tutorials and
-
00:15:50 in this playlist you will see all of the awesome videos that we have.
-
00:15:55 You can watch them and learn more about how to use Stable Diffusion.
-
00:15:58 What is Stable Diffusion?
-
00:15:59 How to use Automatic1111 web ui and other all awesome Stable Diffusion related guides
-
00:16:05 and video.
-
00:16:06 You cannot achieve this with image to image when you use a scribble and line art like
-
00:16:11 this.
-
00:16:12 The rest is same that I am not going to show them in this video.
-
00:16:16 You can just run them like this and try them yourself.
-
00:16:20 Please don't forget to like subscribe.
-
00:16:22 Leave a comment.
-
00:16:23 Join our discord channel.
-
00:16:24 The discord channel link is in the description.
-
00:16:27 Also, if you support me on Patreon, I would appreciate that very much.
-
00:16:30 You can find our support me on Patreon link in our channel and also in the description.
-
00:16:36 I thank them very much.
-
00:16:38 I thank my Patreon supporters very much.
-
00:16:41 Hopefully see you in another awesome video!
-
00:16:42 stay tuned.